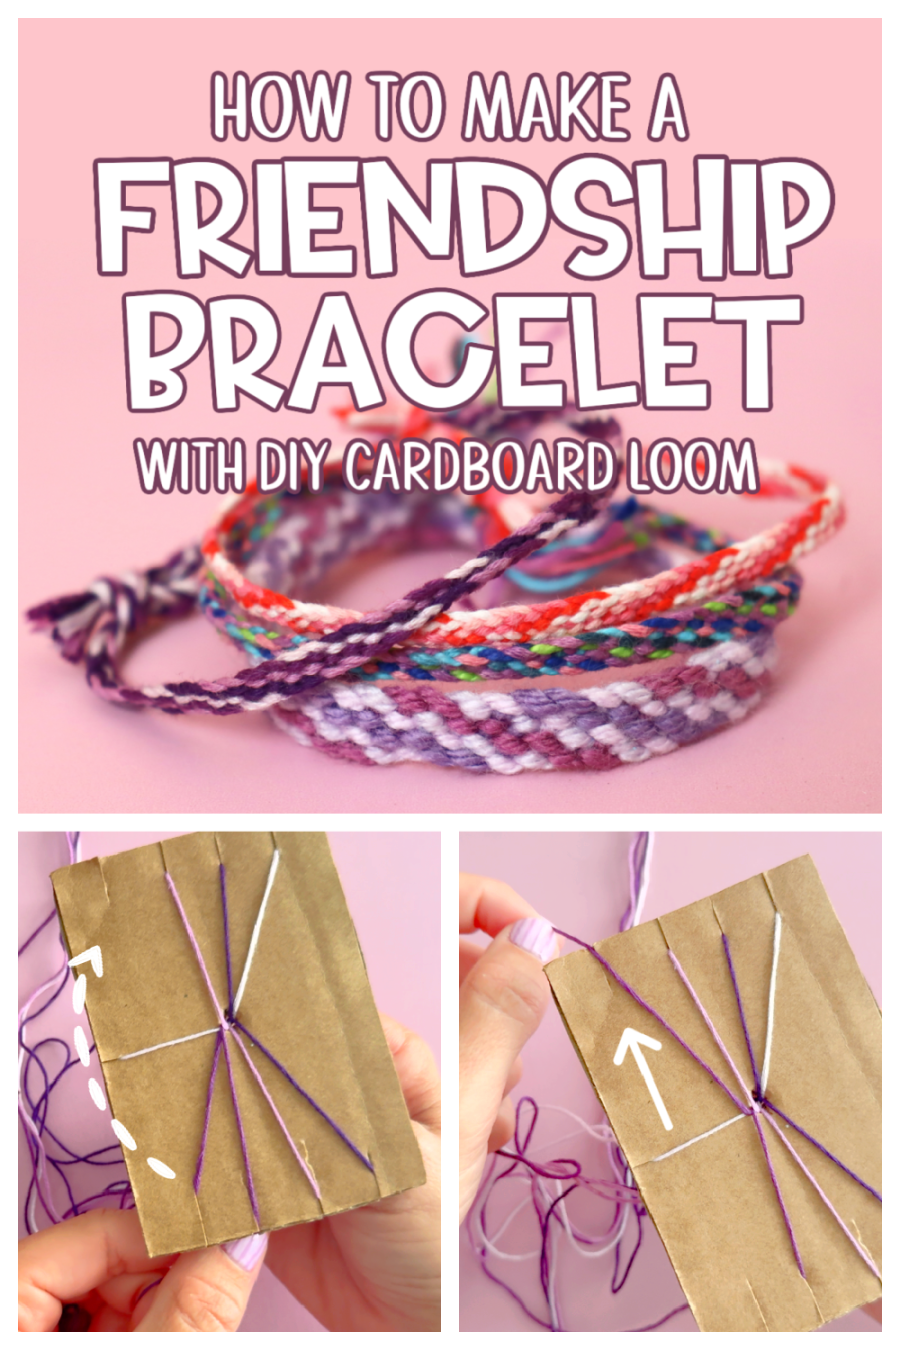
Looking for an easy friendship bracelet craft that doesn’t require a fancy loom? This DIY cardboard bracelet loom is the perfect solution! With nothing more than a piece of cardboard and some yarn or embroidery floss, kids can create beautiful woven bracelets at home, in the classroom, at camp, or on the go.
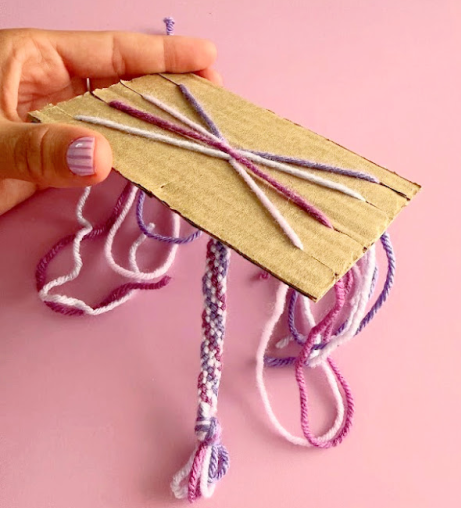
This budget-friendly craft is great for beginners and is an excellent way to practice fine motor skills while making colorful handmade woven bracelets.
Whether you’re looking for a rainy day activity, a summer craft, or a screen-free project, this DIY bracelet loom is sure to become a favorite.

Why You’ll Love This Cardboard Bracelet Craft
- Easy to make
- Uses recycled cardboard
- Great for kids and beginners
- Perfect travel activity
- Encourages creativity
- Inexpensive craft supply
- Makes adorable handmade friendship bracelets
Supplies You’ll Need to Make a Friendship Bracelet
- Cardboard or Foam Core Board
- Scissors or craft knife
- Yarn or embroidery floss (3–7 colors)
How to Make a DIY Cardboard Bracelet Loom
Step 1: Cut Your Cardboard
Start by cutting a rectangle from a piece of corrugated cardboard.
A good size is approximately:
3 x 5 inches
You can make it larger or smaller depending on the bracelet you’d like to create.
Step 2: Cut Even Slits
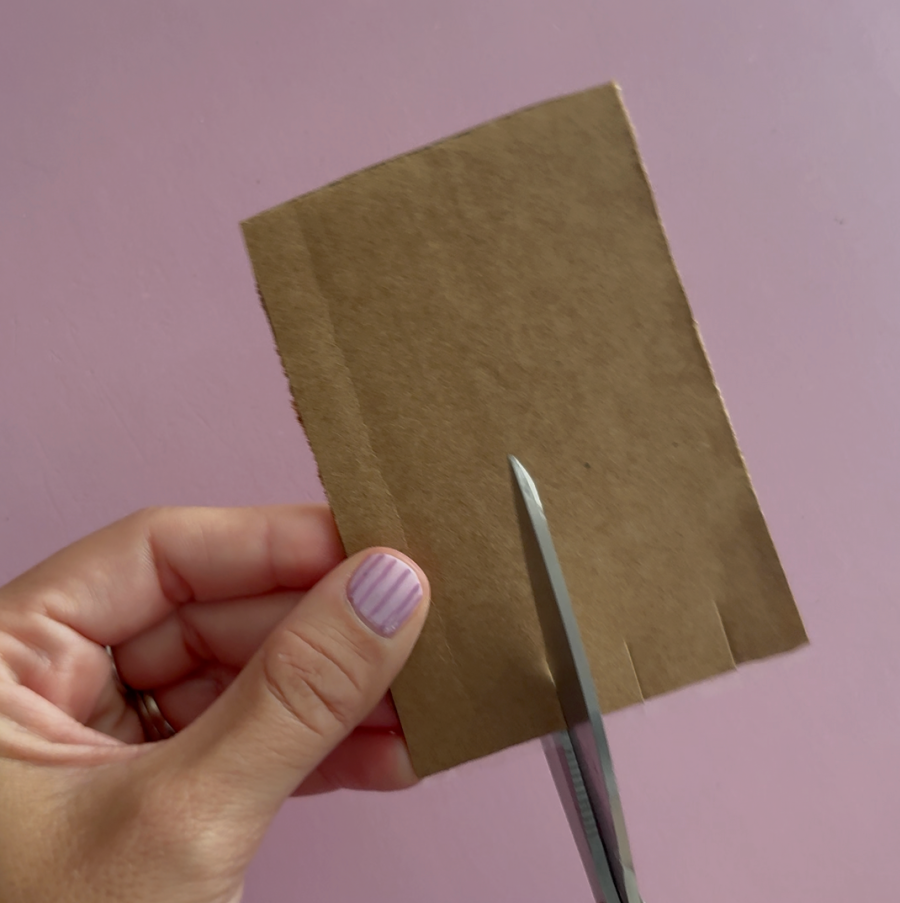
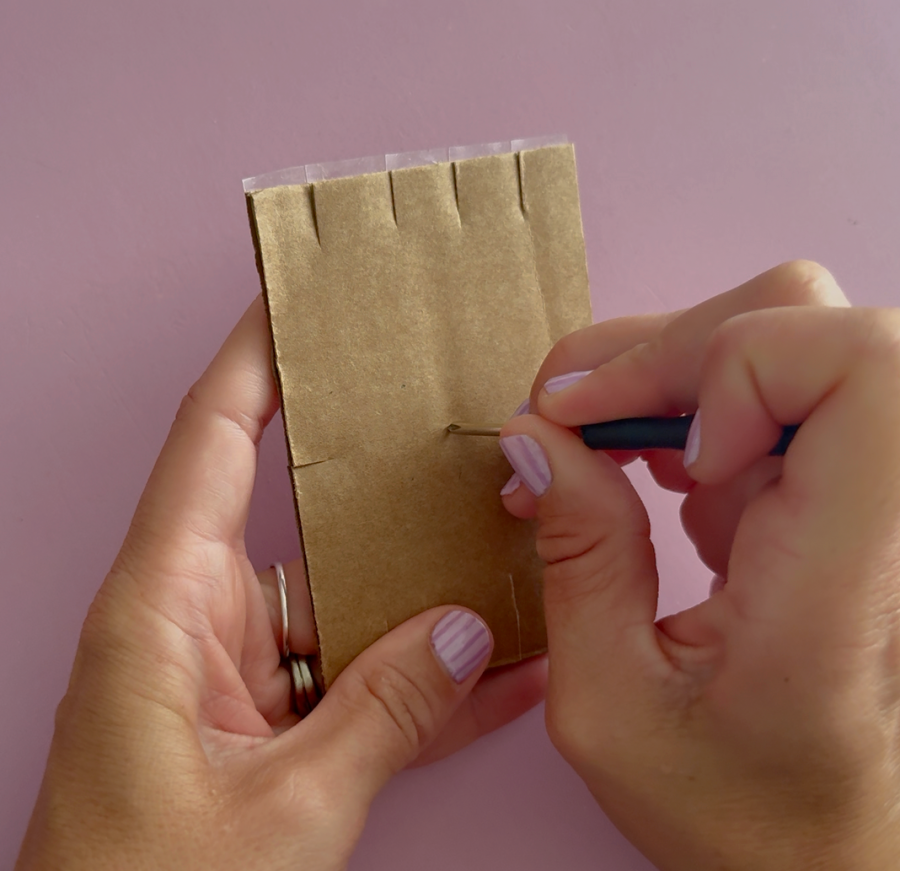
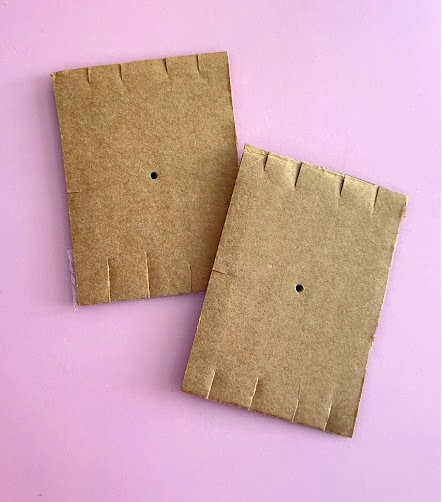
Using scissors or a craft knife, cut 4 evenly spaced slits along the top and bottom edges of the cardboard.
You don’t need to measure, they don’th ave to be excat!
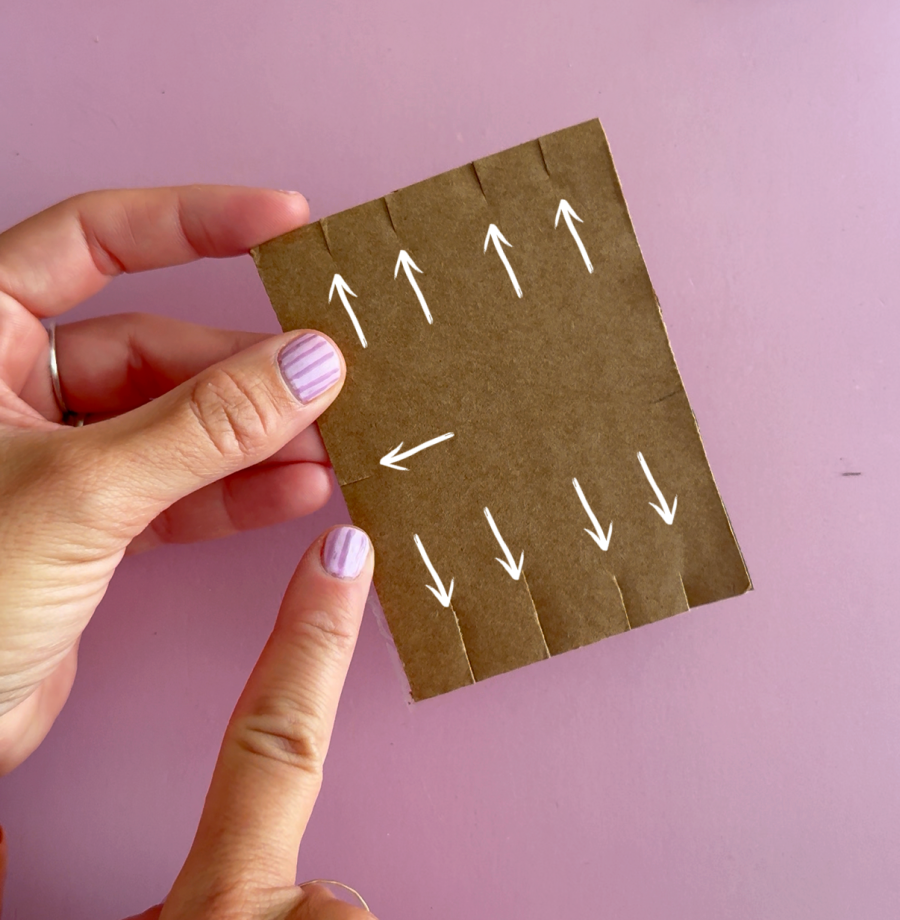
Add one slit on the side.
Try to make each slit about ½ inch deep.
Poke a hole in the very center using a pencil or screwdriver
Step 3: Prepare Your Yarn
Cut 8 pieces of yarn or floss.
Each strand should be about:
24-36 inches long
The longer the strands, the longer your bracelet can be.
Choose coordinating colors or create fun rainbow combinations. (more on that below)
Step 4: Tie the Strands Together
Gather all of the yarn pieces together and tie a knot about 2 inches from one end.
Leave a small tail.
Step 5: Thread the Loom
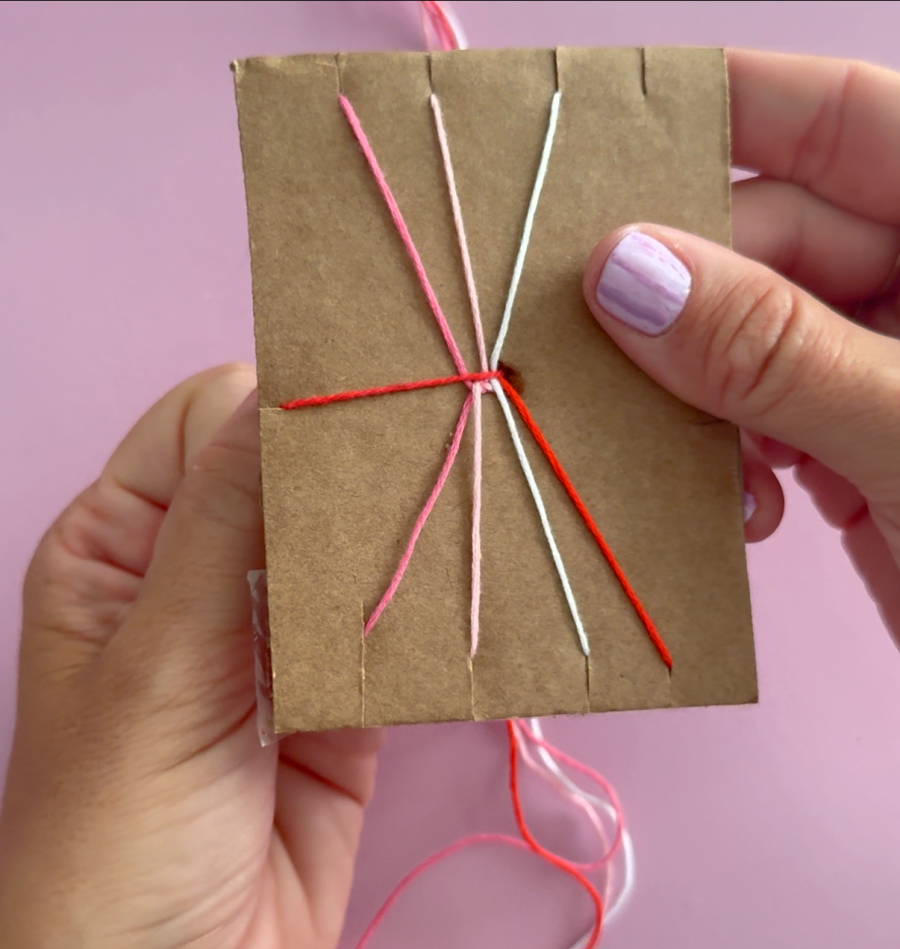
Press the knot of the embroidery floss into the hole in the center of the cardboard. I used the screwdriver or pen to help push it inside.
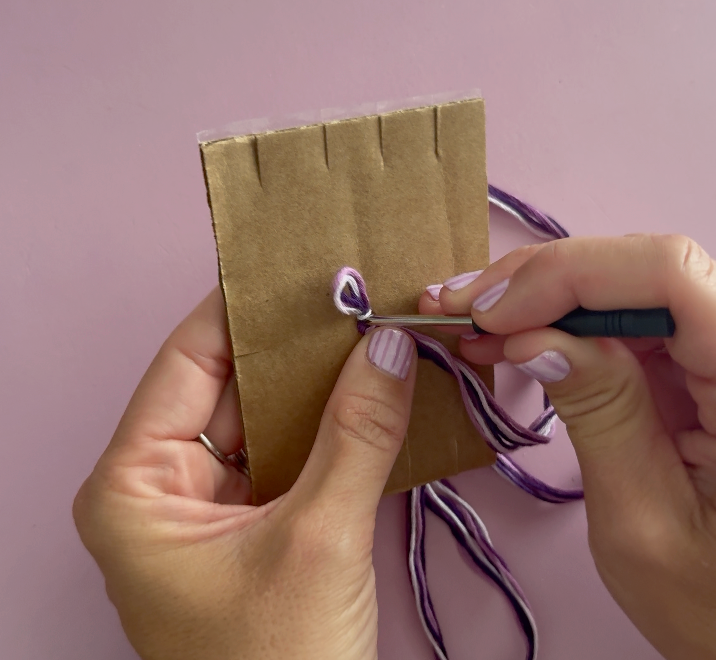
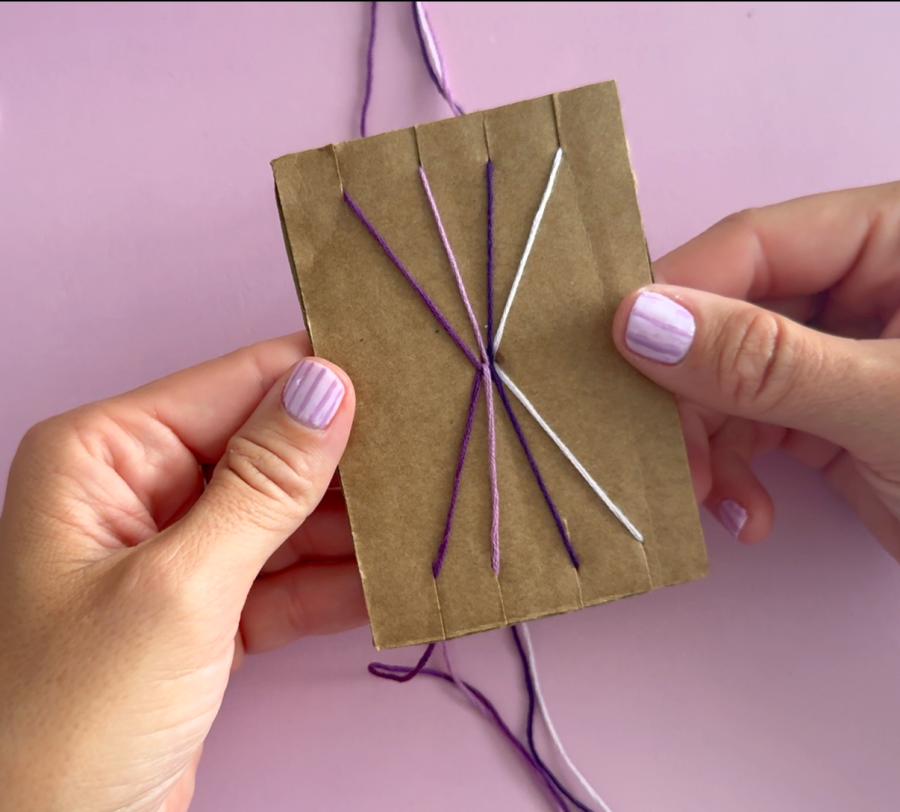
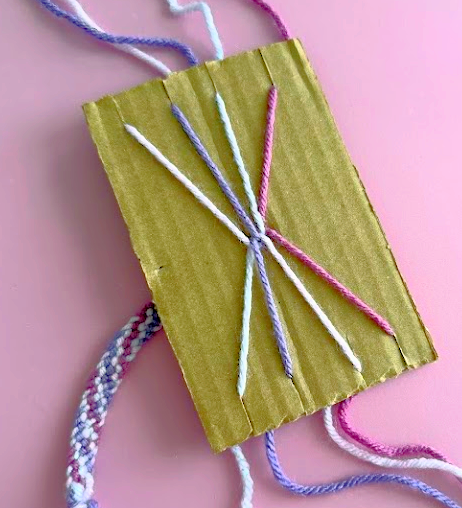
Slide one strand into each slit across the top and bottom of the cardboard.
Bring the strands behind the cardboard and place each one into the matching slit on the bottom.
The cardboard now acts as a small weaving loom, keeping the yarn organized and evenly spaced.
Step 6: Start Weaving on your DIY cardboard loom
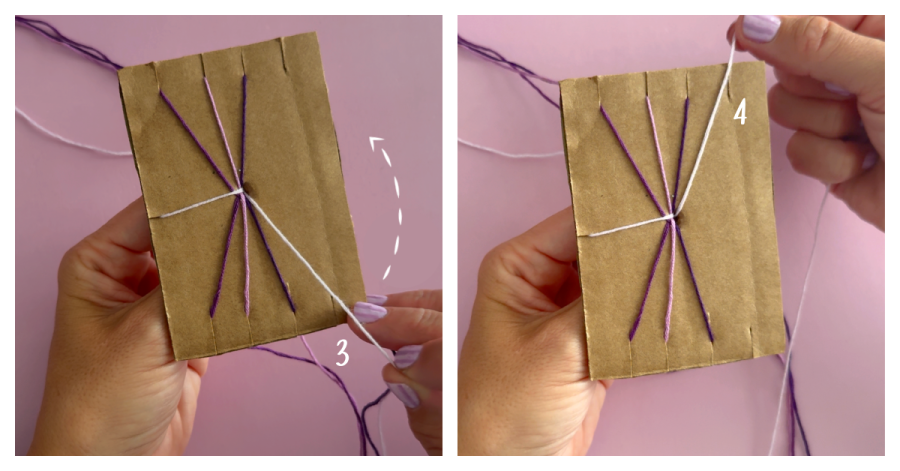
Start by placing the one notch on the side in your left hand always keeping the notch on the left side. Take the thread in the top right corner and bring it over to the side notch. This is just a placeholder while you move the threads around.
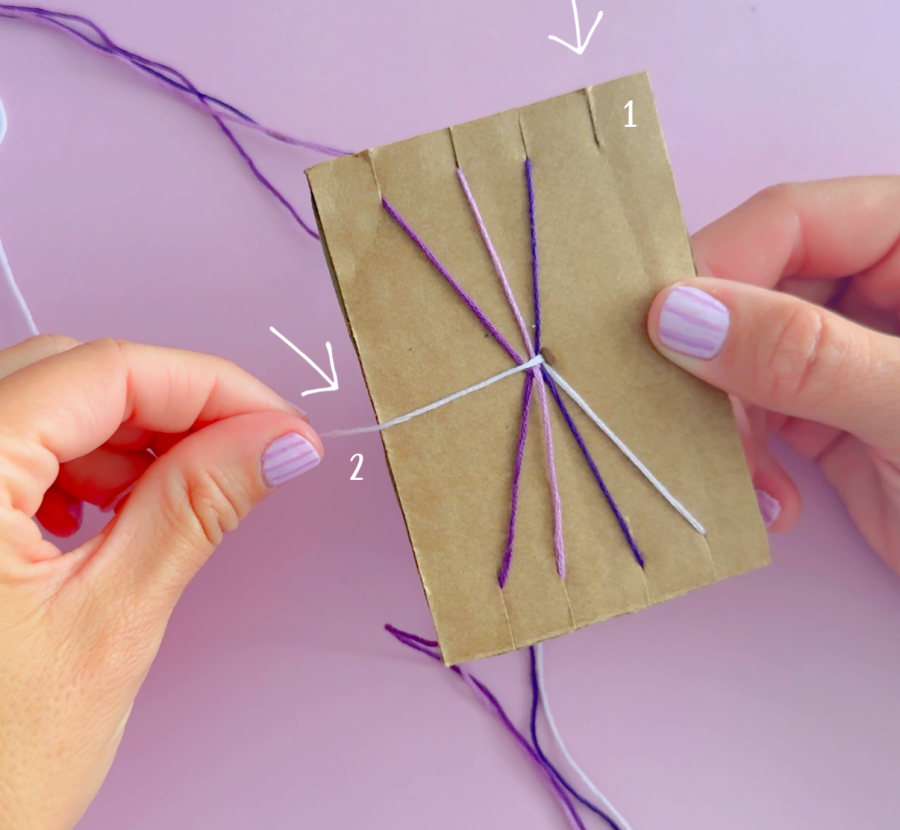
Take the bottom right corner thread and move it up to the empty notch. (3 to 4 in the image)
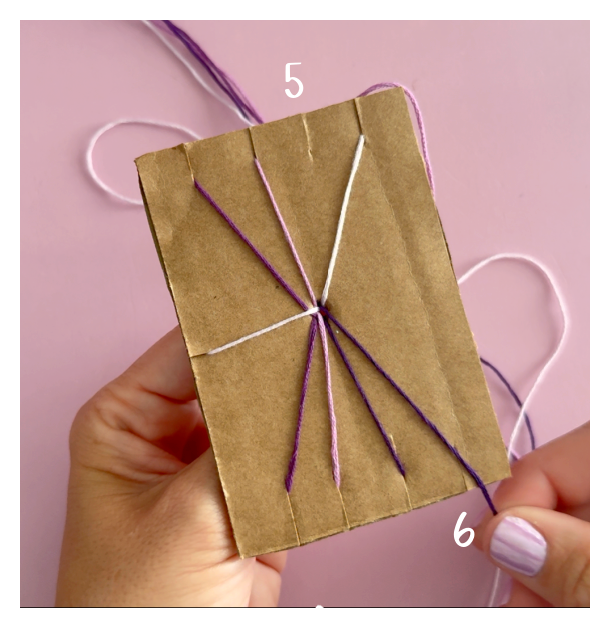
Take the thread right next to the thread that you just placed in the empty notch (number 5 in the picture below) and move that one down into the empty notch. (number 6)
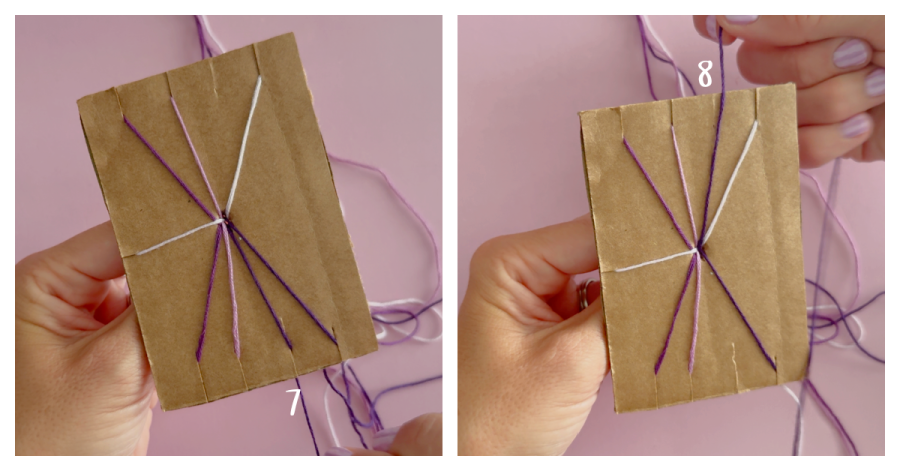
Take the thread next to the thread that you just placed in the empy notch (7) and move it up to the empty notch (8). This is the basic weaving technique. You will continue across the cardboard until every thread has shifted (all the ones that started up will be down and all the ones that started down will be up.
Once the empty notch is the bottom left corner, you take the thread out of the side notch and place it back into the rotation.
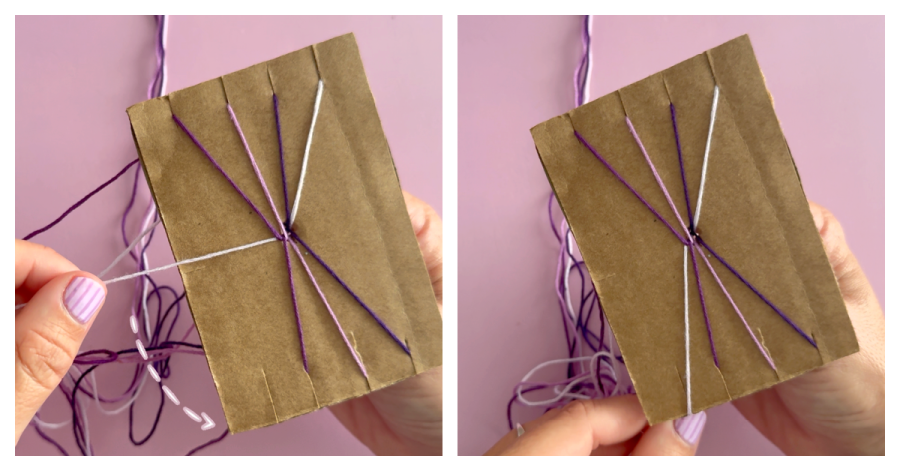
Gently pull the yarn knot underneath snugly.
Repeat with the next outer strand. (moving top right to the empty side notch and rotating all the threads like stated above)
As you continue weaving, you’ll notice the bracelet beginning to form underneath the cardboard.
Make sure to run your fingers through your yarn or thread to prevent tangling.
Step 7: Continue Until the Bracelet Is Long Enough
Keep weaving until your bracelet fits comfortably around your wrist.
This usually takes about 30 minutes depending on the size and speed.
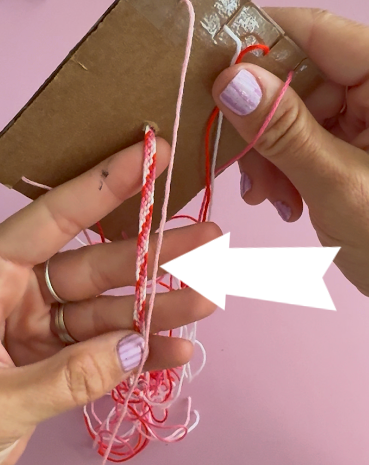
But you can set it down and come back to it- which is why this is such a great project! Throw it in your backpack and do it on the go!
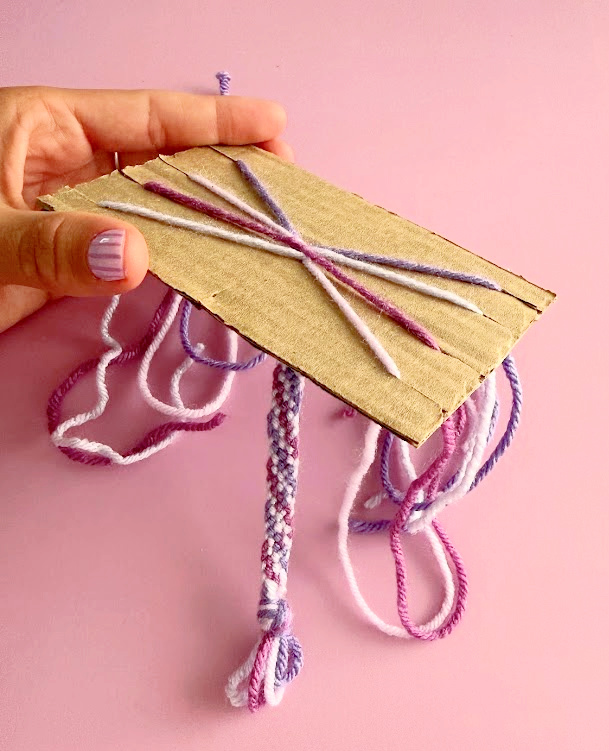
Step 8: Finish the Bracelet
Remove the bracelet from the cardboard.
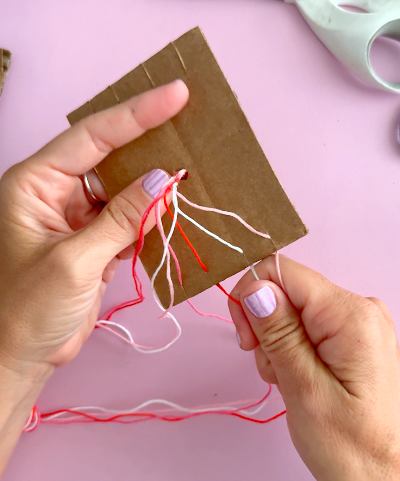
Tie another knot at the end.
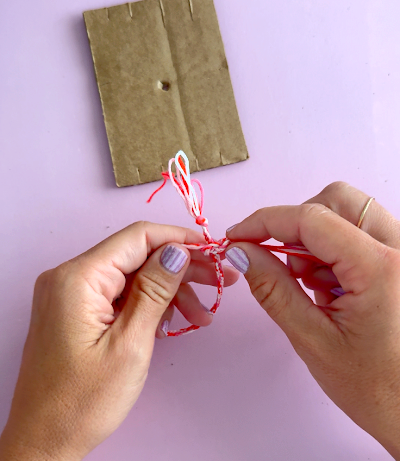
Trim the excess yarn, leaving enough to tie the bracelet around your wrist.
Bracelet Tutorials
I love making bracelets! This DIY Cardboard Bracelet Loom technique is really similar to my Jellyfish Bracelet tutorial.
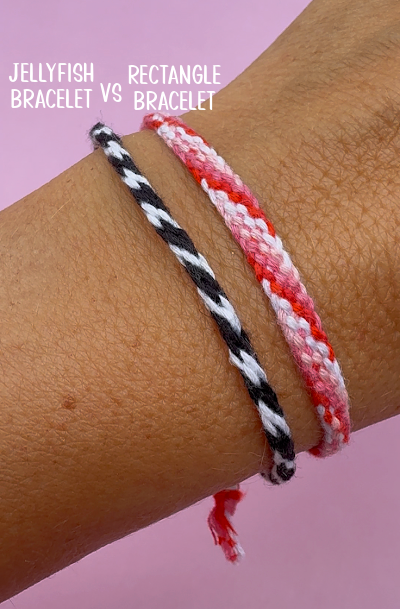
Here are some other bracelet tutorials you might like:
Tips for Success
- Keep your weaving snug but not too tight.
- If the yarn slips out, simply place it back into the slit.
- Mix different yarn textures for a fun look.
- Use embroidery floss for thinner bracelets.
- Add beads before weaving for extra sparkle.
Fun Color Combinations
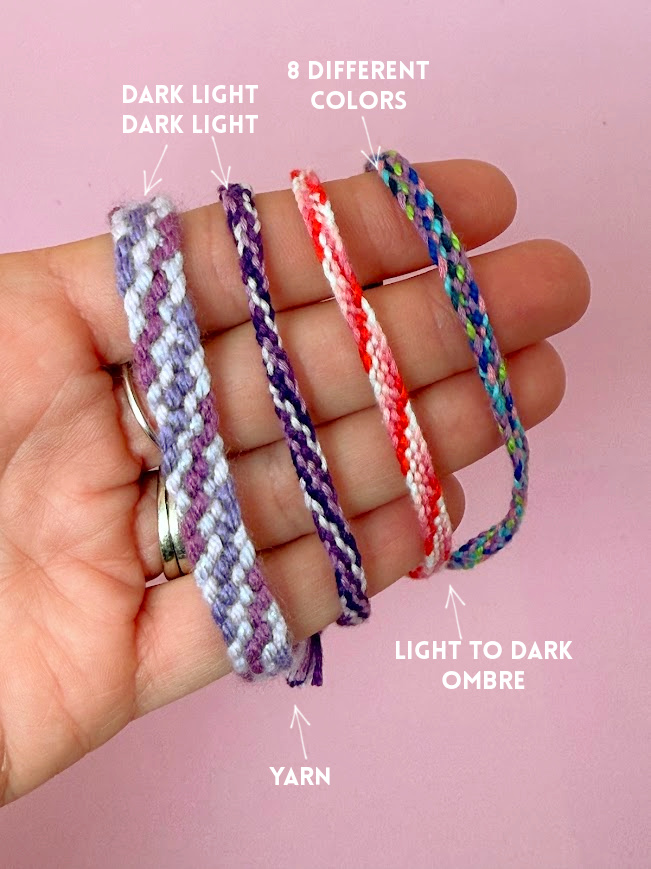
To get a cohesive pattern, I like to pick 4 colors and have two of each. Lining them up on the notches- so white on top, white on bottom underneath it. Light pink on top and light pink on bottom underneath it. If you put light to dark on the cardboard form, your bracelet will take an ombre look. If you do black, white, black, white, it will have a striped look. I did do one that was 8 different colors and it looks cool but not as cool as the patterned ones.
- Rainbow
- Pastels
- School colors
- Patriotic red, white, and blue
- Halloween orange and black
- Christmas red, green, and white
- Ombre shades
- Favorite sports team colors
Variations
Try making:
- Anklets
- Bookmarks
- Keychain straps
- Lanyards
- Hair ties
- Backpack zipper pulls
Once kids learn the weaving technique, they can create all kinds of handmade gifts.
Why This Is a Great Kids Craft
This bracelet activity helps children:
- Develop fine motor skills
- Practice hand-eye coordination
- Learn simple weaving techniques
- Build patience and concentration
- Express creativity through color choices
It’s also an excellent classroom craft because each child only needs a small piece of cardboard and a few strands of yarn.
Frequently Asked Questions
What kind of cardboard works best?
Corrugated cardboard from shipping boxes works best because it’s sturdy enough to hold the yarn securely in the slits.
Can I use embroidery floss instead of yarn?
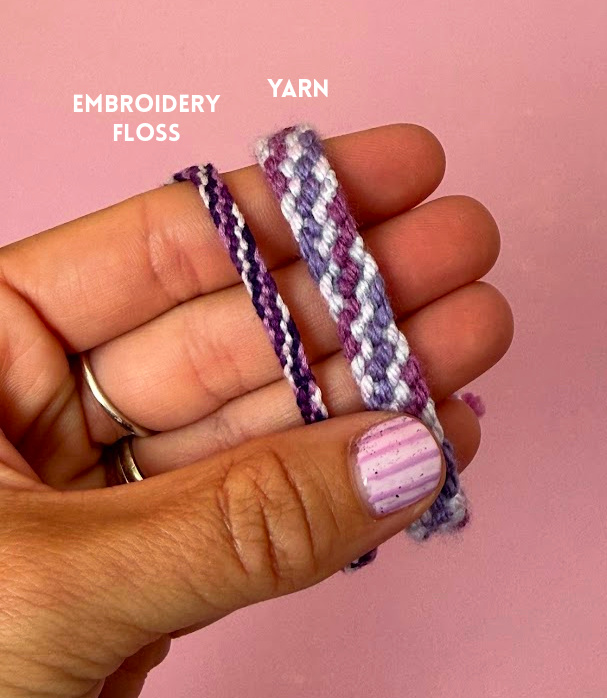
Absolutely! Embroidery floss creates a thinner, more traditional friendship bracelet, while yarn makes a thicker, softer bracelet. Yarn is easier to work with for smaller hands as the underside doesn’t get as tangled.
What age is this craft best for?
Children ages 6 and up can usually complete this project with minimal help. Younger children may need assistance cutting the cardboard and getting the weaving started.
Can I reuse the cardboard loom?
Yes! As long as the slits stay intact, you can make bracelet after bracelet using the same loom.
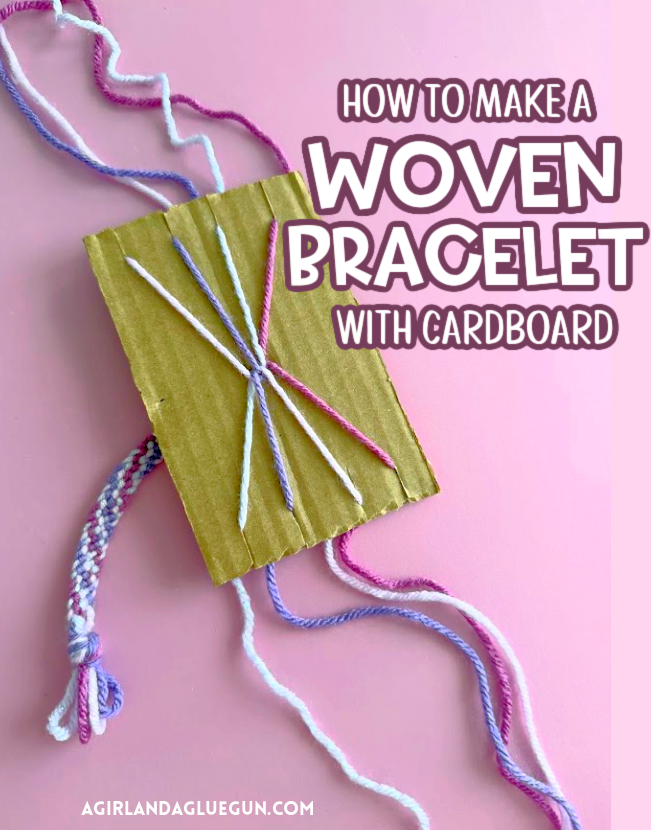
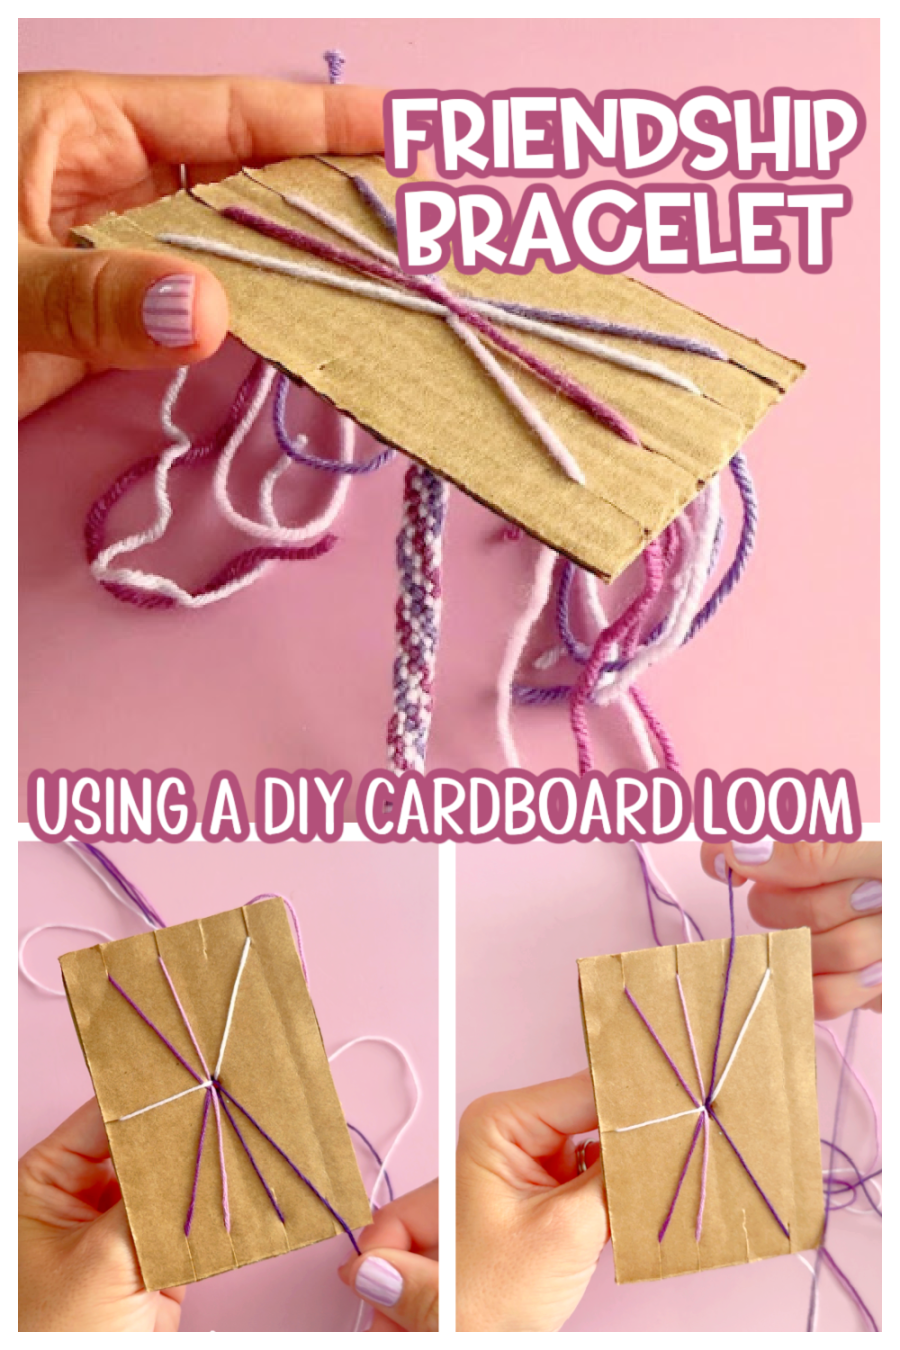
Save DIY Cardboard Bracelet Loom for later
Too busy to get crafting today? No problem! Pin this post to remind yourself about this project later! Sharing my projects helps me reach more people, allowing me to continue sharing free content!
The BEST kid crafts and activities
and when I say kids, I mean kids of all ages!
- black glue art
- salt art
- hot rocks
- Yarn bracelets
- DIY window clings with puff paint
- Play dough activity mats
- Melted crayon art
- magic wallet
- Learn to make black scratch paper
- Melted Crayon Suncatcher
- Pressed Flowers Jar
- Bleeding Tissue craft
If you are looking for more fun kids’ crafts- my craft camp has two weeks full of fun projects that you will love to do as well!
Final Thoughts
You don’t need a store-bought loom to make beautiful friendship bracelets. A simple rectangle cut from a recycled cardboard box works just as well, making this an affordable and eco-friendly craft for kids and adults alike. Grab some colorful yarn, cut a few slits in your cardboard, and start weaving your own handmade bracelet today!
Leave a Reply