
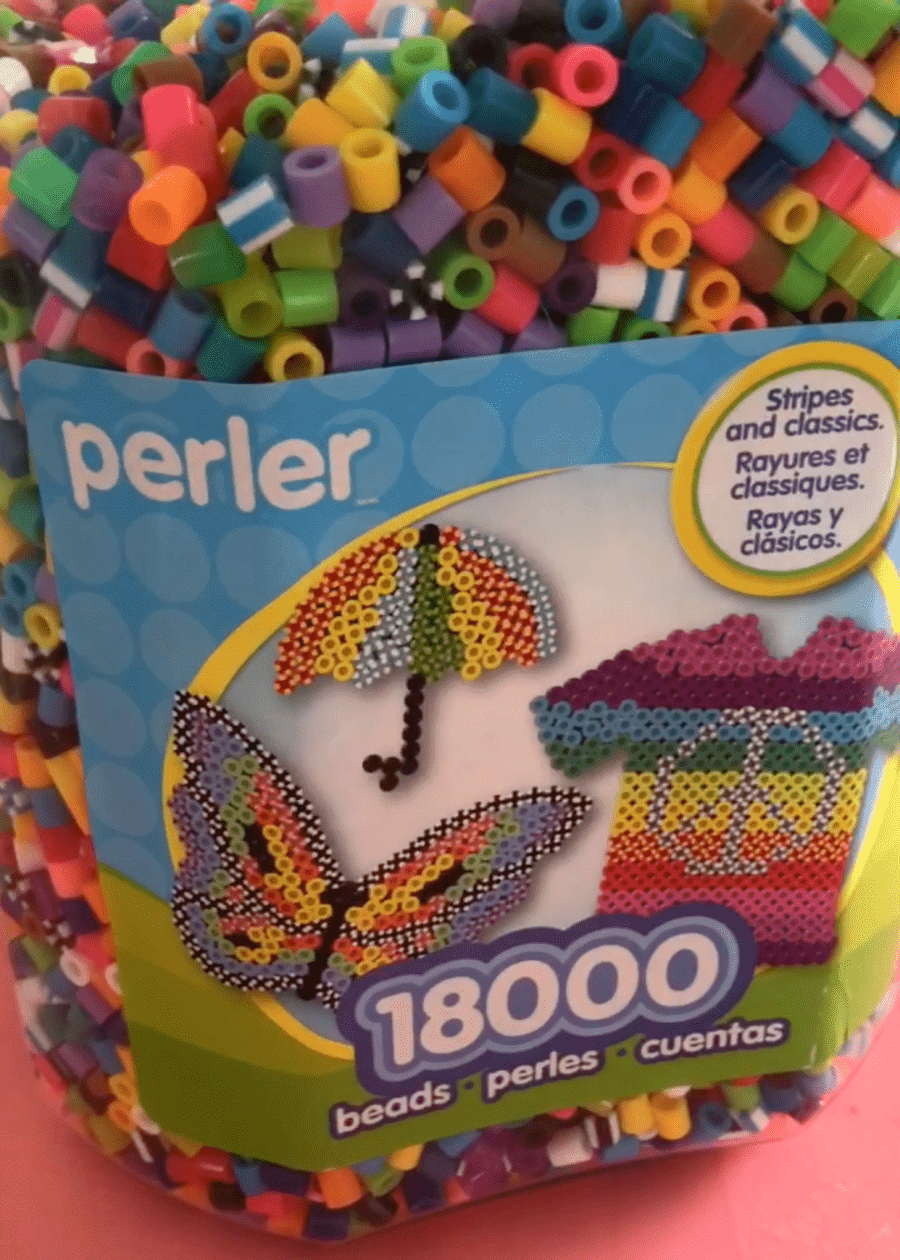
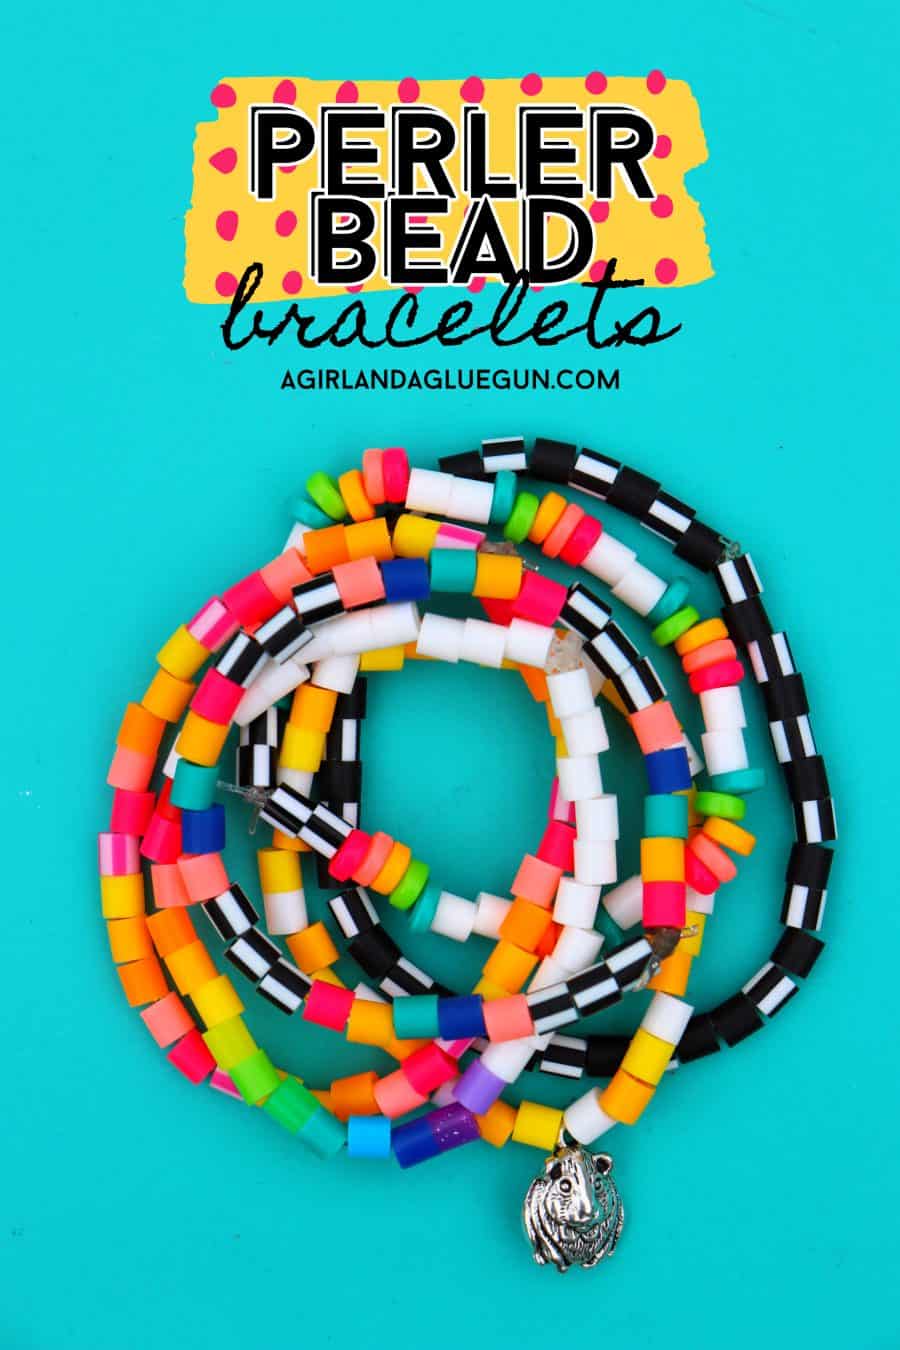
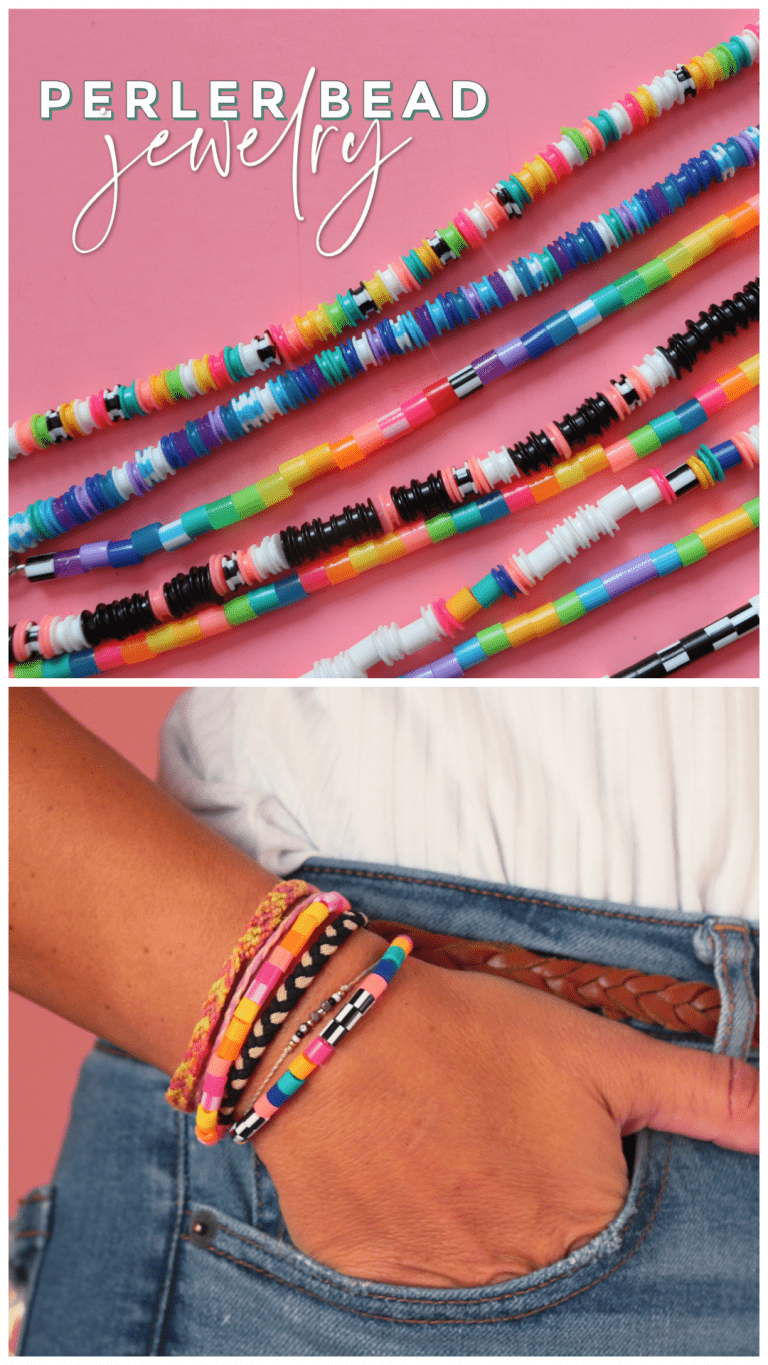
Need a quick craft that everyone will have fun with? Put down a bucket of perler beads and let everyone make their own patterns and designs of perler bead bracelets (or ankle bracelets. or necklaces!)

We just got back from camping- and every year I try to bring a craft for the nieces and nephews to do! The craft I brought never actually got pulled out of my camper- INSTEAD, everyone made perler bead bracelets!
We bought this bucket of perler beads to add some beads to our hair (my daughter has been having fun with that lately!) and they sat on the table. Everyone came over and started whipped up a few bracelets! It turned into the funnest craft!
They are fast and teens and kids can easily make them! Win Win and Win!
Supplies to make Perler Bead Bracelets
- Perler beads
- e6000
- Elastic cording
- scissors
- tape
- oven (if you want to melt the perler beads)
This isn’t the one I have (this one has more beads) but it doesn’t have the fun black and white striped ones. You can purchase a pack of striped perler beads here!
If you are doing these for a school function or for a team- you can packs of specific colors!
How to make Perler Bead Jewelry
Perler bead necklaces and bracelets are super easy to make! (bonus because the opening is pretty wide so it’s really easy to get on the elastic! Smaller kids can do this too!)
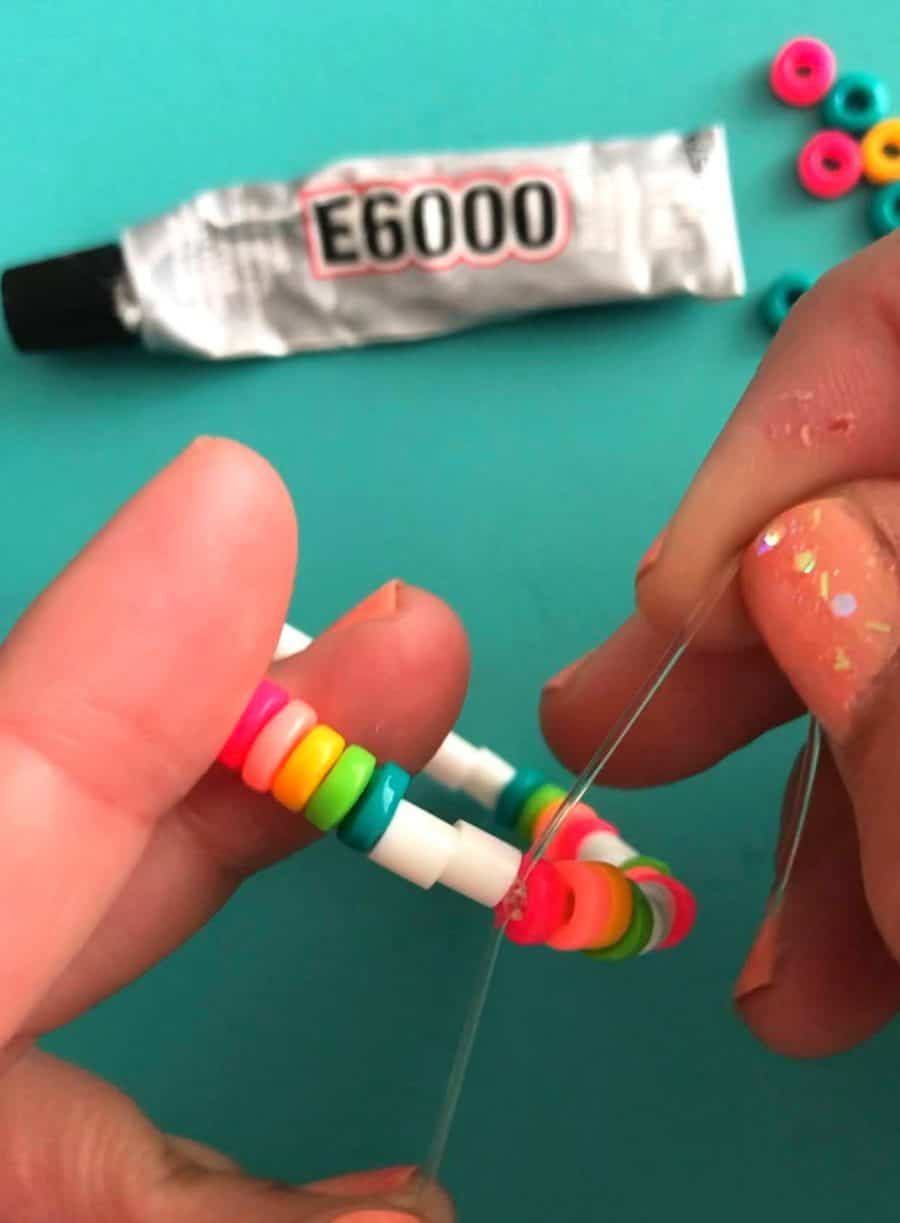
I like to cut my elastic to size (I always add a few inches so I have enough to hold onto to tie a knot) then tape to my workspace. This keeps the beads from sliding through or any accidental drops. Then thread your beads!

Once you are done- tie a know and add some e6000. The e6000 takes about 24 hours to cure- but only a little bit to dry. It really holds up and you don’t have to worry about the knot getting undone! (I have heard that clear nail polish can also work in a pinch!)
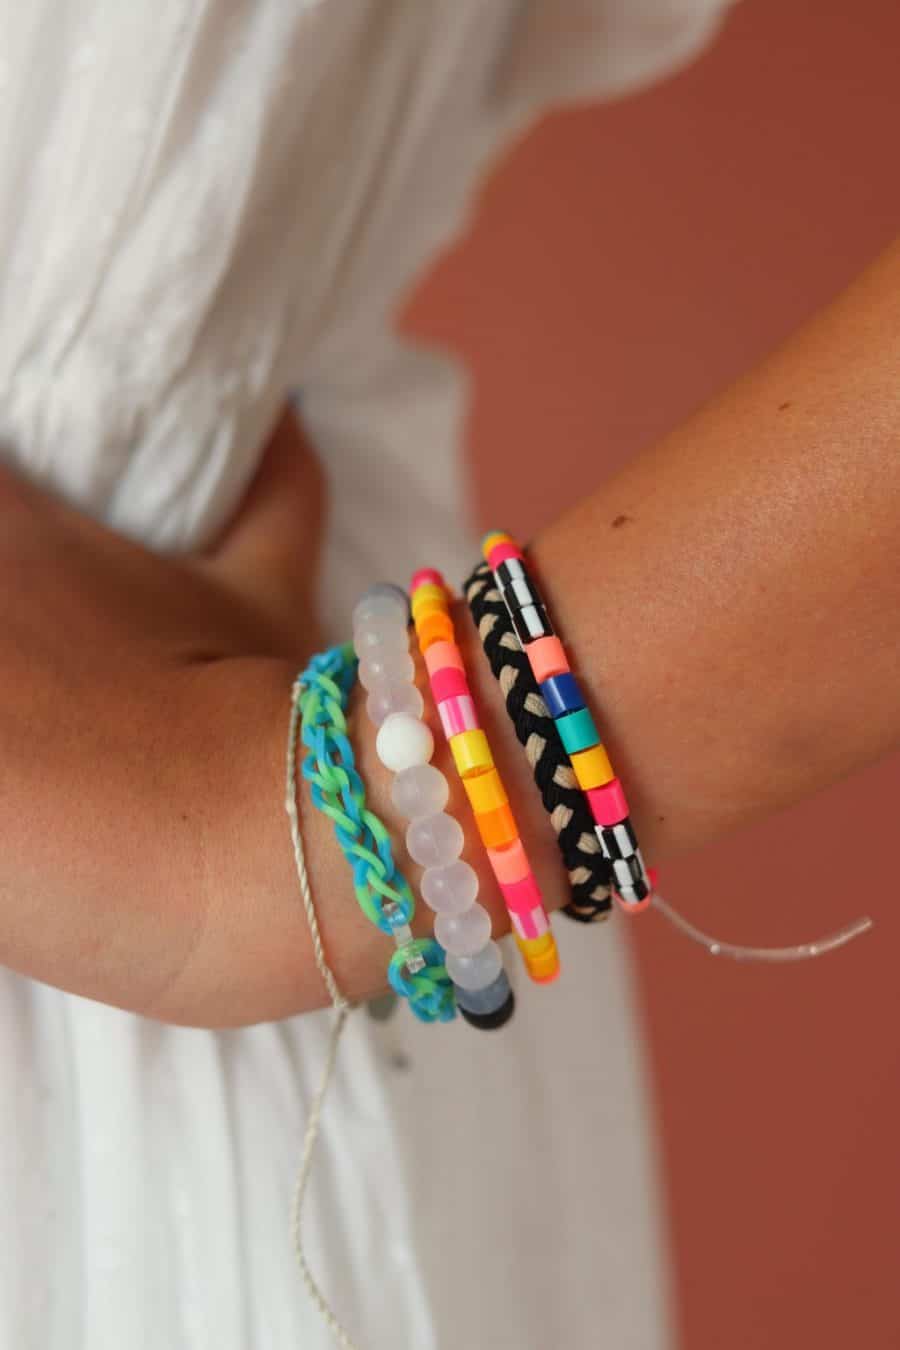
Once the e6000 has dried- rock your bracelet, necklace, ankle bracelet.
Try Melting the Perler Beads!
Now. Because I’m extra and can’t do anything just normal. I wanted to try melting my perler beads.
I actually did something similar when I was making the mask lanyards out of perler beads and used my iron. It turned out really cool. But they were harder to thread since the holes were closed in on. (This is what they looked like! Really cool to look at!)
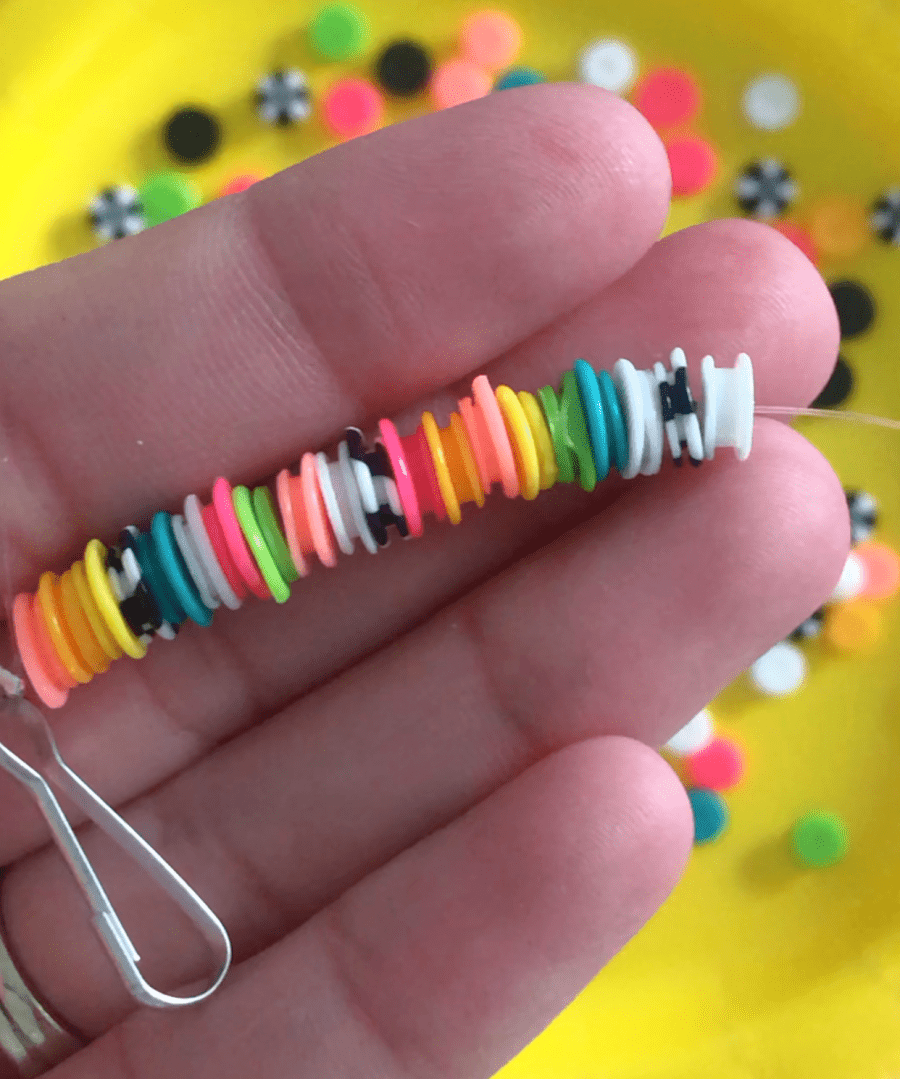
THIS TIME I wanted to go the easier route and stick them in the oven!
I actually have a pan that I use for crafting since I don’t want to eat off the same stuff my sculpey has been baked on. You do want your beads all propped up.
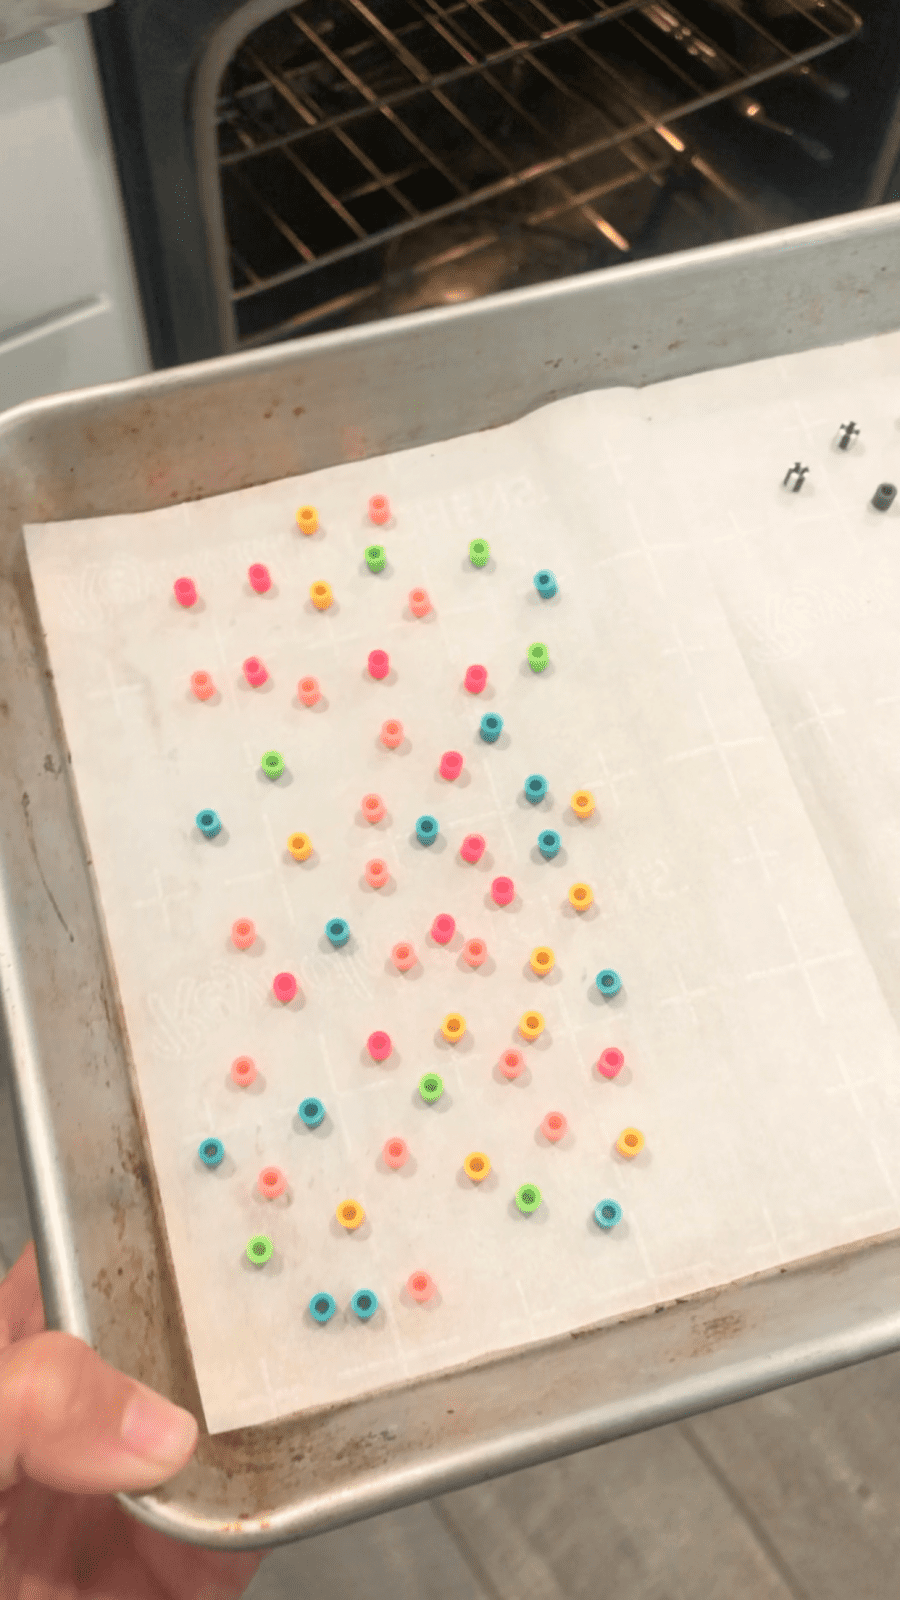
300 degrees for 5-7 minutes. It turns them into little donut shapes! They also are more glossy! I did try them in my oven at 350 and they melted so much that I couldn’t get my elastic through the hole!
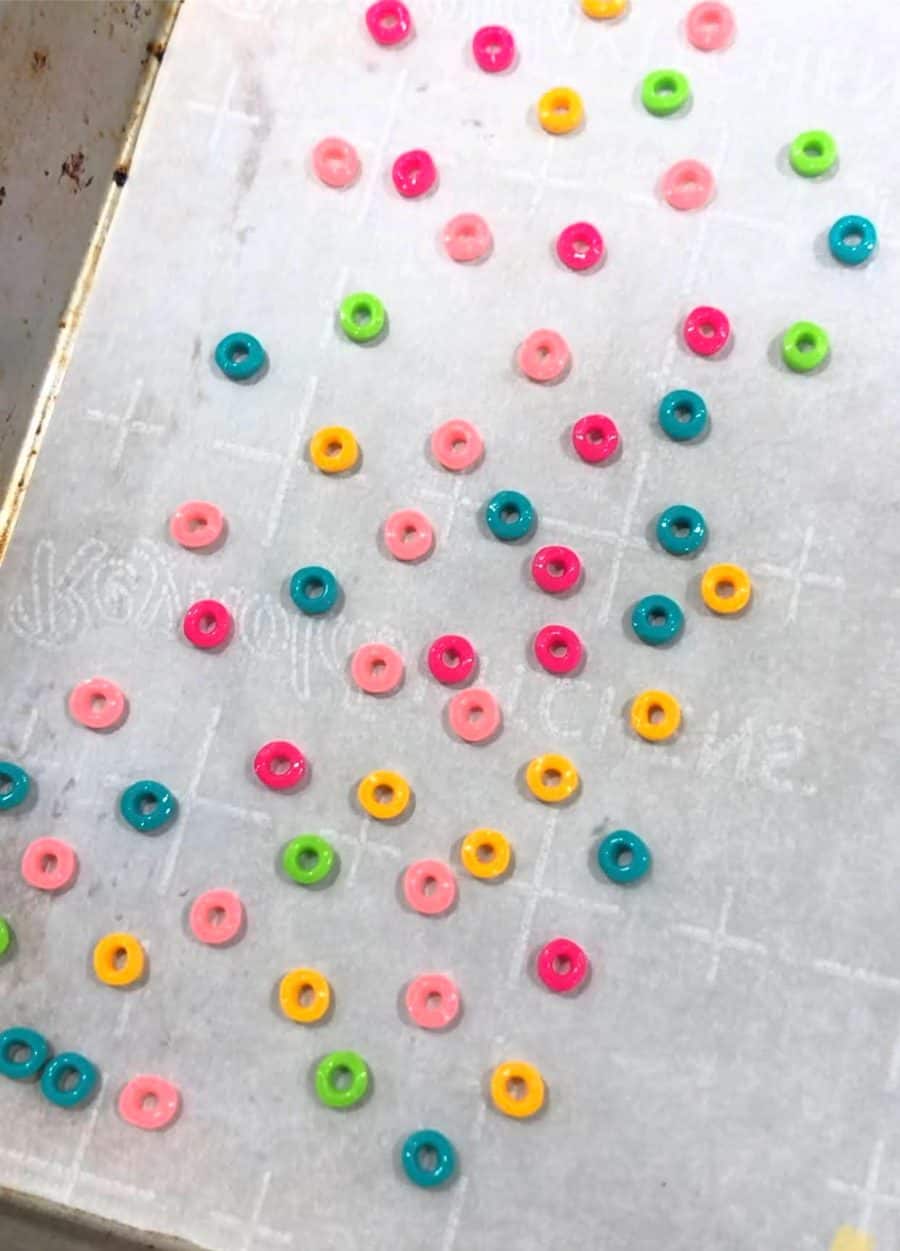

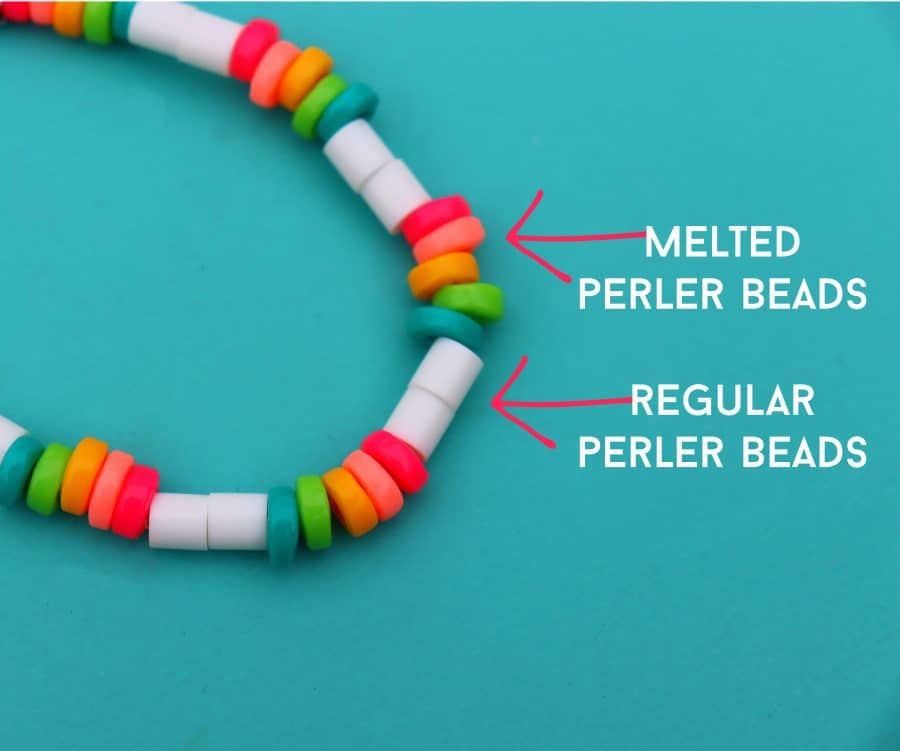
After they cool, you can string them up! We liked to mix and match with regular perler beads and melted to create some fun patterns! (You could also melt some with the iron and create 3 different looks!)
A few other fun variations you can add is putting some charms on it. Or adding regular beads to the bracelets.

It was super fun to see everyone’s different outcomes! So many cool designs and patterns. Kid created some with their school colors, favorite football team, red white and blue, My daughter even made one that we said looked like beetlejuice!
This bucket of perler beads have been used (and used and used!) and we are not even halfway gone with the beads! They last FOREVER! So if you are looking for other fun projects to make with perler beads check out my roundup of awesome perler bead crafts!
Aso-few years ago, I bought giant perler beads and created these fun earrings with them! Check out the video!
Have fun creating all the things!
Too busy to get crafting today? No problem! Pin this post to remind yourself about this project later! Sharing my projects helps me reach more people, allowing me to continue sharing free content!

This project is part of my Kid’s Craft camp! Make sure to click on the image to see all 50 craft ideas!
Leave a Reply