
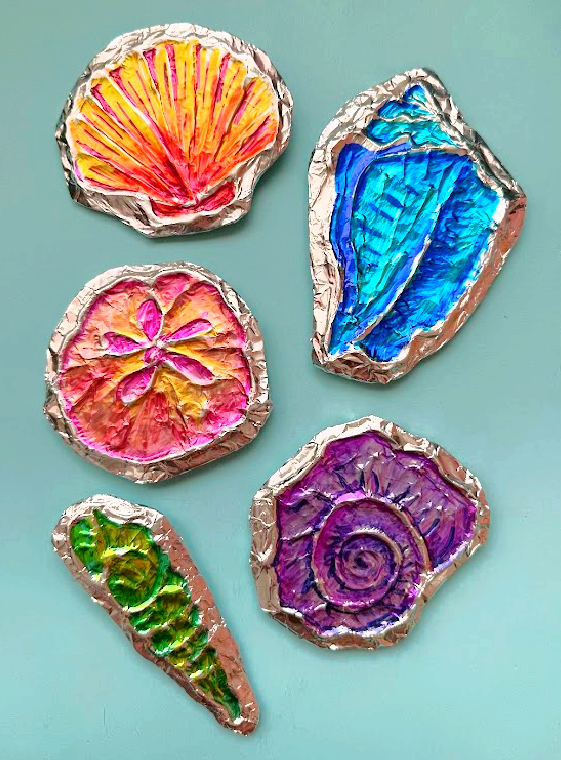
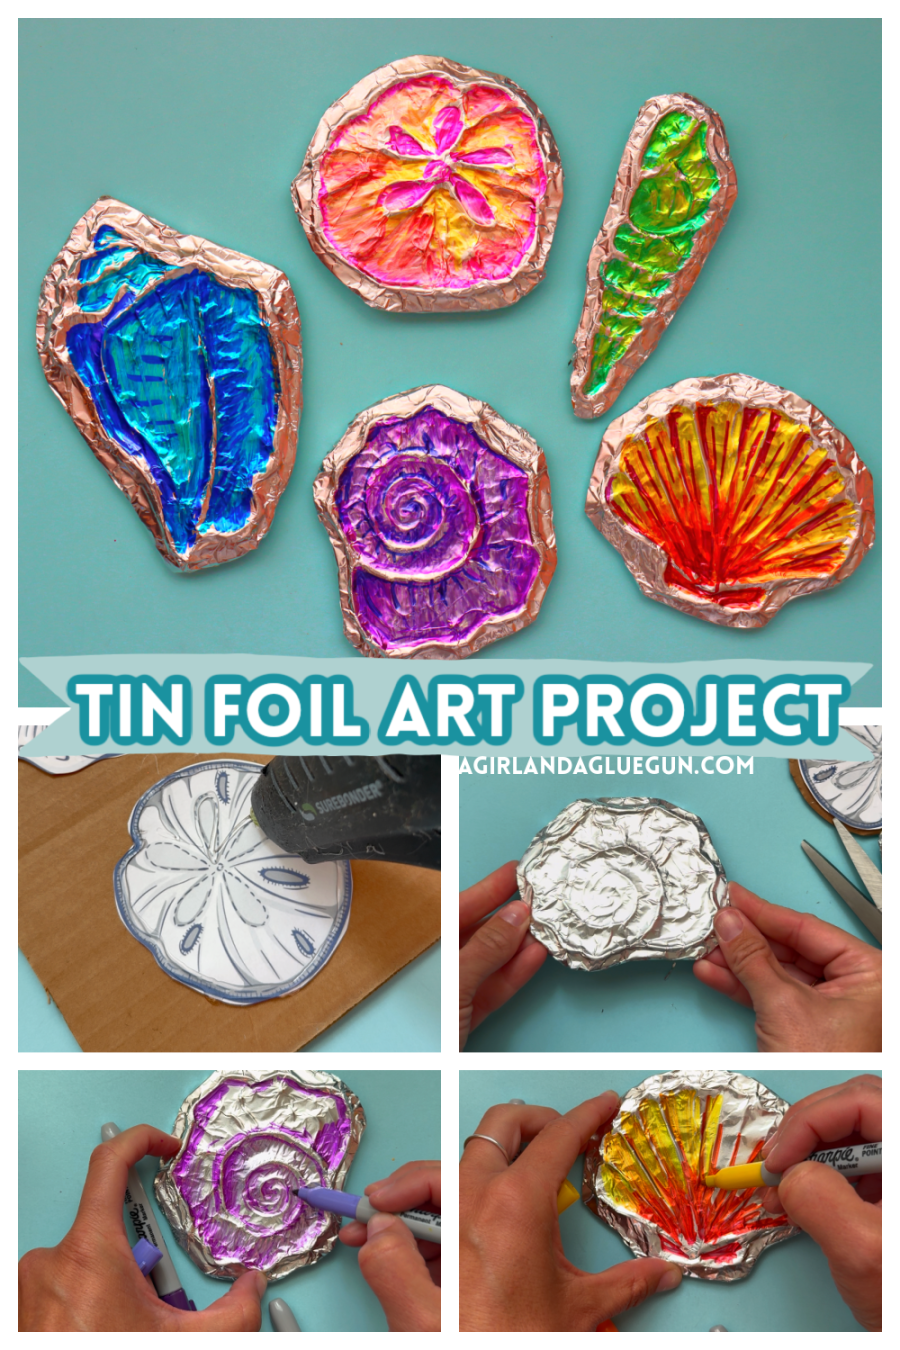
Looking for a creative art project that’s inexpensive, easy to make, and impressive enough to display? This tin foil art craft for kids combines cardboard, hot glue, aluminum foil, and colorful Sharpie markers to create beautiful raised designs that shimmer in the light.

Whether you’re planning a summer camp activity, or simply looking for a unique afternoon craft, this foil embossing technique is a fun way to encourage creativity while building fine motor skills.


Why Kids Love This Tin Foil Craft
This project transforms ordinary household supplies into eye-catching artwork. The raised hot glue lines create an embossed effect beneath the foil, while permanent markers add vibrant pops of color.
Kids enjoy:
- Watching their drawings become 3D works of art
- Experimenting with bright color combinations
- Feeling the raised textures under the foil
- Creating unique keepsakes to display or gift
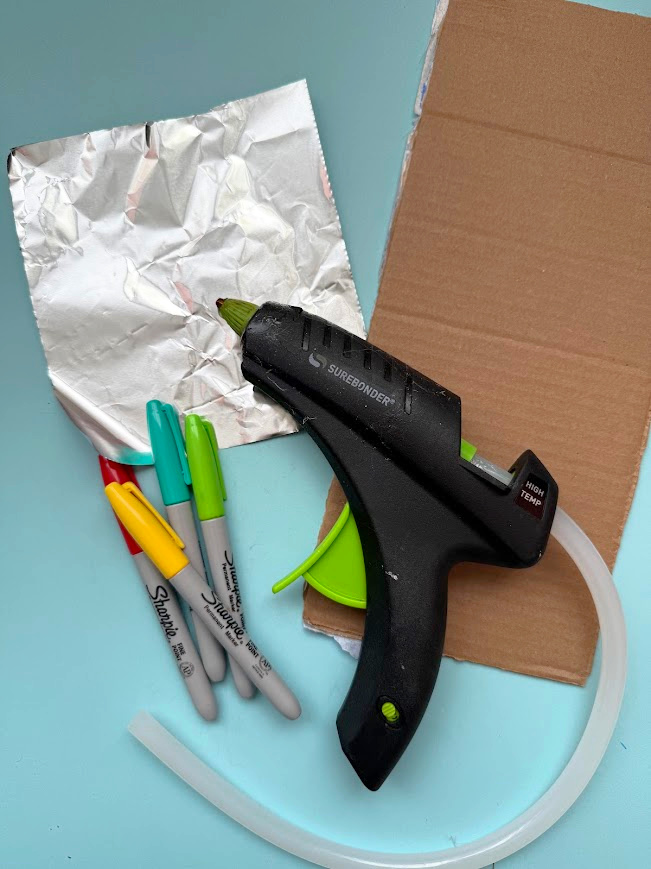
Supplies You’ll Need
- Cardboard (cereal boxes or shipping boxes work great)
- Hot glue gun and glue sticks (adult supervision required)
- Aluminum foil
- Sharpie permanent markers in assorted colors
- Scissors
- Pencil and paper for sketching designs (optional)
How to Make Hot Glue Tin Foil Art
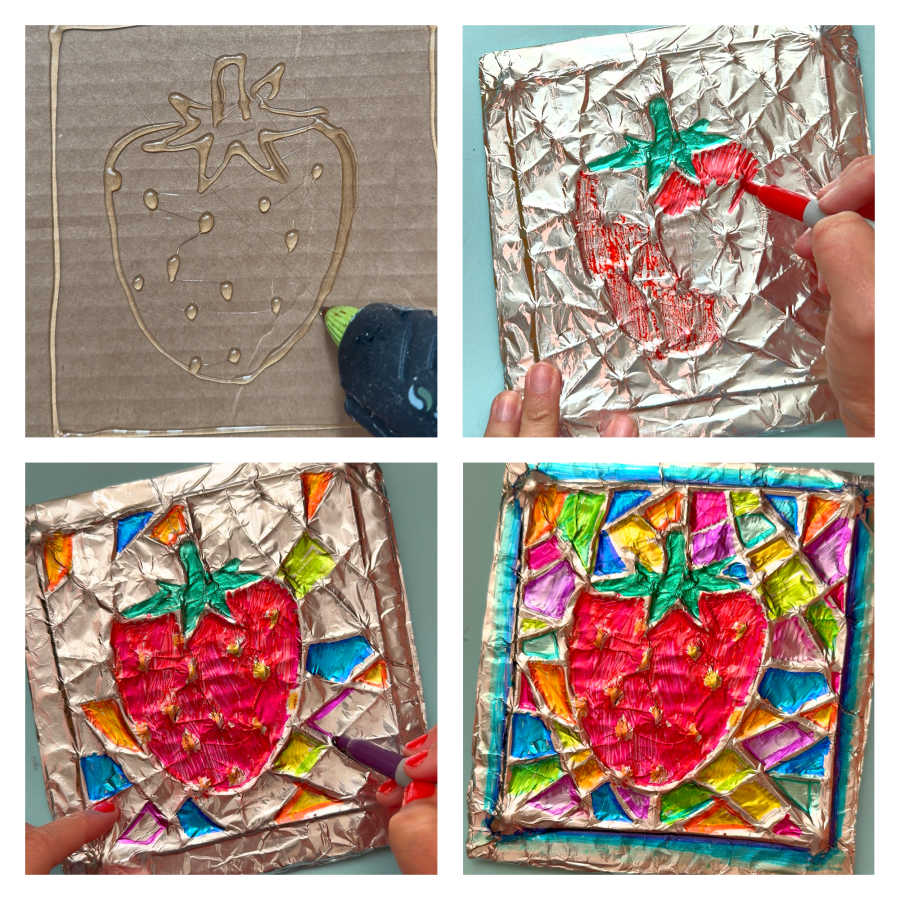
Step 1: Draw Your Design
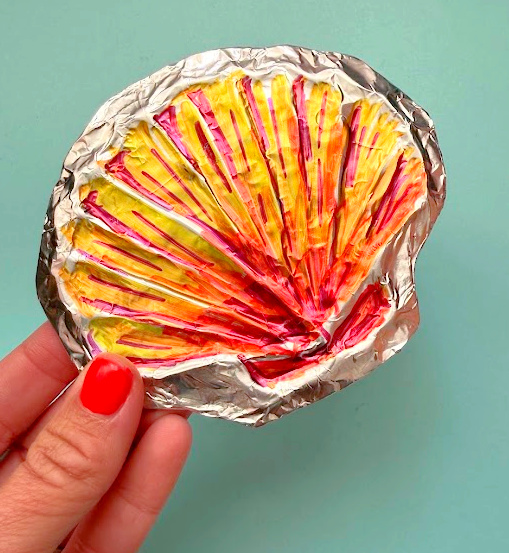
Sketch a simple design onto a piece of cardboard. Bold shapes and outlines work best because they’ll show through the foil. Shells, flowers, hearts, leaves, fish, and geometric patterns are all excellent choices.
I used a seashell template from my bean art project! There are lots of good images there to use!
Step 2: Trace with Hot Glue
Using a hot glue gun, carefully trace over the lines of your drawing to create raised edges. Allow the glue to cool completely before moving on.

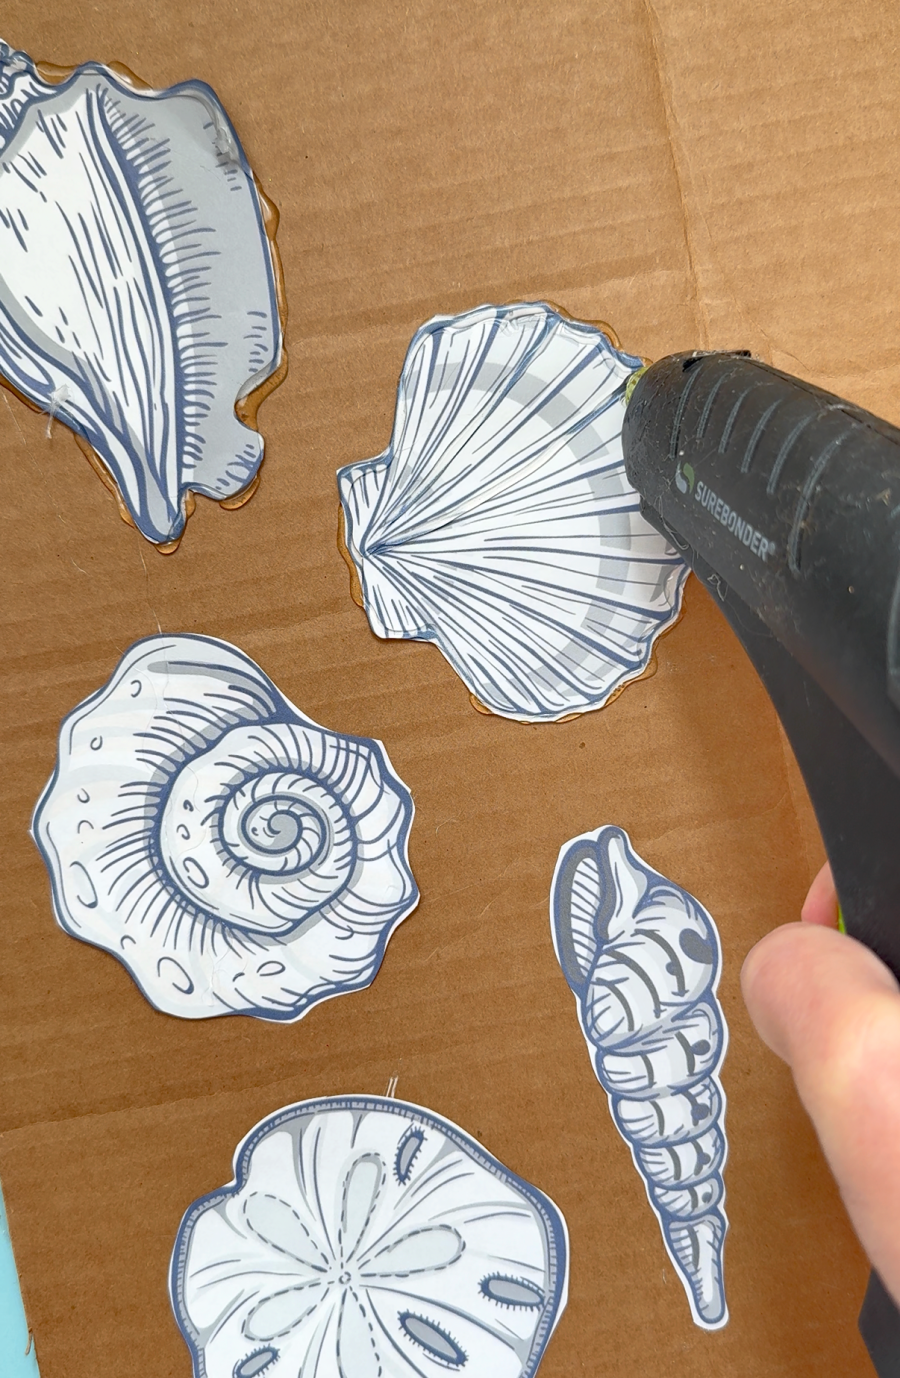
Tip: Adults should handle the hot glue gun for younger children.
Step 3: Wrap with Aluminum Foil
Place a sheet of aluminum foil over the cardboard and gently smooth it with your fingers. Press around the raised glue lines so the design becomes visible through the foil.
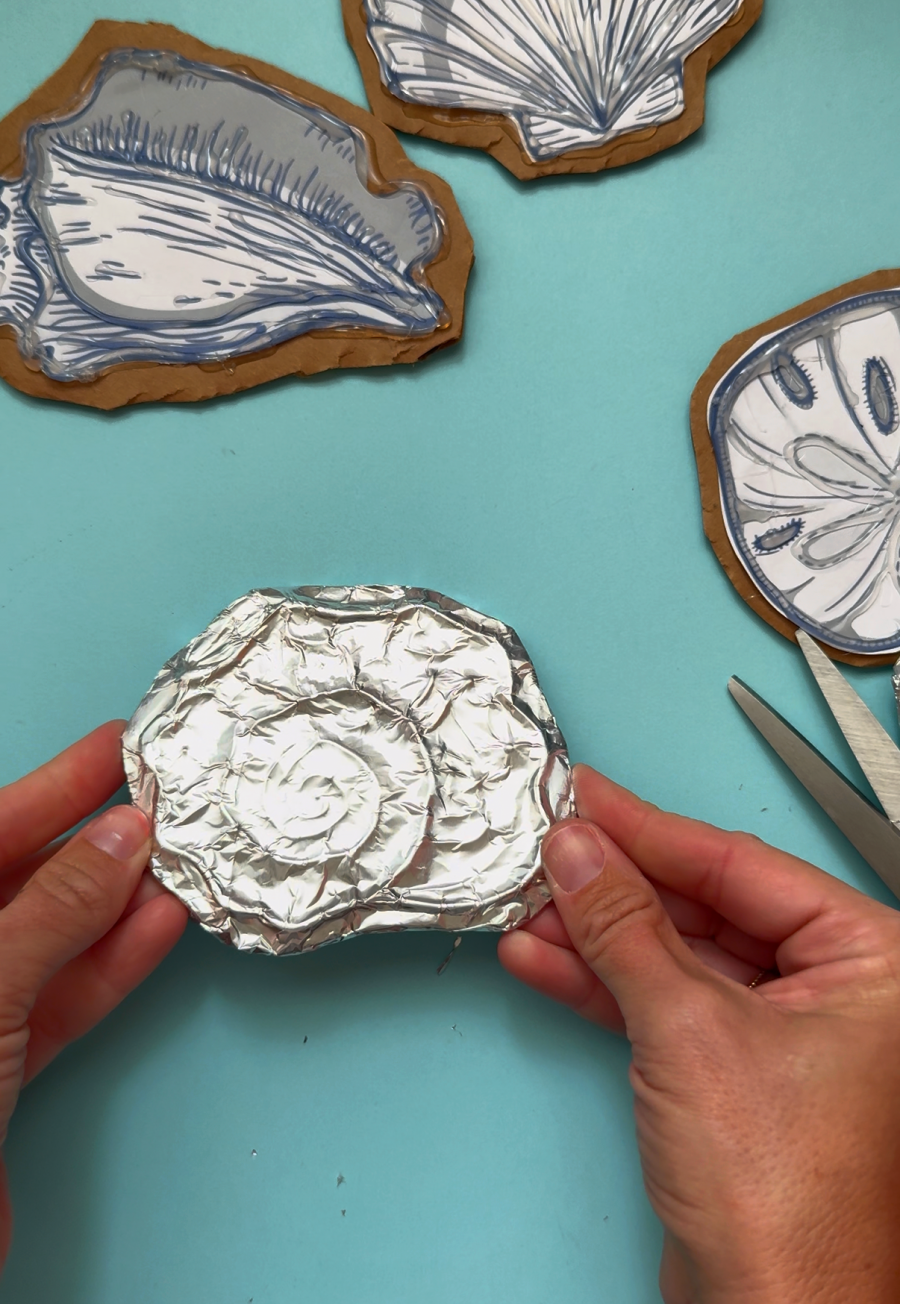
Avoid pressing too hard—you want the foil to hug the contours without tearing.
Step 4: Add Color with Sharpie Markers
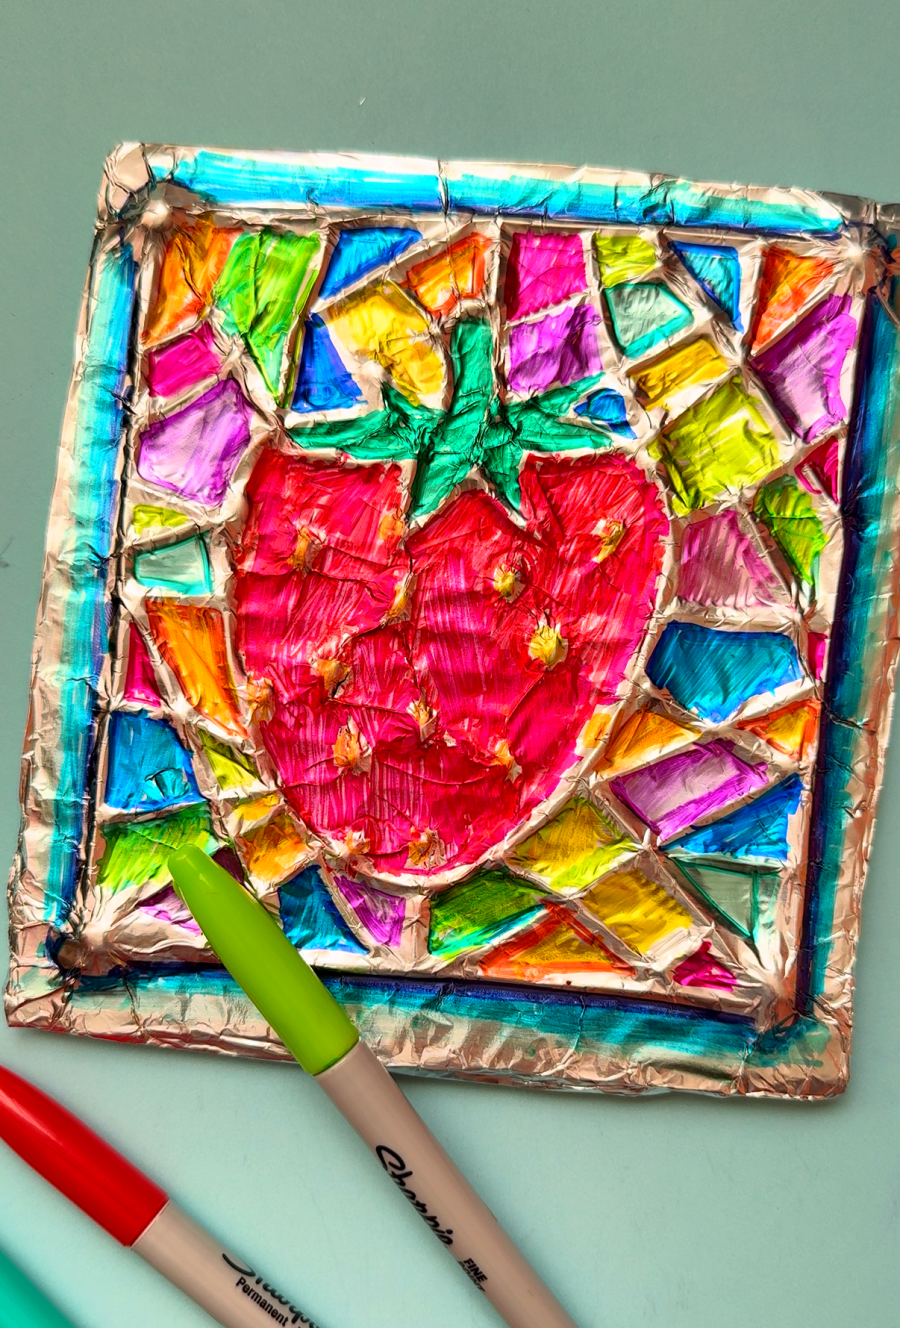
Use Sharpie markers to color directly onto the foil surface. The metallic background reflects the ink beautifully, creating a stained-glass or faux metal embossing effect.

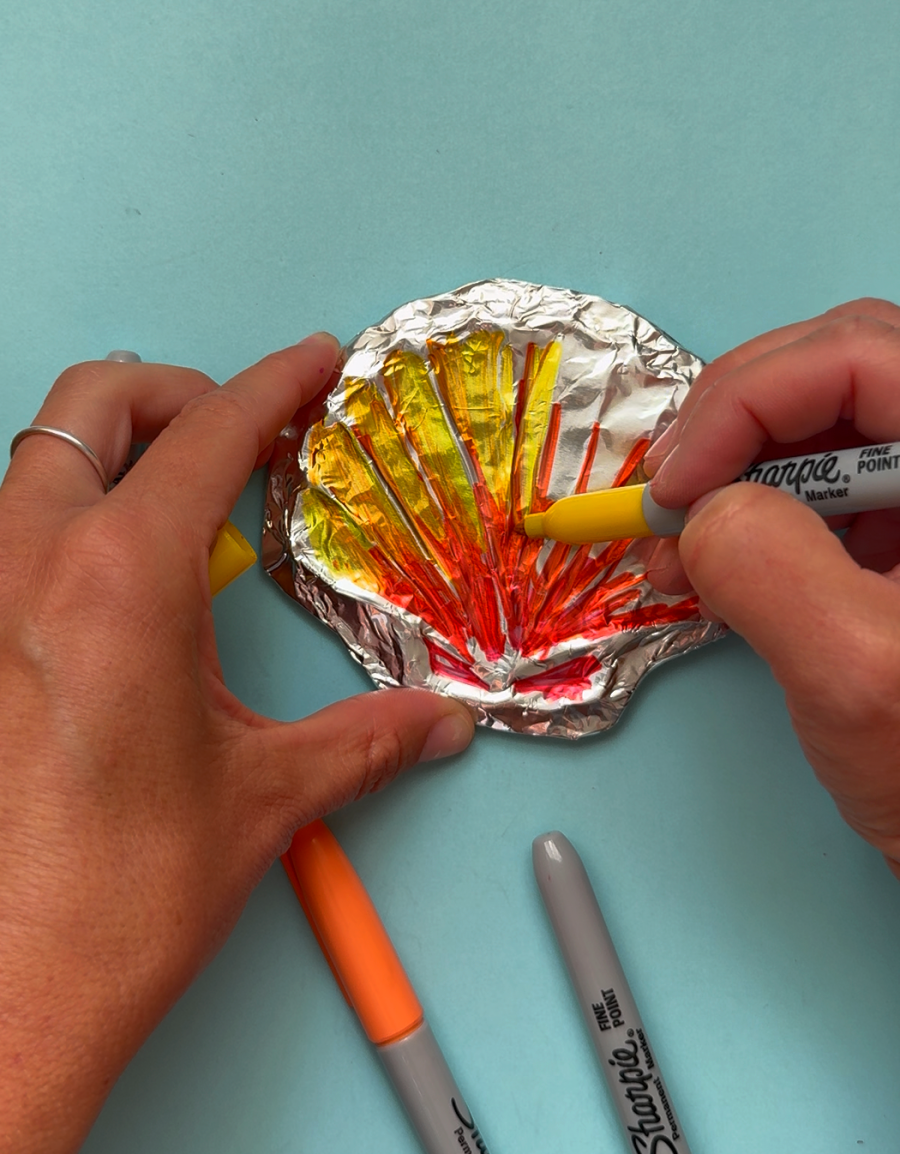
Layer colors or blend shades to make the artwork even more vibrant.
(We tried this with washable markers and it did not work!)
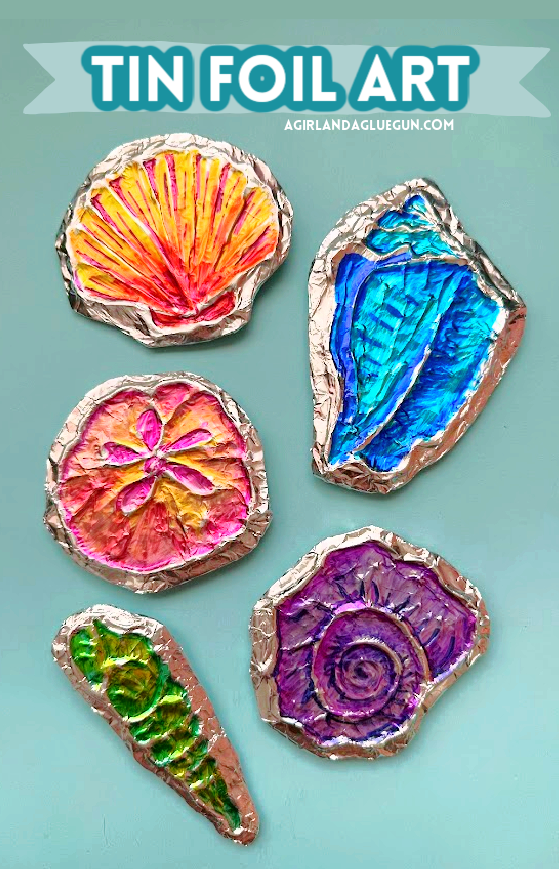
Step 5: Display Your Finished Art
Hang your creations on the wall, use them in a classroom display, or glue magnets to the back for colorful refrigerator art.
Fun Design Ideas
Try creating:
- Ocean shells and sand dollars
- Butterflies and dragonflies
- Dinosaurs
- Flowers and leaves
- Mandalas
- Space-themed planets and stars
- Holiday ornaments
- Hearts for Valentine’s Day
- Pumpkins and ghosts for Halloween
- Snowflakes for winter
Educational Benefits
This hands-on activity supports early learning by encouraging:
- Fine motor skill development
- Hand-eye coordination
- Creative expression
- Pattern recognition
- Color exploration
- Patience and careful observation
It also introduces children to the concept of embossed art and texture in a simple, accessible way.
Tips for Success
- Keep designs fairly simple with bold outlines.
- Smooth the foil gently to prevent ripping.
- Permanent markers produce the brightest colors on foil.
- Protect your work surface from marker bleed-through.
- For younger children, have an adult complete the hot glue step before kids add the foil and color.
Frequently Asked Questions
Can kids use the hot glue gun themselves?
Because hot glue can cause burns, an adult should complete this step or closely supervise older children who have experience using a glue gun.
Do I have to use Sharpie markers?
Permanent markers work best because they adhere well to the foil and create rich, vibrant colors. Washable markers typically won’t produce the same effect.
What kind of cardboard works best?
Thin cardboard from cereal boxes, snack boxes, or shipping cartons is sturdy enough while still being easy to cut.
Can this be done in a classroom?
Yes! Teachers can prepare the hot glue outlines ahead of time, allowing students to complete the foil wrapping and coloring independently.
Final Thoughts
This hot glue and tin foil art project is a simple, budget-friendly craft that delivers stunning results. With just a few everyday materials, kids can transform basic cardboard into colorful embossed masterpieces that sparkle and shine. It’s an engaging activity for home, classrooms, homeschool lessons, art camps, or rainy-day fun—and every finished piece is uniquely beautiful.
Save Tin Foil art for Kids later
Too busy to get crafting today? No problem! Pin this post to remind yourself about this project later! Sharing my projects helps me reach more people, allowing me to continue sharing free content!
The BEST kid crafts and activities
and when I say kids, I mean kids of all ages!
- black glue art
- salt art
- hot rocks
- Yarn bracelets
- DIY window clings with puff paint
- Play dough activity mats
- Melted crayon art
- magic wallet
- Learn to make black scratch paper
- Melted Crayon Suncatcher
- Pressed Flowers Jar
- Bleeding Tissue craft
If you are looking for more fun kids’ crafts- my craft camp has two weeks full of fun projects that you will love to do as well!
Leave a Reply