
Grab your glue and some beans and try out this bean art kids craft! It’s mosaic art that is perfect for little hands!

Beans beans the magical…craft supply? Seriously! I can not believe how much fun this project turned out! These are like the kid version of mosaic art! Once you make one, you will want to create so many! And luckily, the beans are cheap! So you can craft your heart out!
Bean art, also known as bean mosaics, is a unique form of art that has been gaining popularity in recent years. Through the use of a variety of beans, artists are able to create stunning and intricate mosaics that showcase their talent and creativity. In this article, we will take a closer look at the world of bean art and explore the fascinating techniques and methods used to create these bean masterpieces. Get ready to be inspired and amazed as we dive into the world of this unconventional art form.

This project is part of my Kid’s Craft camp! Make sure to click on the image to see all 50 craft ideas!
Supplies to make bean art
- Beans
- Pictures (some printables are down below)
- cardboard
- Elmers glue
- Paint (optional)
There are two different ways to create these pictures. I will go over each technique. But you either need one bean and paint or a bunch of beans and no paint! So pick which way you want to create your bean art pictures and then pick your supplies from there!
There are a variety of beans out there! They are all pretty inexpensive. The most expensive one was $2.20 a bag. I found a bean soup mix that had a great mix of beans. Here are some of the beans we used:
- Lentils
- Great Northern beans
- Kidney beans
- Red beans
- Pinto beans
- Black beans
- Lima Beans
- Green split peas

How to create bean art
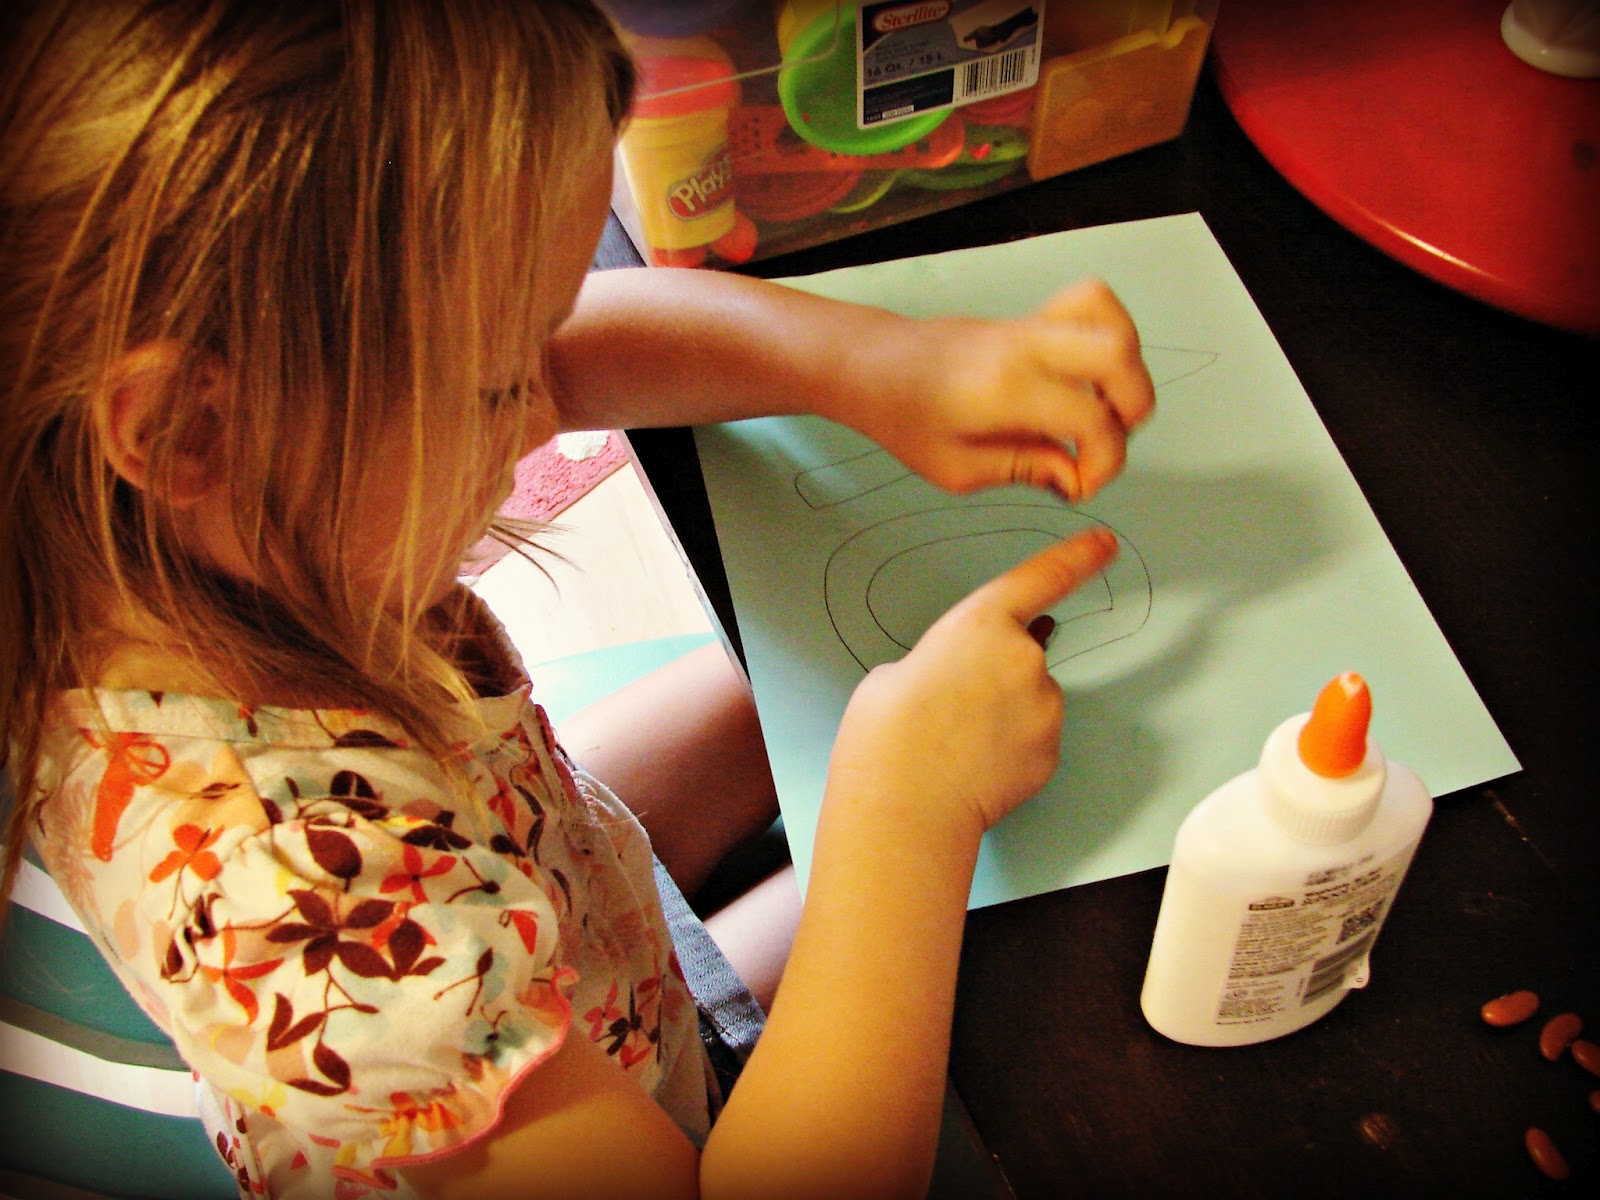
Like I mentioned, there are two different ways to make these pictures. But the set up for each way is the same. Either print a picture, rip out a page of a coloring book, or have kids sketch out a design or their name. We did this on cardstock. Then we glued the paper onto a piece of cardboard. (We just cut up a big Amazon box!) The beans get really heavy so it’s nice to reinforce the paper.

Method 1: Variety of beans
The first method is using all the different kinds of beans. Find your picture and then pick the beans that will match the best.
I just worked in sections. I started with the leaves of the sunflower. “Color” in the section where you want to work with glue. Don’t add too much glue and don’t work in too big of sections because you don’t want the glue to start drying before you can add in the beans.

Then add your beans! Glue, beans, glue beans!

The green and yellow beans were the hardest to work with because they are split so the tops are round and the bottoms are flat. The other beans were smooth all the way around so you could just throw them on the picture much quickly!


Here is my daughter’s sunflower picture. She was 8 years old when she made this!
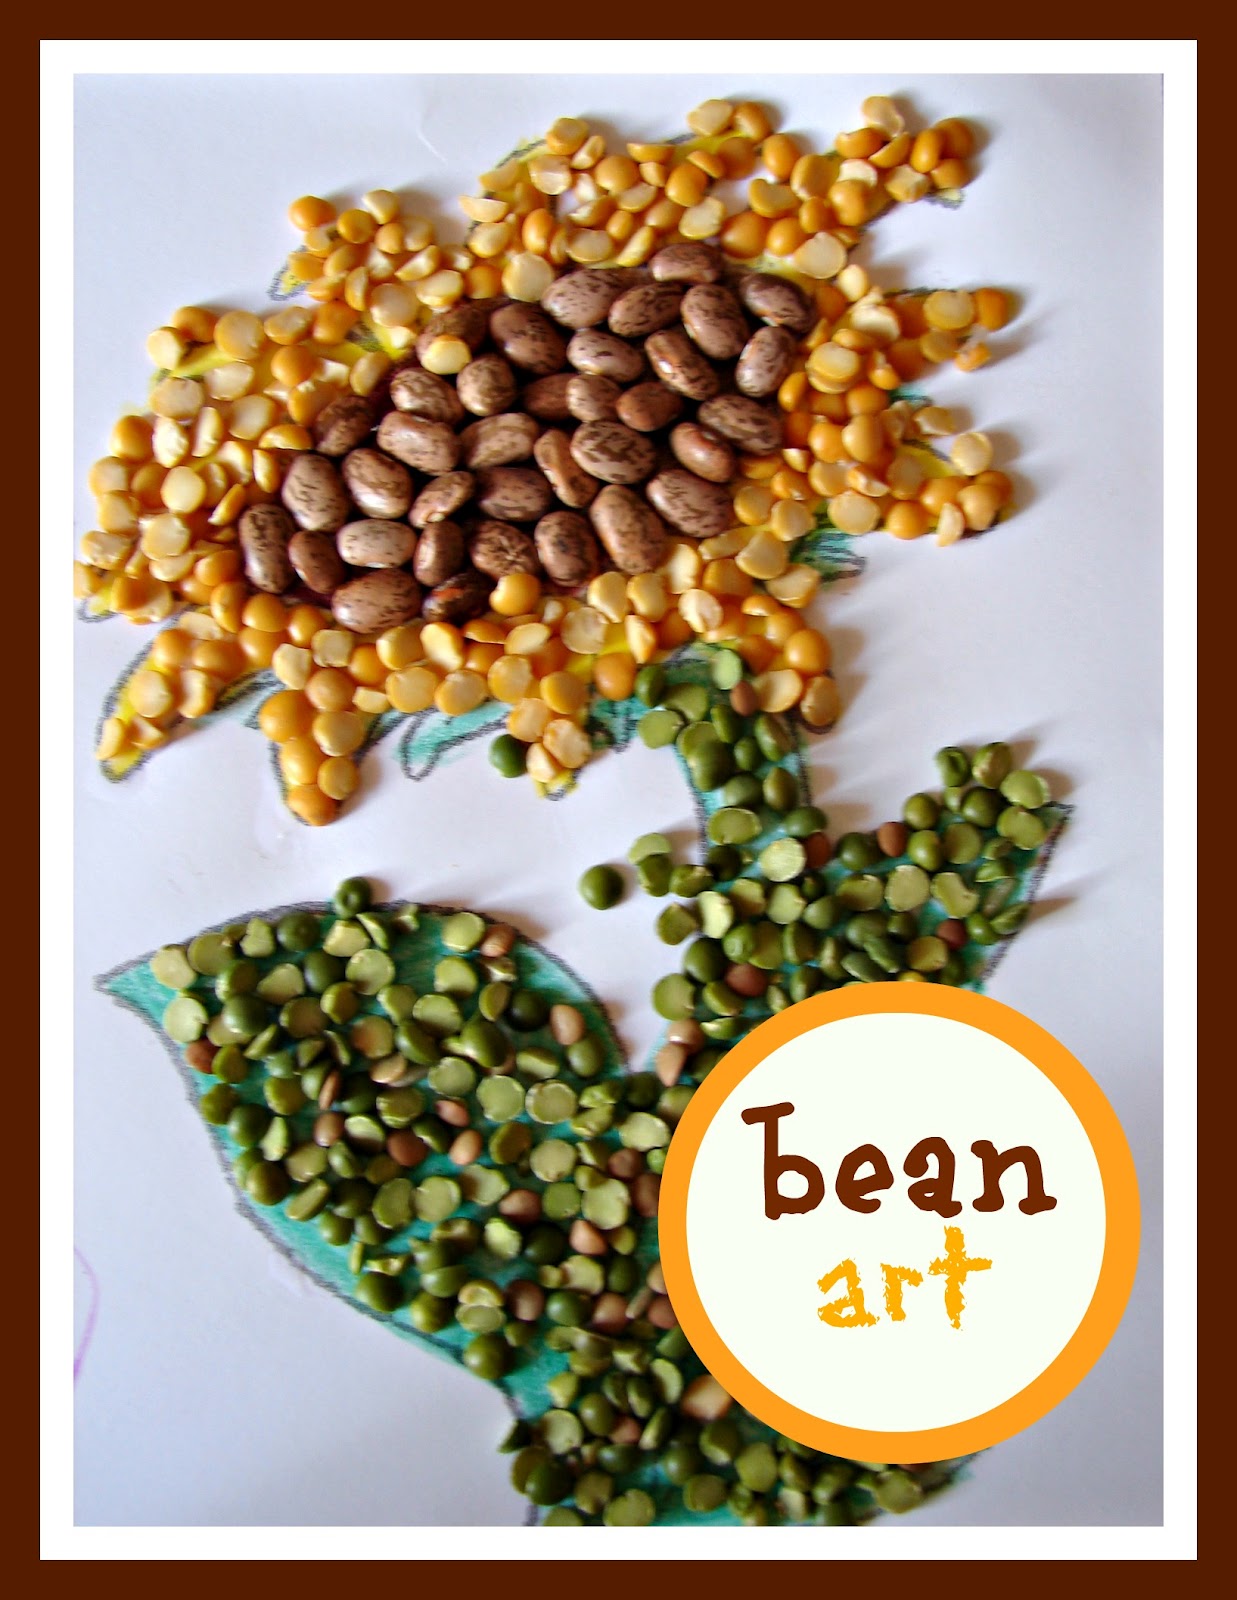
You can see she colored the picture underneath so if she missed a section it’s not as obvious!

and here are a couple of other options made with just beans!


Method 2: One bean and paint
The second method is using only great northern white beans.
You work in colored sections. Glue on the beans and before you work on the next section, you add paint!

You want to ensure the glue is set up or the paintbrush will push the beans. I glued on the fish. Then glued on the sand since it wasn’t touching the fish. When I placed beads on the bottom, the fish was dry enough to paint. Then I painted the sand.

And repeat! Add on the beans for the fins and the seaweed, paint, and then add on beans to the next section!

The paint makes the pictures pop! This works well if you are doing a picture that you need bright colors since most beans don’t come in teal!


Download the free printables below:

I created over 20 pictures that would be perfect for bean art. You can also rip out pages in a coloring book, print off your kids favorite characters or just have them draw a picture or write their name to fill in beans!
Printing them out
If you are looking for a great printer to use – I love my HP! I wrote up a whole post why The reasons I love the printer. This post also shows how you can make sure you are getting the best prints by adjusting your settings!
IF YOU DON’T HAVE A PRINTER: You can also upload the files to staples or office max and have them print them! Sometimes the local library has a printer for public use!
Click on the image below and the printables will automatically open in a new window.

Too busy to get crafting today? No problem! Pin this post to remind yourself about this project later! Sharing my projects helps me reach more people, allowing me to continue sharing free content!


The BEST kid crafts and activities
and when I say kids, I mean kids of all ages!
- black glue art
- salt art
- hot rocks
- Yarn bracelets
- DIY window clings with puff paint
- Play dough activity mats
- Melted crayon art
- magic wallet
- Learn to make black scratch paper
- Melted Crayon Suncatcher
- Pressed Flowers Jar
- Bleeding Tissue craft
If you are looking for more fun kids’ crafts- my craft camp has two weeks full of fun projects that you will love to do as well!
Mel says
I'm looking for ideas for my almost three year old, I have the beans I love the idea of coloring them.
The polka dot dog is pretty cool, I like it!