
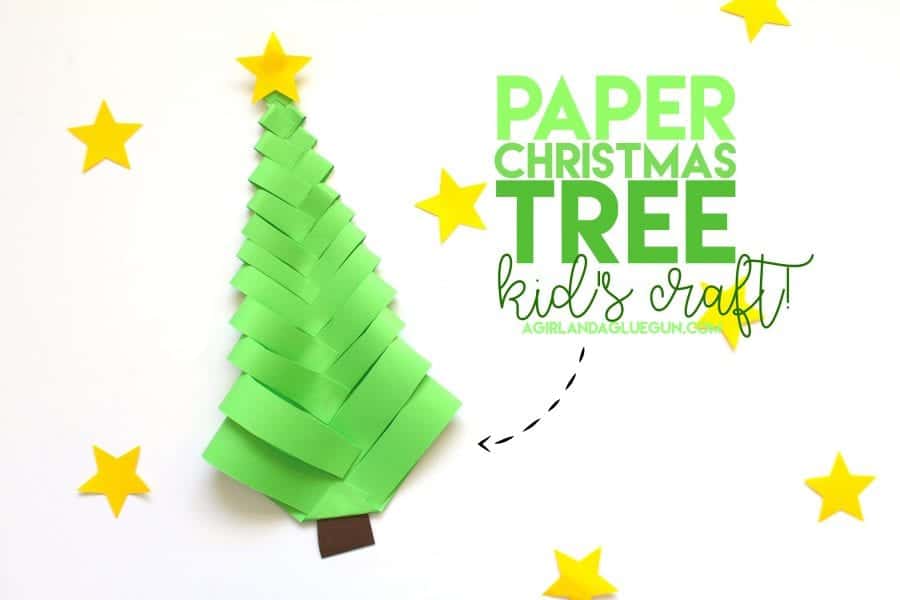
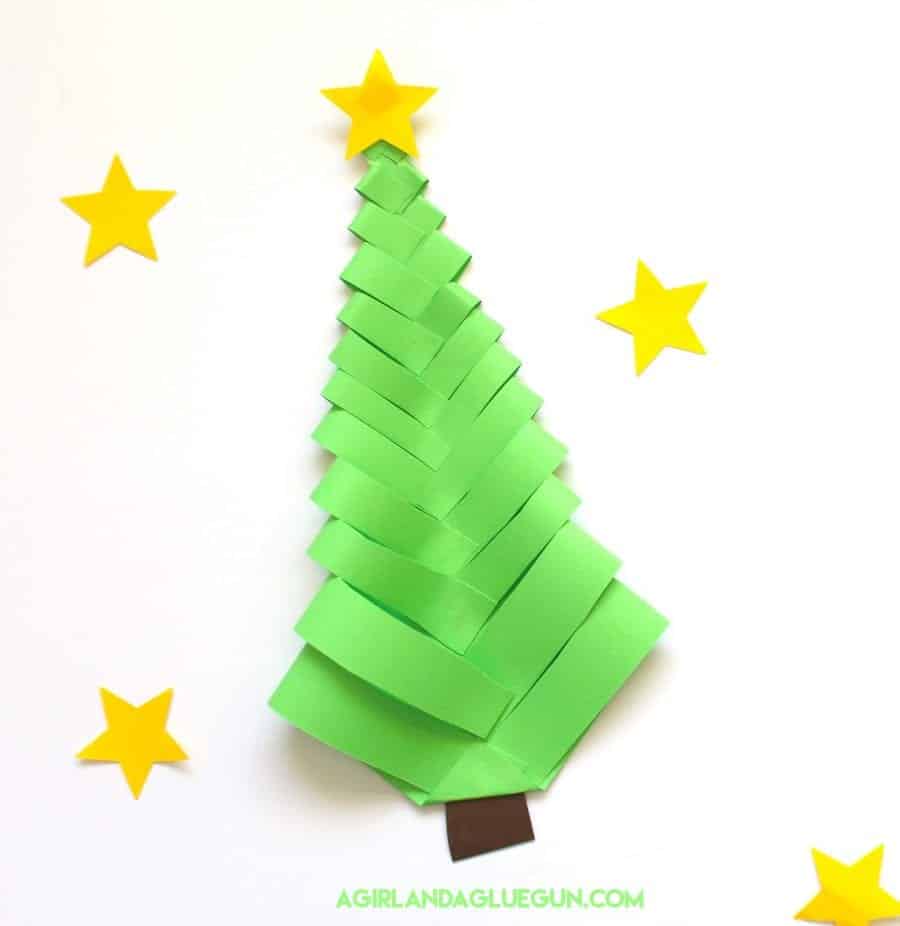
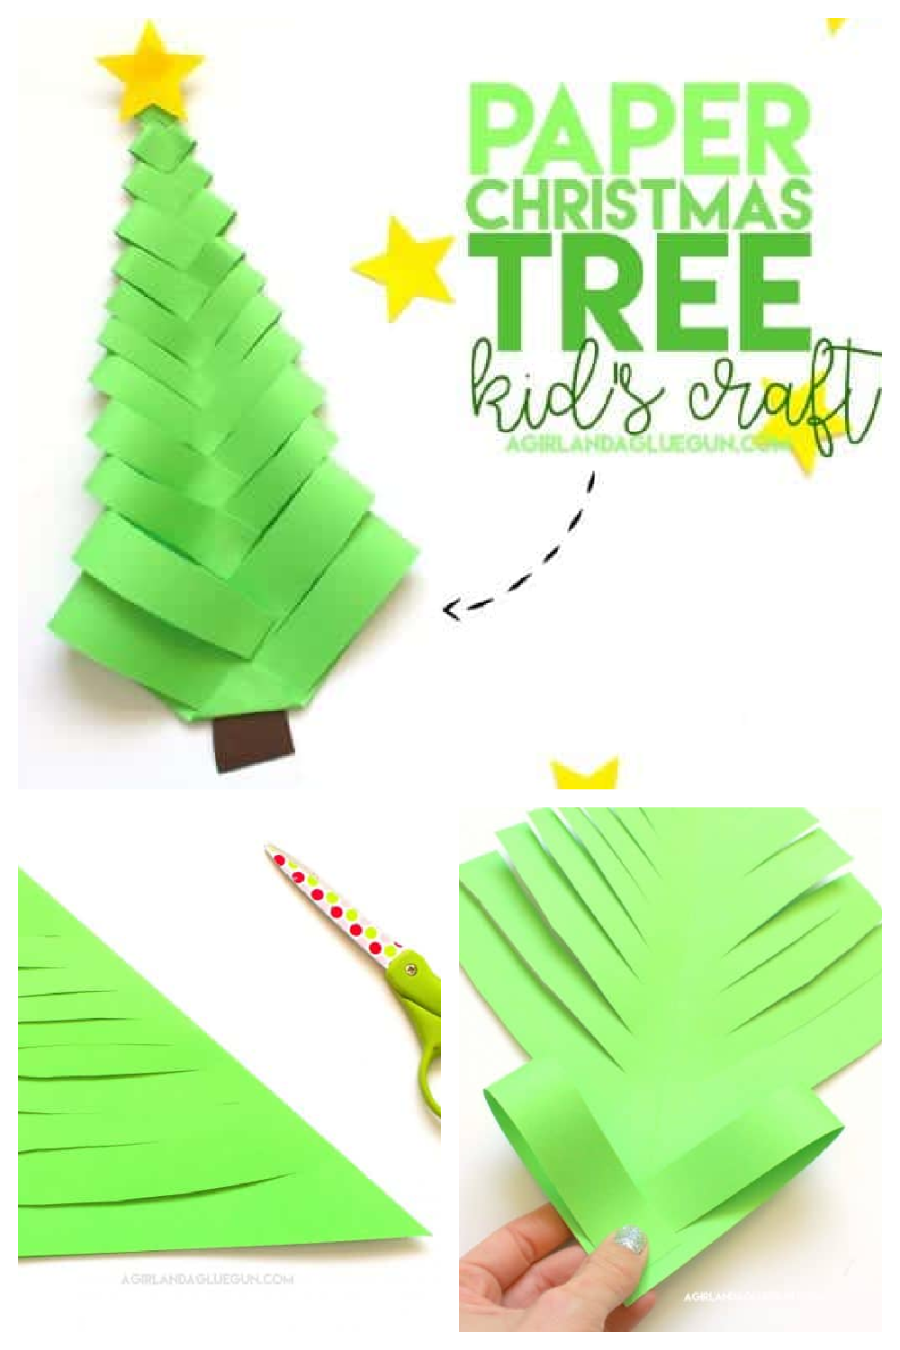
A perfect Kid’s craft for this holiday season- Paper Christmas Tree. A cheap and easy DIY!
My daughter came home from school with the cutest Paper Christmas tree! I asked her how she made it and a cute little YouTube video was born! I tried my best to explain the whole DIY but it’s easier to watch to understand!
Supplies to make a paper Christmas tree
- Green paper
- glue stick
- scissors
How to create a paper tree.
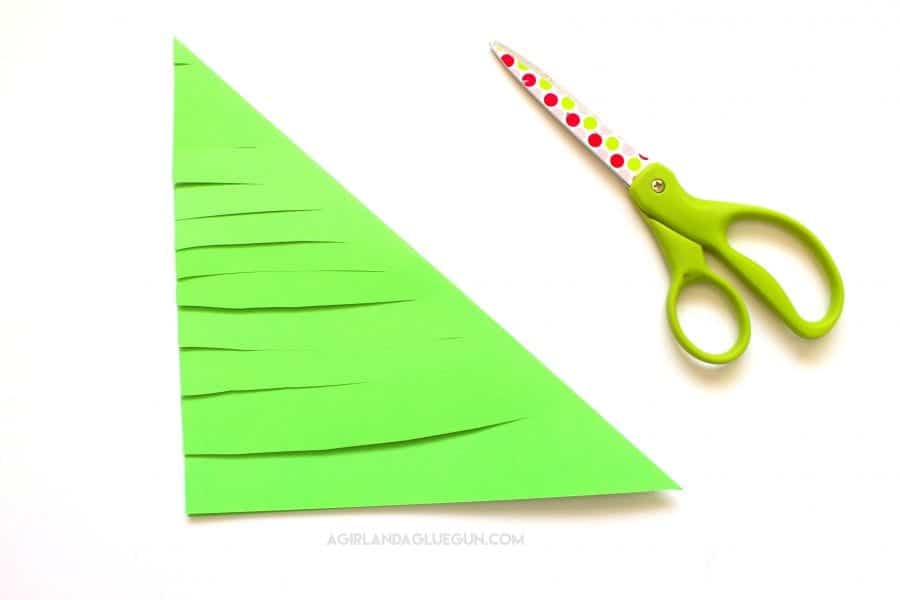
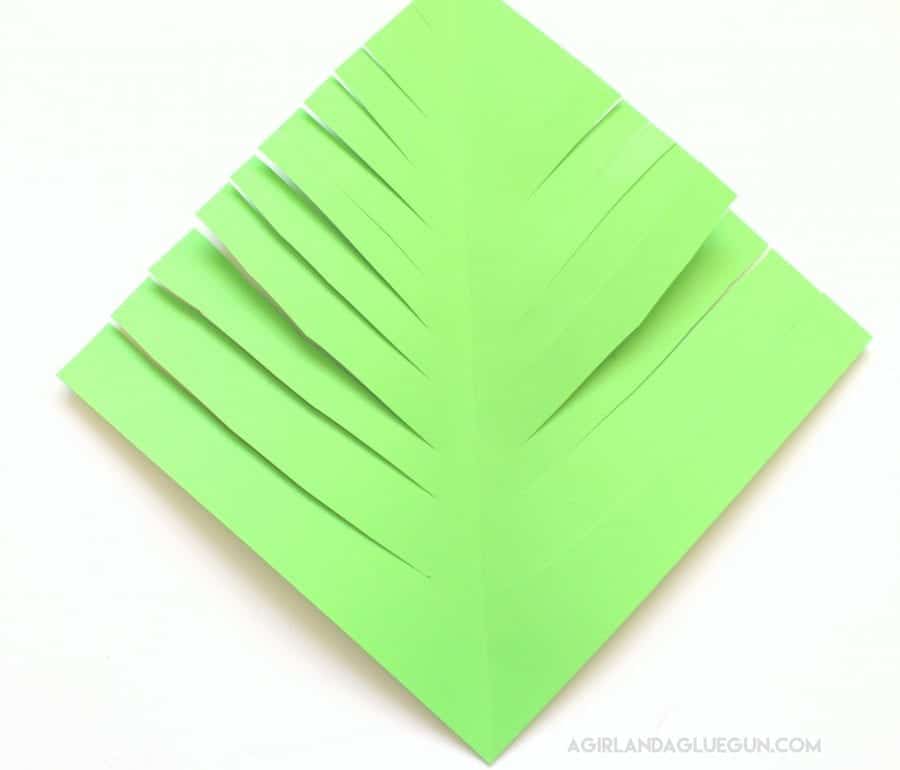
Fold the paper corner up to line up the sides and snip off the top so you have a square.
Keep the square folded into a triangle shape and snip lines making sure not to go all the way through the fold. Space them out however you want. The end result will have different looks depending if the cuts are thin or thick.
Cut the strips parallel with the bottom of the triangle.
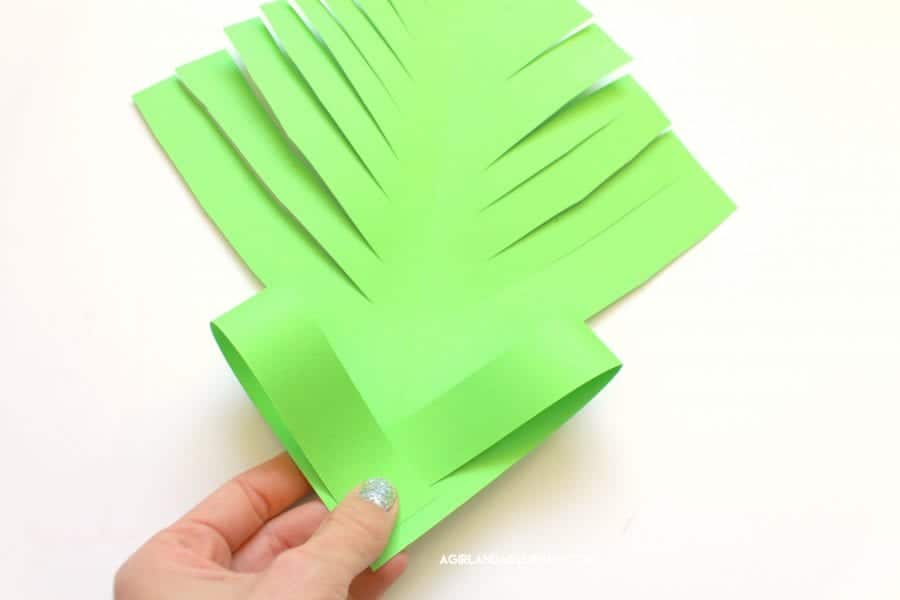
Open it up.
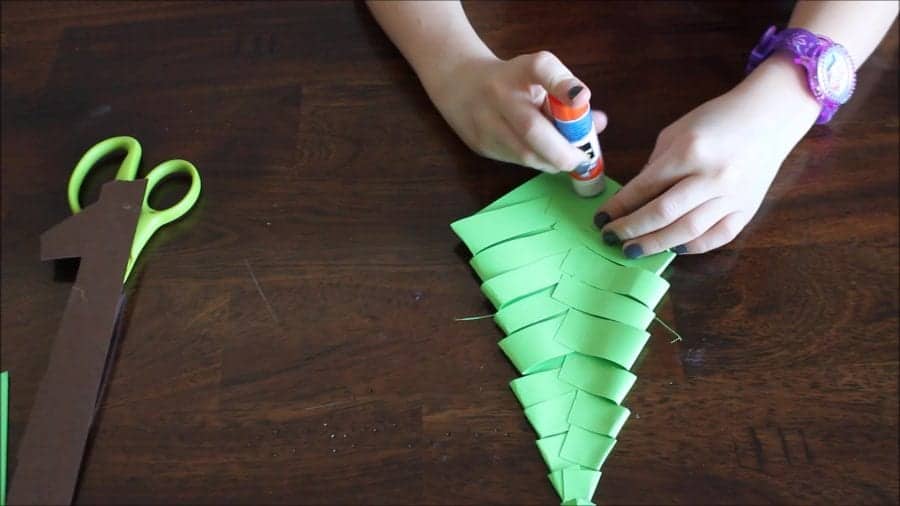
You are going to bend each strip down to the center and glue it in place.
Fold up the bottom off the tree to make the bottom flat.
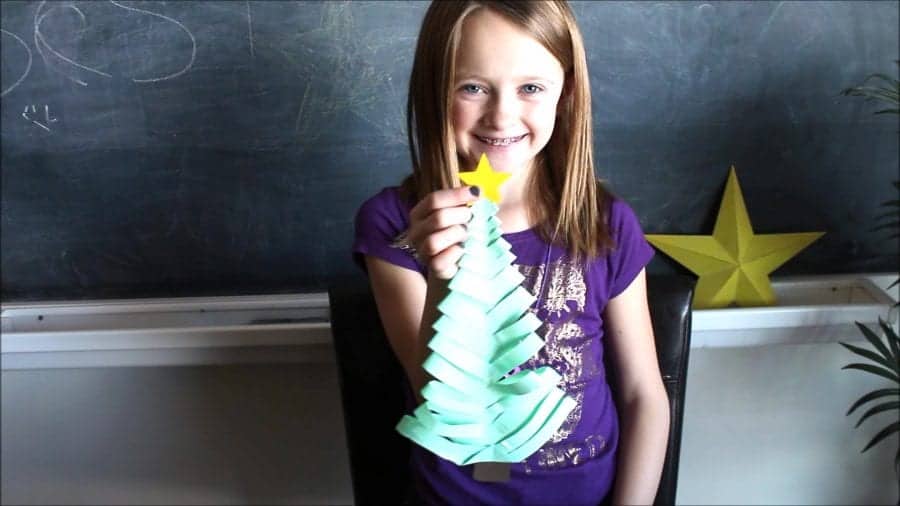
From here you can add brown paper for a stump, yellow stars, or make candy canes or ornaments! Or grab some glitter glue and decorate the tree! Let each kid get creative! That’s one of my most favorite parts! I love seeing the end results! They are all so different even when everyone starts out with the same supplies!
You can also add a magnet to the back to hang on the fridge!
Isn’t she the cutest!?

Watch the video on how to make a paper Christmas tree- kids craft
Christmas Kid’s Crafts
- Cookie cutter Ornaments with book pages
- Beaded Candy Cane
- Baking soda ornaments
- Melted cup ornament
- Dollar Tree nativity craft
Too busy to get crafting today? No problem! Pin this post to remind yourself about this project later! Sharing my projects helps me reach more people, allowing me to continue sharing free content!
Leave a Reply