
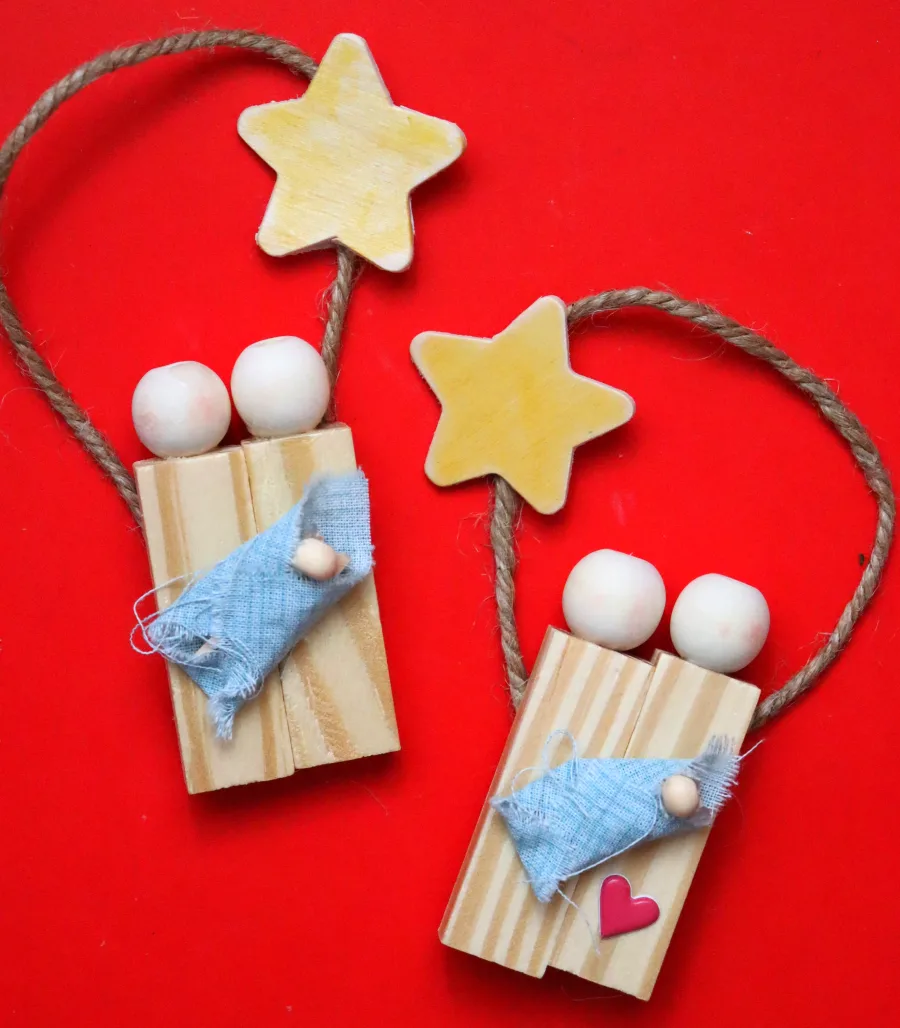
This Dollar Tree Nativity Craft is the perfect ornament that kids can make from start to finish! It’s inexpensive and a great project for a Christmas party!
Are you looking for a crafty way to get into the Christmas spirit? Whether you’re religious or not, you can bring the joy of the holiday season into your home with your own handmade Dollar Tree nativity scene. This article will provide an easy-to-follow step-by-step guide to creating a nativity scene for your own holiday décor. By the end, you’ll have an amazing nativity scene crafted from the humble items in the Dollar Tree for just a few dollars. So come join in the holiday fun: it’s time to get crafty and create your own nativity scene!

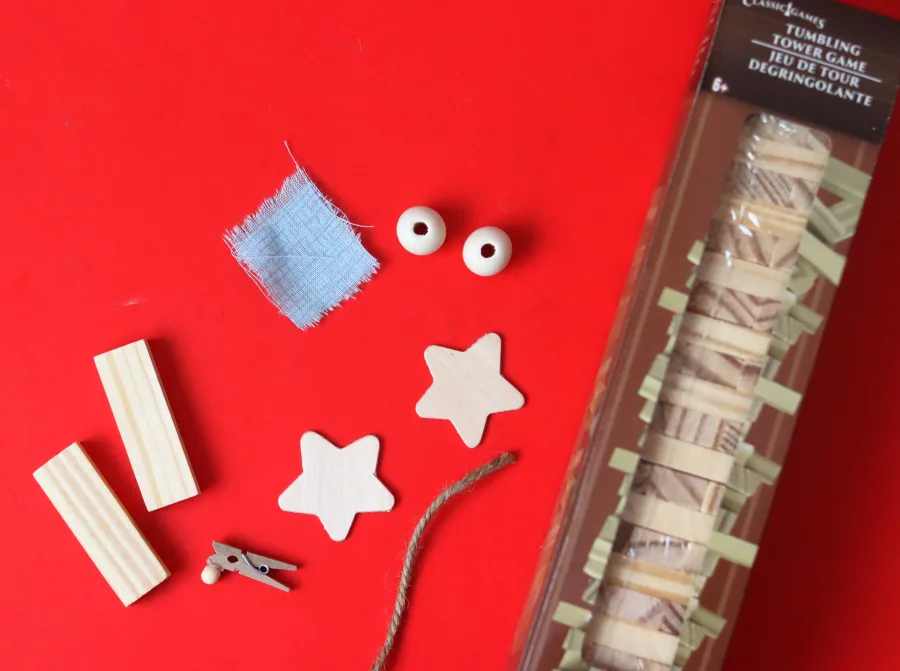
Supplies to make Dollar Tree Nativity Craft
This craft is great for a big group to make! One package of tumbling blocks will make 32 nativity sets! And the clothespins and beads are usually sold in groups of 12 or more! So if you are looking for a great craft for a Christmas party, then look no further!
- tumbling blocks (dollar tree)
- Wood stars (or star stickers)
- wood beads (they had these as beads and as a garland that you can cut apart!)
- small clothespins
- small wood bead
- twine or ribbon
- tape
- hot glue gun or tacky glue
- yellow marker or paint
- scrap fabric
- heart stickers (optional)
FYI: these Dollar Tree tumbling blocks are a bit smaller than regular jenga blocks! You could make these jenga blocks as well but you might need bigger beads to make things proportionally.
How to make the Dollar Tree Nativity Craft
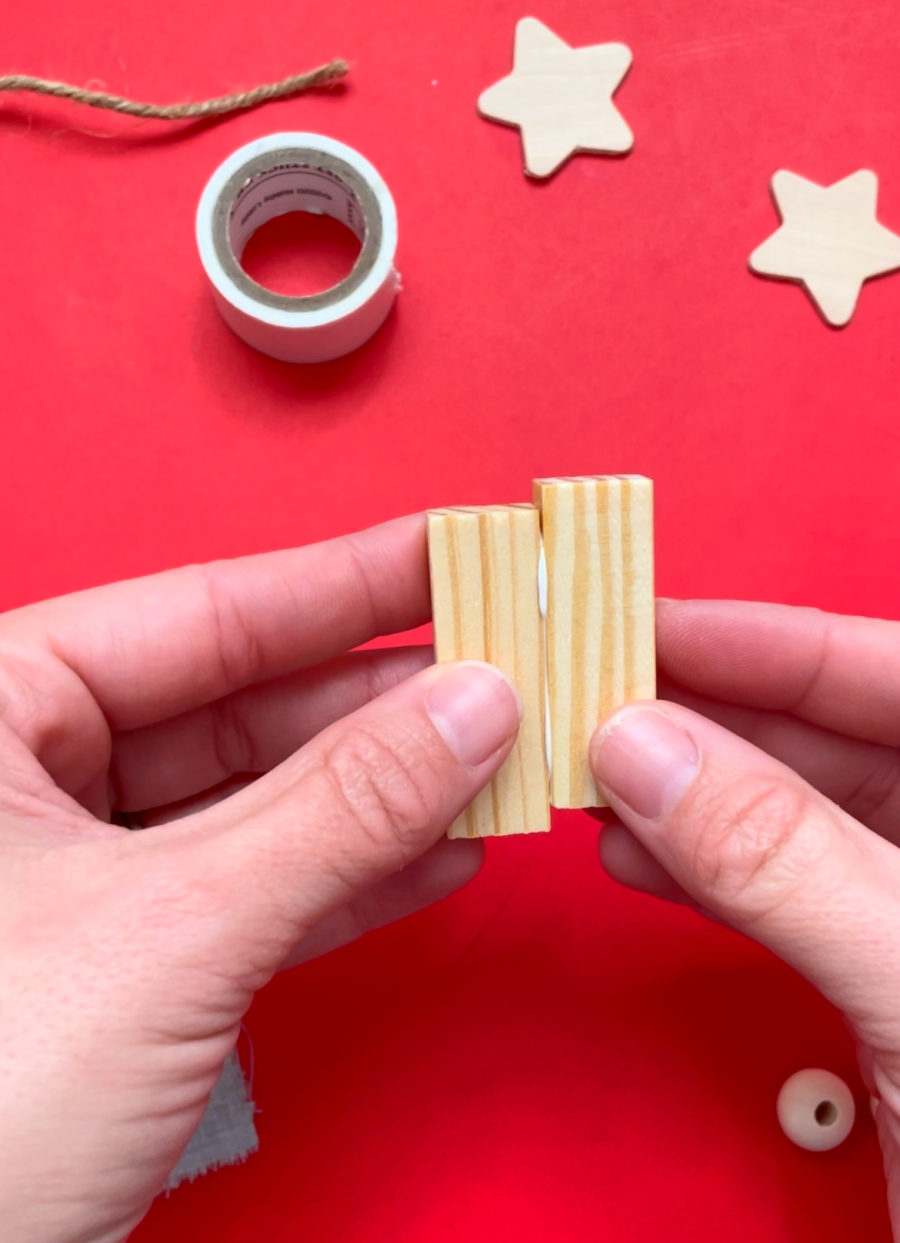
I am using tacky glue to assemble the ornament since that is what we used when we had the kids make them! It does take a little etc time to dry. I would use my hot glue gun if you are making these with older kids.
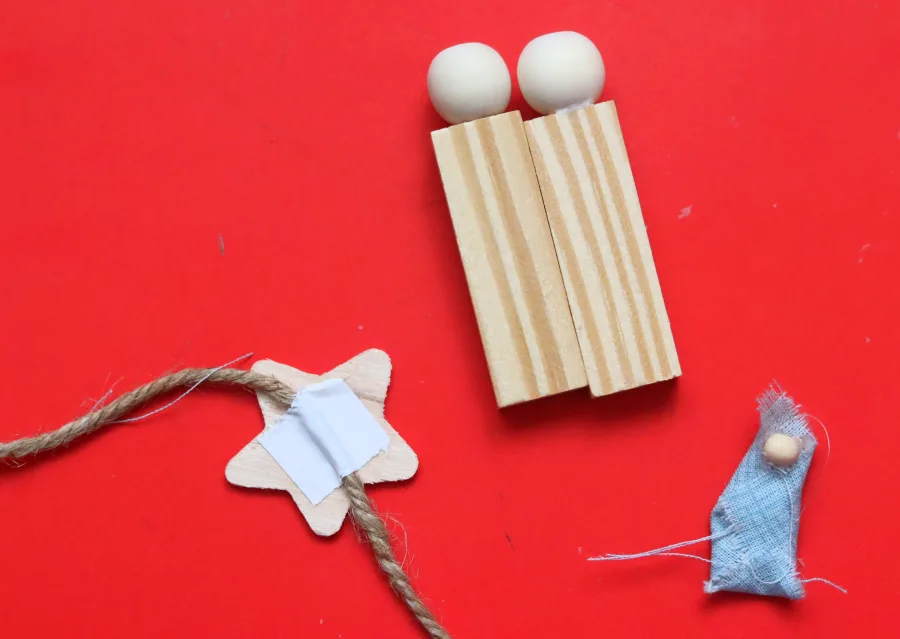
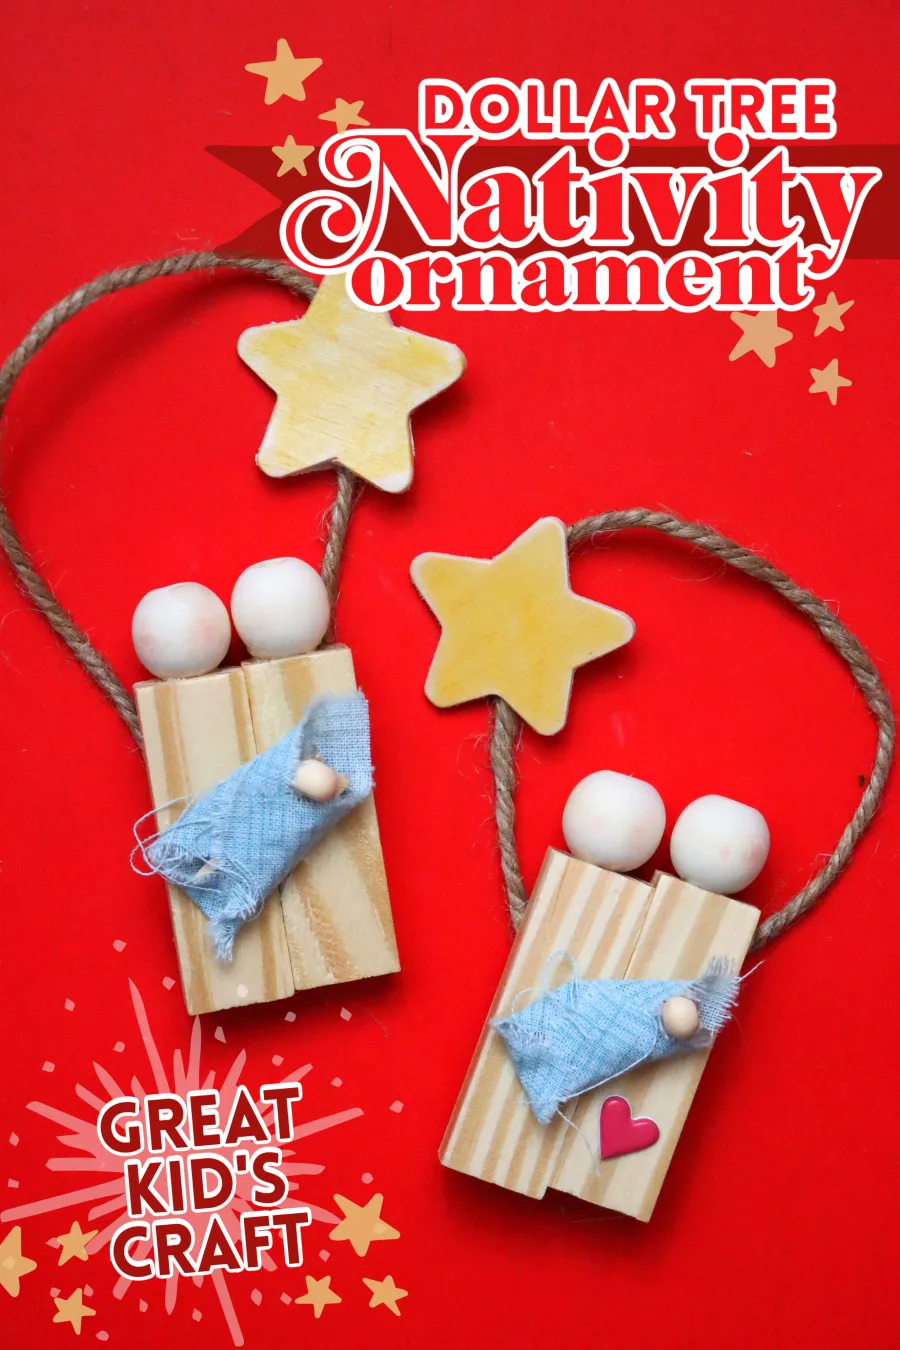
Make Mary and Joseph
Take two blocks and glue them together on the side. I like to stagger the blocks so one is little bit taller than the other.
Take two beads and glue them on the top of each Jenga block. I took a little blush and a cotton swab and added some rosy cheeks to the wood beads- but that is an optional step!
I assemble Mary and Joseph first so the glue has time to dry!
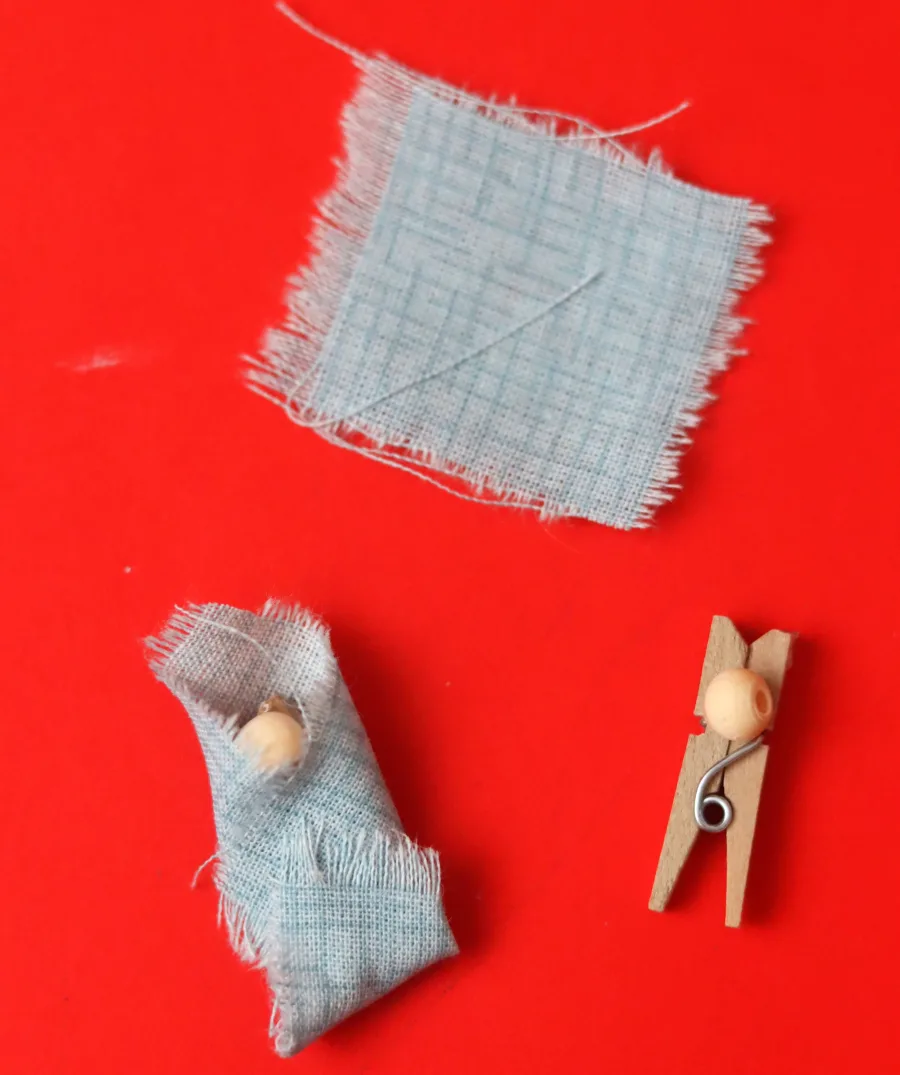
Create Baby Jesus
Taking the small clothespin, I glued on the small bead to the side of it. I tried gluing it on the front of the clothespin, but it stood out a little too far for my liking.
Take a piece of scrap fabric- about 1 1/2 inch by 1 1/2 inch and wrap it around the clothespin diagonally, adding a little glue to hold it into place. I folded up the bottom and glued that piece as well so the baby looks like it’s being swaddled.
I ripped my fabric into squares so the edges had a cool fringe texture!
Make the star
I was trying to make this as kid-friendly as possible, so we just colored the stars with yellow Crayola markers. You could paint them, or use glitter glue, or just leave them as is!
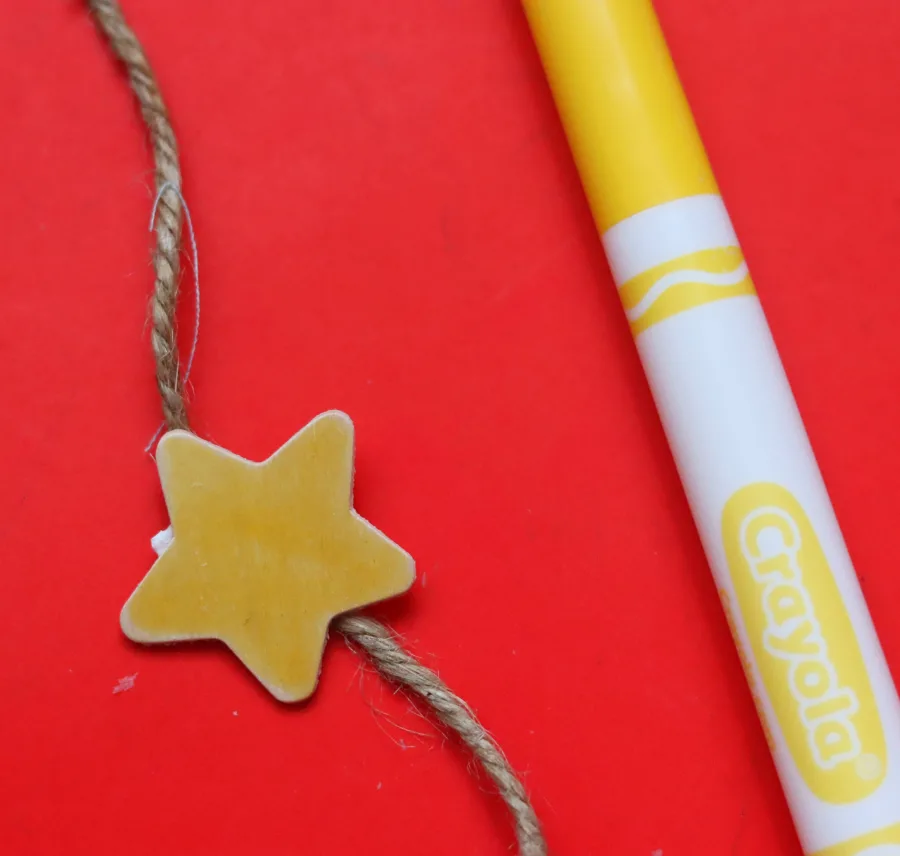
I did find star stickers that you could use instead of wood stars, but I think the wood stars look more rustic and matches the feel of the ornament.
Take a piece of tape and tape the twine to the back of the star. My twine piece was about 5-6 inches long. I wanted the star off center so I put it about off the side instead of the middle of the string.
Assemble the nativity ornament
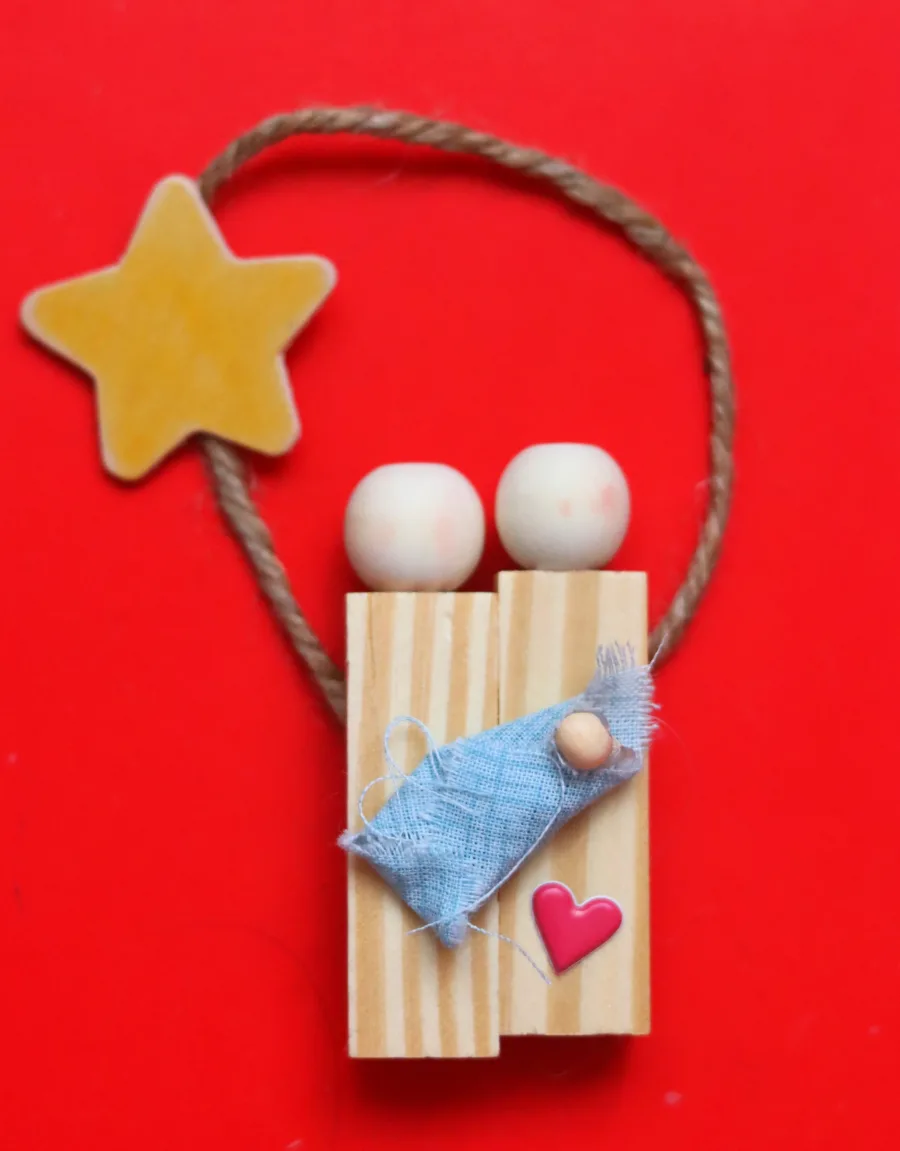
Once you have all three pieces, you can put together your nativity!
I flipped the Mary and Joseph over to the back side (the side that I didn’t add rosy cheeks to) and taped the strings down.
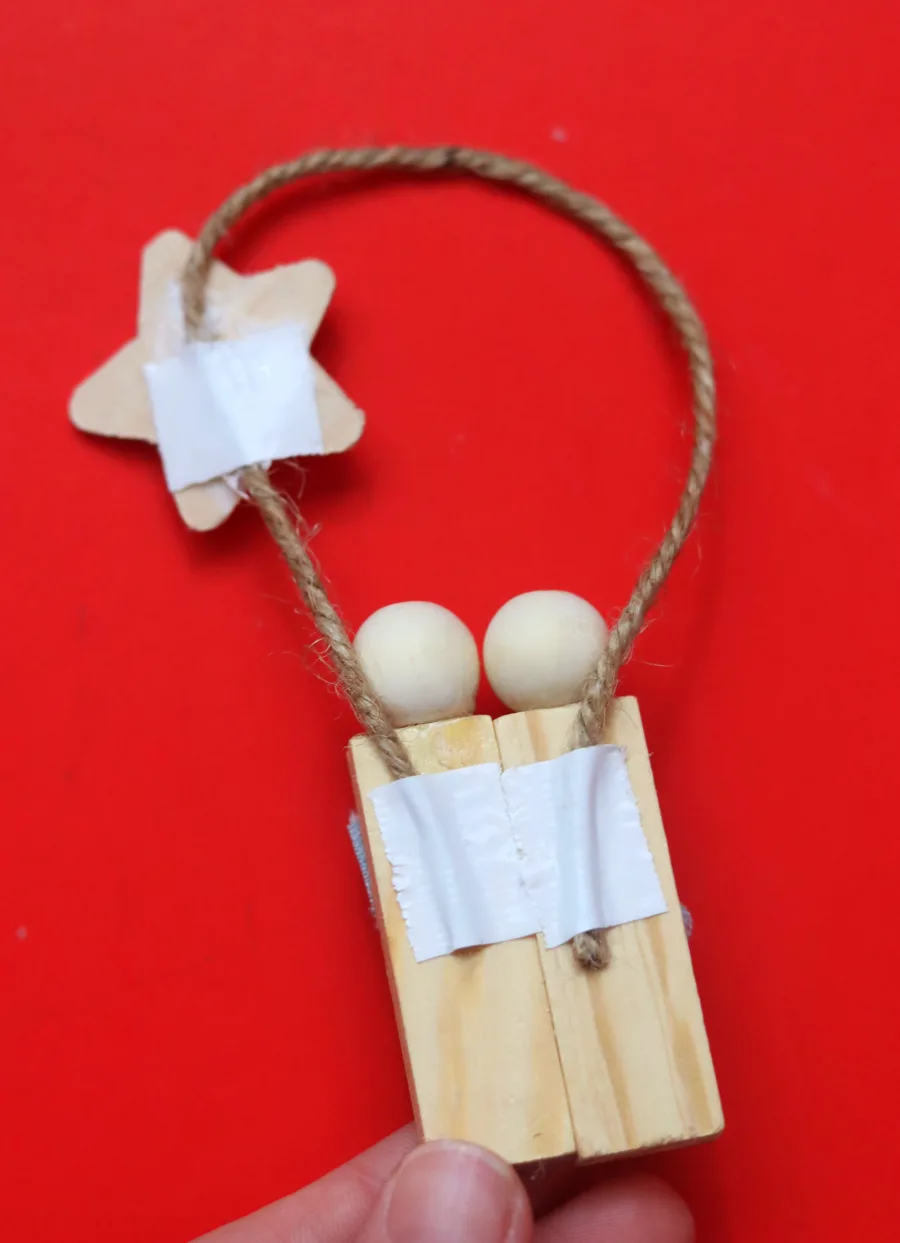
Then add a dob of glue and put on baby Jesus. I saw these adorable heart stickers when I was looking for star ones I thought they would add a little extra touch to the ornament!
If you are going to make these as a kid’s craft for a church party or a school party, I would recommend doing a bit of prep work before you get there. I had all the fabric and the twine piece pre-cut. I put each piece in it’s own bowl so the kids could just go down like an assembly line!
Christmas dollar tree crafts
- Red wagon from brownie pan
- Tree stand from contact paper
- Christmas wood sign hack!
- Joy sign from dollar frames
- Christmas hack using Dollar store gift bags
- Snowman hat from treat container
- Giant ornaments
- Mickey Mouse ornament
Too busy to get crafting today? No problem! Pin this post to remind yourself about this project later! Sharing my projects helps me reach more people, allowing me to continue sharing free content!
Leave a Reply