
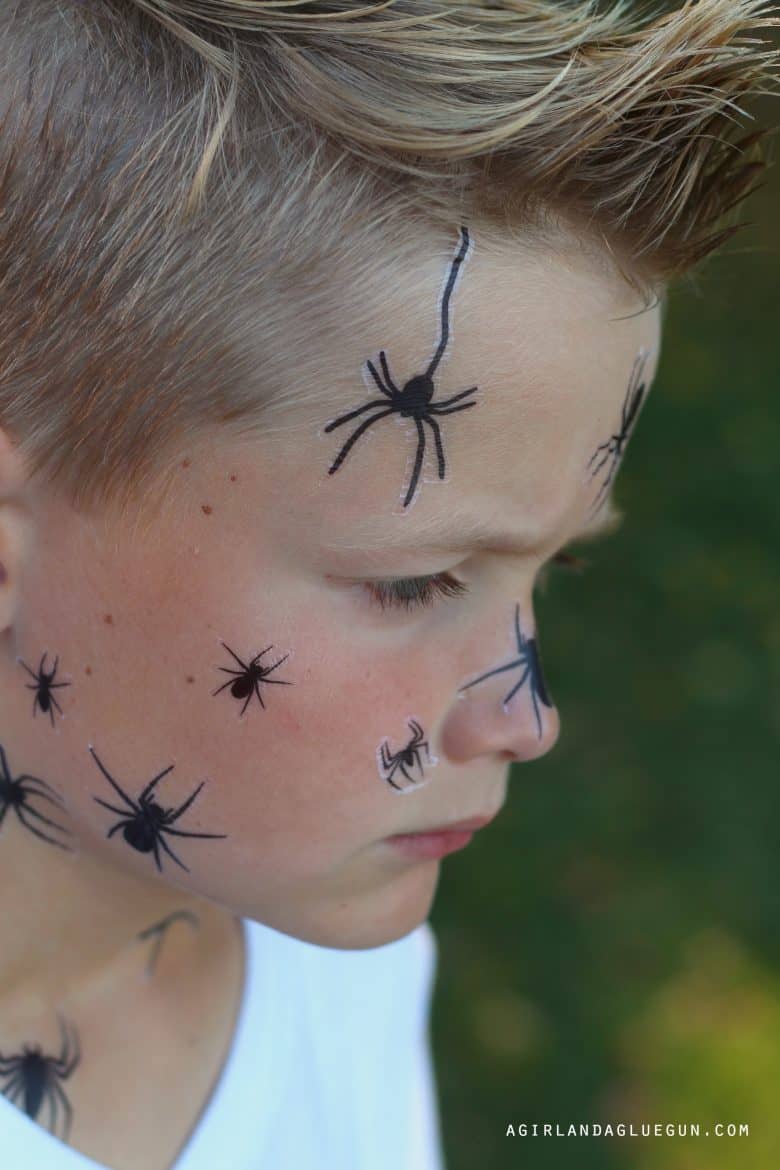
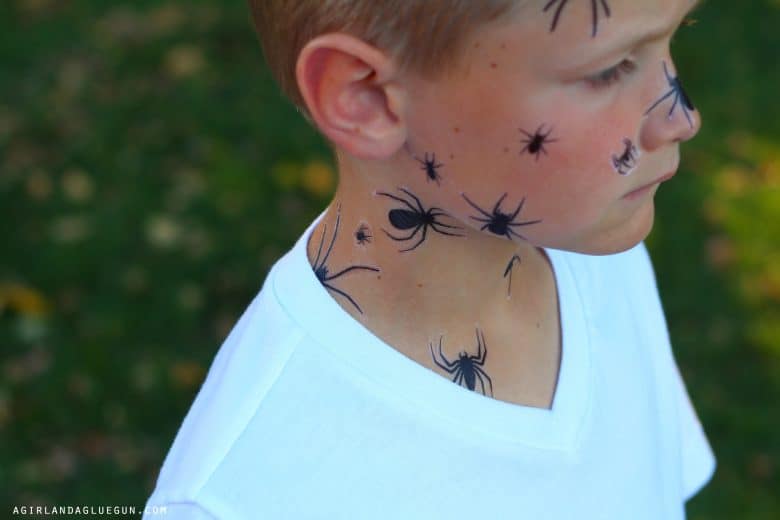
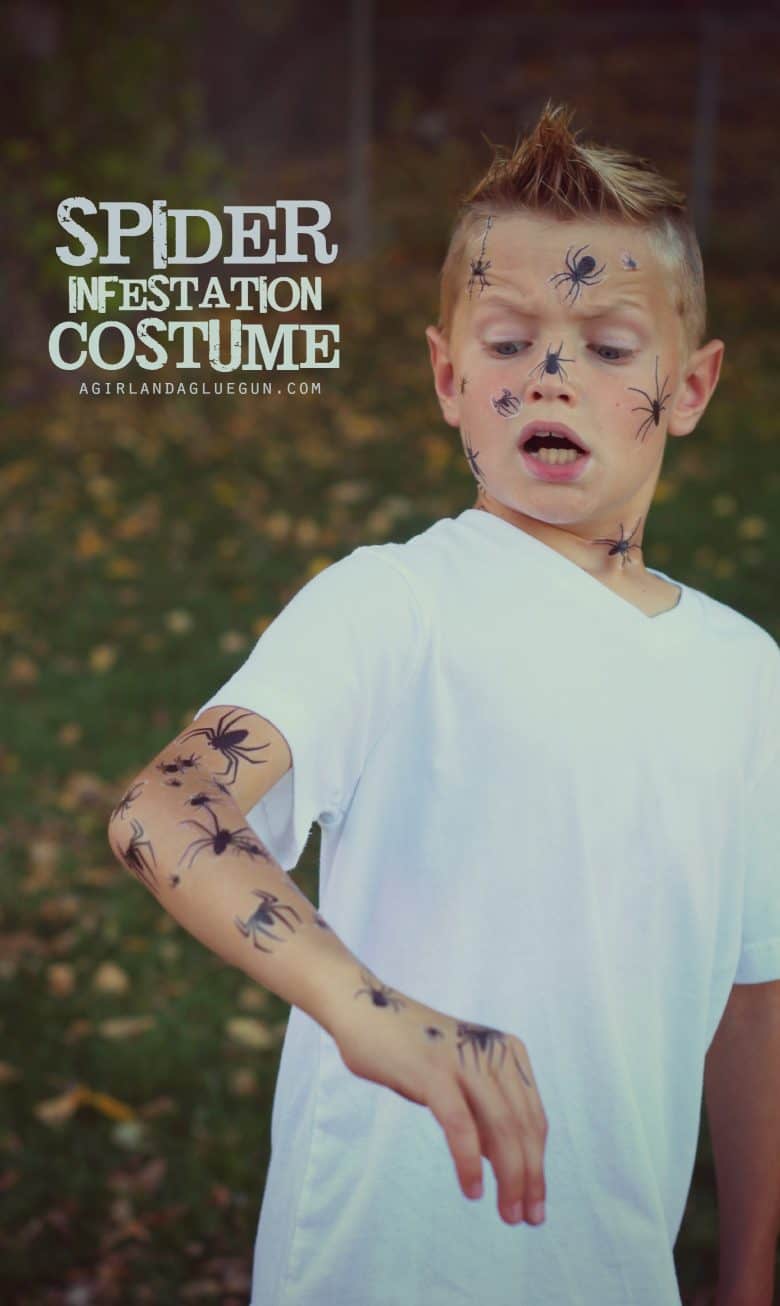
Cut out and apply some cool Spider tattoos for an easy Spider infestation costume idea! Or just add some spiders to be festive this Halloween!

This is for the person who doesn’t really want to dress up…but has too. Or really loves Halloween and wants to rock Spiders all October long!
ANd shout out to my son for not being camera shy. You should see the outtakes!
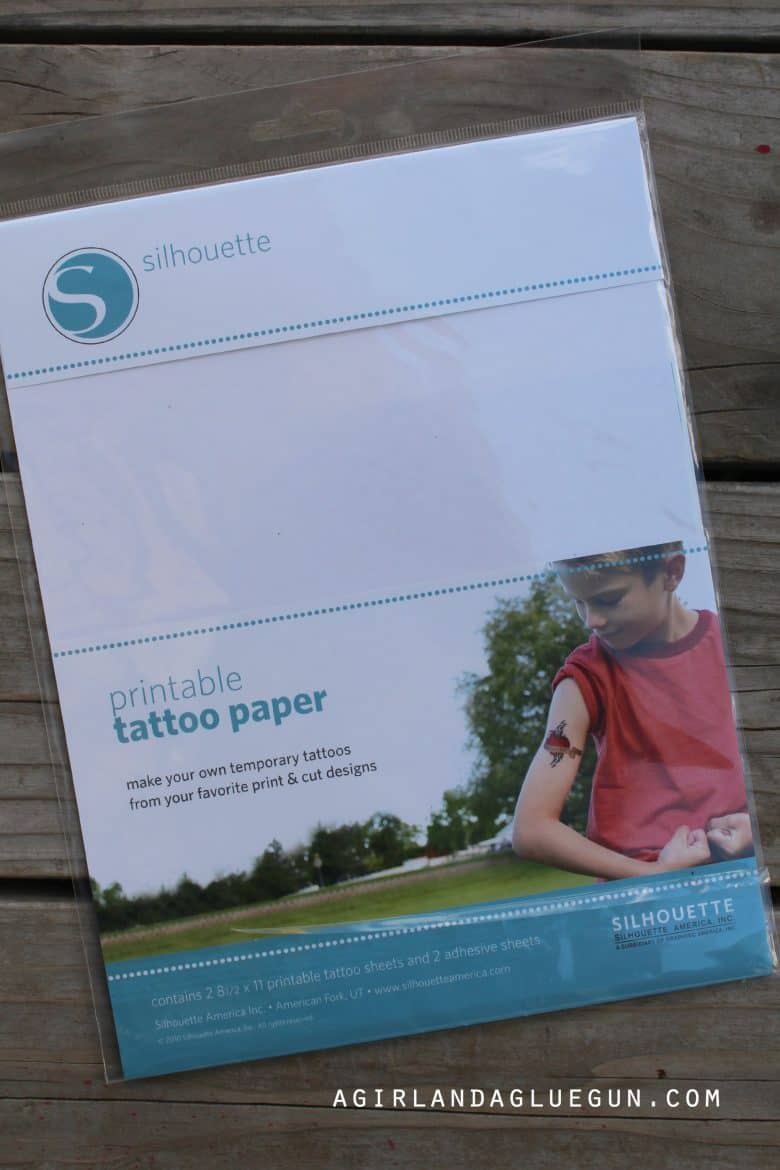
This fun “costume” is made using tattoo paper from Silhouette!
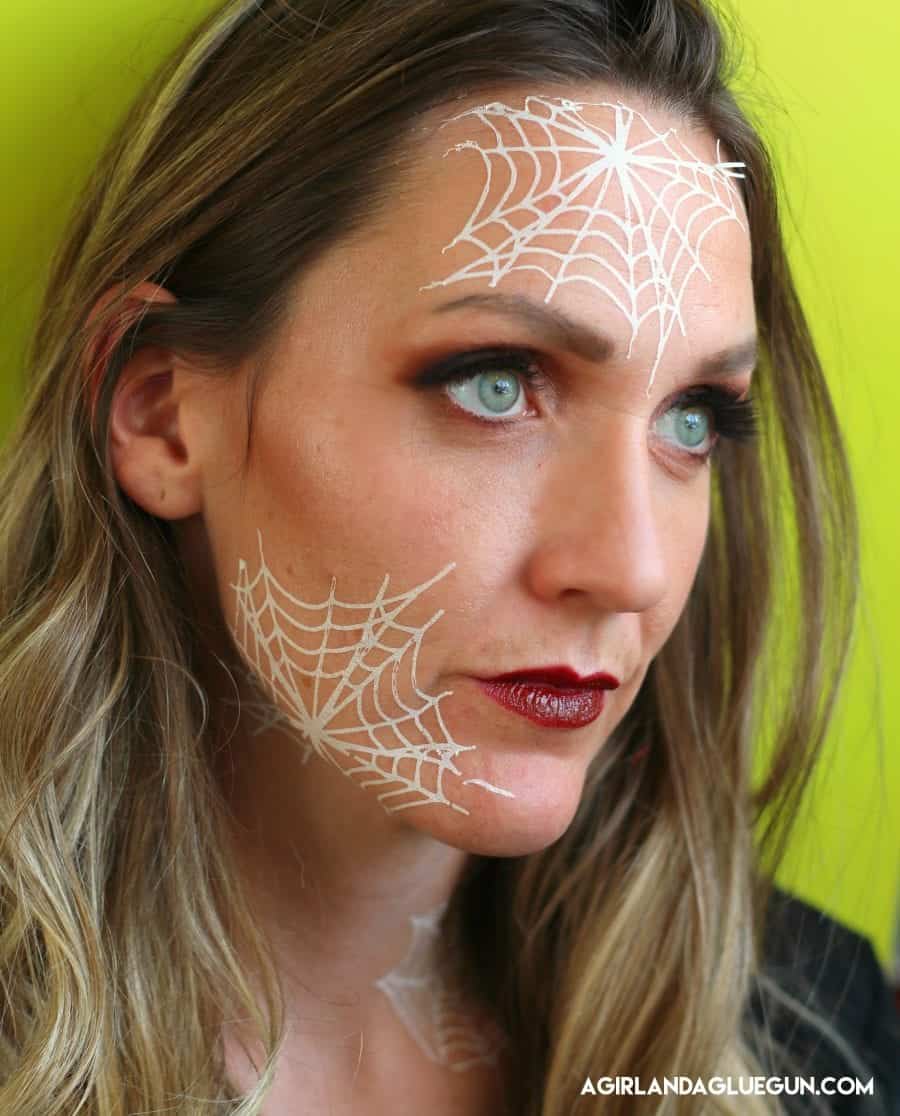
I did a similar version for a witch’s costume!
How to make Spiderweb Tattos
Supplies to make spiderweb tattoos
- Printable tattoo paper
- electronic cutter
- Cutting mat
- cut file (down below)
This tutorial is going to walk you through how to cut these out using my silhouette cameo. This same technique can be used on your cricut- I just don’t know the ins and outs as well! and YES! you can use silhouette materials on a Cricut! They have so many cool things!
Silhouette all has -white, gold, and silver tattoo paper!

How to use tattoo paper
The silhouette tattoo paper is a little bit tricky…so let me walk you through the steps!
We are going to be using the print and cut feature.
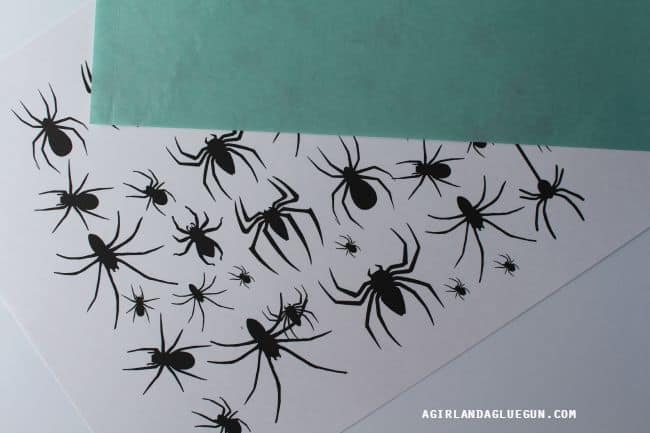
Upload the spider image and make sure that you have the print and cut selected (in the page setup) so you have the registration marks showing around the spiders.

Since the spider legs are teeny tiny, I offset to create a little outline to make the tattoo a little more thick!

Press the star (offset) and then you can outline the spiders as much you want! After you apply, you will want to carefully remove the black spiders leaving only the outline!
When you open your package of tattoo paper, you should have two white sheets and two blue sheets. The blue sheets is the top layer. Take your white sheet and load it into your printer so it will be printed on the shiny side.
Press print in your silhouette studio

If you need a good printer- I wrote up a whole post about why I love my HP!


The blue sheet is the clear protective layer and the layer that activates the tattoo.
It has a strip across the top.
Peel it off and then line it up with the top of your white sheet. (It’s sticky so don’t touch it)

Slowly take the backing off and adhere it the whole sheet to the white tattoo paper. Rub it down pretty well.
The top piece is the clear protective layer. Think about those fake tattoos you get. You have to peel the top clear layer off and and then flip the tattoo over and apply it to your skin.
Then put it on a silhouette mat and load it into your silhouette cameo.
Cutting out the spiders
The spider legs are just teeny tiny. So I like to offset the spiders and make them a little bit thicker. You can see a little bit of a clear outline around the spider.
There is a Silhouette tattoo paper cut setting, so make sure you click on that and then cut out the spiders!

(Just an fyi- if you are cutting out something with words, you will need to print it backwards for the tattoo to work. Since these are spiders, you don’t need to do that step!
Apply your spider tattoos
This is what your tattoo should like when you cut it out.
When you are ready to apply, you will peel off the protective layer. That tattoo is a little sticky.
Put the sticky part down on your skin where you want it. Press a damp cloth against your skin until the tattoo is saturated and then remove the backing.
The backing should just slide right off leaving a nice creepy spider!

How to remove temporary tattoos
I got nervous that maybe they would be hard to come off especially being on a face–but a little baby oil and they came right off! A serious win! I have heard hand sanitizer, rubbing alcohol, and nail polish remover works as well.
Troubleshoot Print and Cut
If your print and cut is not cutting exactly around the spider as it should, you might need to recalibrate it! If it isn’t registering your print and cut registration marks, try using a brighter light by you cameo! It’s usually a light issue!
THE SPIDERWEB SVG CUT FILE
This files are zipped. You will need to click Extract All to open them all up. (see image below) If you are using an ipad- The free app iZip is great as well.
I have included the spider as well as the spiderwebs that I used for this fun Halloween costume!
Just click on the image below and the download will start automatically!

SAVE FOR LATER
Too busy to get crafting today? No problem! Pin this post to remind yourself about this project later! Sharing my projects helps me reach more people, allowing me to continue sharing free content!
OTHER totally cute Halloween projects
- ghost and candy corn garland
- Halloween cut files
- Creepy Doormat
- Pool noodle candles
- Halloween sensory game
- Yard monsters
- Halloween play doh printables
- Trivia game (free printable)
- DIY spell Book
- Halloween golf
- Classroom party games
- Spooky dinner ideas with free printables
- mummy door for your front door board
- DIY witch’s broom
- Table decorations for Halloween
You can also hot glue some spiders on a shirt to get the whole effect! (go here for the tutorial!) 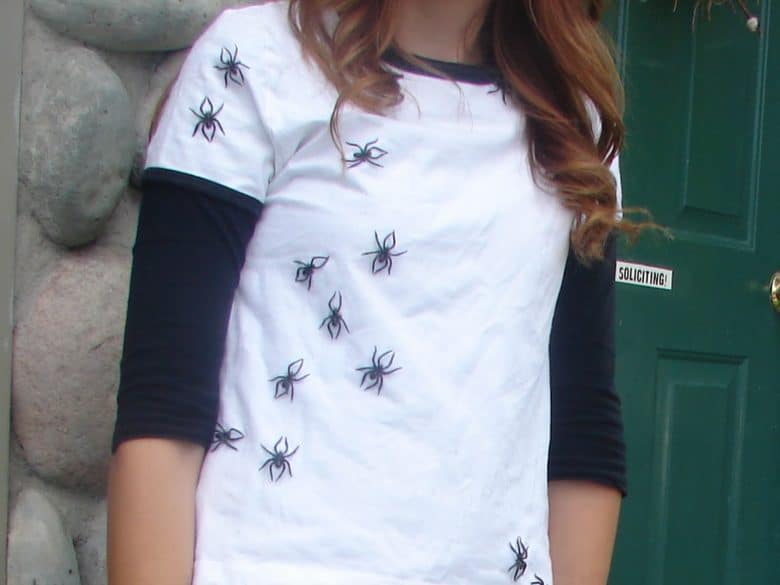
Sandi Magle says
Oh my gosh, I had boys and they would have loved this….except they would have wanted to go further. How about taking the same download for fabric transfer paper…and getting the shirt all creepy crawly with spiders….
Too much fun1 Sandi
Dorothée says
I love the idea ! I’m a grown up invited to a halloween party and I do not feel like dressing up but I do have a cameo and this would totally make the trick ! You wouldn’t share your spider file by any chance ? Thanks again for the idea.
Kimbo says
here you go! https://drive.google.com/file/d/0ByiSRT2CjMoSQUZ4MFBDelRtY3M/view?usp=sharing
Dorothée says
That is so wonderful of you, thank you very much ! I’ve also found your skeletton costume so now I hesitate. Will send a picture 😉