
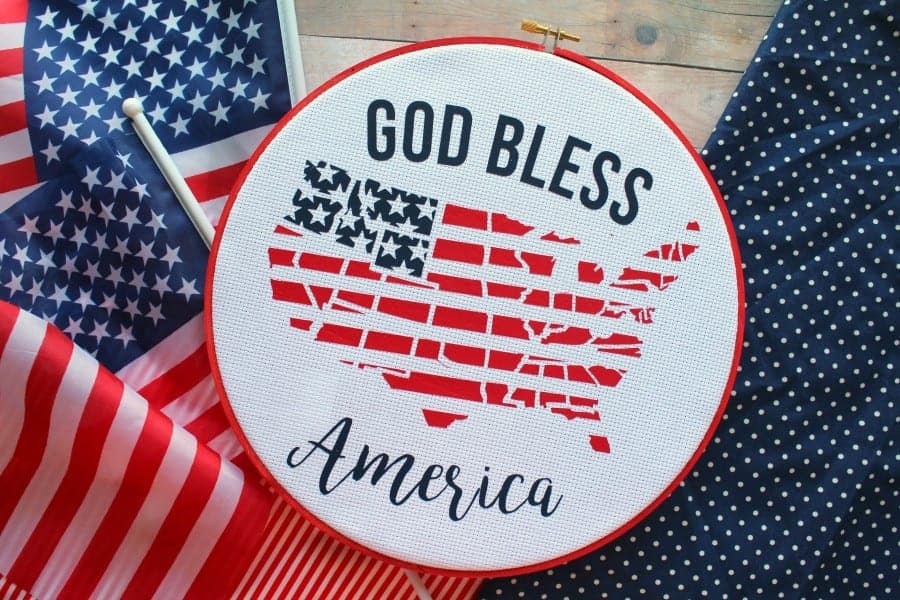
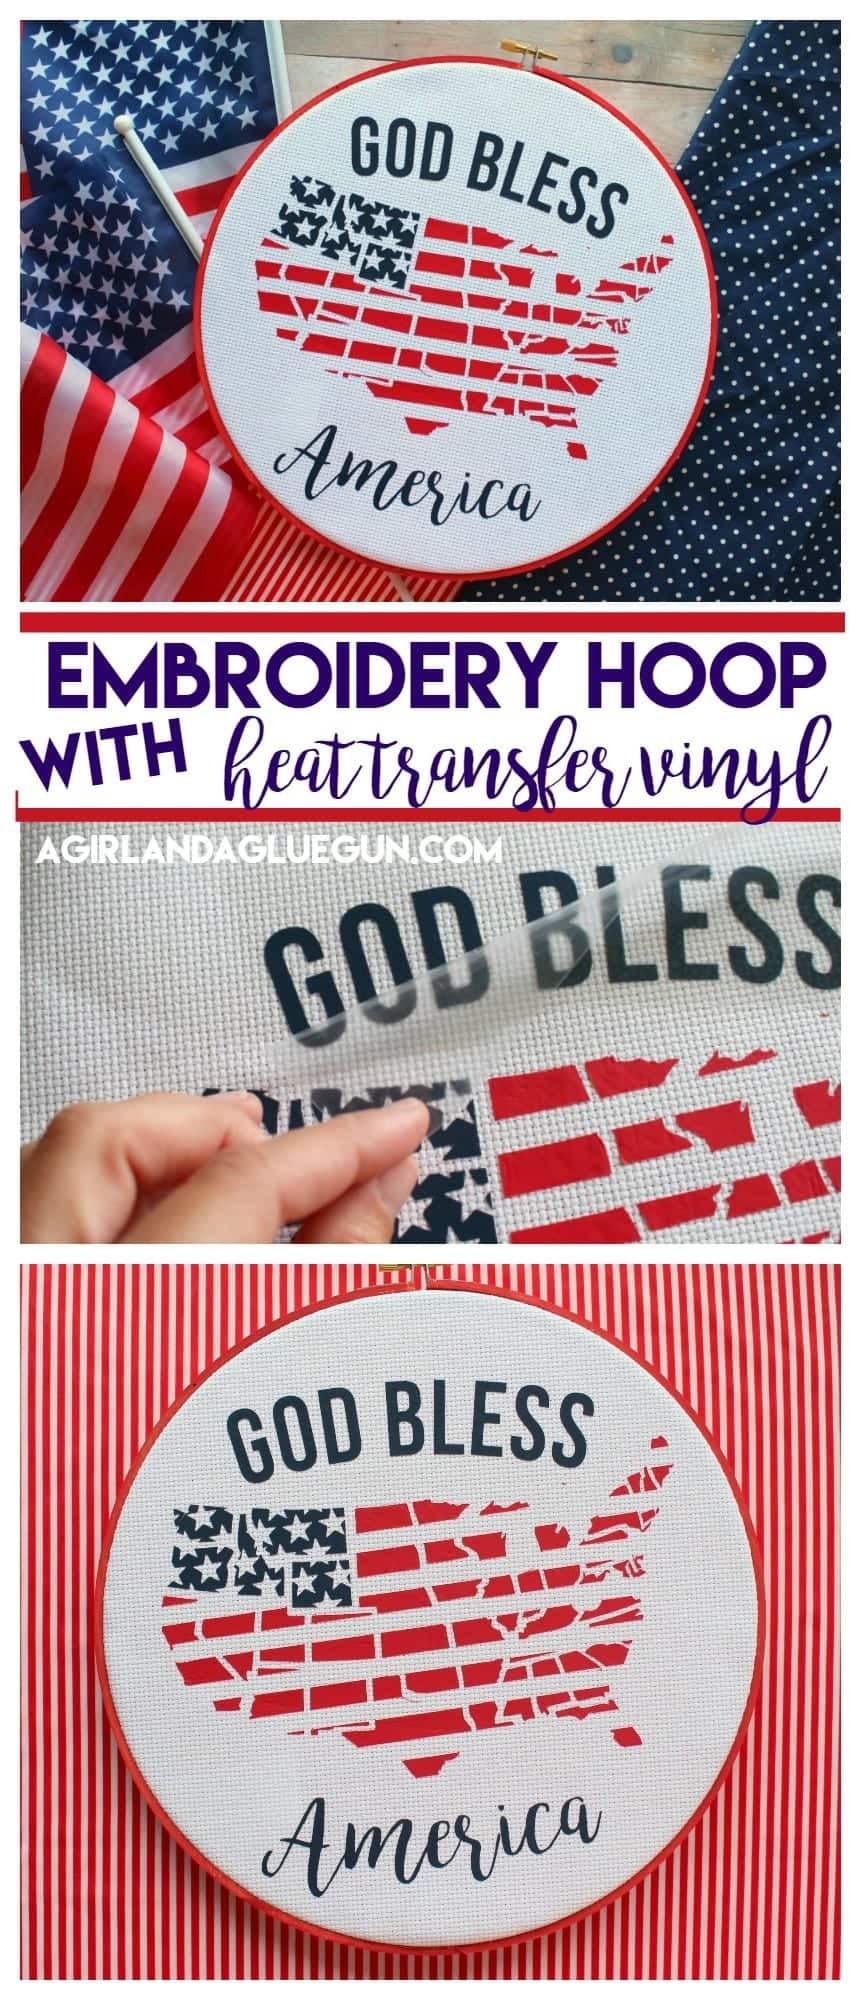
Learn how to make this God Bless America embroidery hoop without any actual embroidery skills! Heat transfer vinyl for the win!
Today I have a fun project- An embroidery hoop that you can use as a perfect July wreath for your front door- plus I have links to 14 other Awesome vinyl projects…all in the name of Red White and Blue!
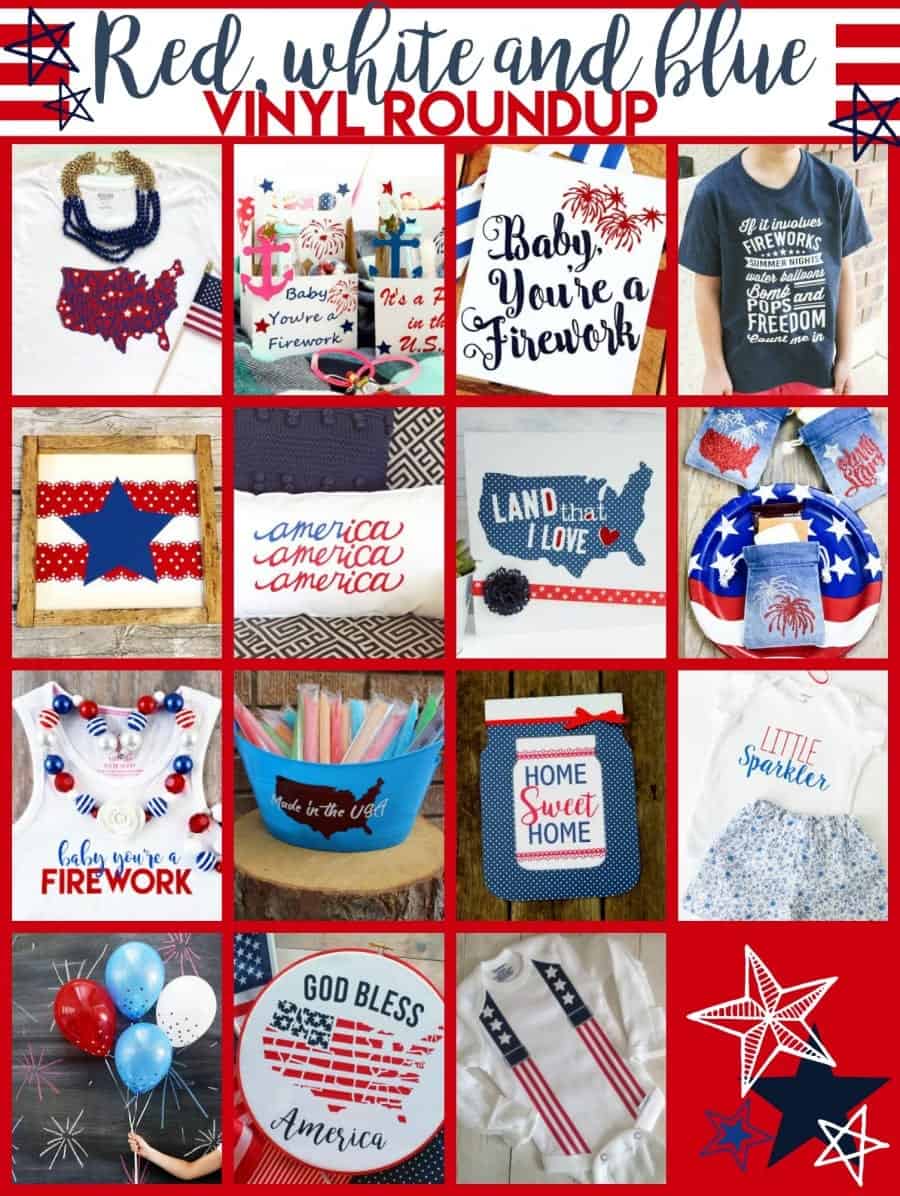
Awesome Independence Day Vinyl projects
- Patriotic shirt by Pitter and Glink
- Treat boxes from a Kailo Chic Life
- Wall art from Sweet Rose Studio
- Easy Diy shirt from A Crafted Sparrow
- Star vinyl sign from Crafting in the Rain
- America Pillow from Kiki & Company
- Land that I love from 733 blog
- 4th of July Smores kit from A Pumpkin and a Princess
- Firework Tank from Artsy Fartsy Mama
- Festive Popsicle bucket from Doodlecraft
- Polka Dot Mason Jar from MM Scrap Shoppe
- Little Sparkler shirt from Made to be a Momma
- Star Confetti Balloons from Sugar Bee Crafts
- Embroidery Hoop America from A Girl and a Glue Gun
- Suspender onesie from Silhouette School
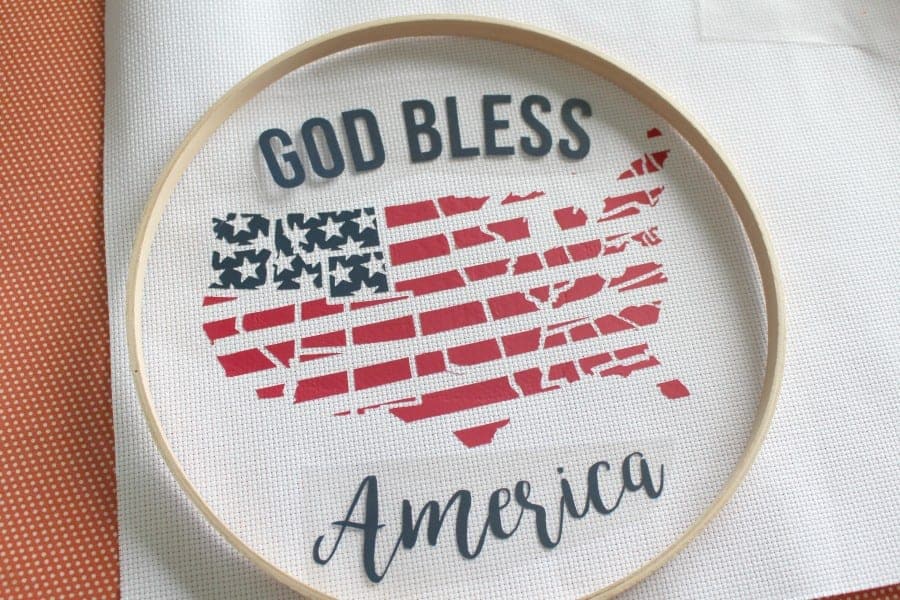
Can you tell what project was mine? A fun embroidery hoop….with no embroidery!
How to make a faux embroidery hoop for the 4th of July
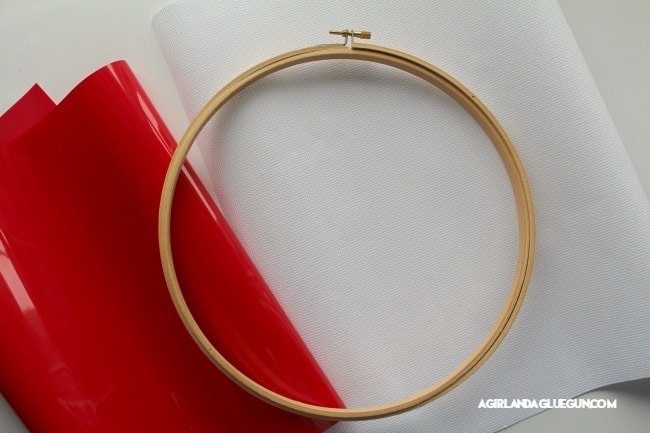
Here is what you need:
- an embroidery hoop (Mine is 10 inches) and I painted it red for fun!
- Heat transfer from Expressions Vinyl (Red and blue to make the stars and stripes!)
- Embroidery fabric (or just white fabric)
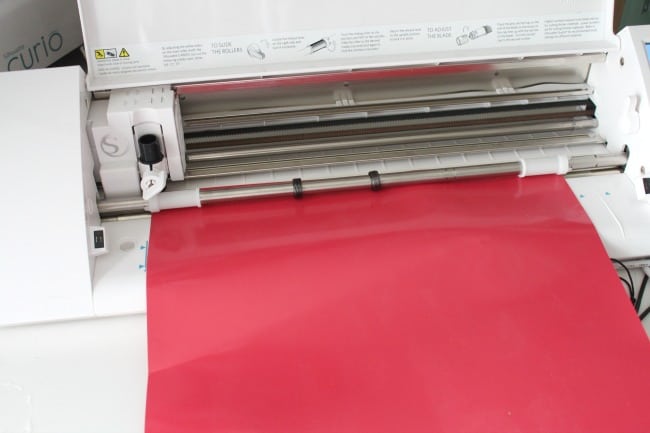
- Electronic Cutter
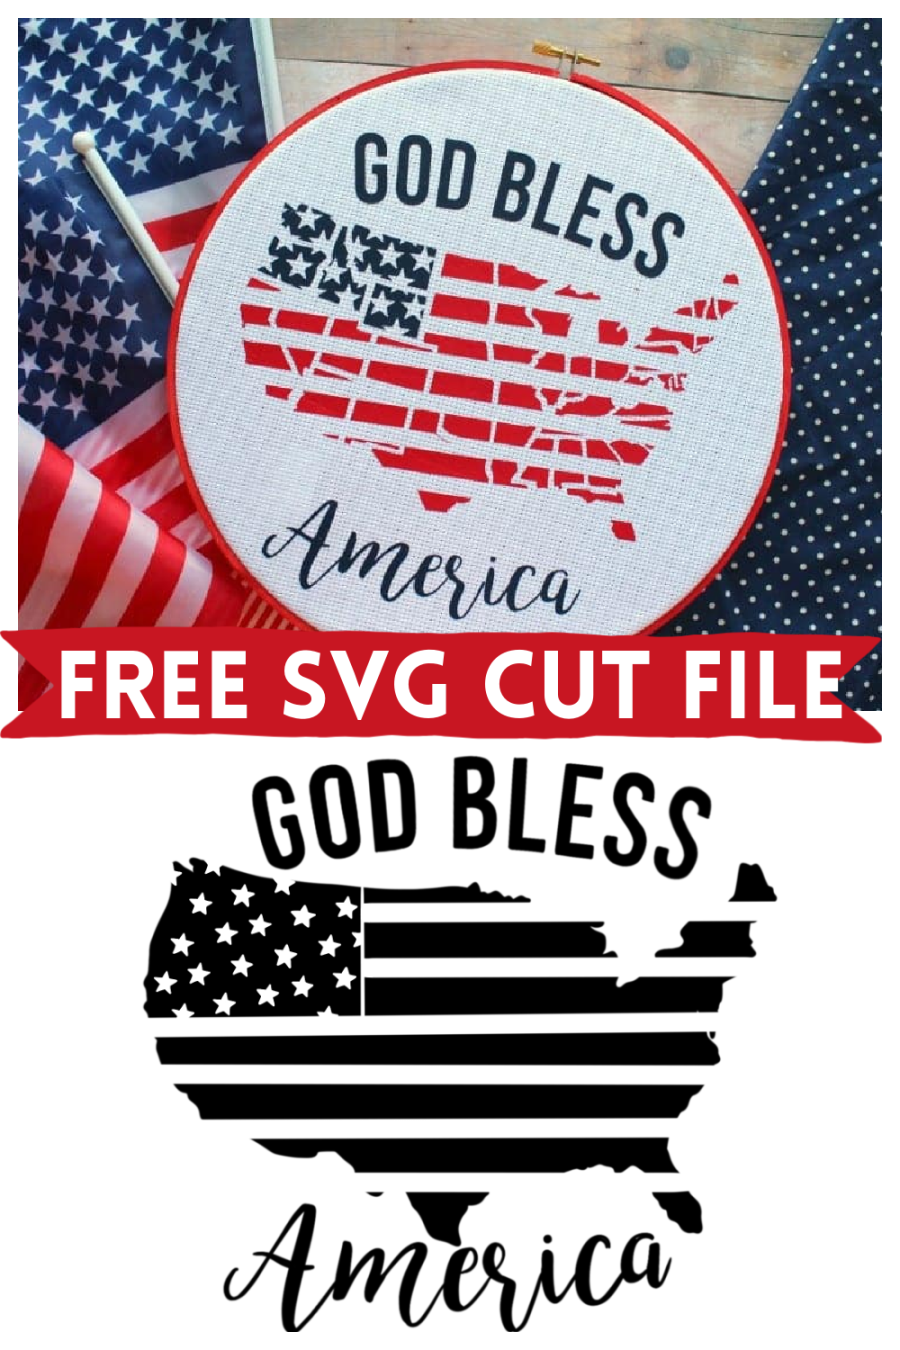
- Free cut file (down below)
All these free SVG files are compatible with the Cricut design space software and Silhouette Studio. I have a silhouette cameo that I use almost daily and LOVE. If you are new to silhouette, I did create a whole Silhouette Love series! I want everyone to love their silhouette as much as I love mine!
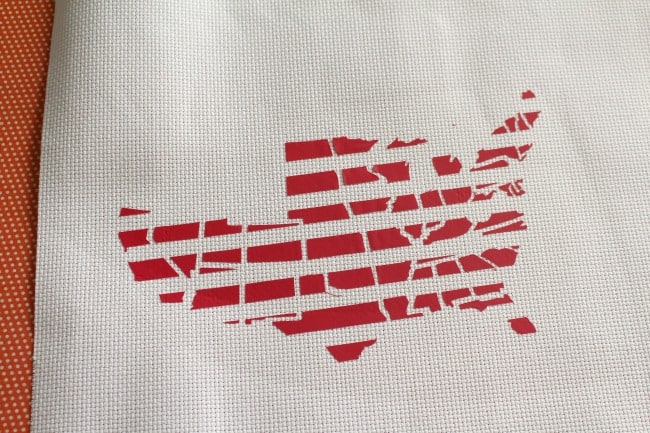
Using my Silhouette studio, I designed this and turned the United States into a flag and then turned it into a free svg cut file for you so you can recreate this at home.
How to cut out the red white and blue vinyl
Once you have uploaded your design and sized it to your project. Then you need to make sure to flip it all Horizontally (because you cut Heat transfer vinyl on the backside!)
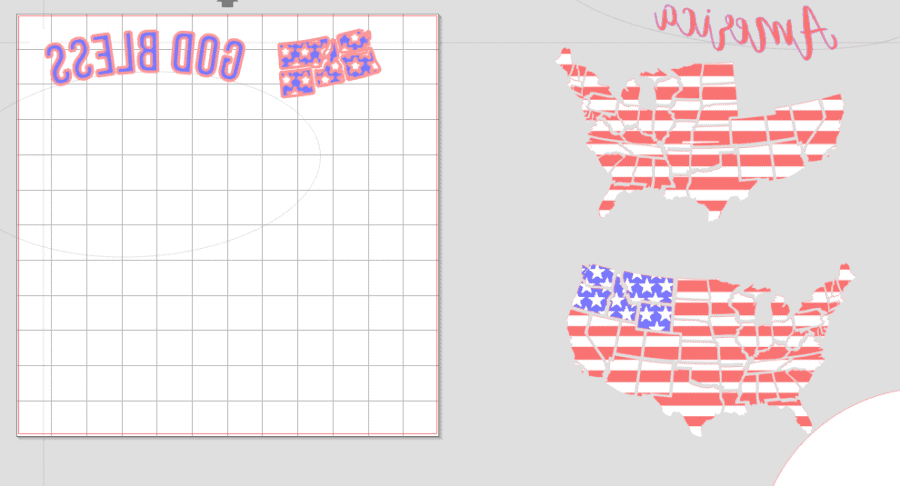
Then send to cut! (I cut blue vinyl together and then red altogether and the white is just the material I iron it onto.)
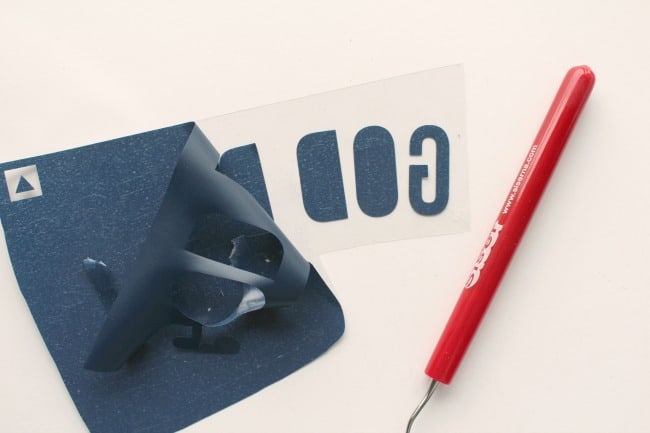
After it’s all cut…you weed the vinyl. Pull away the vinyl that is not part of the design.
How to make the God Bless America embroidery hoop tutorial
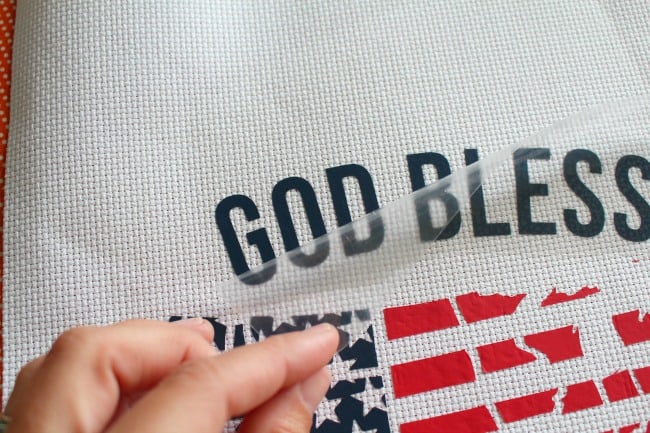
Once you have all the vinyl ready to go, it’s time to start pressing with your iron or heat press. (I used medium heat on my iron) Press for 15 seconds. Then peel off the carrier sheet. Make sure to read this post about how to apply HTV with an iron!
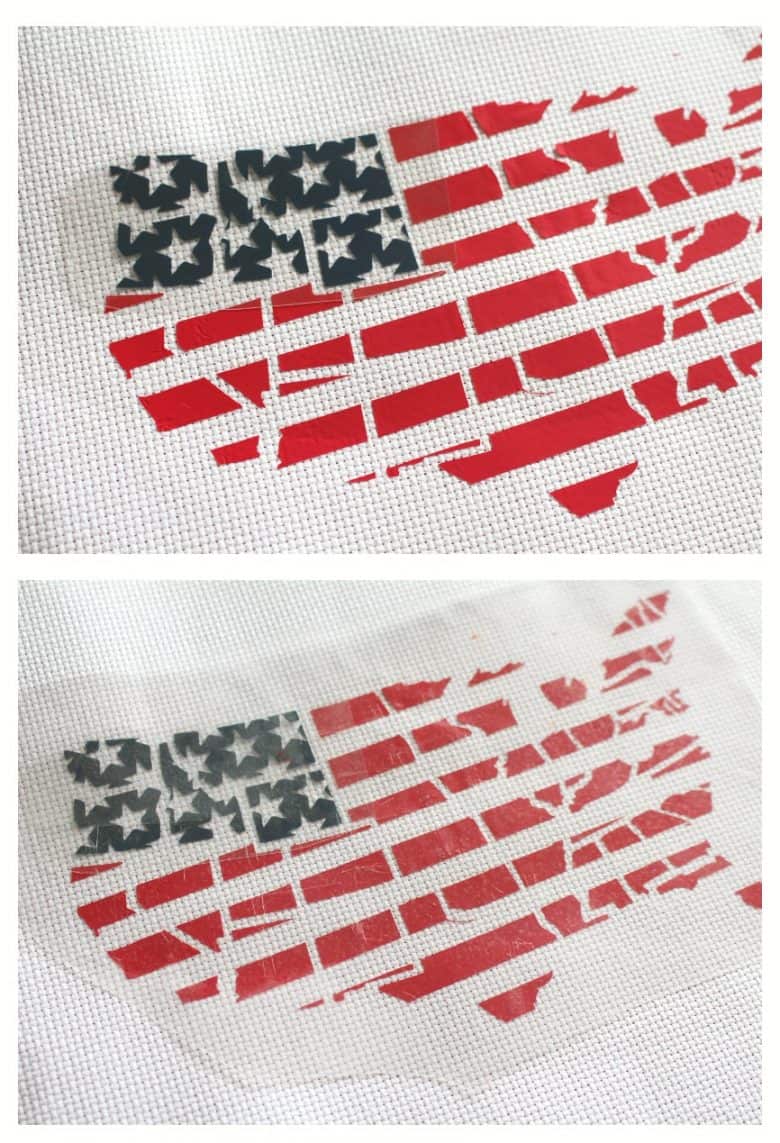
Then add the next layer. You can see the carrier sheet (that clear sheet that covers it.) I placed the other carrier sheet over the entire project to make sure my iron didn’t touch any exposed vinyl.
Then I place the hoop on it to make sure my spacing on the words was good. Then ironed those on! You want to make sure you leave enough fabric around the edge to secure it in the embroidery hoop!
Peel off the carrier sheet and add the hoop. Trim any of the extra fabric off with scissors.
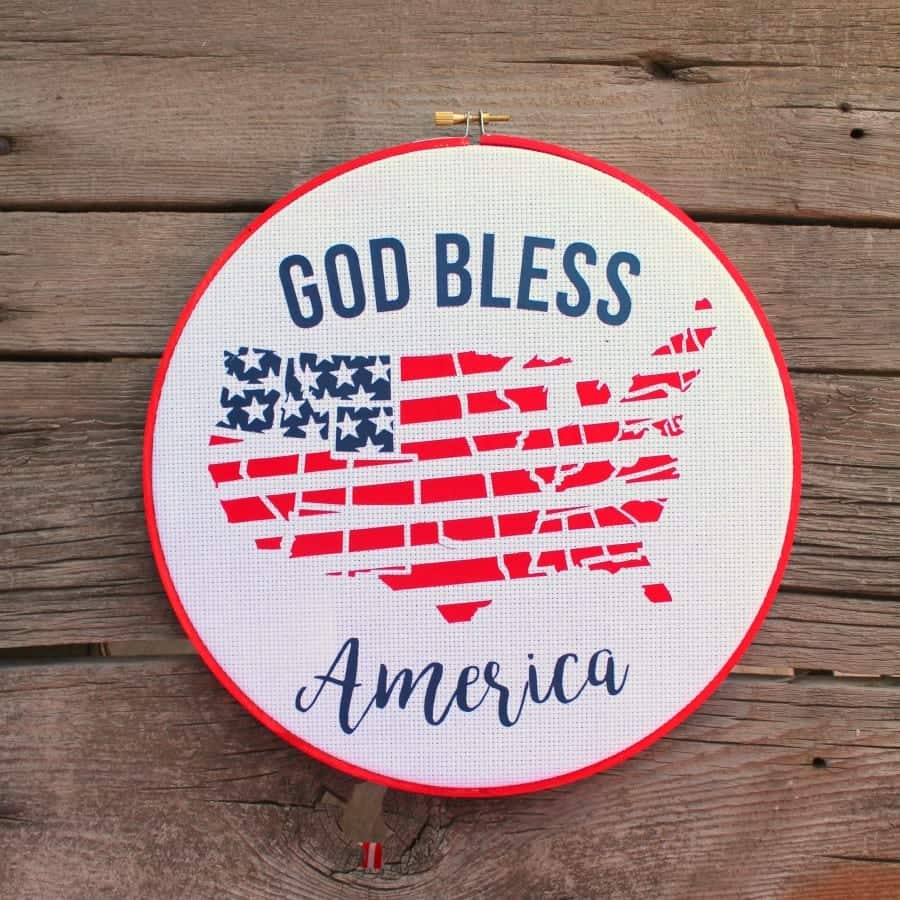
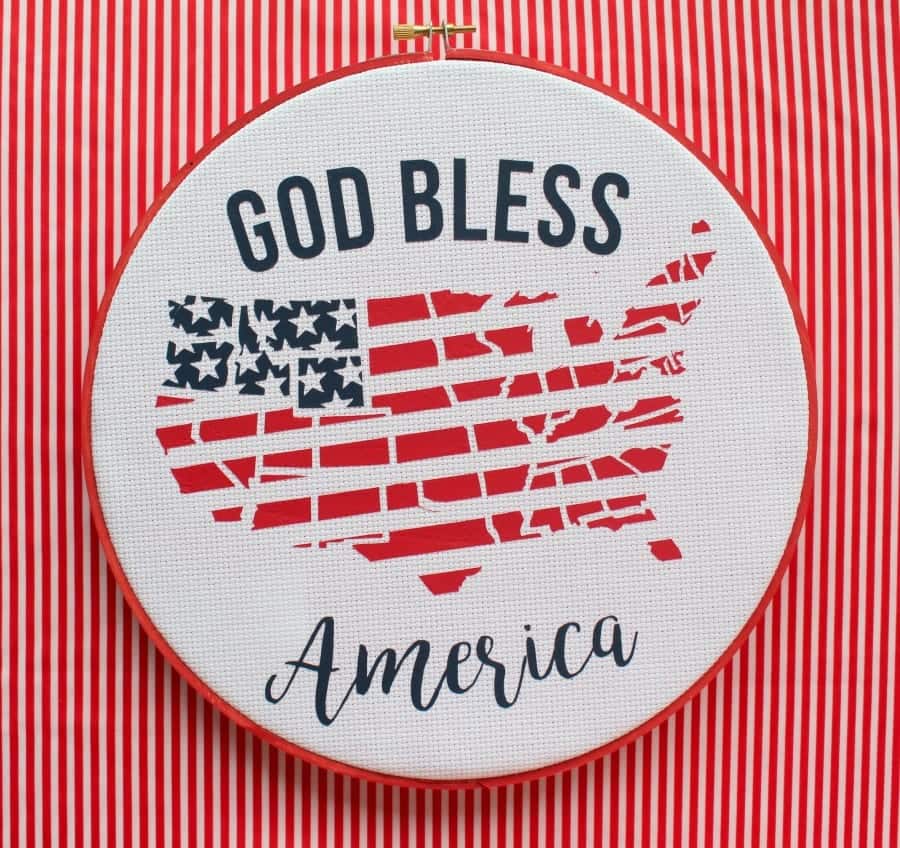
You can add ribbon and use it as a fun patriotic door hanger or just place it on your mantel or wall! You can leave it up from memorial day until July 4th!
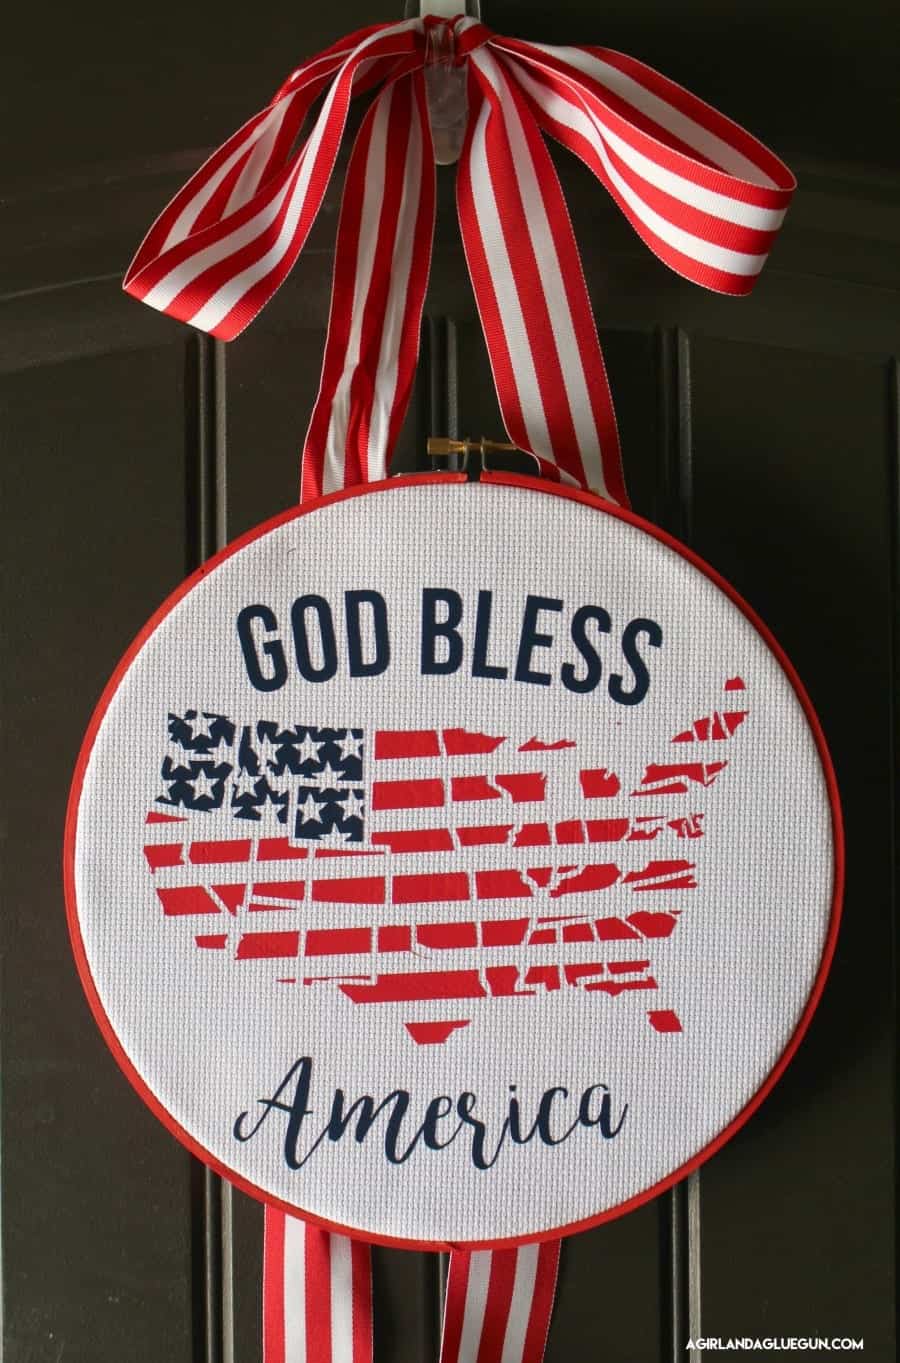
It’s also a darling centerpiece for all your festivities! Add it with a fun striped runner and mason jar full of mini flags or sparklers for the perfect party decor!

Of course, this would also be super cute on a shirt as well!
Grab the God Bless America EMBROIDERY CUT FILE DOWN BELOW
Most of my cut files come as SVG, PNG, and JPEG!
Sign up below to access this cut file and all my free cut files offered on my website! It’s well over 175 SVG freebies! Members can log in right here!

If you do not see the form above, you can sign up here.
Troubleshoot vinyl
I have been using adhesive vinyl and heat transfer vinyl for years! I’ve written up so many posts as I have come across problems! Here are some of the most asked questions that have come up!
- How to layer adhesive vinyl
- Why is my heat transfer vinyl peeling up?
- How to remove heat transfer vinyl (if you spell something wrong or put it on crooked)
- How to use transfer tape with adhesive vinyl
- Using an iron with heat transfer vinyl
- Washing instructions for Iron-on vinyl projects
- How to cut vinyl decals bigger than your machine
- Best way to weed vinyl
- Is the Cricut Easypress worth it
Here is an image to pin:
Good luck making this fun art project and thanks for reading!