
Looking for an inexpensive way to give plain flip flops a colorful makeover? Wrapping embroidery floss around flip flop straps is a fun and easy DIY project that turns basic sandals into one-of-a-kind summer accessories. Add a few charms or beads, and you’ll have a personalized pair that’s perfect for beach days, vacations, pool parties, or everyday wear.
This simple craft is great for tweens, teens, and adults, and with a little supervision, older kids can join in the fun too!
Why You’ll Love This DIY Flip Flop Craft
Plain flip flops are affordable, but they don’t have to stay boring. By wrapping the straps with vibrant embroidery floss, you can create custom sandals that match your favorite outfits or celebrate the season.
This project is:
- Budget-friendly
- Beginner-friendly
- Perfect for summer camps and sleepovers
- A great handmade gift idea
- Easy to customize with colors and charms
Supplies You’ll Need
- A pair of plain flip flops
- Embroidery floss in your favorite colors
- Scissors
- Craft glue or a secure knot to finish the ends
- Optional: charms, beads, letter beads, or small pendants to attach to the straps
How to Wrap Flip Flops with Embroidery Floss
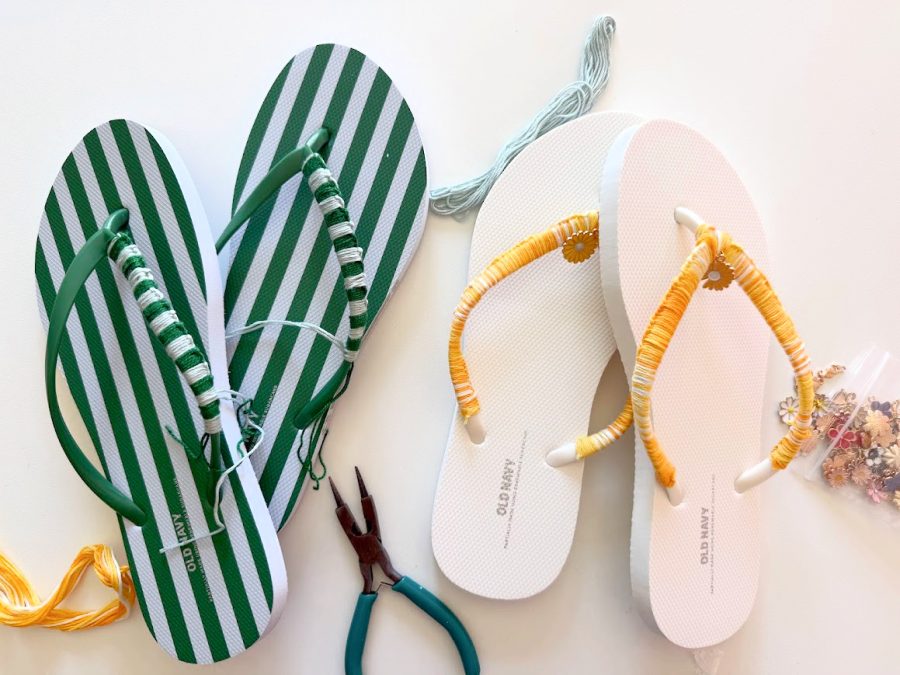
Step 1: Choose Your Colors
Pick one color for a clean, classic look or combine several shades for a striped or rainbow effect. Bright tropical colors are especially fun for summer. I used this ombre yellow. You need to pull out about 10 feet and then double it in half. Leaving you with 5 feet and a fold in the middle.
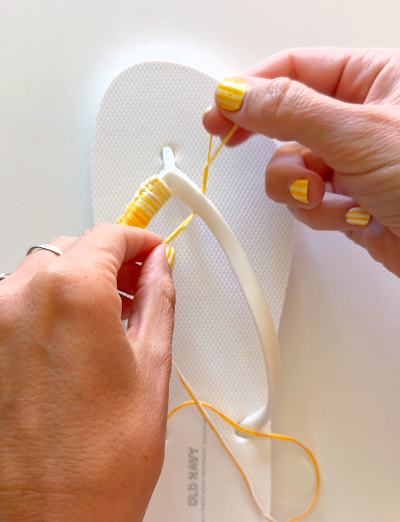
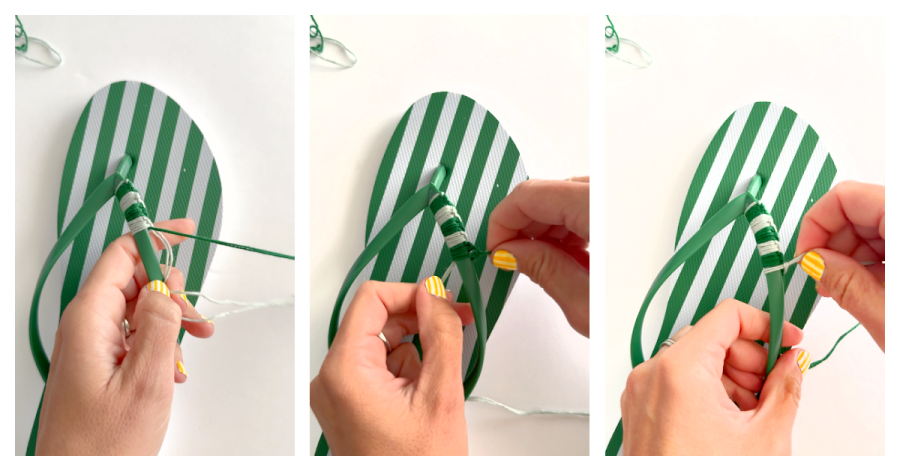
Step 2: Secure the Floss
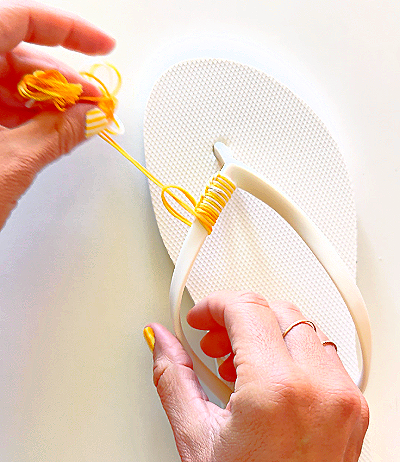
Tie the embroidery floss near the middle of the strap. You are going to do the same knot over and over again! Even to attach the string to the flip flop.
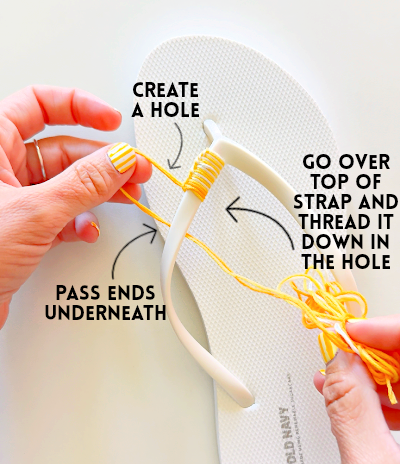
Place the fold underneath the strap so it’s by the toe area. You will take the ends and place them up and over the strap and run it down into the loop of the embroidery floss (where my finger is).
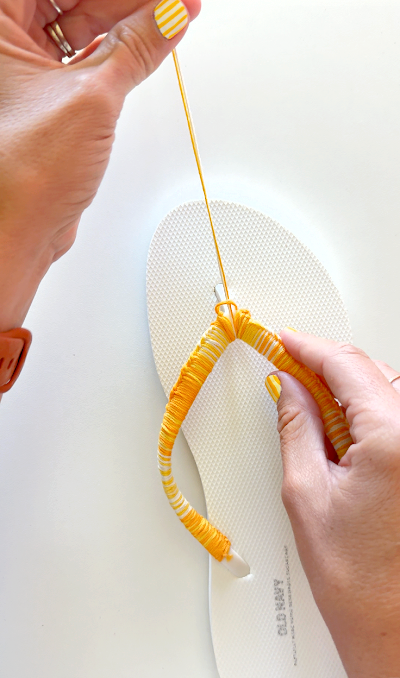
Pull it tight and push up the center of the flip flop. Then repeat repeat repeat over and over again.
Step 3: Troubleshoot
If you accidently mess up and go around the top at first and thread it through the bottom, the knot is going to be on the underneath instead of the top. So it’s important to stay consisitent. You also want to keep the strings snug and close. They can slide down the rubbery strap, leaving gaps. You can add a little glue as you go to keep things in place.
Step 4: Finish the End
Tie another secure knot and trim away any excess floss. A small amount of glue can help prevent the knot from loosening with wear.

The middle had a little white spot so I ended up making a few knots around the middle to complete finishing off the strap.
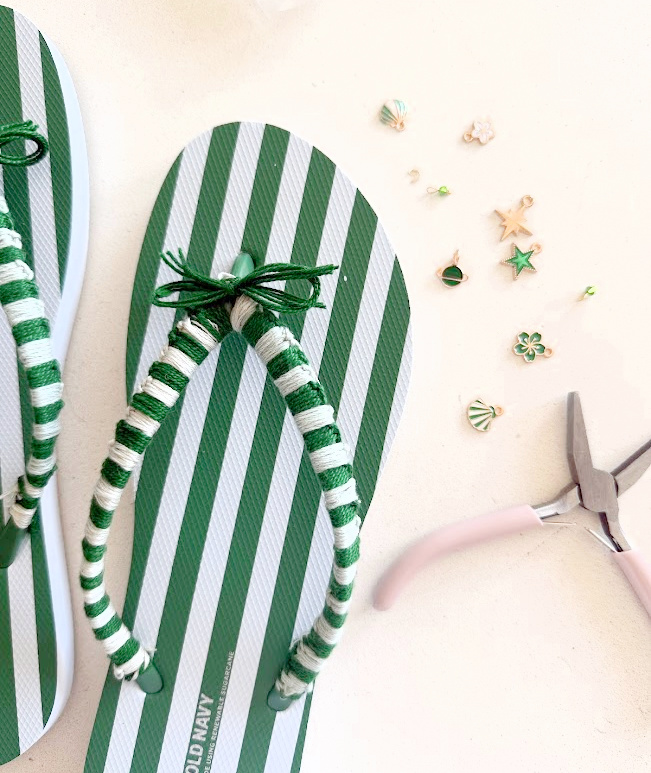
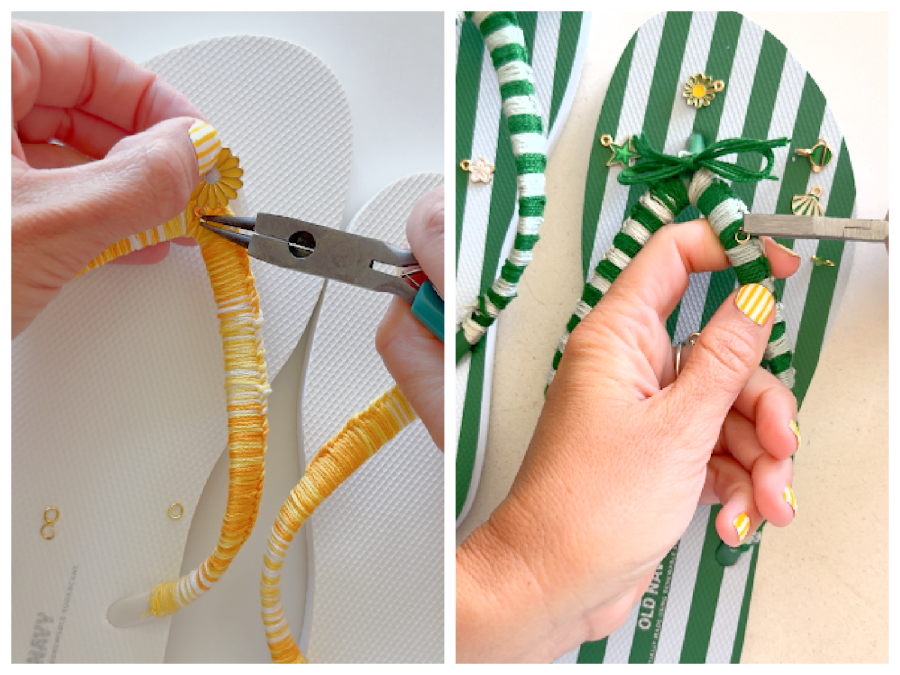
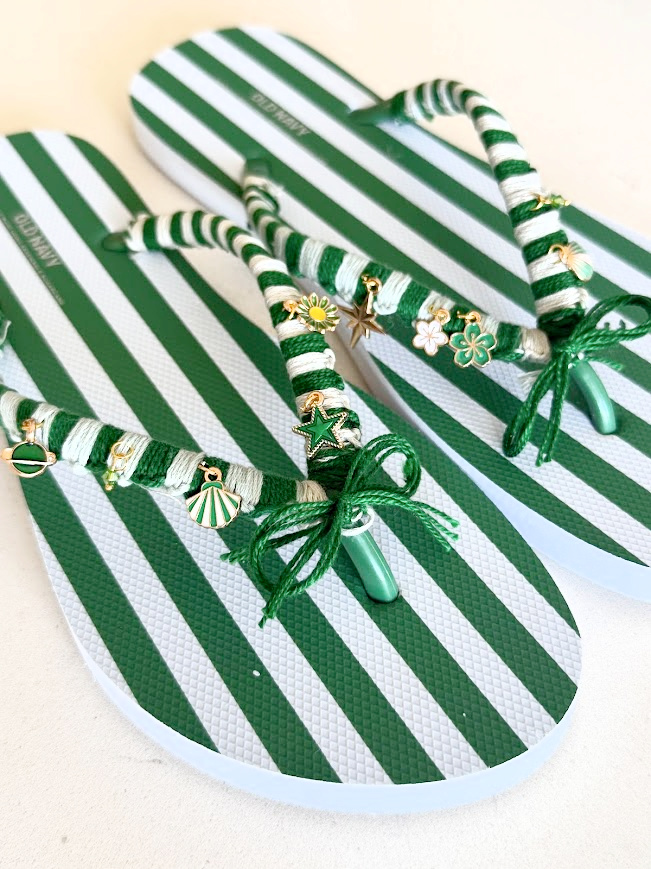
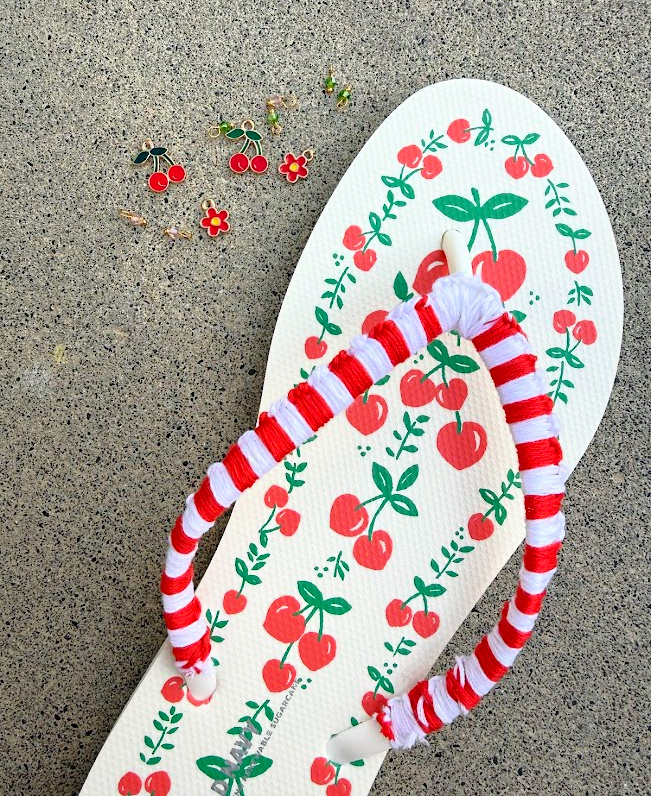
Step 5: Add Decorative Charms
For an extra-special touch, attach small charms, shells, initials, or beads to the straps. Mix and match embellishments to create a pair that reflects your personality and style.
Fun Design Ideas
Try decorating your flip flops with themes like:
- Beach shells and starfish
- Sunshine and daisies
- Smiley faces
- Tropical colors
- Friendship bracelet-inspired patterns
- Patriotic red, white, and blue
- Pastel florals
- School spirit colors
- Monograms or letter charms
I tried alternating colors to create stripes. It actually wasn’t too hard. I did 8 feet of two different colors (so 4 strands once they are doubled over.) I just alternated doing 3 knots in one color while holding the other color underneath. The knots secured the the color and then I just switched threads to do 3 colors in the other color!
Tips for the Best Results
- Wrap the floss tightly so it stays in place during wear.
- Stick with embroidery floss made from cotton for a soft, comfortable finish.
- Coordinate your floss colors with the charms for a polished look.
- Allow any glue to dry completely before wearing your sandals.
- If your flip flops get wet often, check the wrapped sections occasionally and re-secure any loose ends.
FYI: I have not worn these long enough to see how the charms and floss hold up!
Frequently Asked Questions
Can I use yarn instead of embroidery floss?
Embroidery floss works best because it’s thin, flexible, and wraps neatly around the straps. Thicker yarn may create bulk and wear out more quickly.
What kind of charms can I add?
Lightweight jewelry charms, alphabet beads, tiny tassels, and miniature beach-themed pendants all work well. Just make sure they’re securely attached so they don’t snag or fall off.
Are these flip flops washable?
It’s best to spot-clean them gently. Repeated soaking may cause the embroidery floss to fade or loosen over time.
Create Your Own Summer Style
A pair of DIY embroidery floss flip flops is an easy way to add color and personality to your summer wardrobe. With just a few inexpensive supplies and endless customization options, you can transform ordinary sandals into fun, handmade accessories that are as unique as you are.
Grab your favorite floss colors, add a few cute charms, and get ready to step into summer with style!
Save Embroidery Floss Flip Flops for later
Too busy to get crafting today? No problem! Pin this post to remind yourself about this project later! Sharing my projects helps me reach more people, allowing me to continue sharing free content!
The best Summer crafts and activities
- Water Balloon Toss
- Paper Fans DIY
- Yarn Bracelet
- WATER BLOB
- Rock painting ideas
- 20 summer games
- make slime
- Paper spinner
- melted crayon suncatcher
- Sidewalk paint
- Games to play with paper plates
Perfect for Summer Activities
These handmade flip flops are a great project for:
- Summer camps
- Beach vacations
- Pool parties
- Family craft nights
- Sleepover activities
- DIY birthday parties
- Vacation Bible School crafts
- Teen craft clubs
They also make thoughtful handmade gifts for friends, sisters, teachers, or bridesmaids heading to a beach wedding.
Leave a Reply