
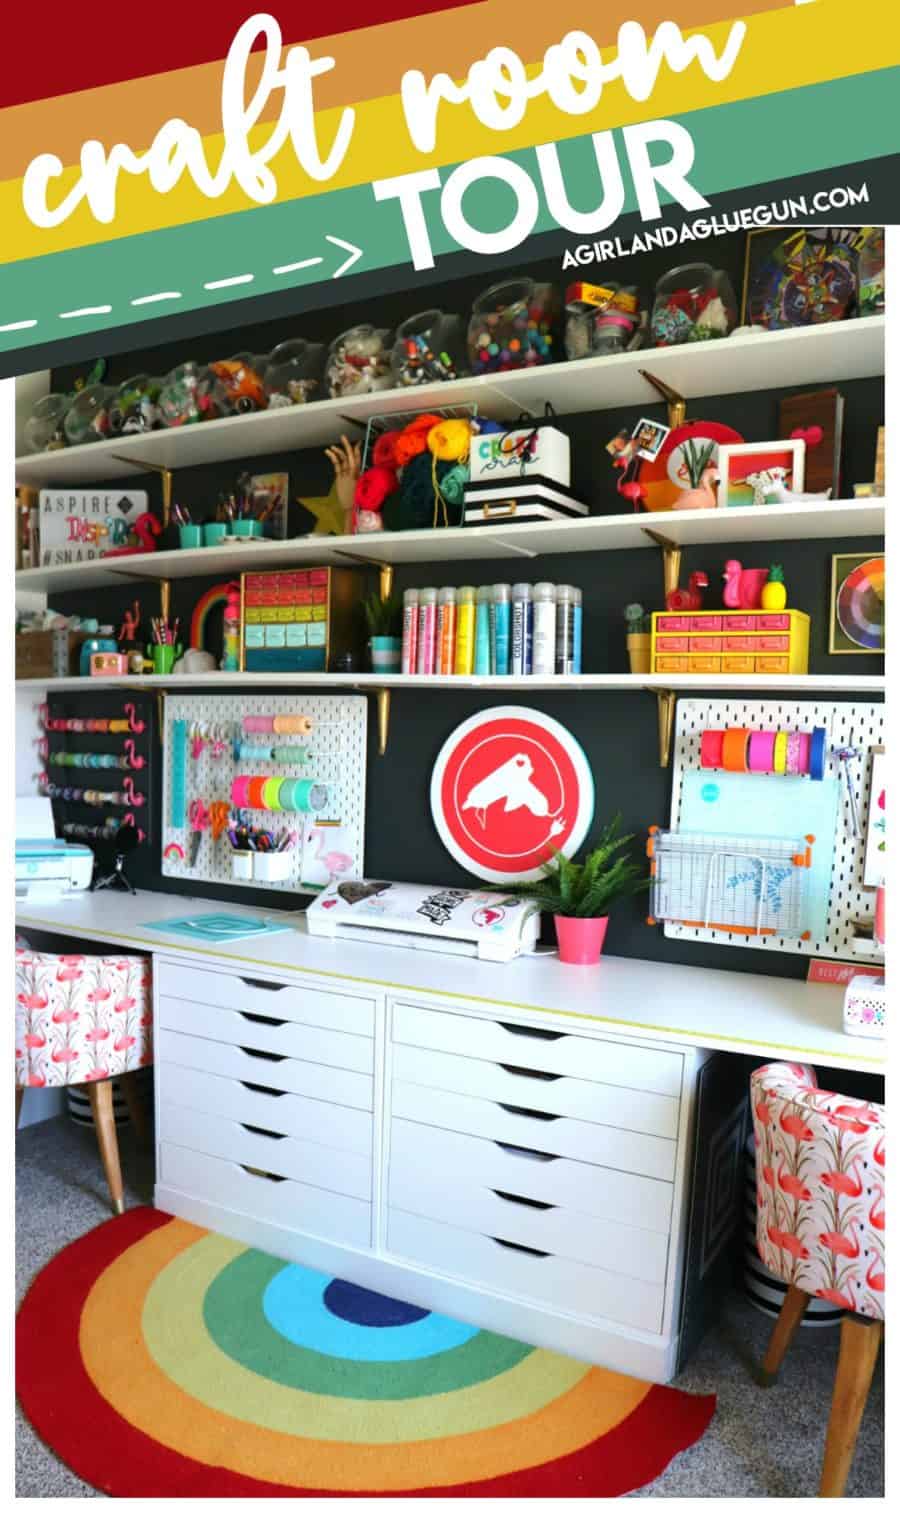
Come sneak a peek inside my favorite place. This craft room tour shows off where and what I store in all my nooks and crannies! I’ll even show you how I made my desk and shelves!
This post is a long time coming! I have been wanting to film it and photograph it for a while! The problem is, I can’t keep it clean enough! I just keep crafting and making a new giant mess! Lucky for you–I decided to just shove my mess in the hall and pretend like it’s clean!
So here you go! I have a video that will show you…everything! My Monica closet, what’s behind my door. Close up of my heat press station and even what’s in my Ikea drawers! Down below I will walk you through how I made my desk (the most asked about the question on my Instagram )
(Pssst. If you want to see my old craft room- check it out here!
Here is the picture that I sketched up after the fire. It was such an advantage to have a fire and get to plan it all from complete scratch.
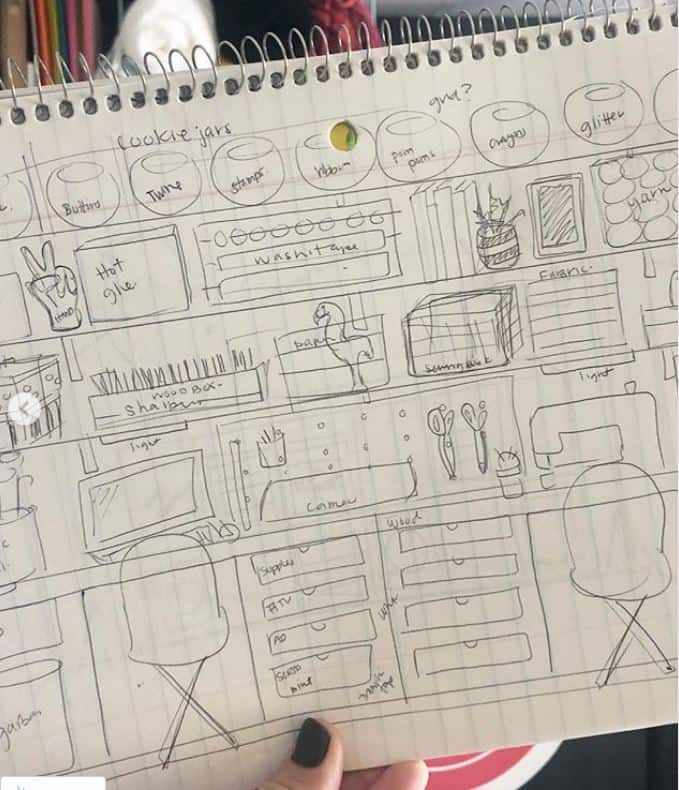
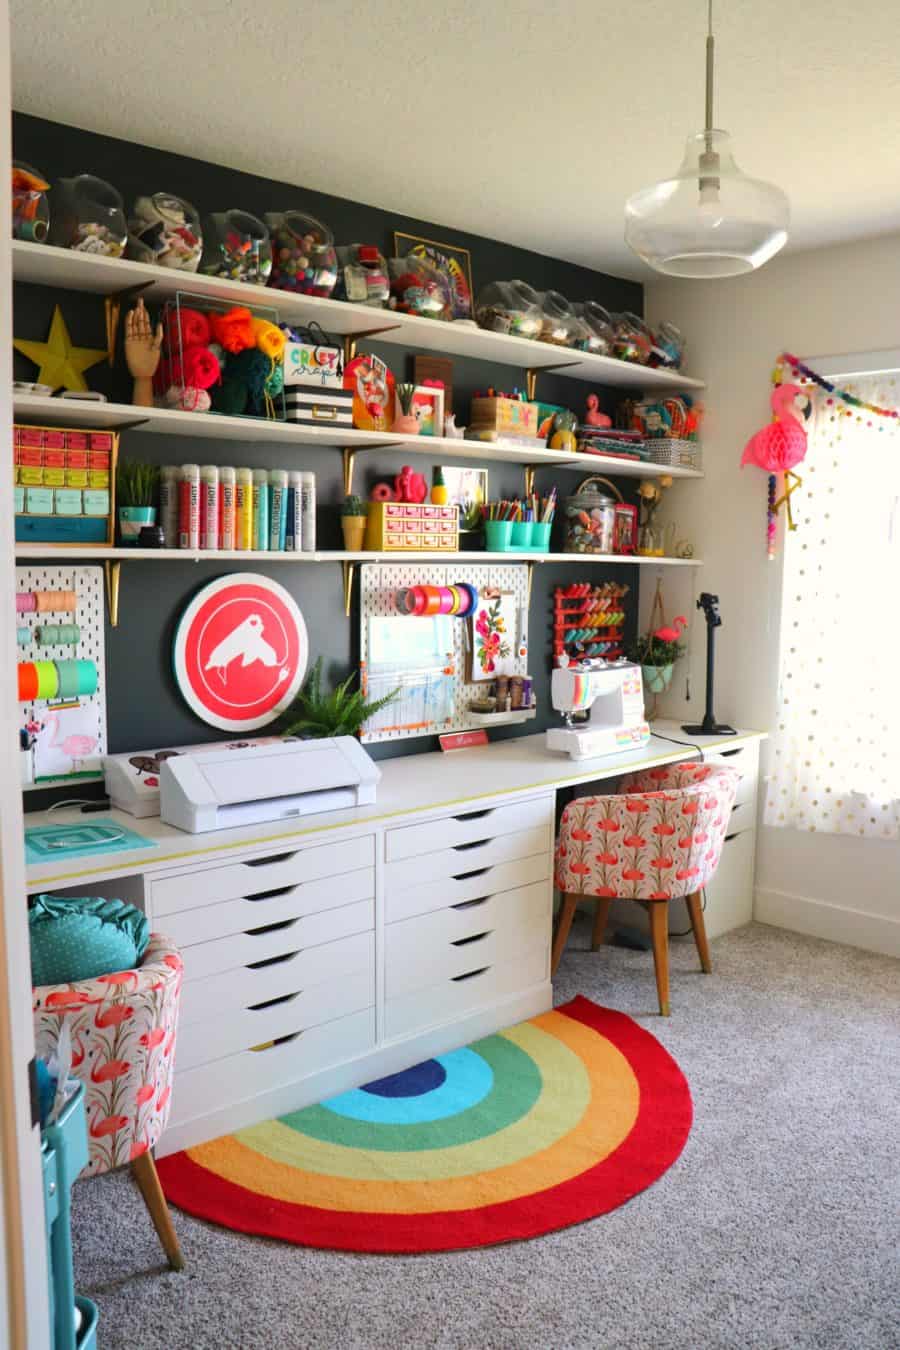
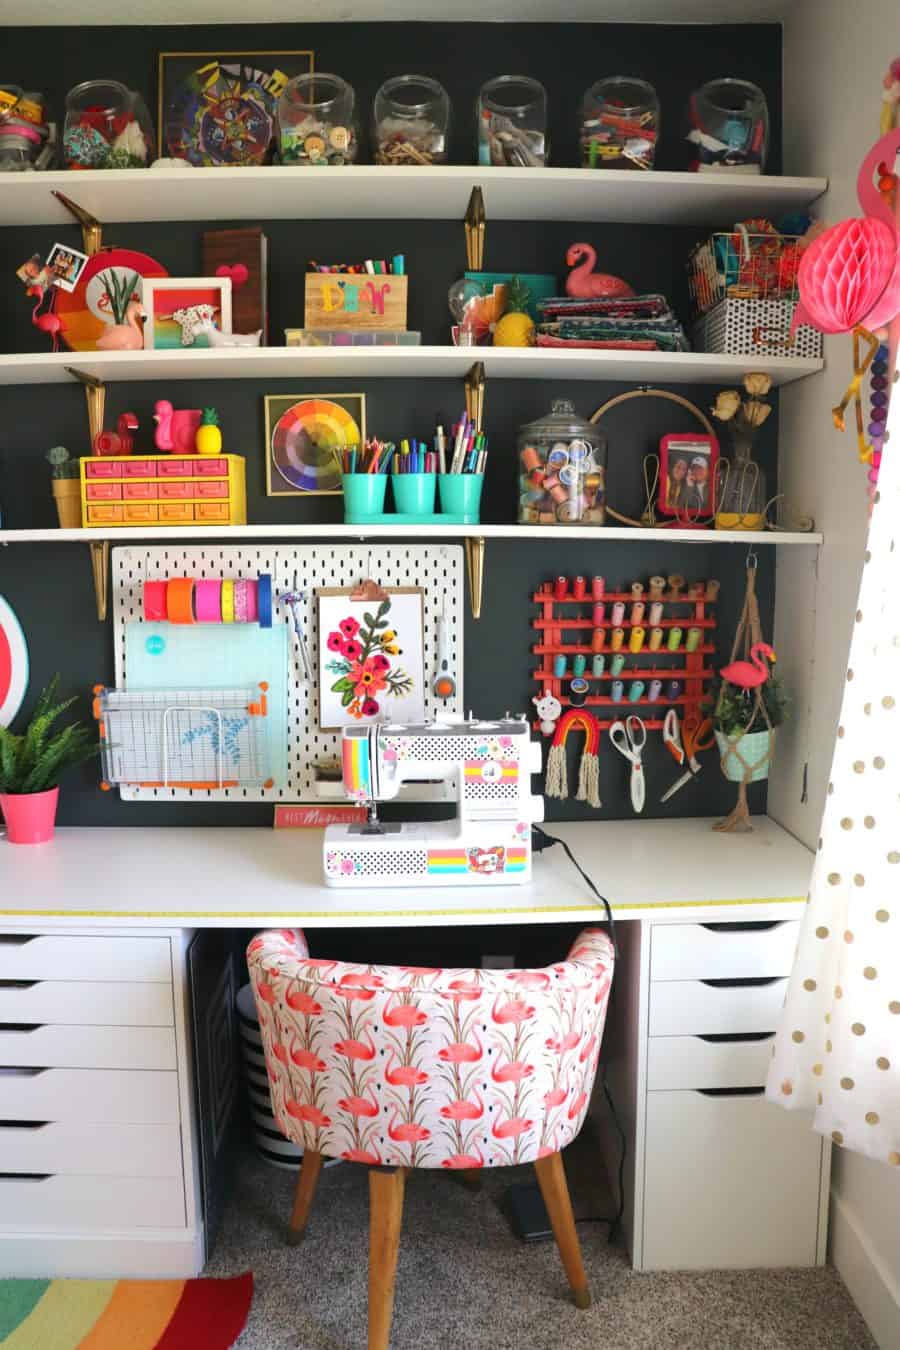
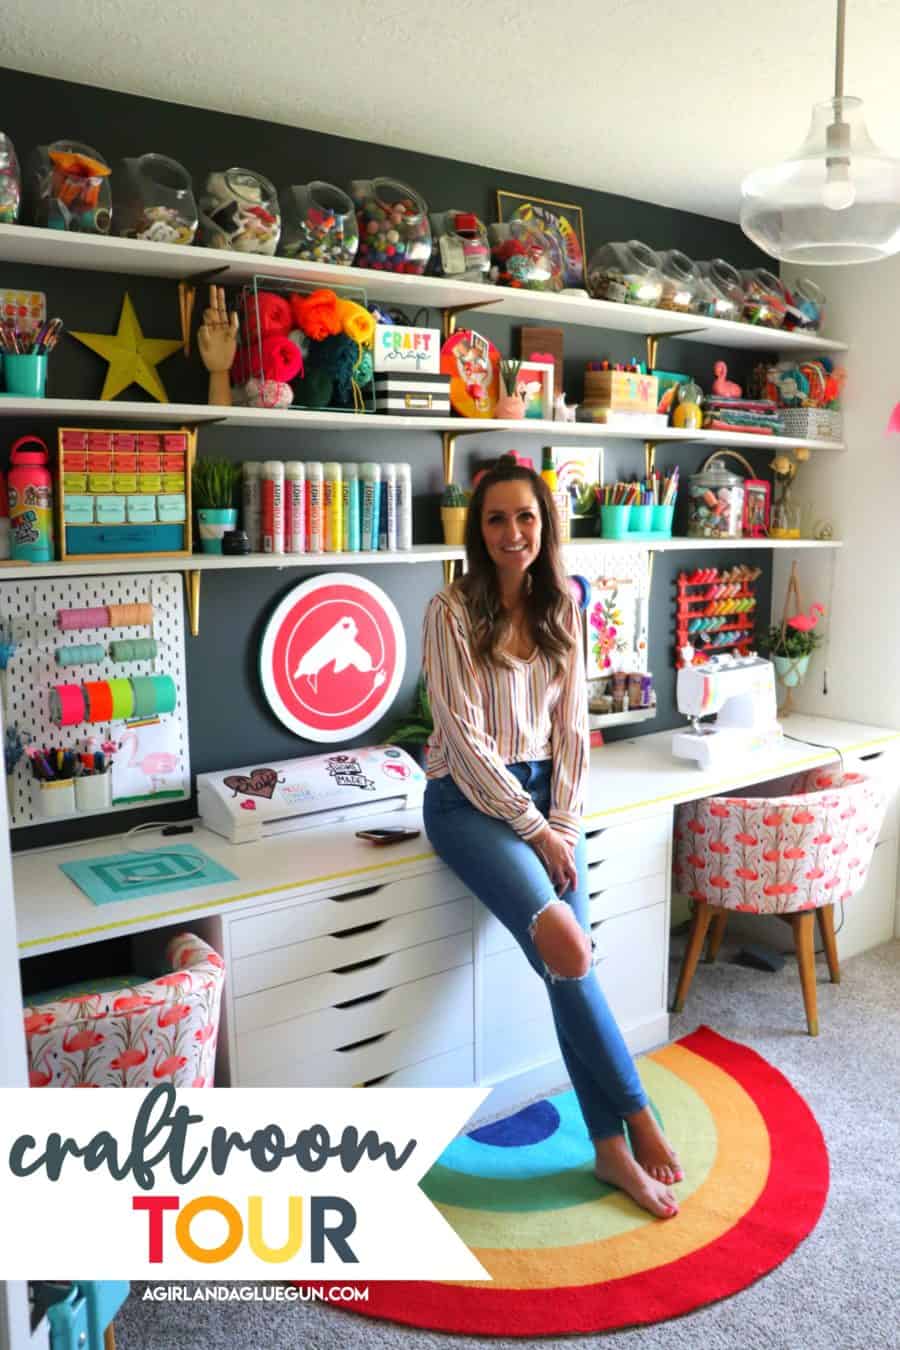
I knew the space. I knew what worked. What didn’t? What I needed. I knew I liked everything out on display- If I don’t see it, I don’t remember I Have it, and then I never used it! You will notice in the video I found some punchboards that I forgot I had! So the plan was to make it look as nice and neat as possible….with everything still out! It can look cluttered real fast- and it does look cluttered. But the rainbow objects help keep me happy enough that I don’t mind!
First.
How to build a big Craft Room shelf!
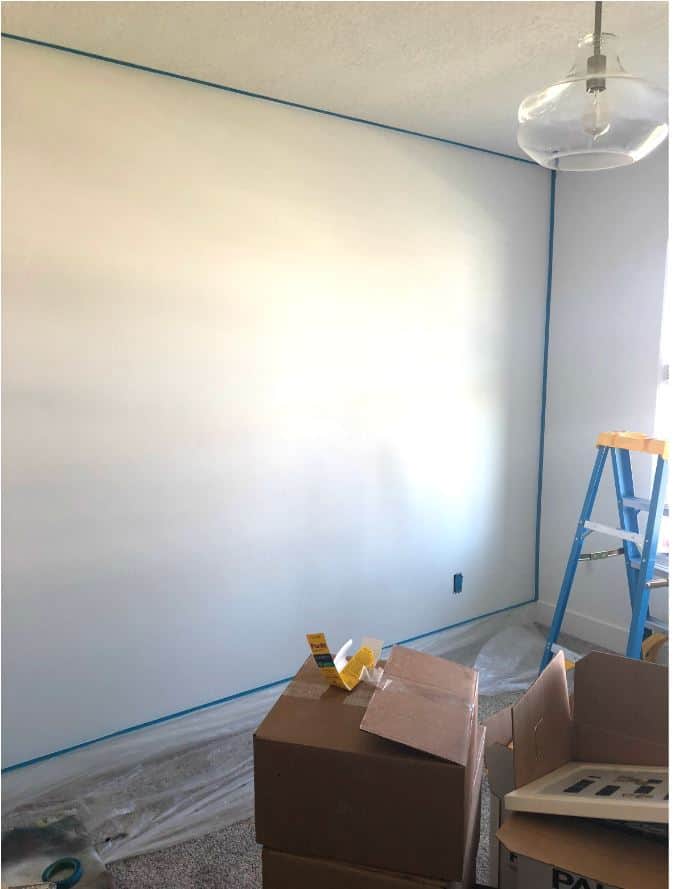
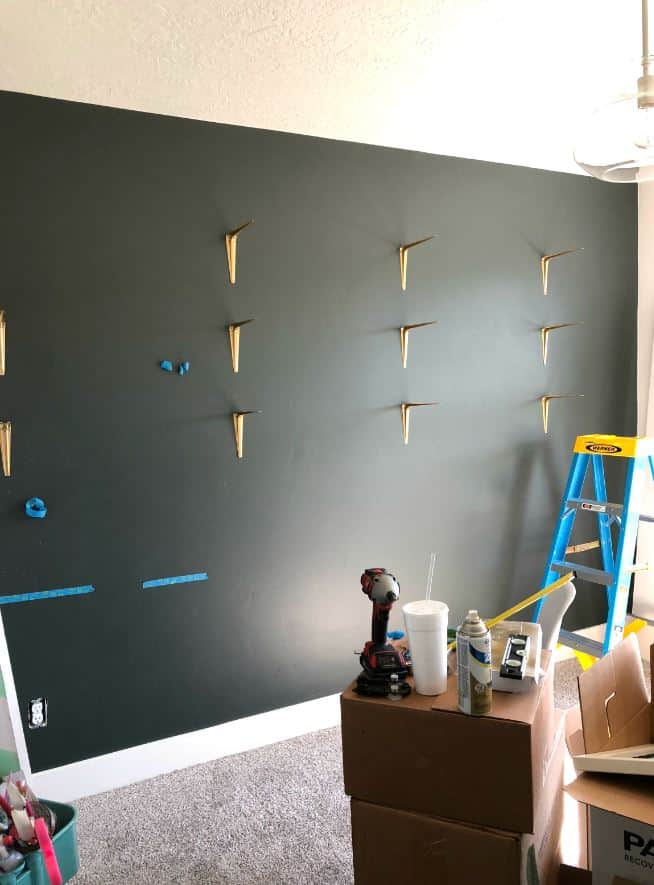
I wanted a nice dark backdrop to make all the color pop off! Rock bottom from Sherwin Williams – a dark green/blue depending on the light, is the paint color I chose! I didn’t want black– even though it sometimes photographs black.
Next up shelves. The whole wall needed to be utilized. I purchased the cheapest brackets and spray painted them gold and screwed them in on every other stud. I let the studs guide me on lining things up.
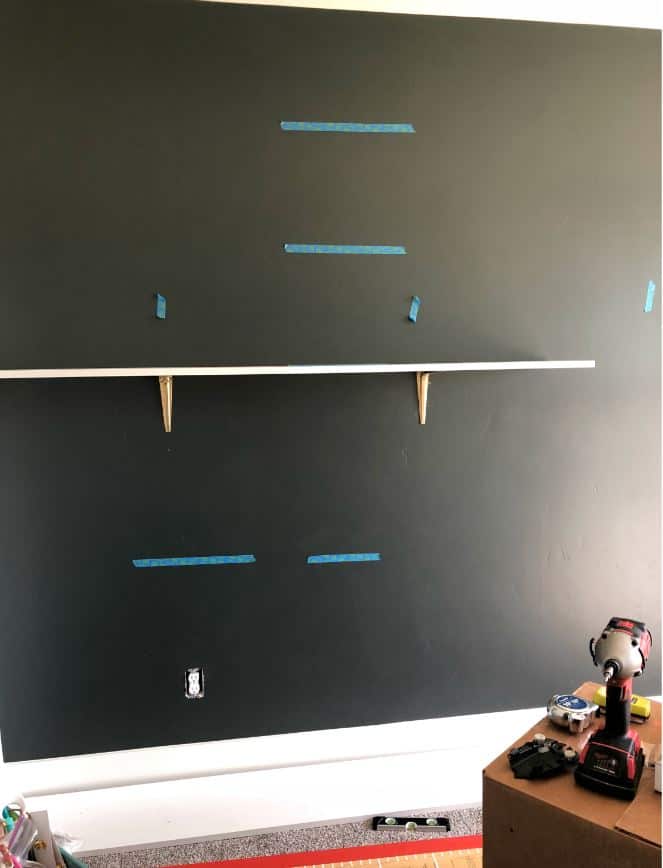
I grabbed some painter’s tape and mapped out how far apart I wanted the brackets. There are a lot of cookie jars that were going on the top shelf so I wanted to make sure that they fit as well as some of my containers. You can see the tape down below- that marked where the desk would be.
![]()
The shelving I bought is MDF that is already painted white. SCORE for skipping a step! You could grab some wood for a little bit cheaper- but it could bow and then the cost of painting.
Decorating the shelves
After they were up…I started to fill them up!
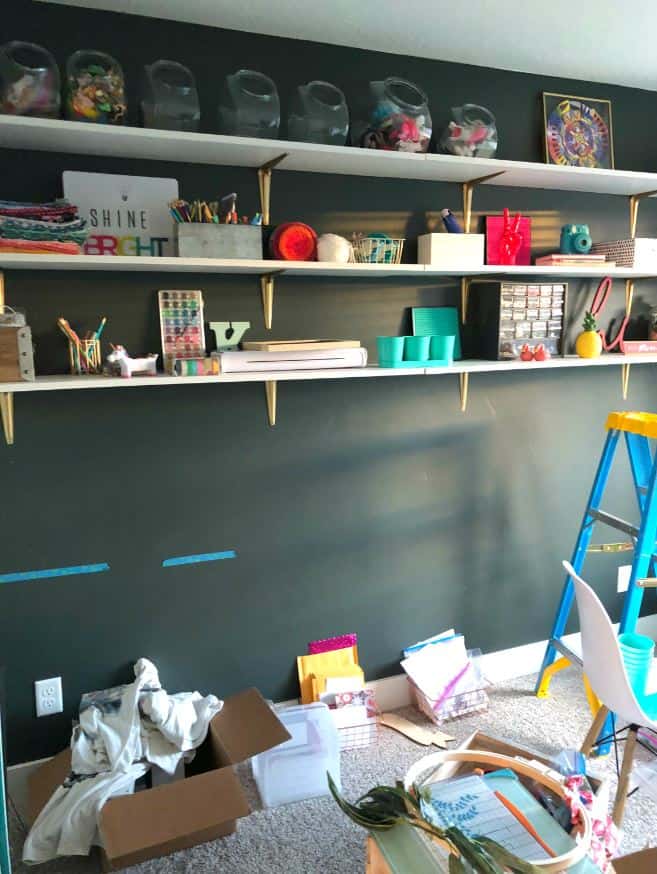
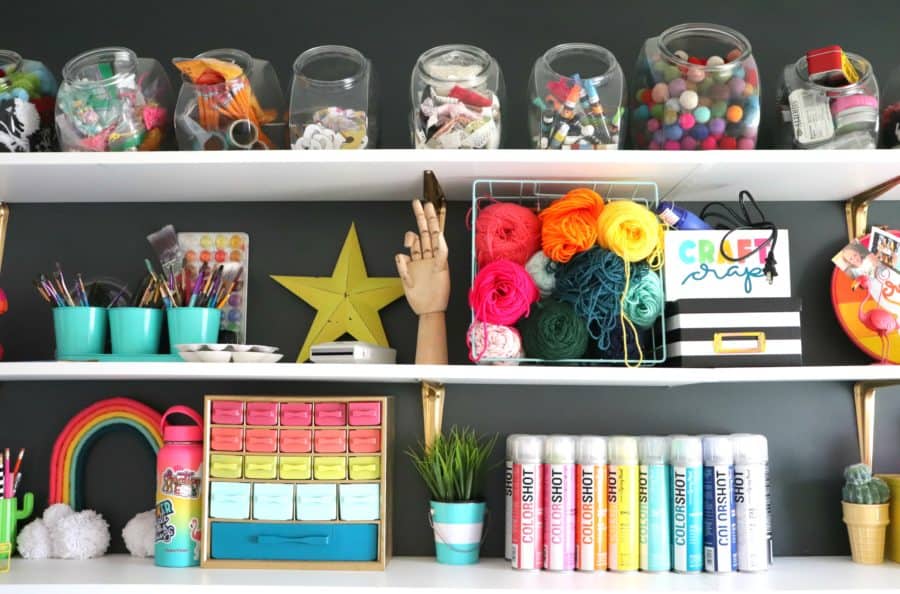
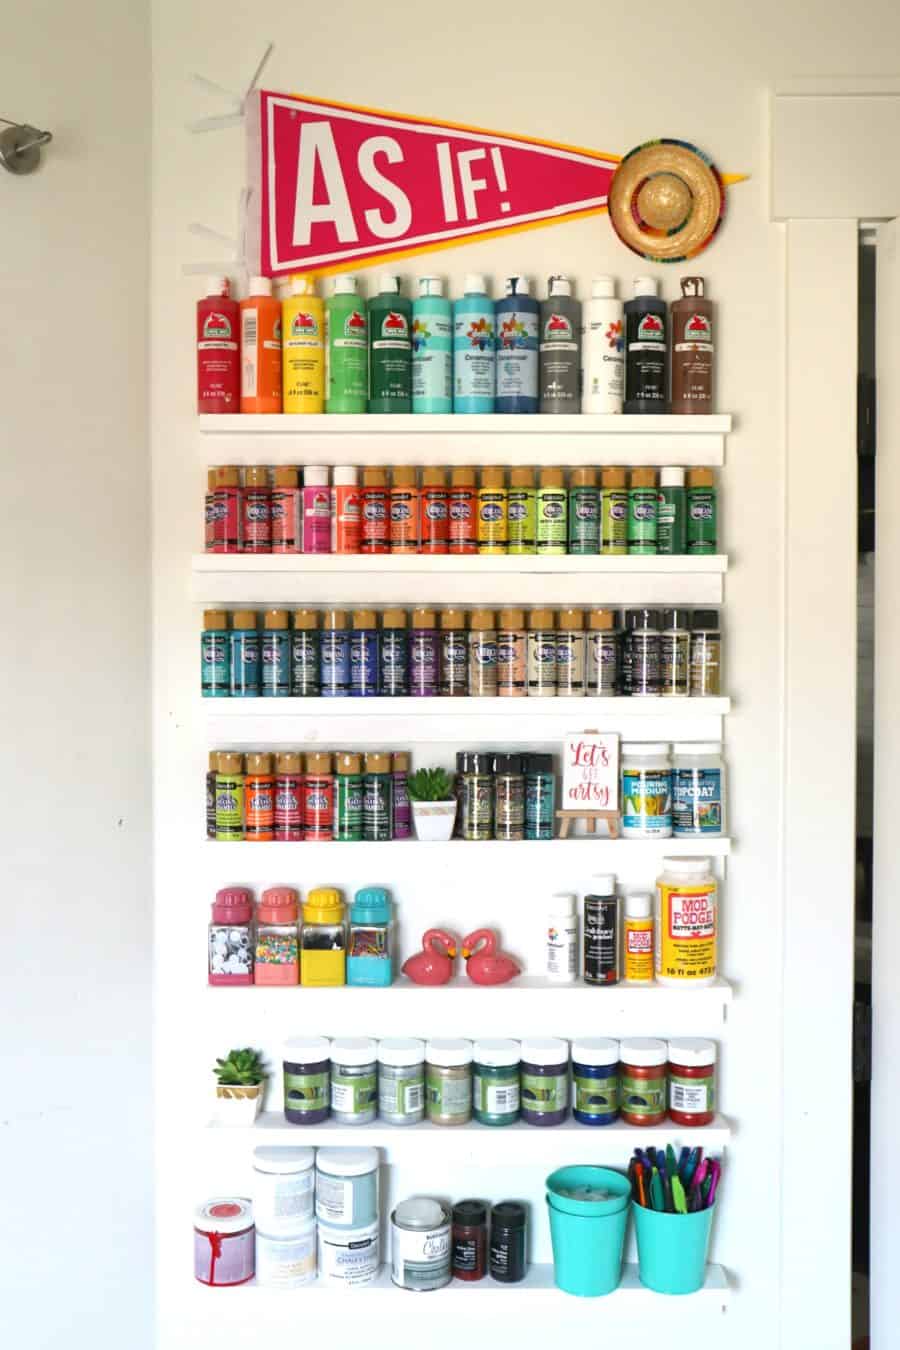
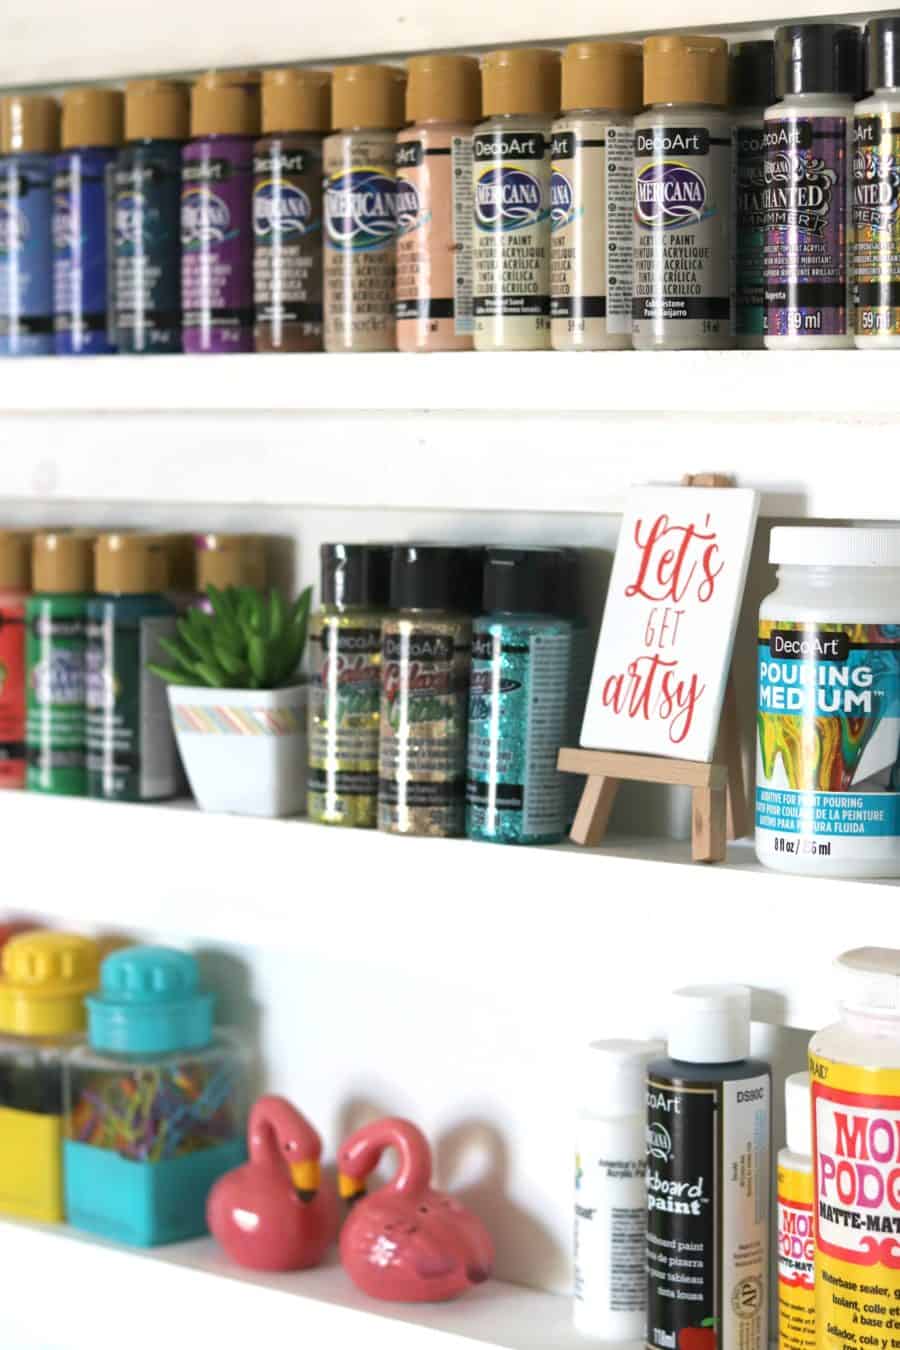
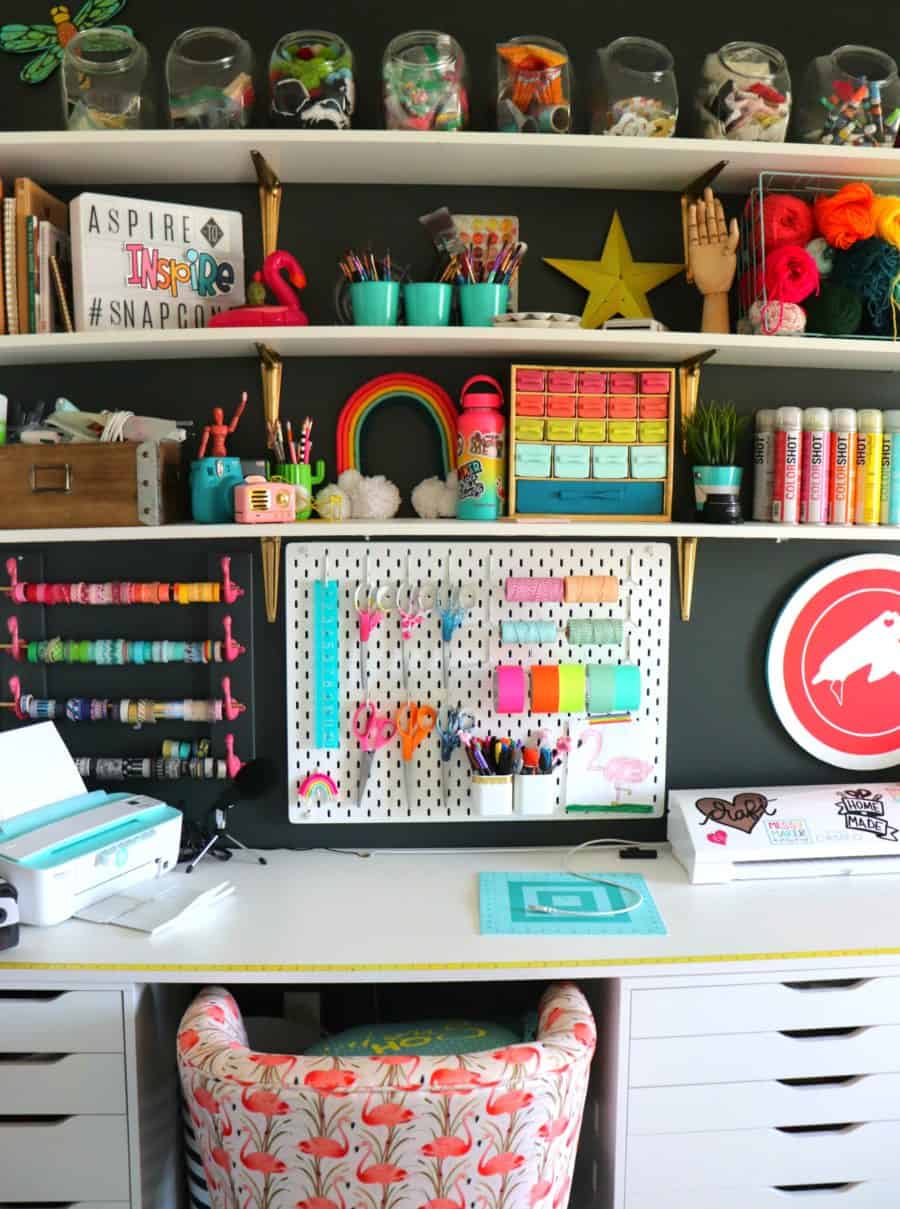
The very top is all cookie jars. Holds buttons, adhesives, pom poms, paint pens, lace, pipe cleaners, chipboard letters, etc. It’s a great way to contain the mess but still have easy access to it!

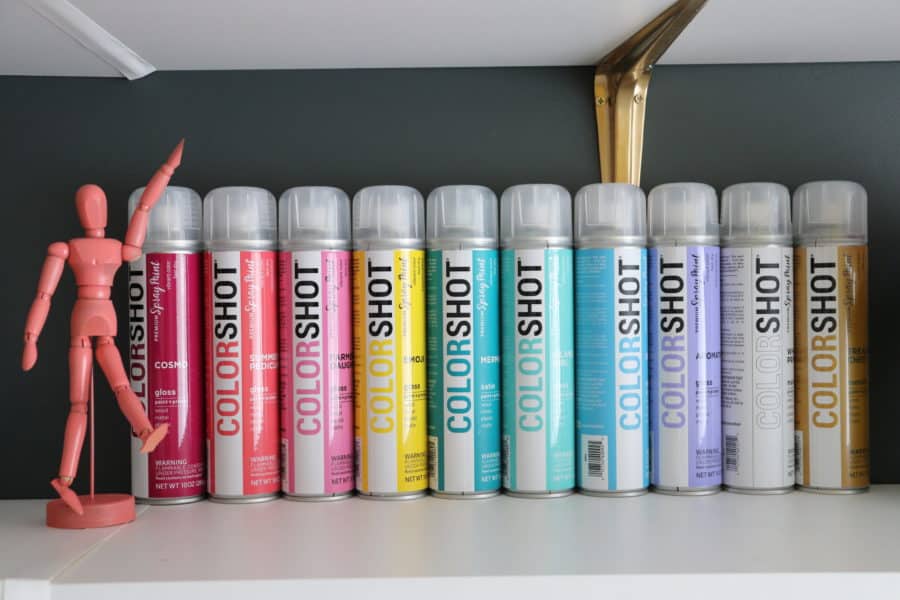
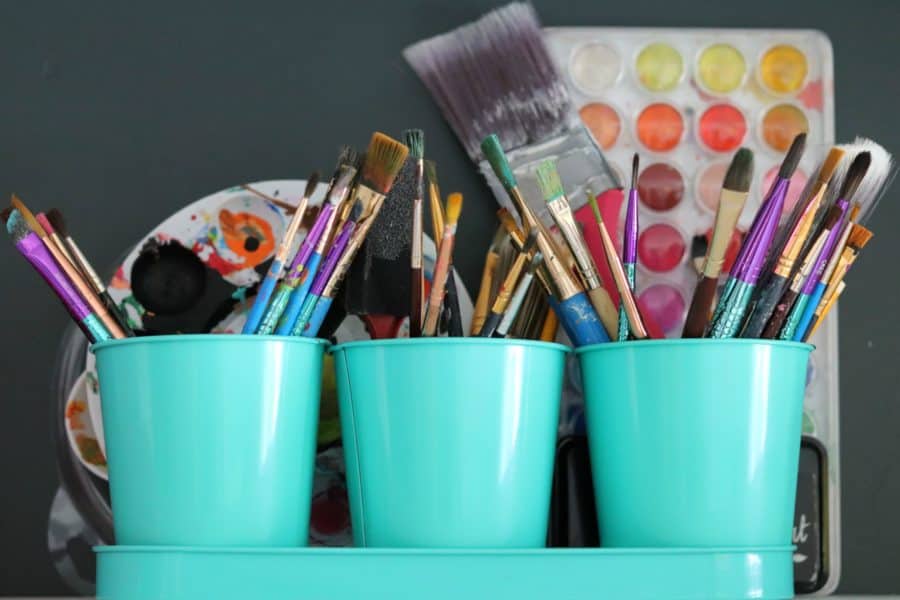
I have my favorite spray paint out on display, as well as my paintbrushes,
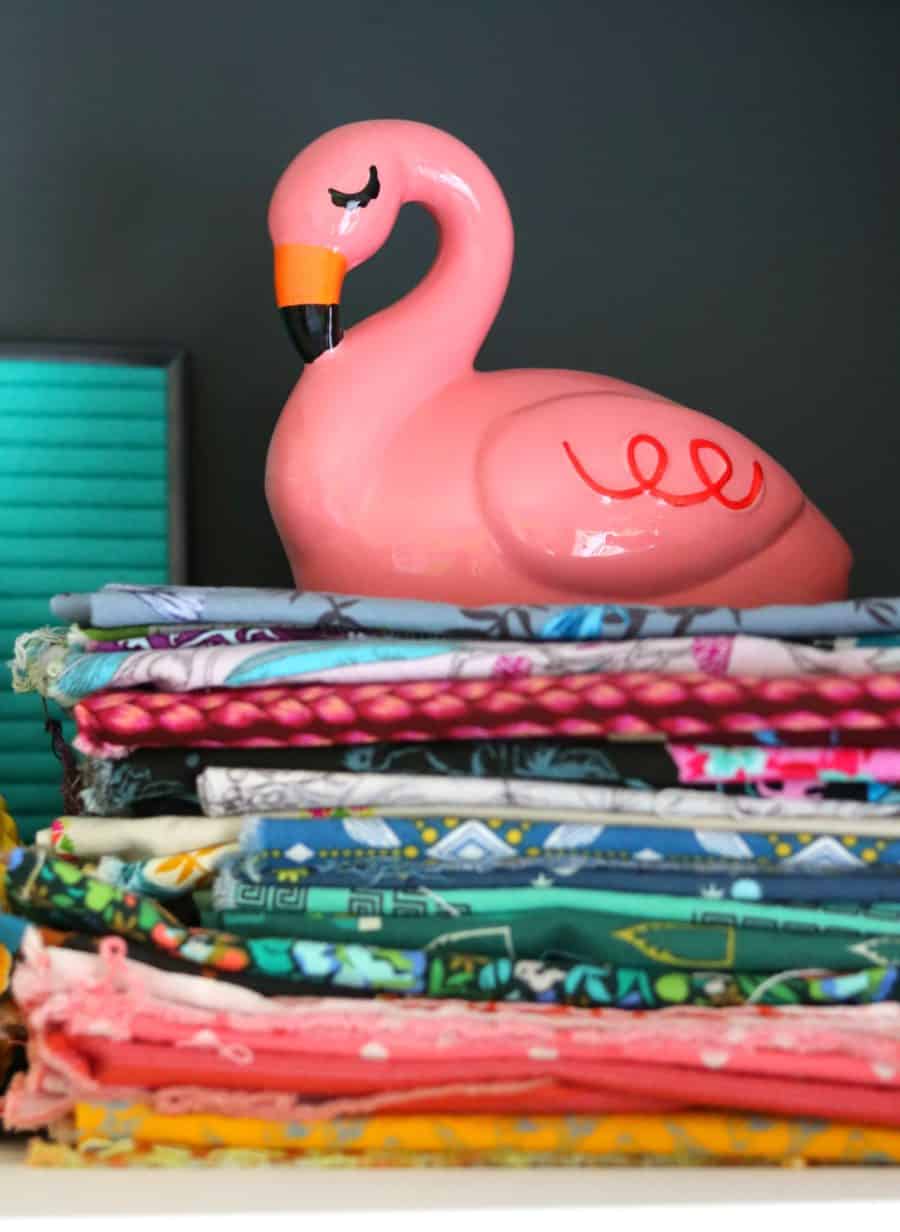
Keep in mind…I have a lot of random things. Gifts from people, craft projects, and blog conferences. I have a thing for flamingos. So if you are randomly at some point thinking…why is there a tiny sombrero. It’s because I’m sentimental.
Let’s move on.
How I made my craft room desk
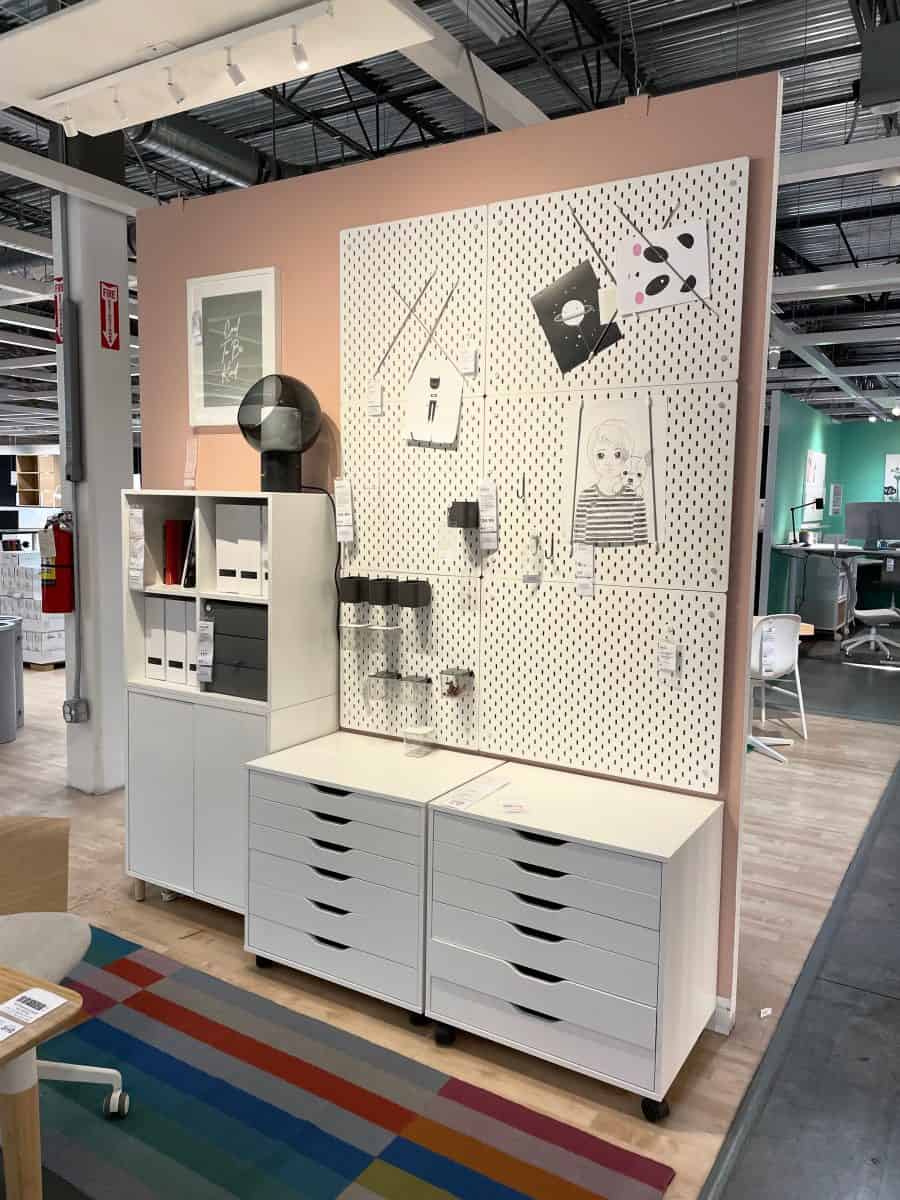
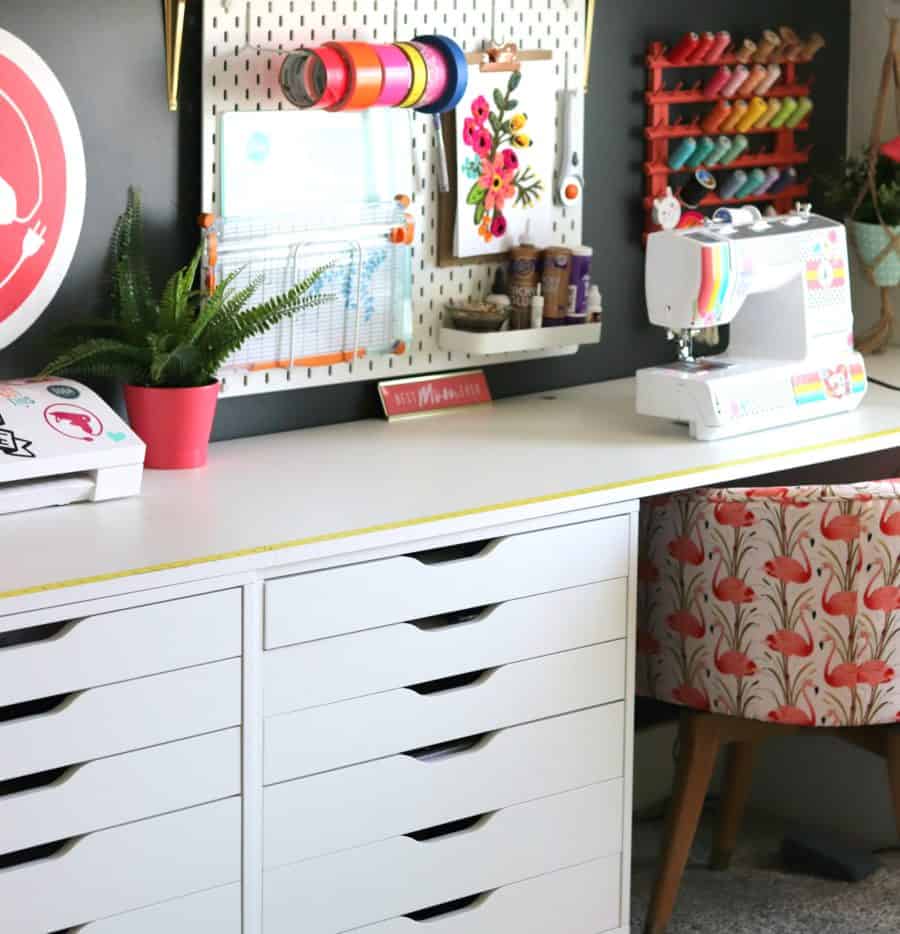
When I was planning out my craft room. I knew I wanted these Alex storage cabinets. They fit vinyl (close enough anyways) Look awesome and sleek and are way more affordable than anything else I saw.
Desk details from Ikea
- Alex filing cabinet (I used two)
- Alex small drawers
- Alex’s small filing cabinet
- Ikea Raskog cart by the door
- Ikea pegboard and accessories
I got these babies all assembled. It didn’t take too long. But as soon as I did, I realized that the big cabinets and the small cabinets are two different heights. Why Ikea? why? I ended up adding a piece of wood to the wheels to boost them up. I was not planning on even using the wheels…but need them for height.
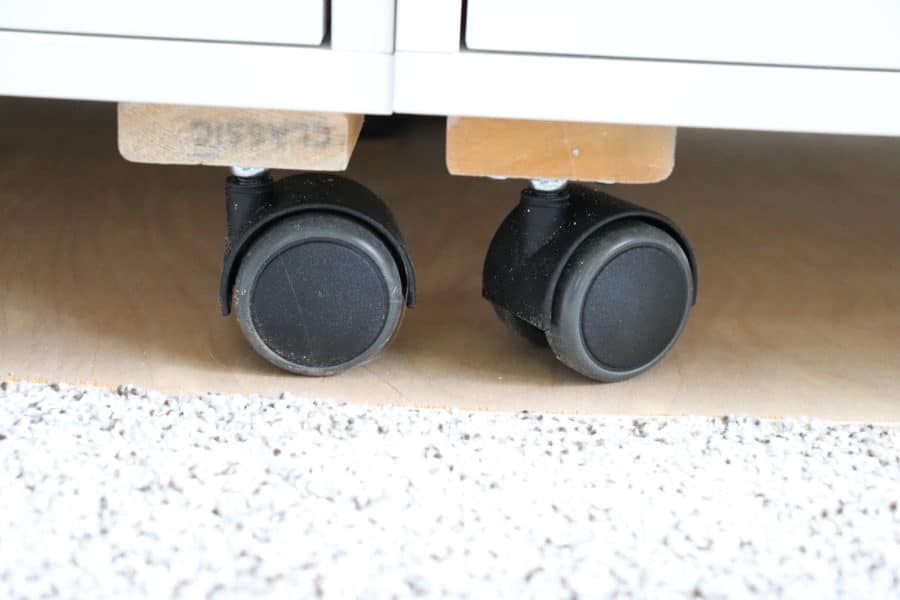
The big Ikea cabinets aren’t as deep as the other ones eighter. Once again. WHY IKEA? So I had to build a wood pop-out to keep the desks from getting pushed back to the wall. No pictures. Just wood screwed to the wall (super legit) It doesn’t look pretty but NO ONE sees it.
I placed a small piece of MDF around the bottom. I made sure the wheels were in far enough that the wood sat flush.

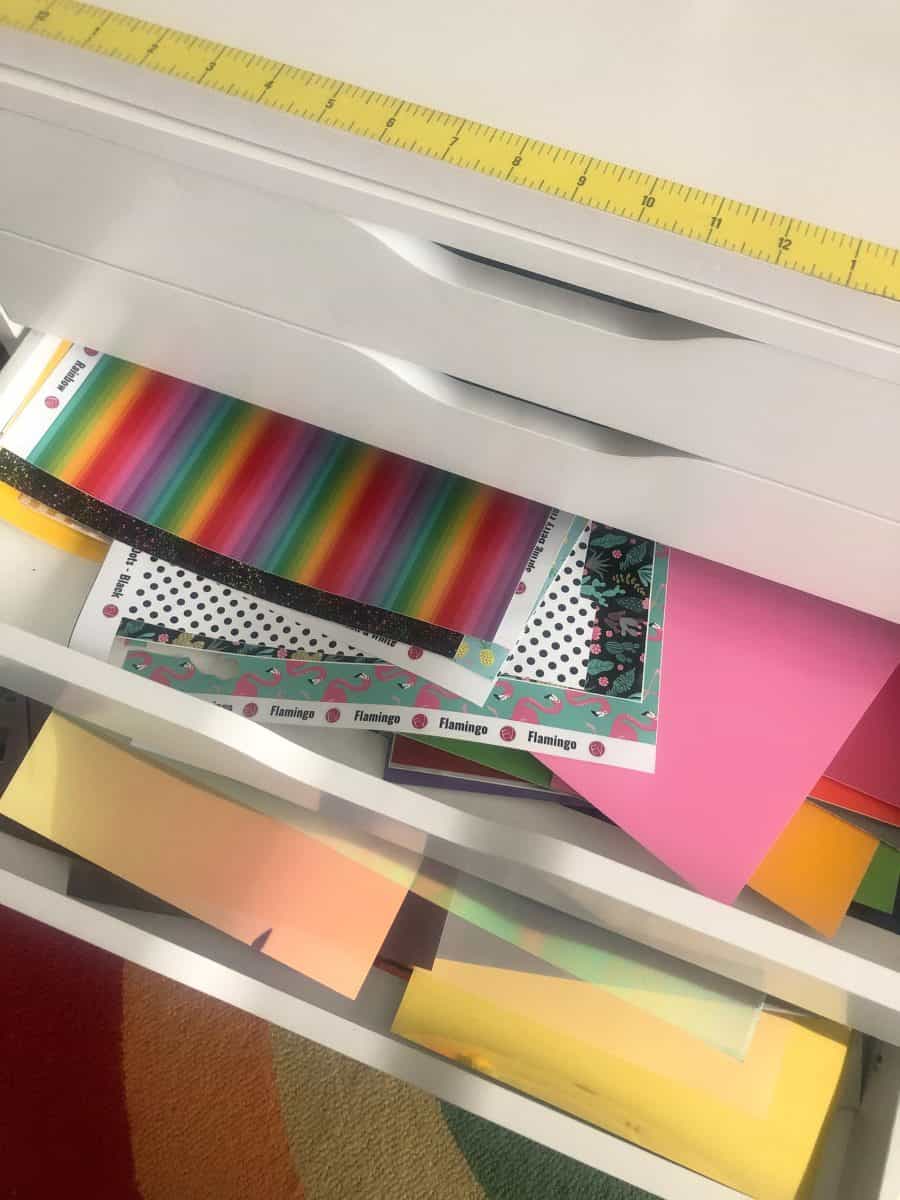
These hold my craft vinyl, minc machine, foil, mint machine and supplies, and lots of different odds and ends.
Top of the craft desk
Time to run to Home Depot to get the top of my craft room desk! It’s closet organization shelving. It was two feet wide by 8 feet long. My wall is 12 feet long. So I had to cut off 2 feet from each piece. I had them cut down perfectly and they are just wedged together super tightly you can’t even see the seam in the middle. 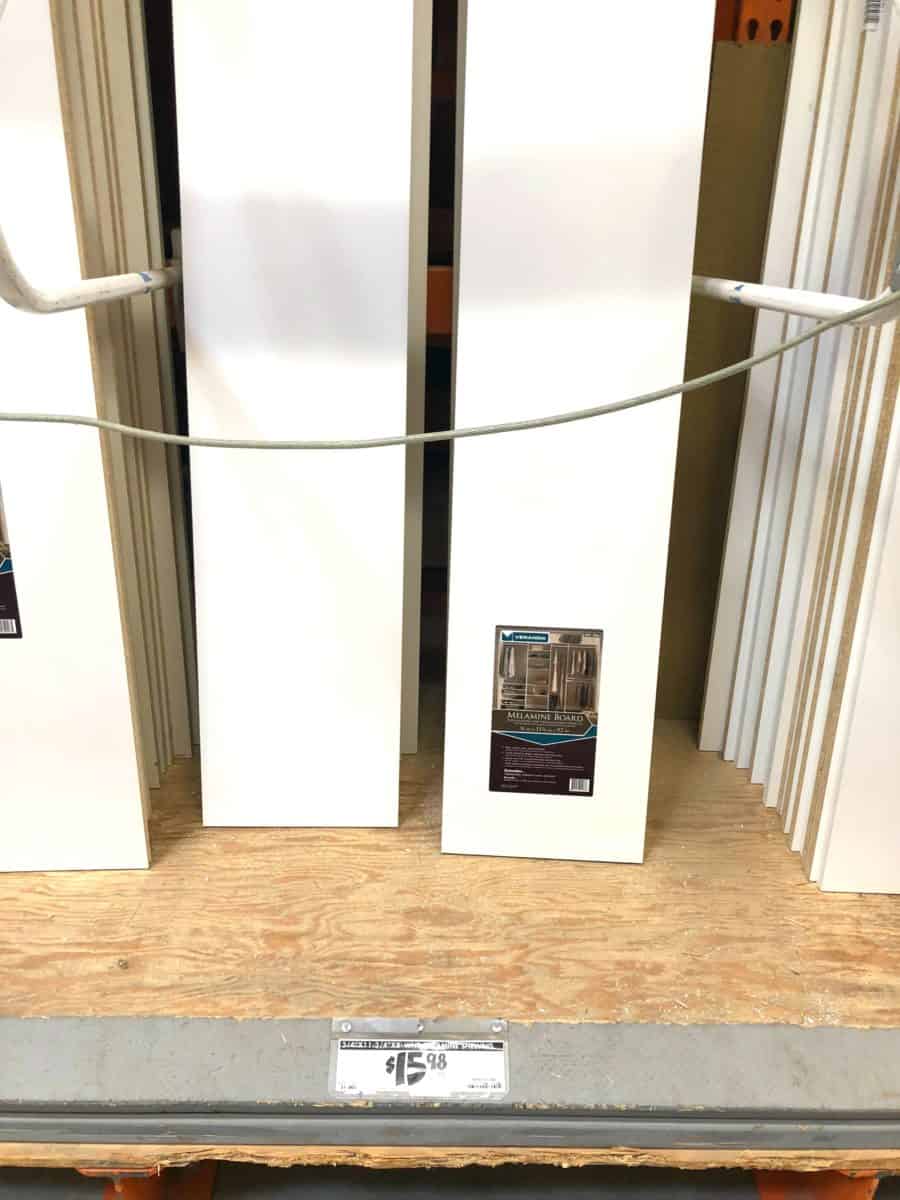
(these are the smaller sizes- the 2 feet ones were more expensive.) They come already white- and the finish is the best. They clean up so nicely if you get a little marker on them or paint! I recommend them 1000 times.
I added the measuring tape washi along the edge too!
Once I had my desk in…It was time to put things up on the wall.
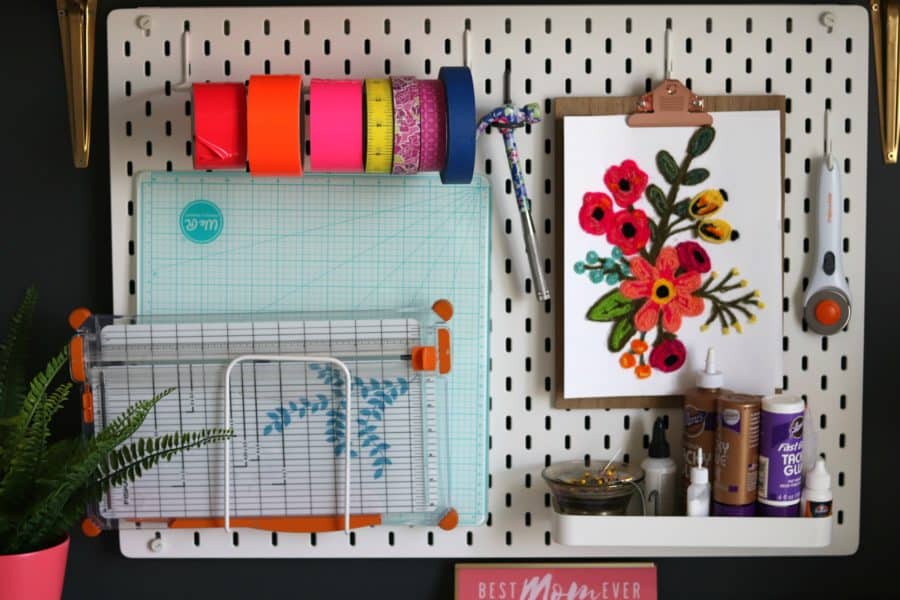
Pegboard Organization
After the shelves were up, I added the pegboards (also from Ikea!) Here is the problem. I wanted them right above each chair. but the brackets got in the way. So they are off-centered and it bothers me. So let’s pretend they aren’t!
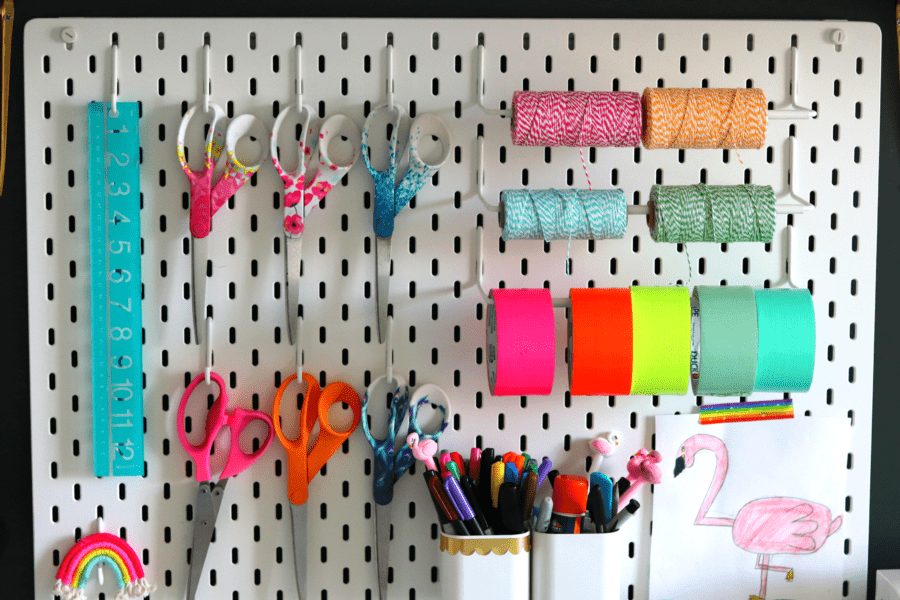
All the little hooks are from Ikea too. I love this thing. I use these scissors, rulers, and pens probably every day! It’s so easy to grab a pair of awesome Fiskars scissors and go! I love these pegboards! You can paint them too just as I did in my laundry room.
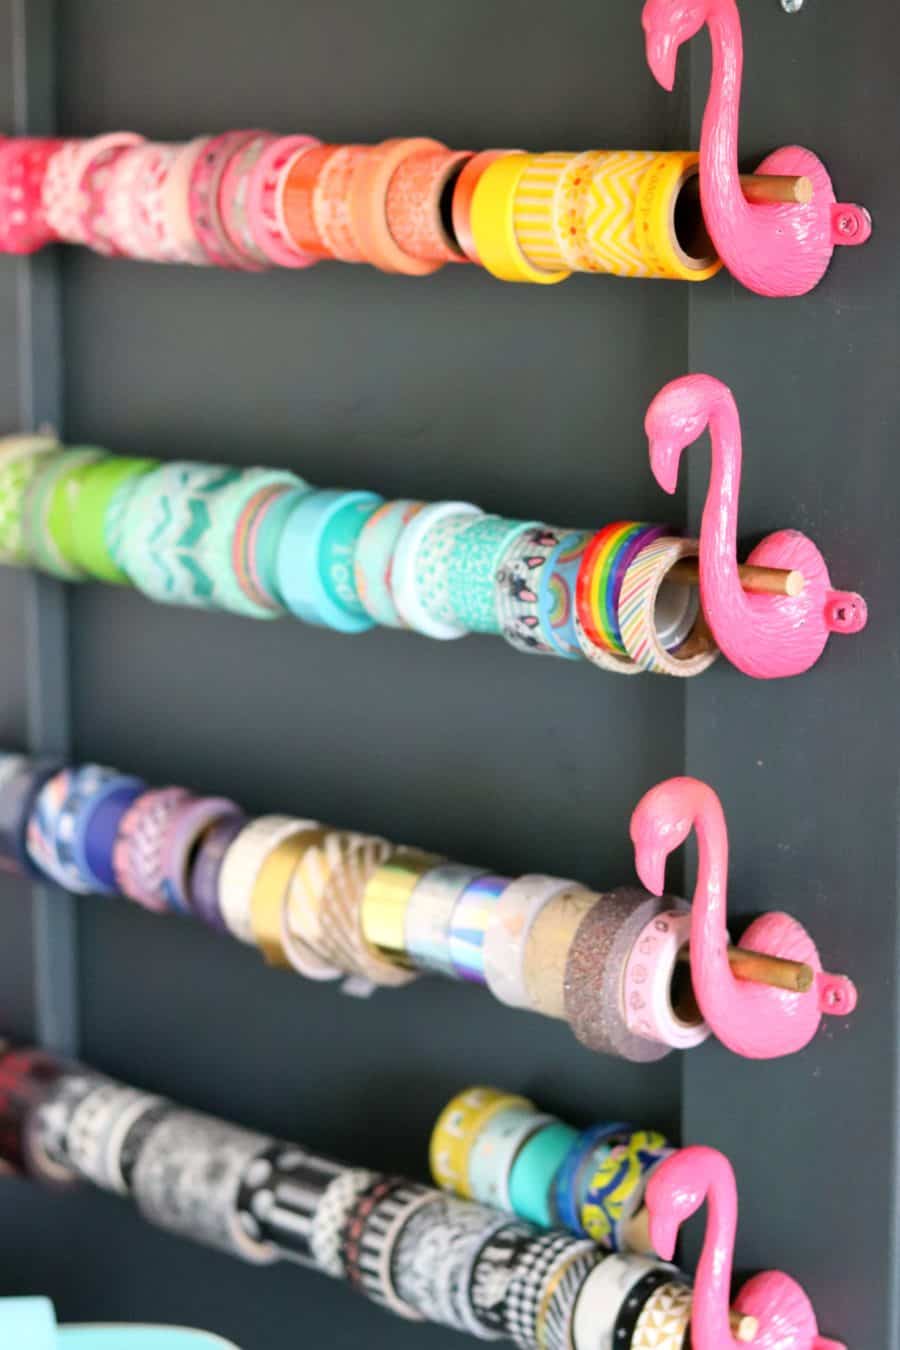
I LOVED my washi tape holder in my old craft room. So I created something similar but with flamingo hooks
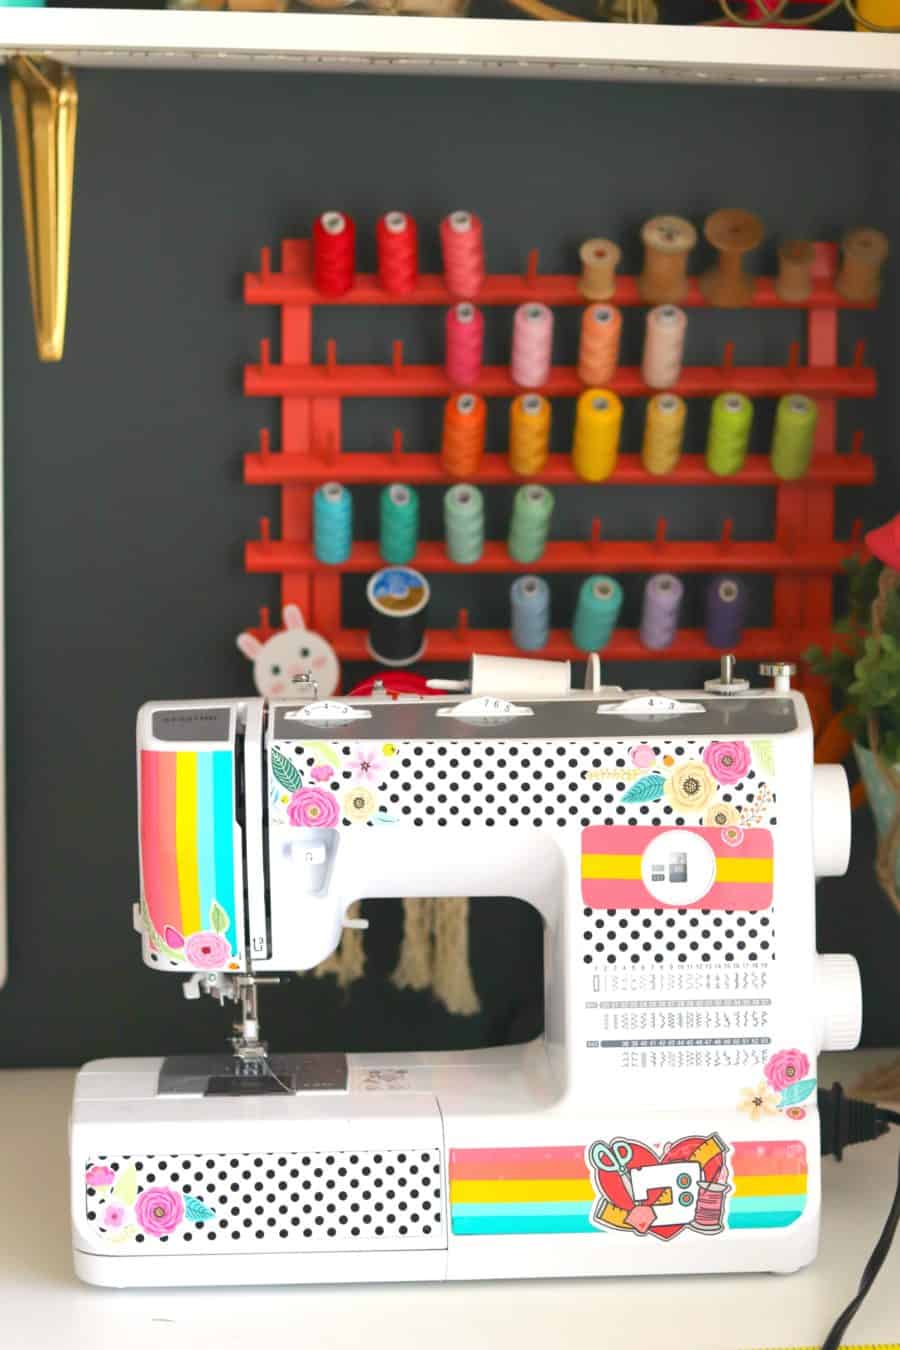
The opposite side is my sewing station and so on that wall are my thread and sewing scissors.
and in the middle a big fat glue gun logo.
![]()
Heat Transfer Vinyl station
To the right of the shelves Is my window…and sitting next to my window is my Heat transfer station.
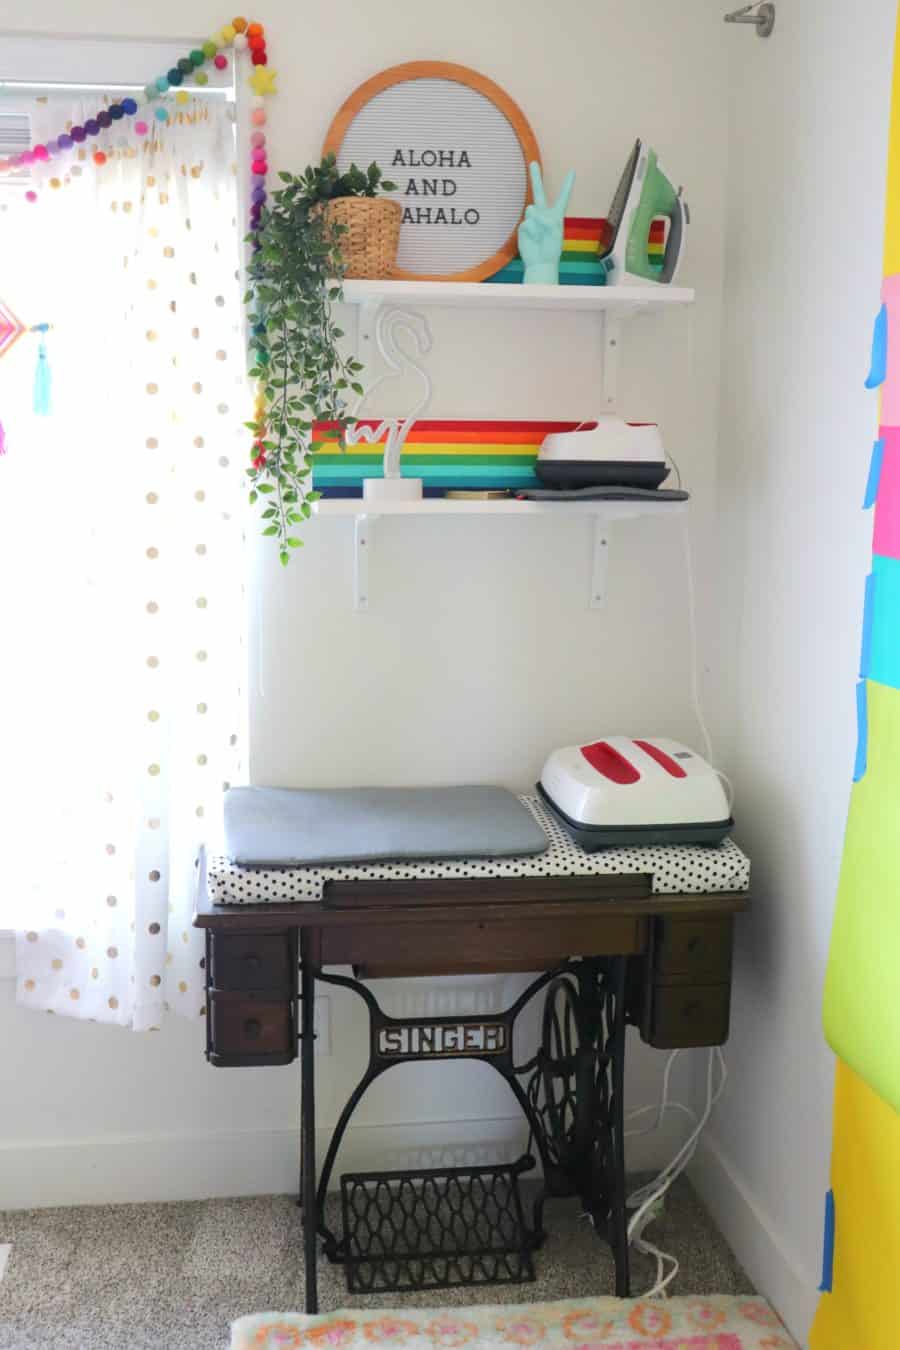
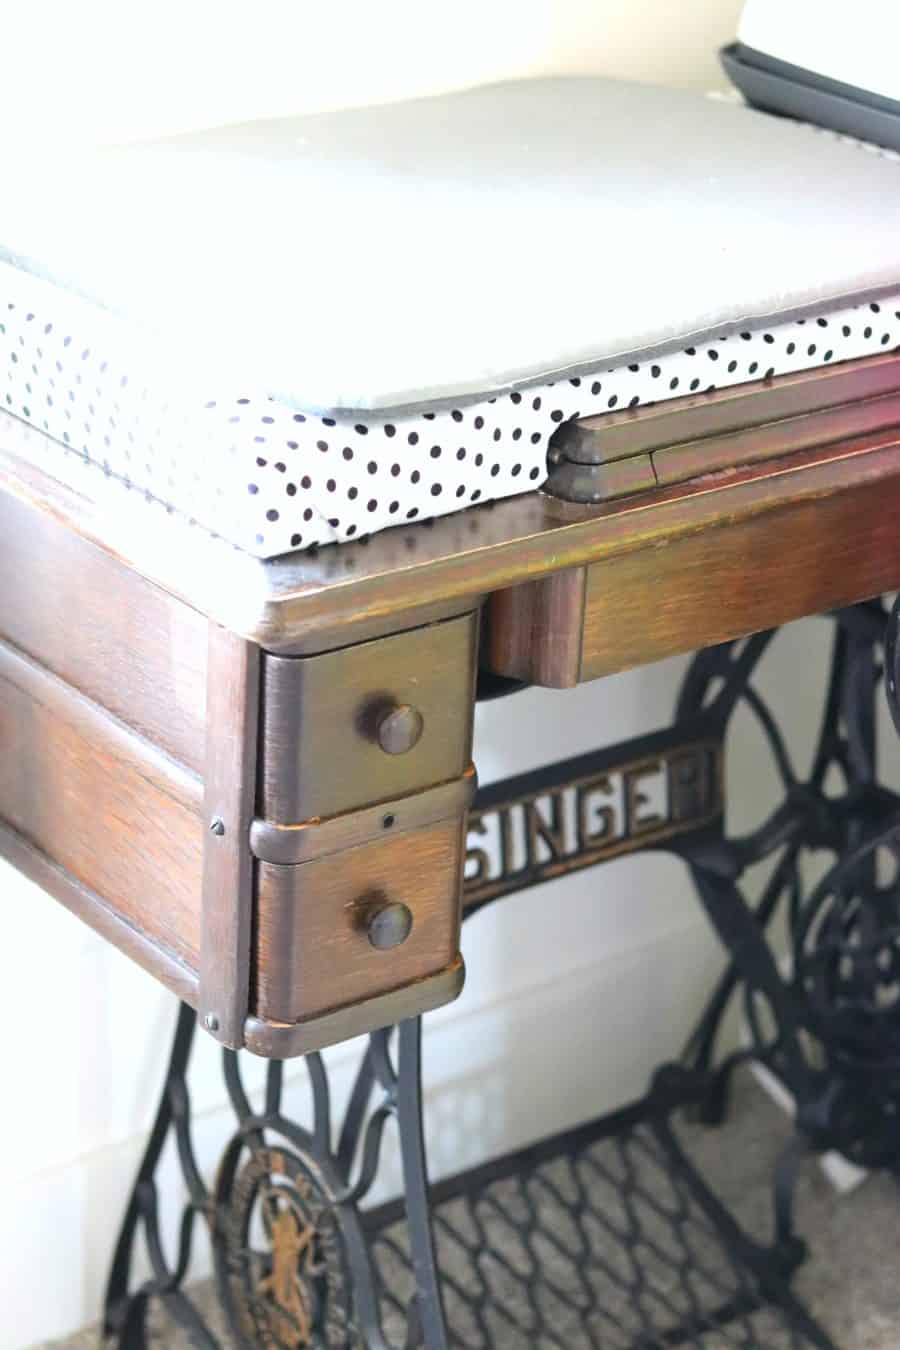
I hated having to put my ironing board up and down and up and down. So I took my grandma’s old singer sewing machine table and made a cover for it. It’s pretty and solo functional. I have my easy press and iron ready to go with a touch of a button! My shelves are just two pieces of wood to make an l shape and then painted rainbow!
( the cover I made out of wood. Just cut out to fit the top perfectly. Covered it with padding and fabric.
Photography Wall
Across the wall of shelves is my photo/staging station. My old craft room was cluttered and I never had a spot to take photos. I lost a lot in the fire- stuff I didn’t use so I didn’t feel the need to repurchase it. And that meant I had extra room for a designated spot to snap photos!
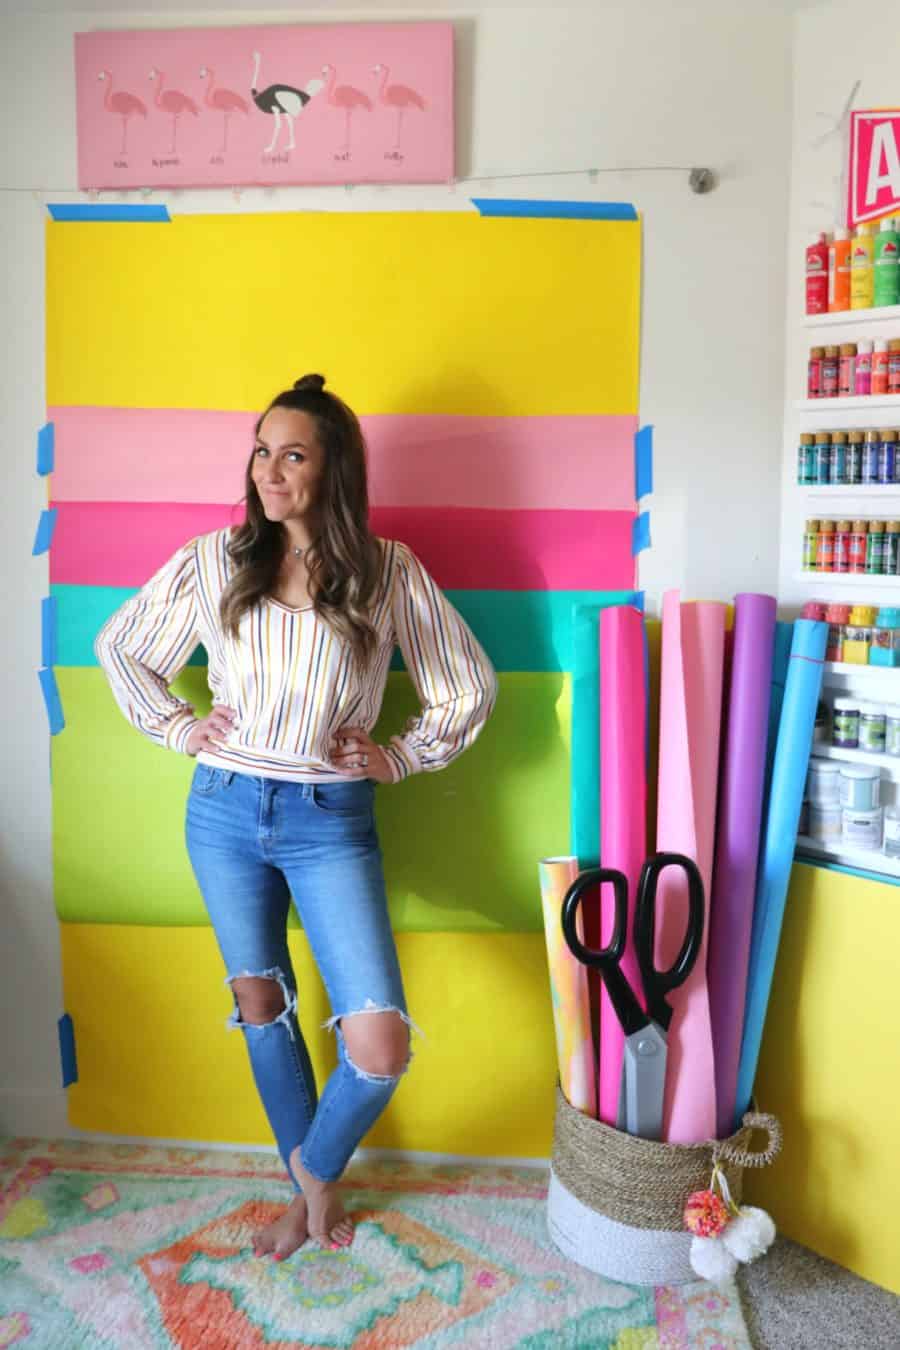
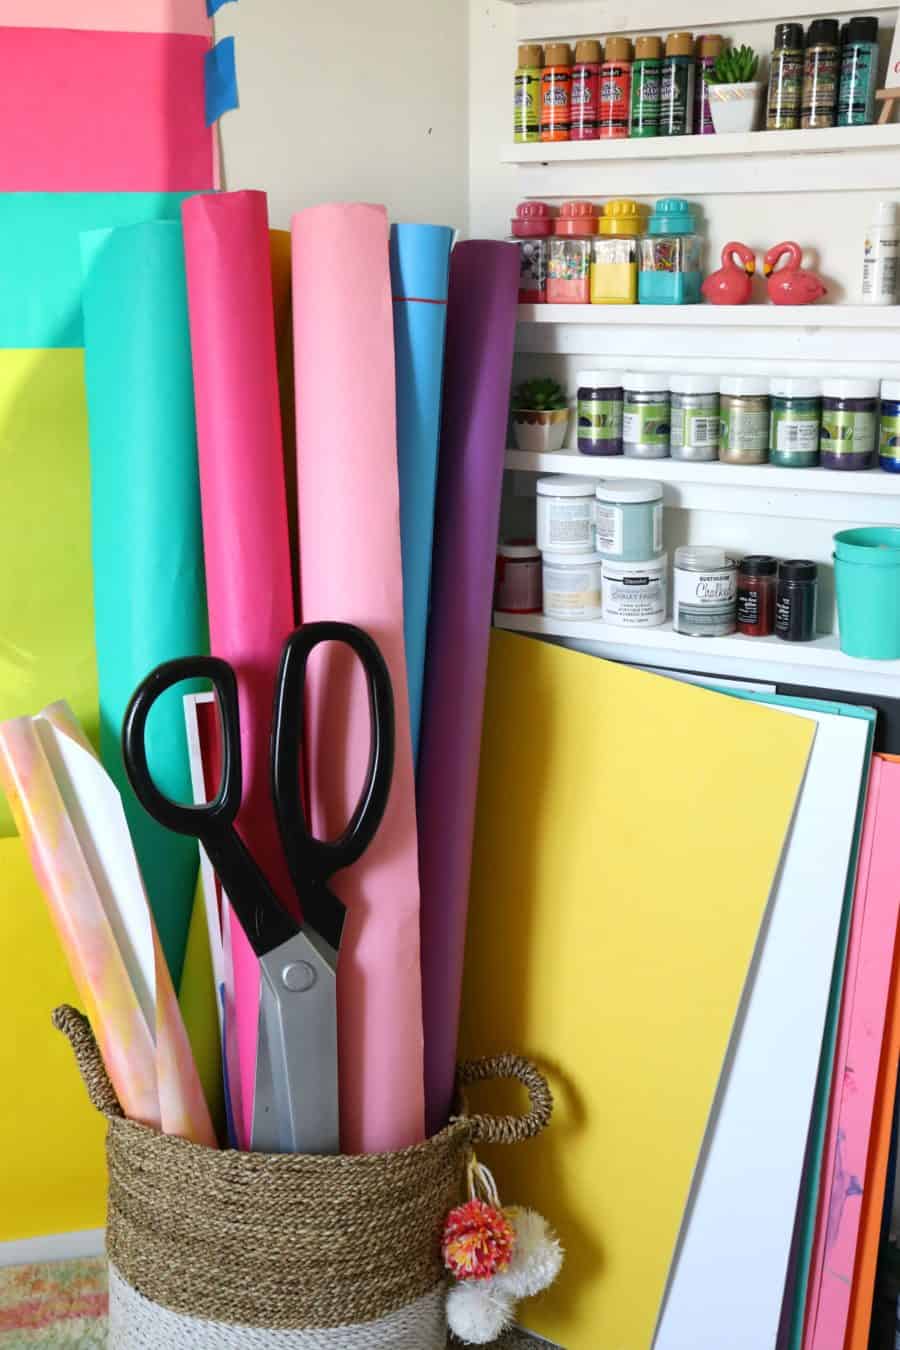
I bought an Ikea curtain wire hanger (here is one similar on Amazon ) and I had lots of rolls of paper (you can find these online at Walmart or in the hobby lobby in the teacher/bulletin board section) I only bought fun bright colors, but they have tons of options including brick and clouds. I just clip up whatever color I want and snap some photos. (they just sit in a basket) I am going to be painting this wall some kind of colorful pattern though so I will have a permanent backdrop!
Shaggy rug by photo station: sold out but this one is similar
Right next to my photo station is my wall of paint. I had it in my last craft room- it was just such a great use of wasted space so I had to recreate it!
Below all the shelving is poster boards for flat lays.
Craft Room Closet
Moving around the craft room, we have the door and an idea cart. This is my project station. I have lots of ideas and projects so I buy stuff for them when I think about it, and stick it in this cart. It’s a catchall (read: not pretty) but it’s so functional for me!
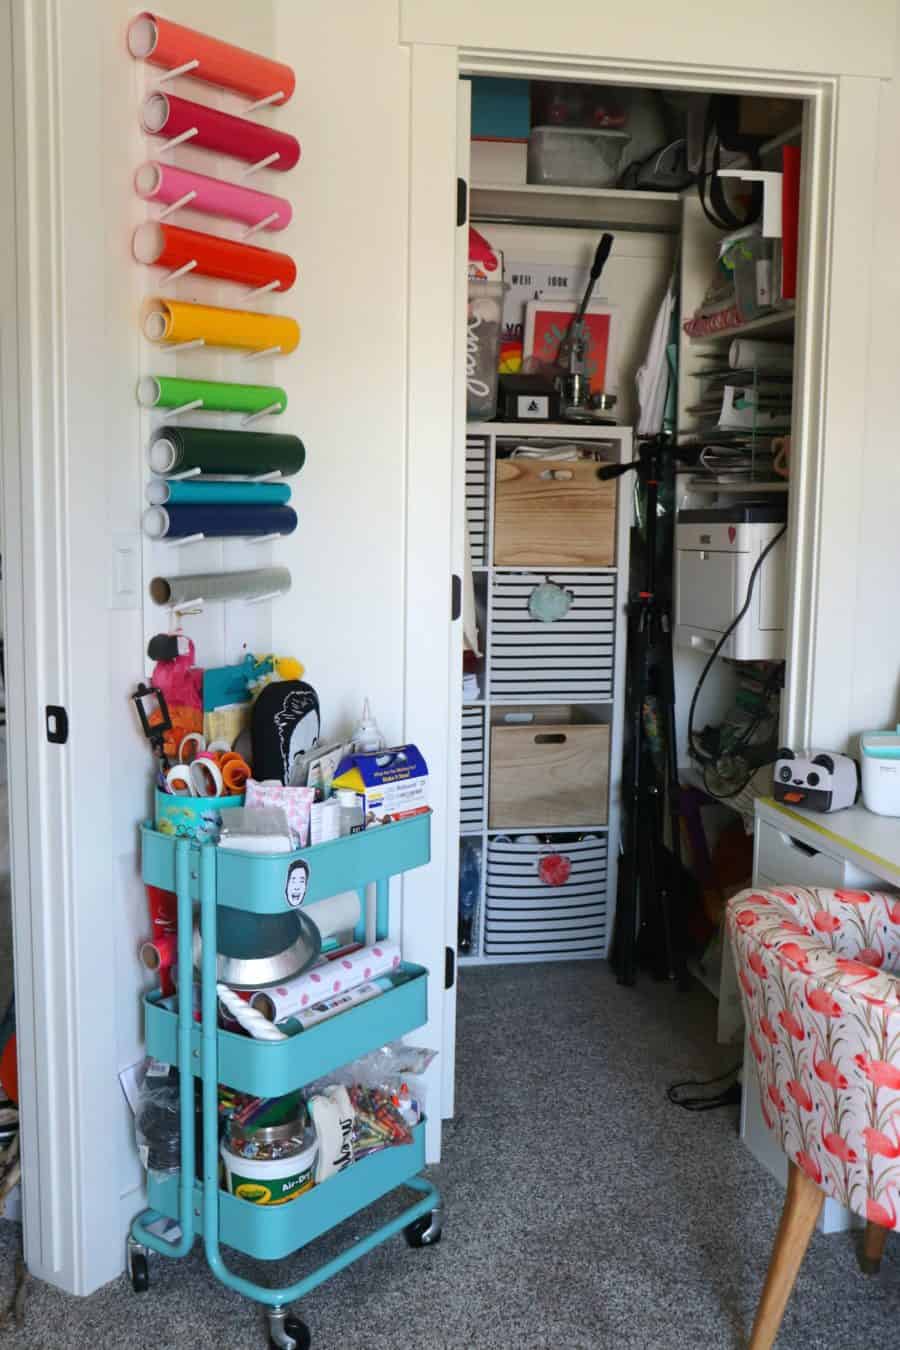
At the very bottom is the kid’s art stuff, tempera paint, air clay, crayons, beads, shrink paper, etc. It’s a place where they can help themselves!
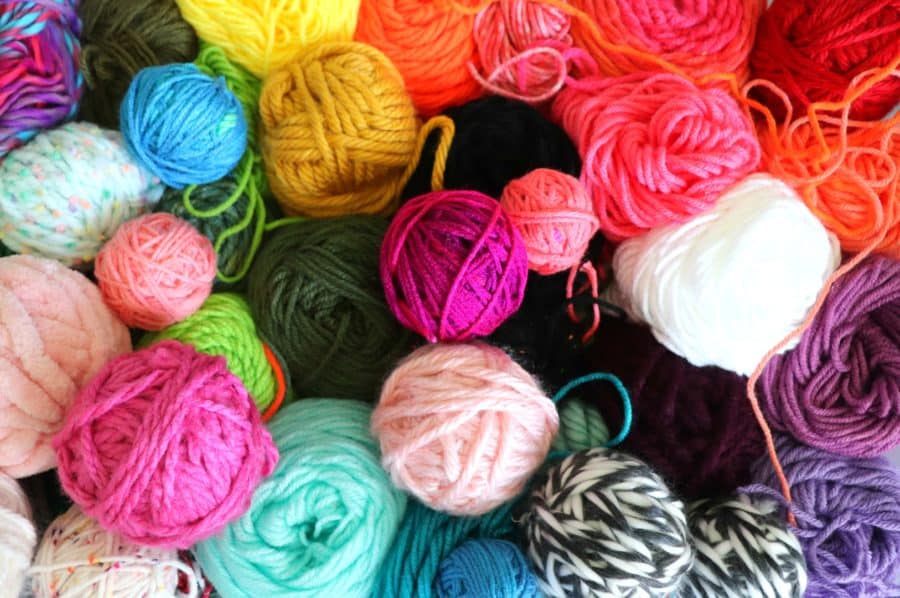
And then my Monica’s closet. That is the only photo I have it. it’s a mess. It holds vinyl blanks, blank shirts, mugs, signs, button makers, yarn, scrapbook paper, the biggest printer, fabric, ties dye stuff, stuffing, letterboard stuff, umbrella lights, camera stands, etc etc etc. It’s organized, but not pretty and rainbow colored like how I prefer it!
and then back to the wall of crap!
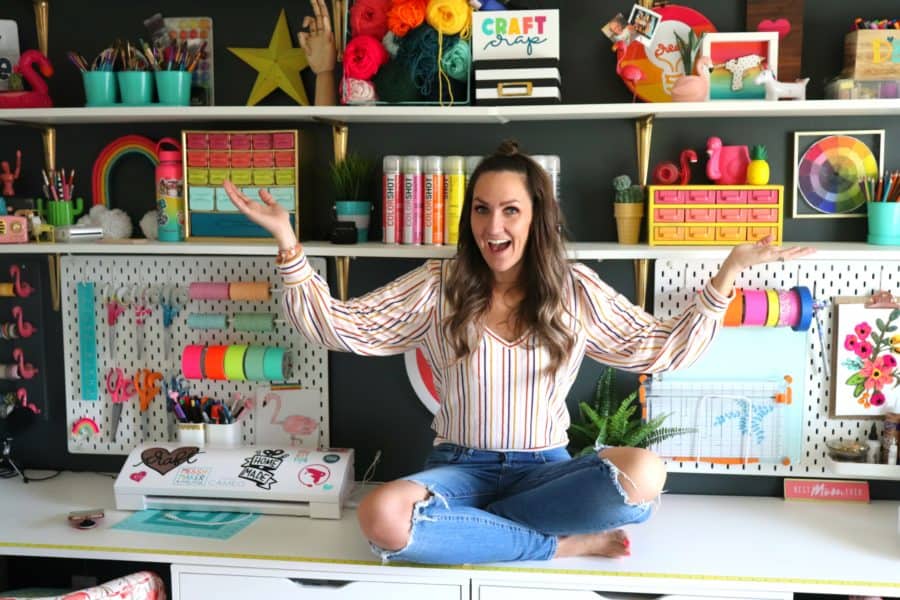
This is where I sit and work for the most part. My laptop and my cameo and the Ikea drawers are full of vinyl!
If I didn’t link up anything (like my weird pencil sharpener or my blue printer) – However, you can find lots of stuff here on amazon lists: influencer
and here is the link to the best Rainbow Rug
and my flamingo chair ( they swivel and fit underneath the desk so I can tuck them in and get them out of the way if needed!
If you like looking at craft rooms- make sure to check out my huge roundup of 50 craft rooms!
Gael says
I’m in love with your craft room and now that I have a room to do anything with, I’m going to use this as my inspiration. I knew I wanted counter/desk along one wall, but IKEA is overwhelming. Thank you for this tour!
Tori says
Can you tell us what the size of your room is? I loved your first craft room…but also love the new and improved craft room! I, too, love flamingoes and I “save” everything!! I think we’re sisters! LOL Thanks for the tour…..even if we didn’t get to see the “Monica room” hehe!