
Grav the SVG for this Love potion #9 cut file for Valentines Day and learn how to put adhesive vinyl on a curved surface.
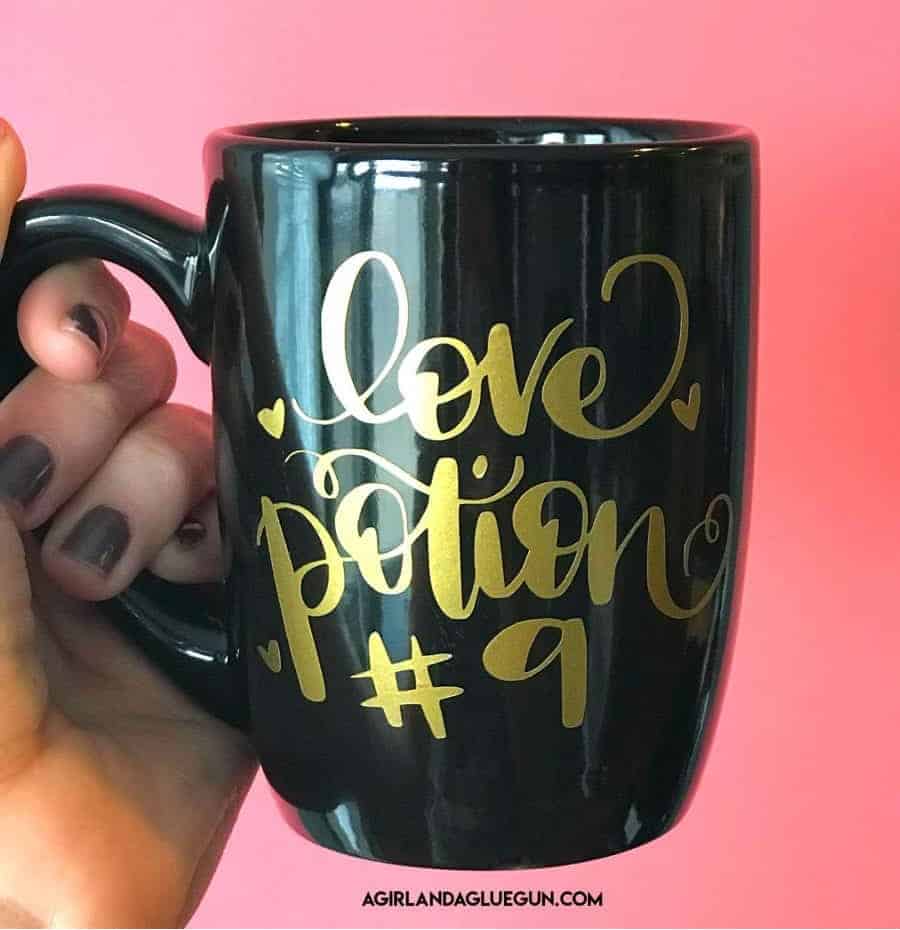
If you are looking to sell products made with this cut file please purchase a commercial license HERE! (This will let you use ANY of the free cut files I offer on my blog! If you are having a crafting day and want to use this to whip up a cute sign or tote bag-then totally free! Every cut file is hand lettered by me on my ipad pro with an ipad pencil. I actually have a WHOLE video on how I create my cut files HERE! Today I have a super cute Valentine’s Vinyl cut file! Love potion #9! 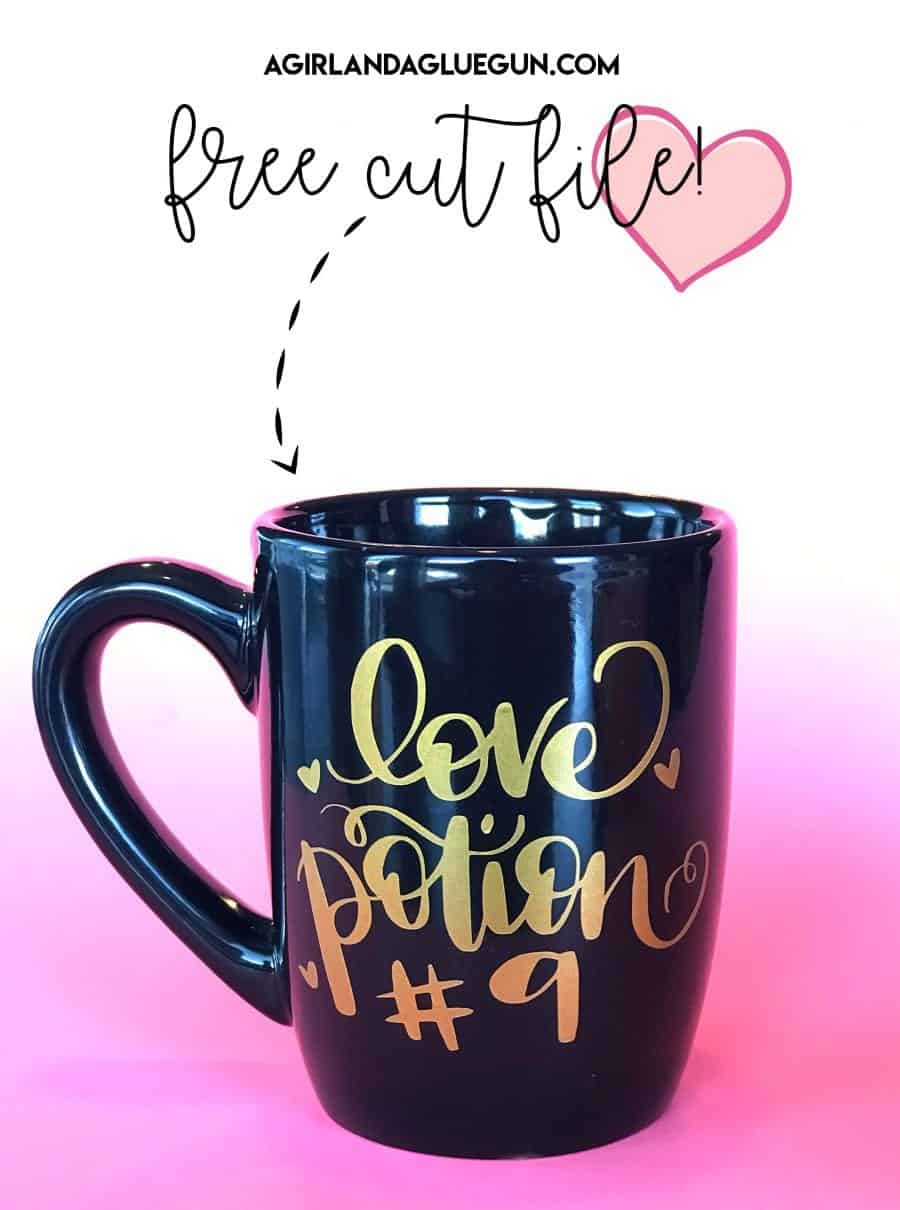
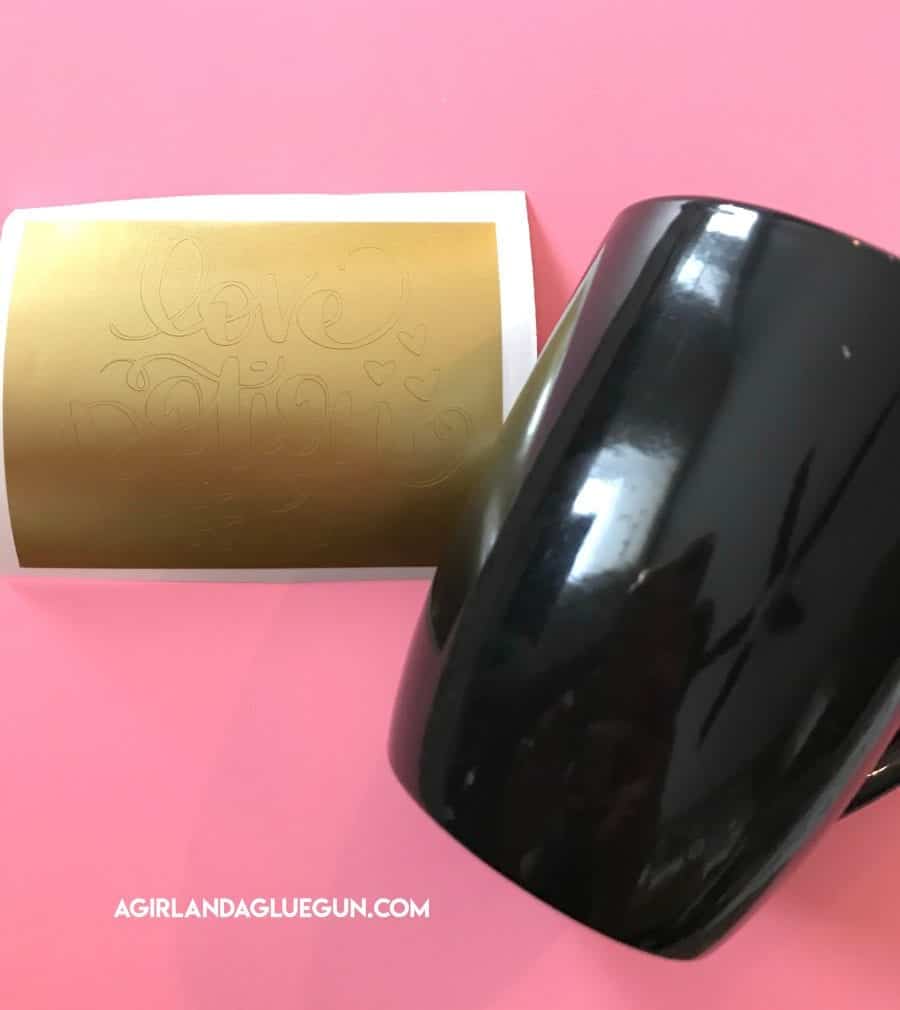
Supplies to make Love Potion #9 mug
- gold permanent adhesive vinyl from Expressions vinyl
- silhouette cameo or Cricut
- Transfer Tape
- Black mug (Dollar Store)
- Cut file (access down below!)
How to apply vinyl to a mug
Weed the vinyl
After you cut out the design on your electronic cutter, it’s time to weed away the excess vinyl! (pull away any extra vinyl that isn’t part of the design!)
Lay over a piece of transfer tape to move your design over to the mug! 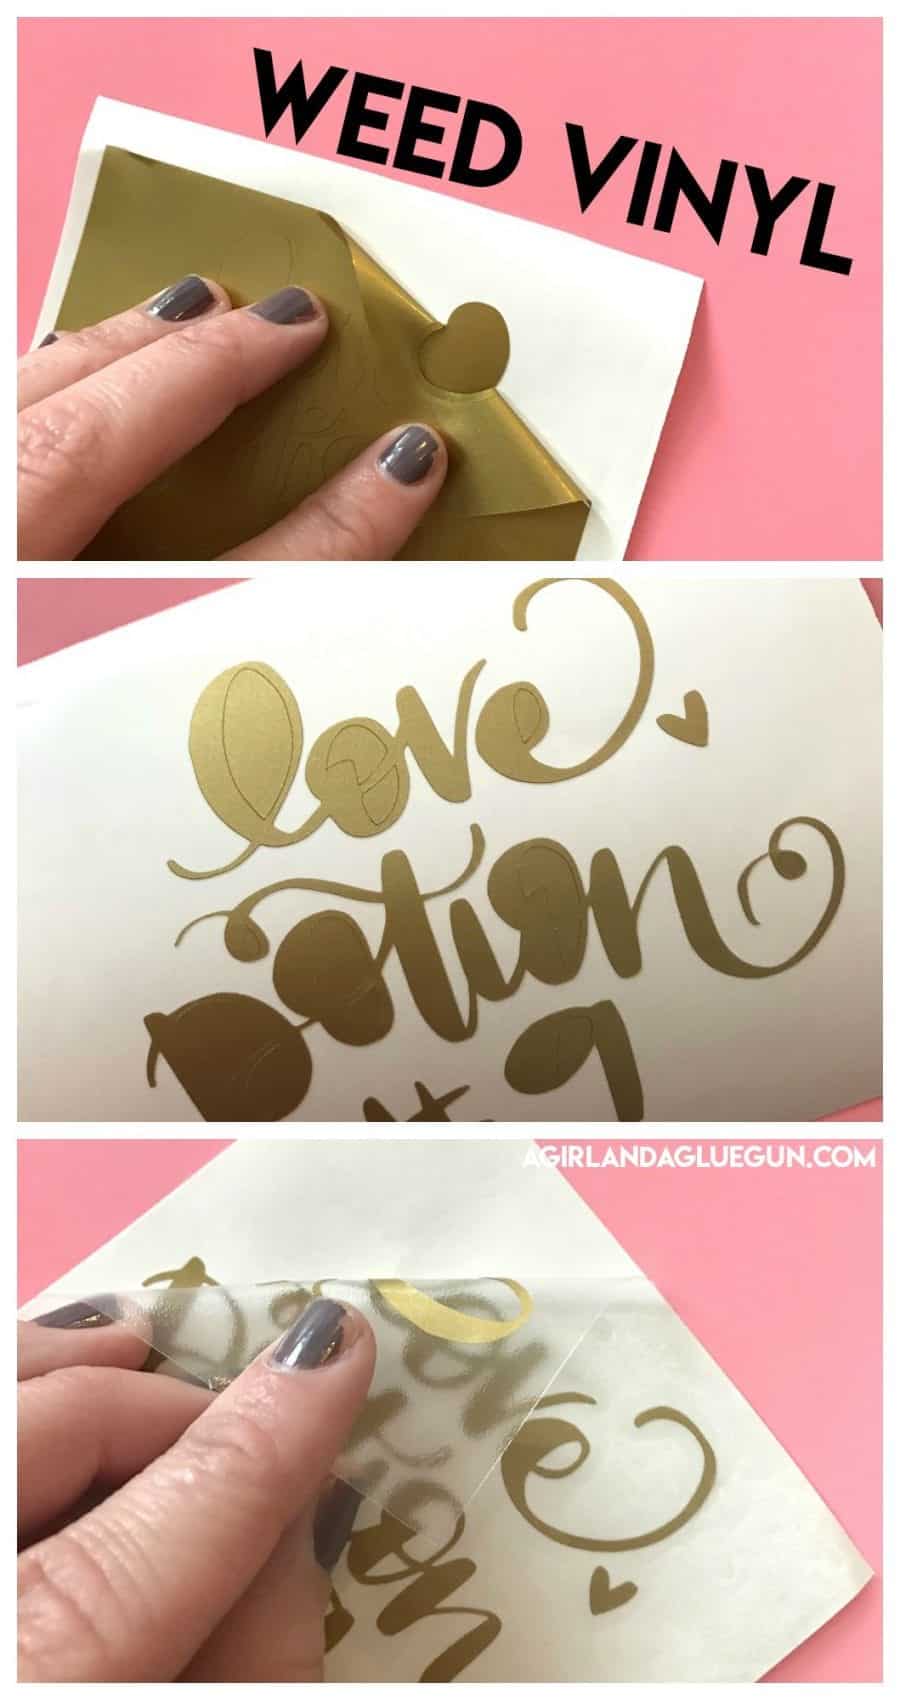
How to apply vinyl to a curved surface
This is the tricky part! Sometimes it can be hard to put vinyl on a mug since it’s a curved surface. I’m going to walk you through it because it’s really not too hard! This is a great way to add vinyl on ornaments too! 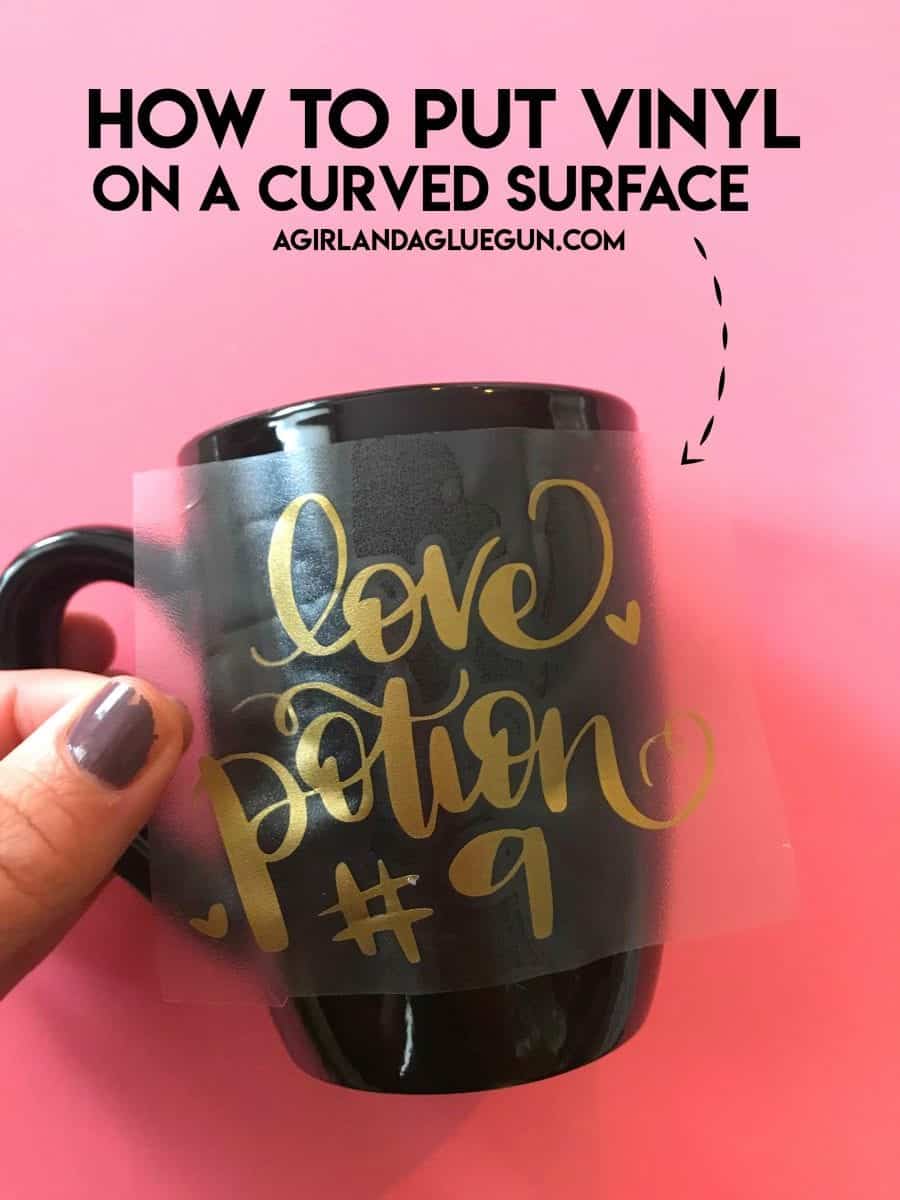 There are two different methods
Adhesive vinyl on a slightly curved surface
This is for a slightly curved surface – Start by putting the vinyl right above the mug and press down in the center. Try not to let the sides touch. You can leave the backing of the vinyl on the sides if you need it! 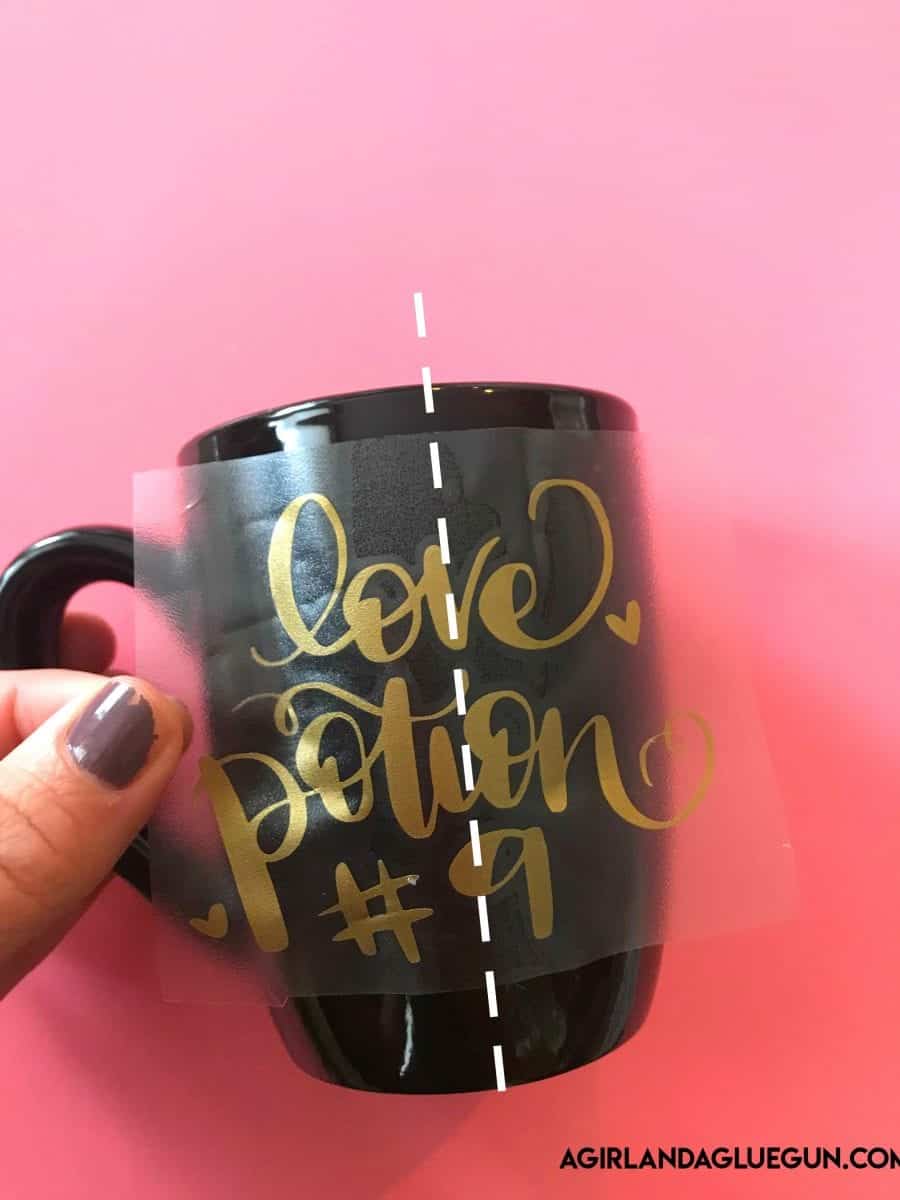 After you press down the center, you are slowly going to smooth out. Starting in the middle and just rubbing your way outward. Do one side at a time. Press it down while pulling the transfer tape tight.
 Don’t rush it! Just smooth as you go. Then work the other side.
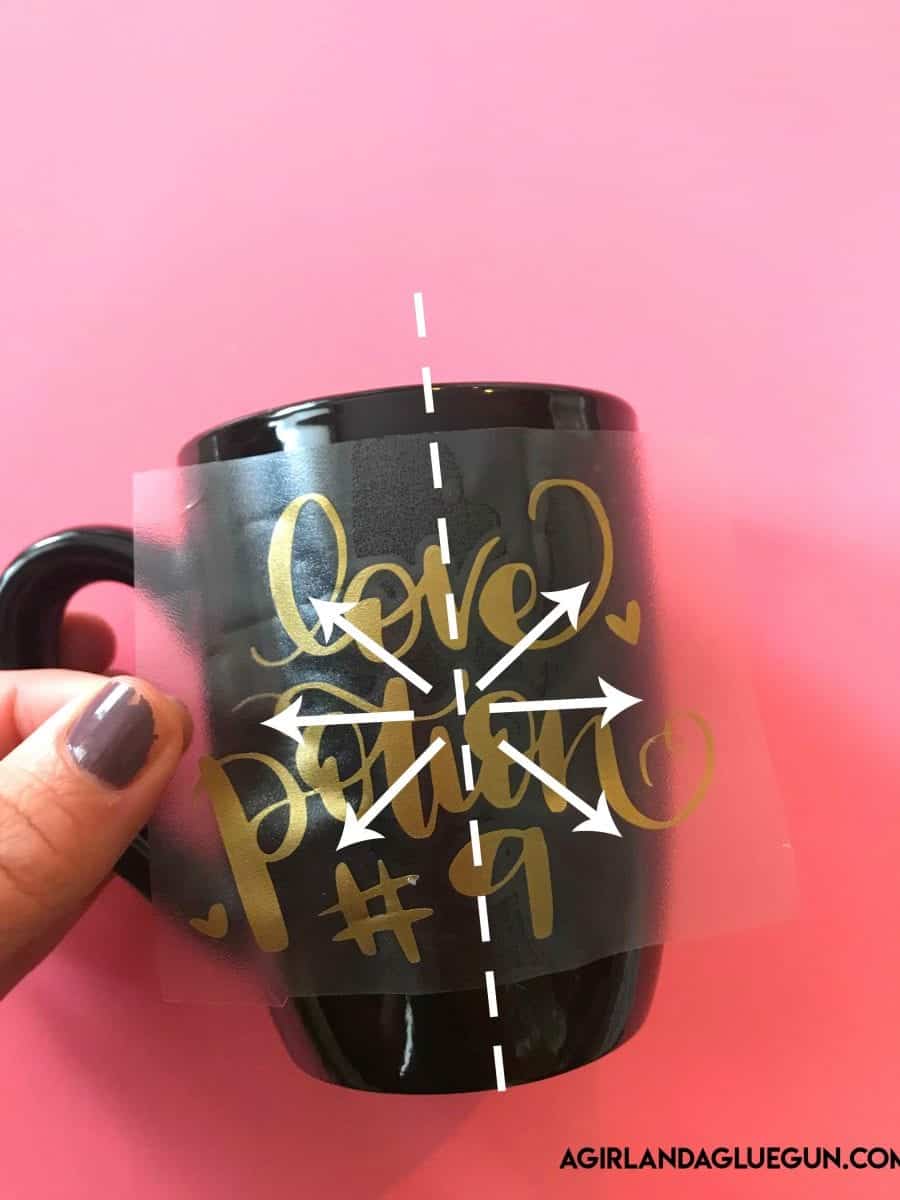 You can see that the transfer tape is getting wrinkled in certain spots! Totally fine! Just make sure the vinyl isn’t getting wrinkled!
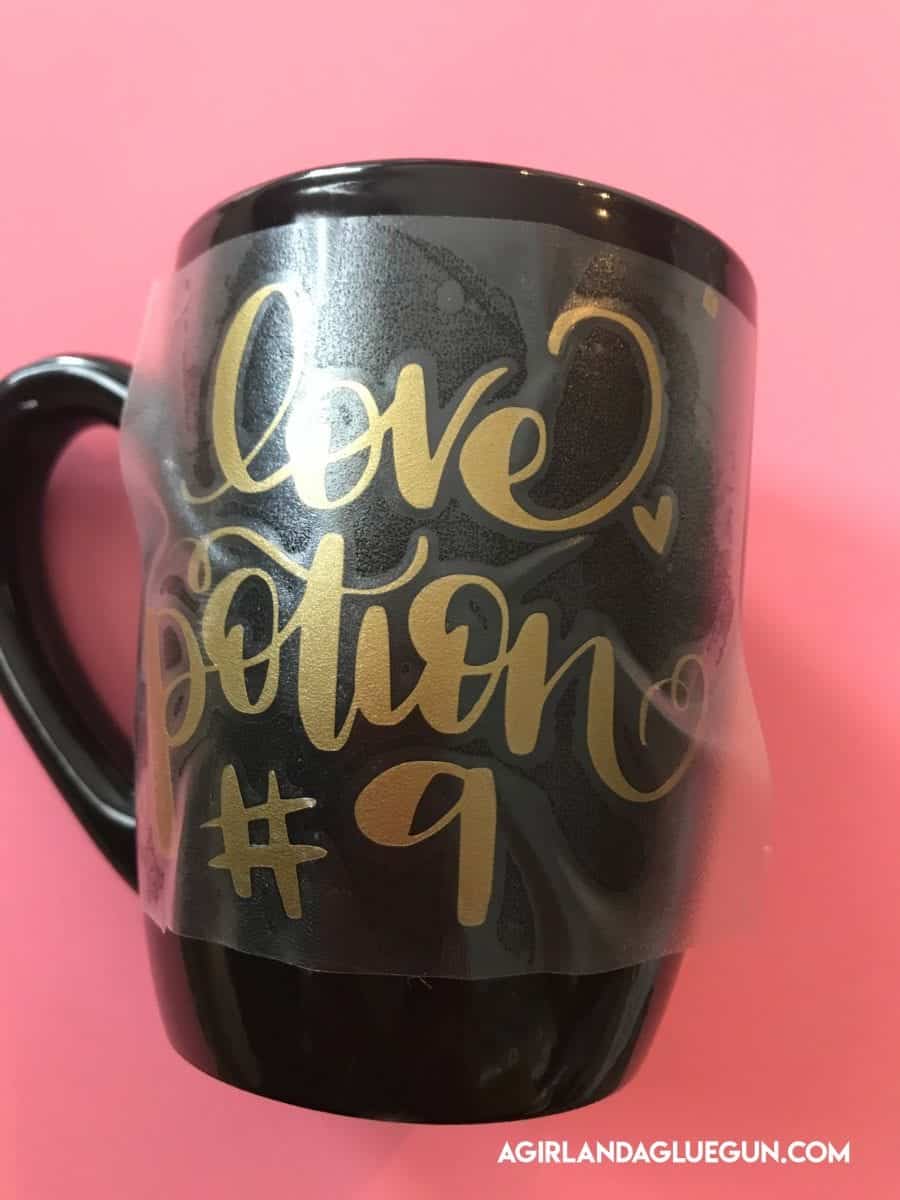
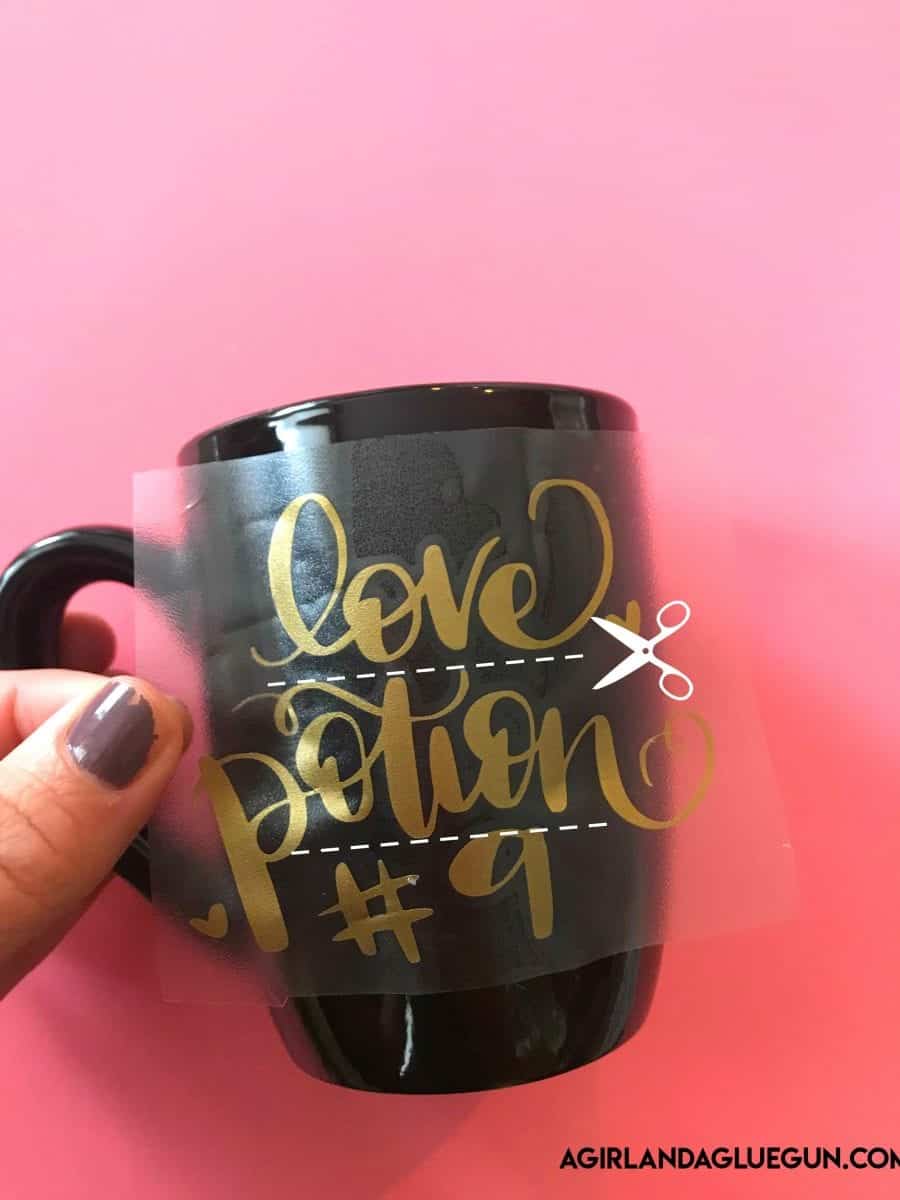
Adhesive vinyl on a really curved surface
The other method that I recommend is for a really curved surface. Before you start, you will want to snip the vinyl apart! You can leave the center intact and just snip around the vinyl so you do each section piece by piece. Or if you have something like my love potion you can just snip off each line of words and rub it down one by one!
 Then you get to enjoy a freaking awesome new vinyl project!
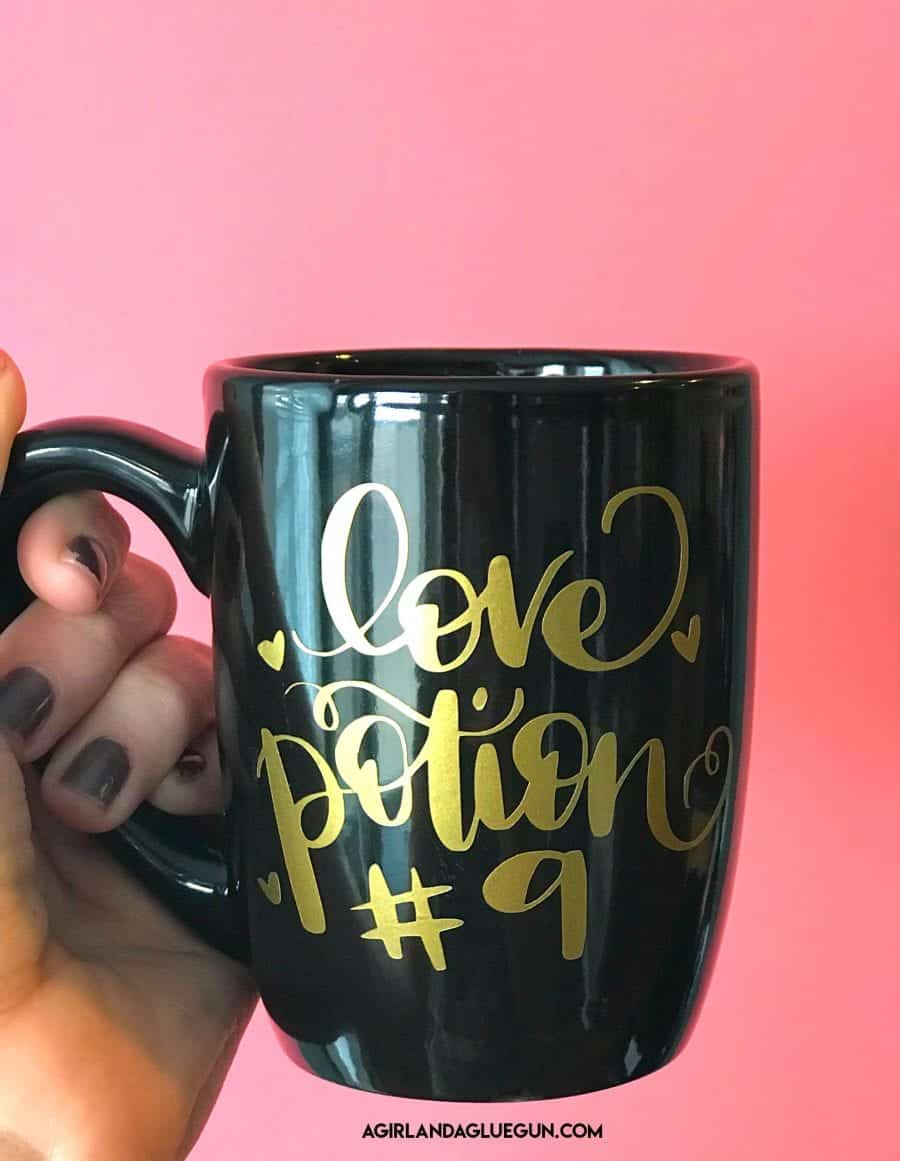
Grab the Love potion #9 cut file for Valentine’s Day!

Sign up below to access this cut file, as well as all my entire free cut files offered on my website! It’s well over 125 SVG cut files! If you are already a member, log in here!
If you do not see the form above, you can sign up here!
Vinyl Troubleshooting and tips and tricks
I have using adhesive vinyl and heat transfer vinyl for years! I’ve written up so many posts as I have come across problems! Here are some of the most asked questions that have come up!
- How to layer adhesive vinyl
- Why is my heat transfer vinyl peeling up?
- How to remove heat transfer vinyl (if you spell something wrong or put it on crooked)
- How to use transfer tape with adhesive vinyl
- Using an iron with heat transfer vinyl
- Washing instructions for Iron-on vinyl projects
- How to cut vinyl decals bigger than your machine
- Best way to weed vinyl
- Is the Cricut Easypress worth it
Hope this list helps!
I also have lots of HUGE BUNDLES for a great price in my shop!
The most popular cut file in my shop? The create for your cutter lid!
And Check out all my free cut files! and if you make anything–I would LOVE LOVE LOVE To see it!
Leave a Reply