
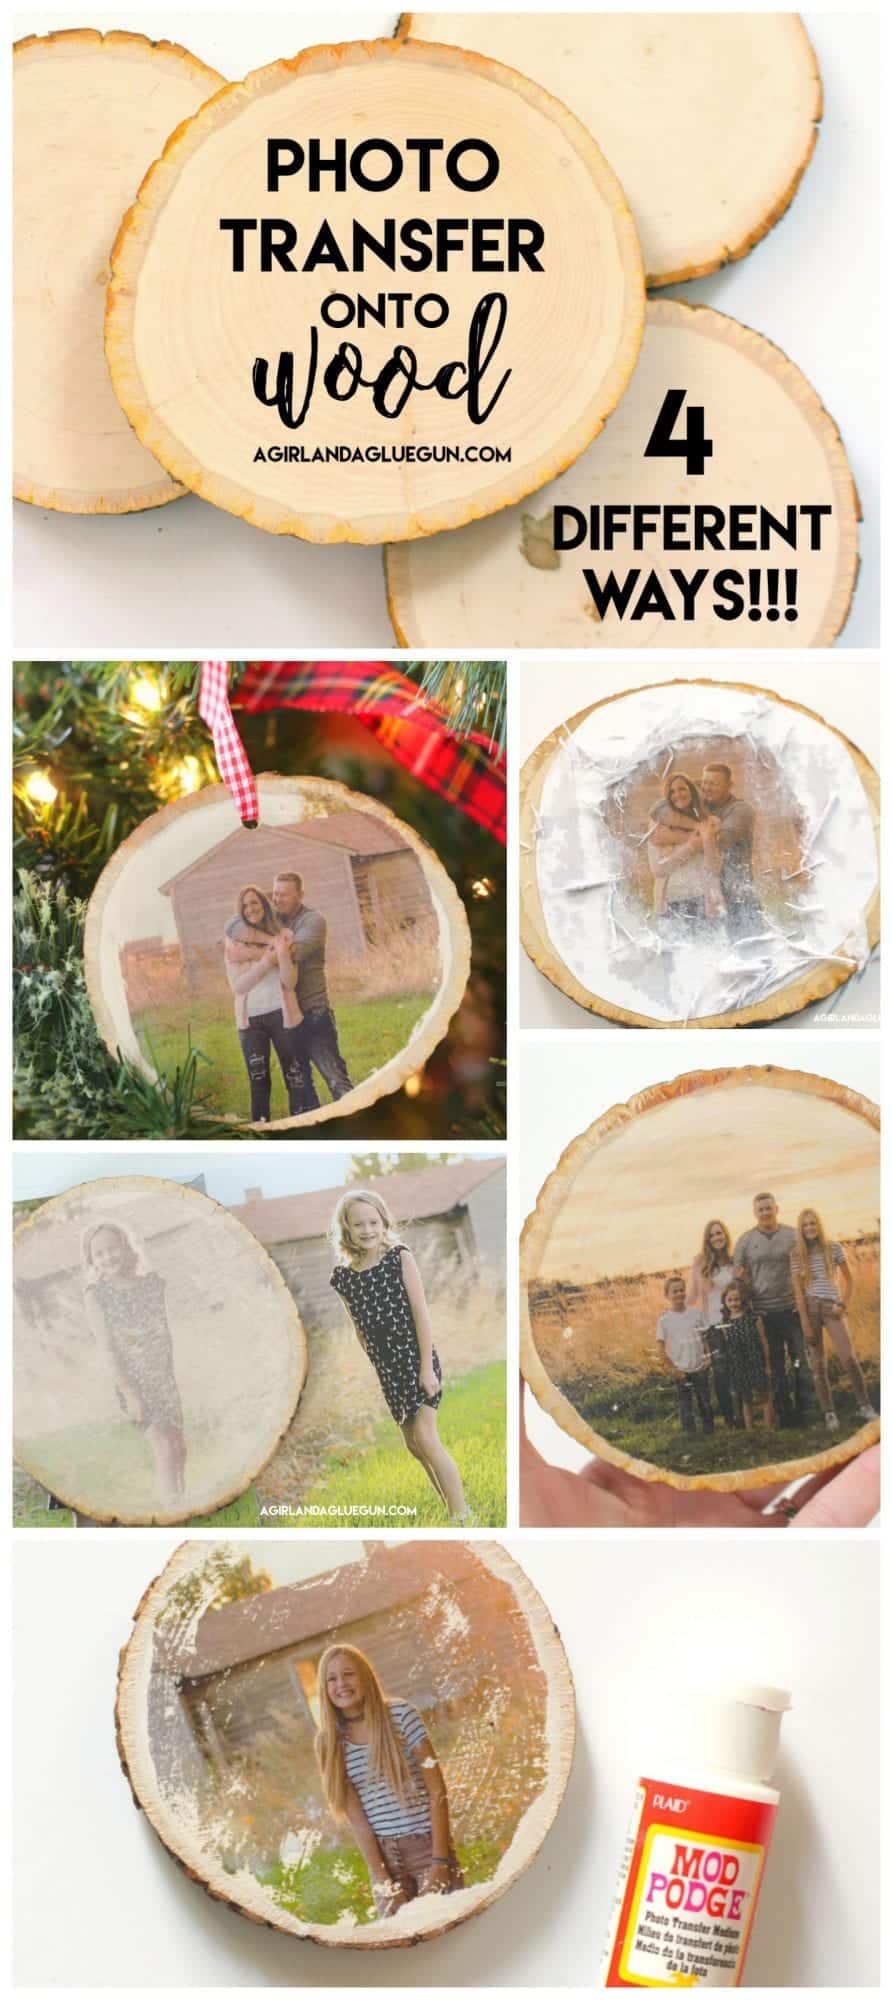
I’ve been doing some facebook lives (see them here) and someone requested photo transfer to wood.
and I’ve never done that. but I’m always up for a fun new craft! I hopped on pinterest and found….a bazillion different ways. So I weeded through them all and came up with the 4 basic ways to achieve the photo wood look! Lots to choose from! you can pick what works for you!
(This post may contain affiliate links)
Each technique requires a couple supplies…but for all You will need wood slices! You can grab all different sizes! I love the ones that are pretty on both sides so I can do double duty (two for one!) (But you can use this basic technique to add wood to anything! Even these wood frames!
I condensed down my facebook live if you want to see in action. If not…it’s all written down below for you!
First things first…
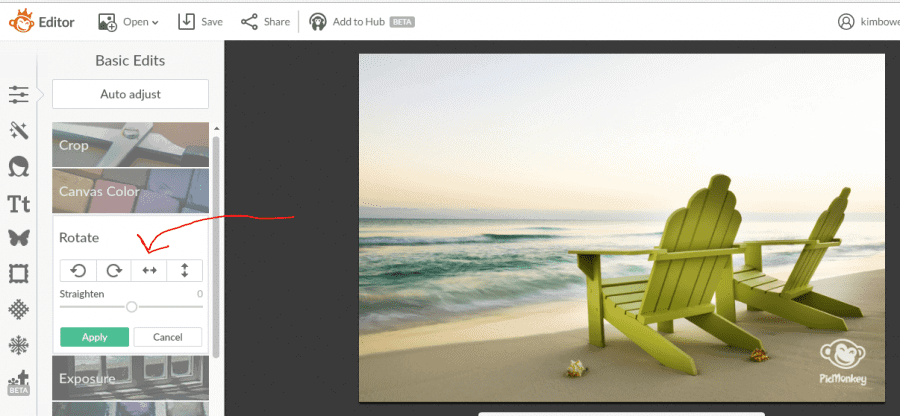
Each photo you transfer will be backwards from the original. It’s not that big of deal unless you are doing something with a landmark–or even your house. You could notice if your garage was on the opposite side. Or if you have words on a t-shirt or anything like that. (The right is the original…the left is the transfer) 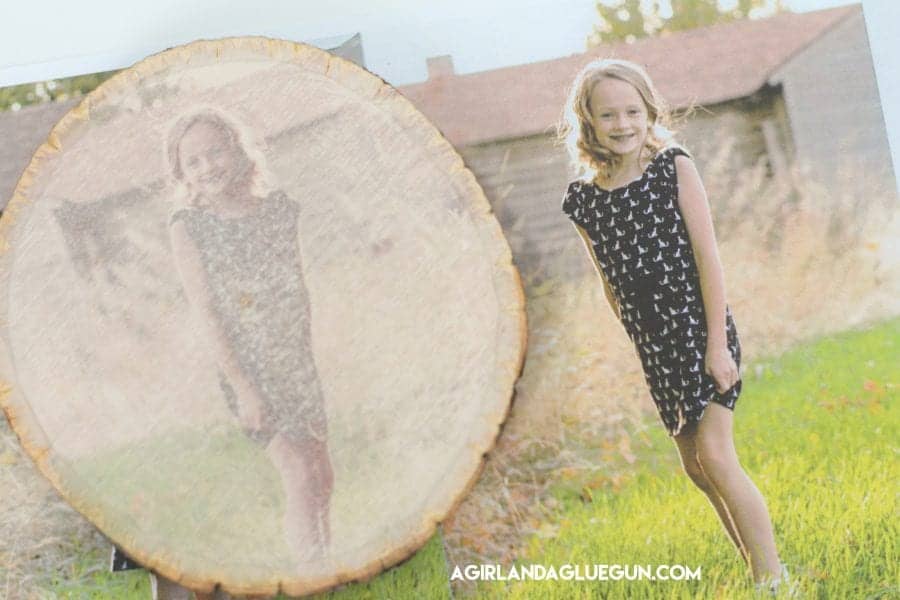
It’s an easy fix to mirror image the photo. Head to picmonkey and upload the photo you want to flip. Click rotate on the left and click the errors and it will flip for you. Then you save! Easy peasy!
Now let’s get on to the fun!
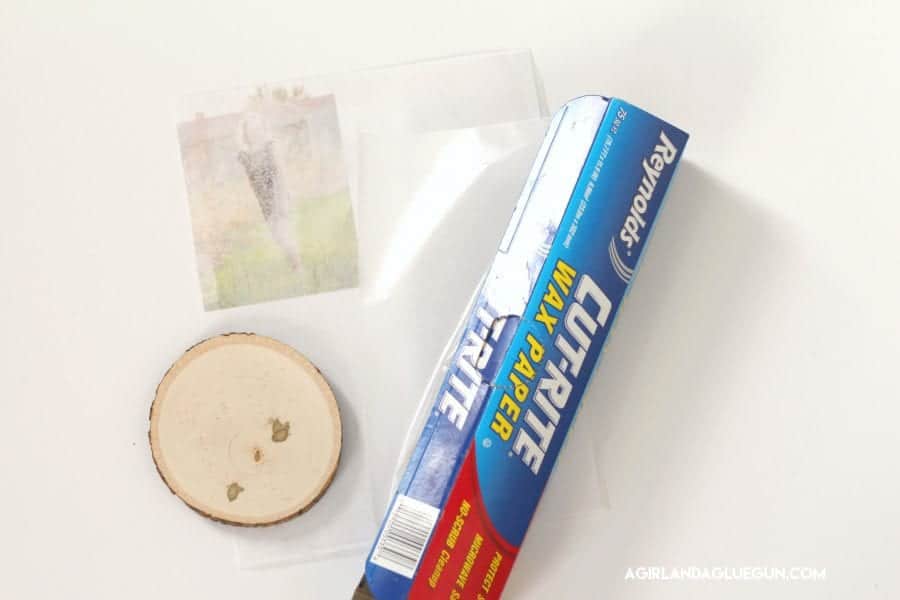
#1 Wax paper transfer.
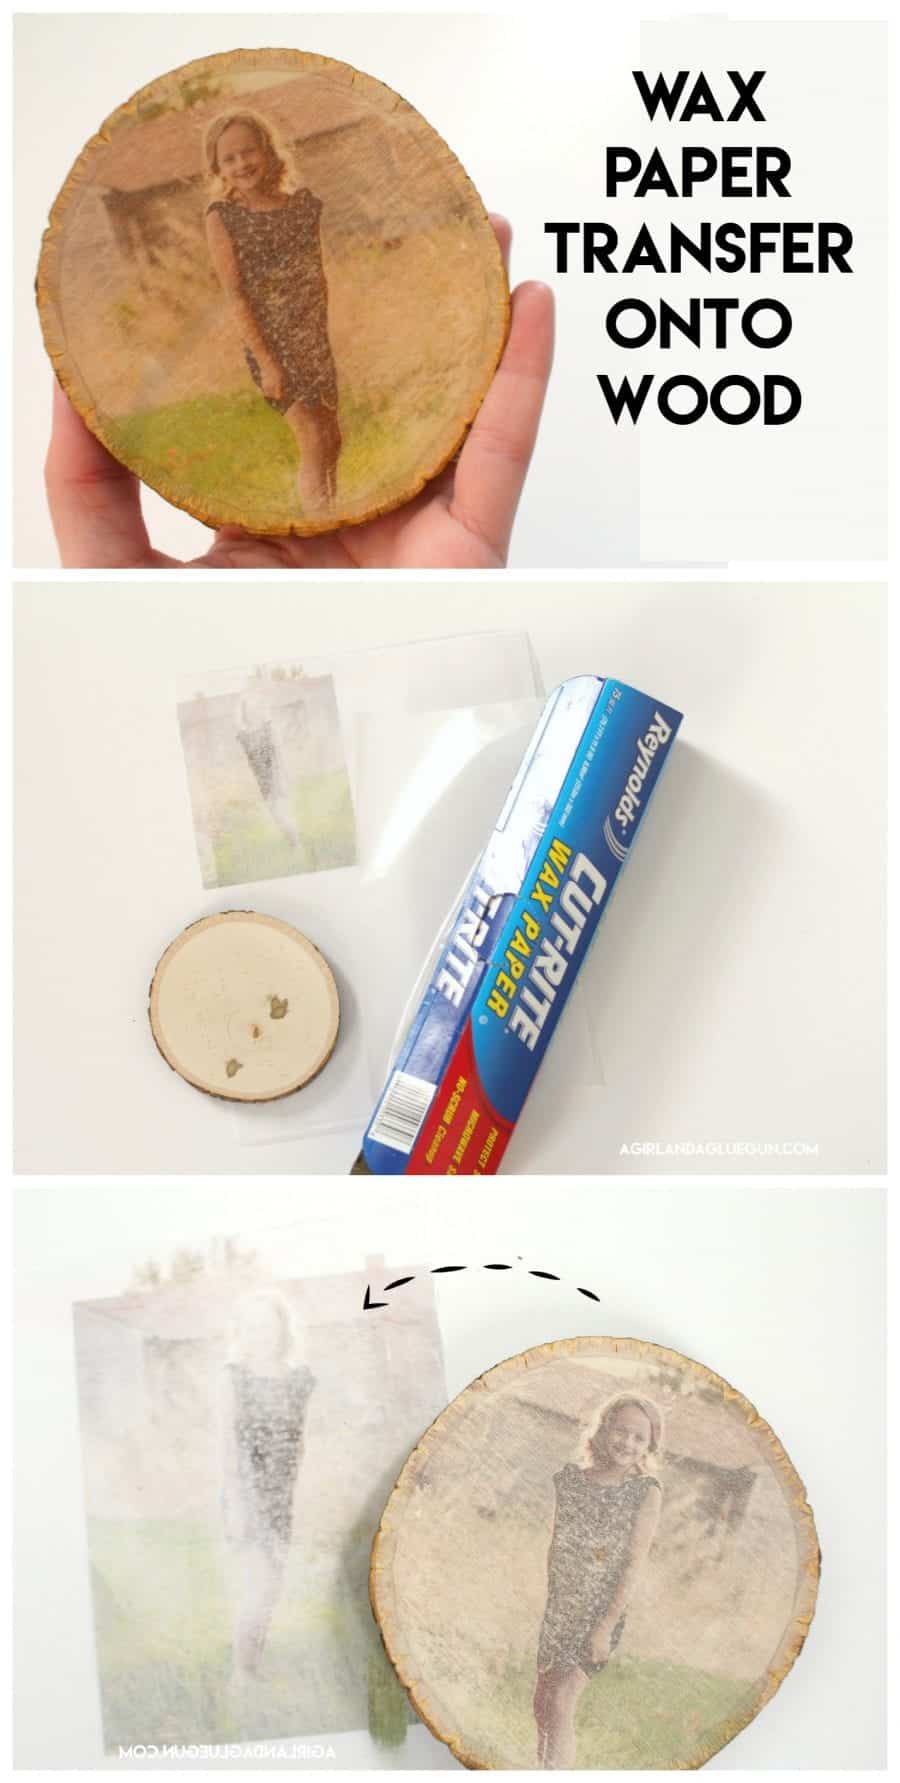
This is by far the easiest technique. It’s also the most distressed looking (not as crisp as the other techniques.) It also requires stuff that you probably already have on hand! WIN! 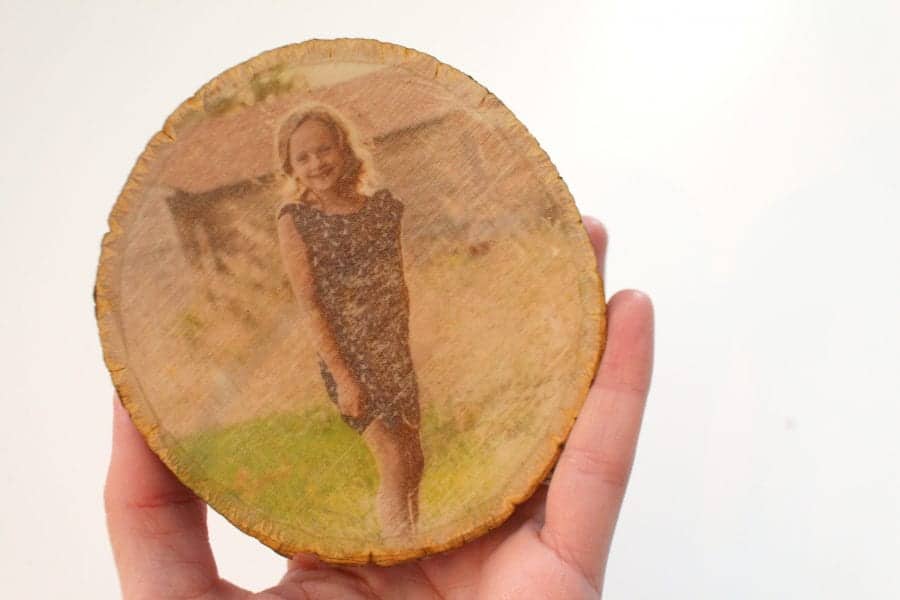
This requires Wax paper. I cut a piece to size and glued it to a piece of paper (so it could run through my printer easily) and just picked a picture and printed it off normally. The wax paper make sit so the ink just sits on top of it and doesn’t absorb in. (I ran this through my INKJET printer!)
 It’s very easy to smear. I was worried that it would dry over time…but this is a few hours afterward and still smudgeable.
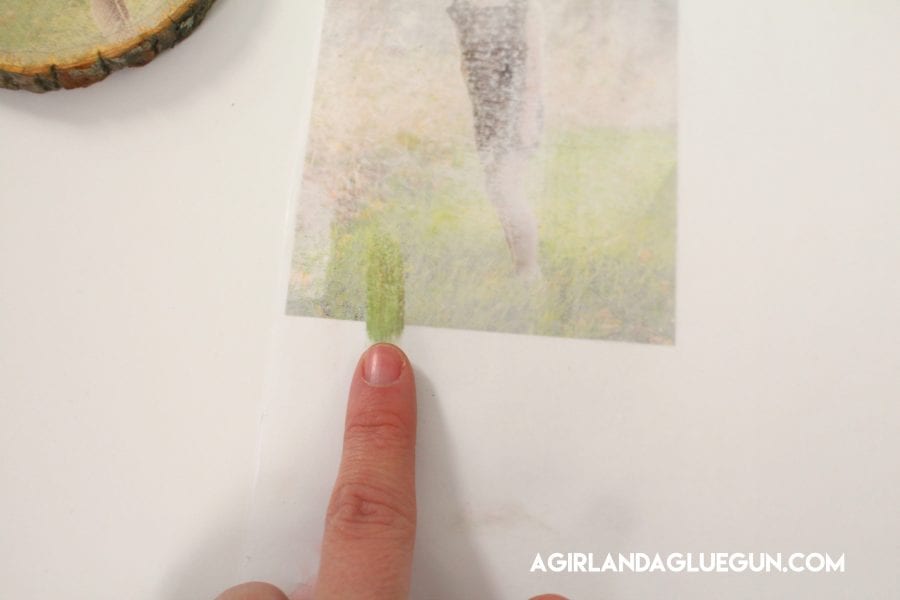
You basically flip over the wax paper onto wood slice (be carefully not to move the paper once on the wood slice or it will smear the picture onto wood) and rub it pretty well.  Peel off and you have the image left behind!
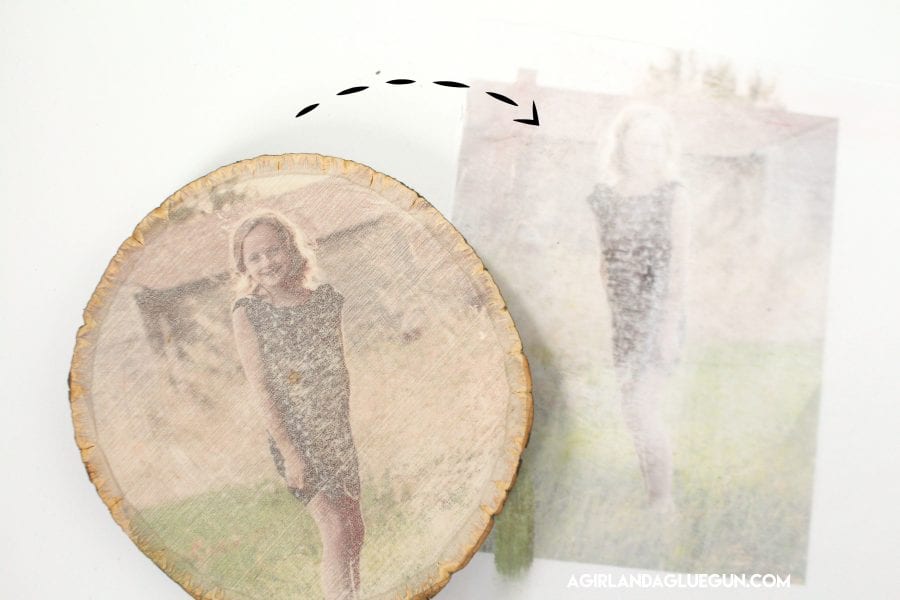
1…B. Sticker paper
A lot of tutorials used Avery sticker paper. (just the backing) it has a silky texture like the wax paper. I had the backing of a piece of vinyl from Expressions vinyl and used that…and it worked the same. So anything that is glossy that the ink can’t absorb into!
The outcome of the photo transfer to wood looks almost identical to the wax paper so I would use whatever you have on hand!
#2: Mod podge technique!
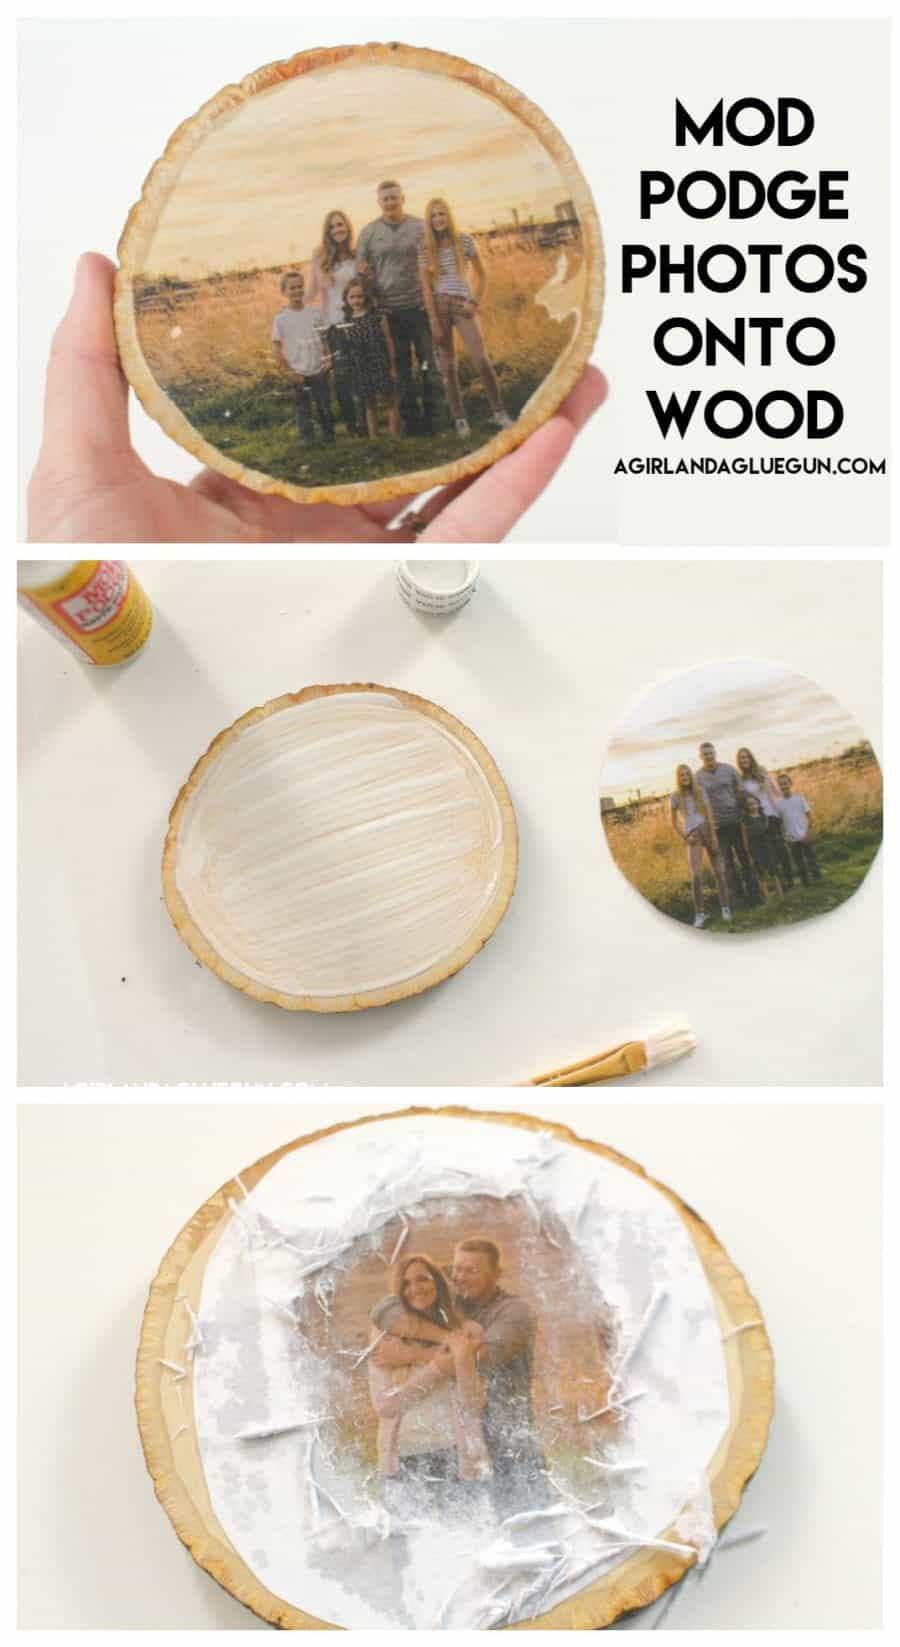
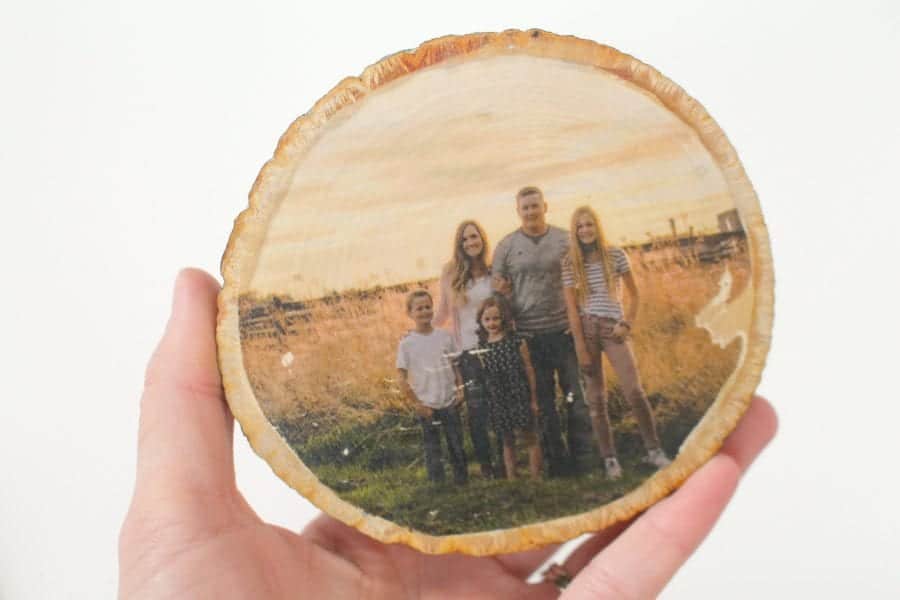
This one requires the longest time. Not really ideal for a craft night. And the photos come out a little darker than the actual photo. But a better quality..and look at the grain coming out! I liked this photo transfer to wood the best!
The photos for this are printed with a laser printer!
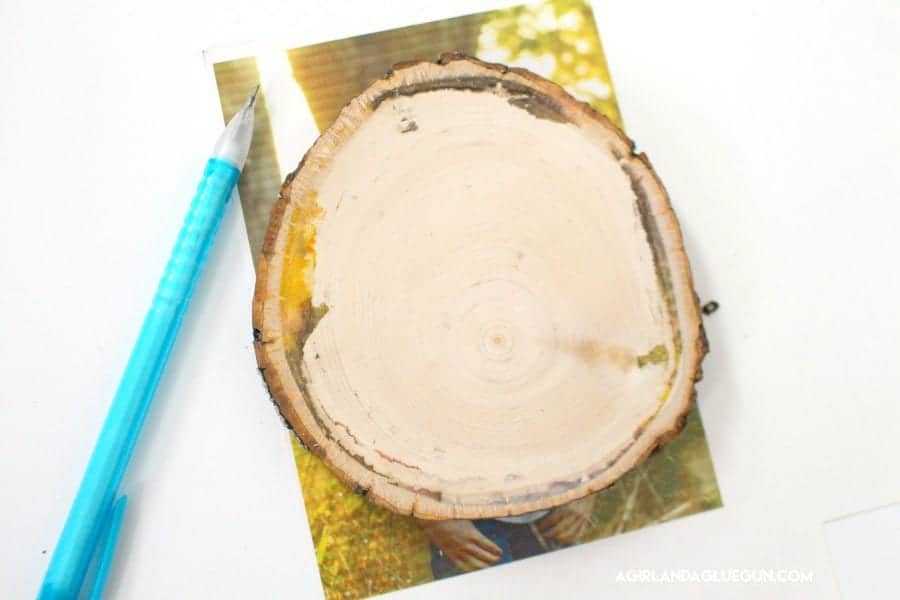
You will need to trace around the wood slice and trim down the photo to fit onto the wood slice.
 Cover the wood slice in a good layer of regular mod podge
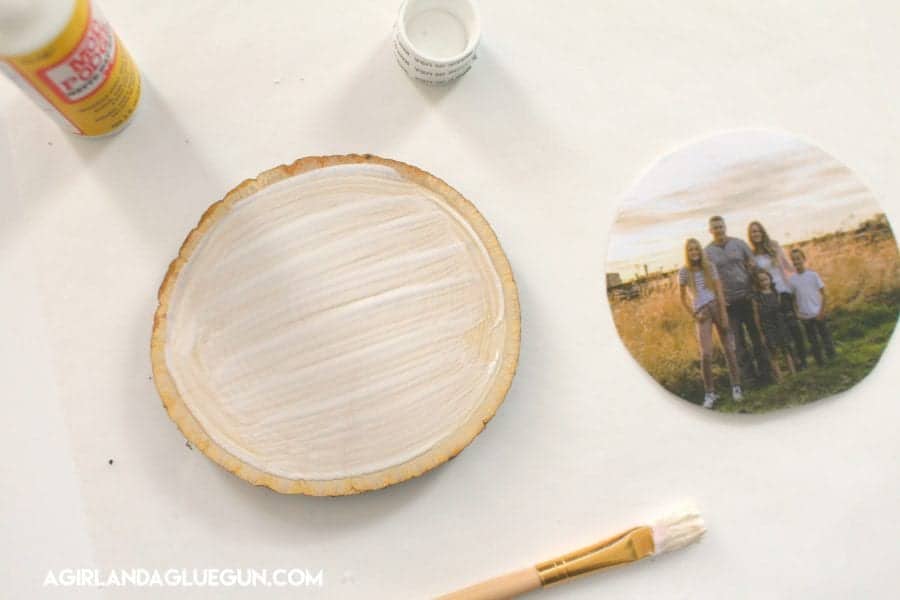 Lay over the photo onto the mod podge and press to get out all the bubbles and wrinkles. You can put something heavy over to keep it smooth. And then wait 24 hours. (I HATE WAITING!) but well worth it!
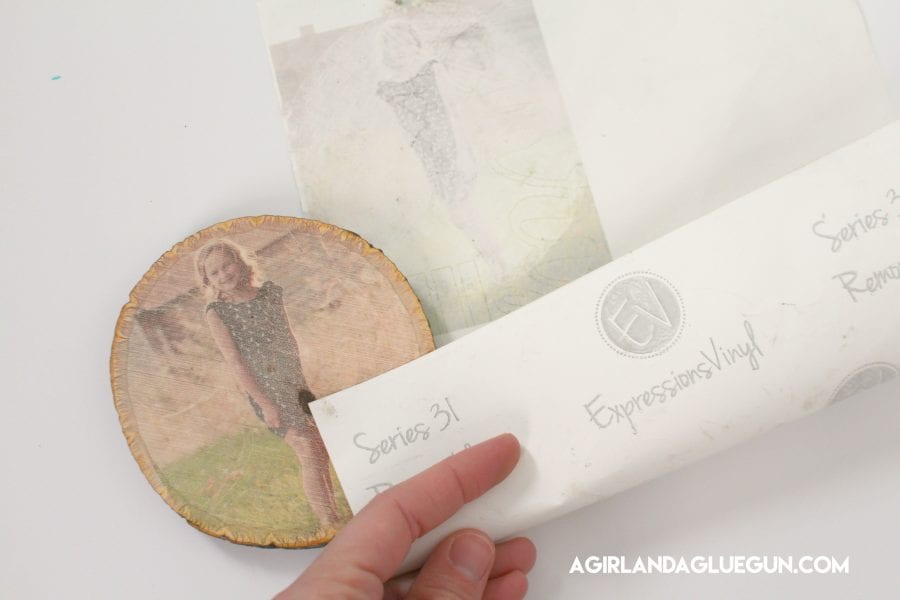
After 24 hours you get the paper damp and rub off the paper. The mod podge keeps the photo onto the wood and you only take off the paper. It’s PRETTY COOL. The paper takes awhile to get off. 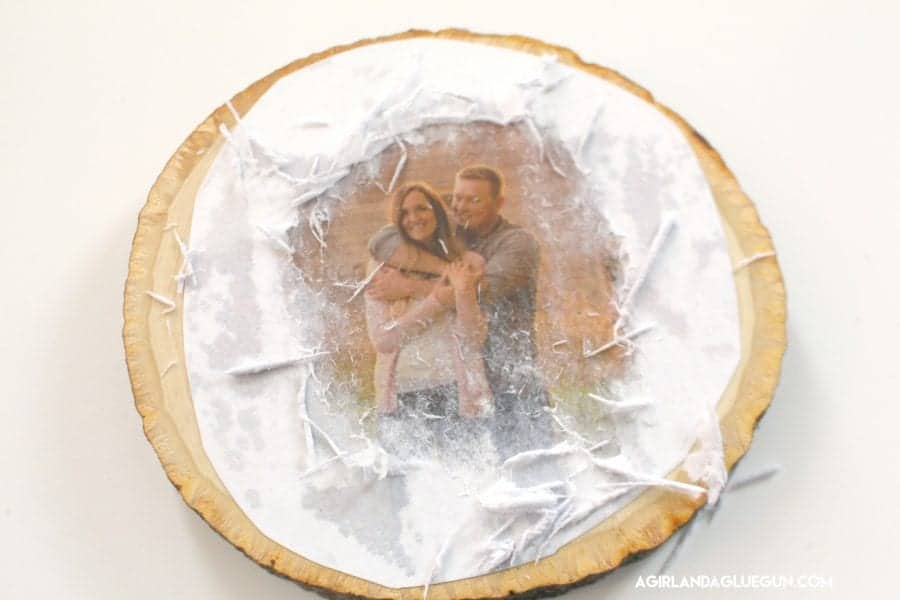
You think you have rubbed it all off…and after it dries the paper shows up. You just get it damp again and rub it off! (also…see the little missing piece on the right? That is a bubble where the paper wasn’t totally down flat!
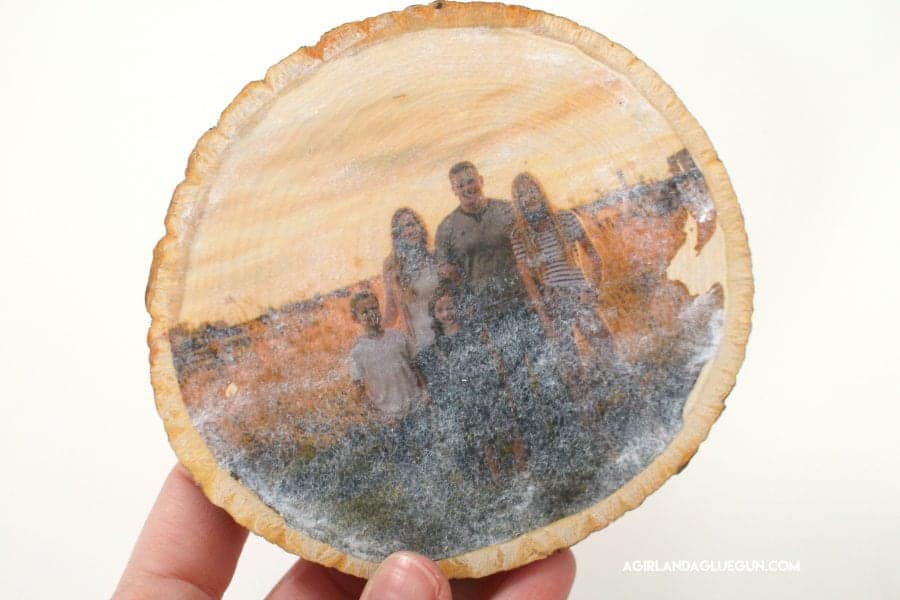
But it turns out really well…and the wood grain is so pretty popping through!
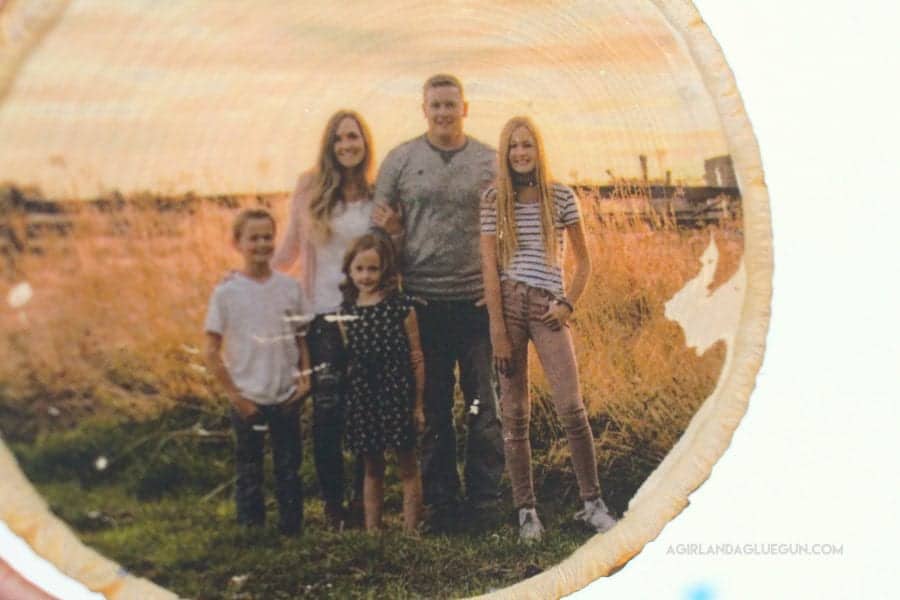
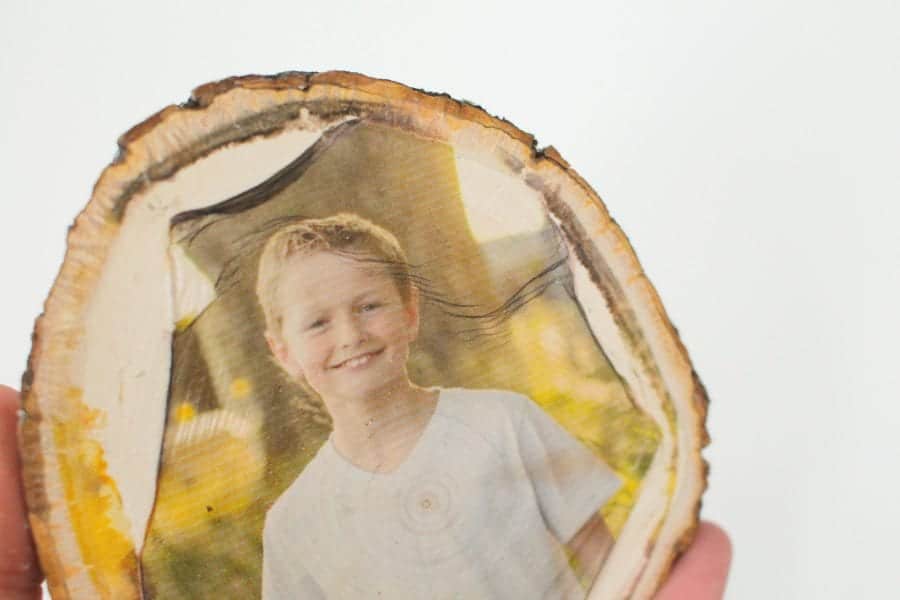
#3: Silhouette Tattoo Paper
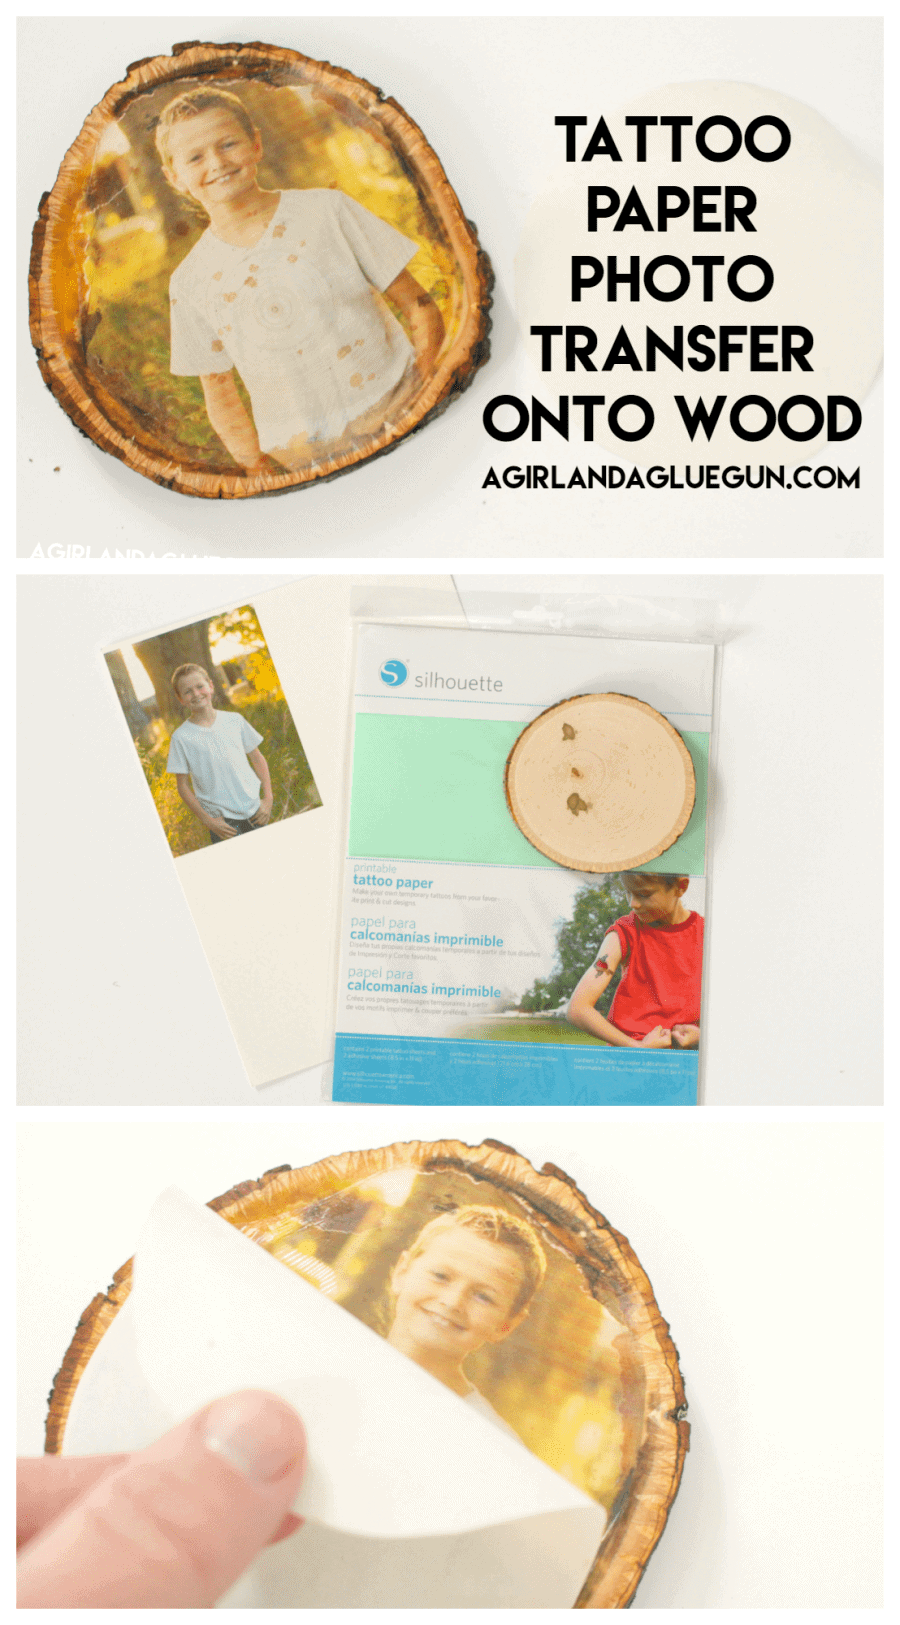
A saw a tutorial on pinterest mentioned using tattoo paper-and I had some so I thought it would be fun to try because their photo was crisp!
And I’m not going to lie. This one was a fail…. at first.
But I did it with a twist and it ended up working!
The tattoo paper is $10 (you can grab some here) It comes in two sheets so you can technically get 8 of these coaster sized photos from it. 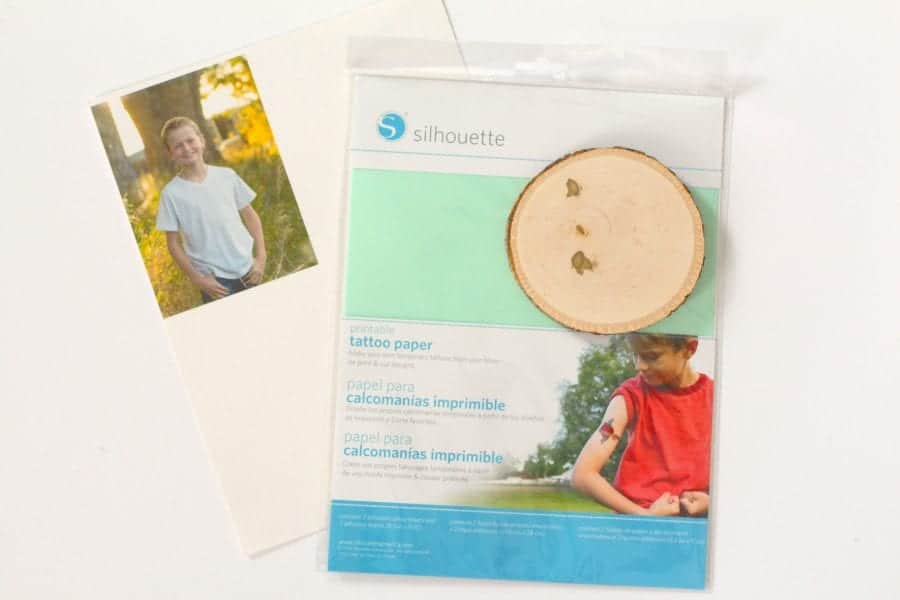
You print on the tattoo paper (INKJET)…cut it down to size and lay it on the wood (it doesn’t smear or smudge like the wax paper.) BEFORE you add the tattoo paper– you need to seal the wood with mod podge. It needed a smooth finish to get the tattoo paper to release. (That is why it didn’t work on the video! too porous!) So mod podge the wood…and wait for it to dry. Then lay on the silhouette photo and spray it with water to get it really damp. and press. You don’t want to rub it. (think of putting on a fake tattoo. The paper kind of slides off when the picture releases. 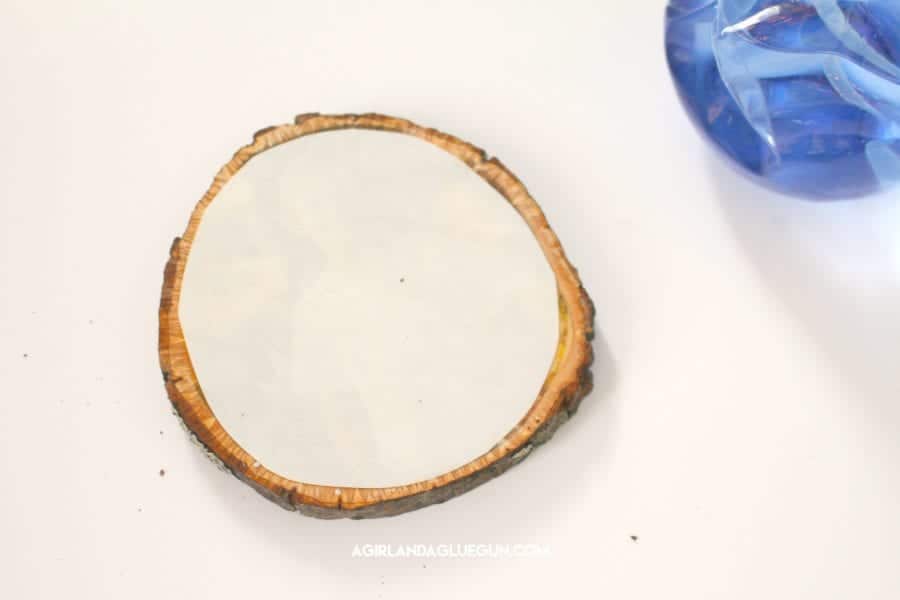 It peels off in one sheet….
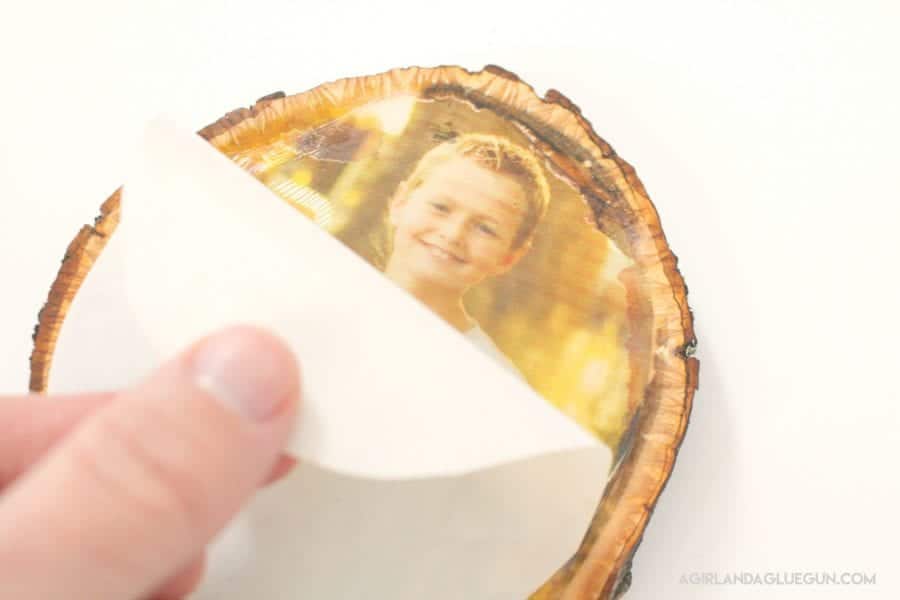 The photo was pretty good quality…AND you can still see the wood grain which is something I was worried about!
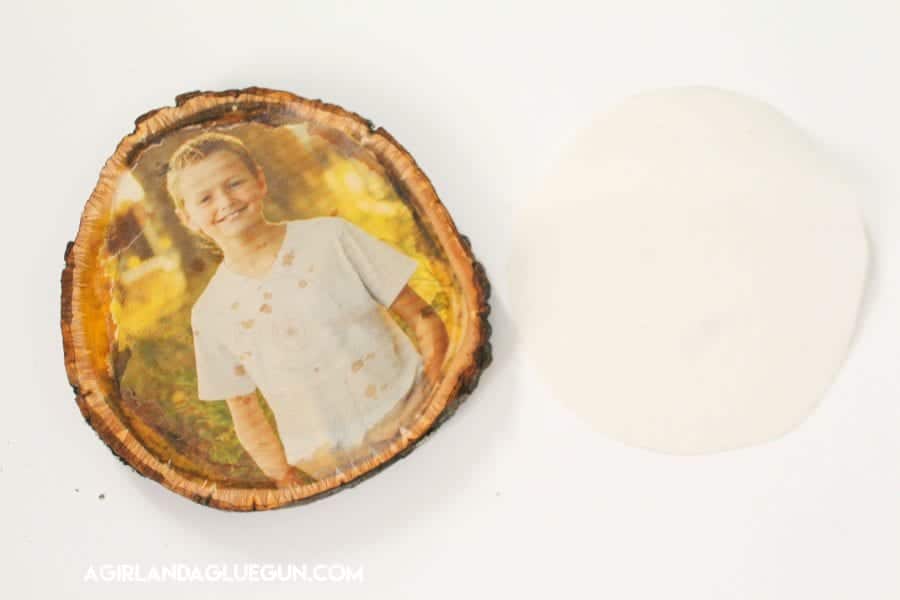
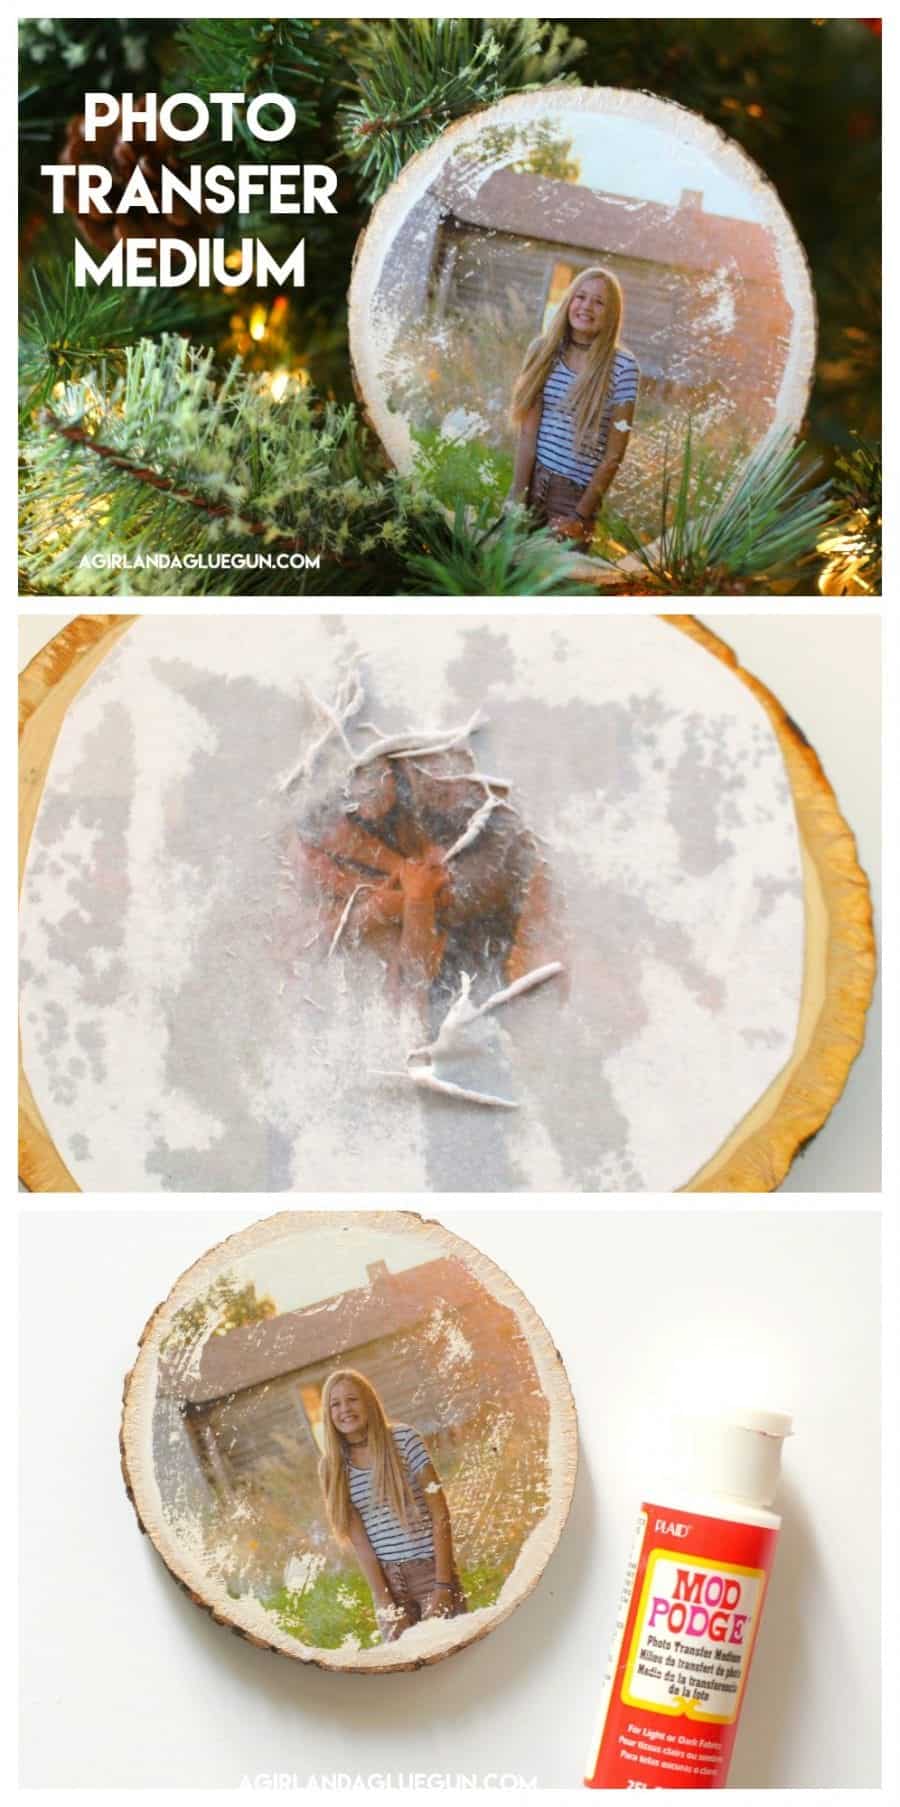
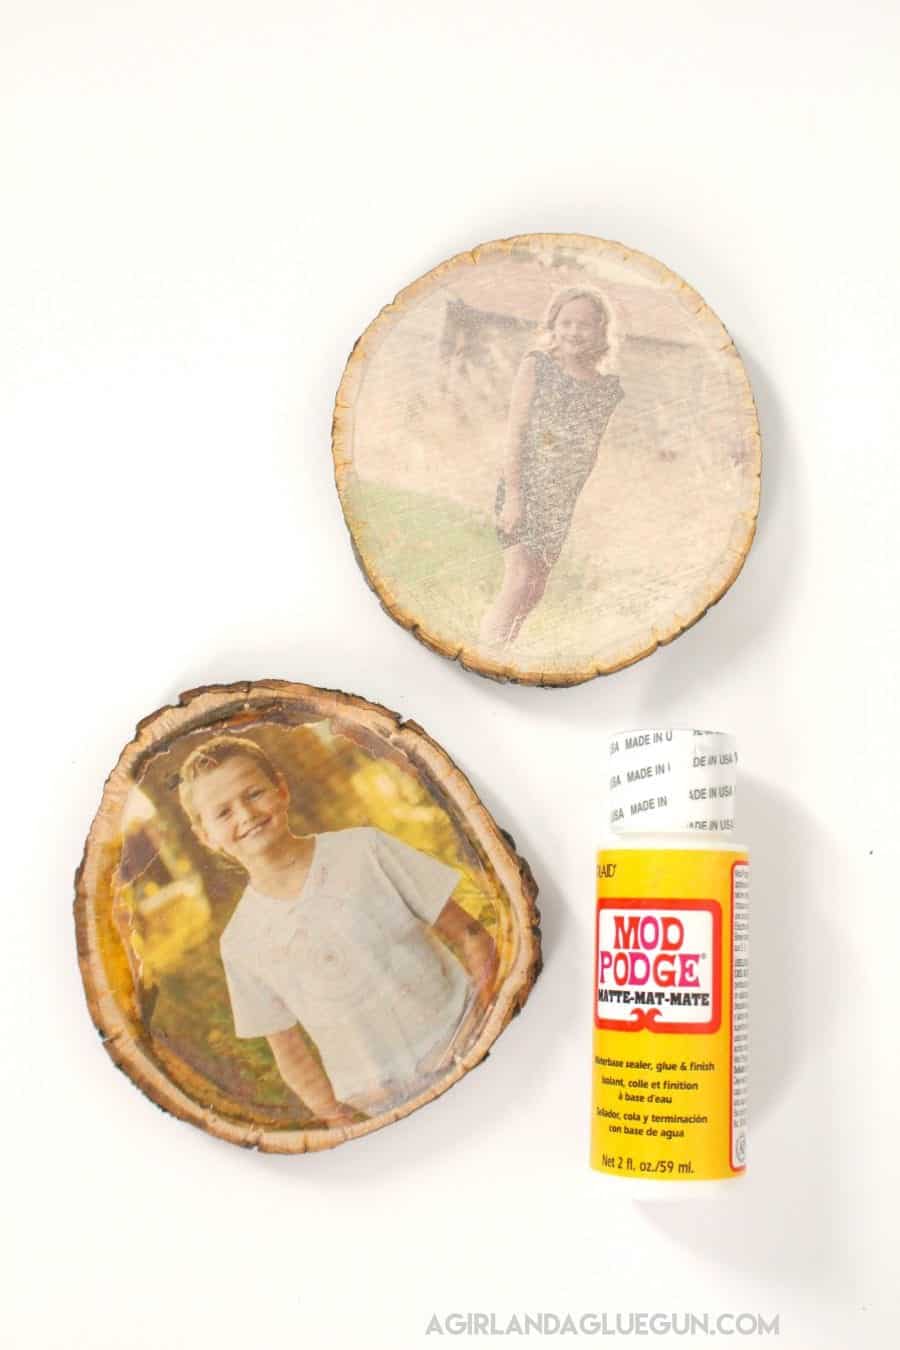
#4. Photo Transfer Medium
This one is an after thought (that’s why it isn’t in the video!)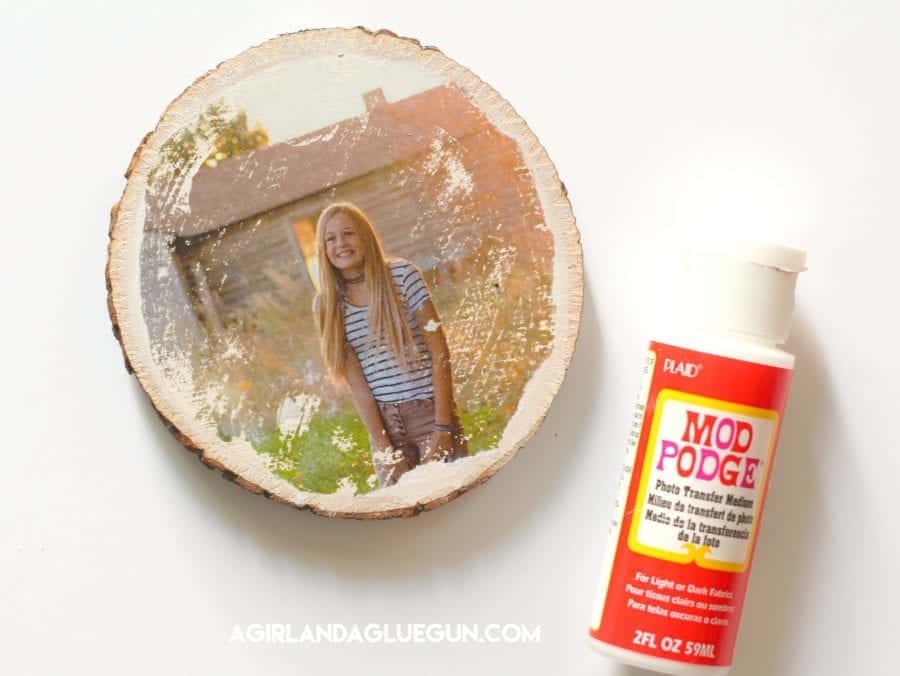
They actually make PHOTO TRANSFER MEDIUM as well as gel medium It’s made specifically for this kind of thing. and I found some mod podge medium in my stash…so I thought it was worth a shot!
It’s done the same way as using mod podge–a coat on the wood, flip picture over and dry for 24 hours. Then rub off the paper backing. As you can see in the photo–When rubbing the paper off…it was taking off some of the photo. So I think a coat of mod podge onto the wood beforehand might have remedied this….(but to be honest…I like the rustic look of it!) 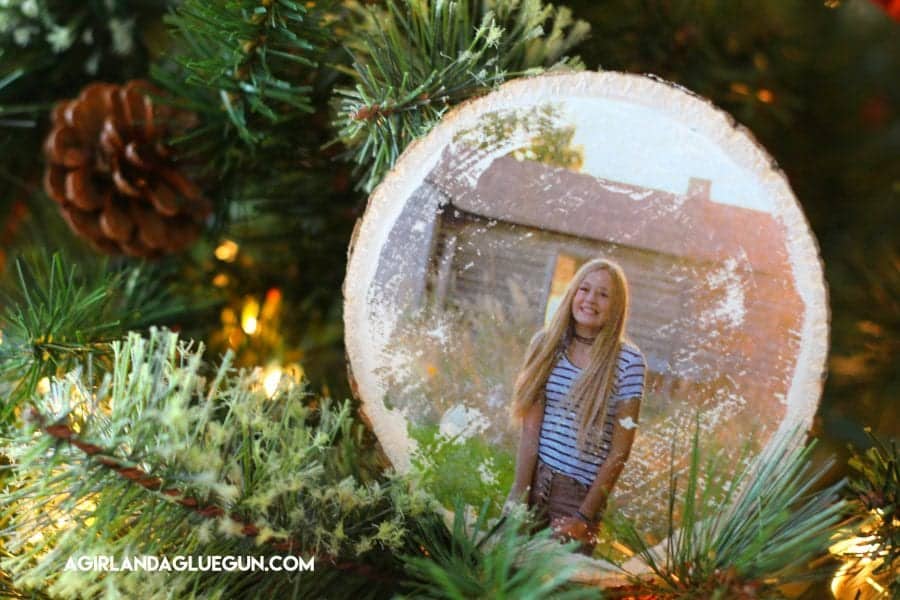
Pro: this is by far the best photo quality of all the techniques.
CON: There isn’t a whole lot of wood grain peeping through. (which is kind of why I kept rubbing to get the distressed look.
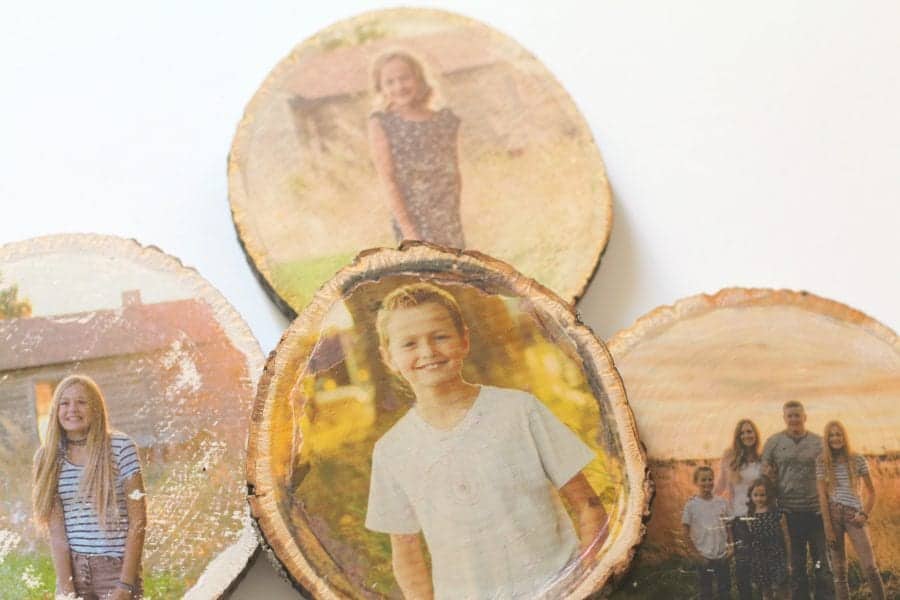
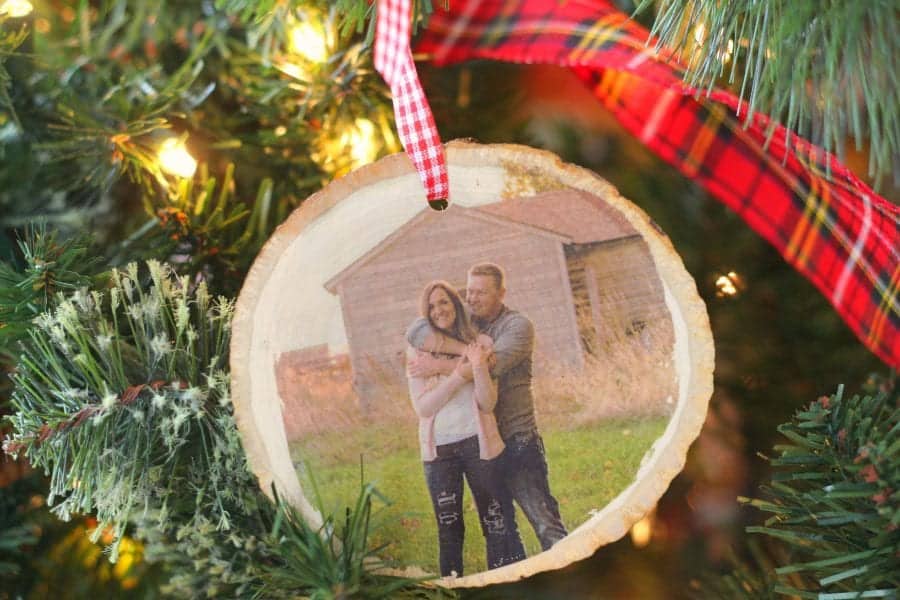
No matter what technique- I sealed all the wood slices with a coat of Mod podge to protect it over the years!
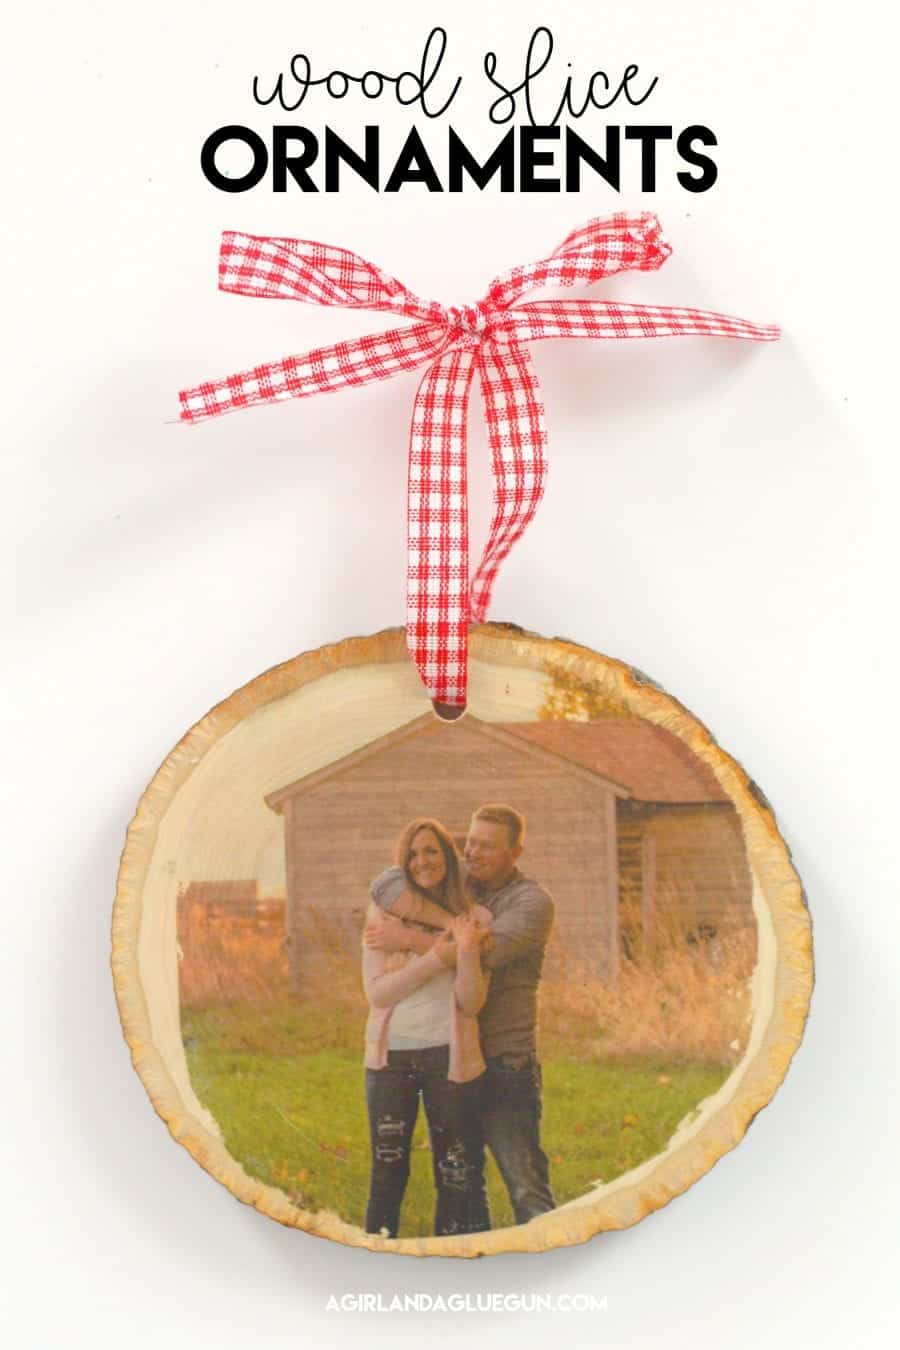
I wanted these on my Christmas tree so I just drilled a hole 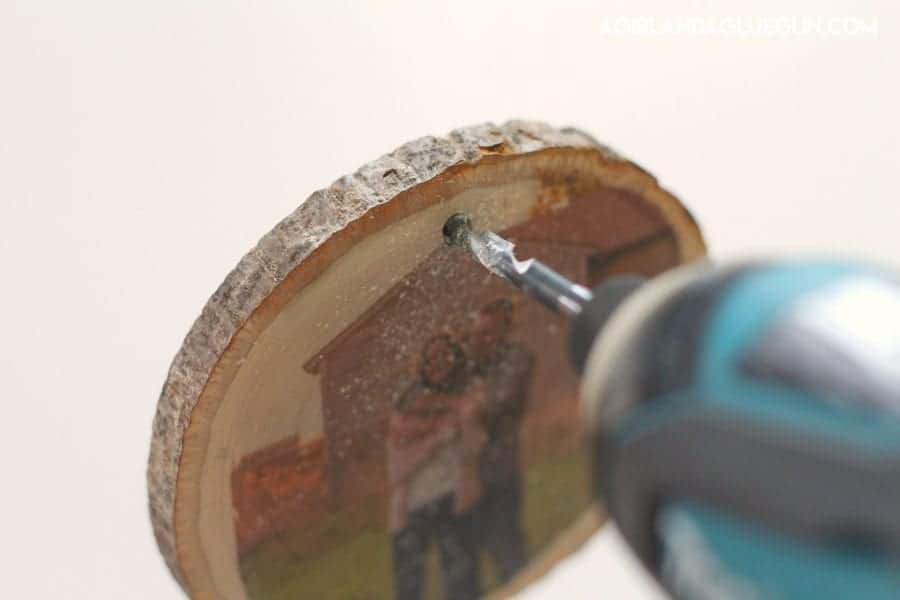
and add a ribbon
So tell me…what is your preferred technique? Or the one you are willing to try first? 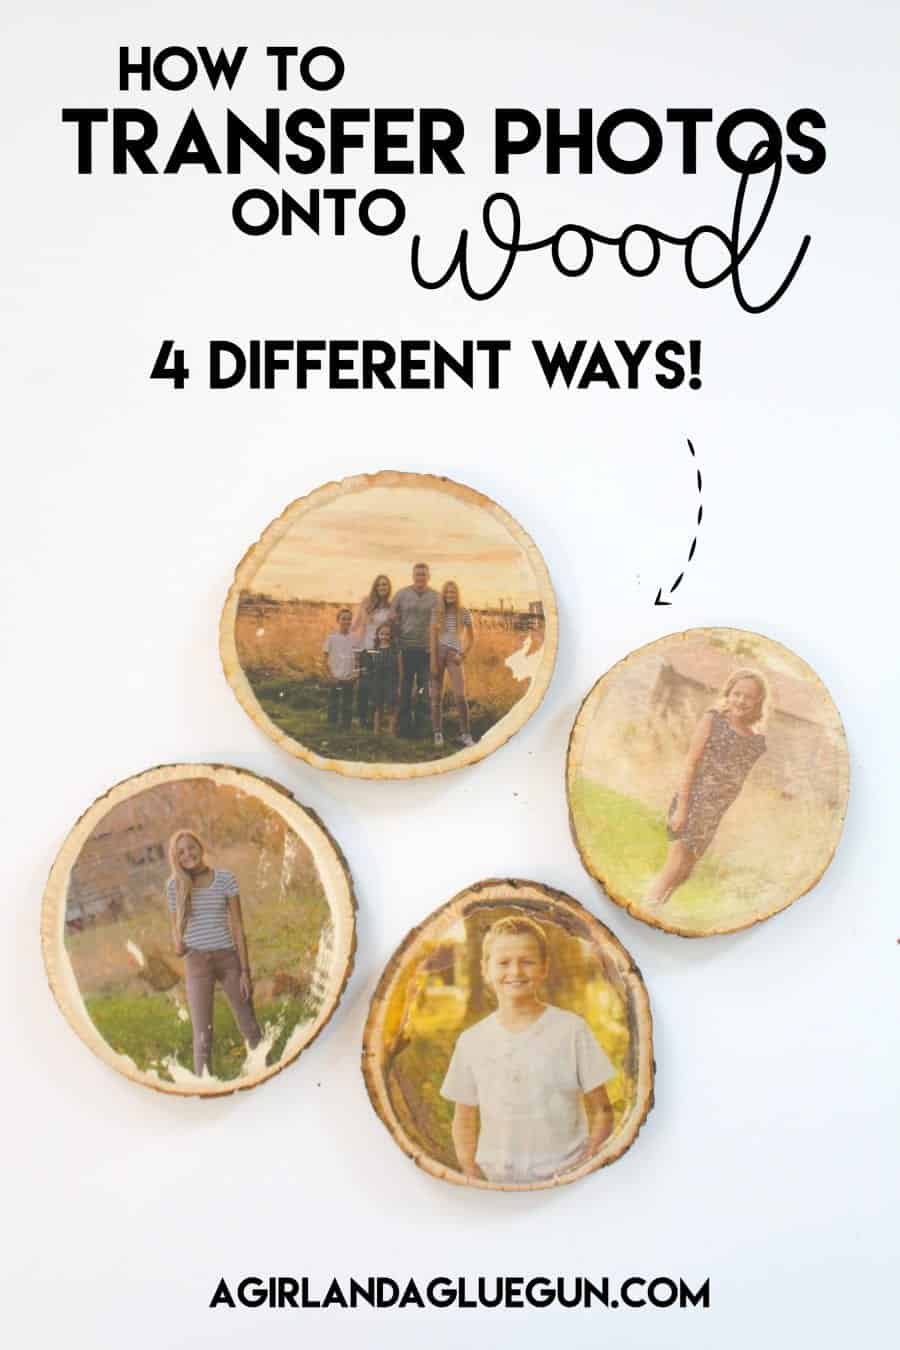
Here are a couple other techniques I found around pinterest:
Craftaholics Anonymous uses this photo transfer to wood technique 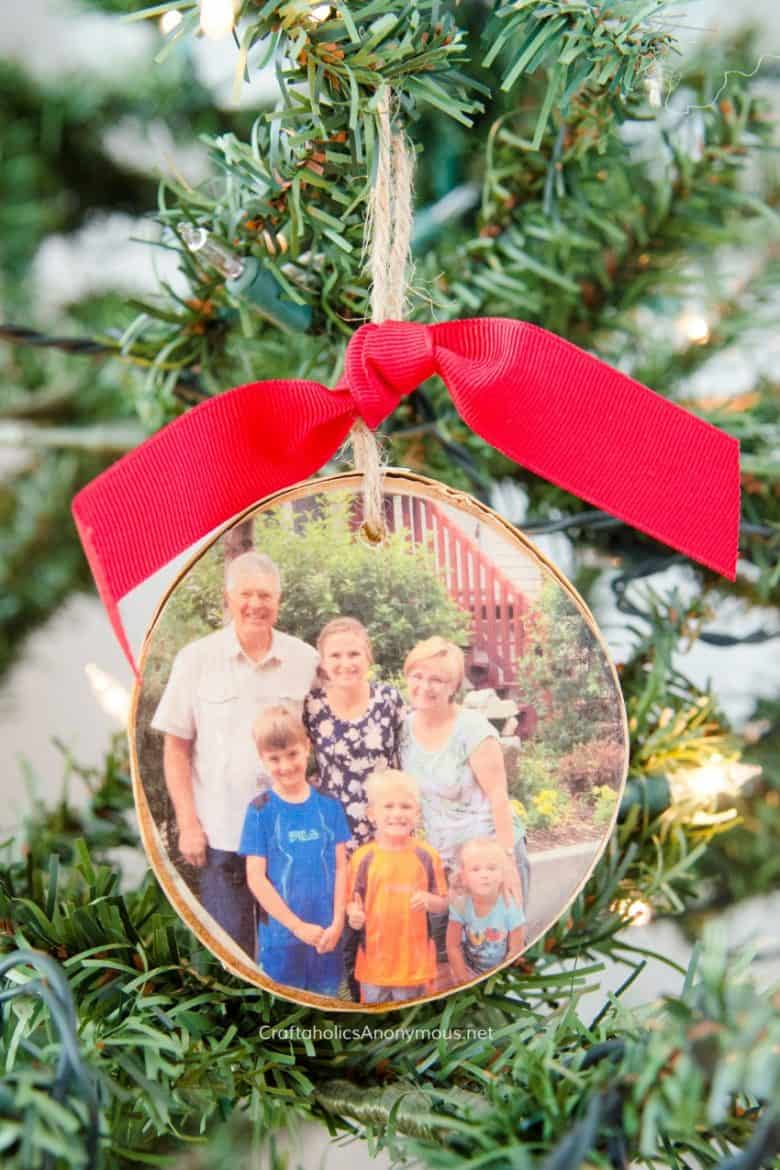
Landeelu did hers on painted wood and it worked in case you were wondering if paint would work!) 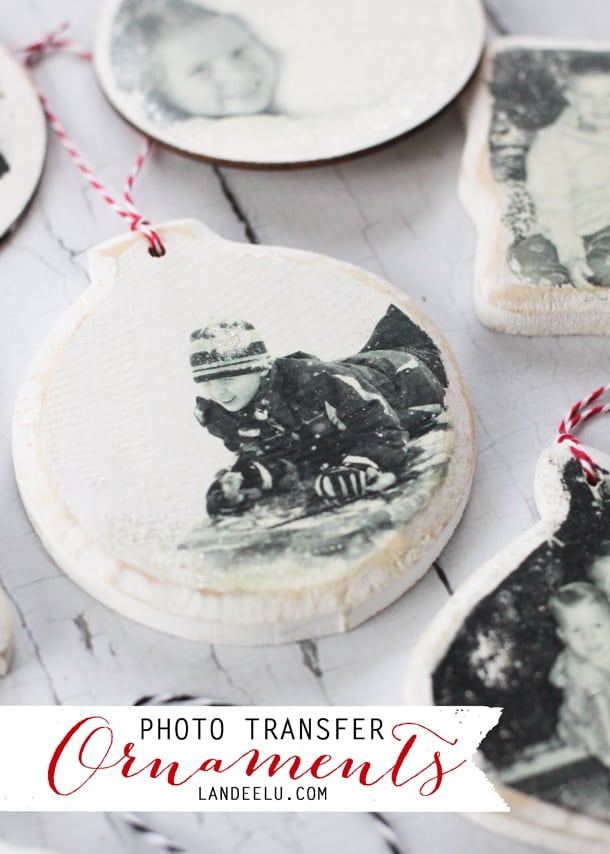
Amber says
on the 3rd example, the one with the modgepodge, did you use a store printed photo for this one? Or one you printed at home using the social techniques listed in the above two??
Kimbo says
You print it at home on an inkjet printer!
Ashley says
Thank you for sharing all of this! I’m going to do some this week for a baby shower gift.
Question… on #4 with the Modge Podge Photo Transfer Medium: You said “When rubbing the paper off…it was taking off some of the photo. So I think a coat of mod podge beforehand might have remedied this….” can you clarify what you meant about adding a coat of MP beforehand? When would you add the MP on this one?
Thank you!!
Kimbo says
add the mod podge to the wood an let dry for 24 hours. THEN do the whole transfer medium method!
Katie says
Would you be able to share what size wood slices you bought? Id love to try these!
Kimbo says
These are just about 5 inches.
jeebsmom says
So in #4, are you saying:
mod podge the wood
let it dry for 24 hours
mod podge again
apply the picture
dry for another 24 hours
rub the backing off
Is this correct?
Kimbo says
exactly!
susan says
Are you using regular printer paper with the laser jet printer or something different like photo paper?
Kimbo says
regular paper with the laser jet printer.
Vanessa says
Are you able to use inkjet with regular paper if you don’t have a laser printer?
Kimbo says
You might have to experiment but the reason they transfer over is how the ink sits on the paper with the laser printer!
Penny says
Can you do a transfer just using regular copy paper that u printed out? I’ve done mod podge with leaving the whole piece of paper on the coaster. Thanks for ur info
Kimbo says
Not sure! You would have to try it out and let me know!
Kelcey says
Little late to this blog post BUT I had to give my two-sense review of this. I tried the wax paper method and the tattoo paper method. The wax paper method technically worked but the image was super faded and low quality. I used a piece of scrap wood because it turned out the way I had thought it would and I didn’t like it. Now the tattoo paper. I AM IN LOVE! First couple I did had a couple hiccups, but by the third one I was a pro! My little tip is don’t use too much water when wetting the backing, it needs very little. If you got them too wet the tattoo image didn’t want to adhere to the mod pog on the wood, and would peel up as you tried to lift the backing away. Less water is better 🙂