
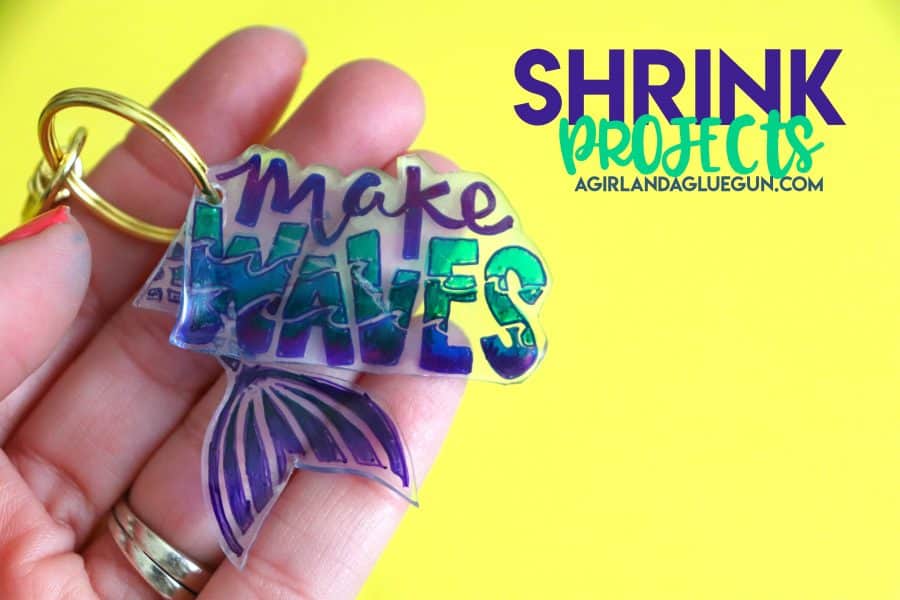
Who doesn’t love watching your creations shrink down in size!? This Shrinky Dink charm bracelet art project will be a huge hit with adults and KIDS!

Today we are making CHARM BRACLETS with shrinky dink paper! A bracelet adorned with miniature, shrunken-down charms. This unique and whimsical accessory has taken the crafting world by storm, and in this article, we’ll dive into the details of how to make your very own shrinky dink charm bracelet. From materials needed and step-by-step instructions, to creative design ideas and tips for perfecting the finished product, get ready to unleash your inner artist and add a touch of nostalgia to your jewelry collection.
What is Shrinky Dinks?
Shrinky Dinks are a toy that involves drawing on thin, flexible sheets of polystyrene, then baking them in the oven to shrink them into one-third of their original size. The sheets can be colored and cut into shapes before baking, and the result can be used to make charms, keychains, ornaments, jewelry, and more.

This project is part of my Kid’s Craft camp! Make sure to click on the image to see all 50 craft ideas!
Here is what you need to make shrink art projects
- Shrink sheets- I bought this one!
- acrylic paint, sharpies, or colored pencils
- scissors
- hole punch (if you want to make a keychain)
- heat source (oven or embossing heat tool)
- pictures or clipart to trace

Silhouette America has white shrink paper that is so cool! You can print on it and make amazing things!
What to do with your shrink art projects
I like to have a project in mind so I don’t end up with just lots of little pieces of shrink art- so here are some ideas of what projects you can make once your shrink down your drawings!
- keychains
- earrings
- button backs
- charm bracelet
- magnets
- necklace
- zipper pull
Just make sure that if you are making a keychain or charm bracelet, you punch a hole in the shrink project before you shrink it down! You also might need some jump rings to attach them!
Check out all these fun shrinky dink projects
How to use shrink art paper and make a shrink dink charm bracelet
1st step: sand
I lightly sand the shrink paper. It helps the color adhere well. Some shrink paper might already have a little rough surface, so you don’t need to do this step. Just run your hand over it and if it is smooth, rough it up a little bit!

Step 2: Draw outline
What is so great about shrink paper is that it’s transparent! You can lay it over any image and trace! I have some clipart at the bottom of the page you can trace. You can find an image of your favorite cartoon character and print it out to trace. You also can just free hand any fun design!

I like to use a black Sharpie to outline. This makes it look nice on both sides once it’s been shrunk down.
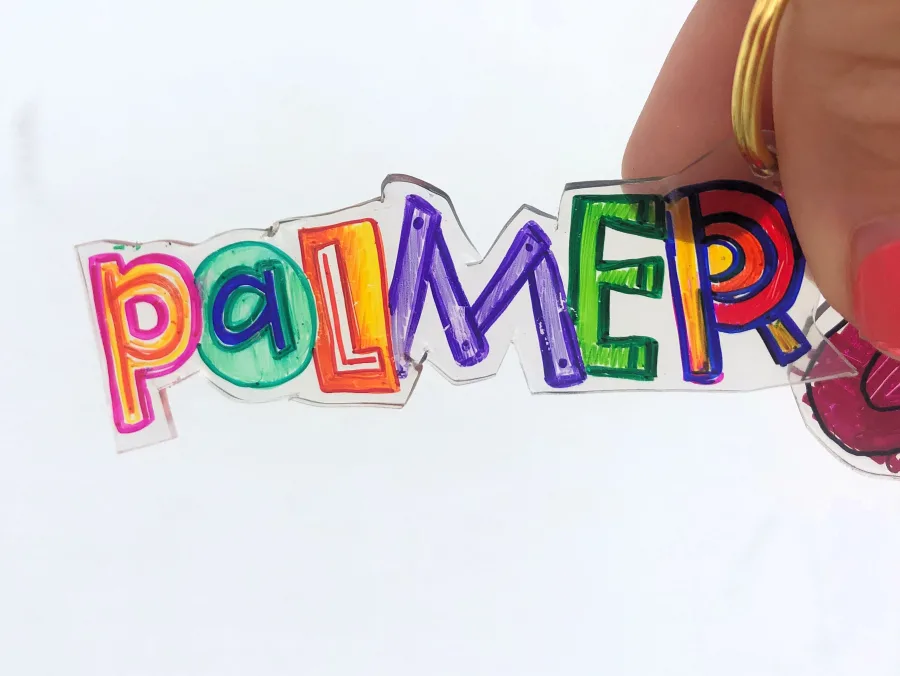
Step 3: Add color
You can color in your design with colored pencils, permanent markers, or acrylic paint. I really like the look of the paint!

Here is a side-by-side. The paint is brighter than the sharpie. But if you are kiddos are little, you might just want to do colored pencils for mess sake!

One thing to note if you choose to paint, you need very light coats. If you add a lot of paint, it will flake off when melting!


Step 4: Cut out
Cut out around each design. You want to make sure you don’t have any sharp edges because they will get even sharper when melted down!

Step 5: Punch a hole
If you are making something that needs a hole to attach it, make sure to pop a hole in before melting! It gets really hard to pop a small hole once it’s shrunk down! You can leave a space in the unpainted part to put a hole in case you don’t want to put a hole in your image.

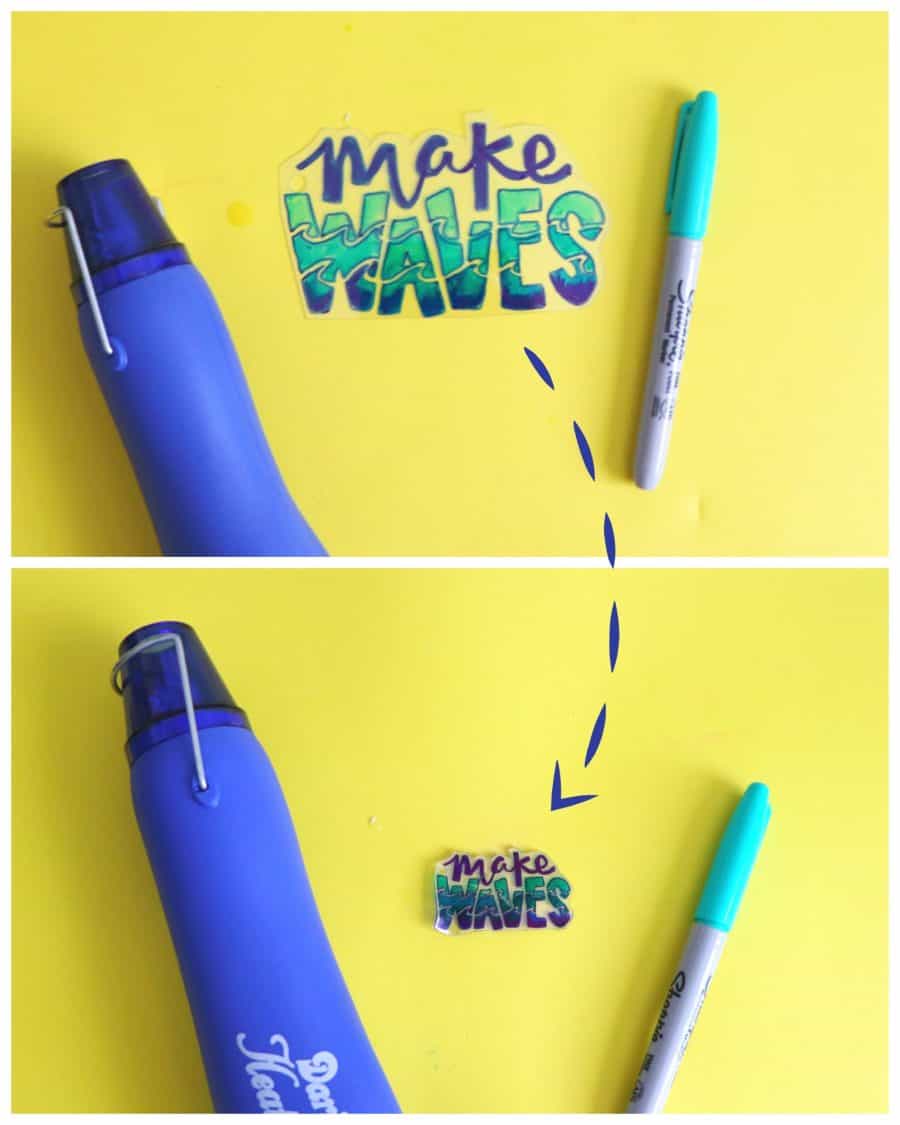
Step 6: MELT
The moment we’ve all been waiting for! MELTING TIME! I have a pan that I use for crafting. If you are using a pan from your kitchen, I would line it with tin foil to protect it!

I put my oven on broil. and place my shrink art spaced out so nothing is touching. Melting will happen REALLY FAST. Maybe 20 seconds. So make sure to watch it. They will curl up on themselves and then flatten out. Take them out when they are pretty much flat.

If the edges are still curved, you can press a flat bottom cup or bowl on the shrink projects right when you pull it out of the oven. This will make sure they cool nice and flat!
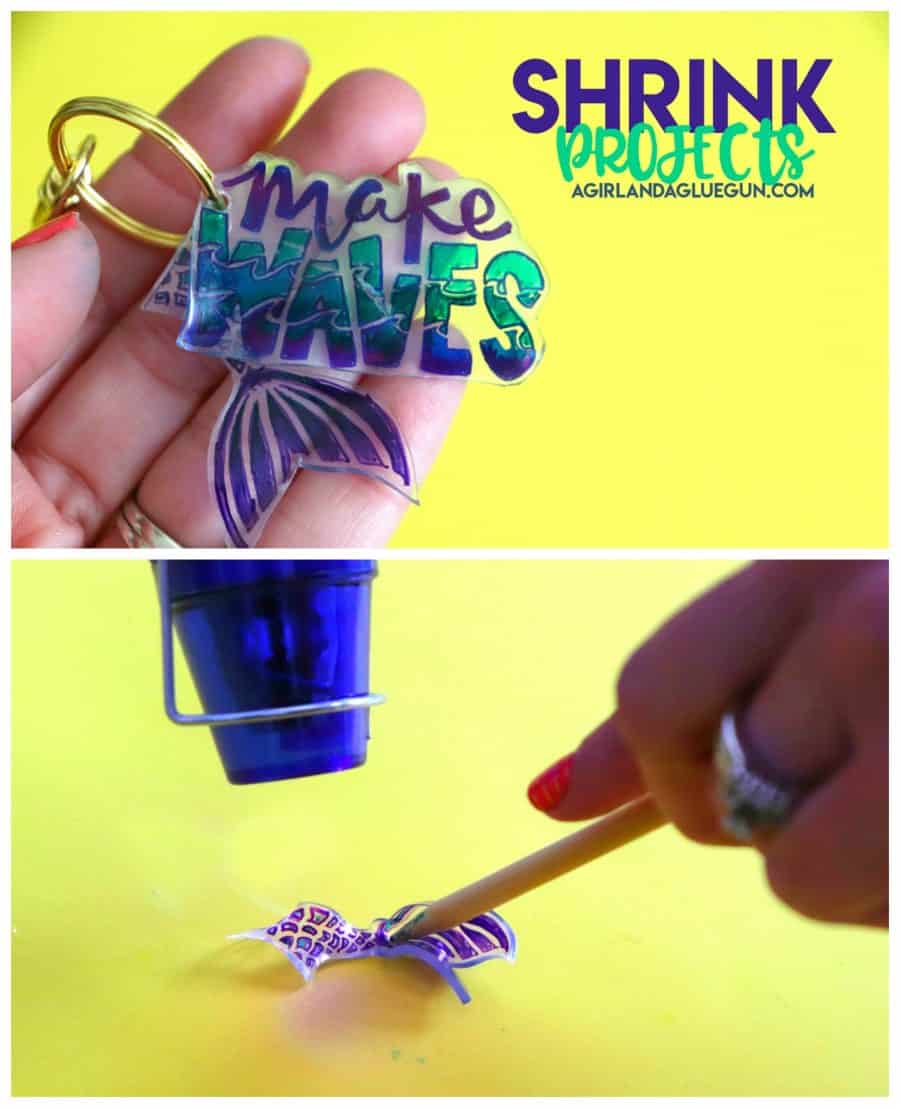
You can also use a heat tool to melt your shrink art project! The heat tool makes the project blow around so I use a skewer to hold it down while it shrunk.

The shrink paper I bought shrinks down pretty well! You can see the size difference with this before and after!
Step 7: Top coat
We are turning our little shrink-a-dinks into charms to make a bracelet so we wanted to make sure they lasted. We did a top coat of matte mod podge to protect them. Let dry.
Make a charm bracelet
Regardless if you are making a keychain, zipper pull, necklace or bracelet charm, you will need to attach a jump ring so you can hook things to it! Just open it up and slip it through the hole and then close it completely.

If you are using the shrink art for a tie tack, earrings or buttons, I would attach them to the backing with E6000 adhesive.
To finish off the bracelet, just attach each jump ring to a chain in the bracelet!


Free Clipart
I created some printables that you can lay down and put the shrink paper over to trace! There is an ABC one that you can use to trace words or your name!
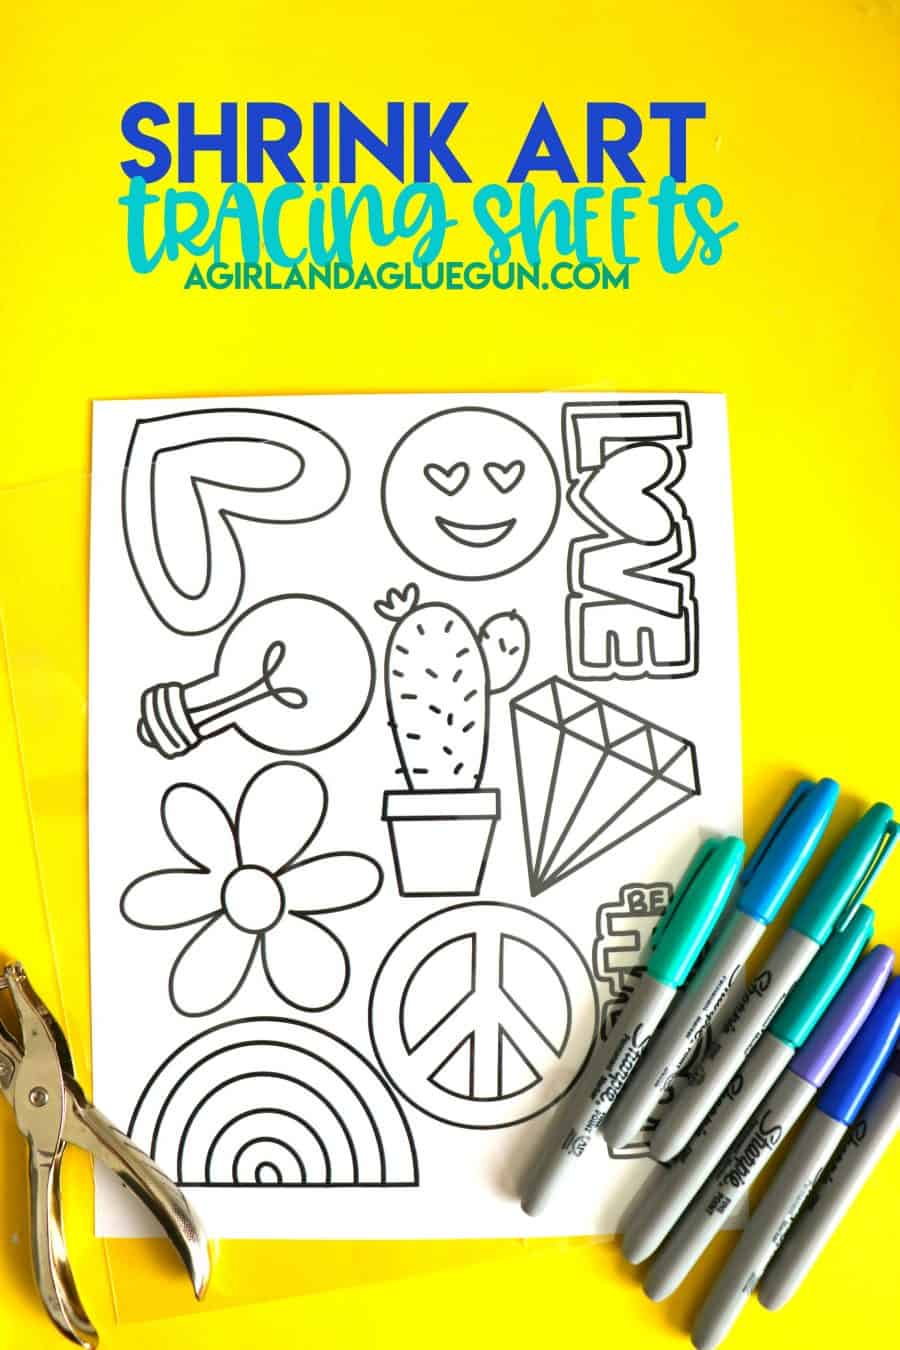
You can grab the tracing printables by click the image below: 6 different sheets. sports, general, abcs, ocean.
- Butterfly clipart
- Clipart: sports, general, abcs, ocean
- Sticker clipart
If you are looking for some fun Projects to do with your shrink a dinks, Check out this post! It’s got so many fun projects!
Save for later
Too busy to get crafting today? No problem! Pin this post to remind yourself about this project later! Sharing my projects helps me reach more people, allowing me to continue sharing free content!

I hope you enjoy shrink down art as much as I do! If you need more kid’s crafts- check out my kids craft camp post!
Leave a Reply