
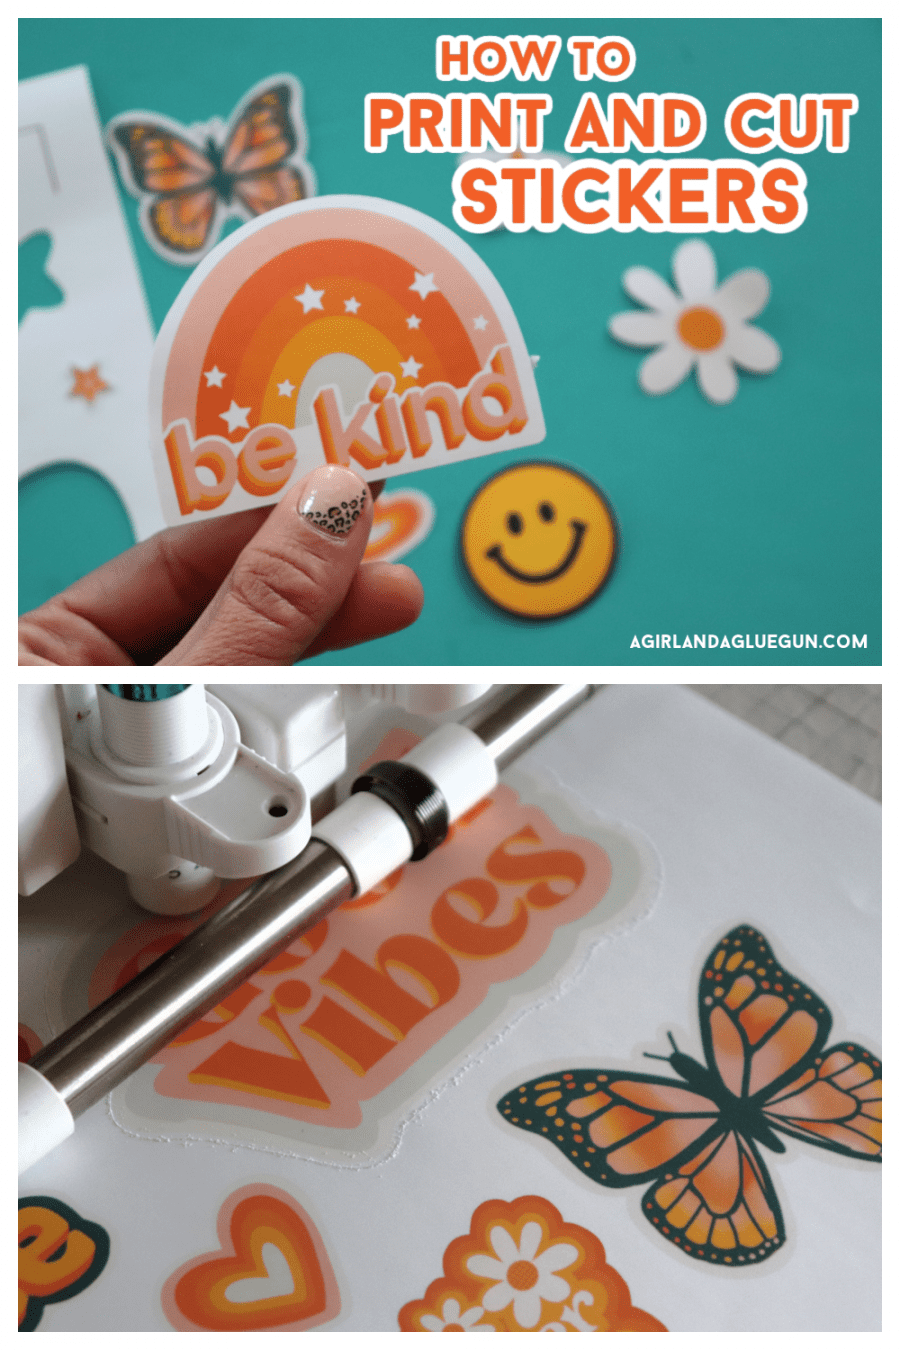
How to use the Silhouette Cameo to print and cut stickers! So much easier than cutting those stickers out my hand! The whole tutorial is here for you!
Making stickers has never been easier- once you know how! And Lucky for you- I’m here to teach you how!
I have a whole sticker series breaking it down
STICKERS FROM START TO FINISH
-
- How to design stickers
- Best printer to use with stickers
- Best Sticker Paper (I tried out 7 most popular kinds!)
- Print and Cut (how to ACTUALLY cut out the stickers! that’s this post!)
So for this tutorial, you need to have your sticker design ready and your sticker paper loaded into your printer ready to go!
How to cut out stickers using the Print and Cut in Silhouette Studio
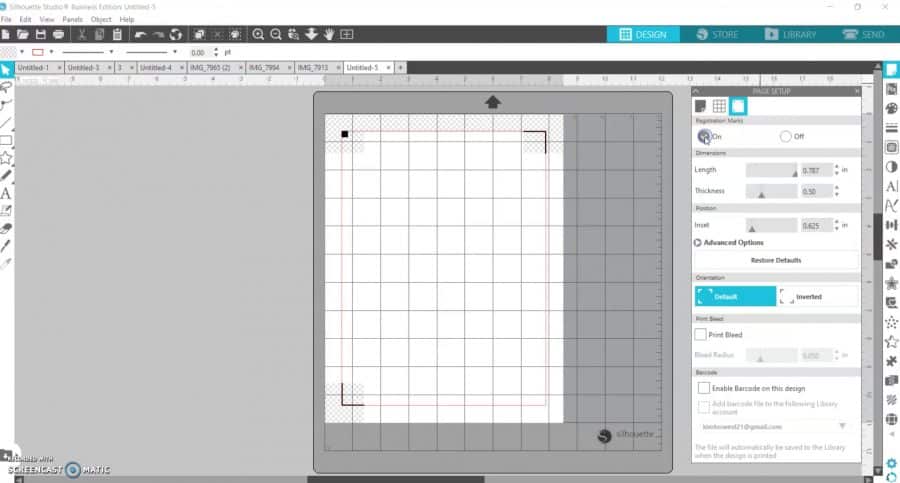
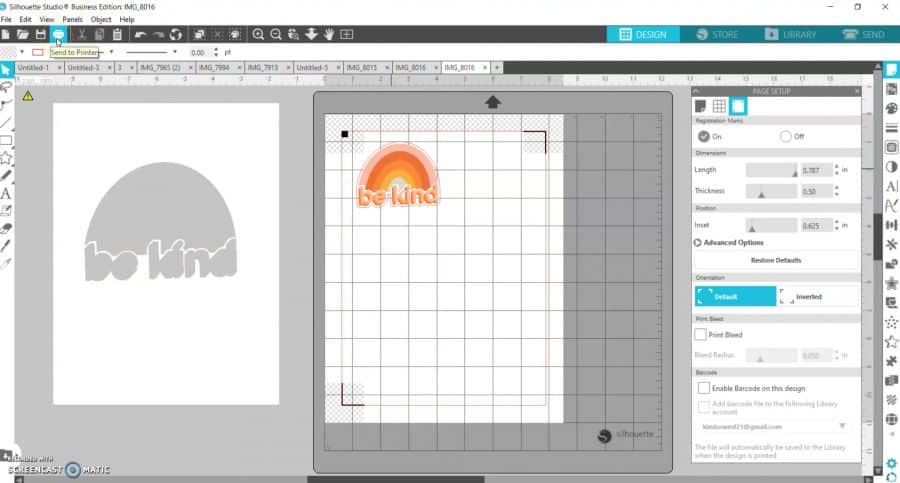
Step one: Page Setup
Open up your page setup in the right hand corner. You will need your mat selected. Your media size will need to be the size of your sticker paper (usually letter sized.)
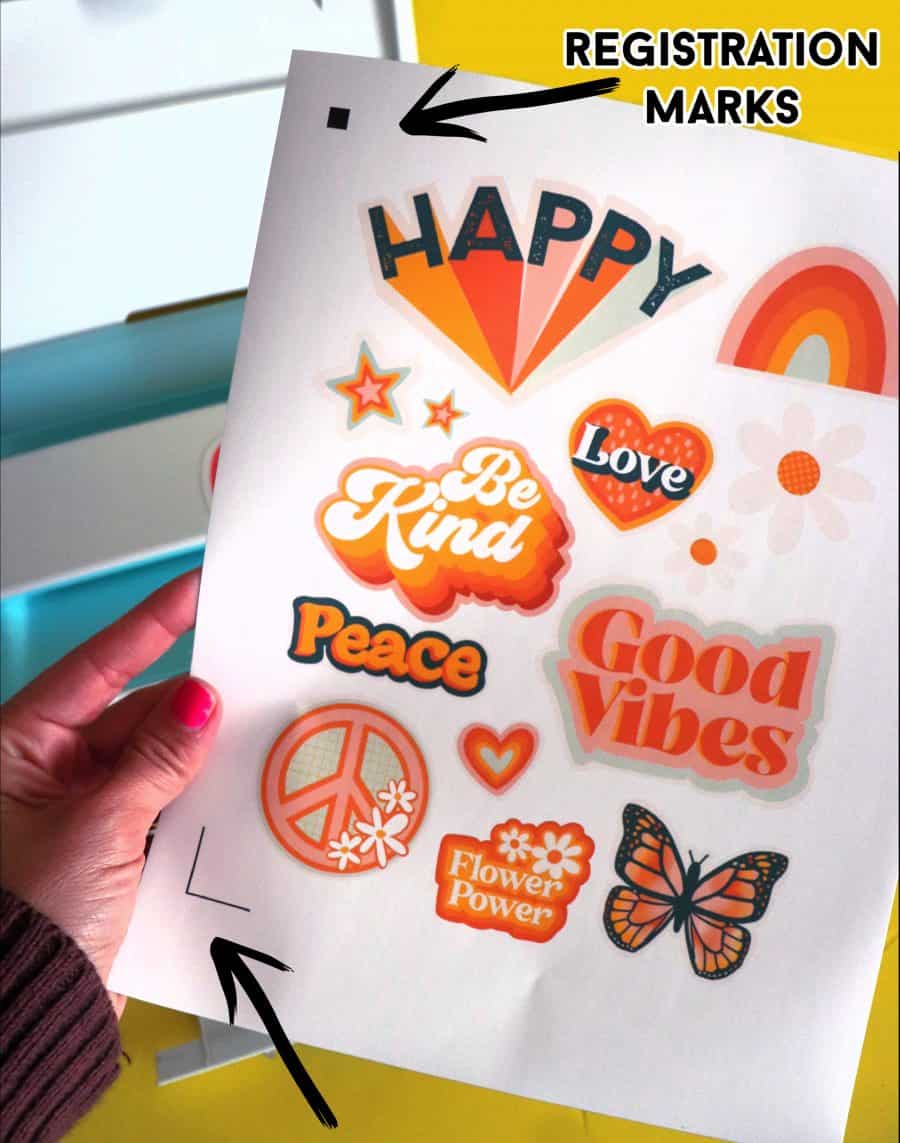
You will also need to click the Registration button in page setup and turn the registration marks on. I just leave it default! You will notice the shading, red outline and black box and lines- These are what your Silhouette will read to know where to cut out. You don’t want any of your stickers or designs to overlap these marks.
Step 2: Upload your design
If you have saved your design as a png with a transparent background- you are essentially good to go-
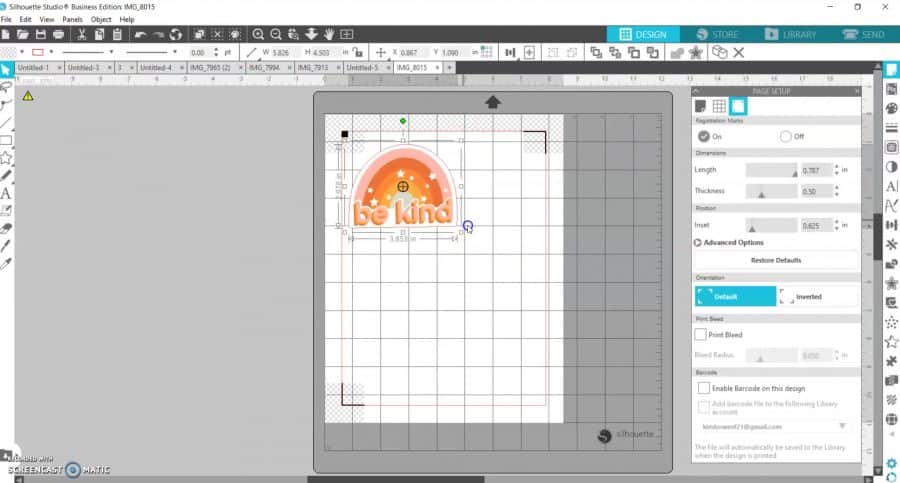
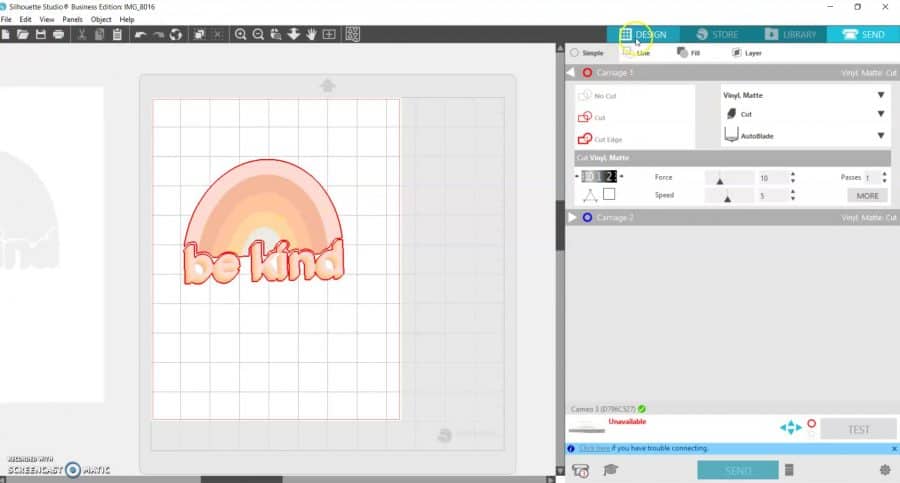
You can test this by clicking send and seeing that there is only one cut line- all the way around the sticker design.

BUT in case you have a design that doesn’t have a transparent background, you need to do a few added steps! This design is one big rectangle and will only cut out one big rectangle.
Open up your butterfly/toast icon (trace) and drag a box over your design.
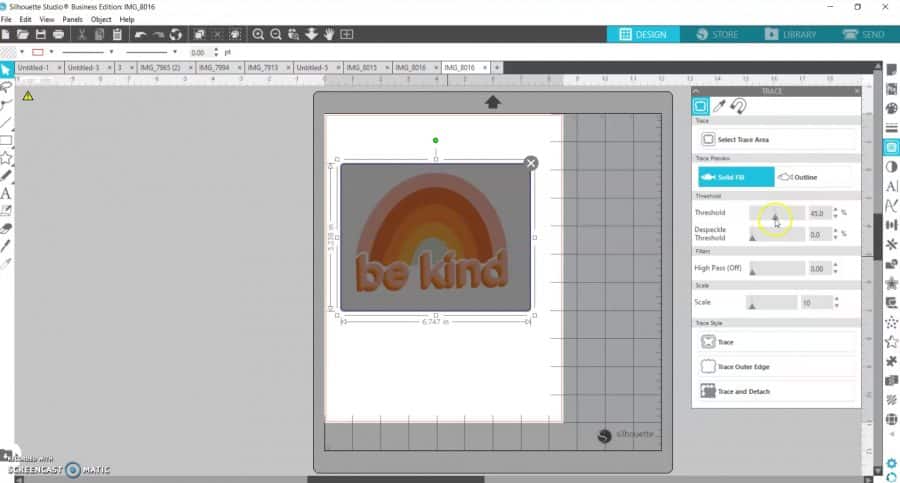
This part is a little tricky- Because it depends on the colors of your design. Essentially you are going to play around with threshold (and sometimes high pass filter) The goal is to get the entire design in yellow. If this was a sticker with a black design- the yellow would automatically pop up. The lighter the color the further you have to play with the threshold.
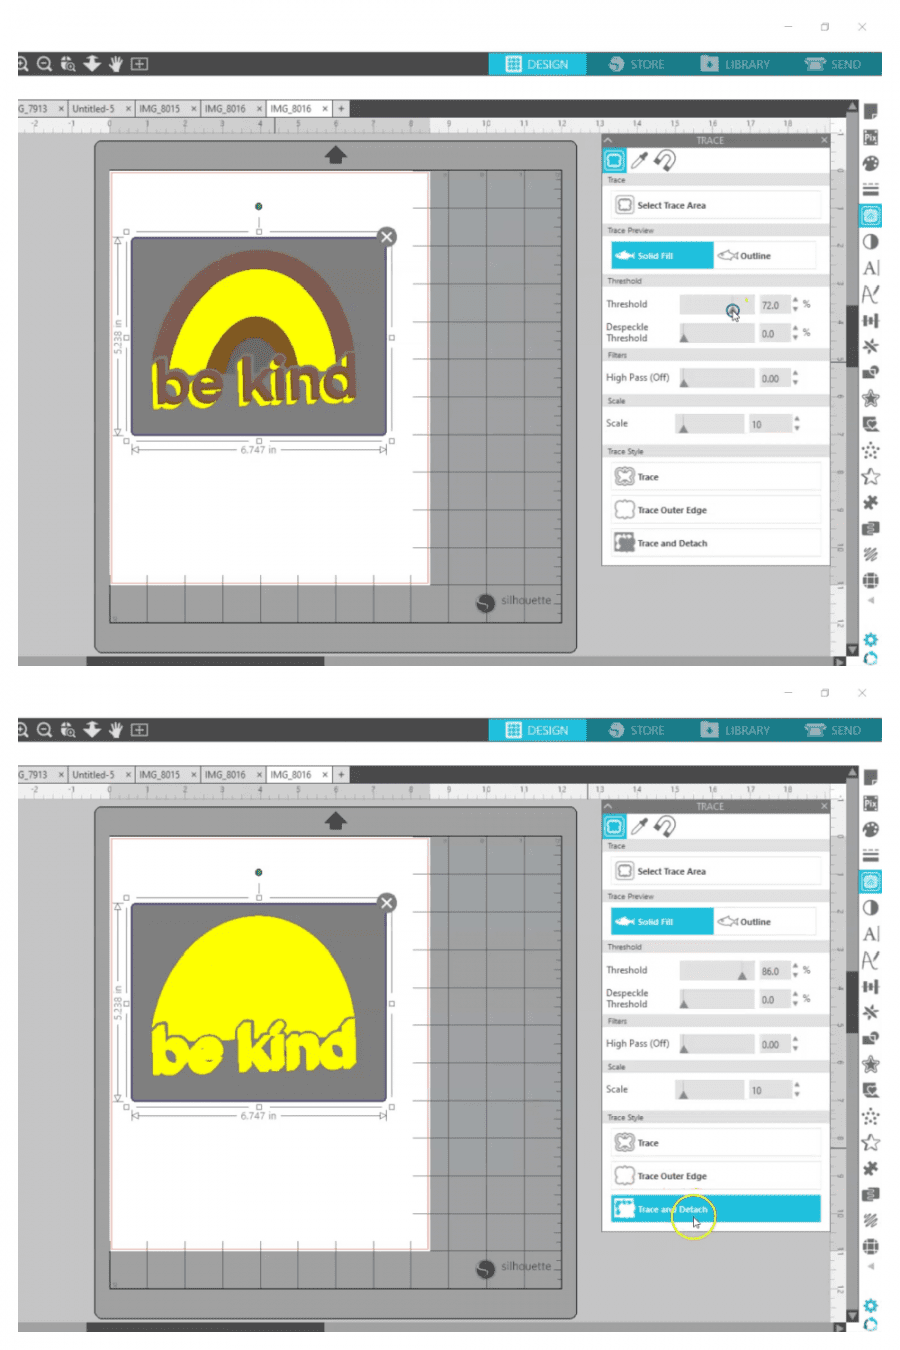
Once it’s all yellow- click TRACE AND DETACH.
That will literally remove the whole background. (love this feature from Silhouette!)
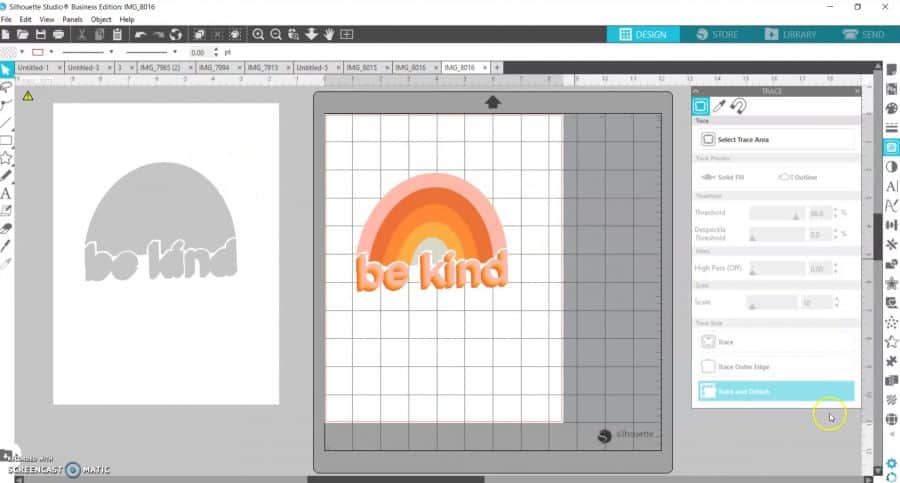
Right now, we still aren’t ready to make a sticker- the cut lines would cut out the rainbow, the be, and the kind all separately. So let’s fix it!
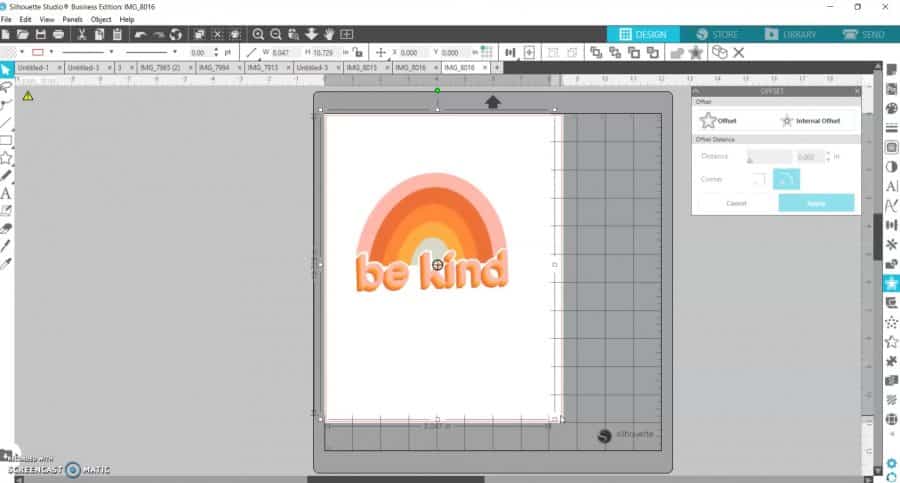
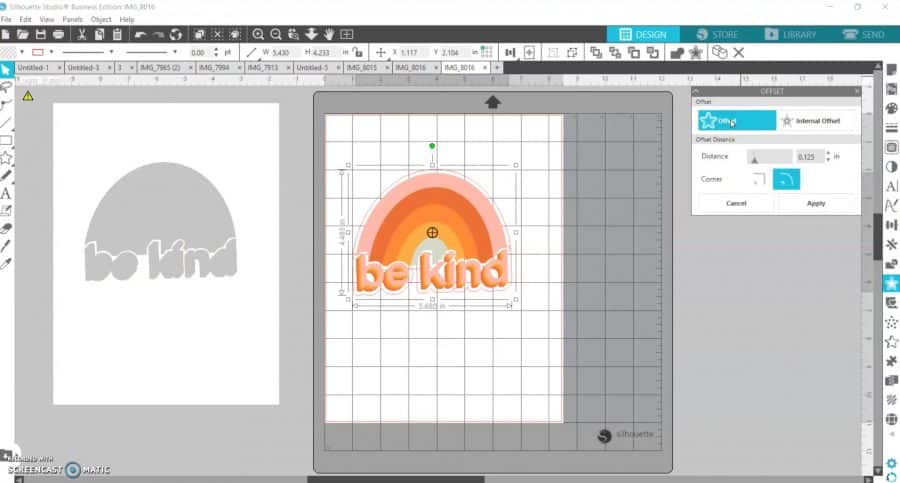
I group it all together to make sure that I don’t move any part of the design accidently. Then open up the star icon (OFFSET!)
When you click offset, you will see a border appear around the edge. You can adjust distance and make the border really large–or make the distance hug the design as much as possible. Click apply when you are happy with the design.
You can see now I have the sticker and I have a sticker background. (I moved it aside to show you, but it’s super hard to line things back up perfectly so I suggest not moving it once you get this far!
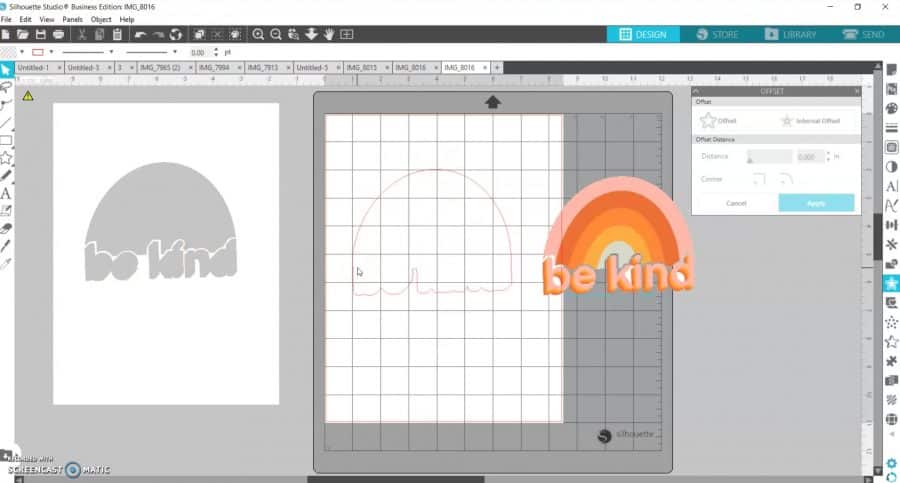
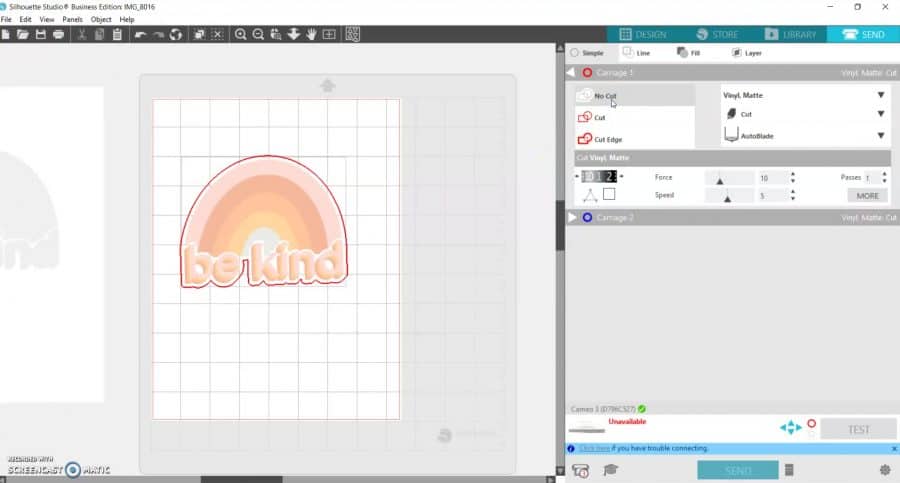
I still have two cut lines (testing it by clicking send.) Click the inside (since it’s all grouped together, you don’t have to click each part of the sticker.) and hit no cut. (see my arrow?)
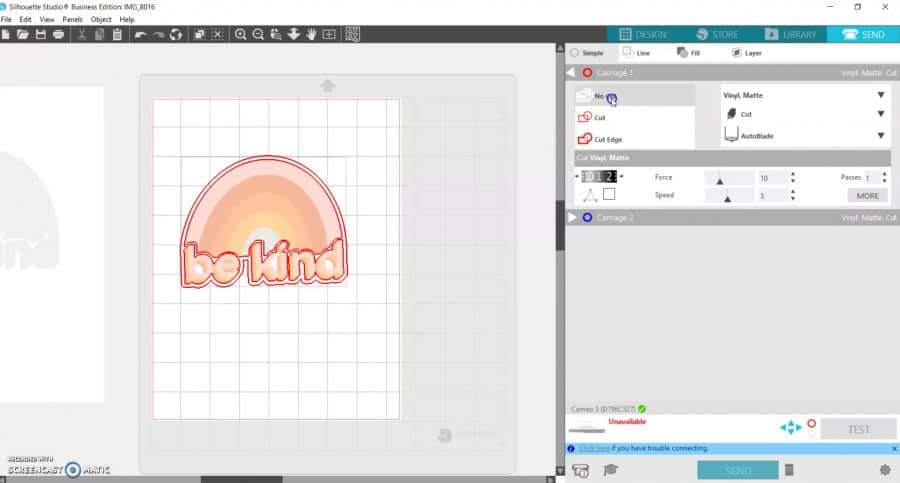
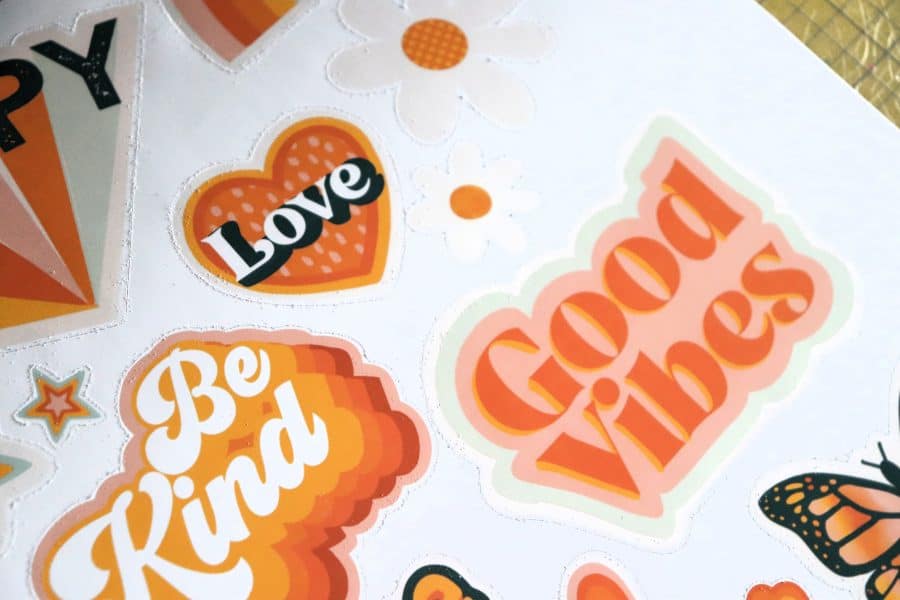
Now you have a perfect little border and one cut line! YOU ARE READY! AT this point I drag over both designs and group together so I can size them easily.
I usually fill up my page with all the stickers so I don’t waste any paper.
Step 3: Print Stickers
At the top left is a printer icon (find the arrow!)
When you click send to printer, you have the option to click preferences. You will want to click best quality to make sure your stickers look AMAZING! (go here to read more about this!)

and print out.
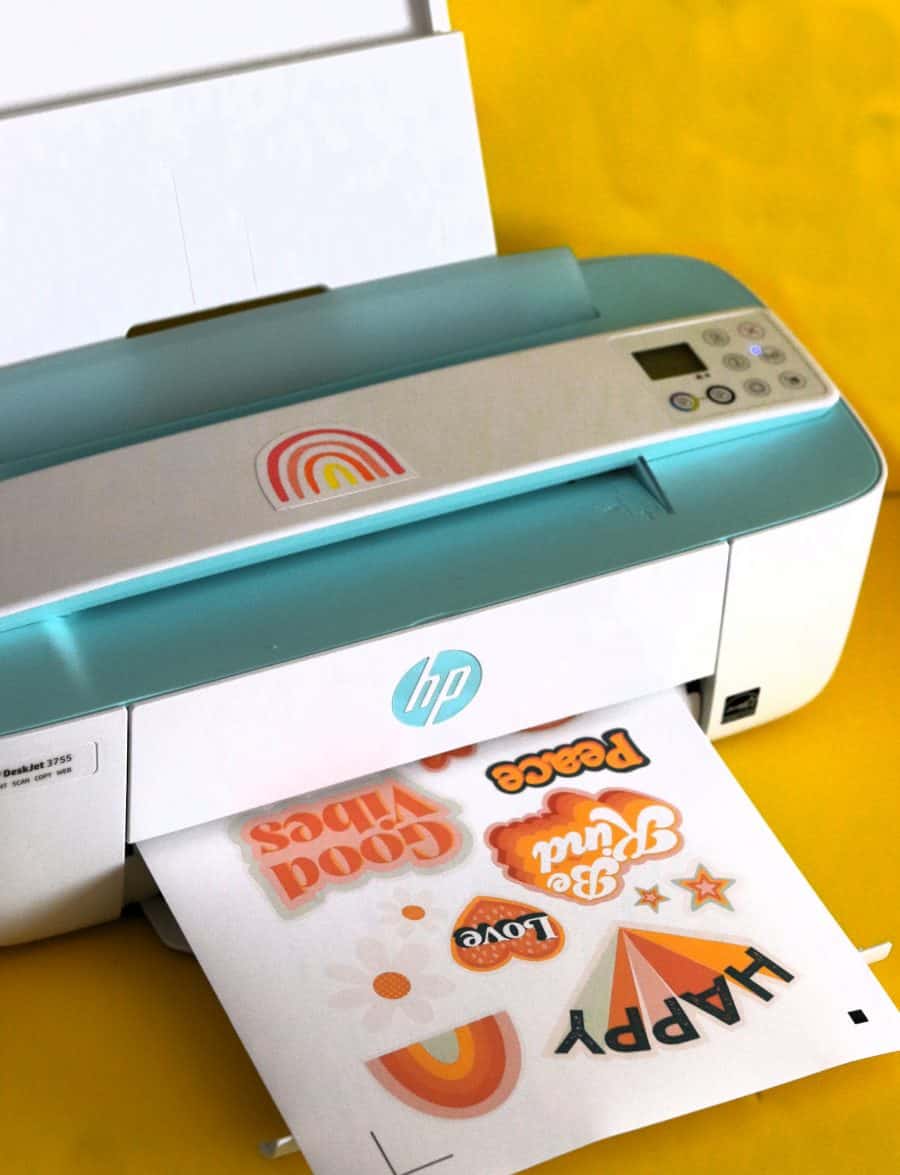
You want to make sure that those black lines are showing up as well as the sticker!
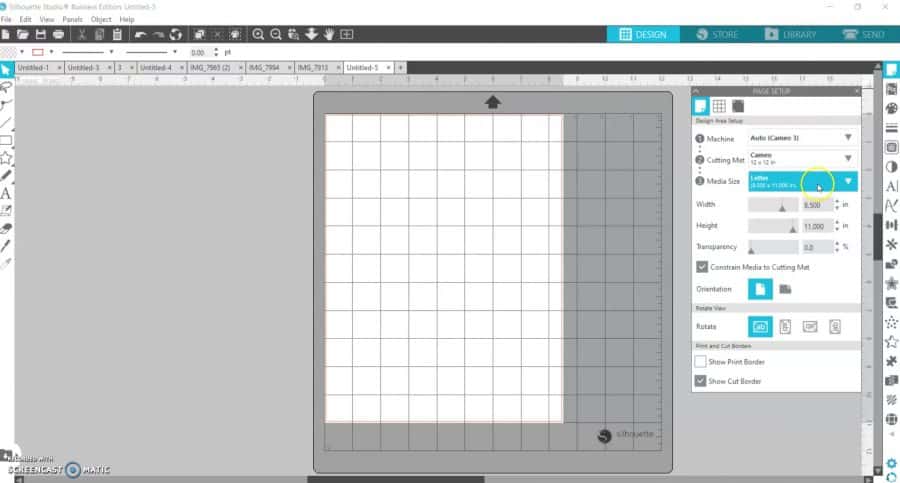
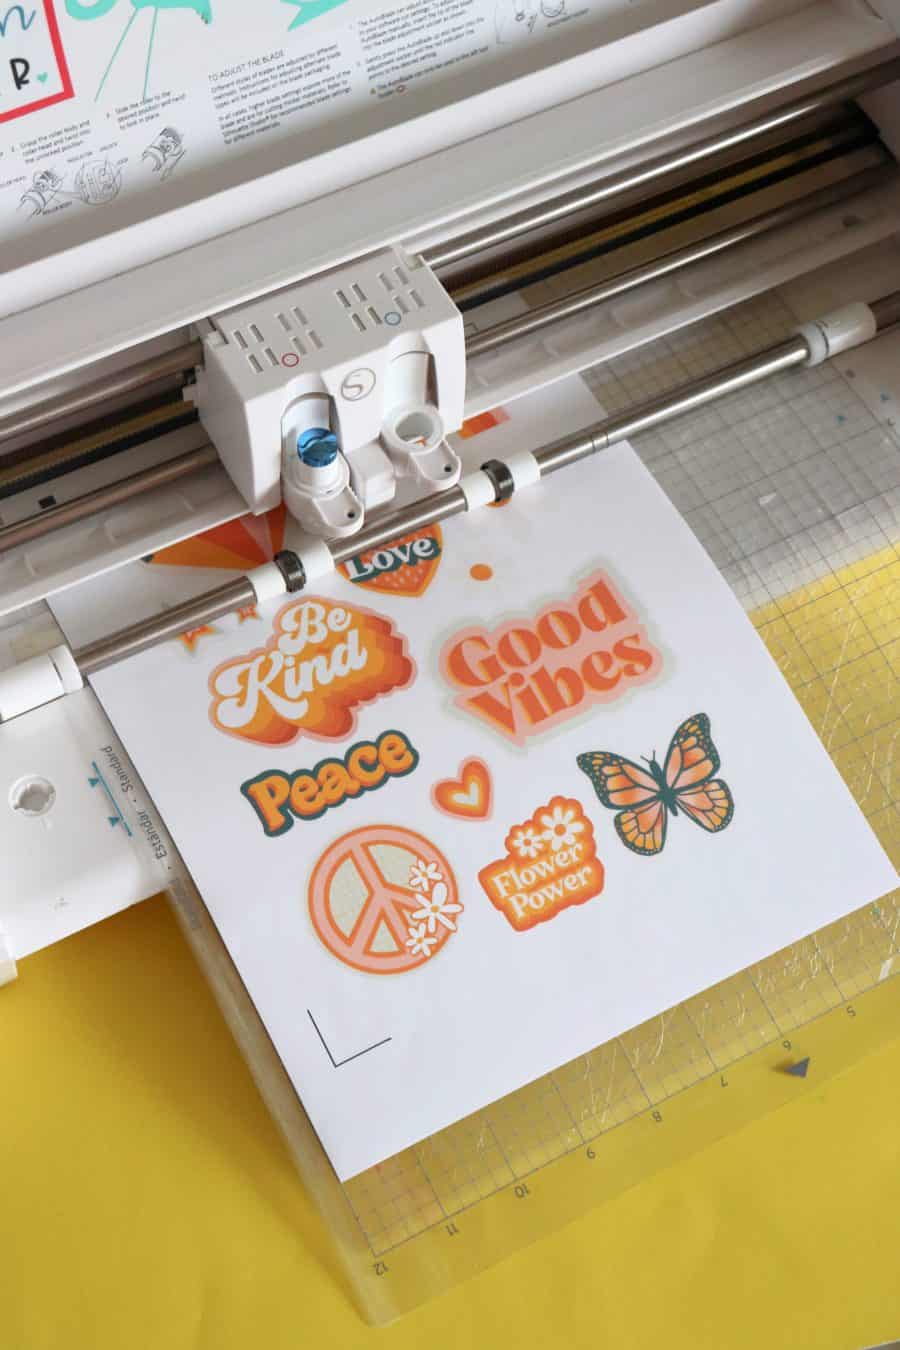
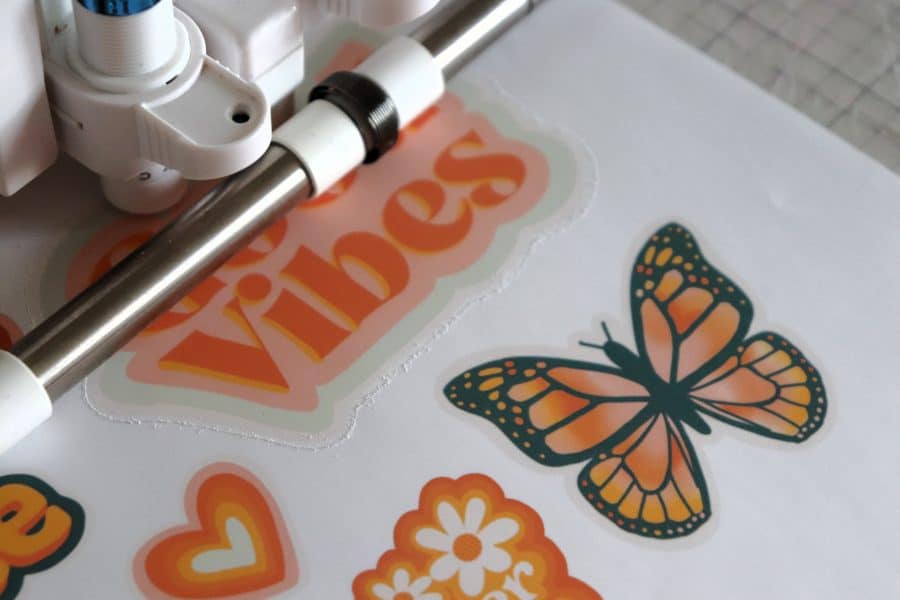
Step 4: Cut out with Silhouette Cameo
Put the sticker sheet onto your mat and load into your Silhouette Cameo. There are two ways to cut out stickers. You can cut all the way through so you have a pile of individual stickers (great if you are selling them).
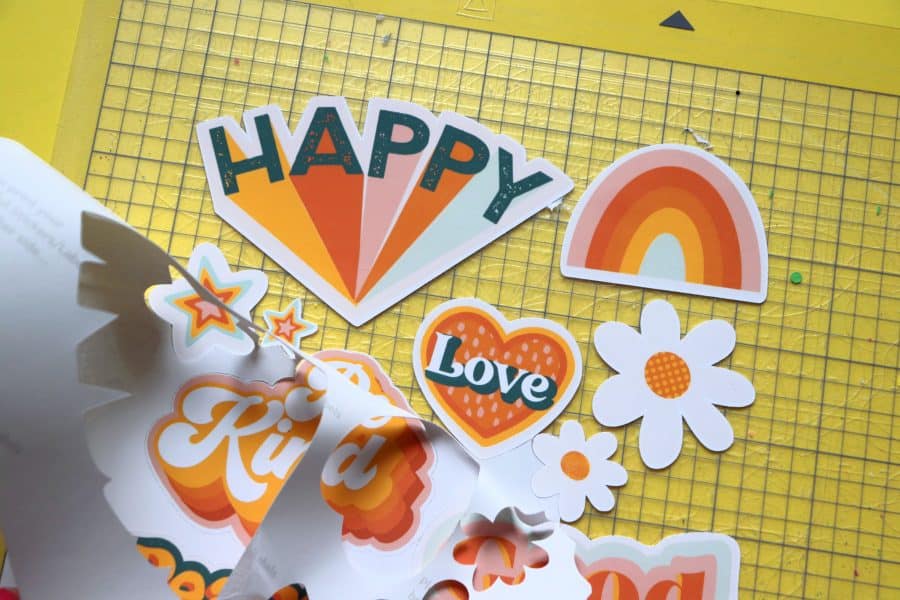
You can also just cut through the top layer so the whole sheet stays intact. This is great if you have a bunch of small designs, cutting out stickers for your planner, or if you are doing stickers or labels for yourself. You can remove the outside sticker paper and it’s just a little easier to grab them when they are on the sheet versus trying to remove the backing.
It’s all in the settings. I click Sticker paper white. The settings that are given are usually what I use if I want to leave all the stickers on the sheet.
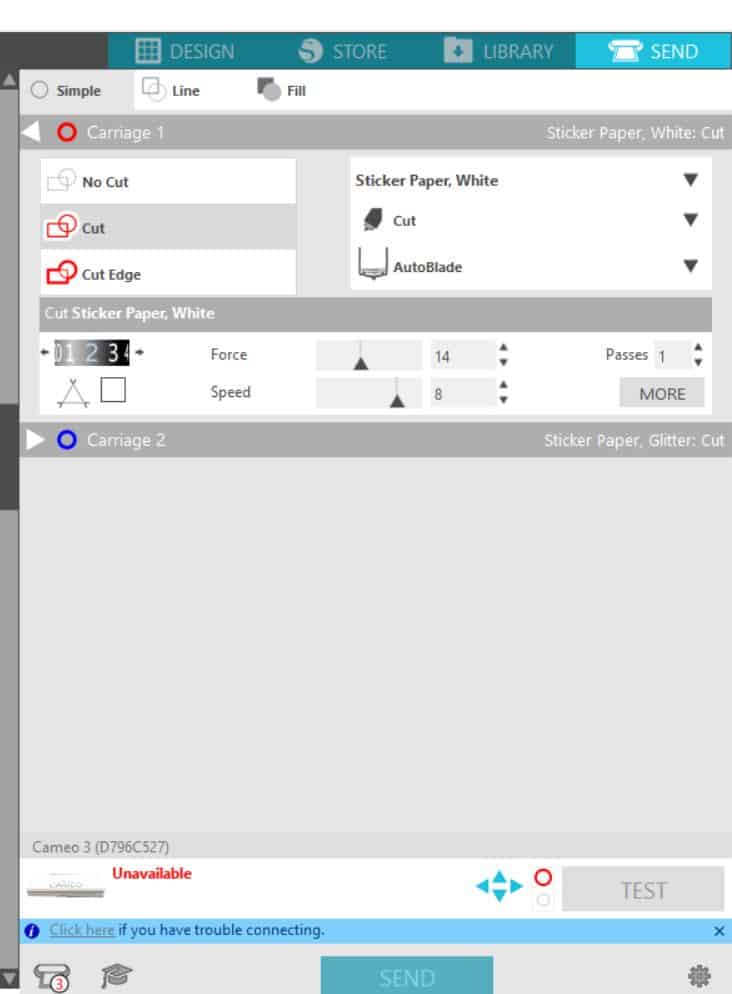
If I want to cut them all out individually, I increase the blade to 3 and do a double pass. (You will need to play around with these settings of course, depending on the age of your blade and thickness of sticker paper!) I always the test cut- but if you do a test cut on a print and cut, it will cut through the registration marks. SO, I keep the scraps of sticker paper that are leftover and put those on a mat to do a test cut before I load the real sticker sheet!
Once your cut settings are good, Load your sticker paper and send! It will go around all the registration marks “reading” it so it knows where to cut! Then just let it do it’s thing!
You could hand cut these out with scissors- But it’s going to be a lot more time consuming, and the silhouette makes it so perfect and professional looking!
Step 5: Troubleshooting print and cut
Occasionally, your Silhouette won’t read the registration marks and/or your cut lines will not cut around the sticker and be a little “off” (FRUSTRATING!) There are a couple reasons!
First: Lighting. If it’s dark, sometimes the Silhouette has a hard time reading the registration marks. People sometimes add extra lights if they are cutting at night, or just make sure to cut during the day. Other people SWEAR BY closing the lid. I’ve never closed my lid- But it’s worth a shot if you can’t get it to read the lines!
Second: CALLIBRATING. Sometimes if it’s a new machine, it’s been bumped or jostled a lot, or a new update can cause your print and cut to not cut out correctly. I swear it happens to me once a year. It’s cutting great one week and the next, it’s not! You just need to recalibrate it! Every time I’ve done it, it totally has fixed the problem. Silhouette has just barely updated their recalibration page- Lots of great info, especially about the bleed feature! Get all the details here!
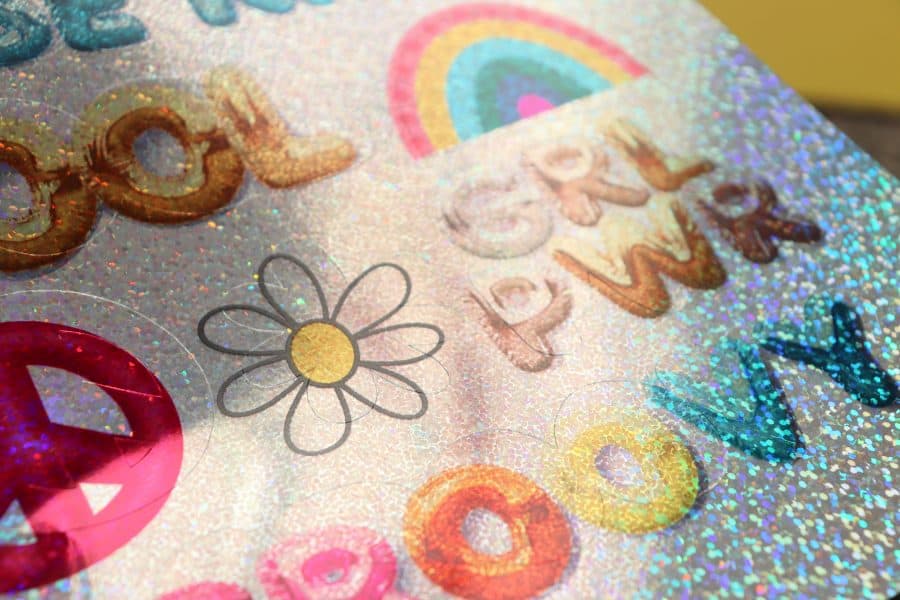
Third: Not regular sticker paper. The iridescent and holographic sticker paper are really tricky to get the cut settings right. The silhouette has a hard time reading the registration marks. I did find an easy hack to get around this- so stay tuned for that post!
The end goal is to get these perfect lines around your stickers!
Quick tip: If you flip your mat upside down and take the mat off the sticker paper vs taking the stickers off the mat- it can help prevent stickers from curling!
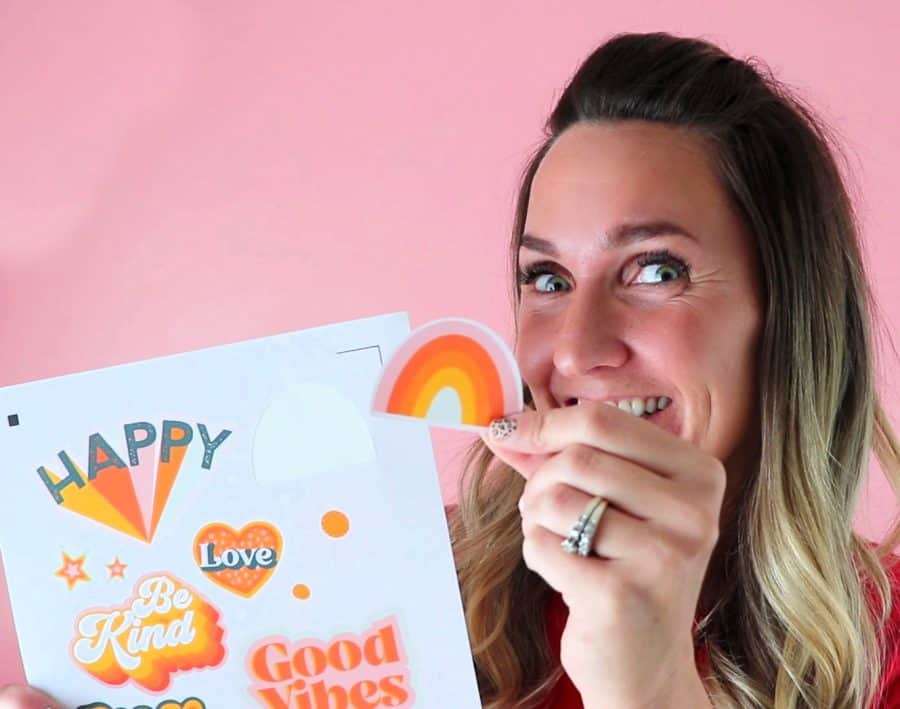
Now you have a slew of stickers ready to decorate ALL THE THINGS!

If you want to grab a free sticker set- sign up for my email below!

Leave a Reply