
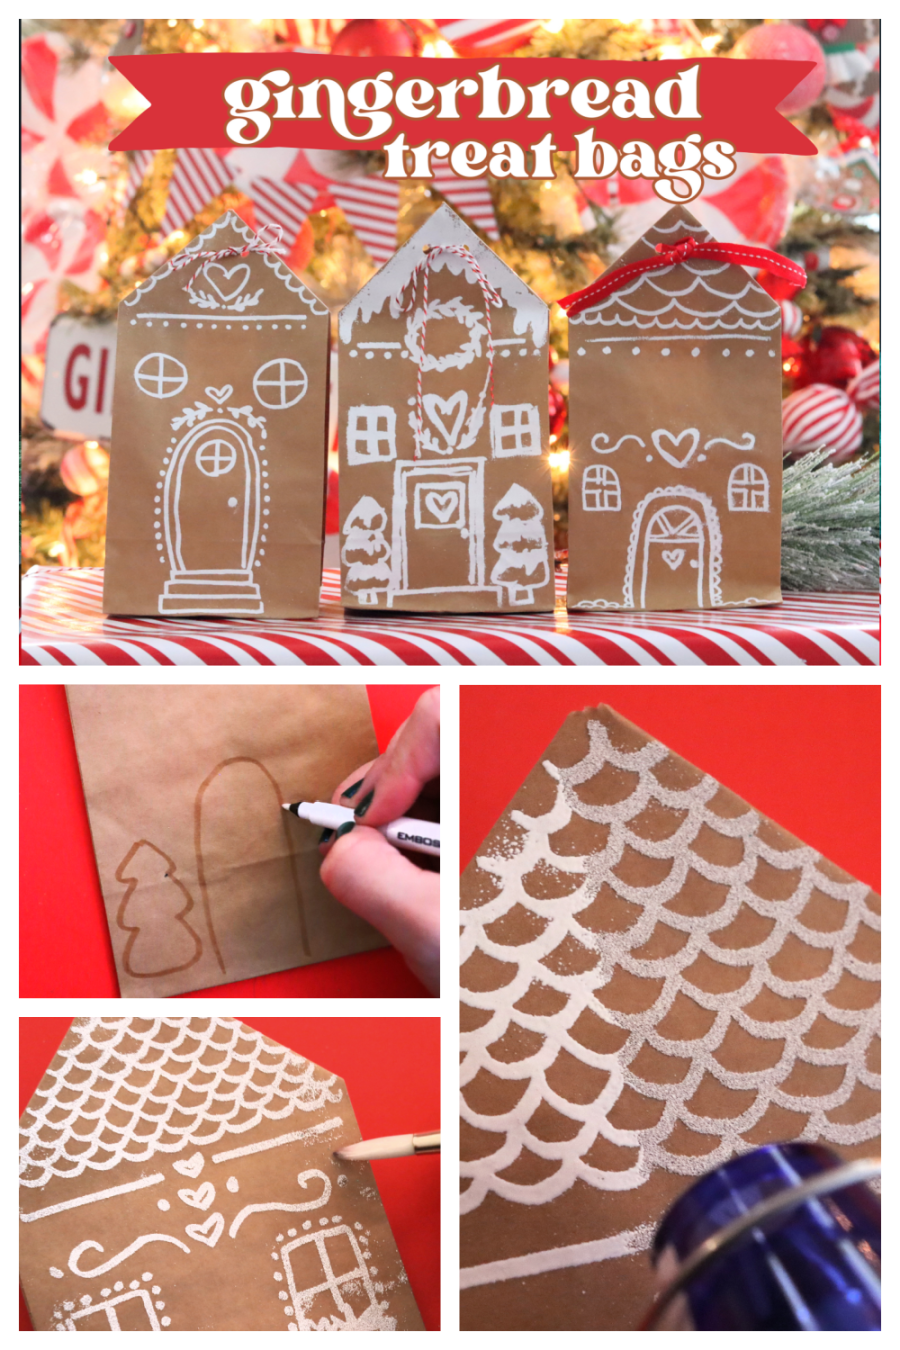
Learn to make the cutest gingerbread house treat bags for the easiest neighbor or teacher gift! This is such an easy DIY project!
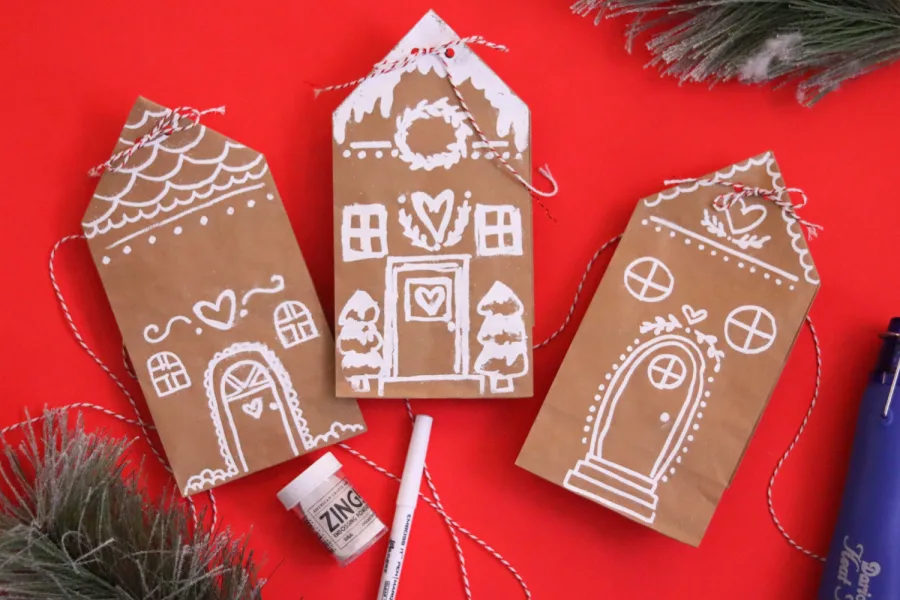
Are you looking for a fun and unique way to share holiday treats with friends and family? Look no further than DIY gingerbread house treat bags – an easy and creative way to bring a festive touch to your holiday celebrations. With only a few simple and affordable supplies, you can create a set of charming gingerbread house treat bags in a fraction of the time it takes to make an entire gingerbread house. In this article, we’ll provide a step-by-step guide to making these delightful little treat bags and share some fun ideas for how to fill them. This project is perfect for anyone who loves to get creative and have fun in the kitchen. So grab your supplies and let’s get started!
Supplies to make a gingerbread house treat bag
- Brown lunch bags
- Twine or ribbon
- Hole punch
- White paint pen or white puffy paint (OR see embossing supplies)
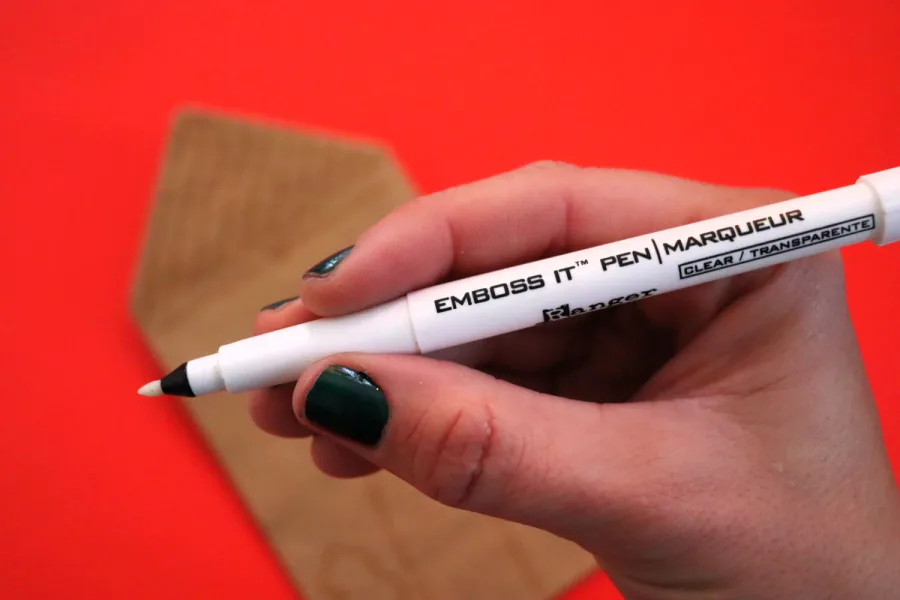
I used embossing technique to create my gingerbread affects. You can use a paint pen or puffy paint just as easily!
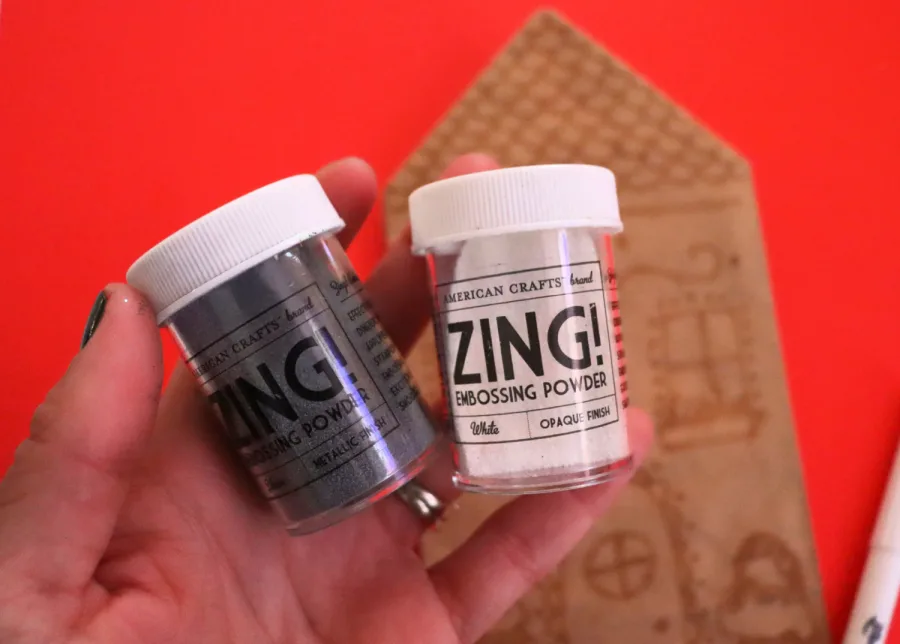
Embossing Supplies
- Embossing pens in clear
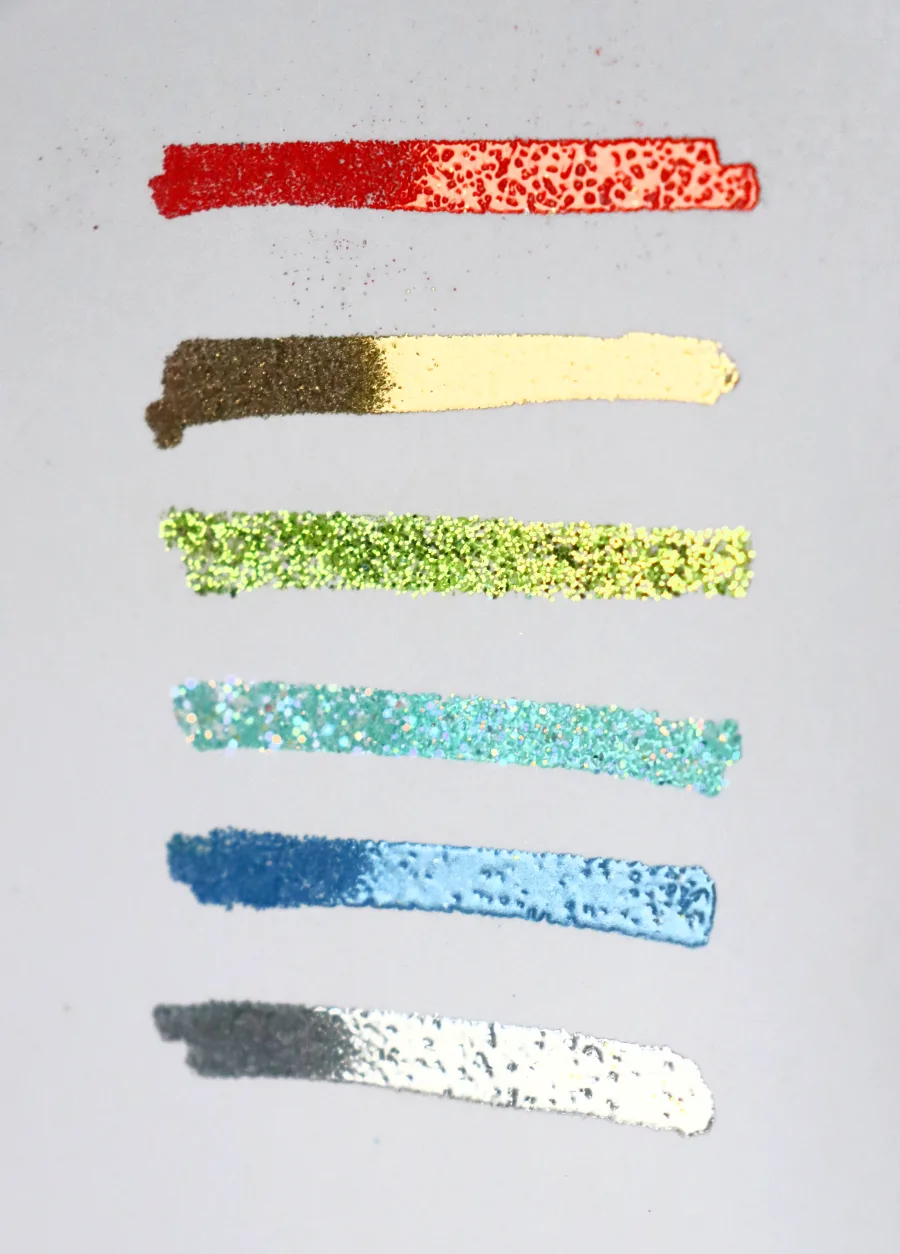
- Embossing powder- I love this set! I usually only buy metallic colors because they look the coolest!
- Heat gun
I have everything linked up here on my Amazon page.
The clear pen is ideal, I have a set that comes in black and clear and I never use the black one.
Here is a look of what the embossing ink looks like when the heat has activated it- the left side is how it goes one and the right side is heated.
How to make Gingerbread house treat bags
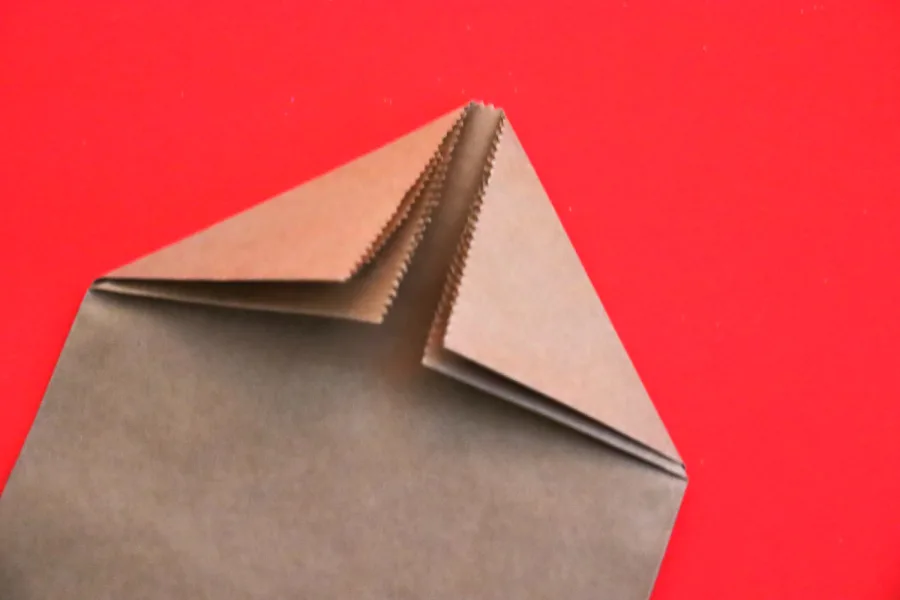
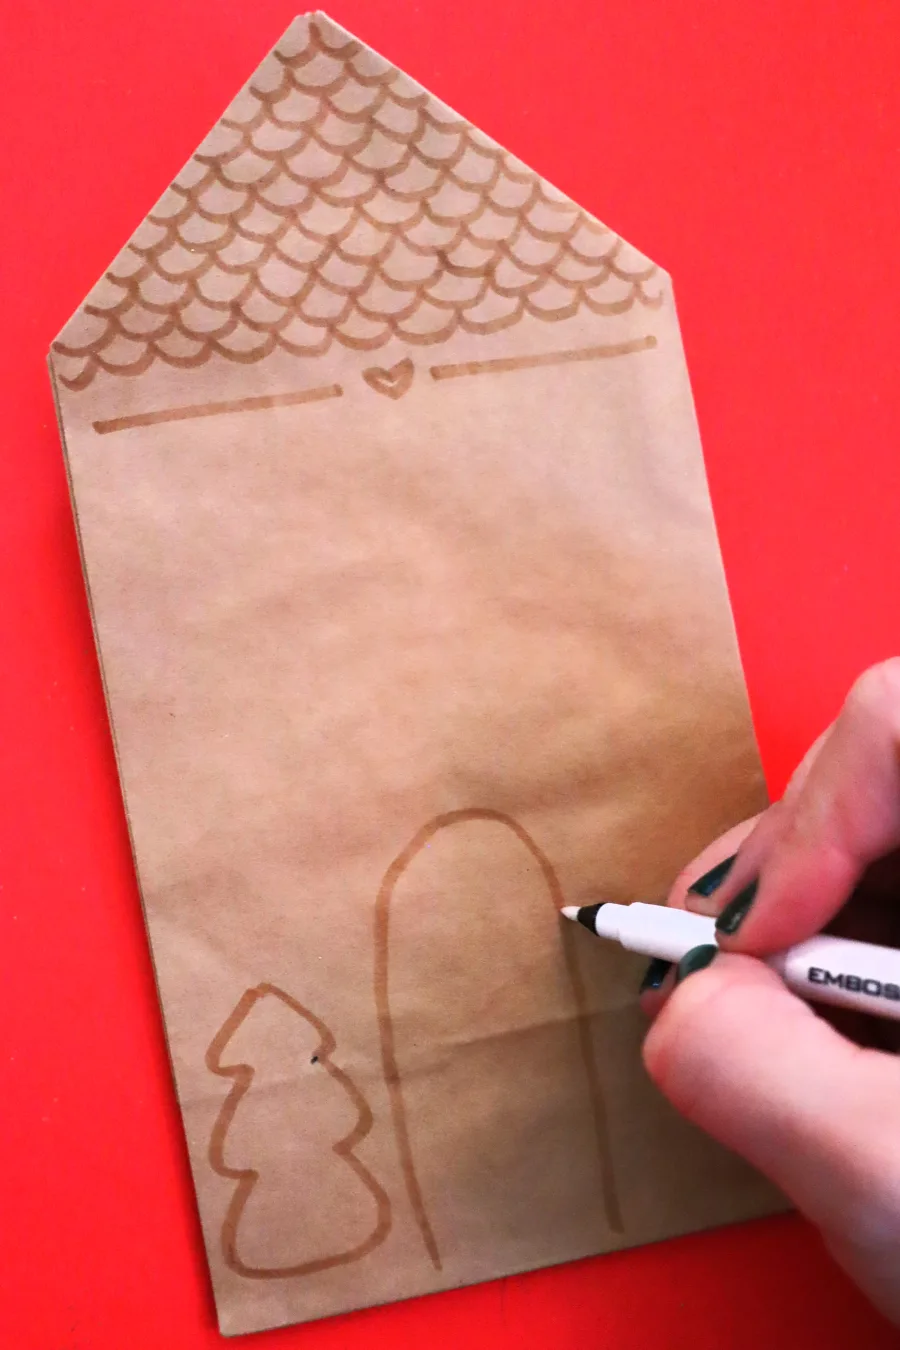
To create the shape of a gingerbread house, you just take your brown paper bag and fold down the two sides of the top to form a triangle (or top of the house!)
Flip the paper bag over and it’s time to doodle.
Embossing the bag
The pen is clear, but you can see where you have drawn. The pen leaves a somewhat sticky residue so work from top to bottom!
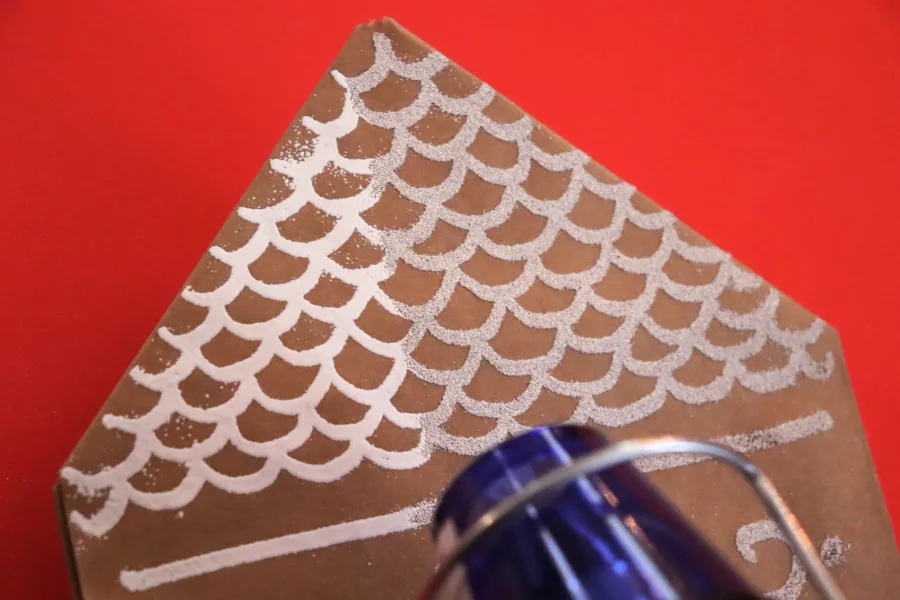
After it’s all drawn on to your liking, it’s time to add the embossing powder!
You just sprinkle the powder right over and shake it around to make sure it gets on all parts of the bag. I do this over a piece of paper so I can easily dump all the excess onto the paper and then pour it right back into the jar!
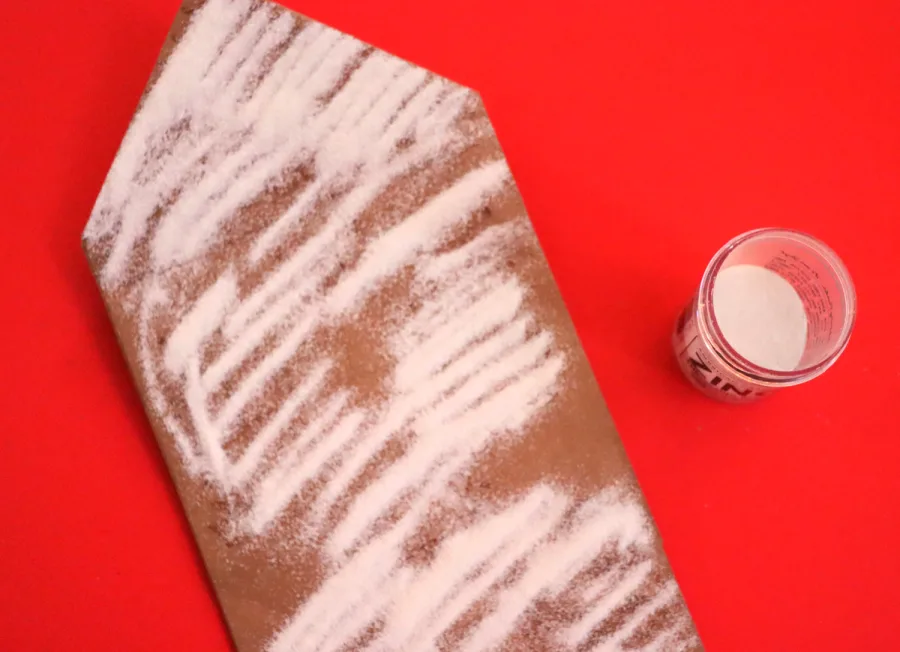
If you leave any speak of embossing powder to the back, when the heat hits it, it going to be stuck there forever! So I have a little paint brush that I use to clean up any smudges or any little stray pieces!
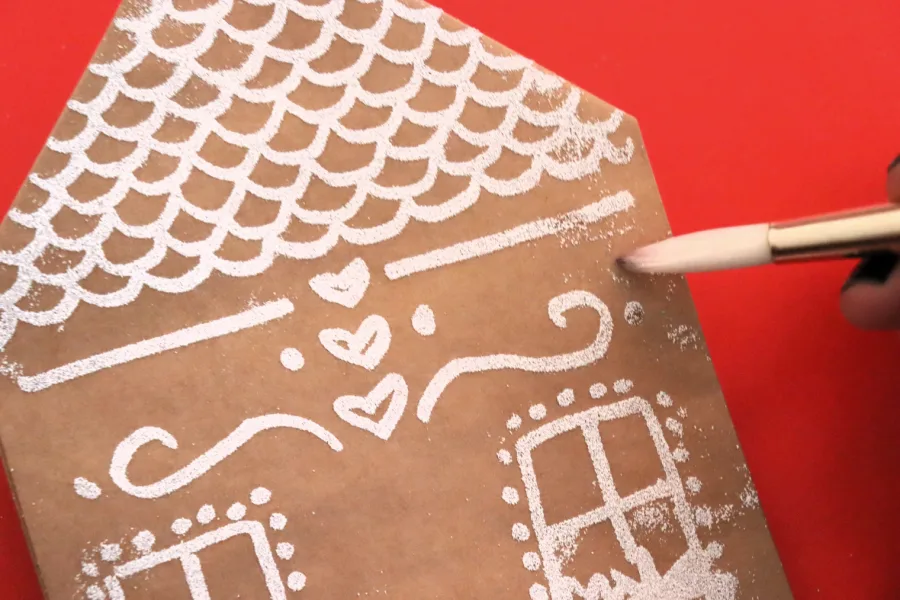
Adding heat
When the embossing powder is in place, it’s time to add heat! The embossing gun gets pretty hot, so don’t hold it too close to the bag! You will see the white start turning glossy. You just keep moving the heat gun around until the entire bag is melted.
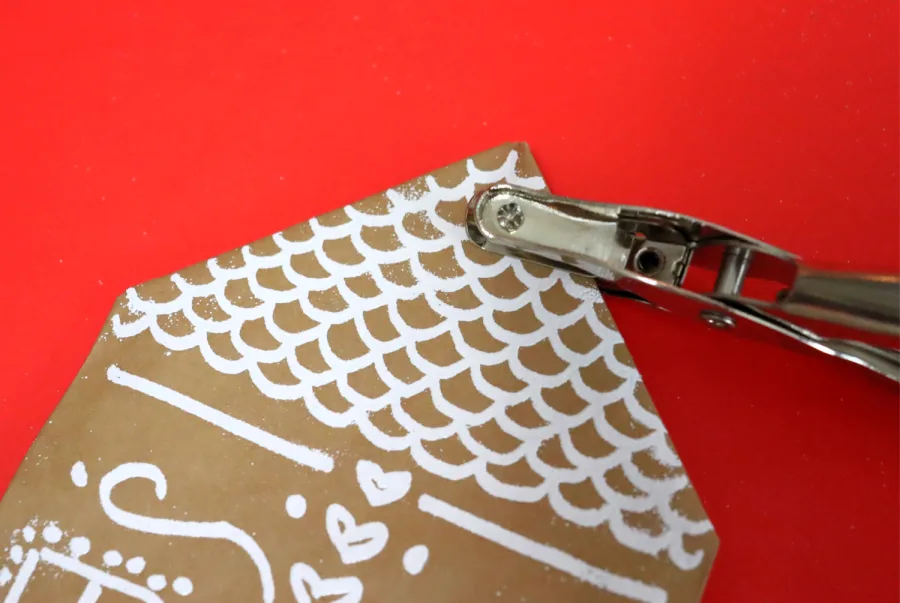
Finishing the treat bag
Once the bag is finished (If you are using the puffy paint, it will take a while to dry!) You need to take the hole punch and pop two holes at the top of the bag.
Fill your treat bag with any fun thing you want: candy, a candle, a fluffy pair of socks, etc! Tie it off with some string to hold the flaps together!
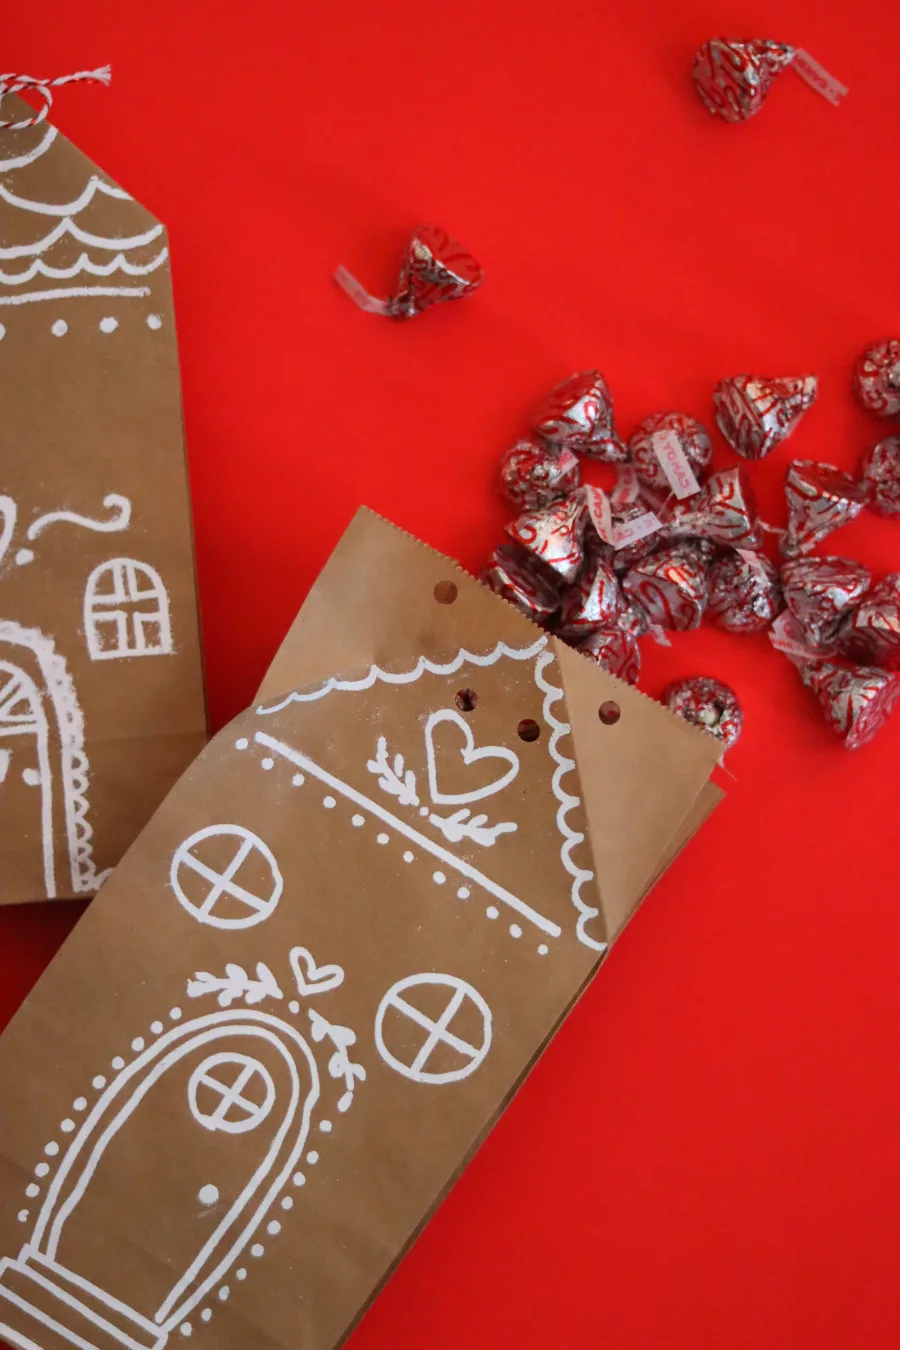

These bags are so cute, you could set them up like a little Christmas village!
Too busy to get crafting today? No problem! Pin this post to remind yourself about this project later! Sharing my projects helps me reach more people, allowing me to continue sharing free content!
Leave a Reply