
Learn how to make this graduation money necklace! An easy and fun way to present your favorite graduate with a gift they will never forget.

Graduation season is the perfect time to show your favorite graduate some love by wishing them the best for the next phase of their life. But if you are looking for a special way to send off the graduate with a unique and personal touch, look no further. Making a graduation money necklace is an easy and fun way to present your favorite graduate with a gift they will never forget. With this guide, you can learn how to create the perfect graduation money lei that will show your graduate just how proud you are of their accomplishment. From gathering the supplies you need to the easy steps to assembling the money chain, you’ll be able to provide the graduate with a handmade and heartfelt gift that celebrates the momentous occasion.
RELATED POST: Money lei tutorial!
Supplies you need to make a necklace out of money!
- dollar bills (I used 60 $1 bills)
- Yarn if you want to add tassels
- Ribbon
You might wonder how much money to give a graduate! I think it depends on how well you know the person and what your financial ability is! There is no right or wrong! My daughter got a Venmo from $5 for graduation and she was super grateful! You could add in some $20 dollar bills if you want to increase the monetary gift, or if you wanted to only do $20, you could substitute some dollar bills with paper. It would look super cool all braided together!
How to Make a Graduation Money Necklace
The trick to making a pretty necklace is making it uniform. It doesn’t really matter what side you fold, as long as you do it the same each time. I think the back is prettier than the front when folded so I chose to have that as the main part of the fold!
Folding up the dollar bills
- Step 1: Fold the dollar bill in half long ways.
- Step 2: Open it up and then fold up the edges to meet the crease you just made.
- Step 3: Fold back in half. You should have a long thin dollar bill.
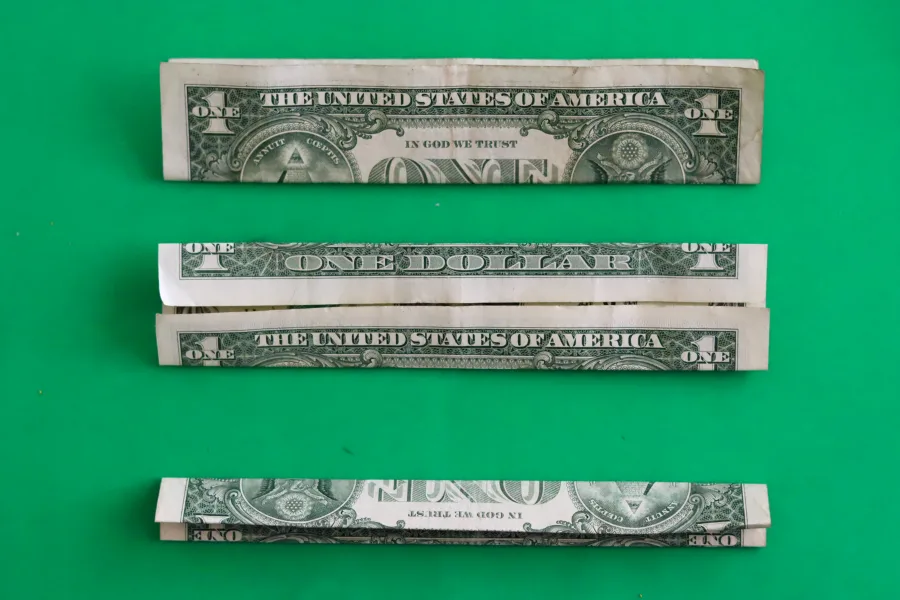
- Step 4:Fold the rectangle in half.
- Step 5: Open the dollar bill and then fold in both ends to meet at the fold you created.
- Step 6: fold that in half.
You are left with a nice folded-up dollar bill. I always made sure that the “in God we trust” was always on the outside.
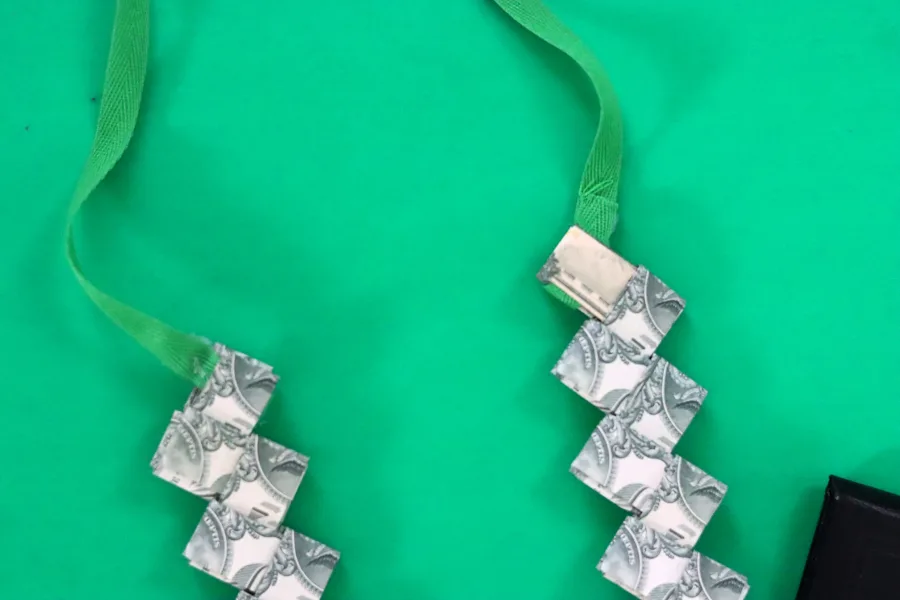
Once you have all the dollar bills folded- it’s time to create the chain! I was trying to recreate Graduation cords, so I do 30 bills for one side and 30 bills for the other side.
How to create a dollar bill chain
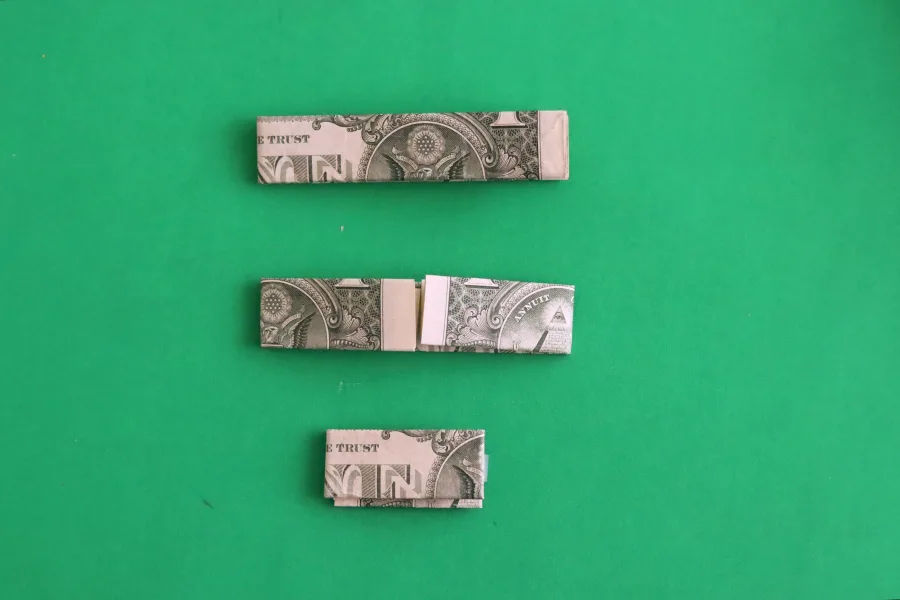
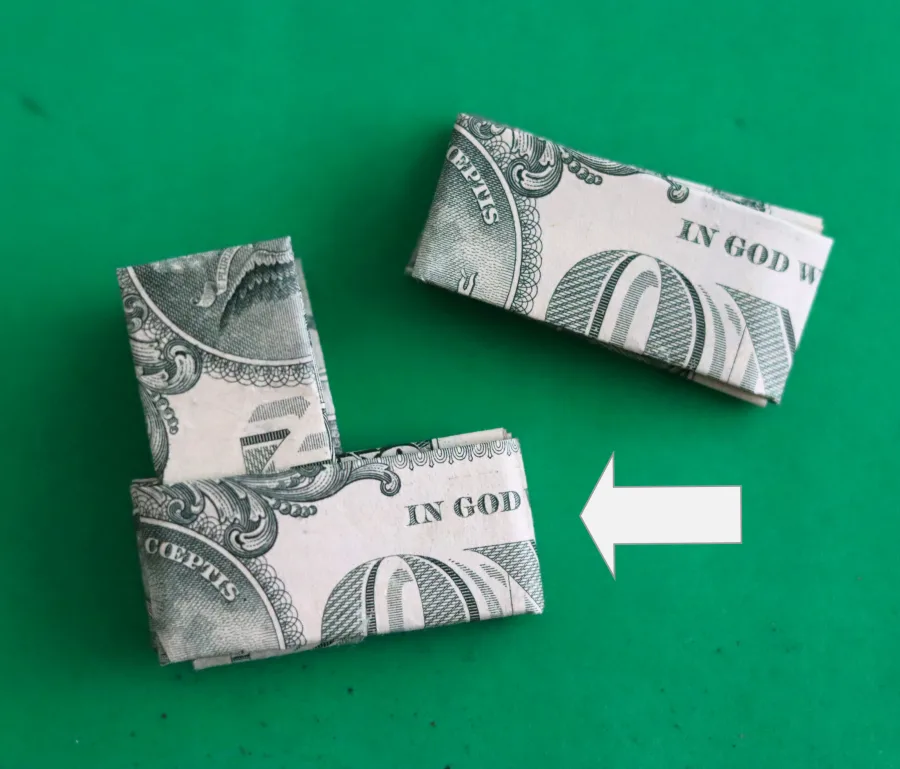
If you hold up the folded bills, you will notice that one side has lots of layers visible and the other side has nice folds. You are going to want to connect each dollar on the nicely folded side!
- Step 1: slightly separate the dollar bill
- step 2: Slide the dollar bill into the folds of the other dollar bill
- Step 3: Push through.
- Step 4: Keep the dollar bill at the top creating an L shape.
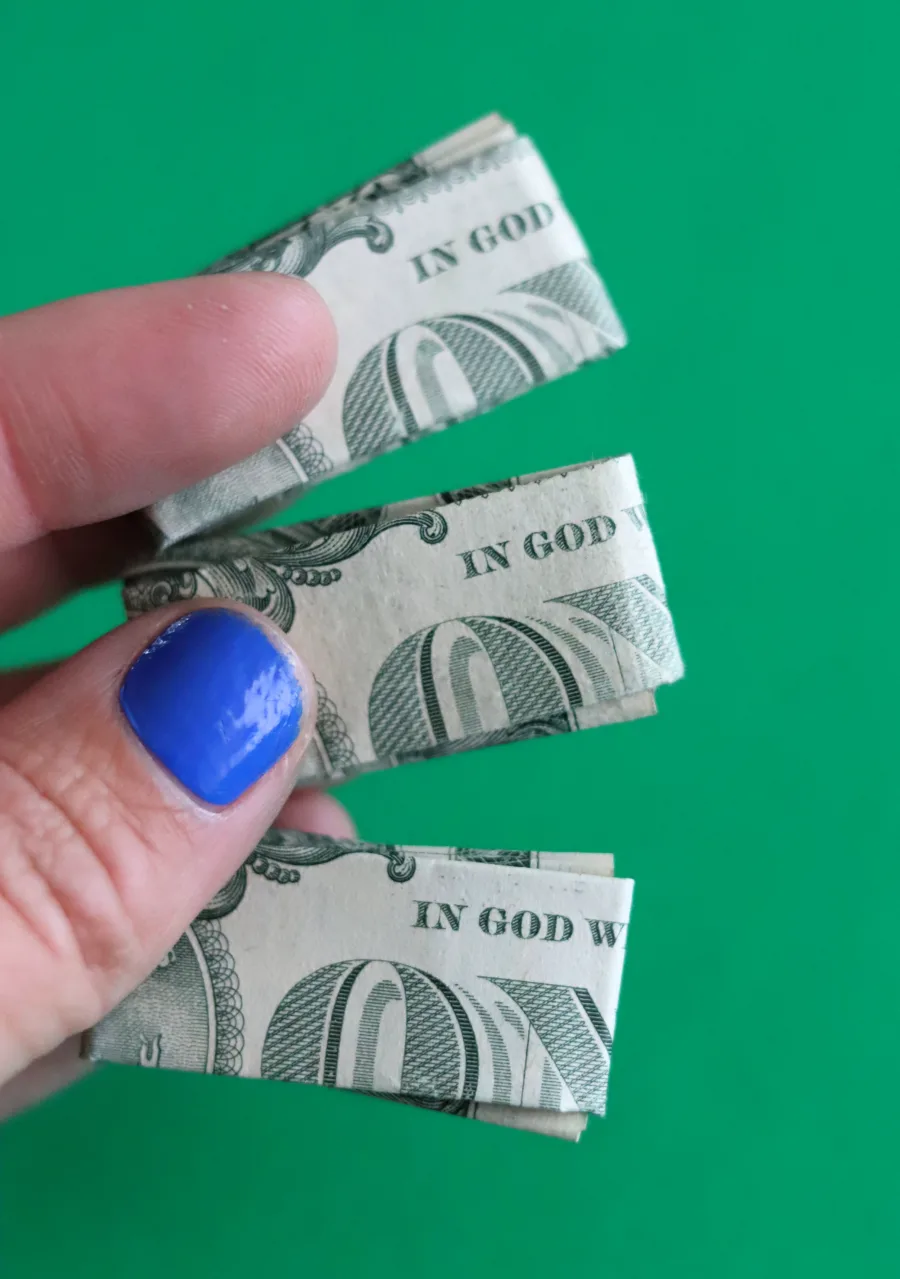
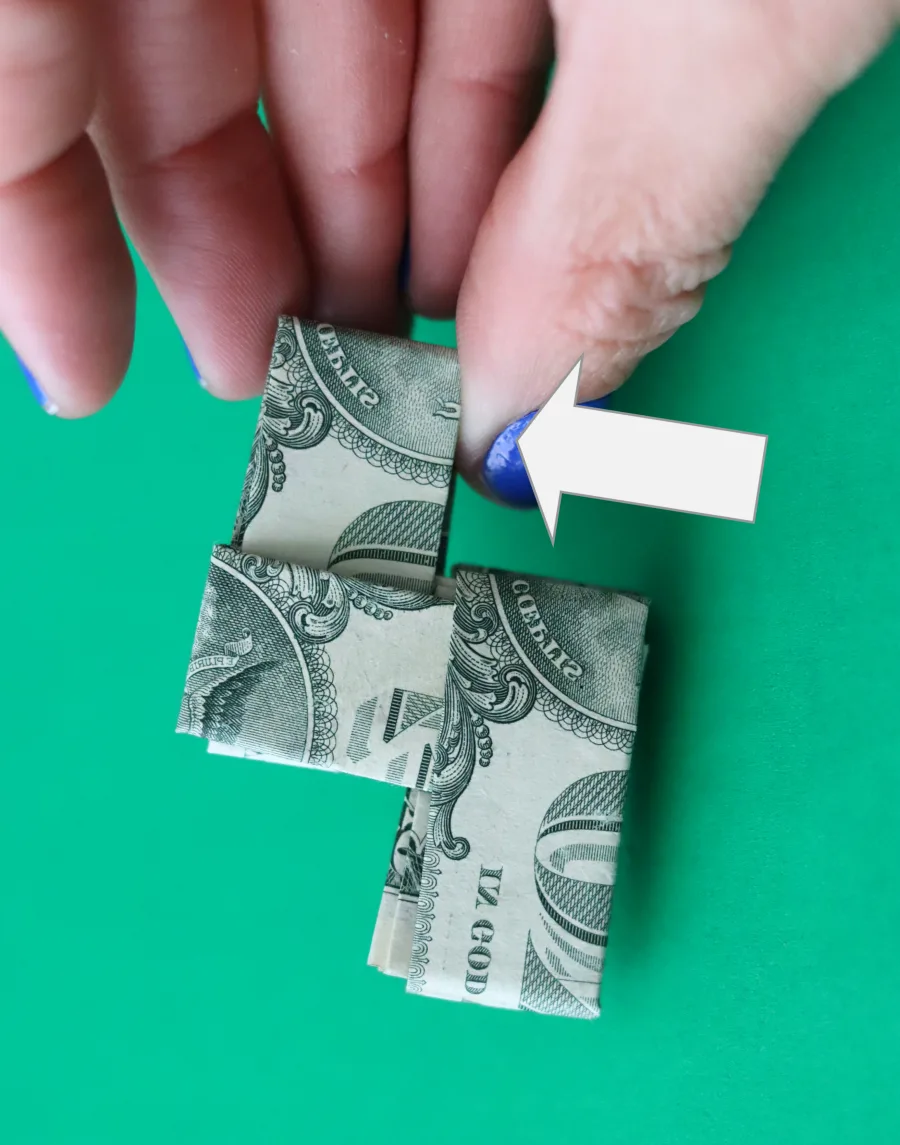
After you create the L shape, it’s time to add another dollar. You are going to make sure the next dollar bill matches the horizontal dollar on the L shape.
You are going to slide it into the top of the L going right to left.
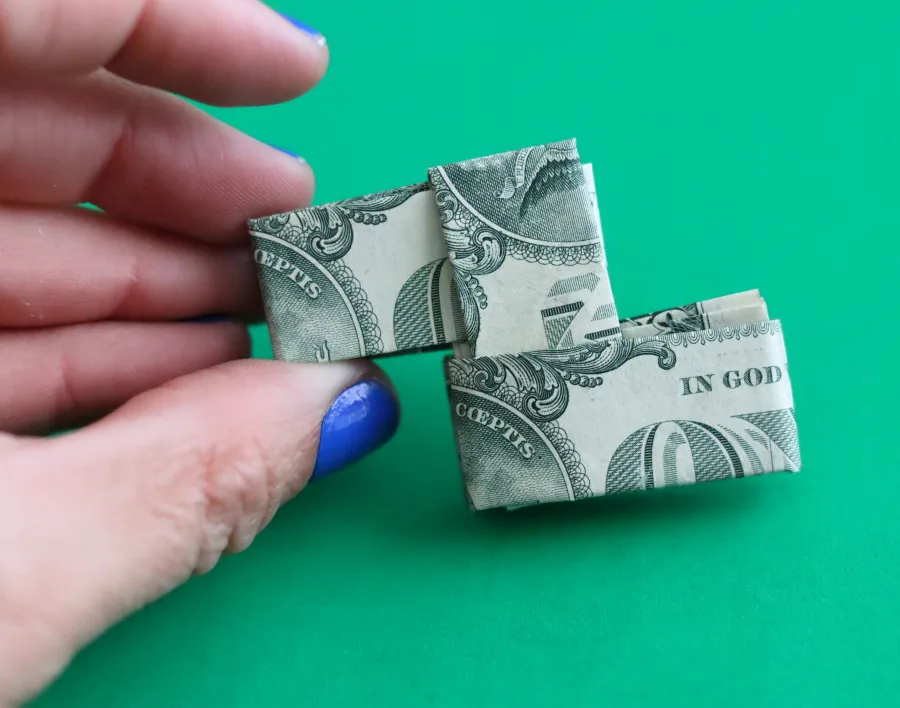
Then turn it, line up the dollar bill so it matches the same direction at the horizontal piece and then slide in another dollar bill. Repeat over and over again!
Finishing the necklace part
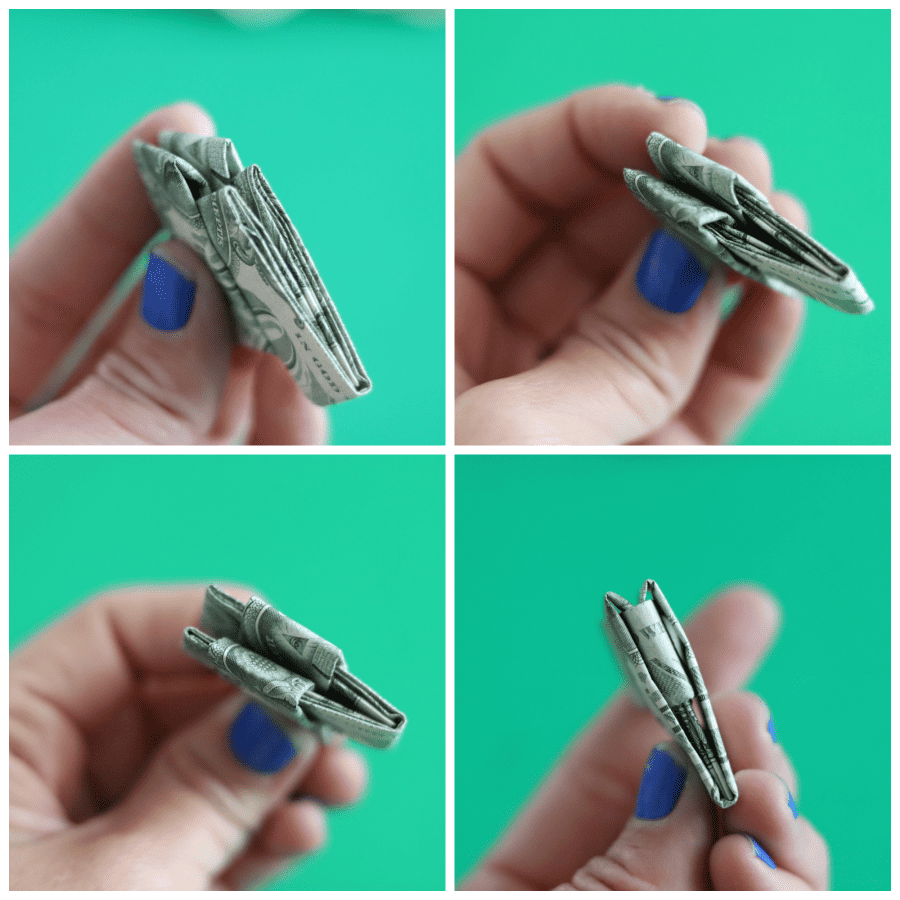
Once I got all 30 on each side, I decided it was time to embellish it!
I followed this tutorial on how to make a tassel and whipped out two tassels to put at the ends of the money chain. The school colors are green and black and her gown is black which is why I opted for green!
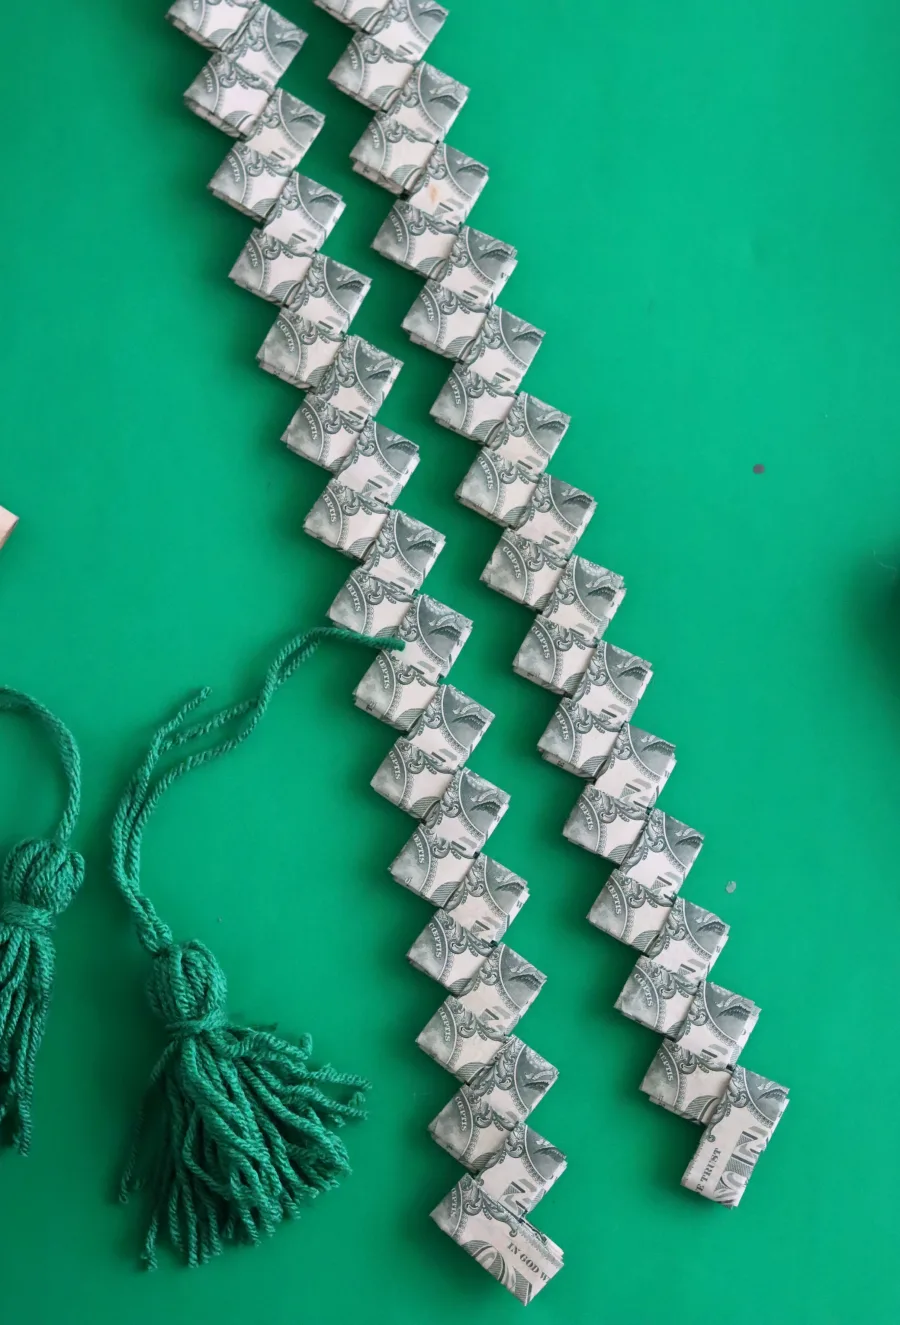
Then I added a ribbon around the loops at the top of the money chain to hang around the neck. I don’t like using yarn since it’s more rough texture.
Alternative: The dollar bill chain is pretty smooth, so you could add 20-30 more dollars and go all the way around. I think it would hang pretty well around the neck!
I did create a video because it’s easier to watch sometimes!
Here is what it looks like all finished! You can also pin this image if you want to save it for later.
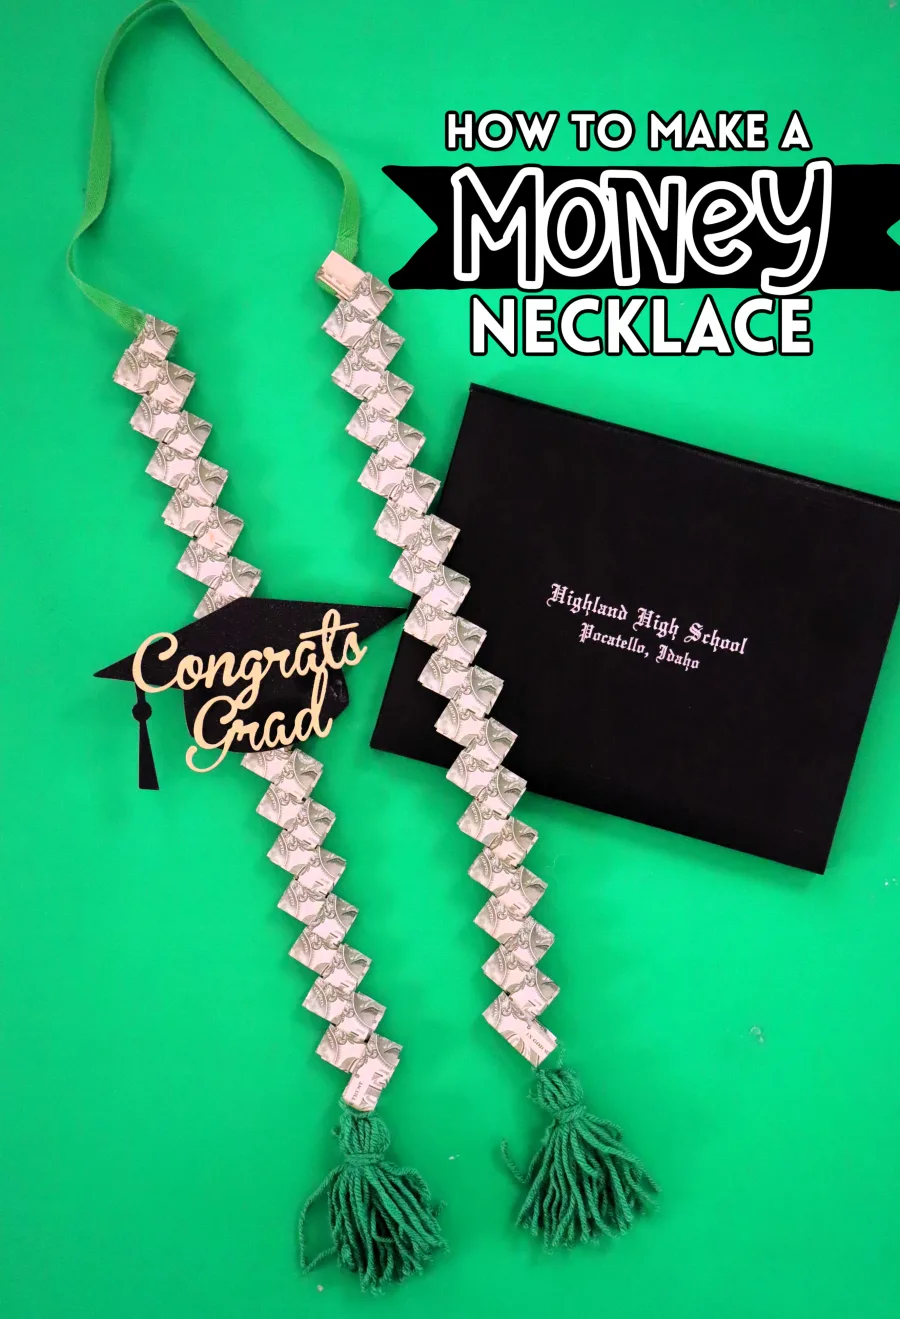
Here is my cute niece wearing it!

Leave a Reply