
Want to turn your windows into giant works of art? Window painting is such a fun and creative activity for kids and adults—and it’s surprisingly easy to do!
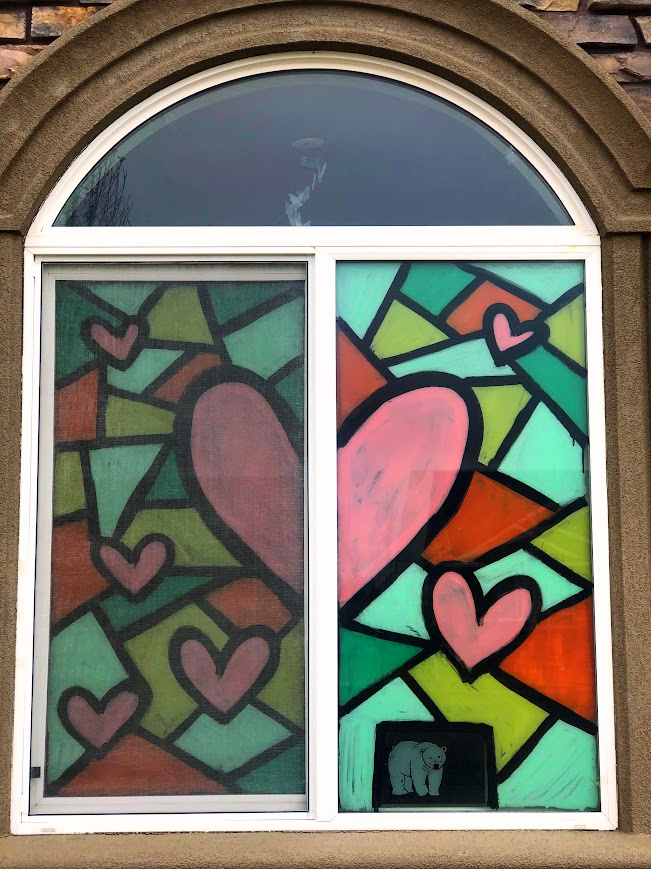
Whether you want to create a colorful stained-glass-style design, paint flowers and rainbows, write encouraging messages, or simply let the kids decorate a window, this DIY window painting project is a fun way to get creative.
The best part? You can use supplies you probably already have at home, and when you’re ready for a new design, the paint can be cleaned off.
And I’m warning you now: painting your windows might become addicting.
What Kind of Paint Can You Use to Paint Windows?
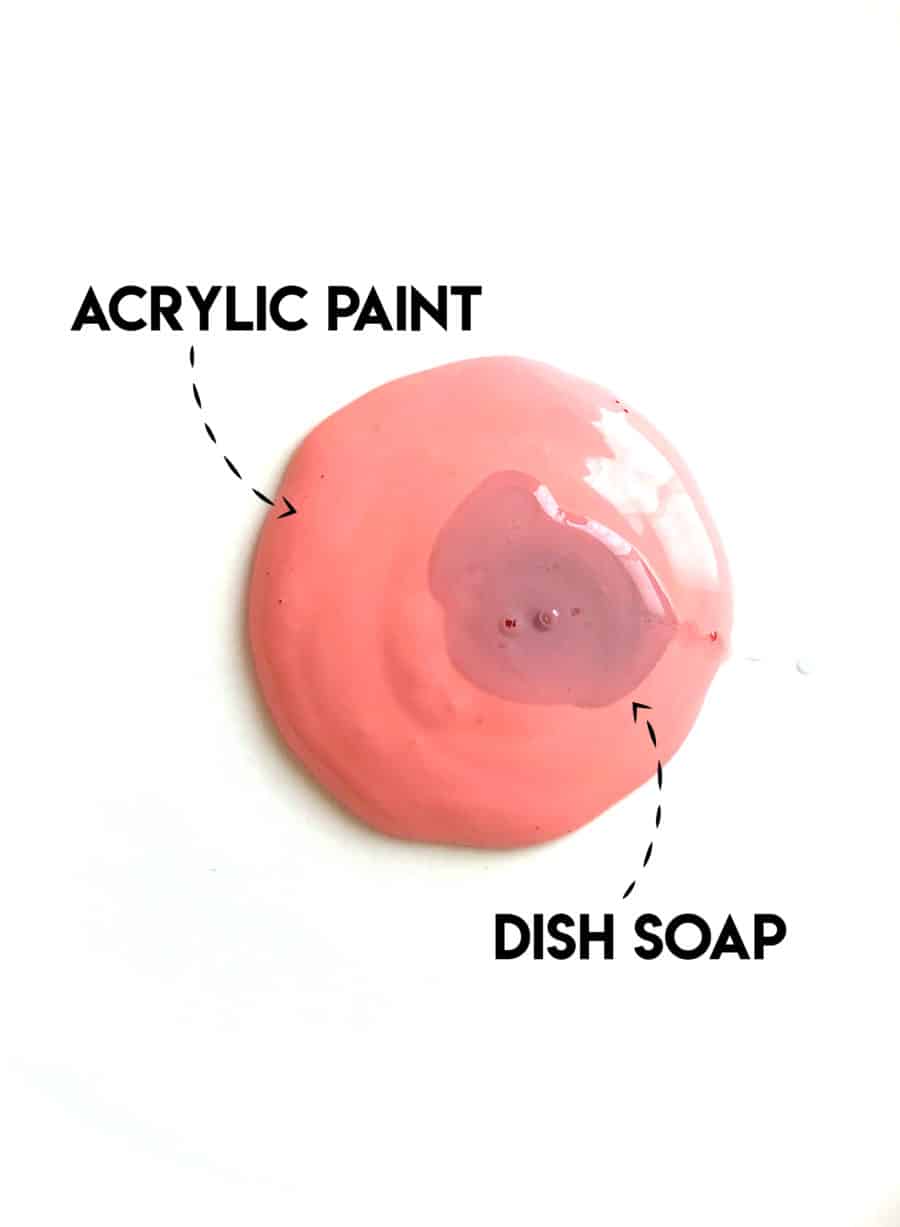
For this project, I used acrylic paint mixed with a little dish soap. I’ve also heard from readers who have used tempera paint for window painting, although I personally haven’t tried it.
I also know that people who paint windows for a living and not just for a fun craft- use interior eggshell house paint. It covers quickly and you can buy it in larger sizes. (You will need a scraper to take it off the window though)
Adding a little dish soap to acrylic paint makes the paint easier to remove from the glass when you’re finished.
Important: Before painting a large area of your windows, test your paint mixture on a small, inconspicuous section of glass first. Different windows and finishes can react differently to paint.
Supplies for DIY Window Painting
You don’t need a huge list of supplies to make painted windows.
You’ll need:
- Acrylic paint
- Dish soap
- Paintbrushes
- Painters tape (optional)
- Window or glass to paint
- Paper towels for cleanup
- Window cleaner or razor scraper for removing the paint
You can use whatever colors you have on hand. I used colorful acrylic paints to create my designs.
How to Make Window Paint
The secret to this project is adding a little dish soap to your acrylic paint.
Stir a small amount of dish soap into your paint before you begin.
You don’t need a ton of soap. The goal is simply to make the dried paint easier to remove from the glass.
I recommend mixing a small amount first and testing it before mixing a whole palette.
How to Paint a Window
Now for the fun part!
Step 1: Clean Your Window
Start with a clean, dry window.
You want the glass to be free from dust and grime so your paint goes on smoothly.
I’m doing my design on the inside- since it was winter and cold outside. it will probably be a little easier for kid to reach from the inside as well.
But I have also painted a window on the outside. I think it’s easier to paint on the outside if you are doing something intricate. Everything is backward when painting inside, so if you are doing words, you will have to flip them to read backwards. So it’s a little tricky. Keep this in mind when planning your design.
Step 2: Plan Your Design
Before you start painting, think about what you want your window to look like.
You could paint:
- Flowers
- Rainbows
- Stained glass designs
- Hearts
- Stars
- Animals
- Seasonal designs
- Holiday decorations
- Inspirational messages
- A colorful abstract design
You can also use painters tape to create geometric designs or sections.
If you’re doing this as a kids’ craft, don’t worry about making the design perfect. Let them get creative!
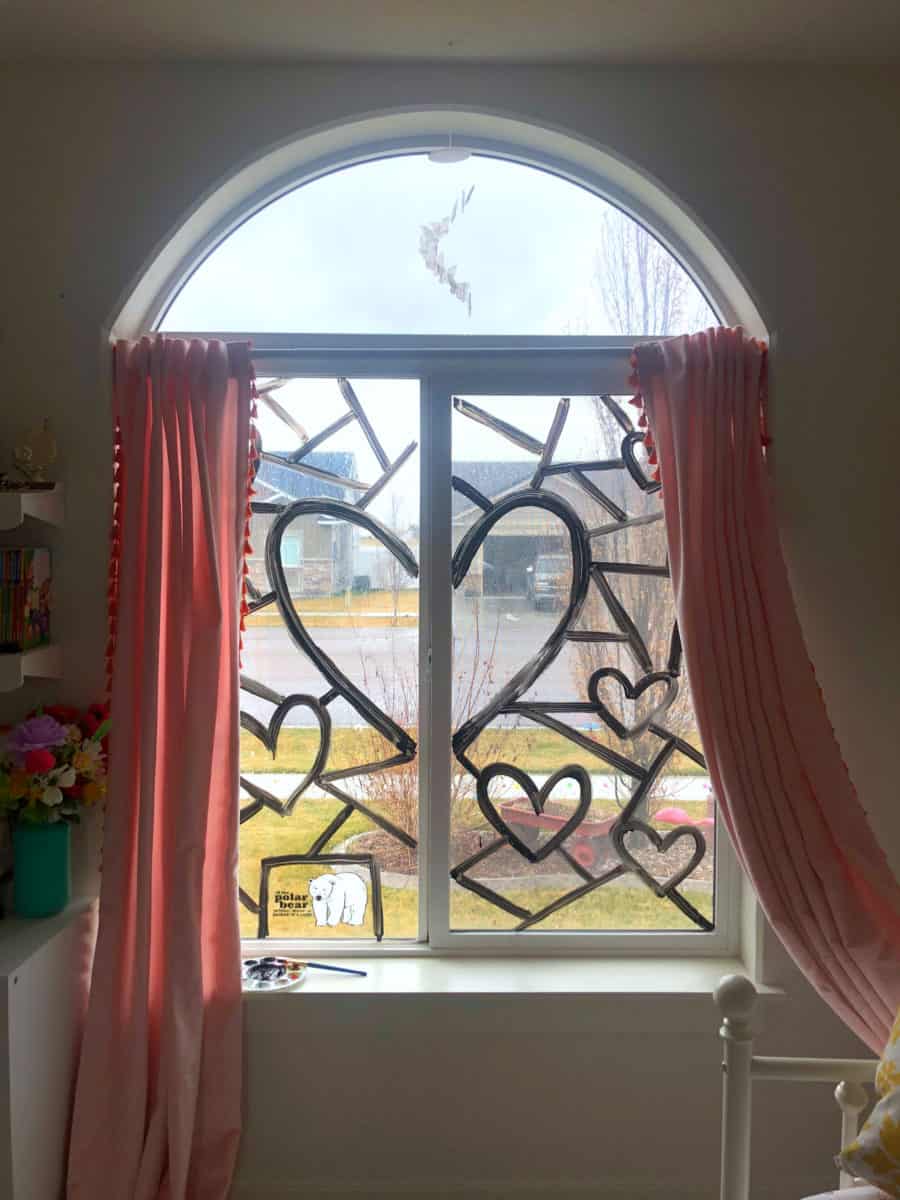
Step 3: Paint the Outline
For my design, I started with black paint.
This created an outline around the different sections and made the finished design look a little like a stained-glass window.
An outline also makes the rest of the painting much easier because you can simply fill in each section with color.
A friend of mine used an Expo marker to sketch her design on the window before painting it, which is another great way to get your design planned out.
Tip: Whatever you paint first is what you’ll see from the outside of the window.
If you are painting from the outside, I like to start with a white flat base to make the colors pop.
Step 4: Let the Outline Dry
Give your outline plenty of time to dry before adding your other colors.
This is important because you don’t want to accidentally smear your outline while filling in the design.
Step 5: Fill in the Colors
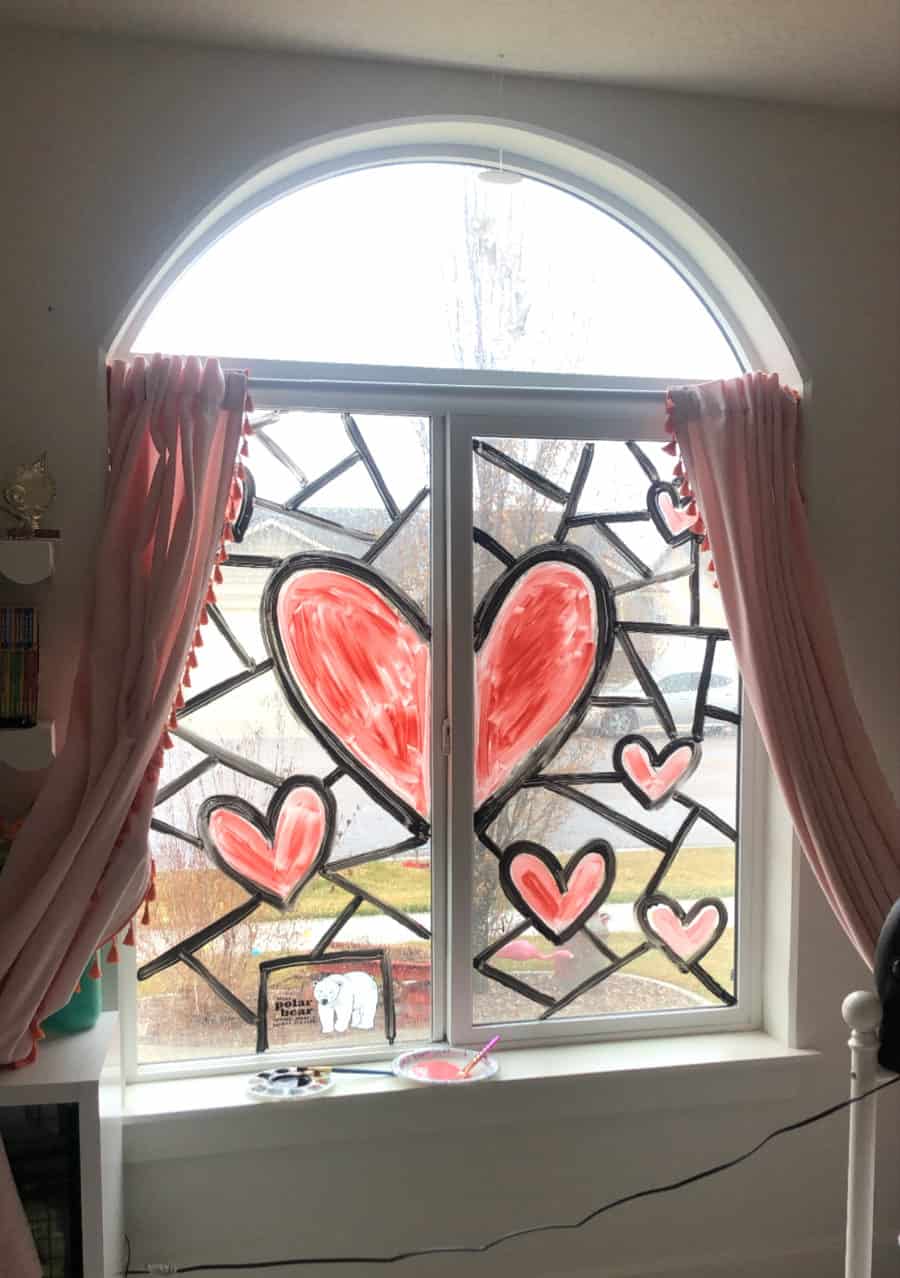
Once the outline is dry, start filling in your design with colorful paint.
This is where it starts looking like a giant coloring page! You could draw a design with black paint to have your kids color it in!
One thing I learned while making mine is that the paint doesn’t always love a second coat. Going back over dried paint can sometimes lift the first layer.
So try to get good, even coverage with your first coat.
I also found that keeping my paintbrush moving in one direction helped create a cleaner look in each section.
Step 6: Look at Your Window From Outside
This is the BEST part.
When you’re painting from inside, you might look at your design and think:
“Hmmm…I’m not sure this looks that great.”
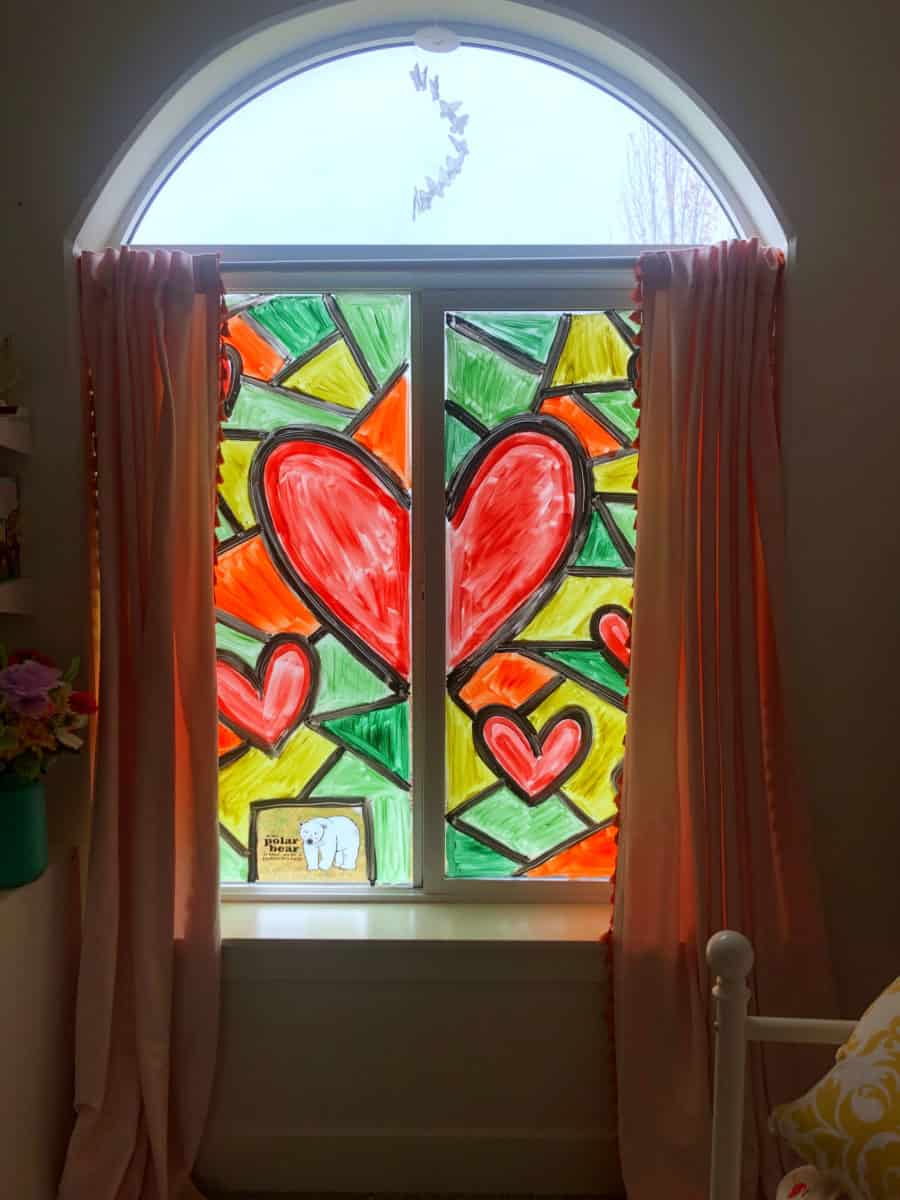
Go outside.
Seriously.
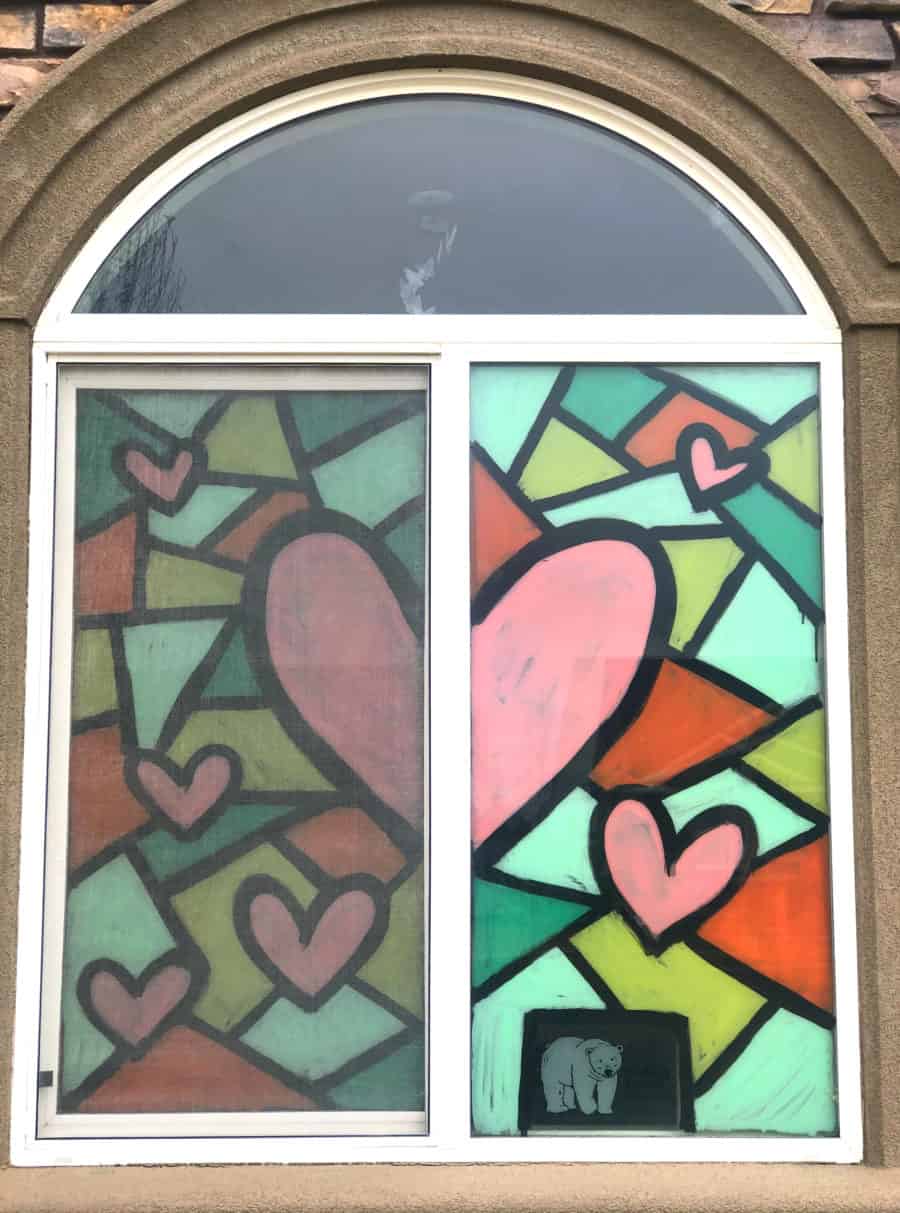
Look at the window from the street or from the other side of the glass.
The design can look completely different once you see it from the outside!
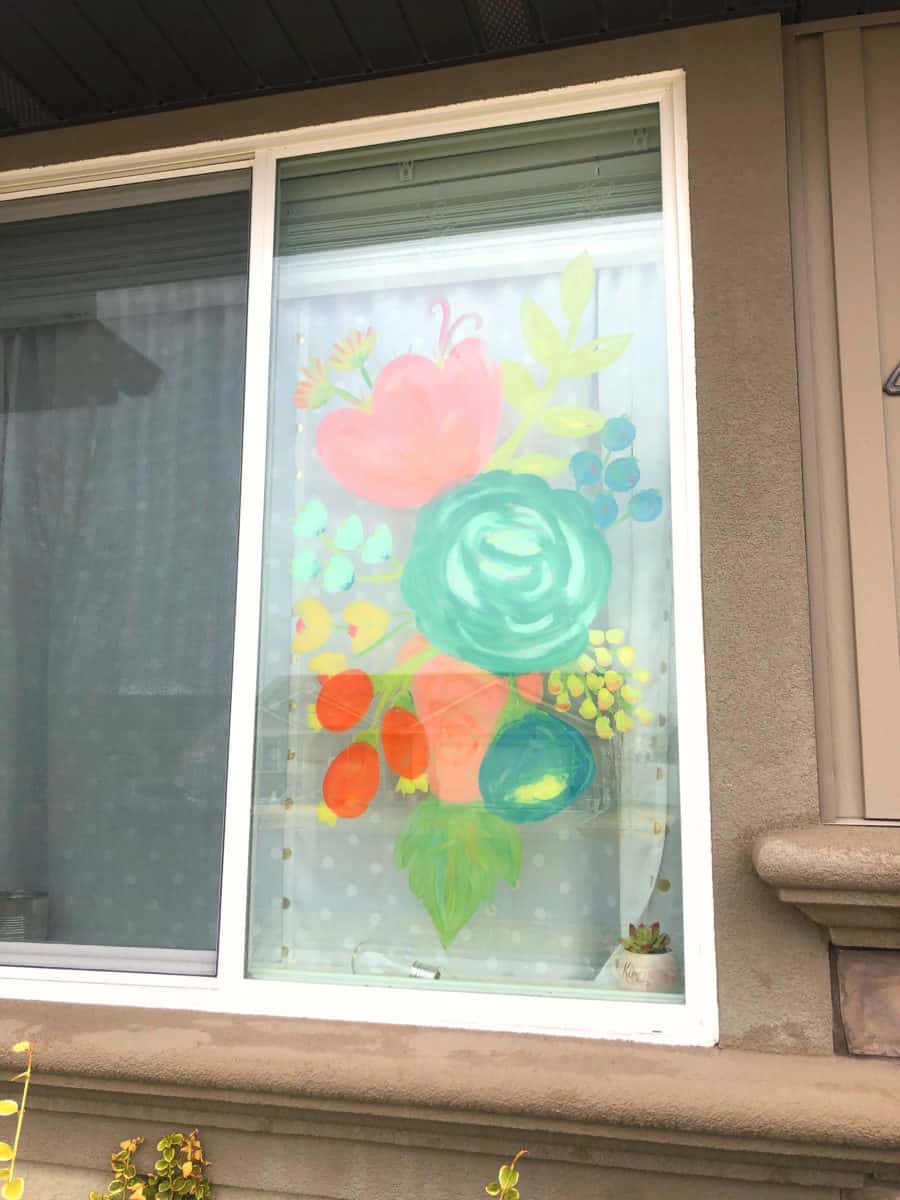
I did want to show you the flower one I painted on my craft room window. It’s cool…but without the black outline, it’s pretty hard to see from the street!
Why Window Painting Is Such a Fun Kids Craft
There is something magical about being allowed to paint on a window.
Kids don’t normally get to paint on giant pieces of glass, so it feels a little rebellious—even though you’re actually giving them permission!
It’s also a great project for:
- Rainy days
- Summer afternoons
- School breaks
- Birthday parties
- Kids’ craft camps
- Family art projects
- Holiday decorating
- Creative play dates
And adults can have just as much fun with it.
Try a Stained Glass Window Design
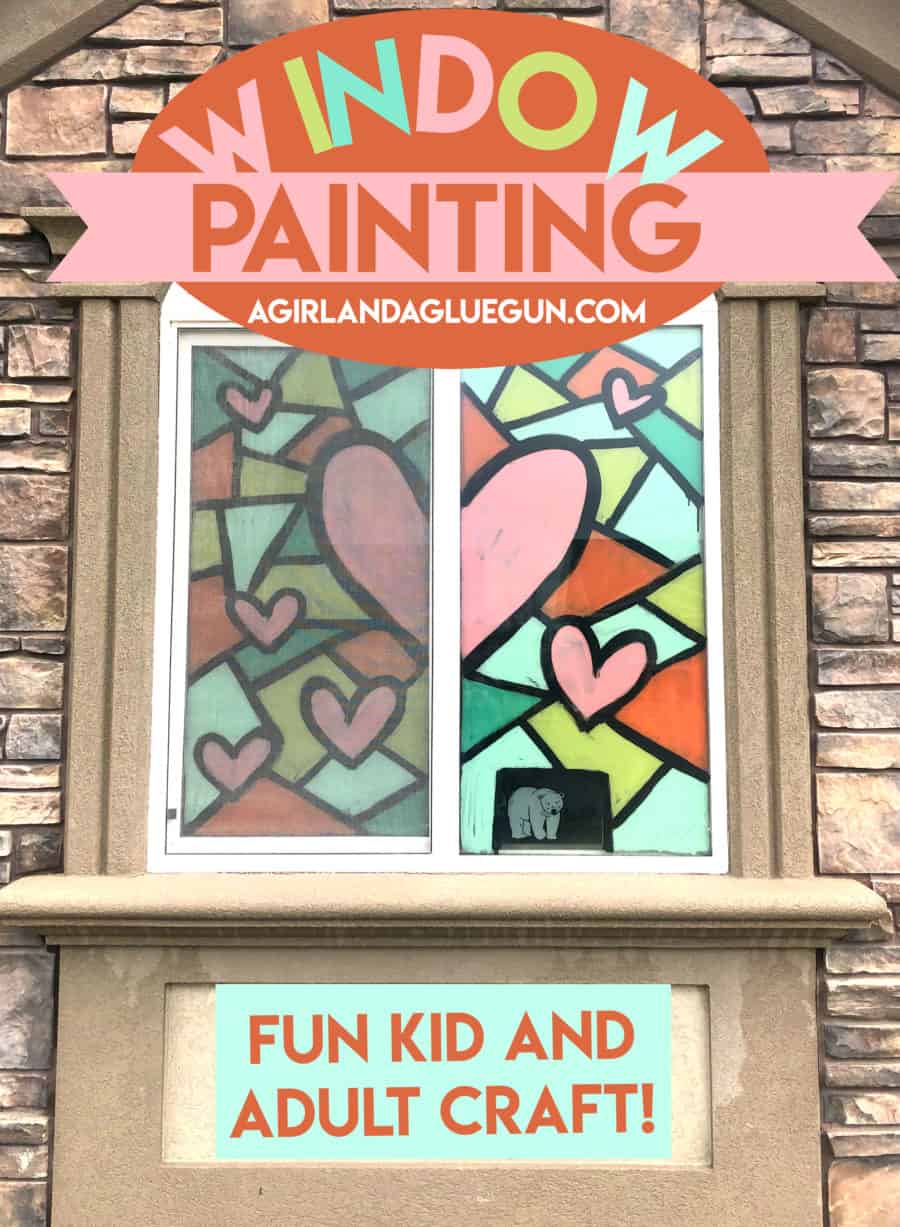
One of my favorite ways to use this technique is to create a DIY stained glass effect.
Paint black outlines to divide the window into different sections, then fill each section with a different color.
You can make:
- Flowers
- Geometric patterns
- Rainbow designs
- Abstract shapes
- Seasonal pictures
The black outline really helps the colors pop when you’re looking at the finished design from outside.
Window Painting for Holidays
This project isn’t just for kids!
You can change the design for any season or holiday.
Halloween Window Painting
Try:
- Ghosts
- Bats
- Pumpkins
- Spiders
- Black cats
- Halloween messages
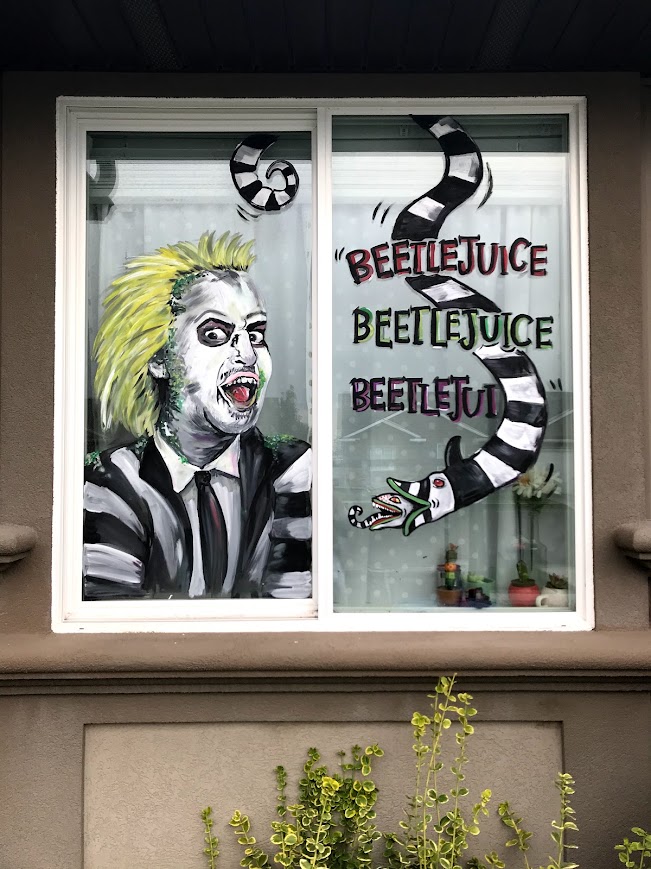
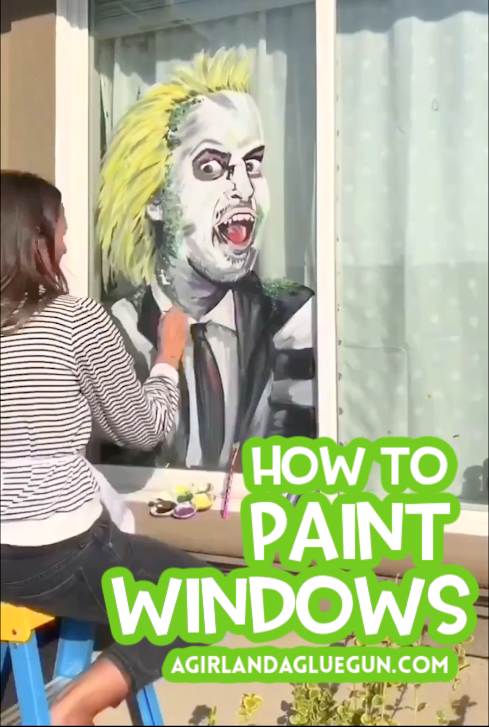
Here is the one I did for Halloween that was Beetlejuice themed! I painted it on the outside.
Christmas Window Painting
Paint:
- Christmas trees
- Snowflakes
- Ornaments
- Candy canes
- Christmas lights
Valentine’s Day Window Painting
Try hearts, flowers, rainbows, and sweet messages.
Spring Window Painting
Flowers, butterflies, rainbows, and sunshine would all be adorable.
Summer Window Painting
Think popsicles, sunshine, watermelon, flowers, and colorful abstract designs.
How to Clean Painted Windows
Okay, I know what you’re probably wondering:
“But how do I get the paint off?”
I wondered the same thing!
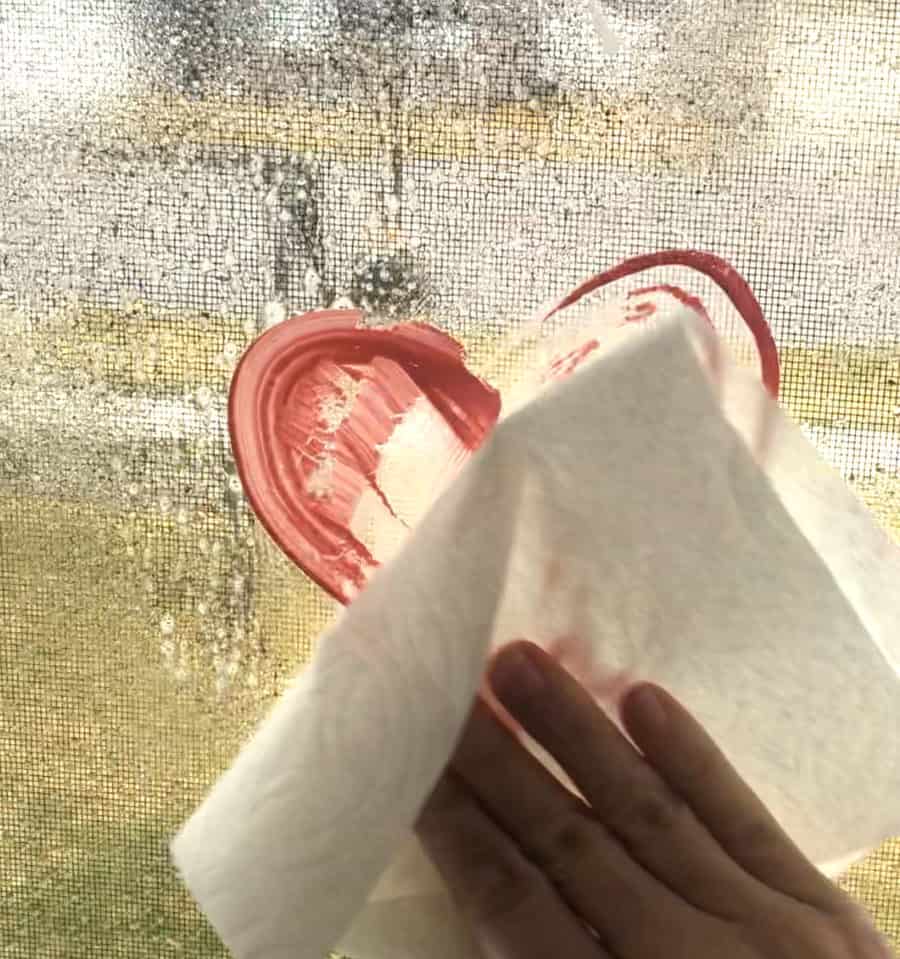
When I was ready to remove my window painting, I sprayed the glass with Windex and wiped it away.
For a large window or a design with a lot of paint, you’ll probably go through quite a few paper towels because the paint comes off onto them quickly.
For thicker areas of dried paint, you may need a little more help. A plastic scraper or other glass-safe scraping method can help loosen stubborn spots.
Always use care when scraping glass and follow the manufacturer’s recommendations for your particular window.
And before painting, test your paint mixture in a small area to make sure it removes the way you expect.
Does Window Paint Block the Light?
One thing I really liked about painting the windows was that the paint didn’t completely block the light coming into the room.
Even with a colorful design covering portions of the glass, the room still felt bright.
And when you’re standing outside looking at the finished artwork, the colors really stand out.
A Few Window Painting Tips
After experimenting with this project, here are a few things I’d recommend.
Use an outline
A dark outline can make your design much easier to paint and can give it that stained-glass look.
Don’t overwork the paint
Try to get each section covered with one coat when possible. Going back over dried acrylic paint can lift the paint underneath.
Keep your brush strokes consistent
Painting in the same direction within each section can help give the finished design a cleaner appearance.
Test first
Before covering an entire window, test your paint mixture on a small area.
Think about the view from outside
Remember that the design can look very different from the exterior, so don’t judge your masterpiece only from inside!
Outline
You can take a Posca marker and outline the design from the outside if you want to create more detail.
Can You Paint Windows With Kids?
Absolutely! Window painting is a great kids’ art project, especially when you’re looking for something a little different from the usual paper crafts.
For younger children, you’ll want to supervise the project closely and handle the cleanup. Let them choose the colors and fill in the sections while you help with the outline.
Older kids can create their own designs from start to finish.
And honestly, adults may end up fighting the kids for a paintbrush.
It’s that fun.
Ready to Paint Your Windows?
If you’ve been looking for an easy DIY window painting project, grab some acrylic paint, dish soap, and a few paintbrushes and give it a try!
Create a stained-glass-inspired design, paint a giant flower, cover your windows with rainbows, or let the kids make their own masterpiece.
And don’t forget to step outside and look at your artwork from the street.
That’s when the magic happens!
Happy window painting! 🎨
The BEST kid crafts and activities
and when I say kids, I mean kids of all ages!
- black glue art
- salt art
- hot rocks
- Yarn bracelets
- DIY window clings with puff paint
- Play dough activity mats
- Melted crayon art
- magic wallet
- Learn to make black scratch paper
- Melted Crayon Suncatcher
- Pressed Flowers Jar
- Bleeding Tissue craft
If you are looking for more fun kids’ crafts- my craft camp has two weeks full of fun projects that you will love to do as well!
Kathy says
I actually tried painting windows with tempera. I do not recommend. If there is a lot of moisture (heavy steam or rain) tempera will run. Even a heavy mixture from powder. Acrylic stays until you take it off. Not to mention the beautiful stained glass effect.
Angela says
I have used just straight acrylic paint and use a razor type scraper to remove is super easy. I’ve also used the scraper to thin over painted lines or because I paint from inside, I screw up the layers sometimes and have to remove a misplaced line here and there. The scraper takes it off like butter. So smooth.