
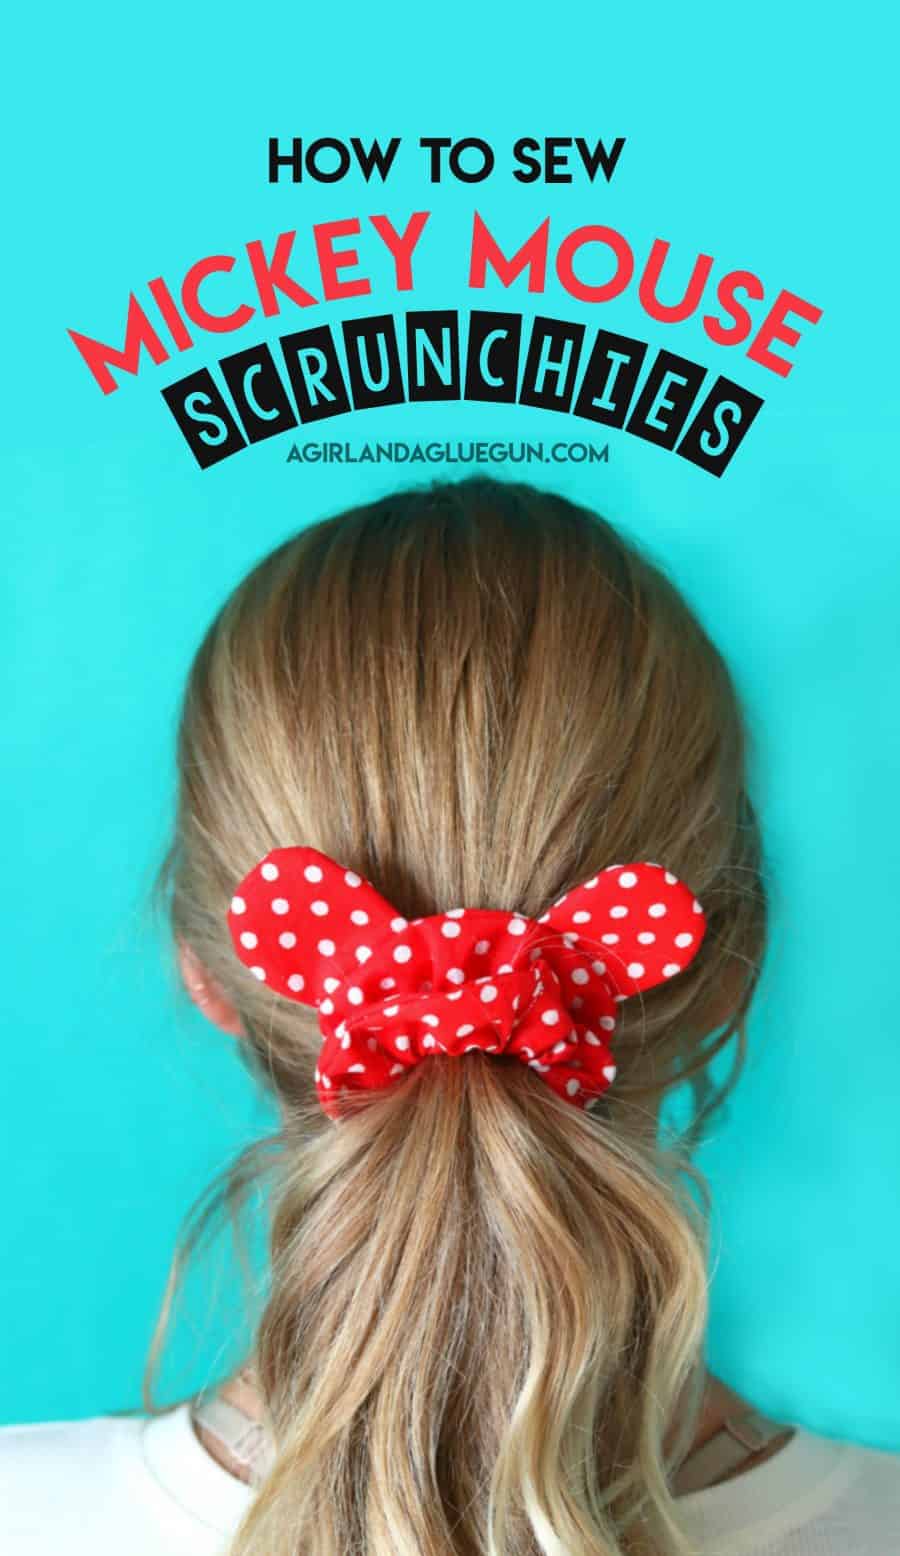
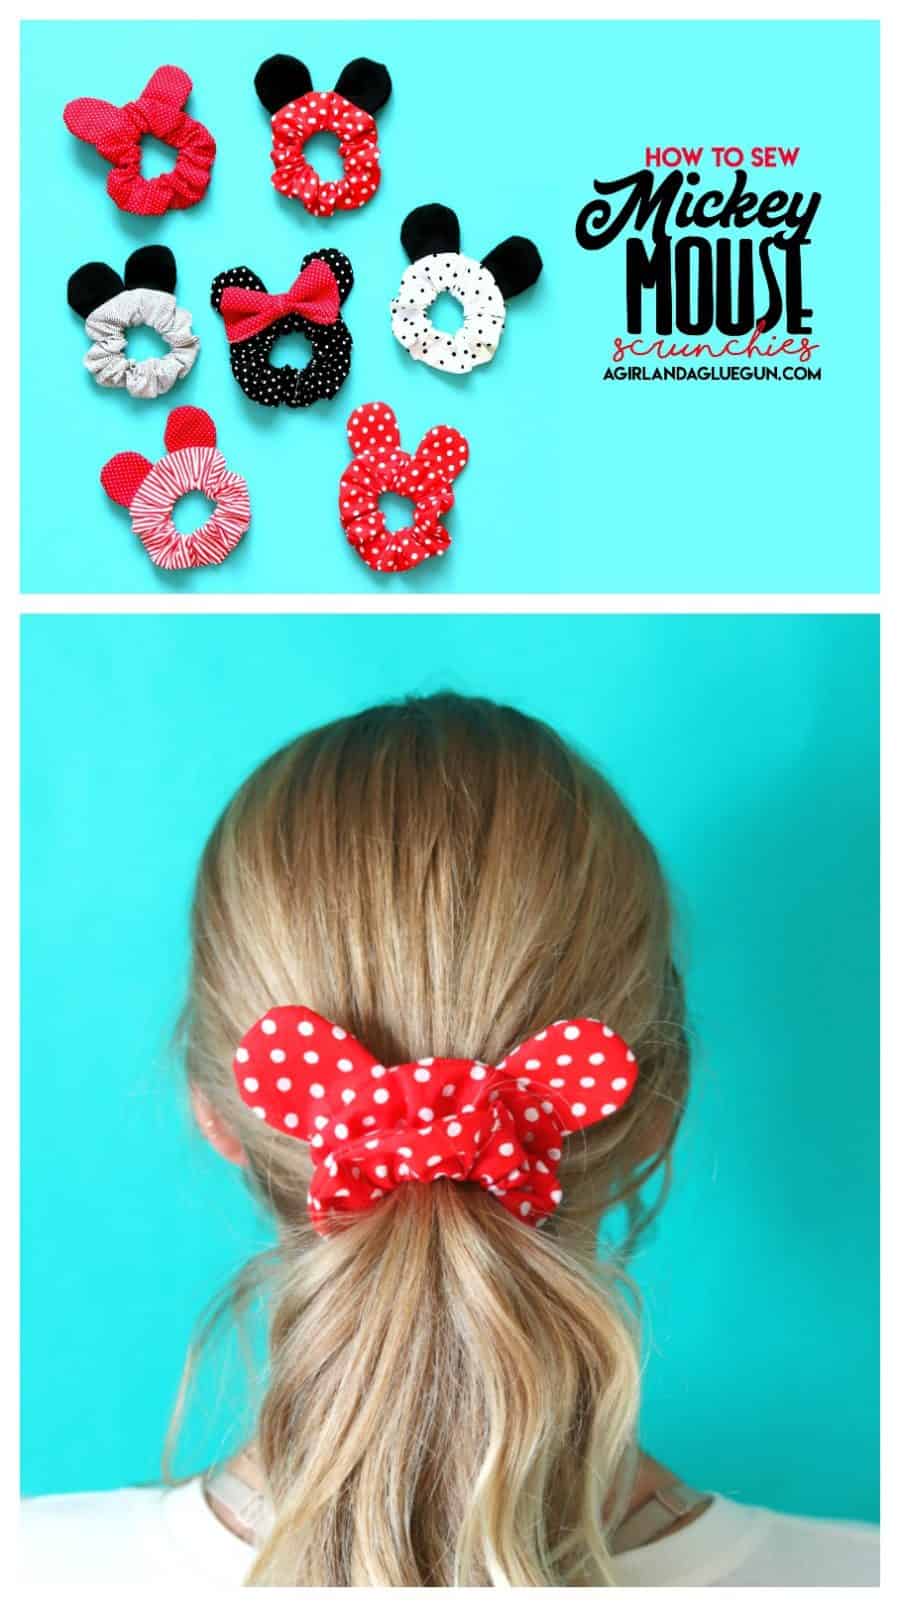
I’m headed to Disneyland in a few weeks (wahoo!) We booked our trip through Get Away Today in case you are in planning a trip too! But I wanted to make a fun little Disney craft–and since my daughters have been sewing up all the scrunchies–I thought I would throw on some fun mickey mouse ears on them !
I have to admit—had a bit way to much fun making these!
Here is what you need to sew a scrunchie:
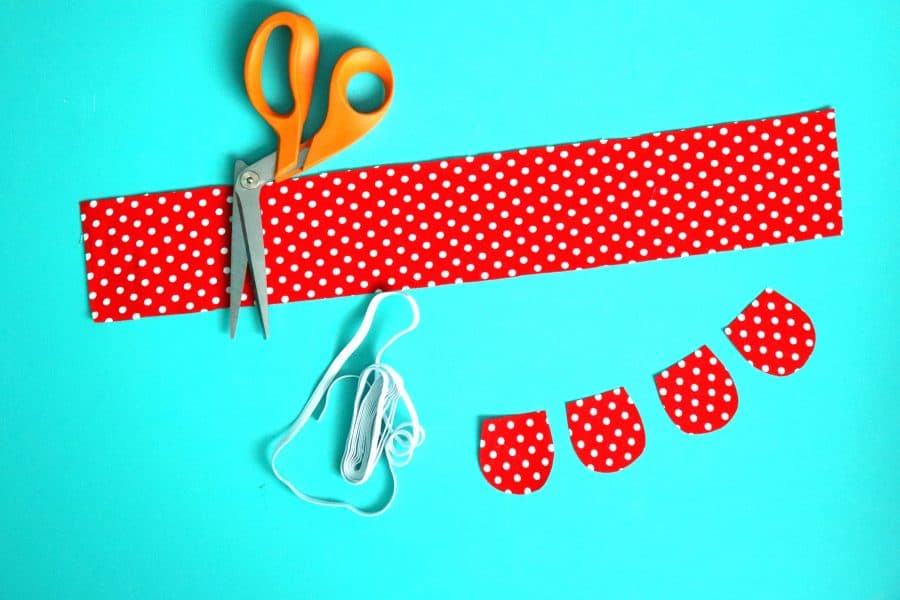
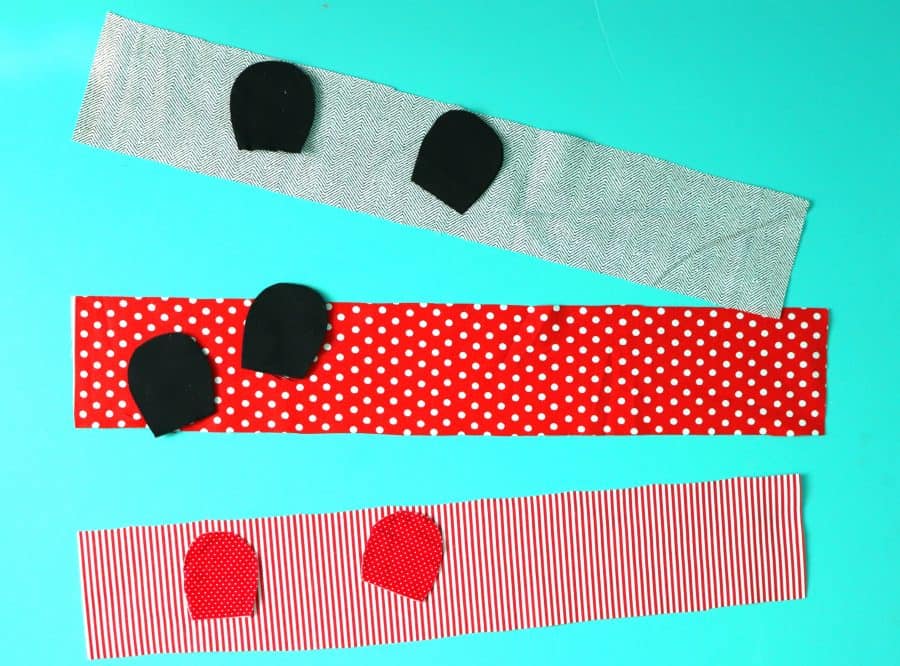
- 3 by 18 inch fabric
- 4 ears cut out of pattern (down below)
- 6-7 inch long piece of thin elastic
- scissors
- pins

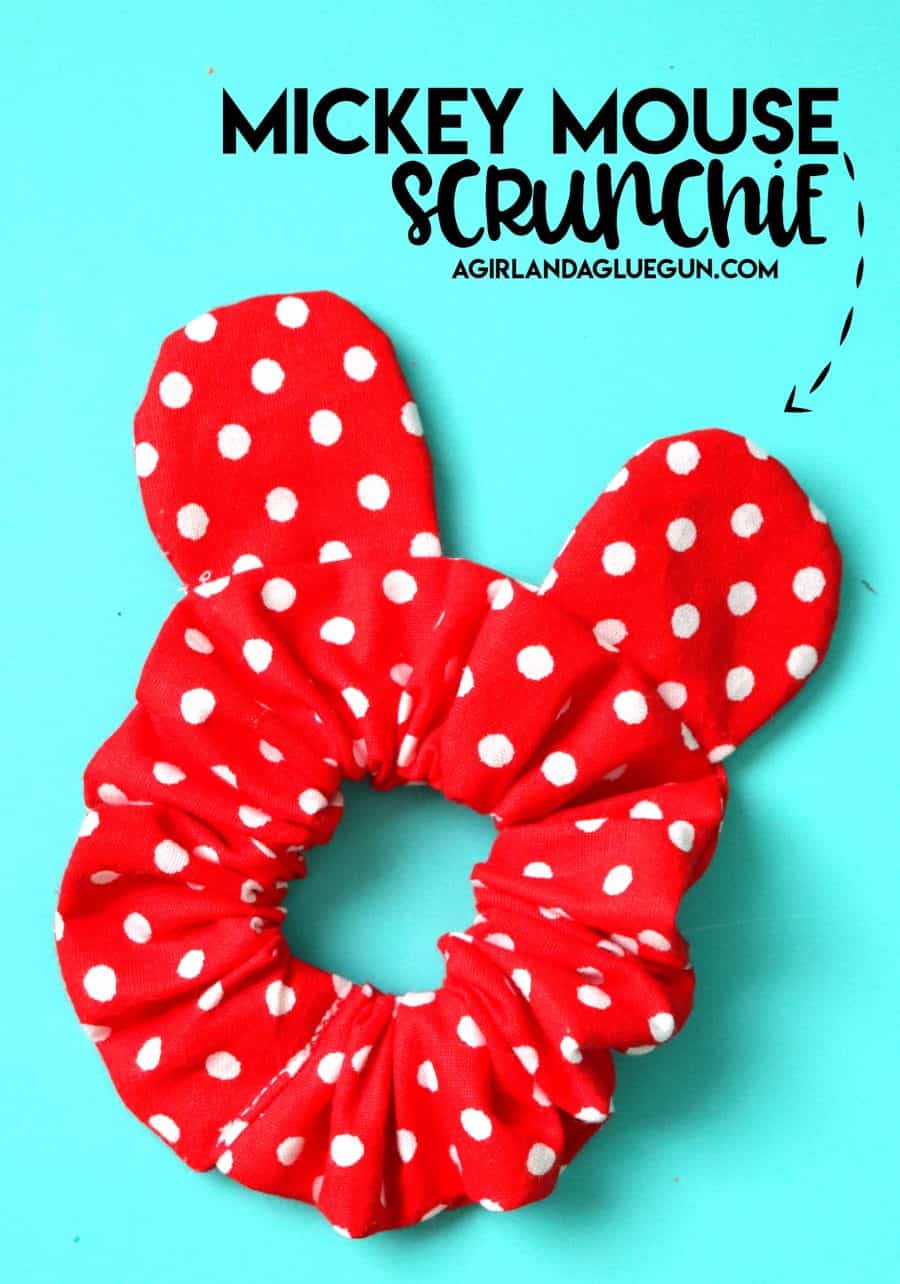
How to sew a scrunchie
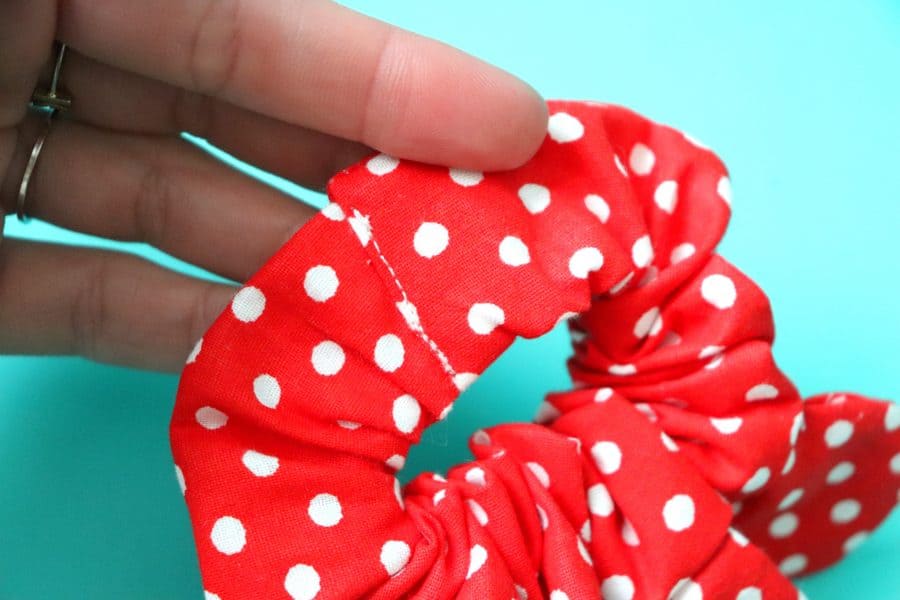
- Putting right sides together sew around the curve (leave the bottom open)
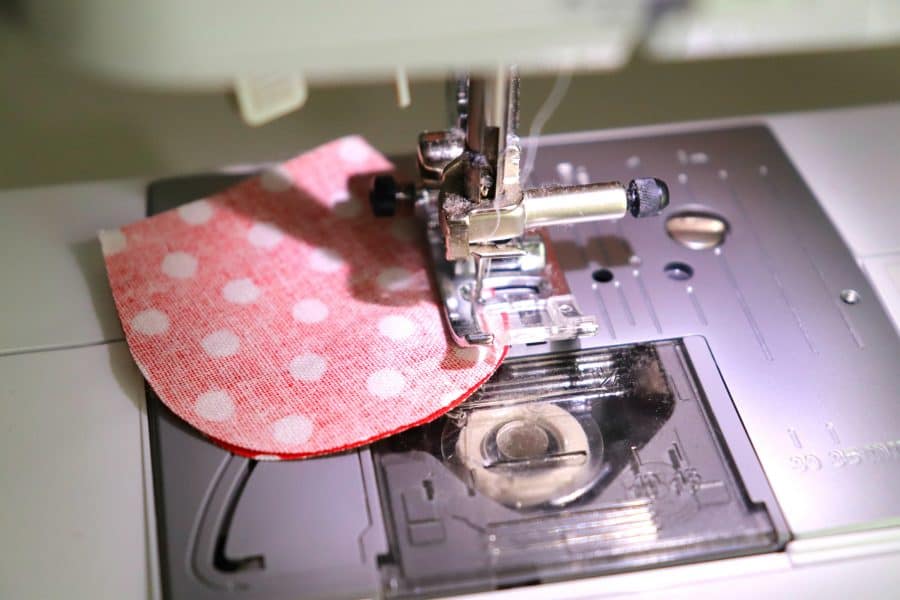
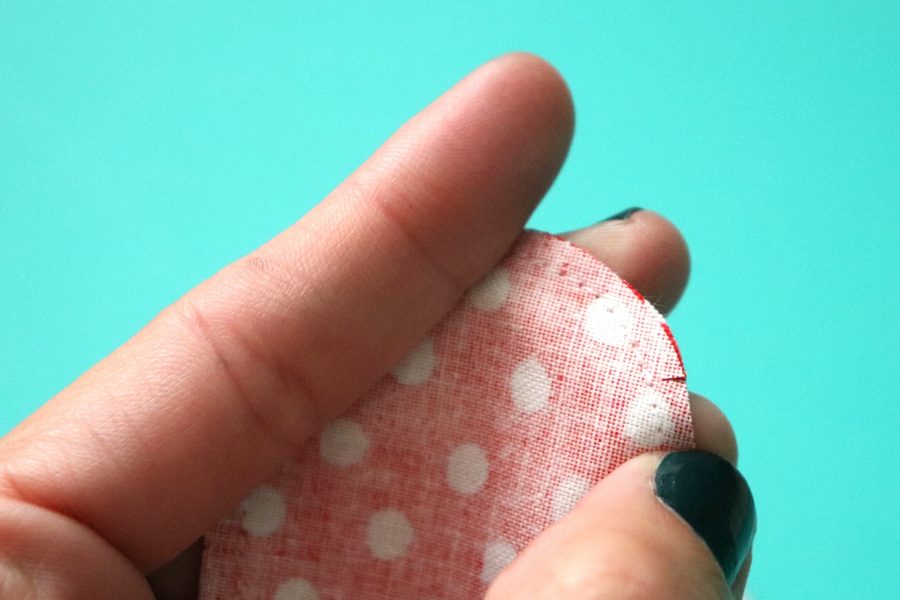
I snip around the edge to help it lie flat when you turn it right sides out.
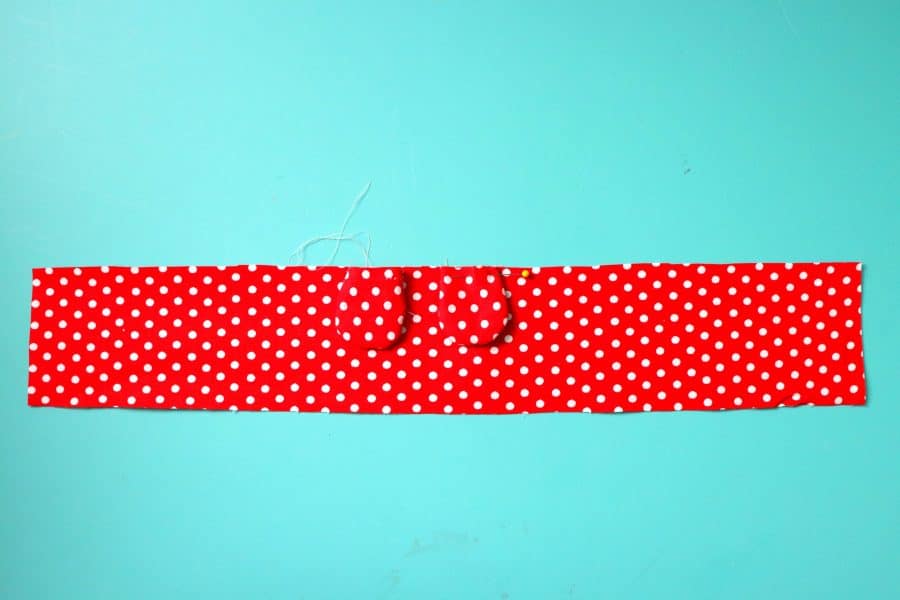
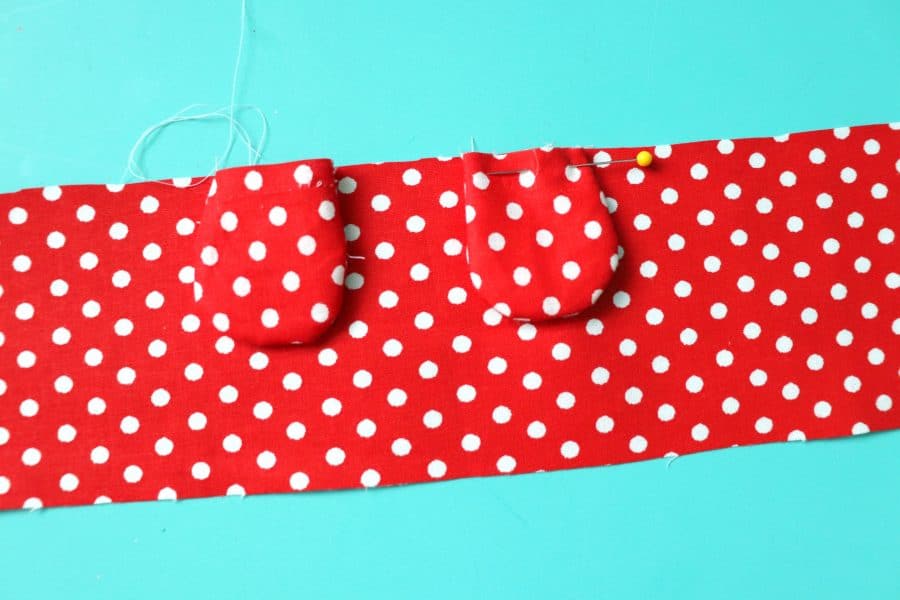
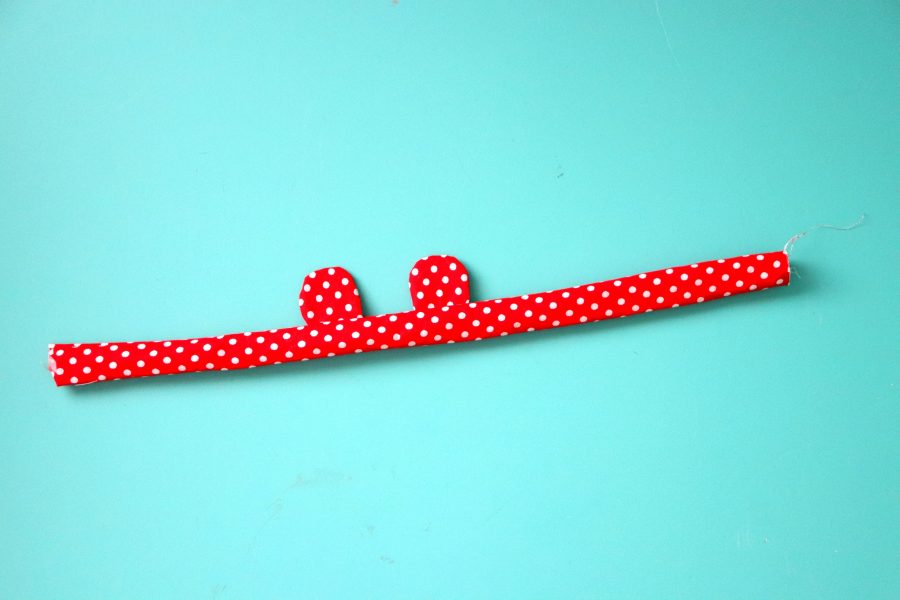
2. I pin the ears (right sides are turned out at this point) in the center of my fabric. I leave 1 inch in between the ears. Sew these on.
3. Then I fold up the sides to make my tube and pin in place.
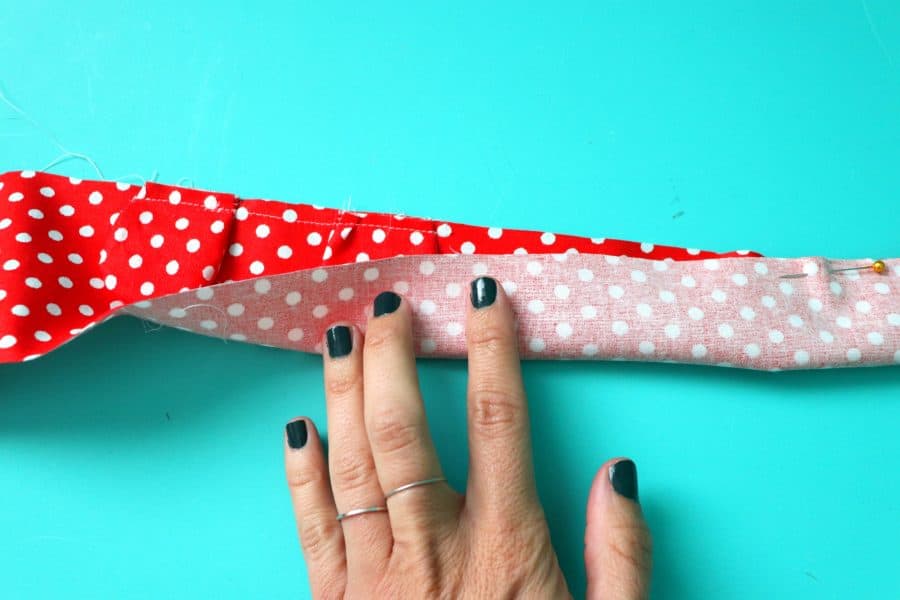
4. Sew along the side to leaving the ends open.
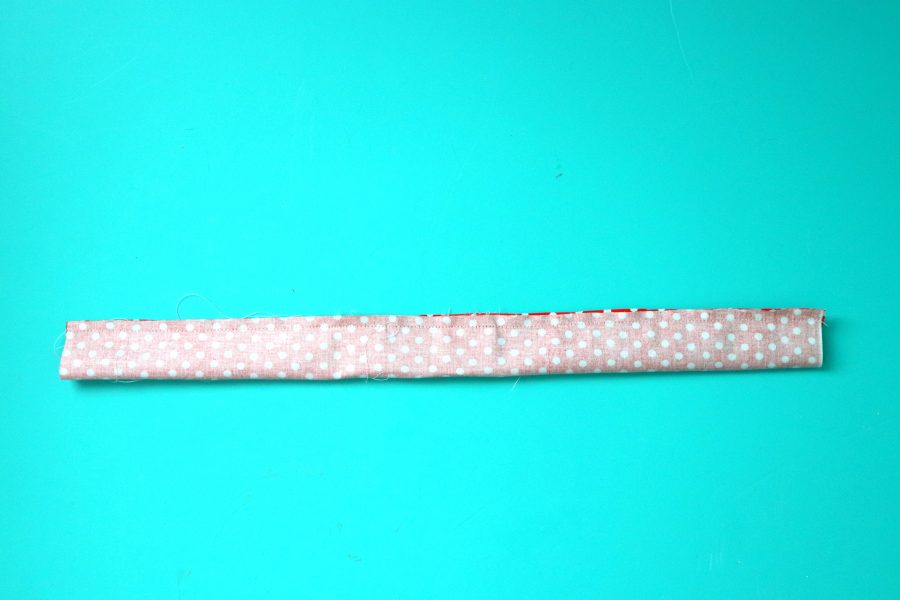
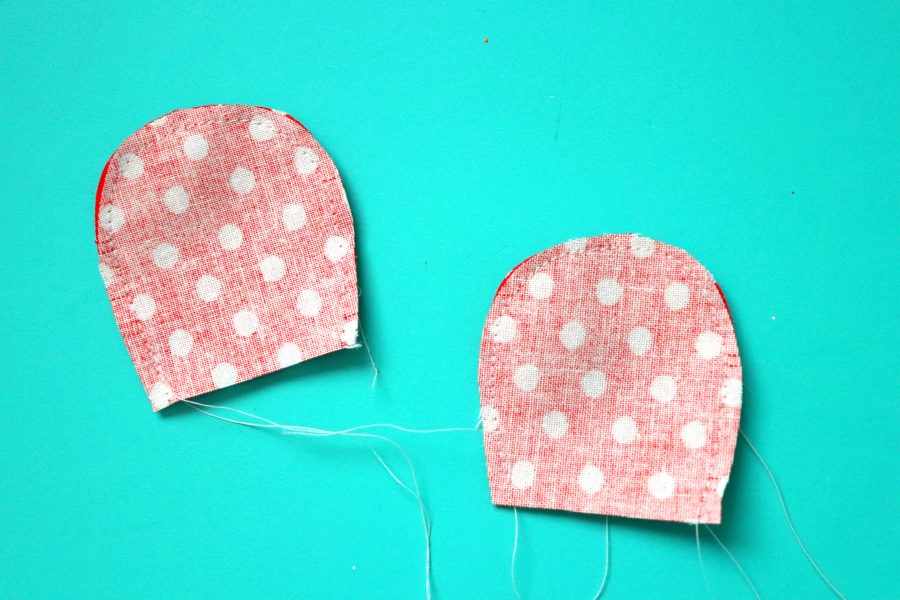
5. Flip it so the right sides are out.
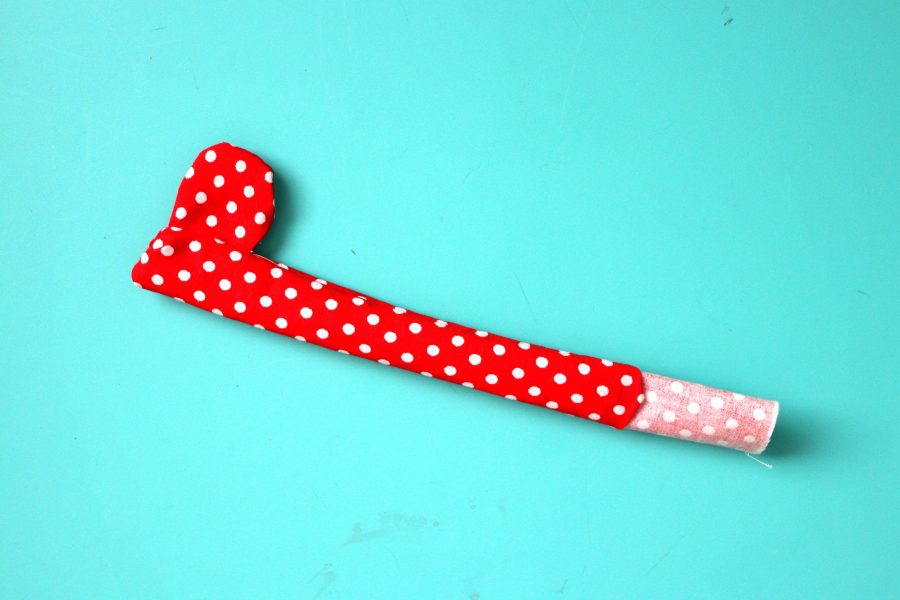
6. Time to add the elastic. I like my scrunchies pretty tight–but you can add a few inches of elastic if you want it bigger. I put a safety pin in the end so I can feed it through the tube.
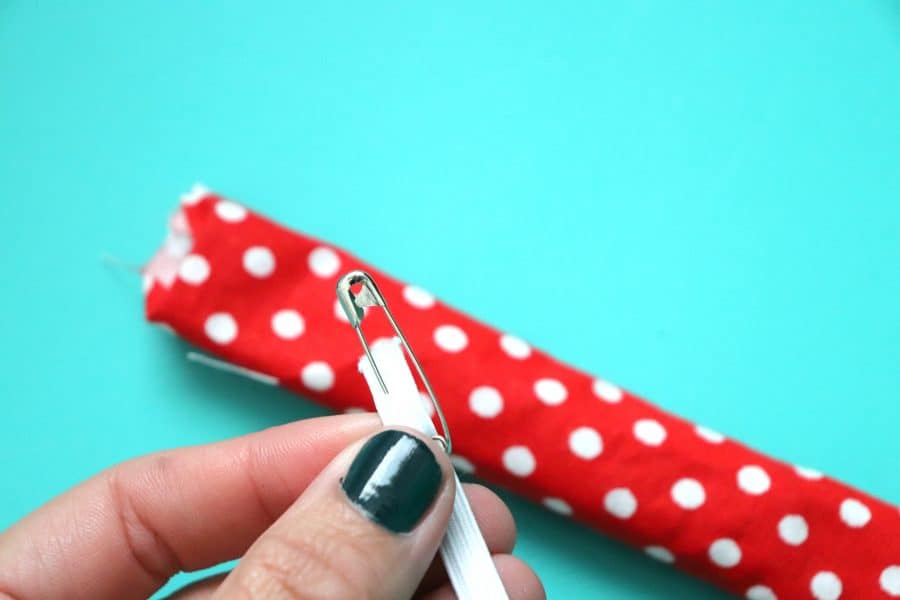
Pinned the other end to the end of the tube to keep it from slipping inside.
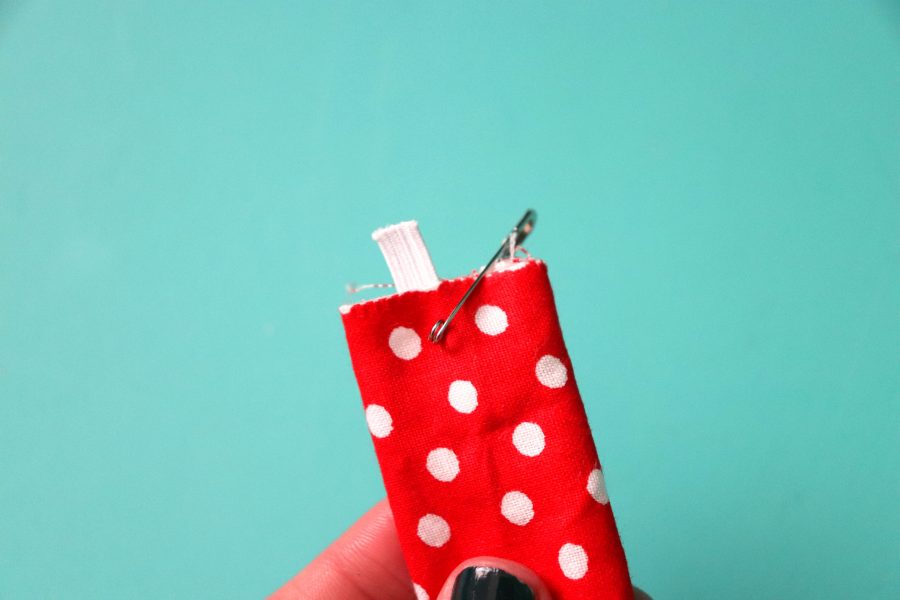
Then I scrunched it up until I could make the ends meet and then sew the two ends of the elastic together.
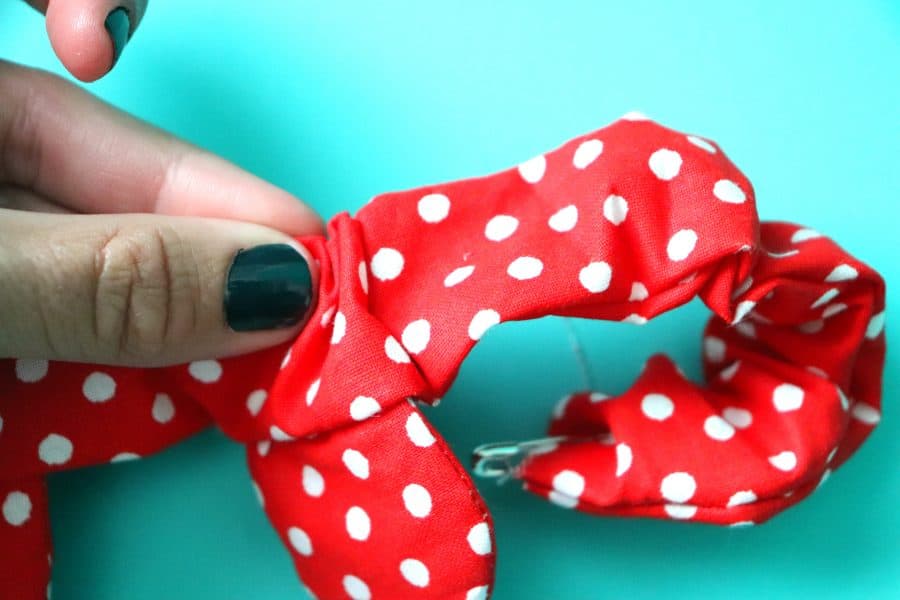

6. I overlapped the ends of the fabric and sewed it up–I knew it would be gathered and it would hide the stitching–but you can hand sew it to hide the stitching if you wanted too!
Then I just created WAYYYY to many!
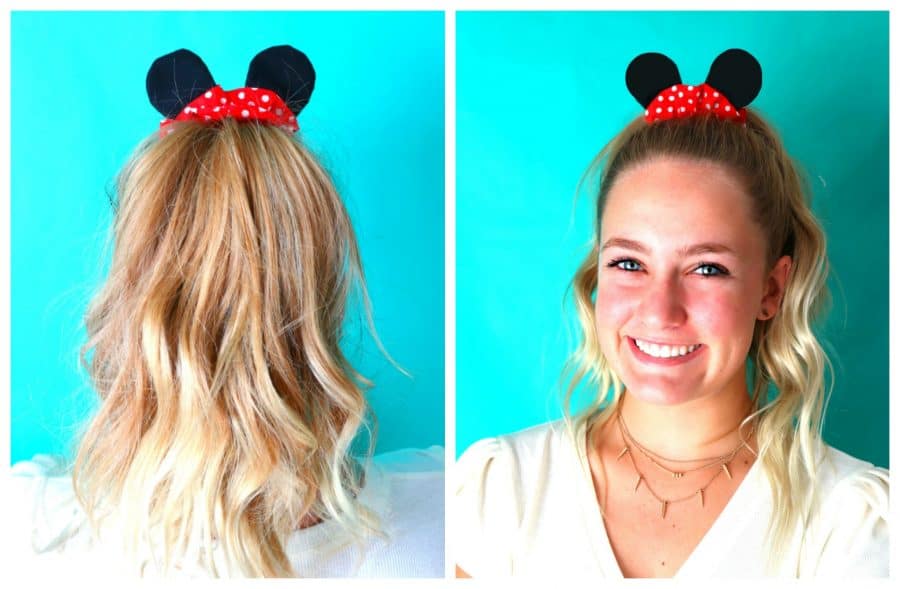
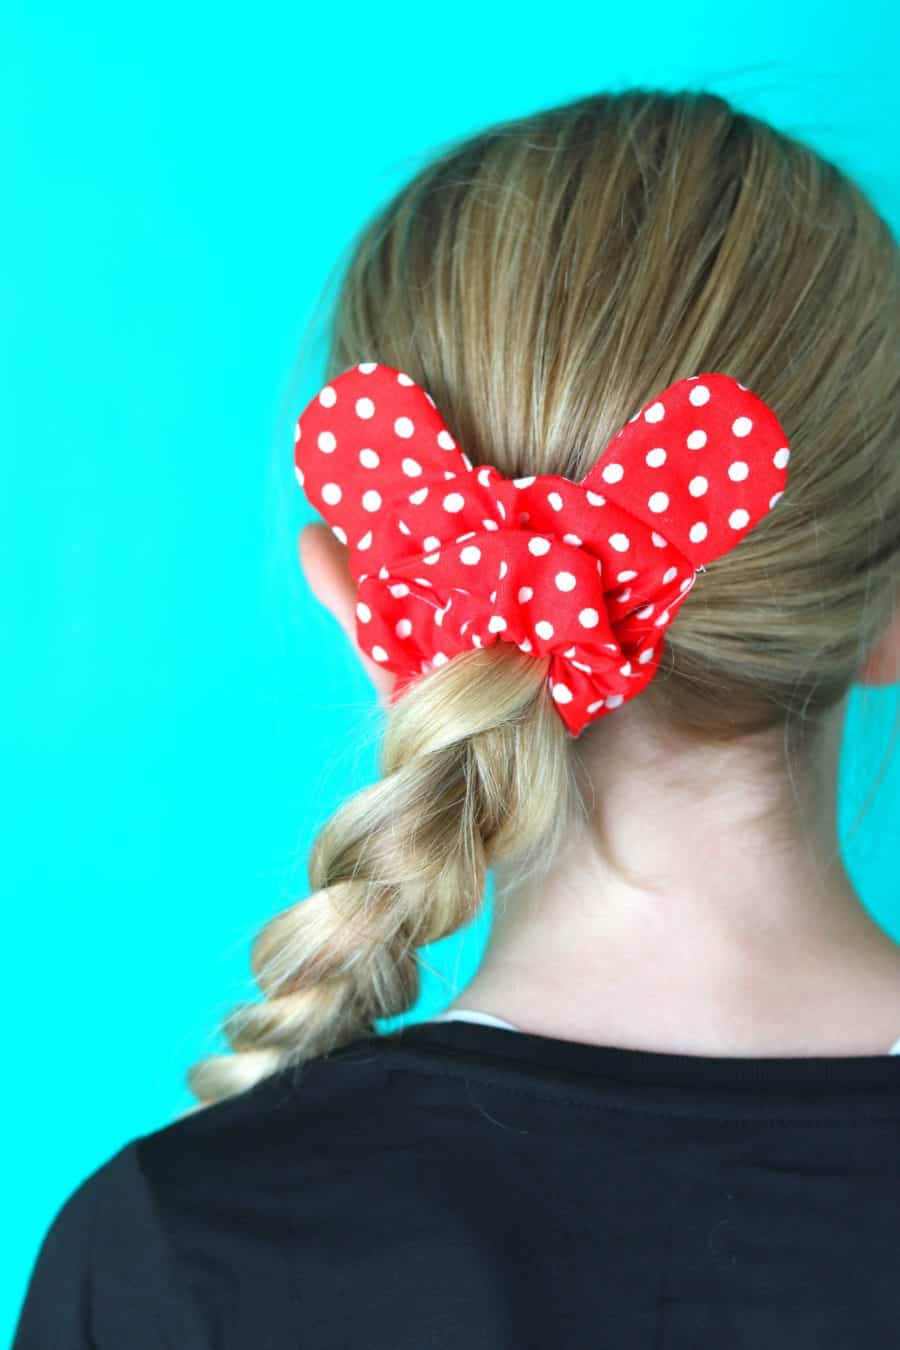
I think they are just so darn cute!

Even when worn on a wrist–since my daughters always have them on their wrists!

Okay- Do you think you are going to try sewing up a scrunchie? Leave off the ears if you want to make a regular scrunchie!
 Here is a graphic to pin if you want to save it for later!
Leave a Reply