
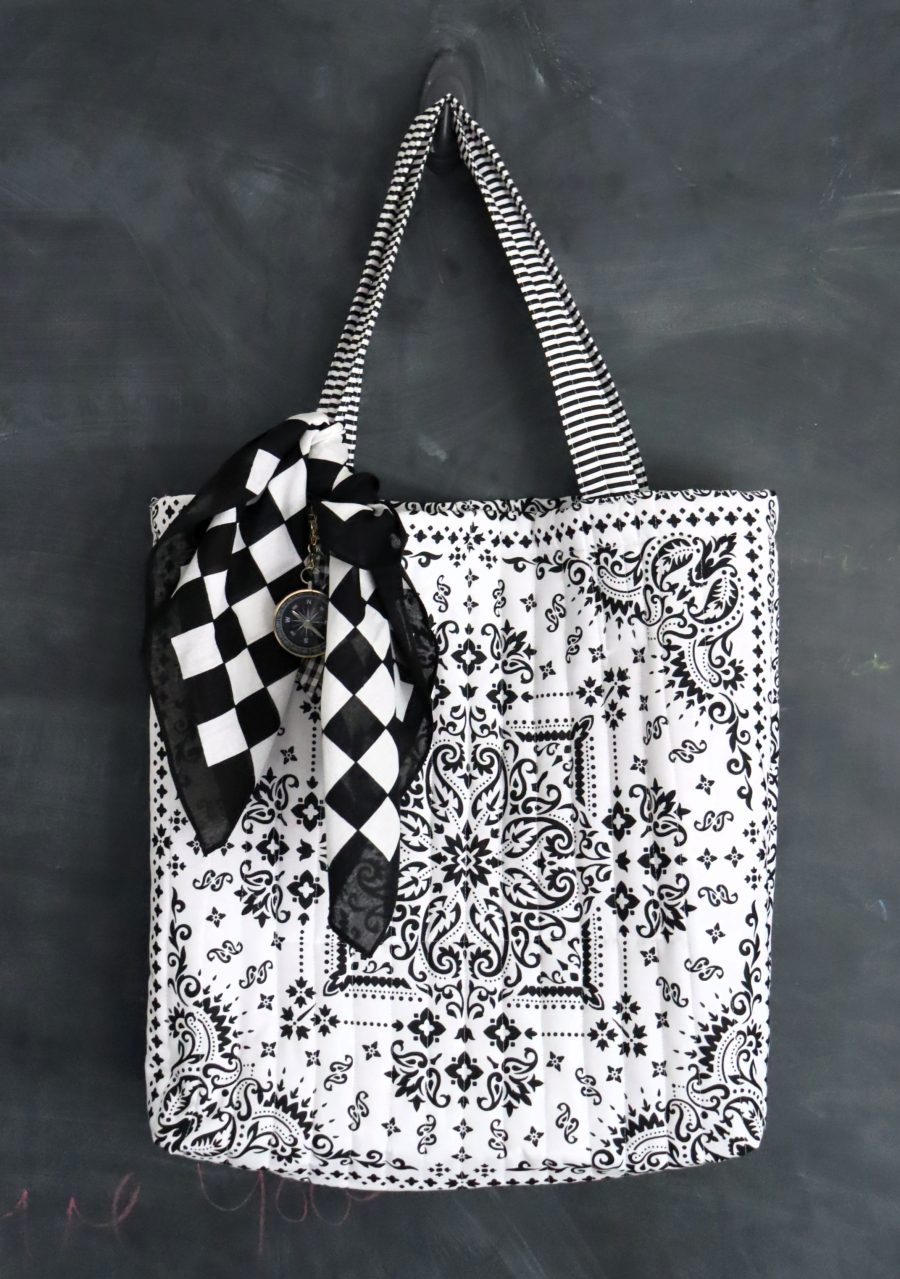
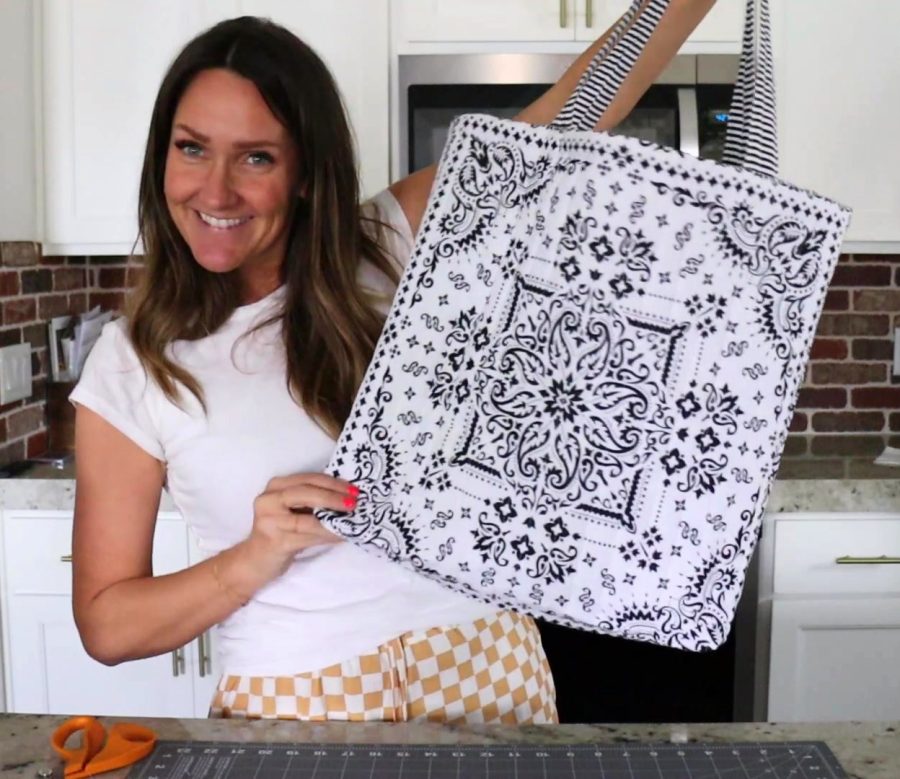
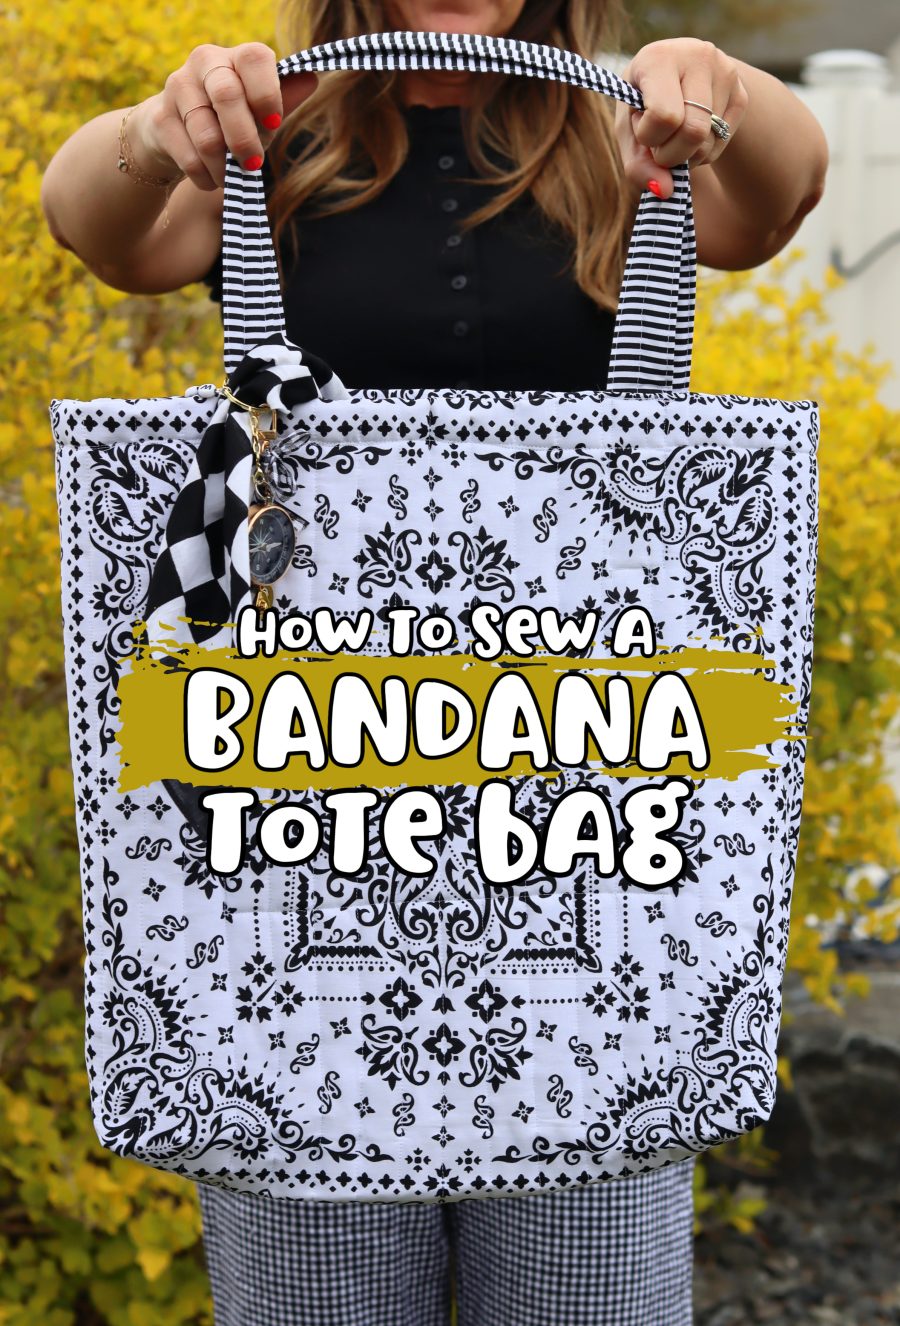
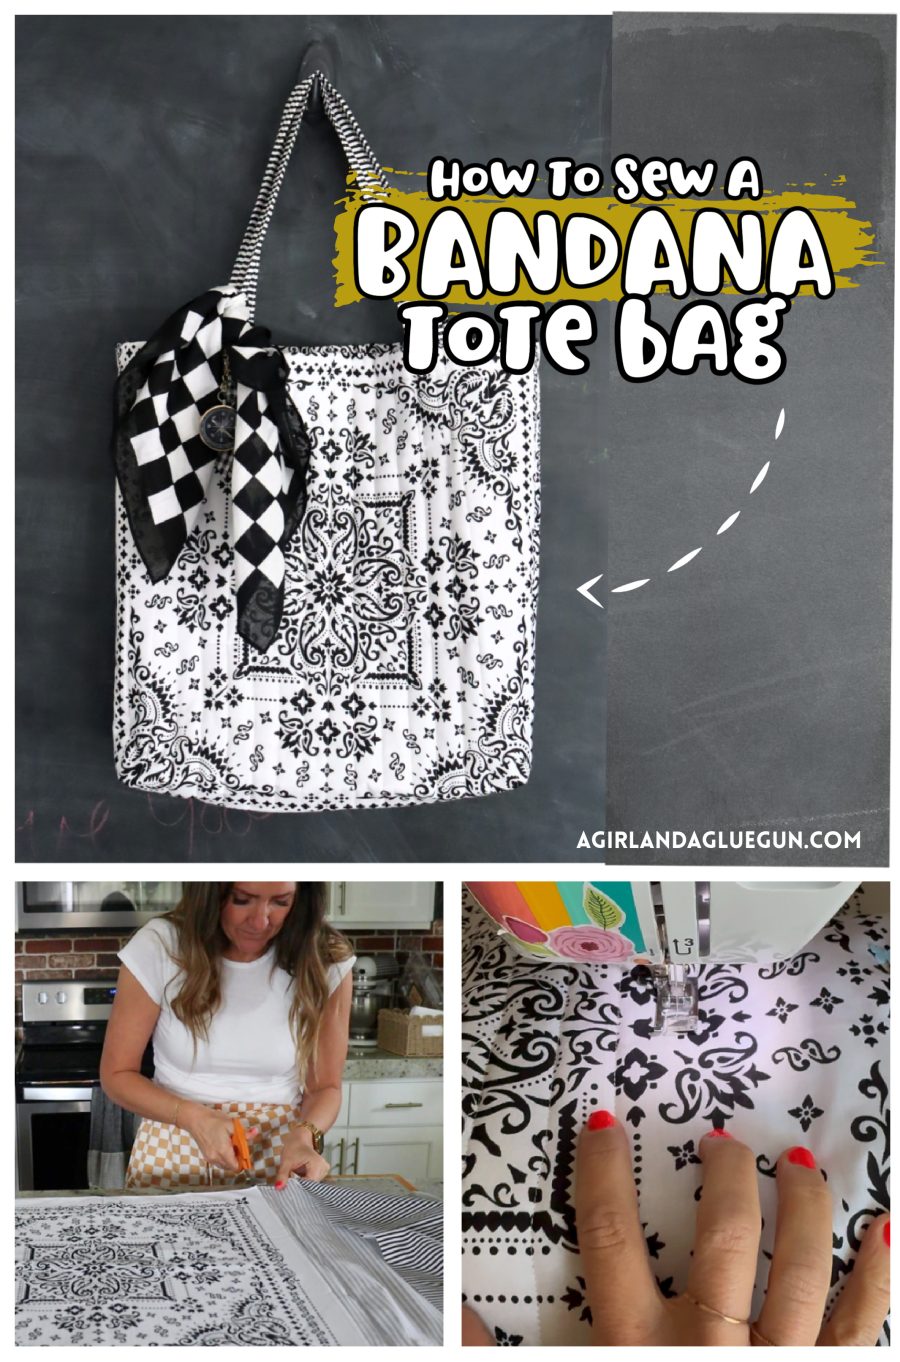
I’m going to teach you how to sew a Quilted Bandana tote bag. It’s perfect for a simple and budget-friendly sewing project! This DIY tote bag is made from two bandanas is the perfect beginner-friendly craft! With just a few supplies and basic sewing skills, you can create a stylish, quilted, reusable bag that’s great for everyday use, gifts, or even a quick craft night project.
Whether you’re new to sewing or just want a fast and fun project, this bandana tote bag comes together quickly and looks adorable! AND I have a printable pattern down below to follow as you sew!
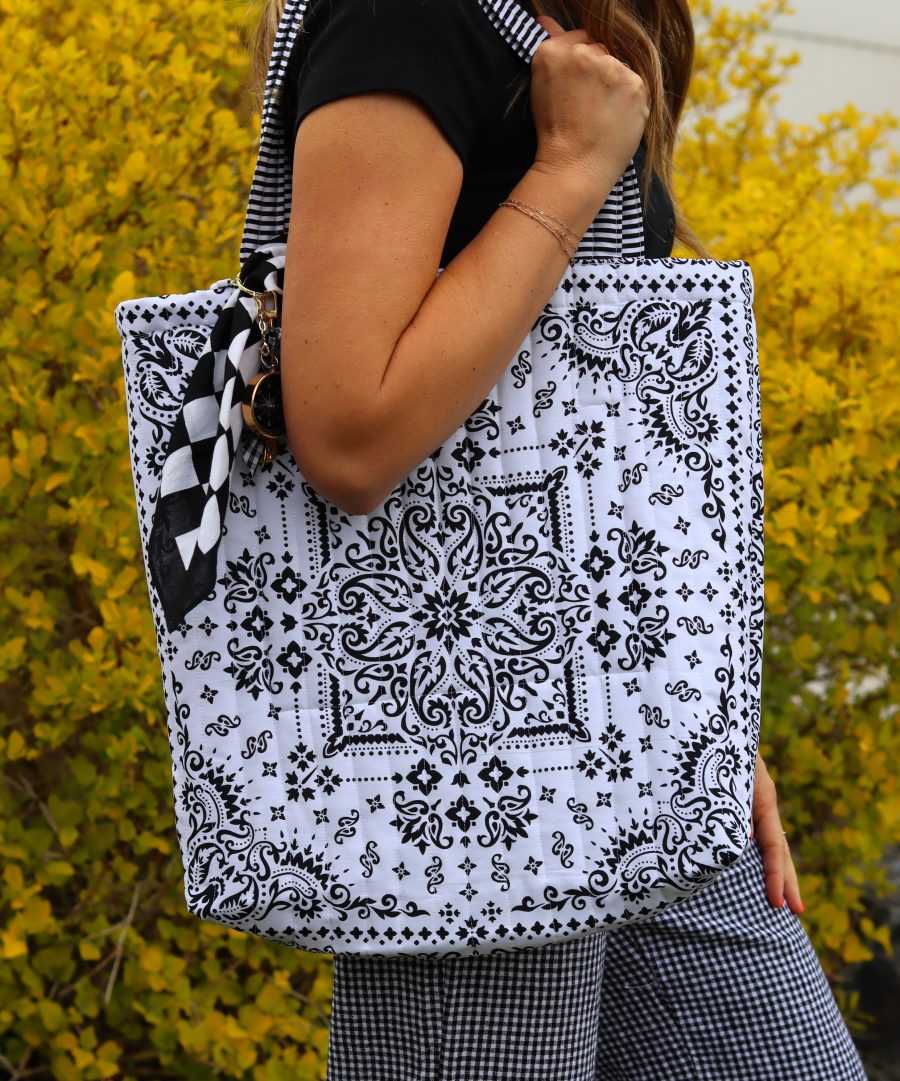
I keep seeing these bandana tote bags in my tik tok feed! I love a good tote bag and I love bandanas so it seemed a natural fit! The original bags can be found at Bloomindales for a cool $400! SHOCKING! So this DIY is very budget friendly!
I also am adapting this pattern a little bit. The original inspiration has two additional side panels and one bottom panel. Instead of adding those additional steps, I’m making box corners so this easy sewing bandana bag becomes even easier!
I created this bandana tote on my youtube channel for my series- CRAFTERDAY! It’s where craft…just to make things! You can watch this bandana tote come together below:
Why You’ll Love This DIY Quilted Bandana Tote Bag
This project is perfect for so many reasons:
- Beginner-friendly sewing project
- Budget-friendly (just two bandanas!)
- Great for reusable shopping bags
- Perfect handmade gift idea
- Customize how you want
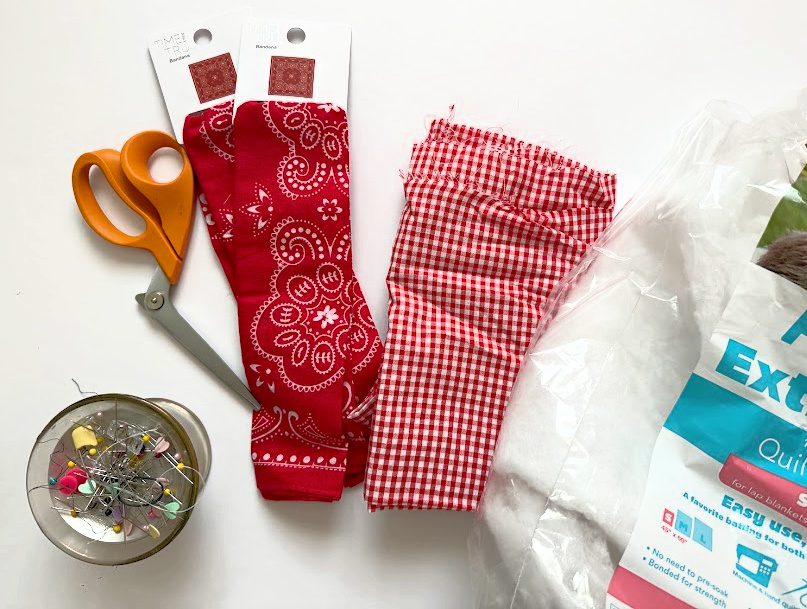
Supplies You’ll Need
- 2 standard cotton bandanas (same or coordinating prints)
- Quilt batting
- 1 yard fabric in coordinating colors
- Sewing machine
- Pins or clips
- Fabric scissors
- Iron (optional but recommended)
You can also purchase 5 bandanas and no coordinating fabric and make this so bandanas are the inside and straps as well as the outer shell!
The bandanas I got are from Walmart (Hobby Lobby has a wide variety of colors as well). The size is 22 inches by 22 inches. If your bandana runs smaller or larger, you might have to adjust the pattern a little bit!
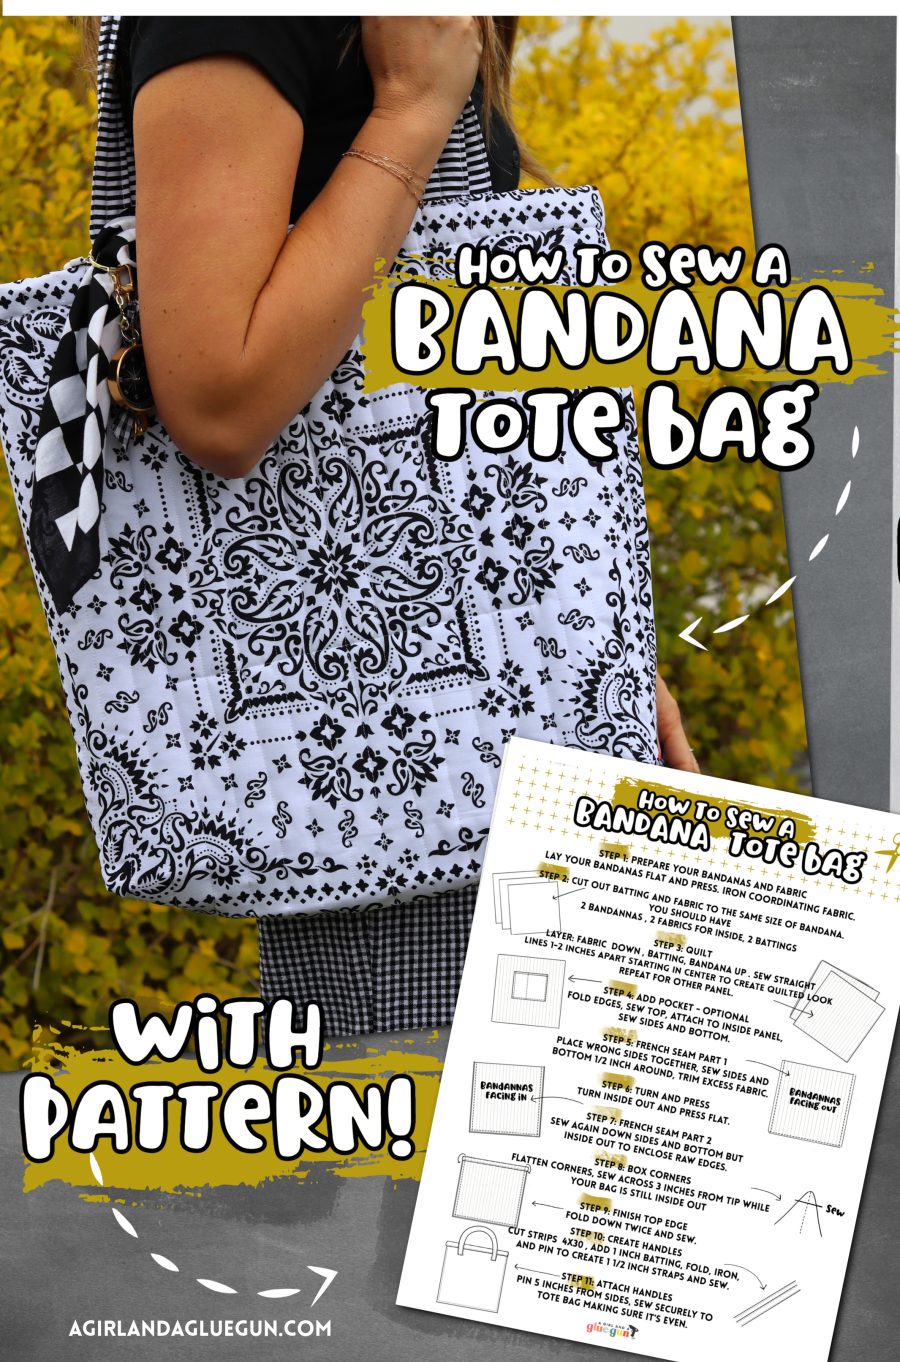
Step-by-Step Instructions: Quilted Bandana tote bag
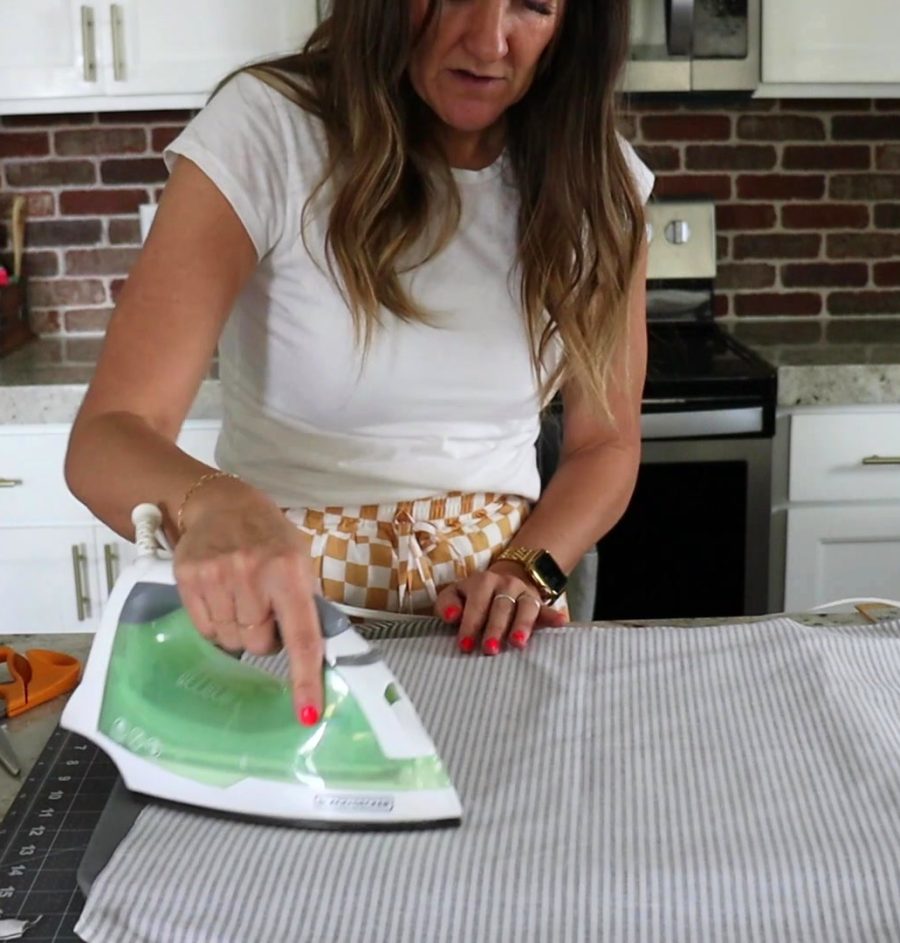
Step 1: Prepare Your Bandanas and Fabric
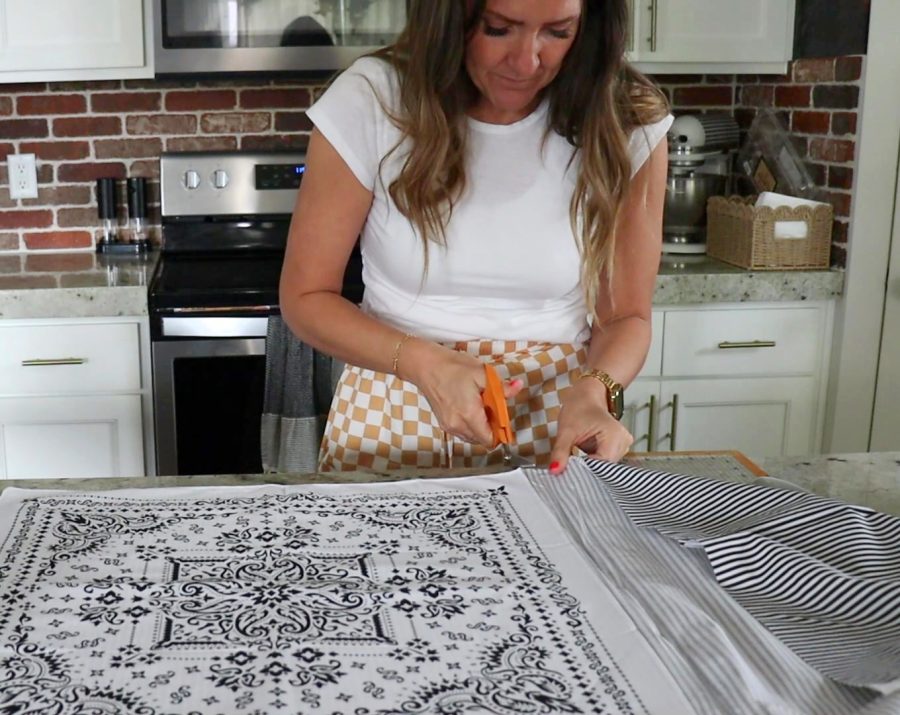
Lay your two bandanas flat and press them with an iron to remove wrinkles. This will make cutting and sewing much easier.
Iron your fabric as well.
Step 2: Cut out batting and fabric
For this tote bag, you need two bandanas, two pieces of coordinating fabric sized to the bandana, and two pieces of quilt batting cut to the size of the bandanas.
To achieve this, I lay the bandana on top of the coordinating fabric and cut out around it using the bandana as a guide. Lay out bandana on top of the quilt batting and cut out a piece of batting.
I did not do this, but wish I had when I was finished with my tote bag; but I would trim off 2 inches from the quilt batting and batting for the top section only. So two bandanas at 22 inches by 22 inches and two pieces of batting and fabric at sizes 22 inches by 20 inches. This will just make it so the top will be easier to finish without the bulk.
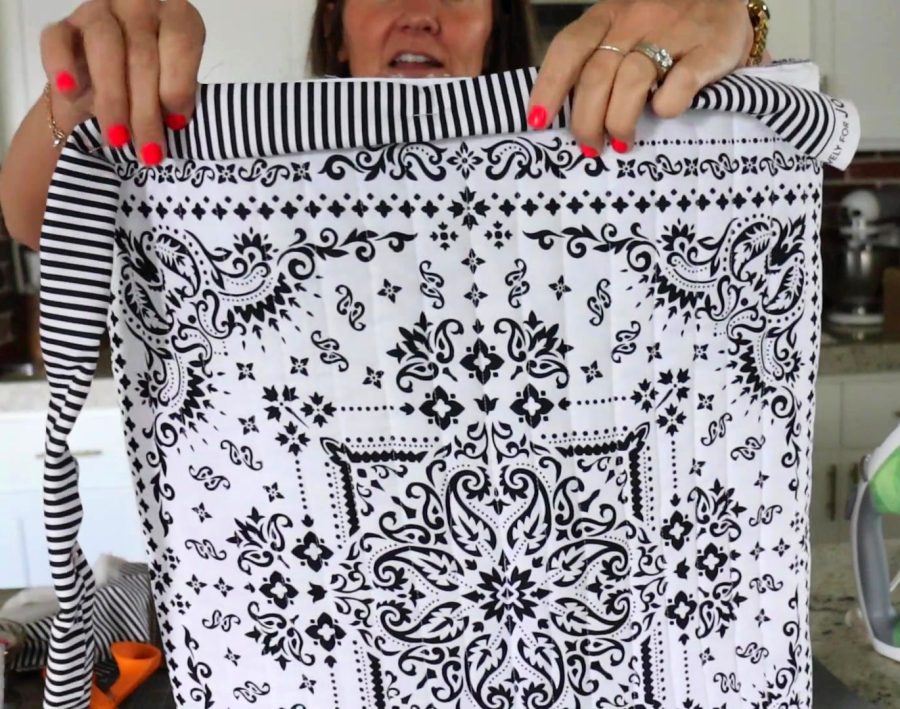
Step 3: Quilt
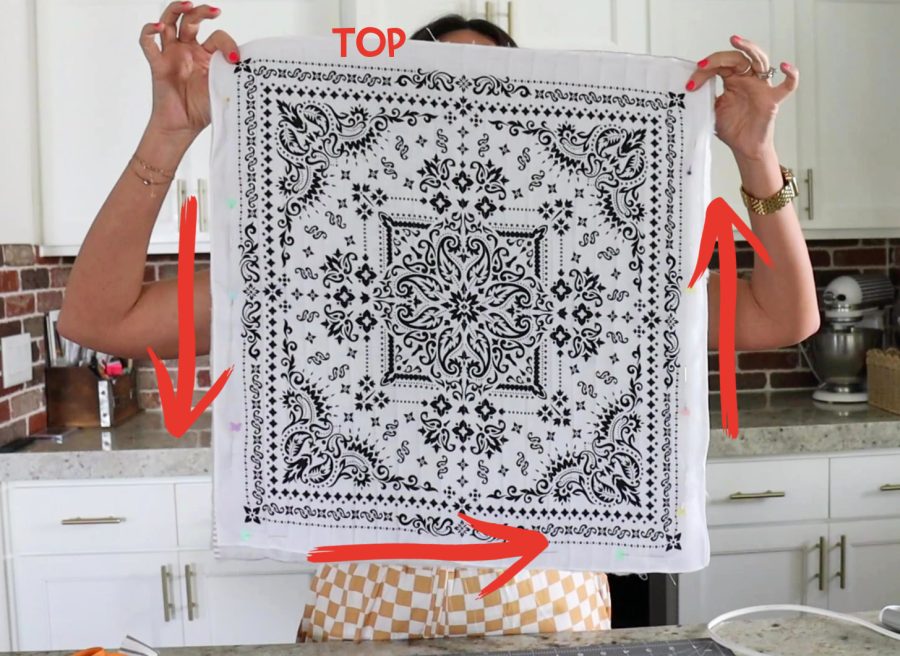
These darling Bandana bags have a quilted look. I do not have a quilt machine.(long arm) But since the tote bag is not too big, it’s easy to create the look with your basic sewing machine. Start by sandwiching the pieces. Fabric (right side facing down.) Place batting on top of that. Put the bandana on top with right side facing up. (If it has a right side! most are double sided. Pin this all in place. (If you trimmed off the batting like I suggested in step 2, Make sure the three sides are completely even and then the top piece of the bandana will have the access over hang!
I lined up the very center of my bandana following the pattern and sewed directly down. Next, sew another line 1 inch, 1 1 1/2 inch, or 2 inch apart.
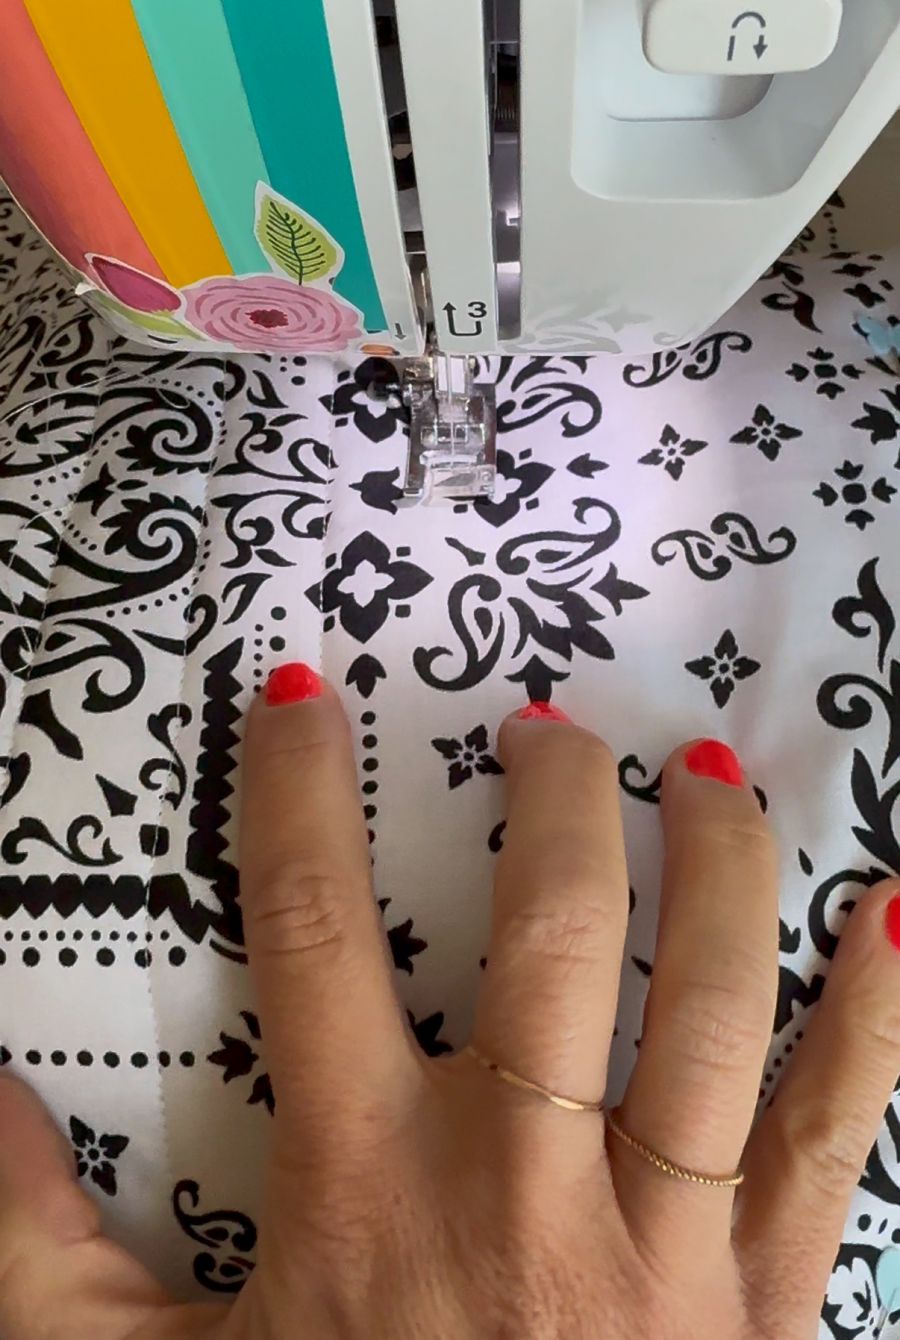
It’s totally up to you how far apart to make each line. Sew down lines spacing each one apart evenly to create a quilted look. Make sure to keep you fabric and batting tight underneath so it doesn’t bunch as you sew.
You should be left with two quilted pieces.
Step 4: Add a Pocket
If you want to add a pocket- this is the step you want to do it in! It’s totally optional, but I love pockets!
- Iron in the edges around the pocket and pin them.
- Sew along the top section of your pocket.
- Pin pocket on center inside of one of your quilted pieces.
- Sew around the two sides and the bottom keeping the top free.
- Sew a stitch down the middle to create two pockets from one piece of fabric
I tried to line up the pocket with the quilted seams, but since my bandana was white and my thread was white, it was barely noticeable.

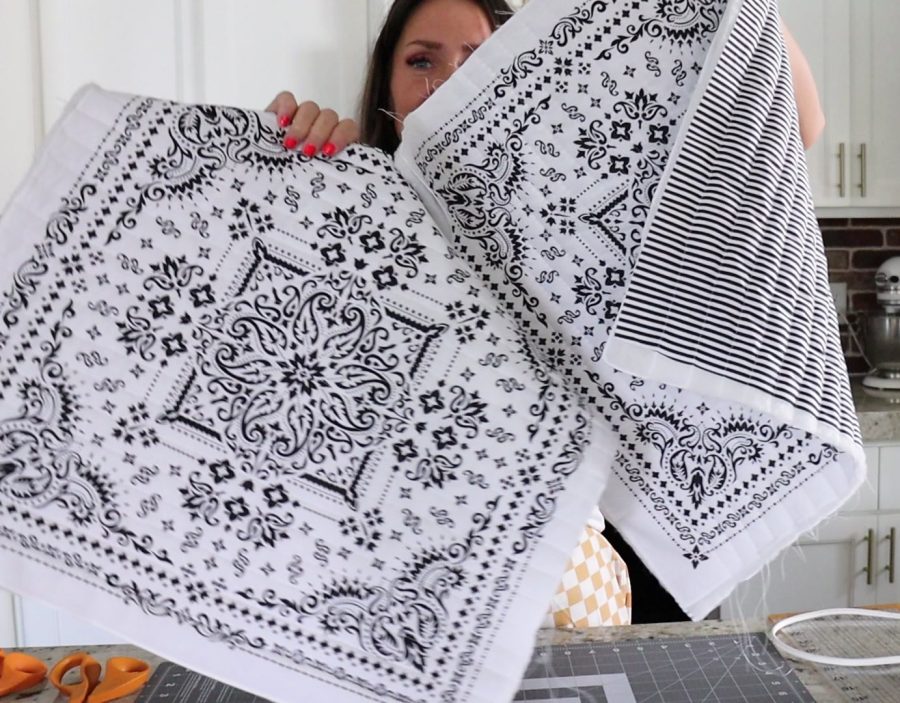
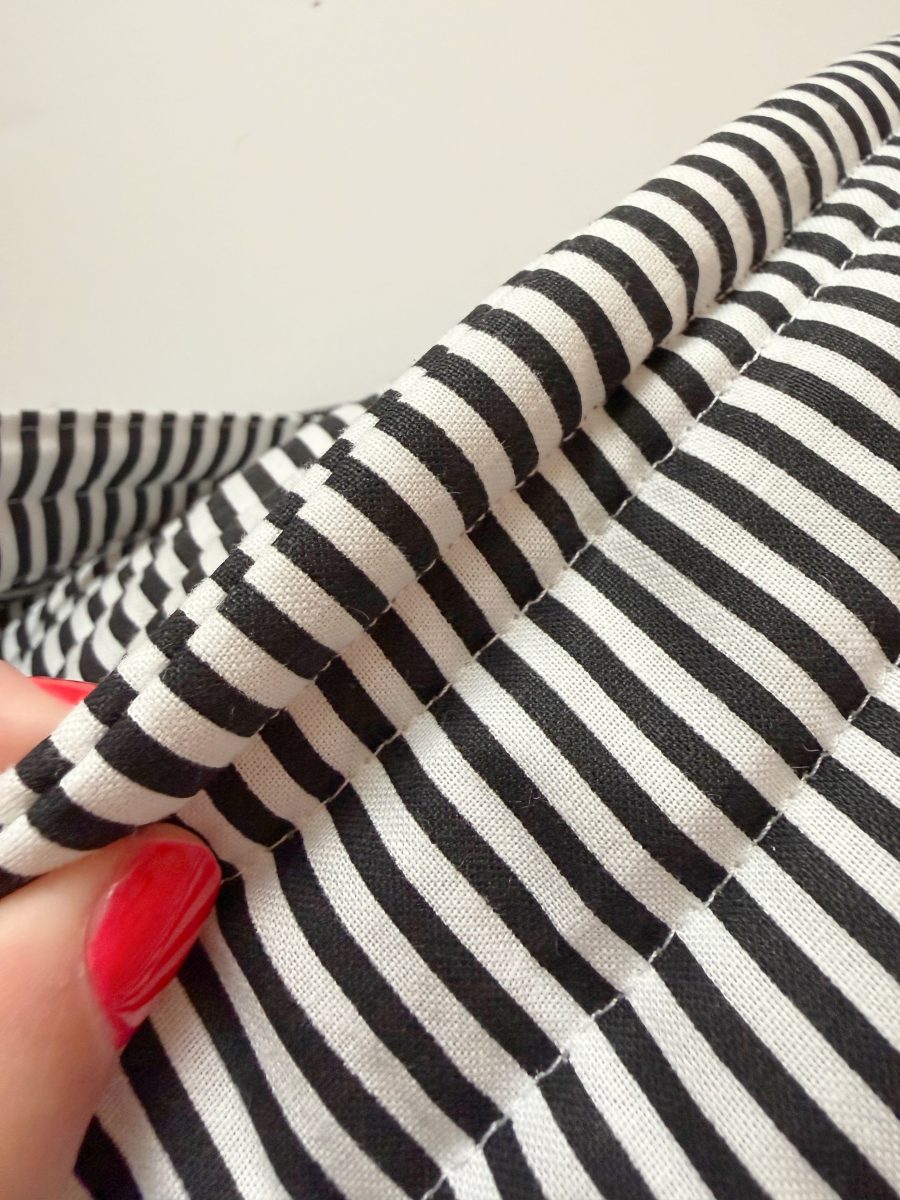
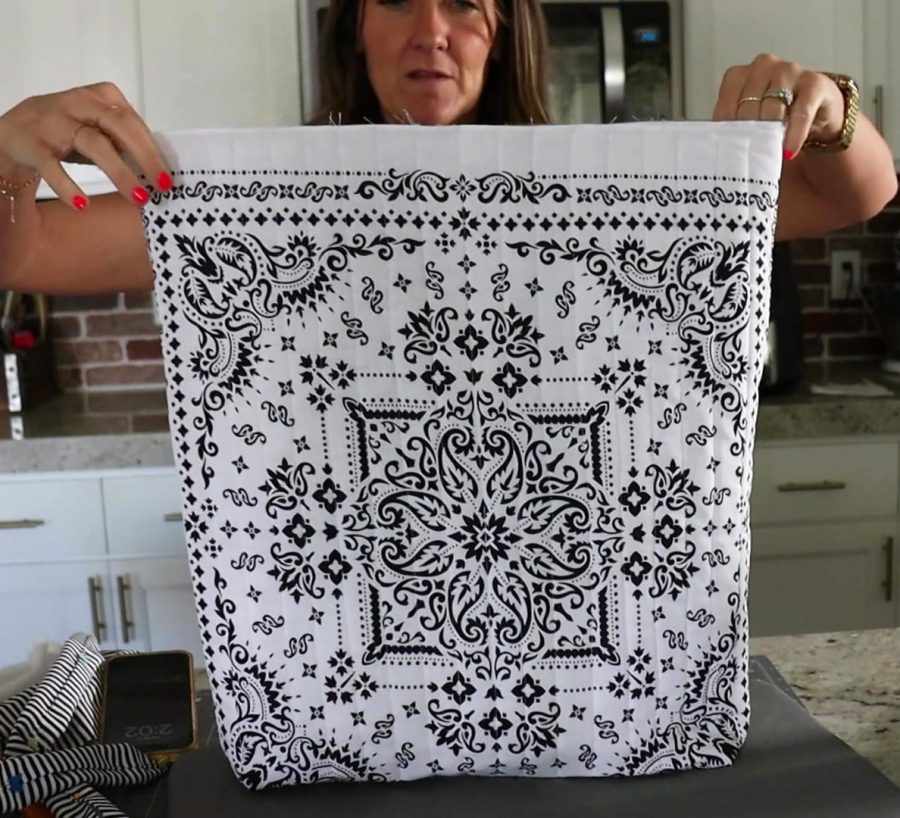
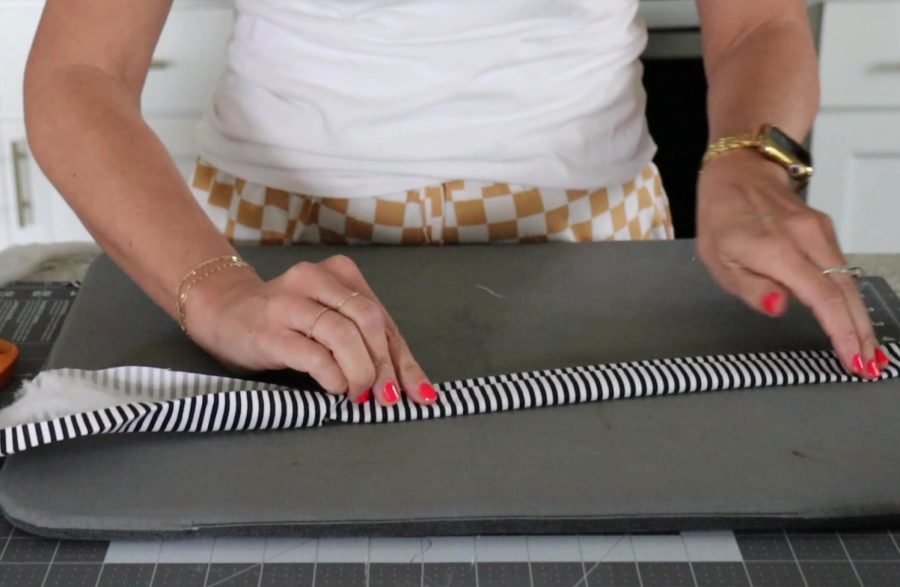
Step 4: French Seam
We are going to be using a technique called the French seam. It’s a great trick to make sure all your edges look nice and finished. It will feel backwards cause the first step is sewing the edges on the front- but trust the process!
Start by putting the quilt pieces wrong sides together. So bandanas are facing out. Pin around the edges. Making sure to leave the top open.
I sewed an inch seam allowance:
- Both side edges
- The bottom edge
Some of the fabric and batting shifted a little when quilting so this is a great time to square it back up. Just make sure you are sewing the same amount of seam allowance along each section. Backstitch at the beginning and end to secure your stitches.
Trim off all the excess fabric and try to get as close to the seam as you can, leaving a 1/8 to 1/4 inch seam allowance.
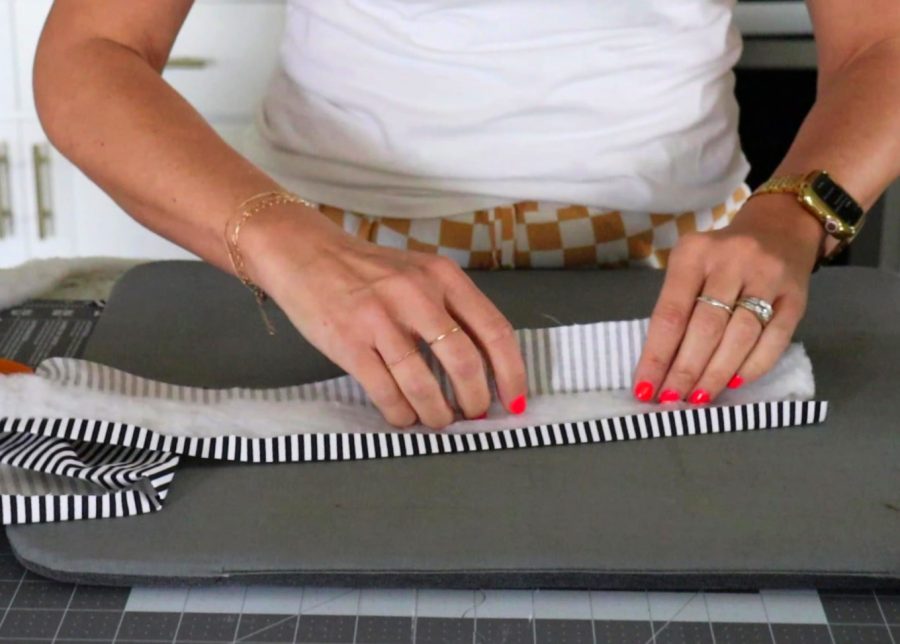
Step 5: Turn and Press
Turn your bag right side in and push out the corners.
Press with an iron to get everything nice and crisp.
Step 6: Sew the seams (again!)
Wrong side facing out: Using pins, once more, pin down the two sides and bottom (leaving top open). You are going to want to stitch far enough on the seam to sandwich in the first seam you sewed. This is a French seam. The second seam hides the first seam.
I sewed a little bit shy of 1/2 inch. If you do it too big, you will have a large seam inside. If you do it too small, you will have some raw edges poke out.
Watch a quick video on the french seam
At this point, the two sides and bottom have a nice seam with no edges, but the top has raw edges.
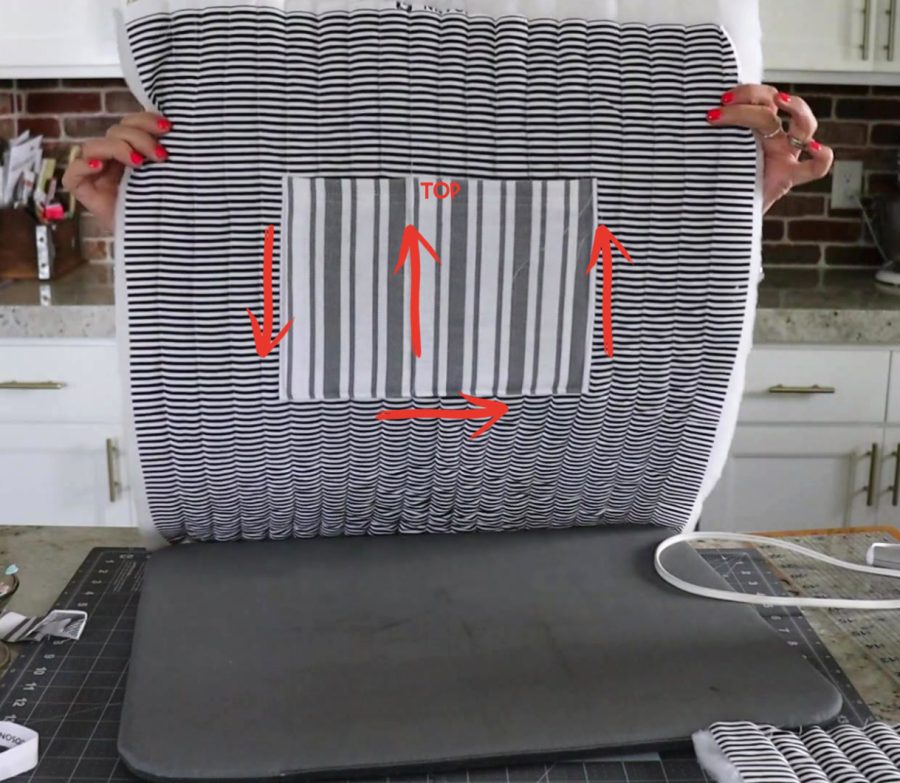
Step 7: Create the Tote Bag Shape (Box the Corners)
To give your tote bag depth:
- Pull one bottom corner open so the side seam and bottom seam align
- Flatten it into a triangle shape
- Measure about 3 inches from the tip and sew a straight line across
- Repeat on the other corner
The bigger you make your “triangle” shape, the bigger the sides and bottom will be.
The triangle corner can be tacked to the bottom or the sides by adding a quick stitch to keep in in place. Repeat for both sides of the tote bag.
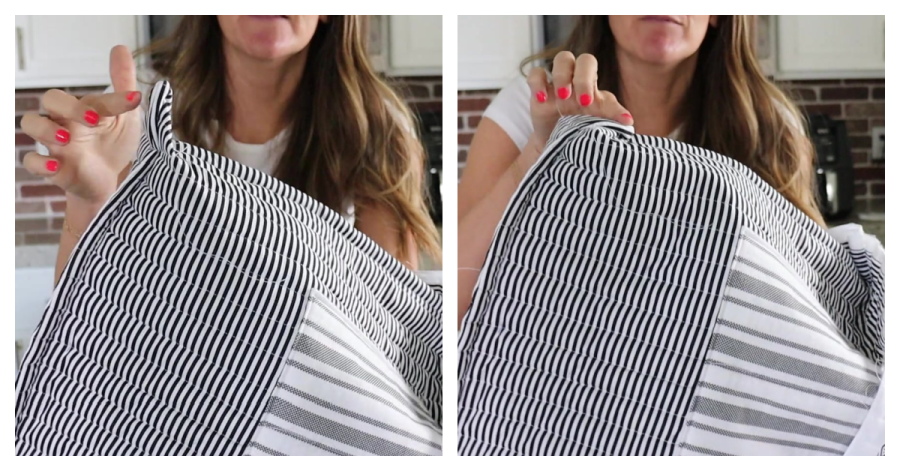
Step 8: Sew down top of edge.
Let’s finish off the top part of our tote bag. My goal was to make the center of the bandana the center of the tote bag. Once you add in the French seam, trimming off access and the box corners, I had a a few inches of excess fabric at the top that didn’t match the bottom. There are two things you can do to finish the top.
Option 1 Binding:
Creating a binding out of complimentary fabric and sew it over the top. You will definitely need to trim off a few inches to match the bottom before attaching the binding. This adds a fun pop of pattern or color.
Option 2 Fold down and Sew:
I was running out of my fabric, so I opted instead for folding down the edges and sewing it. This is why I suggested in step 2 to trim off 2 inches from the quilt batting and fabric. It’s a little less bulk to try to sew around.
Fold the top edge of the bag down about 1 inch and press.
Fold it down again about 1 inch to create a clean hem and pin in place.
Sew around the top.
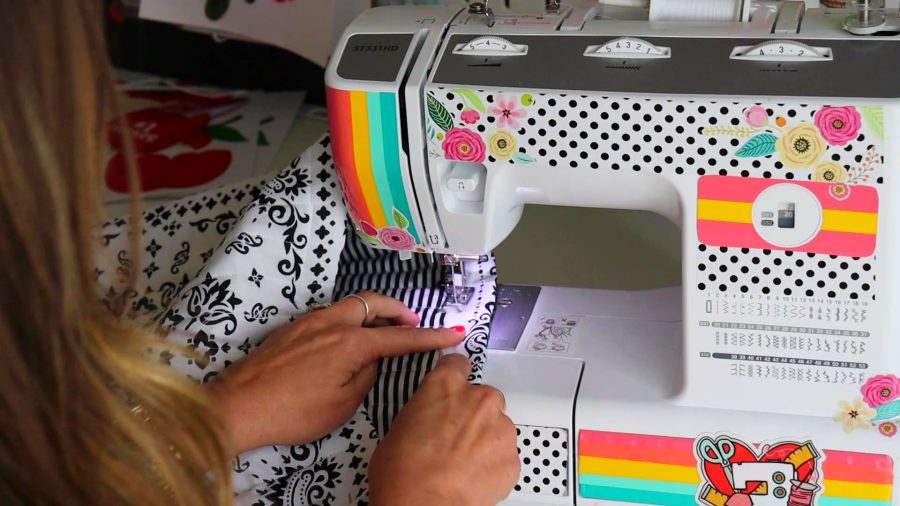
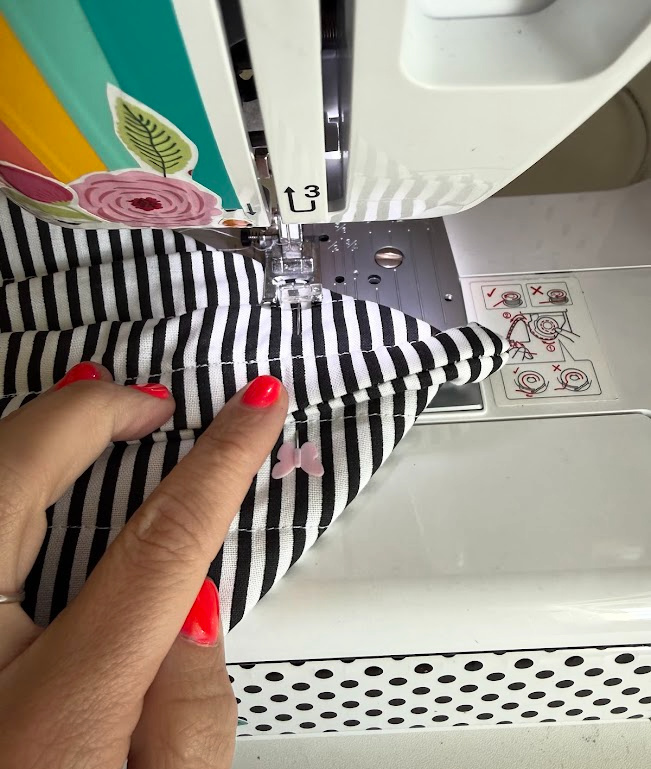
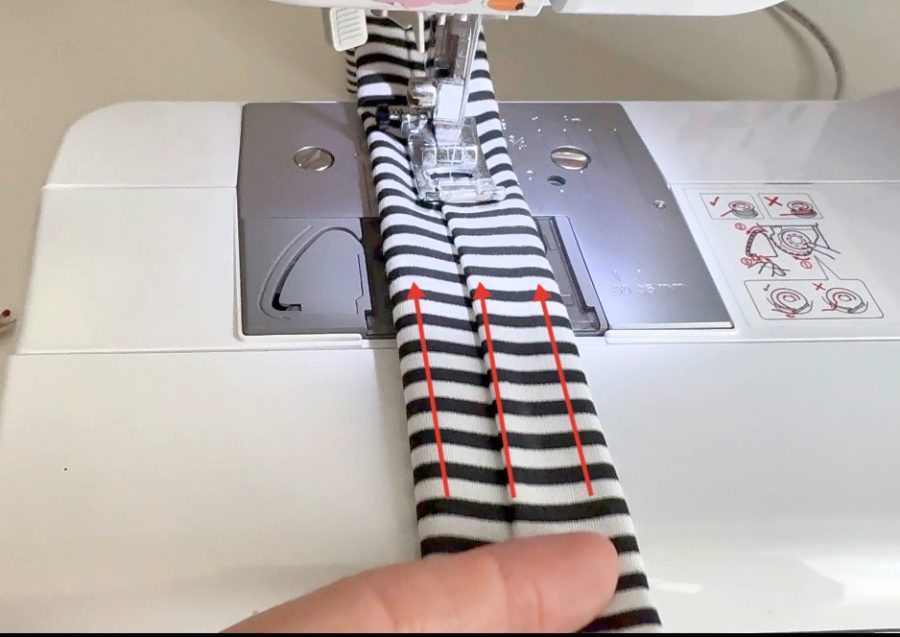
Step 9: Create the Handles
Now for the handles:
I wanted my handles to be sturdy and carry on the quilted look. I added batting in the middle to give it some weight.
- Cut two strips from leftover fabric or a third bandana (about 4” x 30”)
- Cut about 1 inch of batting strips (1″ x 30″)
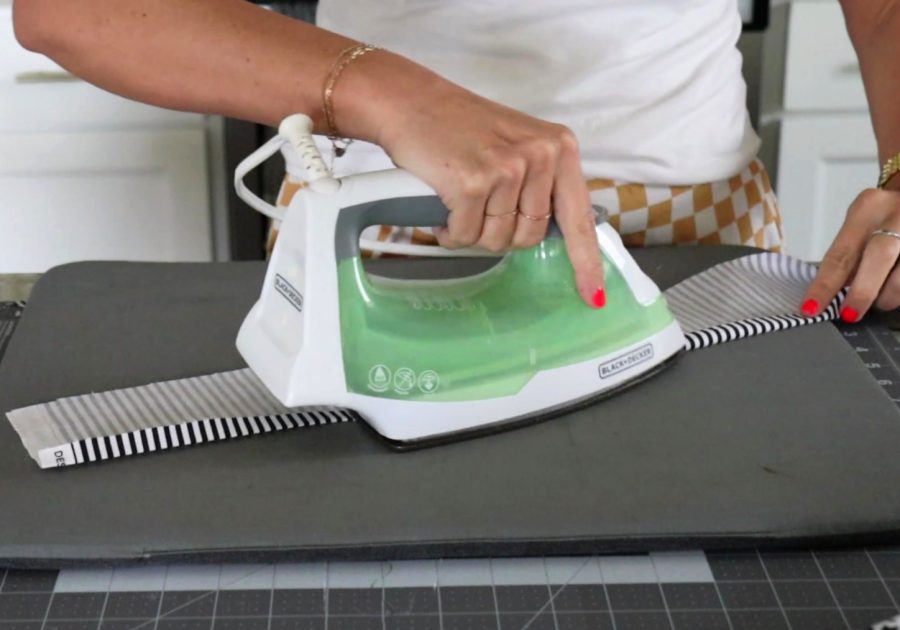
- Iron one side over about 1/2 inch.
- Place strip of batting in center.
- Fold over the unironed edge
- Fold over the ironed edge. It should end up covering the unfinished edge.
- Pin down the middle to hold it in place
- Sew down the middle
- For the quilted look: I sewed down both sides so there were 3 stitches that ran the length of the strap.
Step 10: Attach the Handles
Pin each handle to the inside of the bag, spacing them evenly (about 5 inches from each side seam).
I only wanted my straps to be about 24 inches, which means you have 3 inches on each side to pin down inside and sew. This will help reinforce the straps.
Sew a reinforced square or “X” stitch over each end to secure the handles.
Lining up the next strap to match where you sewed the first strap and repeat.
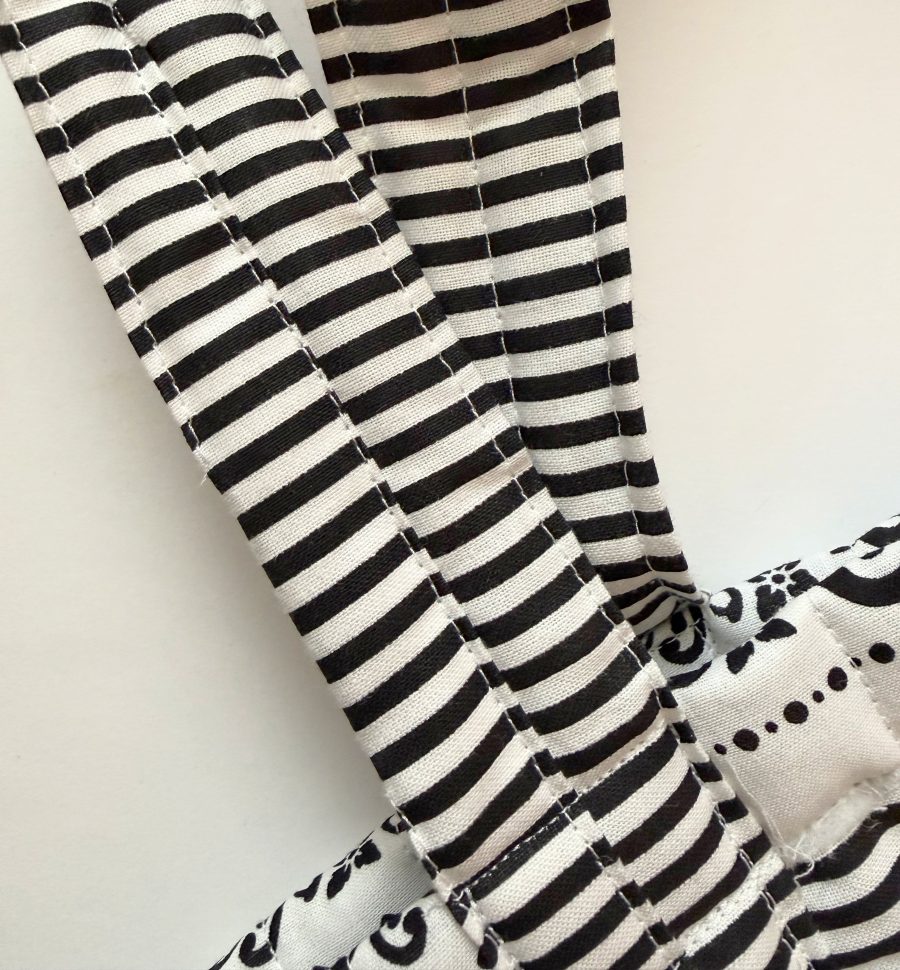
Trim off any extra strings.
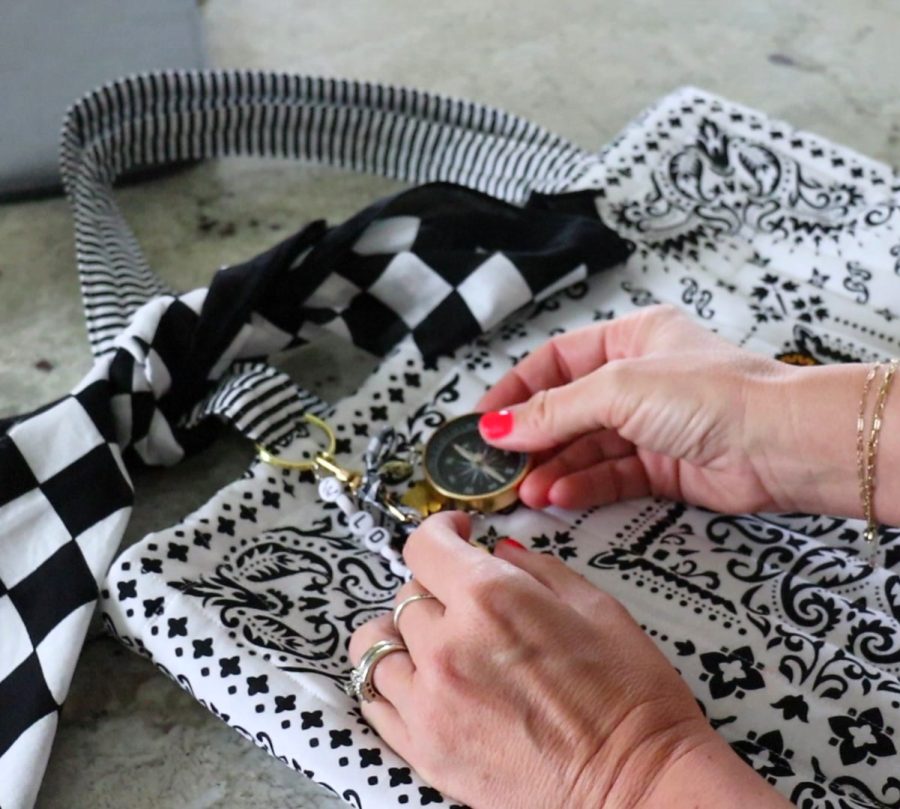
Embellish
The original tote bag had some fun patches on it. You can grab some charms, patches, and other embellishments to really make it your own!

Your Tote Bag Is Finished!
That’s it! You now have a cute and functional DIY tote bag made from bandanas. These bags are perfect for:
- Grocery shopping
- Library books
- Beach days
- Gifts for friends and family
Tips for Success
- Use contrasting bandanas for a fun reversible look
- Add a pocket using leftover fabric
- Reinforce handles for heavier items
- Wash and dry your bandanas before sewing to prevent shrinkage
Make the quilted tote bag your own
One of the best parts about this project is how customizable it is. Choose seasonal prints, school colors, or themed bandanas to match any occasion. Make the straps shorter or longer. Add lots of pockets! Be creative!
These also make great items to sell at craft fairs or add to your handmade shop!
Free pattern for the Quilted Bandana tote bag
I don’t really consider myself a seamstress- because I don’t really follow patterns and just wing it! But I did want to create an easy printable so you can follow along. The pattern really only makes sense after you read all the instructions above. It’s just a basic outline of what I already talked about to keep you on track!
Just CLICK HERE and the DIY tote bag printable will open up for you to print off!
Save Quilted Bandana tote bag for later
Too busy to get crafting today? No problem! Pin this post to remind yourself about this project later! Sharing my projects helps me reach more people, allowing me to continue sharing free content!
Final Thoughts
This easy Quilted bandana tote bag tutorial is the perfect mix of simple, stylish, and practical. With just two bandanas and a little sewing, you can create a reusable bag you’ll actually use every day.
If you try this project, I’d love to see how it turns out!
If you loved this Quilted Bandana tote bag: Make sure to check out my other fun sewing projects here!
Leave a Reply