
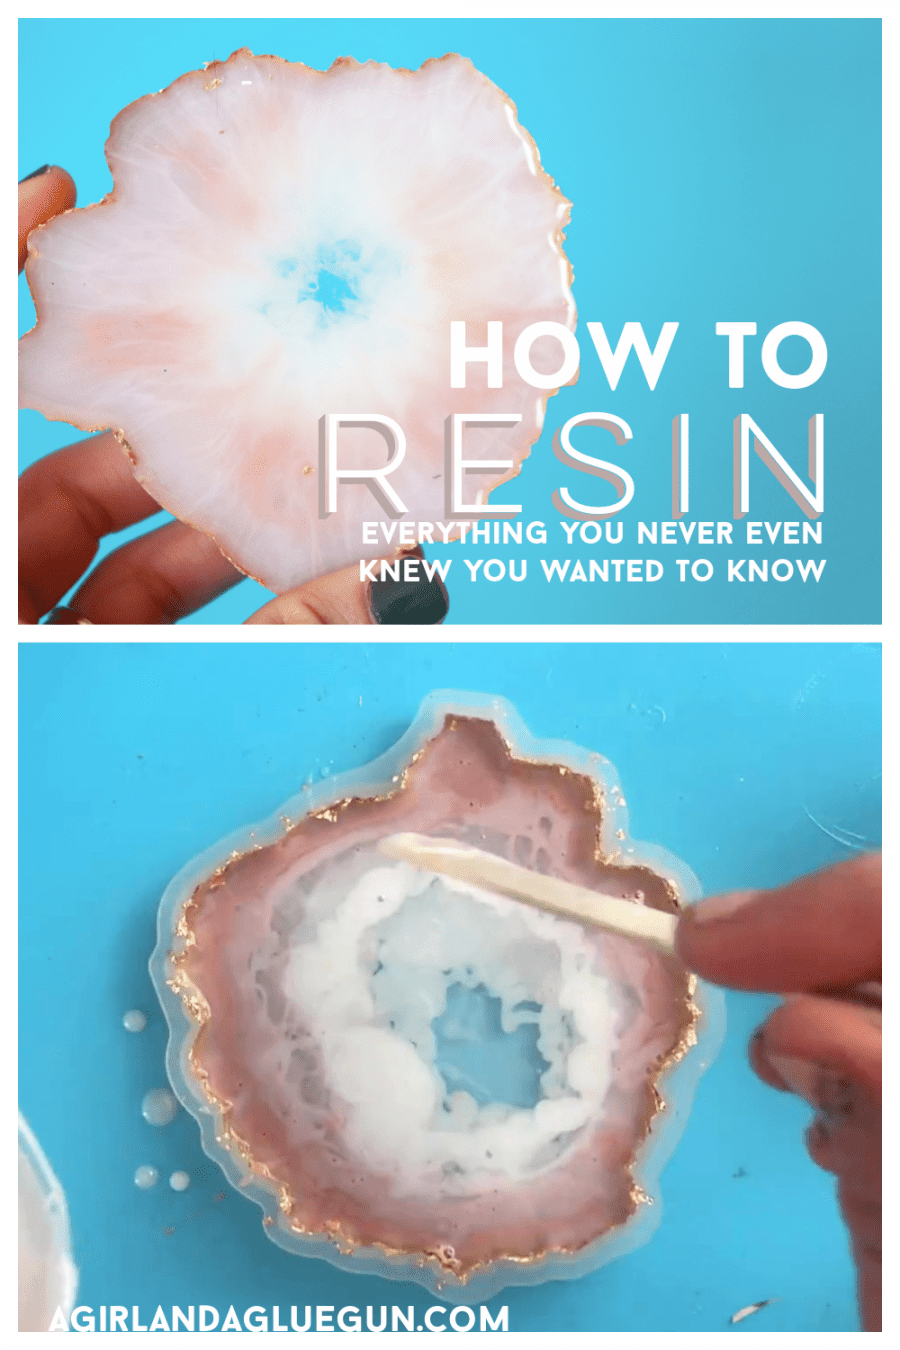
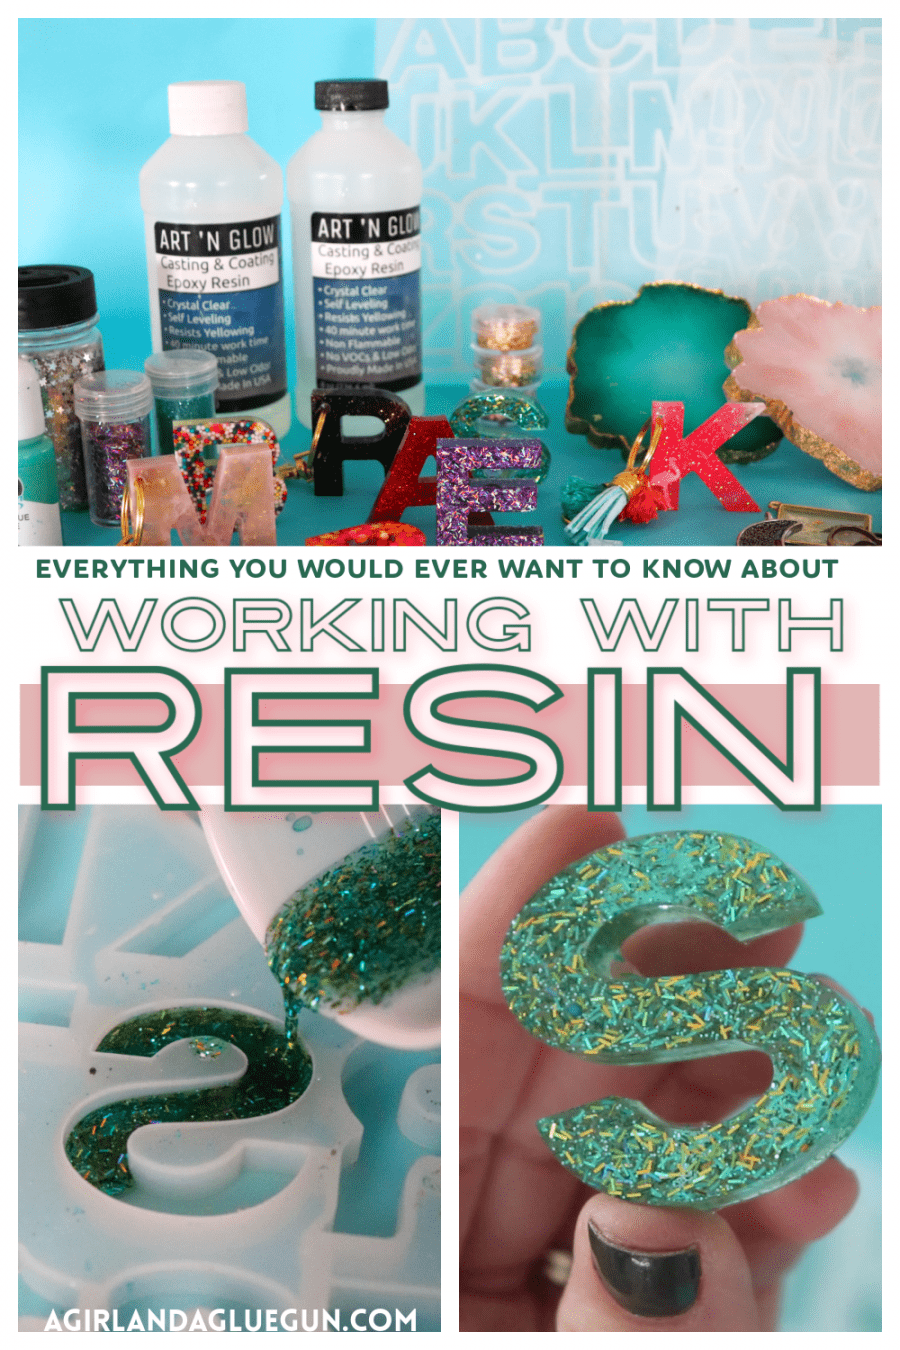
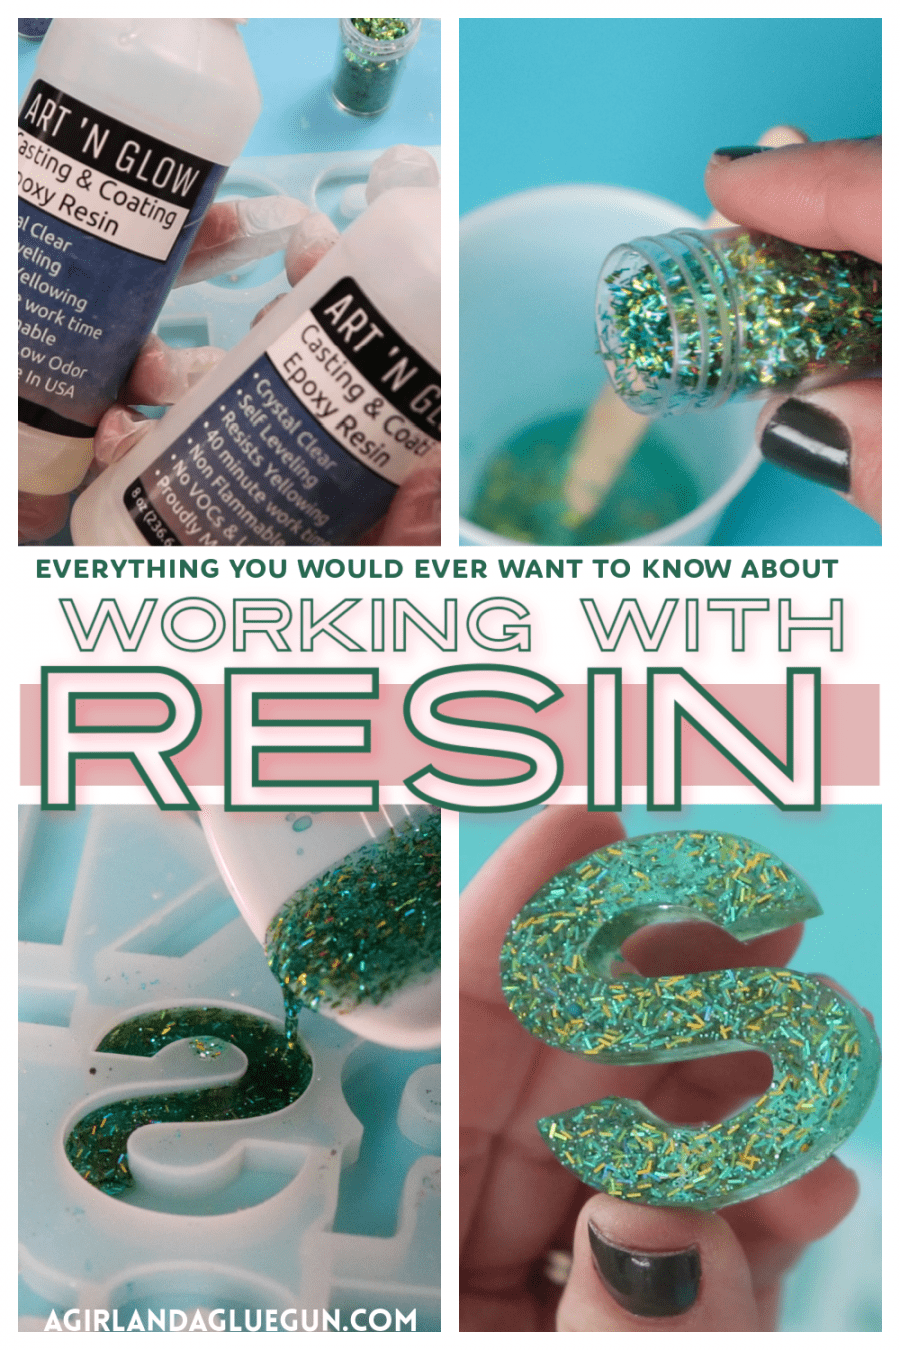
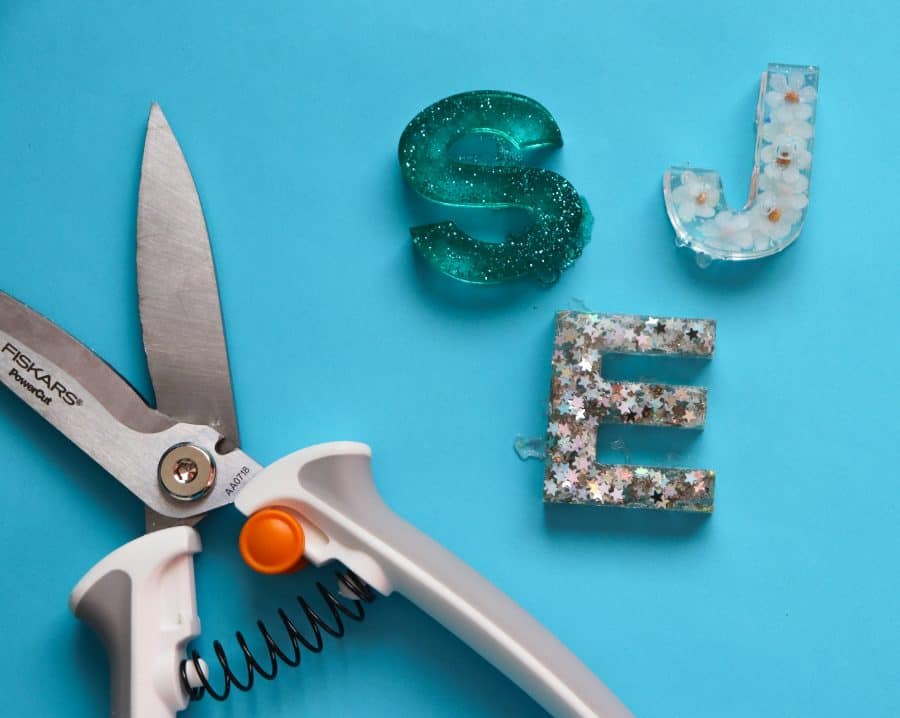
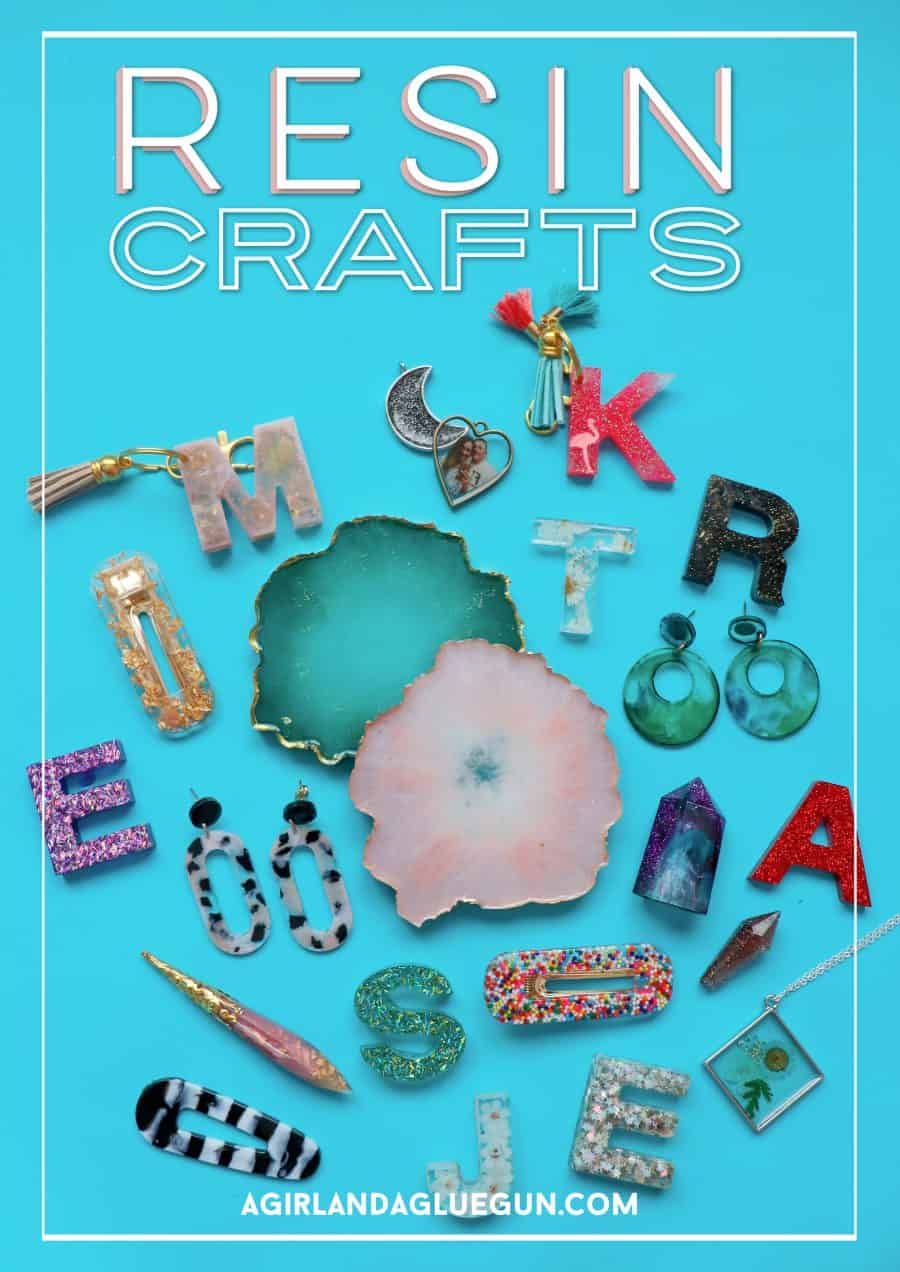
Resin and epoxy has been a hit for so long- I decided to try it out- and I’M ADDICTED! Here is everything you would ever want to know about making Resin and Epoxy Crafts!
I am going to start this with a disclaimer! When I started playing with resin/epoxy- I had so many people tell me to be careful with the fumes/toxins! The kind of epoxy I bought does not mention having to wear a mask- just gloves and protective eyewear. BUT I have heard enough stories- So I am going to recommend wearing a mask, doing resin in a ventilated area, and gloves always! (I am a hypocrite- in the video I had to ditch the gloves so I could stop my camera. Don’t be like kim. Better to be safe then sorry!
I also had another person on instagram reach about and tell me about exotherm- It’s the reaction between resin and hardener as it cures- it generates heat and can heat up and cure faster in the cup because the heat can not escape. I did not have this happen to me- but wanted to put that warning! All resin should come with instructions! Always read them before you start!
What is the difference between RESIN and EPOXY
Another thing I want to cover is the fact that I refer to resin and epoxy interchangeably. They are BASICALLY the same and crafters use both terms. I consider Resin to be what I am making – projects like keychains and earrings. Epoxy is generally when you are applying a thin coat over items to provide a protective layer –think of all those amazing epoxy cups! But I’m pretty sure that the resin I linked up below can be used to do both projects!
Okay! I did put together a youtube video- It seemed easier in case you are a visual learner! But most instructions and tips are down below!
This post contains affiliate links!
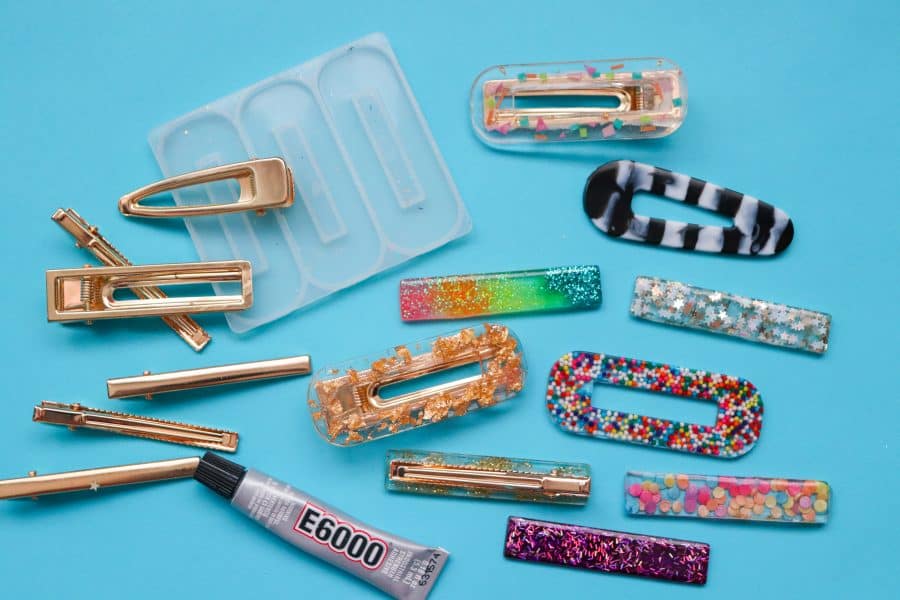
Supplies you need to get started with making resin/epoxy crafts
There are quite a few things you need to get started- Some you might have on hand (like glitter!) But here are the supplies I used in my video-
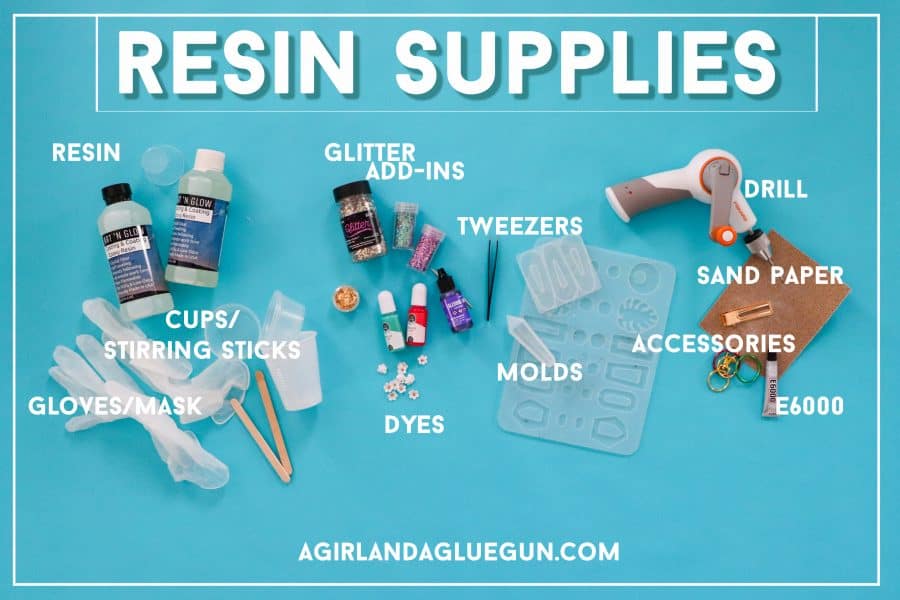
To make life easier- I created an amazon list for all things resin! It has all the things I mention- plus so many cool molds! Check out this list Resin Art from A girl and a glue gun https://www.amazon.com/shop/agirlandagluegun?listId=TA677FVA9HOJ&ref=cm_sw_tw_r_inf_list_own_agirlandagluegun_dp_qV5JY1cS9FHDZ
But here are the basics broken down!
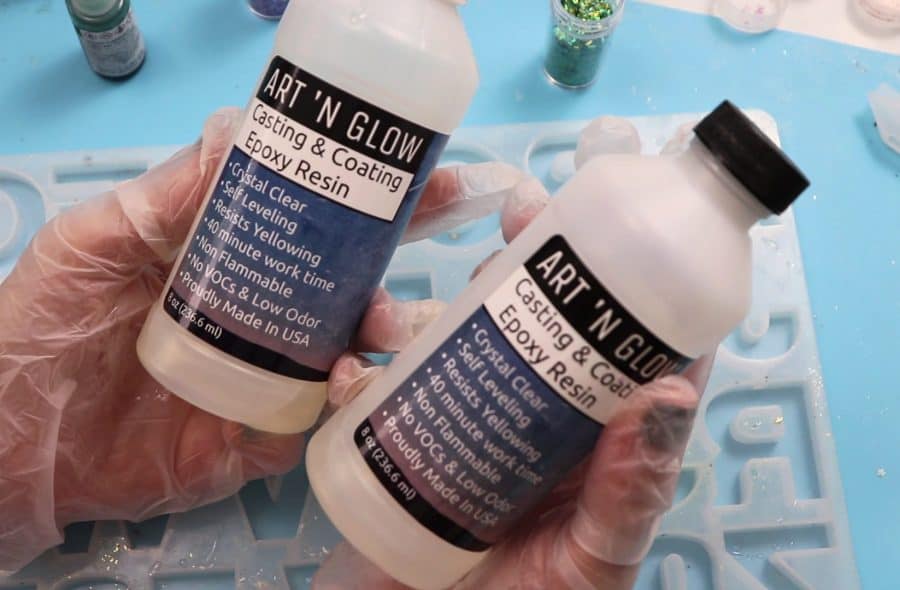
- I like this resin- https://amzn.to/2YeO1TM
- It doesn’t yellow. No UV light needed. Very low odor and self leveling!
- Protective mask and gloves
- cups and sticks to stir (I don’t want to clean them so I bought disposable
- A silicone mat. So handy to have for overspill. everything just peels right up- https://amzn.to/3abtsx2
- Matches/lighter or if you are making resin on the regular- a torch!
- toothpicks if you are putting resin in something with small sections- It helps push the resin in those tight places.
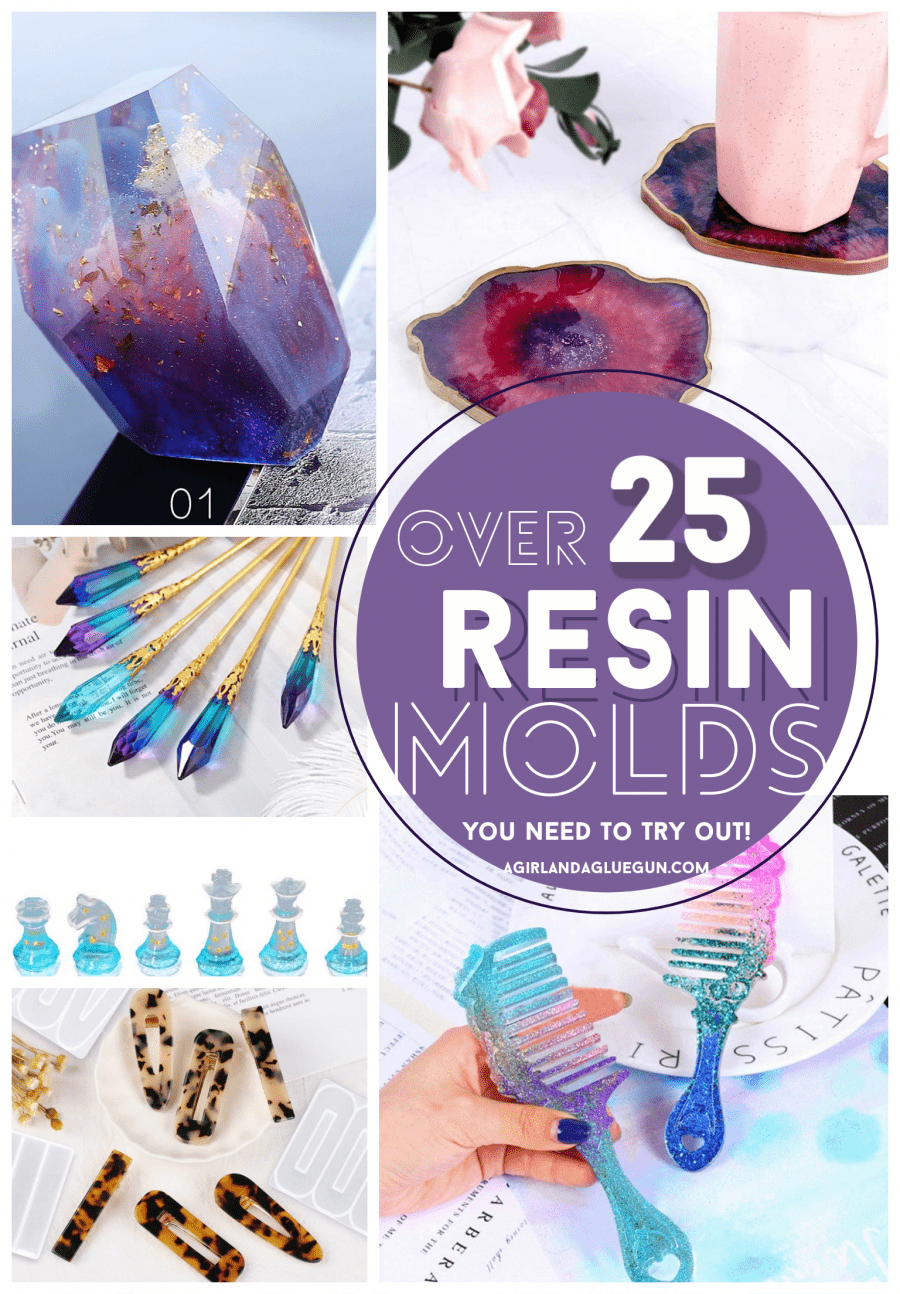
Resin craft Molds
This deserved a blog post all it’s own! Here are all the ones I have purchased- plus things on my wish list: https://www.agirlandagluegun.com/2021/01/resin-molds-you-need-to-try.html
Just make sure you are getting silicone resin molds- they are so easy to use with the resin!
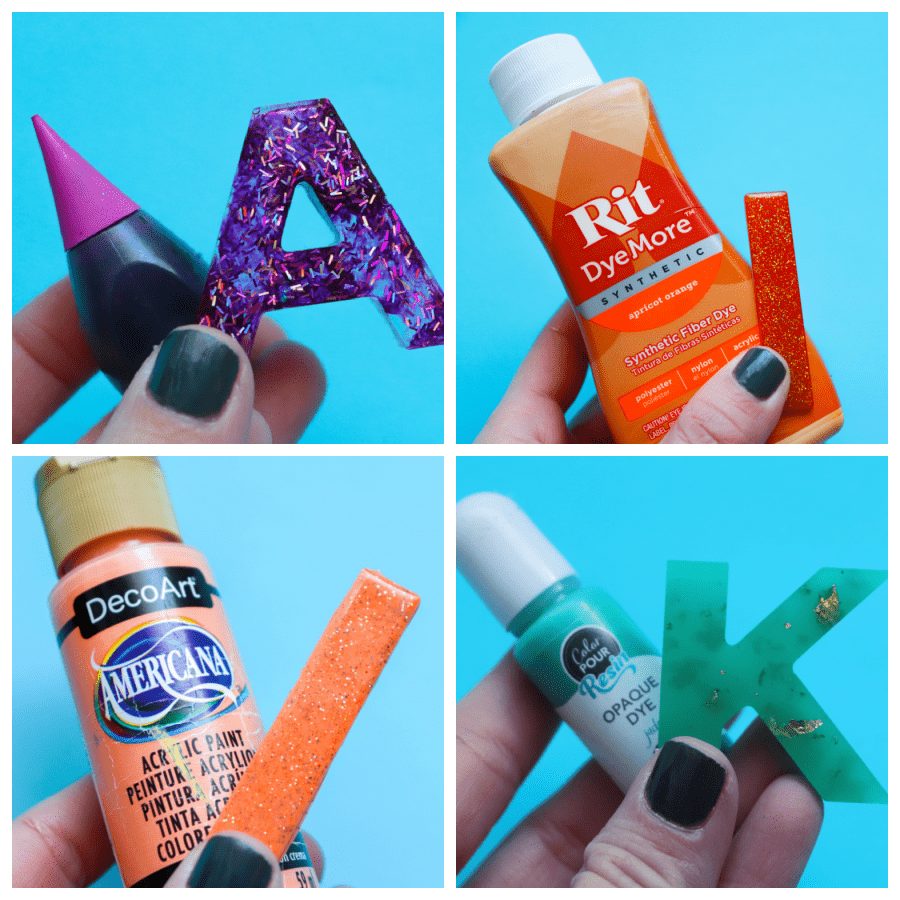
Resin Dyes and Tints:
They do have specific Resin Dyes- the brand I am using can be found at Joann and Michaels- but they have some inexpensive sets on Amazon. One thing to note is there are two different looks- Opaque and Transparent. You can see in the picture below – same color, different looks!
![]()
Opaque Resin Dyes: https://amzn.to/2M8dyLZ
Transparent Resin Dyes: https://amzn.to/39qozRT
Other things you can use to dye the resin:
- Alcohol inks – they are transparent not opaque! These are more expensive- but you might already have them on hand from another project! https://amzn.to/36gkCgB
- Rit dye- a little goes a long way
- Food coloring. You have to stir quite a bit to get it mix with resin but cures fine
One thing I do NOT recommend is acrylic paint. I saw someone use it-I tried it. I hated it. It makes it less shiny- so you don’t get the resin look. PLUS it never feels cured. It always has a tacky feel!
Resin Add ins:
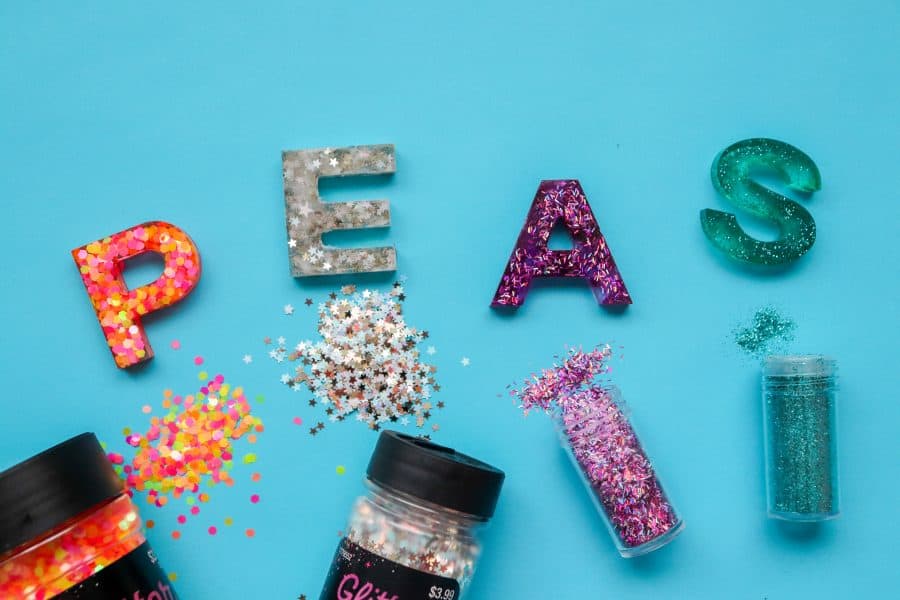
So many cool things you can add into resin. I think Glitter is the most popular- but you will end up walking around your house looking for things to put into resin!
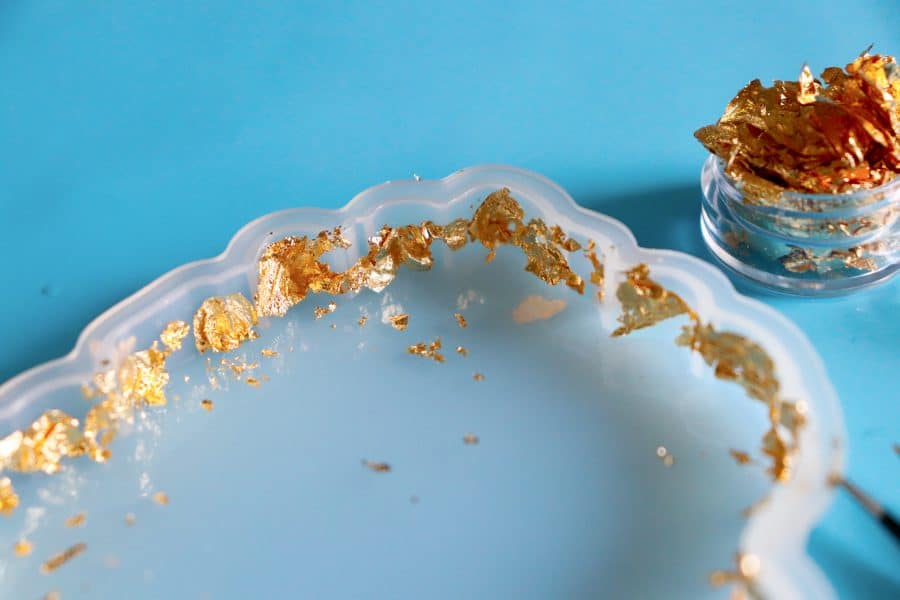
- Glitter. There are so many different kinds- chunky, fine, circles, lines. They all look so cool!
- Gold and silver foils/flecks- https://amzn.to/2YkqP6w
- Pressed flowers- https://amzn.to/3iUiYGj
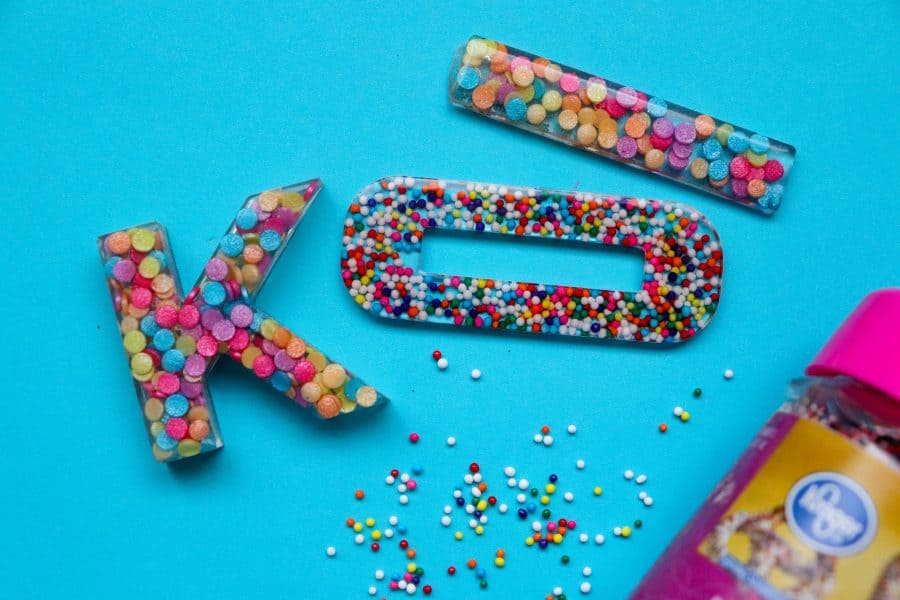
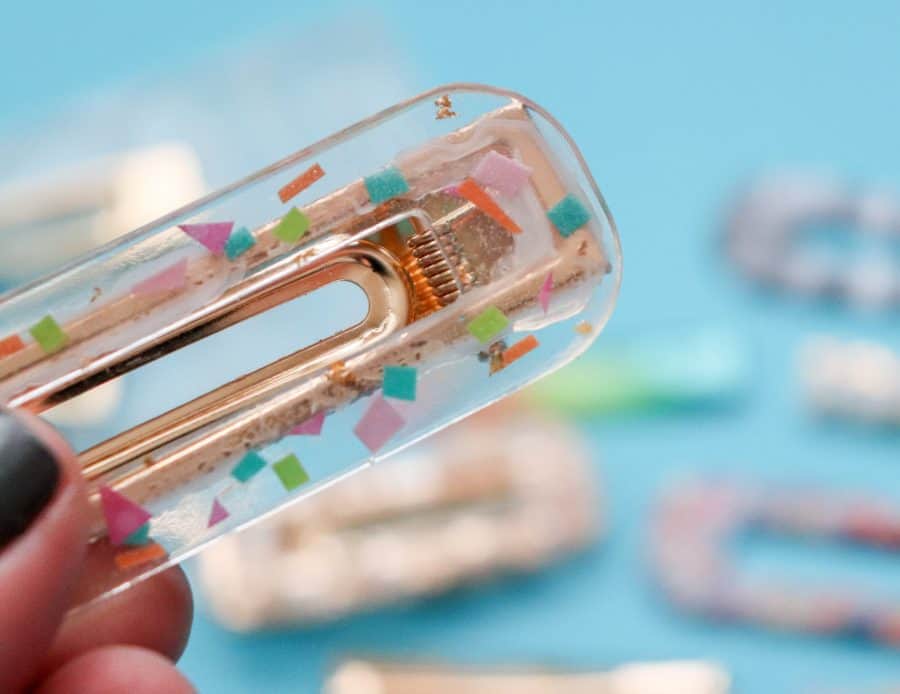
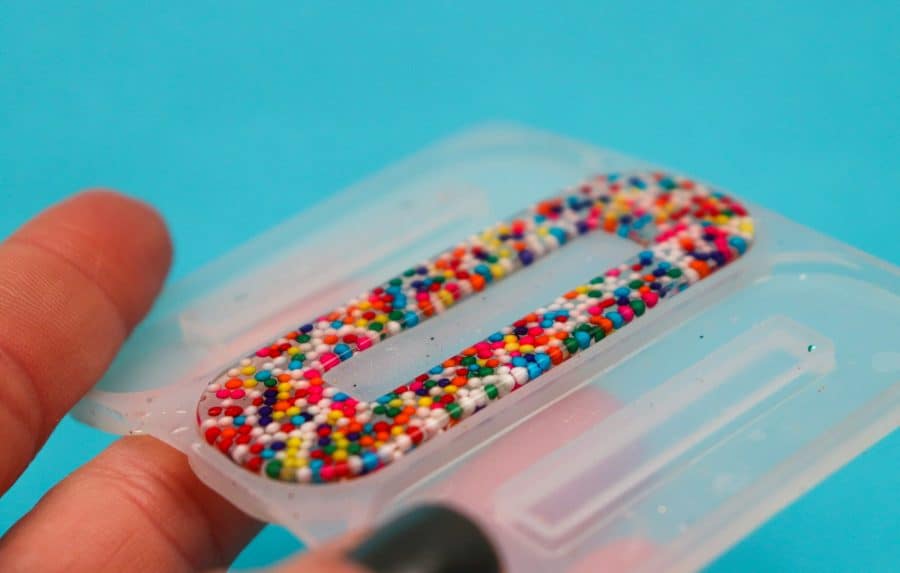
- Sprinkles-
- Confetti
- Stickers
- scrapbook paper
- feathers
- googly eyes
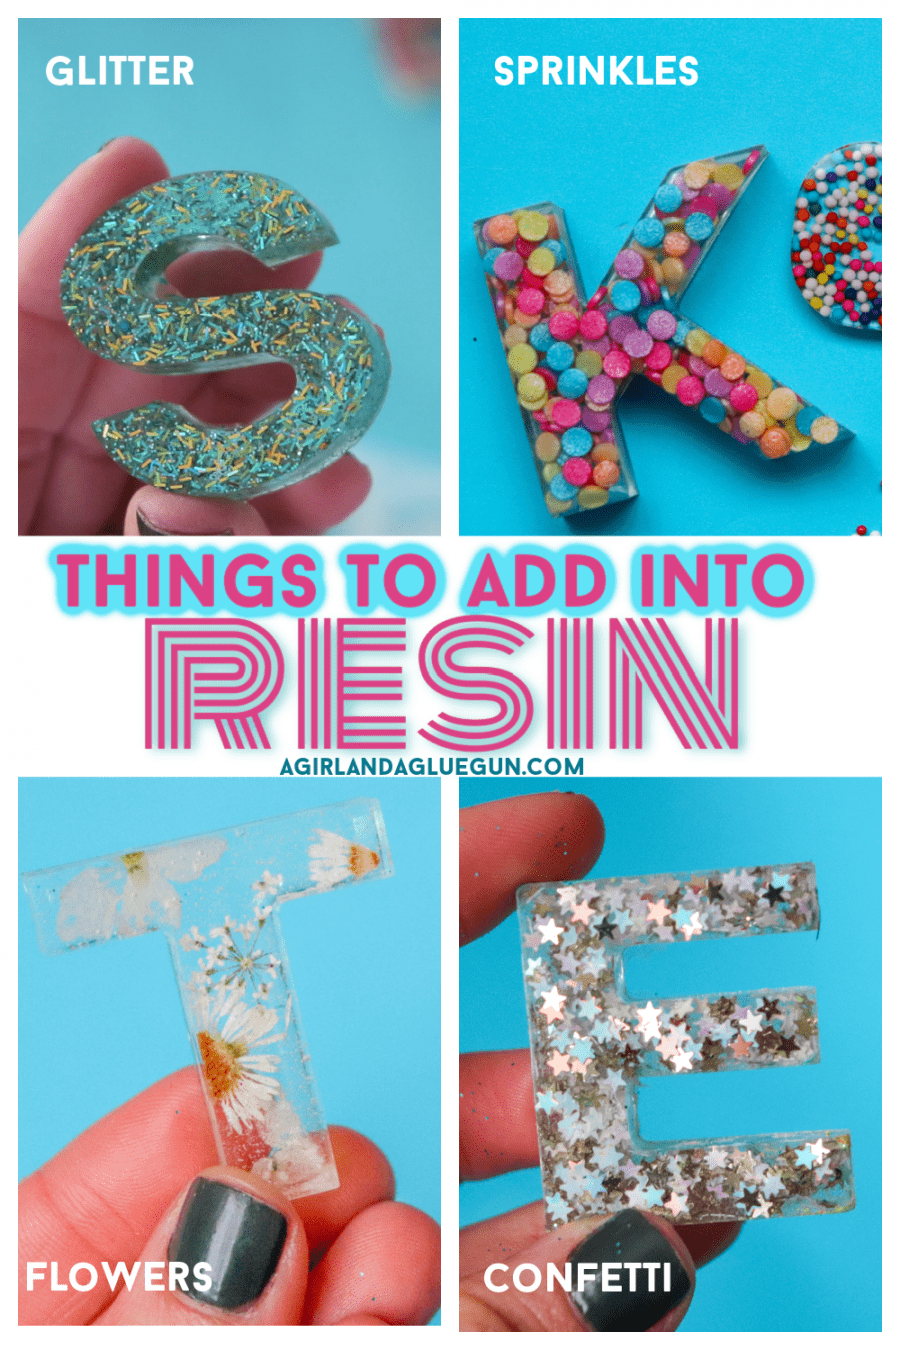
The reason I try out so many is because there are tricks and tips with each kind! The flowers are light and float- so you need to make sure to take a toothpick and push down-
I personally love the chunky gold flecks look- it is what I lined my resin geode coaster with
And sprinkles- I was curious if they would have the colors spread- they didn’t and they looked so cool!
Other Resin ODDS and ENDS
Sandpaper:
Sometimes the edges can be rough- a find grit sandpaper works great! (I do not recommend using this on the front as it scratches!
Sharp Scissors:
Any overspill can break off- but if not- it trims off pretty easily
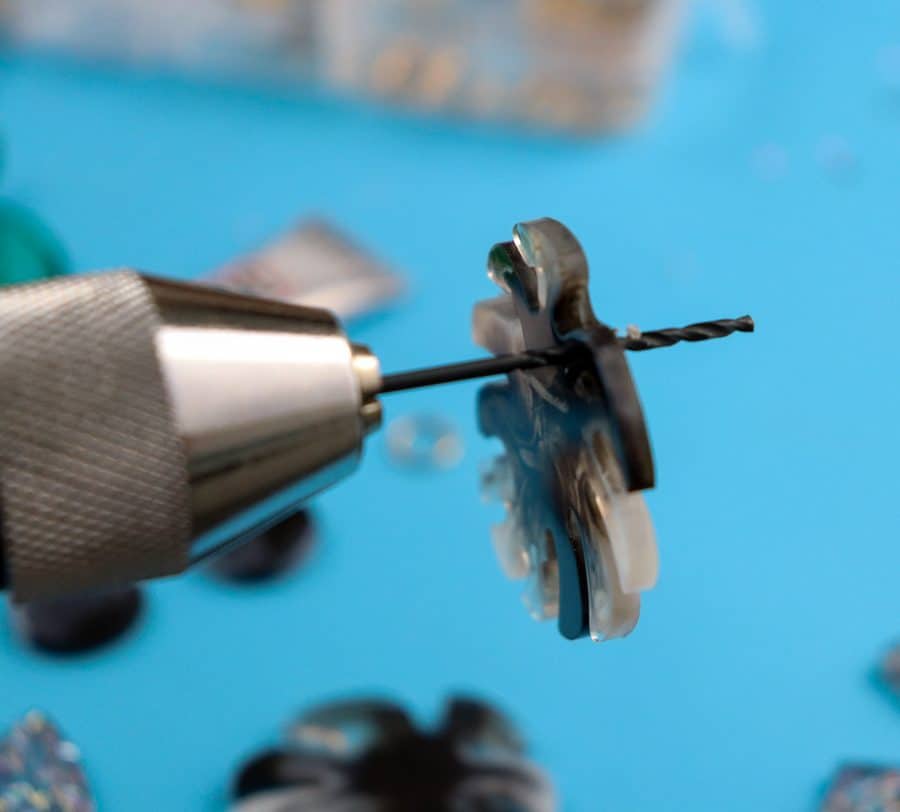
Drill
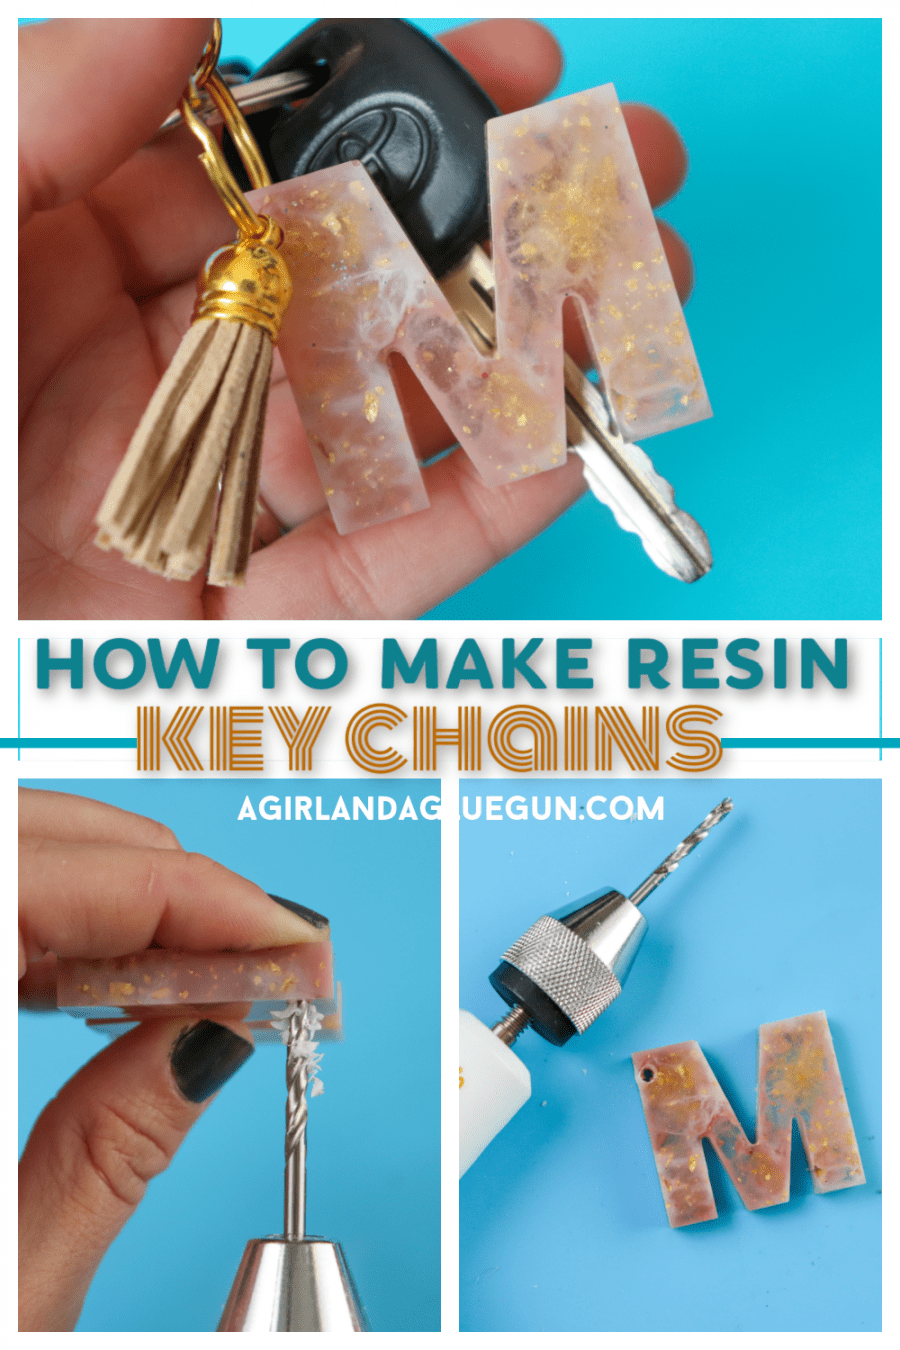
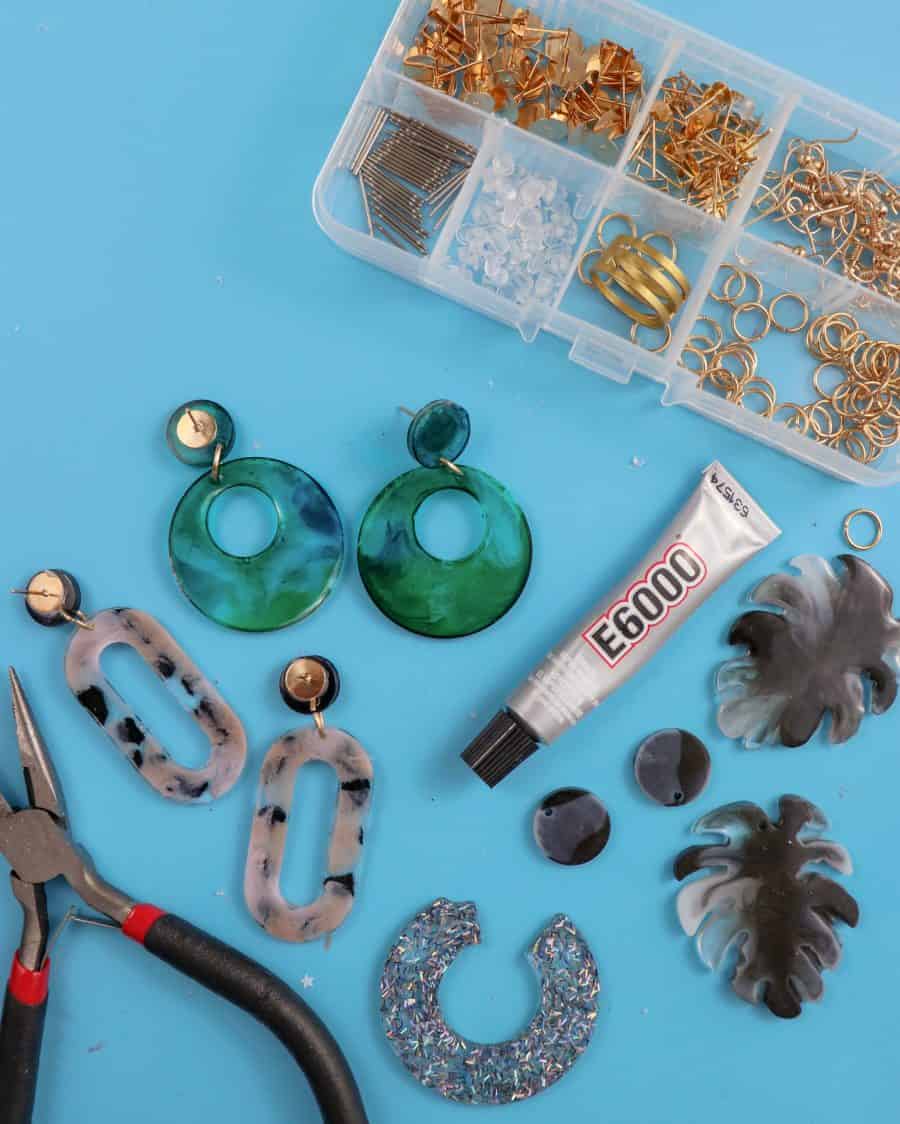
If you want to make any Resin keychains- or drill holes for earrings- having a small drill bit is handy! It actually goes through the resin really well! I love this Fiskars one because it’s priced right, I can leave it in my craft room and my husband doesn’t try to steal it!
Fiskars drill: https://amzn.to/36kpIbt
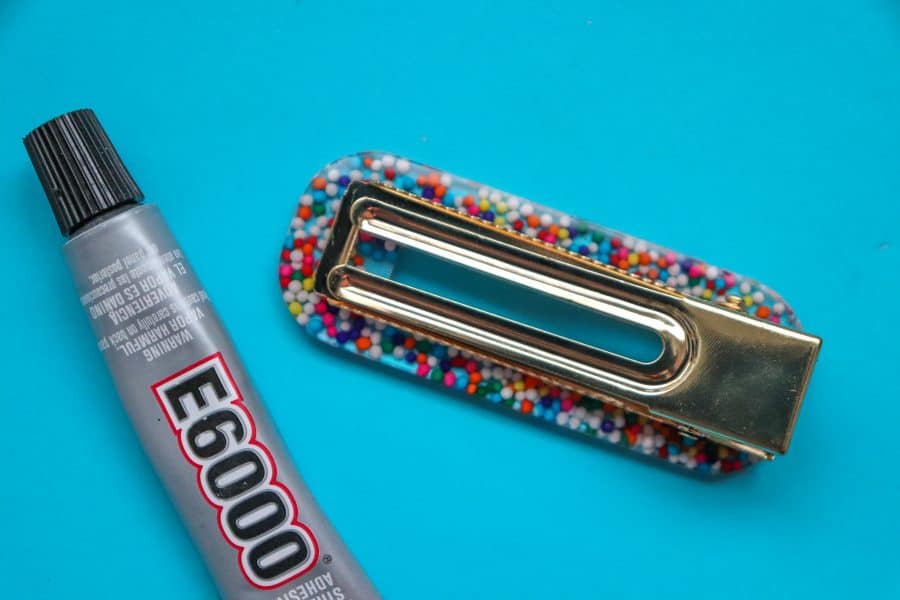
e6000
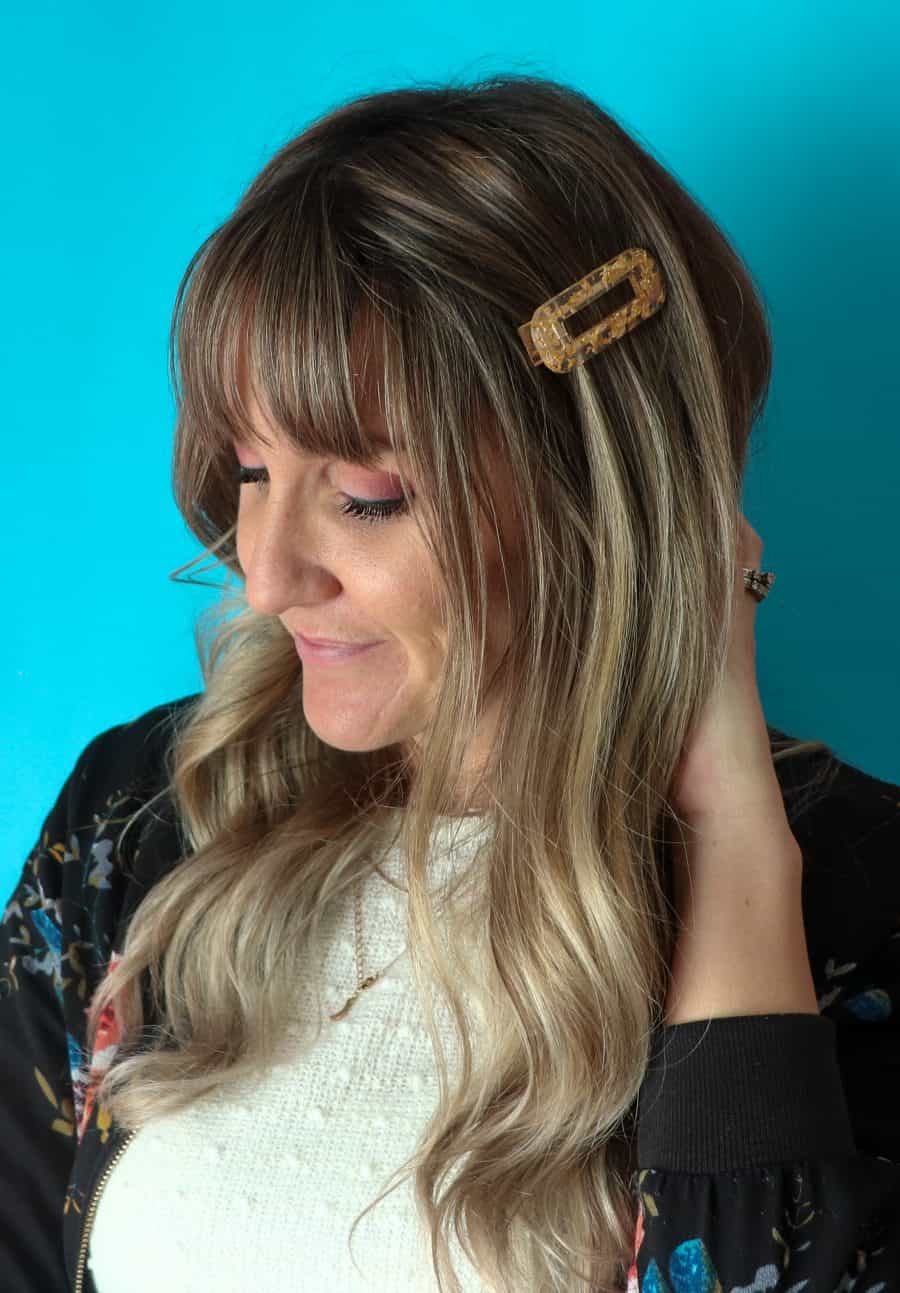
This adhesive is super strong and is great for gluing on earring backs or the clips to the epoxy barrettes. Make sure to get clear or transparent- The Barrette down below, I accidently used a matte e6000 and you can totally see the glue!
and last but not least:
clorox wipes/ baby wipes
These are great for cleanup. The resin is a bit sticky and you will want some of these on hand to help clean everything up when you are done!
How to make resin and epoxy crafts
Since you should be wearing gloves- I like to grab all my supplies and get them all ready. Take off lids of glitter and dyes. Pull your hair back. Your gloves might get resin on them and everything you touch will result in STICKY! Also. the Resin needs to cure for 24 hours. So make sure you at a spot where you can leave it undisturbed. I make mine on a cookie sheet so I can move it to my room when I’m done!
Step 1. Mix equal parts Hardener and Resin.
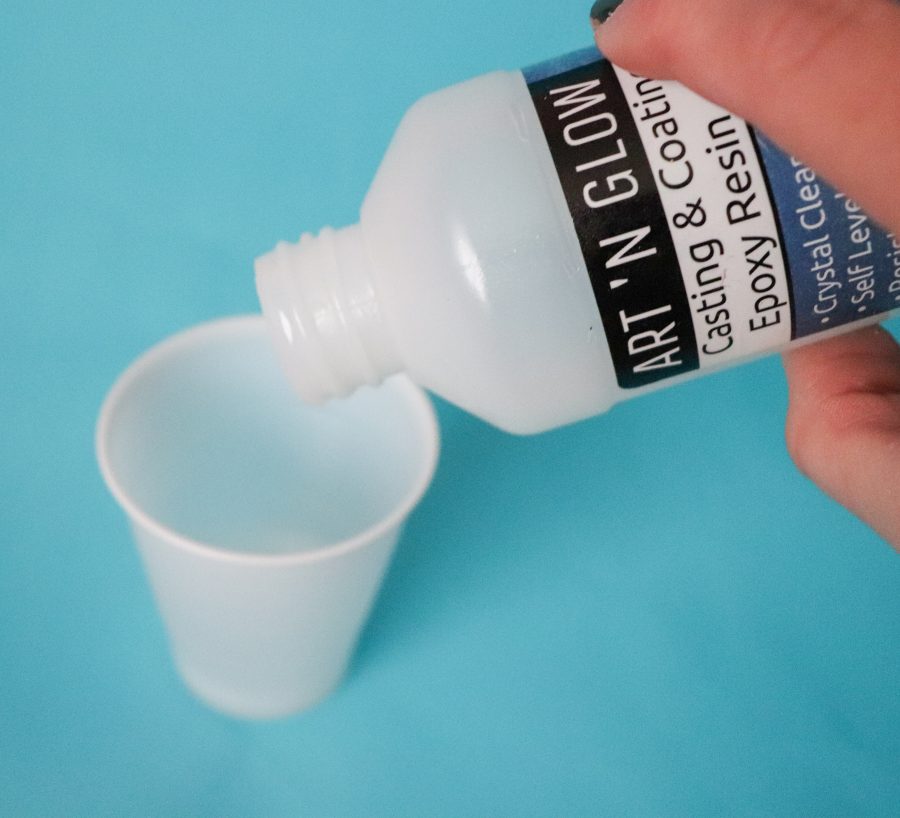
Mix slowly to prevent getting lots of bubbles. You want to mix it really well. I think the instructions state 2-3 minutes! Once its mixed you have about 30 minutes to work with it before it starts to get lumpy and starts the cure process. I mix in a bigger batch- then Pour it into separate cups to add in each color and glitter.
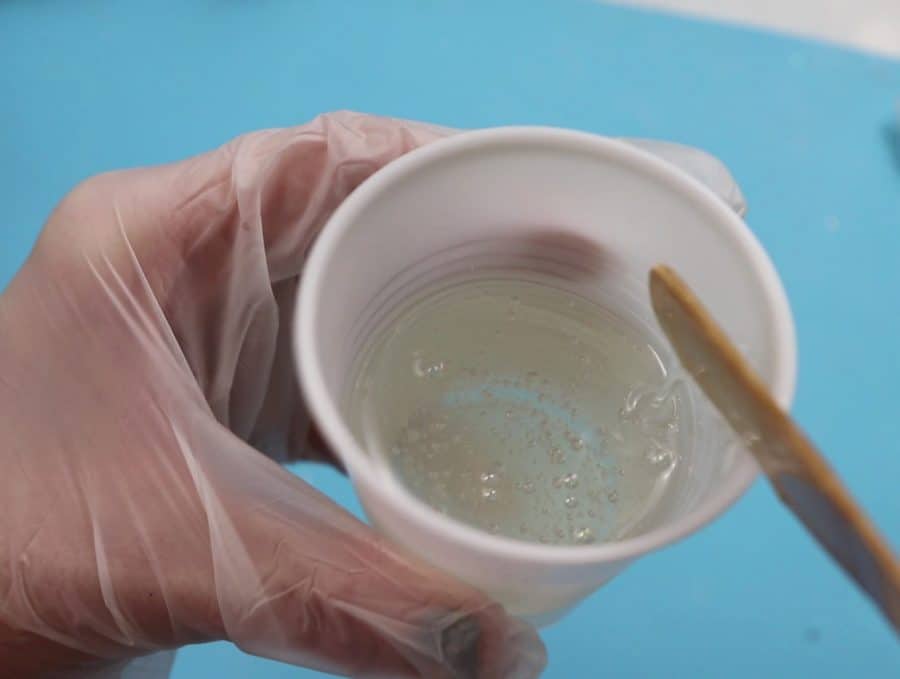
It will still have bubbles- Don’t fret! We will take care of them.
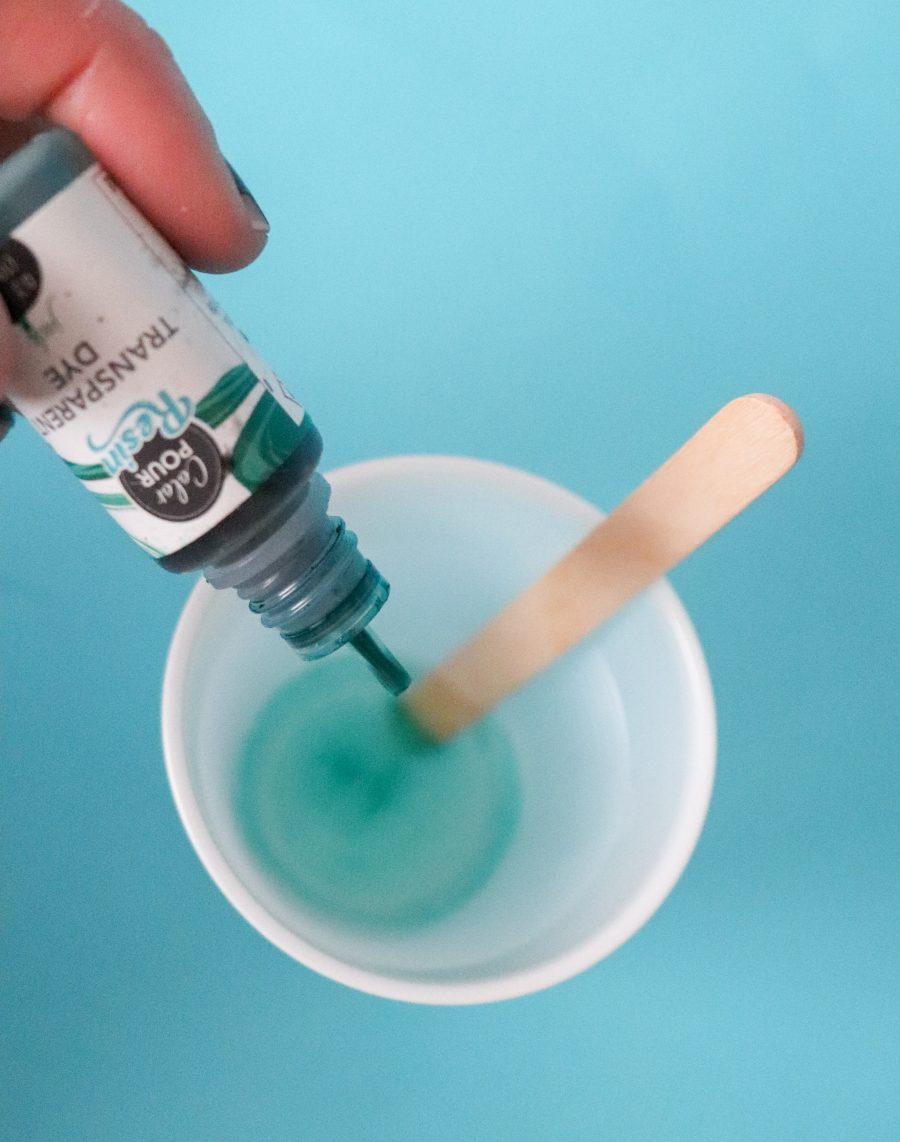
Step 2. Add in coloring.
This part is optional! I like color- but resin by itself is clear and gorgeous. Start with a few drops and work up if you want a deeper color.
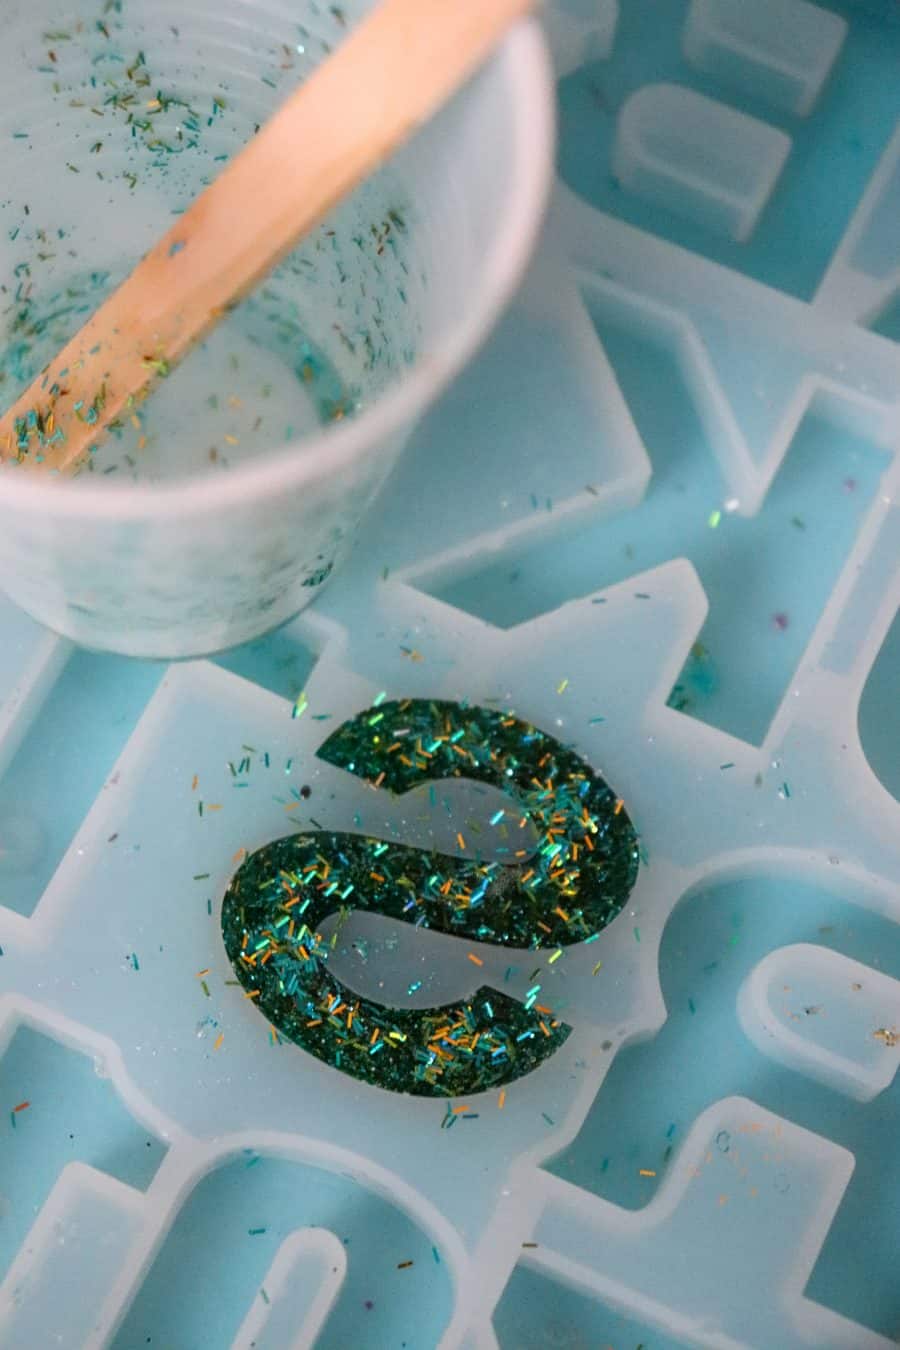
Step 3. Add in glitter or sprinkles
Another optional step- but this is so fun to add in lots of cool stuff!
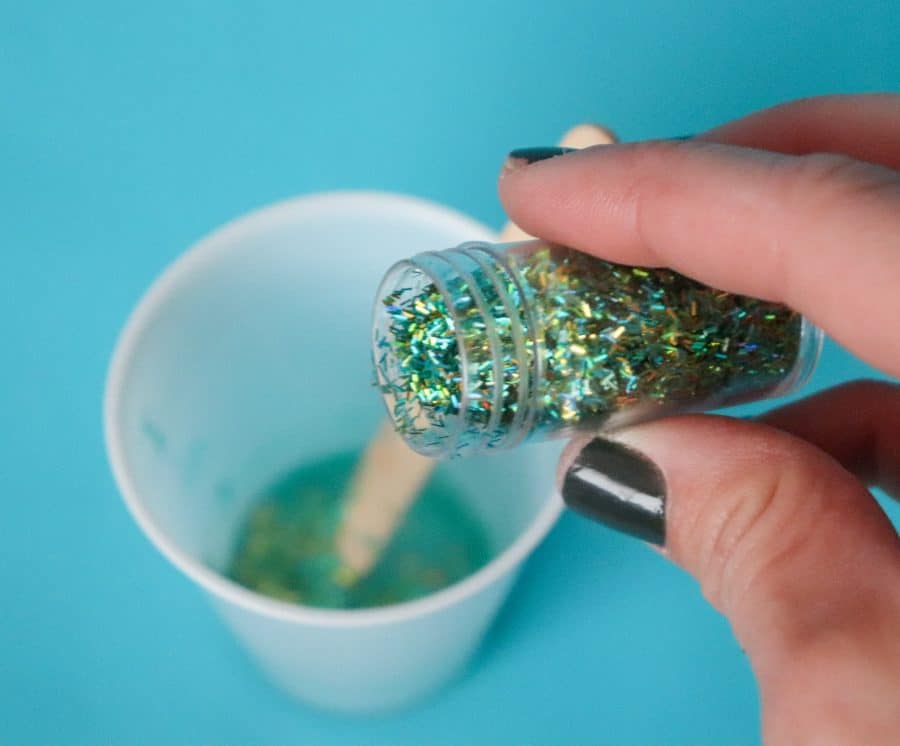
Stir well to mix it all in!
Step 4: Pour into mold.
Pour in slow- Make sure the resin is getting into all the little crevices.
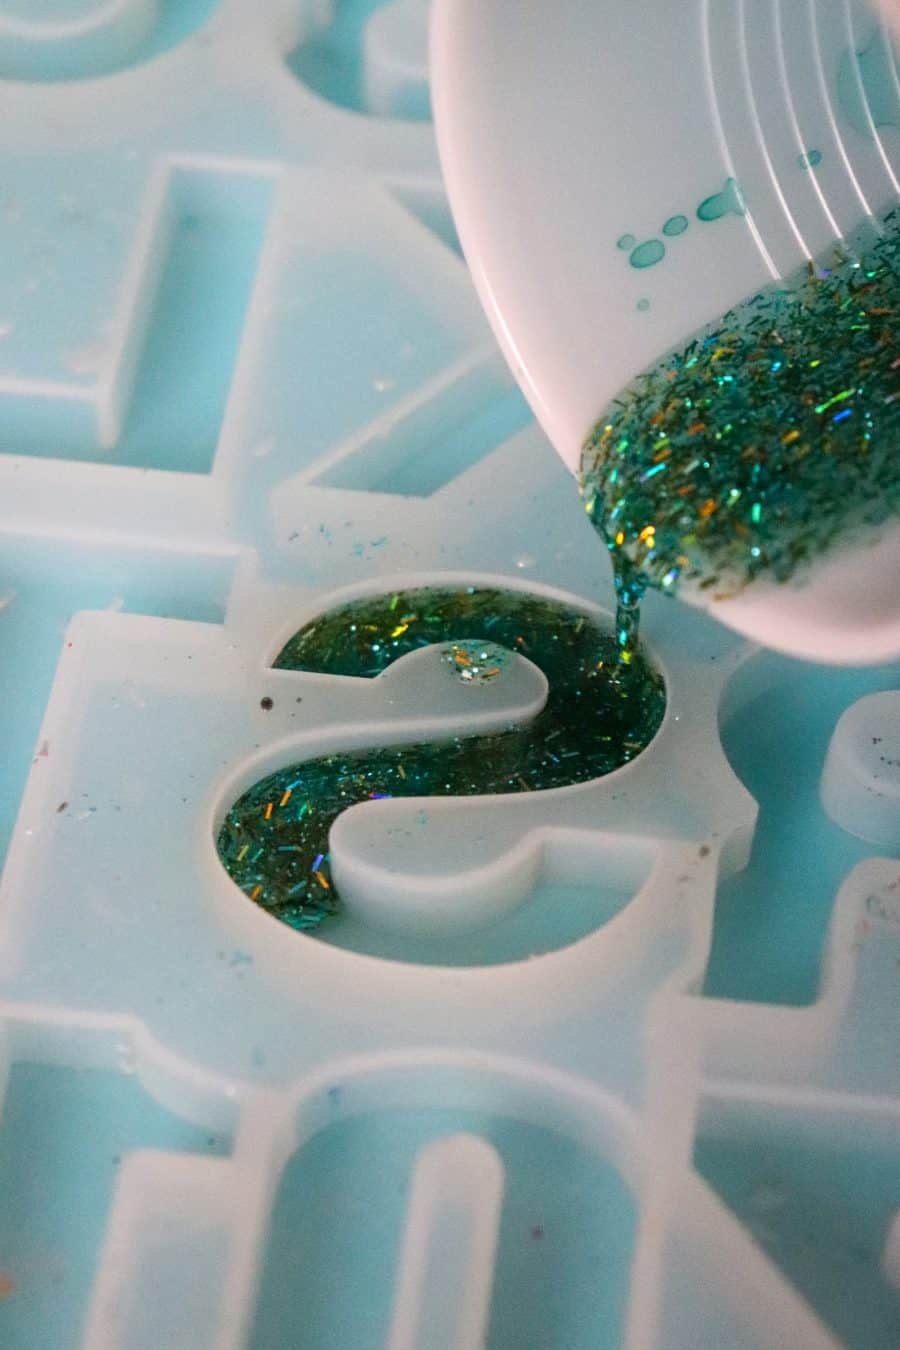
I like to overfill my resin molds just a bit. I find that as it settles and sinks- I’m always left with a little sharp edge- So I add in just enough to almost puff it up- but not enough to overflow. Hopefully you can tell in the picture below what I mean about puffed up over the mold.
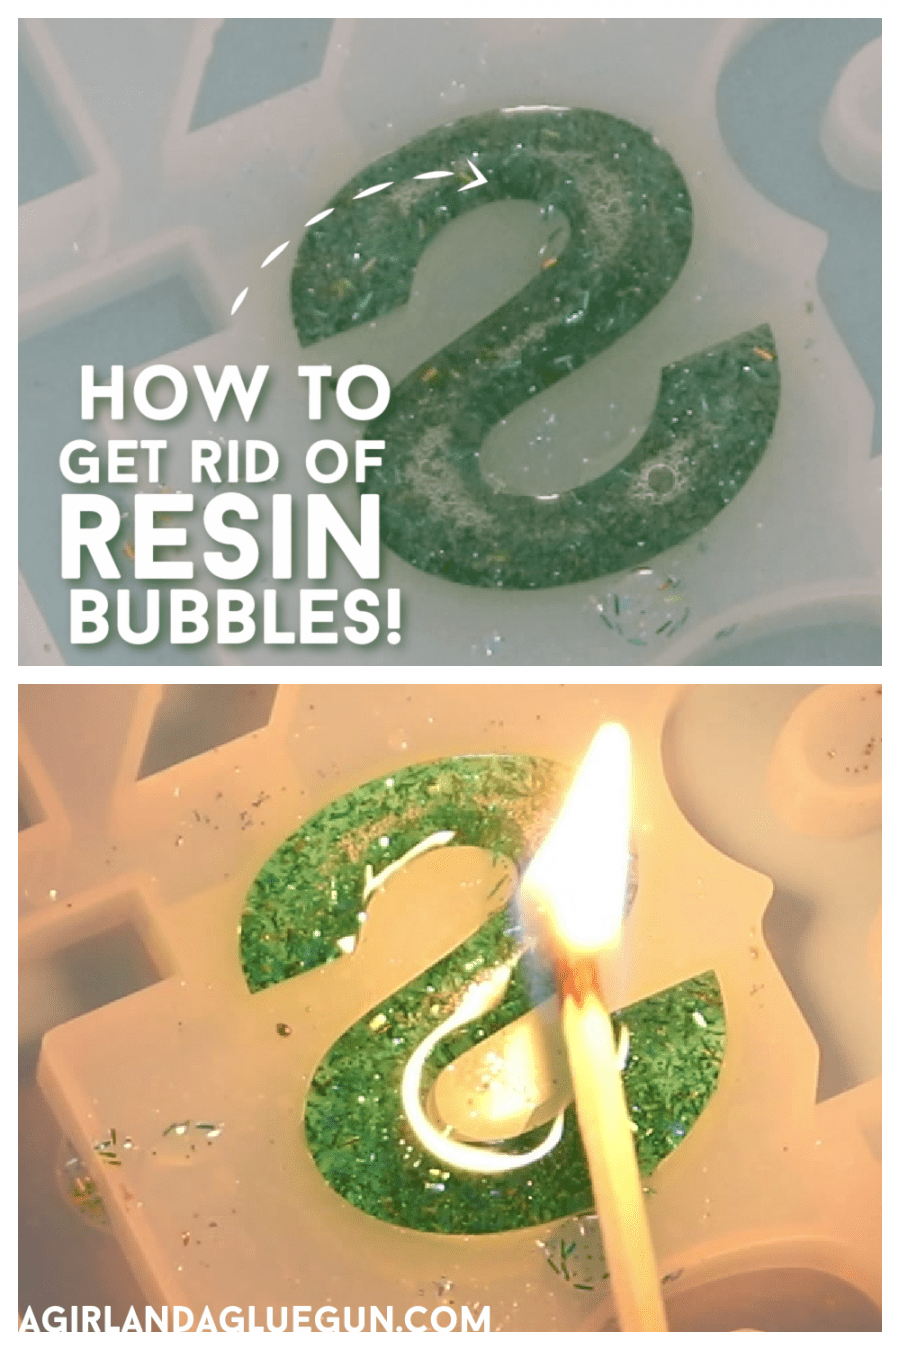
Step 5- Bubbles
As it sits and settles…the air will rise to the top creating bubbles. This is where the heat source comes in handy! Run a match or lighter over and it pops those bubbles! I think you can also spritz it with rubbing alcohol or take a straw and gently blow to pop the bubbles!
Step 6: WAIT
The worst part! Most resin crafts take about 24 hours to cure! It stinks because I’m impatient- but SO WORTH IT!
Step 7: the Reveal!
The best part! Pulling it out of the silicone molds are pretty easy- and it’s so exciting to see it all finished!
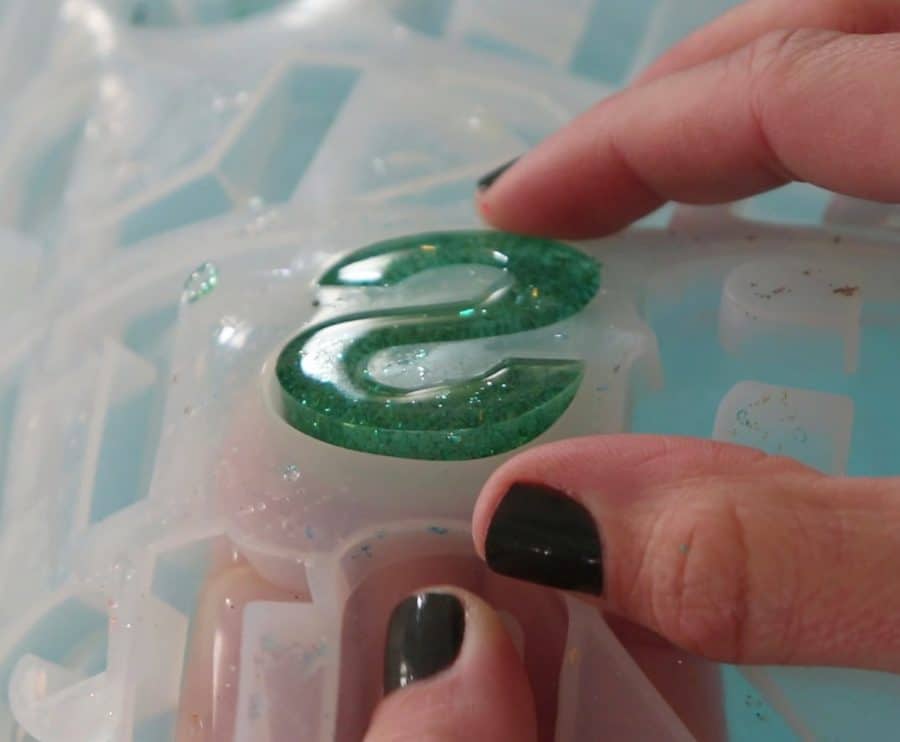
TA DA!
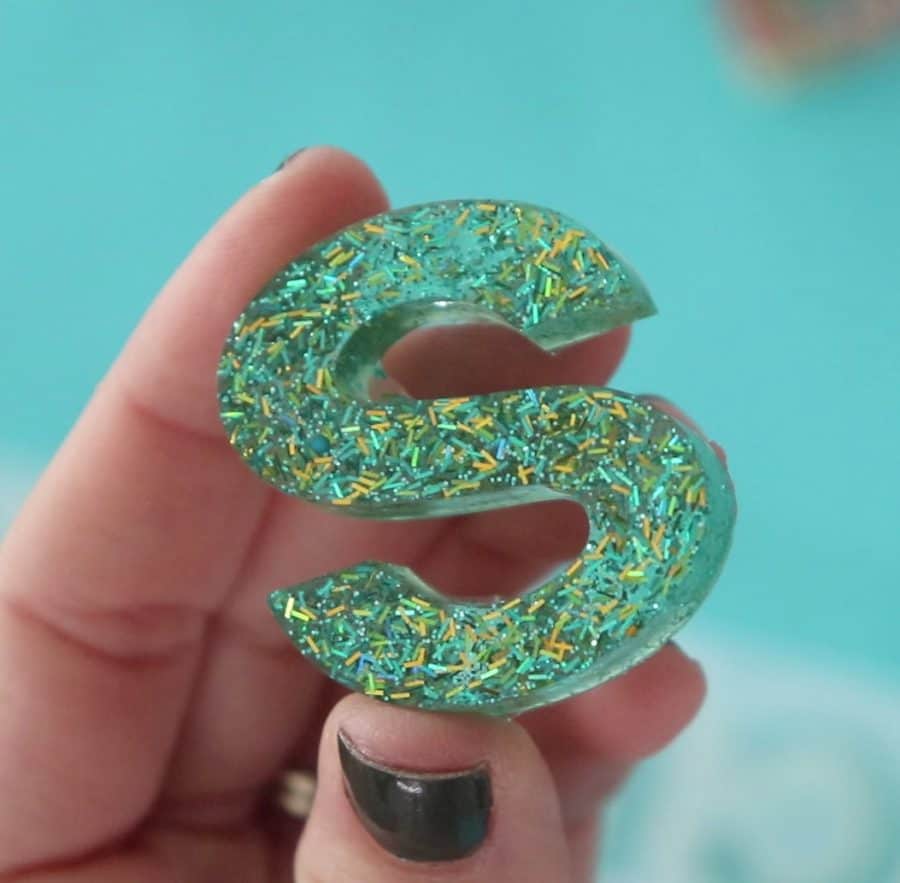
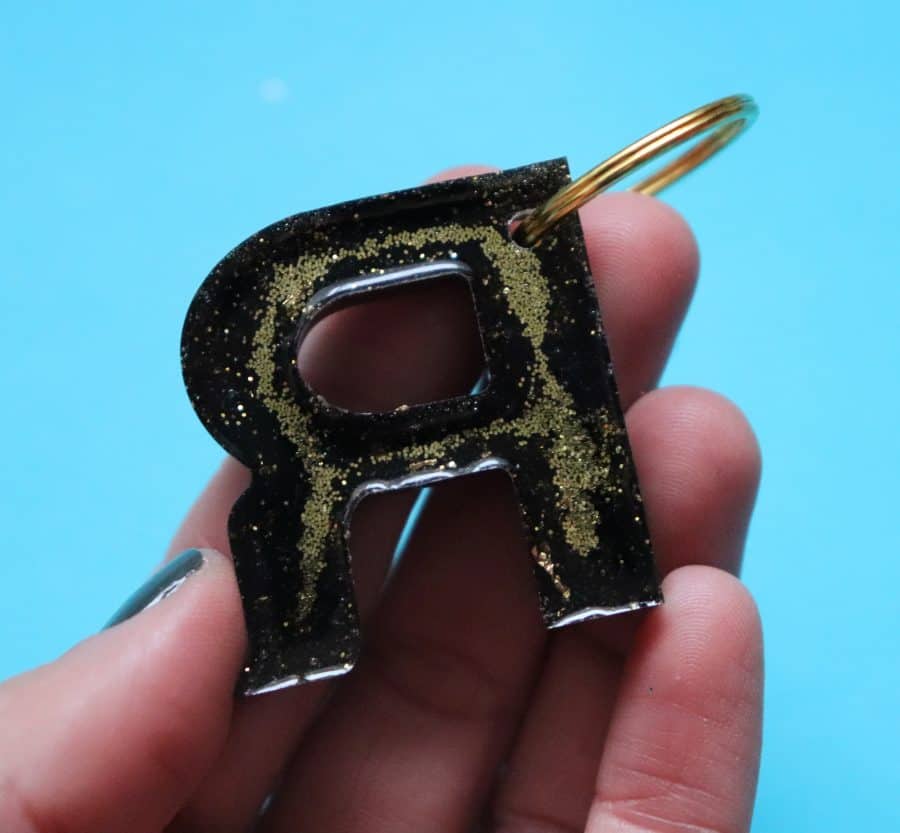
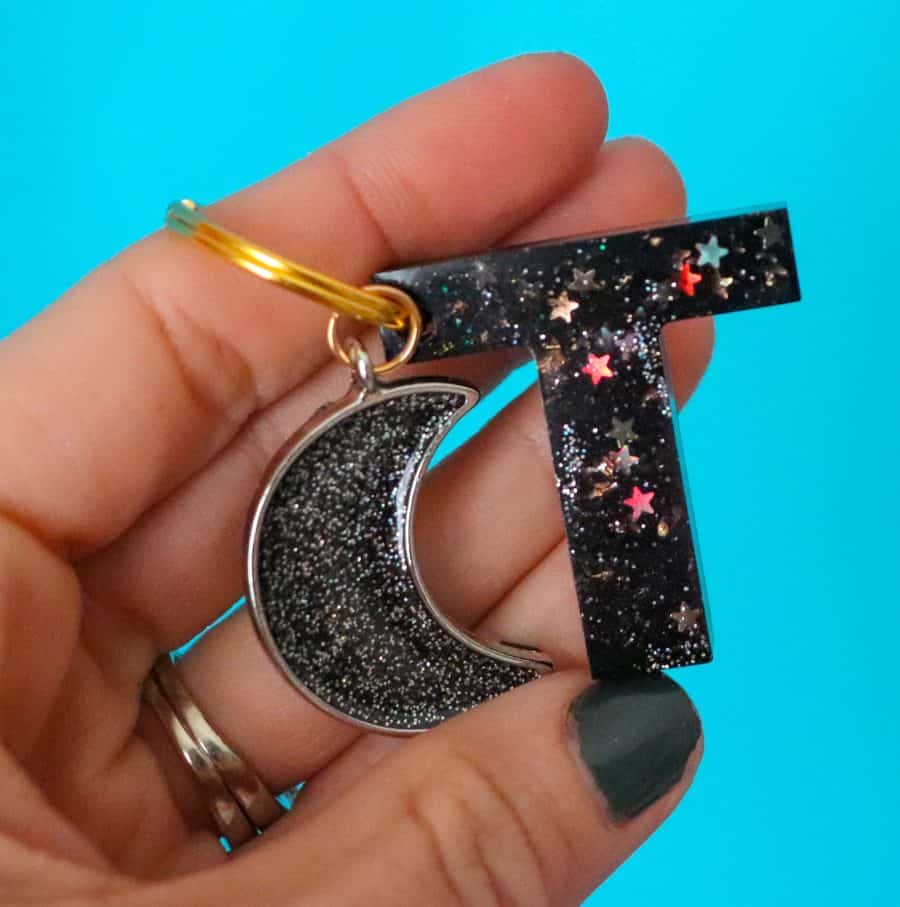
Now it can be drilled into to make a keychain- or add a magnet on the back to put on the fridge!
Troubleshooting Resin Epoxy crafts :
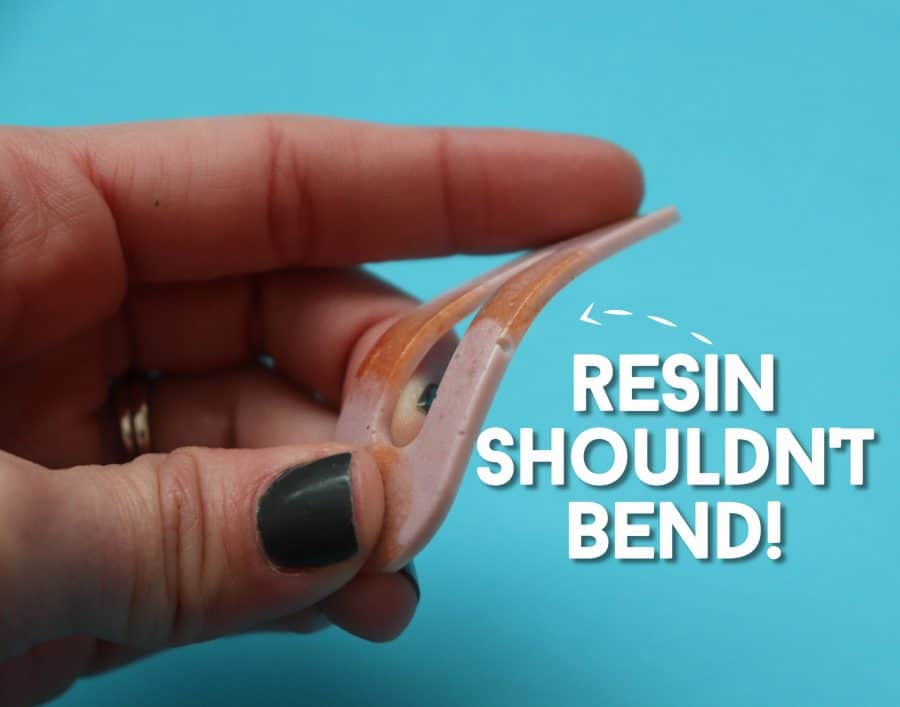
The Resin bends
Resin should not bend. If it does- One of two things probably happened.
A. Your ratios of hardener and resin weren’t exact. You had too much of one.
or B. Something you added into it didn’t work with the resin preventing it from curing properly! (Like the acrylic paint!)
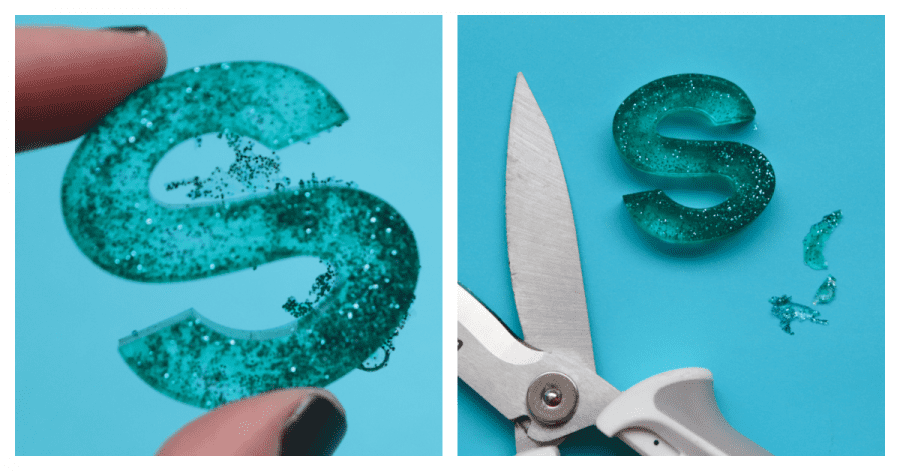
Overspill
Overspill happens! Luckily- most break off! If they don’t easily come off- use some sharp scissors to trim off the unwanted parts!
Your epoxy add ins have settled!
Depending on what you are putting the resin – but anything with a little weight will naturally sink to the bottom. The fine glitter I used didn’t but most everything else does! You want to either A. Add in Lots of sprinkles to fill it up. or do your resin projects in layers. Lay the first part down. Let it cure. Add in another layer. This layering tip should be used if you are using pressed flowers and want them in a specific place!
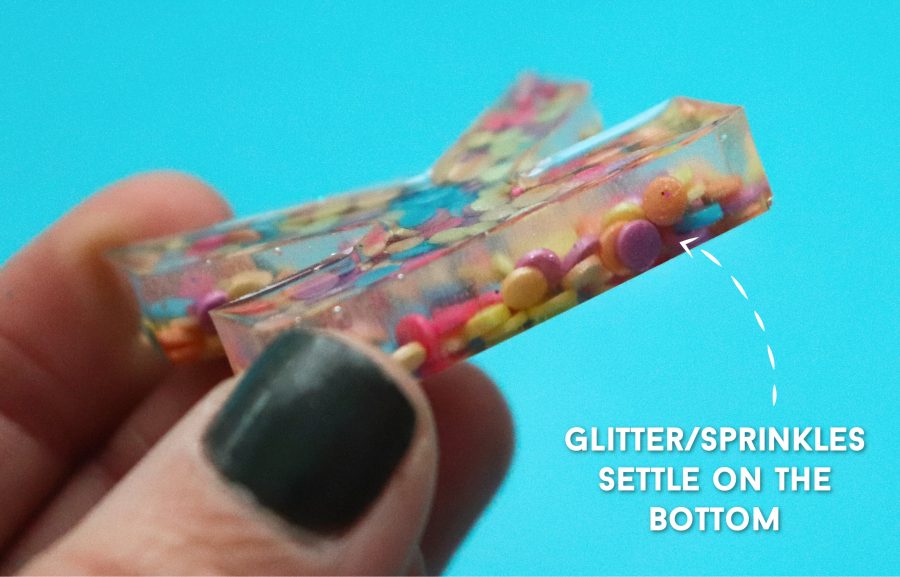
On an opposite side note- I put glitter on the back of one of my resins. I thought it would sink. It did not. As the resin settled- it gravitated toward the middle leaving me with this!
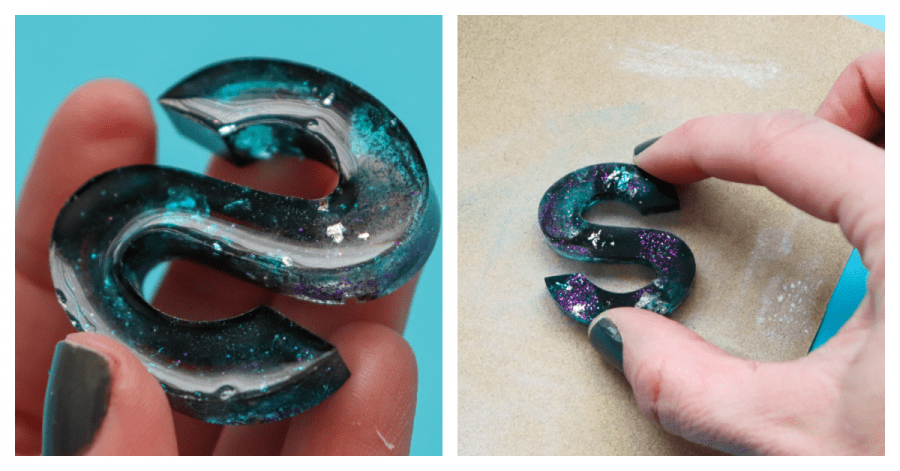
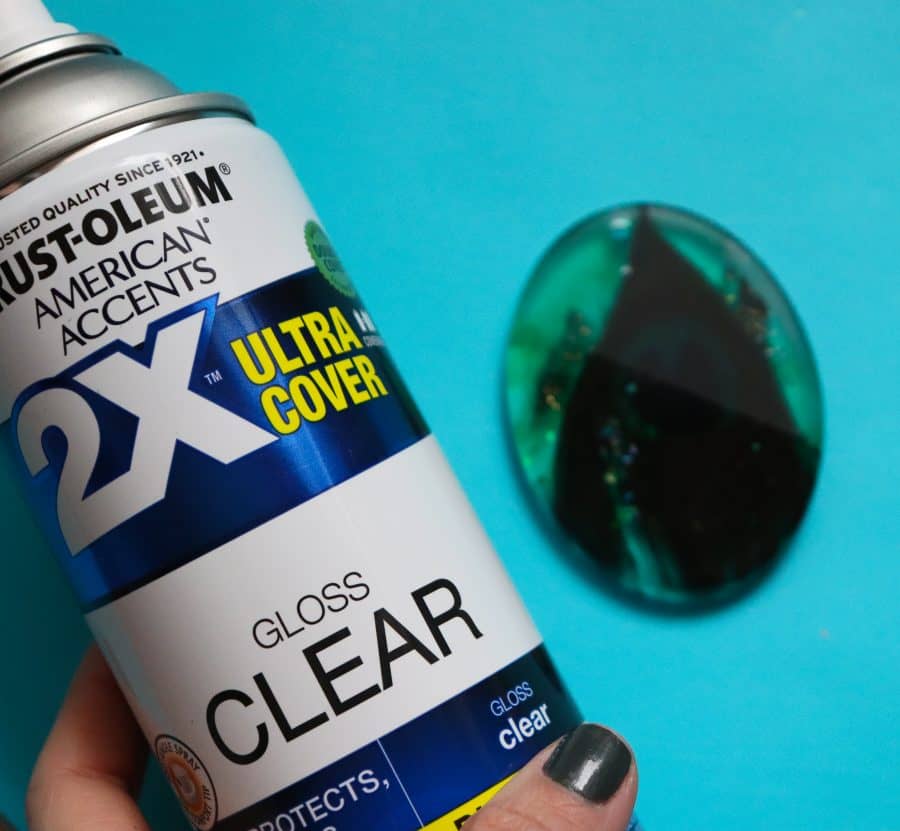
Resin is dull
This totally happened to me. I was so dumbfounded! I had made 100 things with no matte then BAM…Matte! Turns out- it was the mold! I bought this mold from Hobby Lobby. It was a matte finish (it basically isn’t as tacky feeling as the shiny one) All the ones I got on amazon have been shiny!
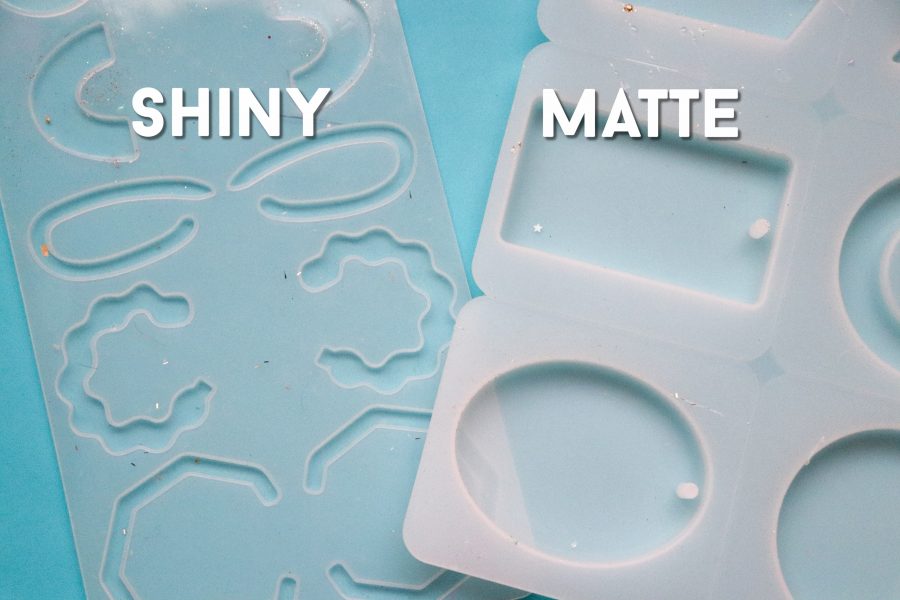
There are two ways to fix the dull Resin projects- You can mix a little more epoxy and give it a top coat to brind the shine back.

Or spray with a clear gloss spray. Easy peasy!
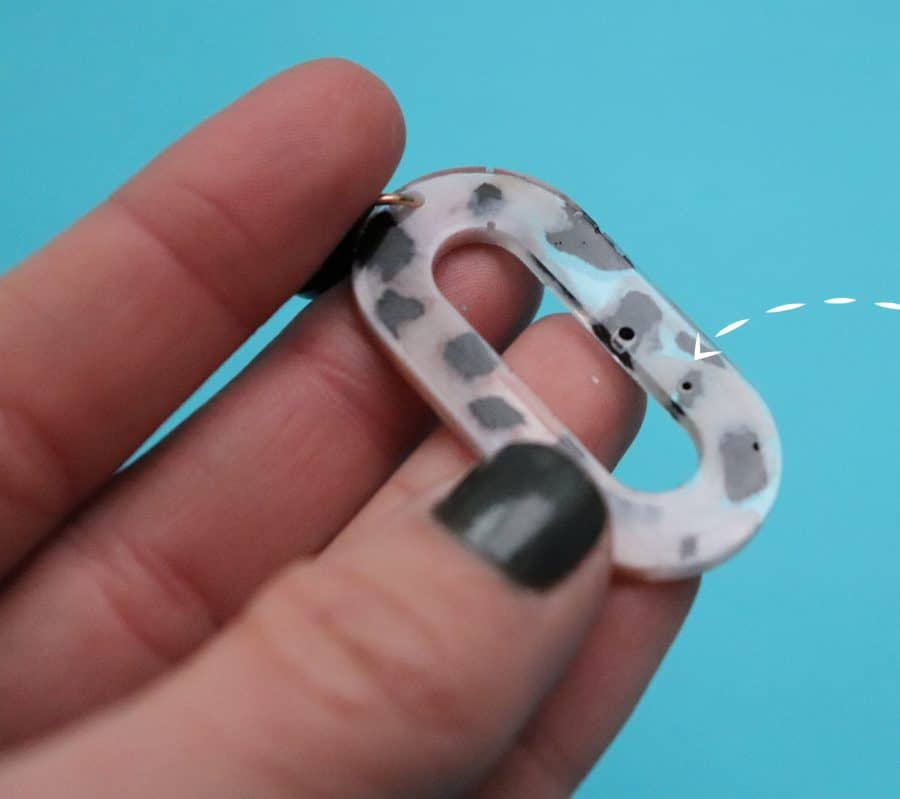
Holes
Holes ususally happend when there is something preventing the resin to getting to all parts of the mold. The black part of these earrings are paper. I placed the paper in the mold and poured resin on top. The resin couldn’t get underneath the paper resulting in holes! I recommend doing a light thin layer of resin before placing your paper or flowers in the mold!
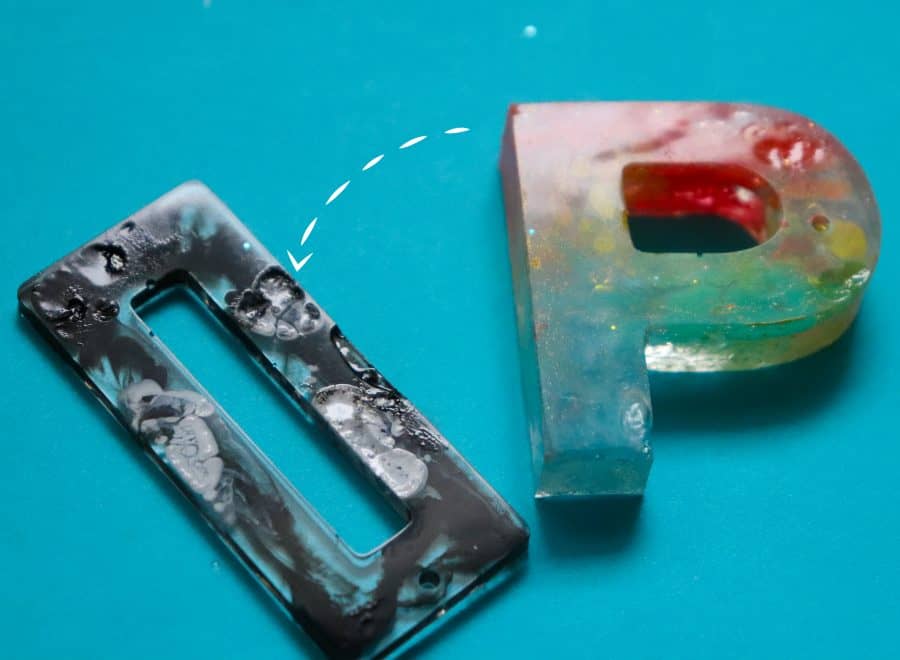
This next example is a great what not to do. I decided to drop in coloring into the mold to get a fun effect. I didn’t mix it the resin and it caused it to not cure where it was touching the mold. The resin couldn’t mix with it- so when I pulled them out I got dye all over my hands. So mix the dye in with the resin!
If you want to create a project with more than one color- I mix them all in different cups and then just add drops one at a time into the mold. Alternating colors! The Resin Geode Coasters I made had 5 different shades of blue/green
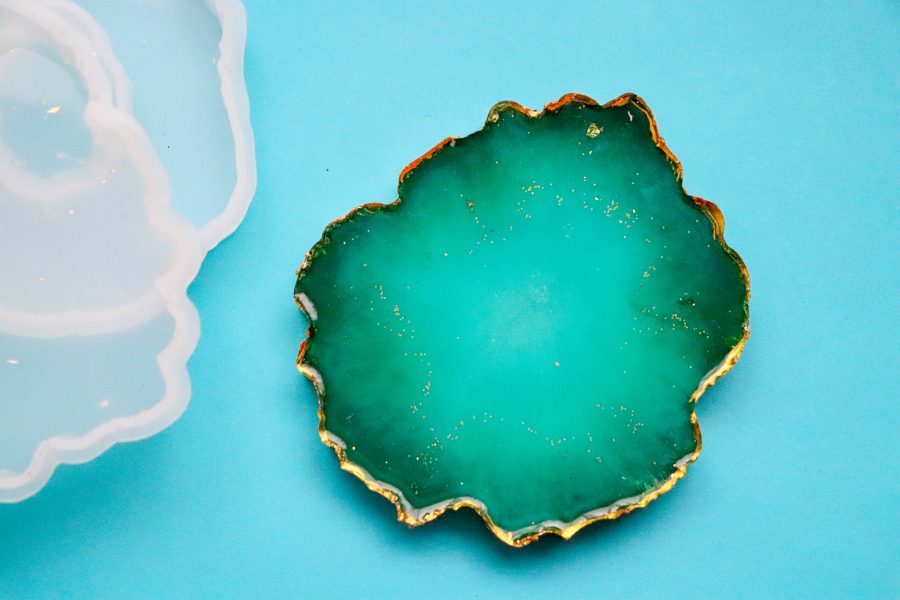
These are some of my favorite projects. All done with 3 different colors and then I would add in clear resin to create the marbled look!
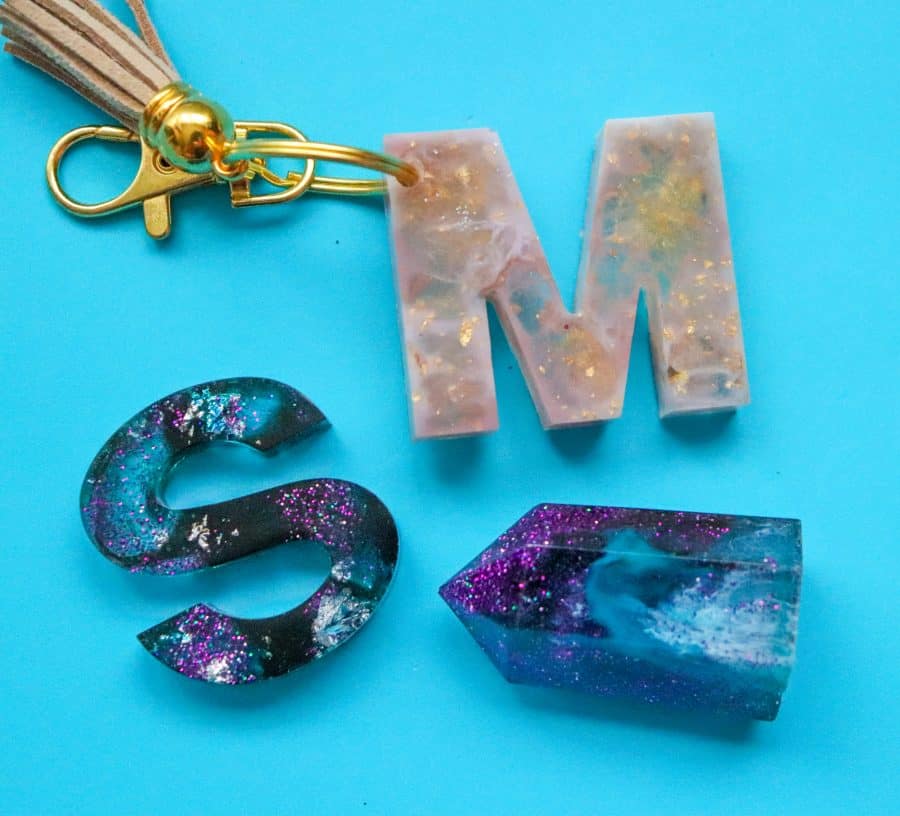
I also always get asked- WHAT Do you do with ALL these epoxy crafts once they are done! I specifically only bought molds that I would use! (my next one is a bookmark and a dog tag!) I made a crap ton of keychains for all my nieces! I even added some resin charms on them! double duty!
I recently cut bangs- so I see a TON of hair barrettes in my future!
I also love that I can make earrings that match every outfit!
HOLY COW! You guys! We made it to the end! and I’m sure I probably forgot Something! Leave me any questions so I know what I need to try next! AND if you guys wants to pin something from this post to help other people find this – I would love you forever!
Leave a Reply