
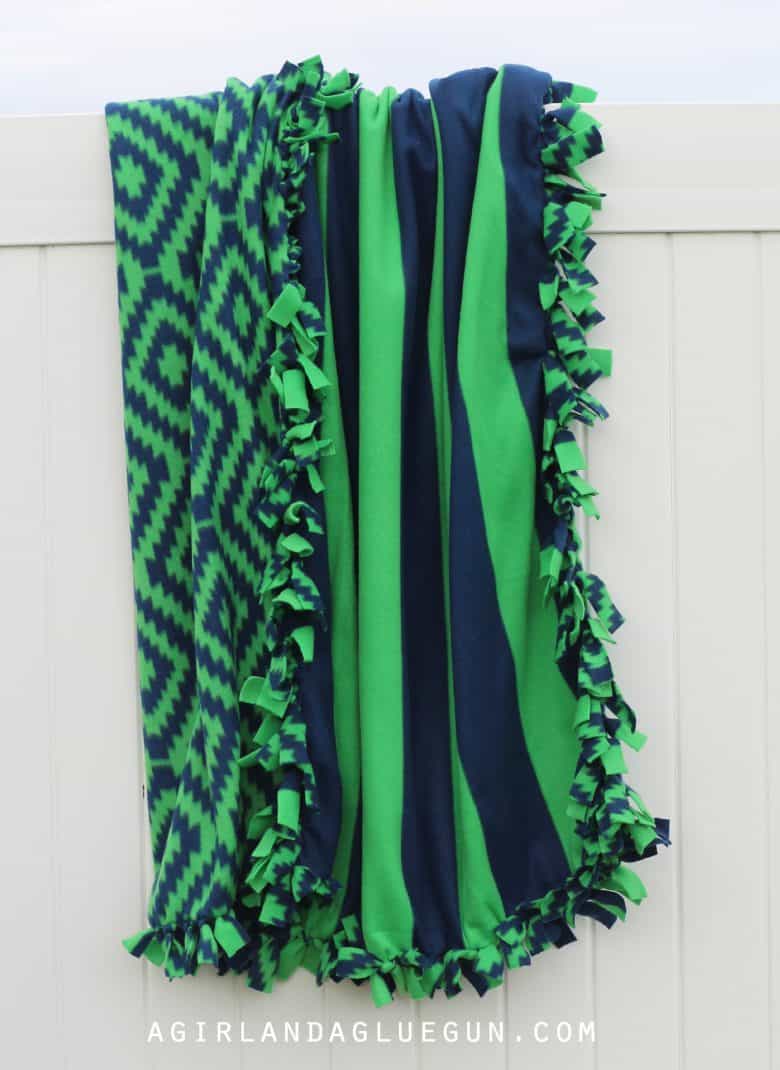
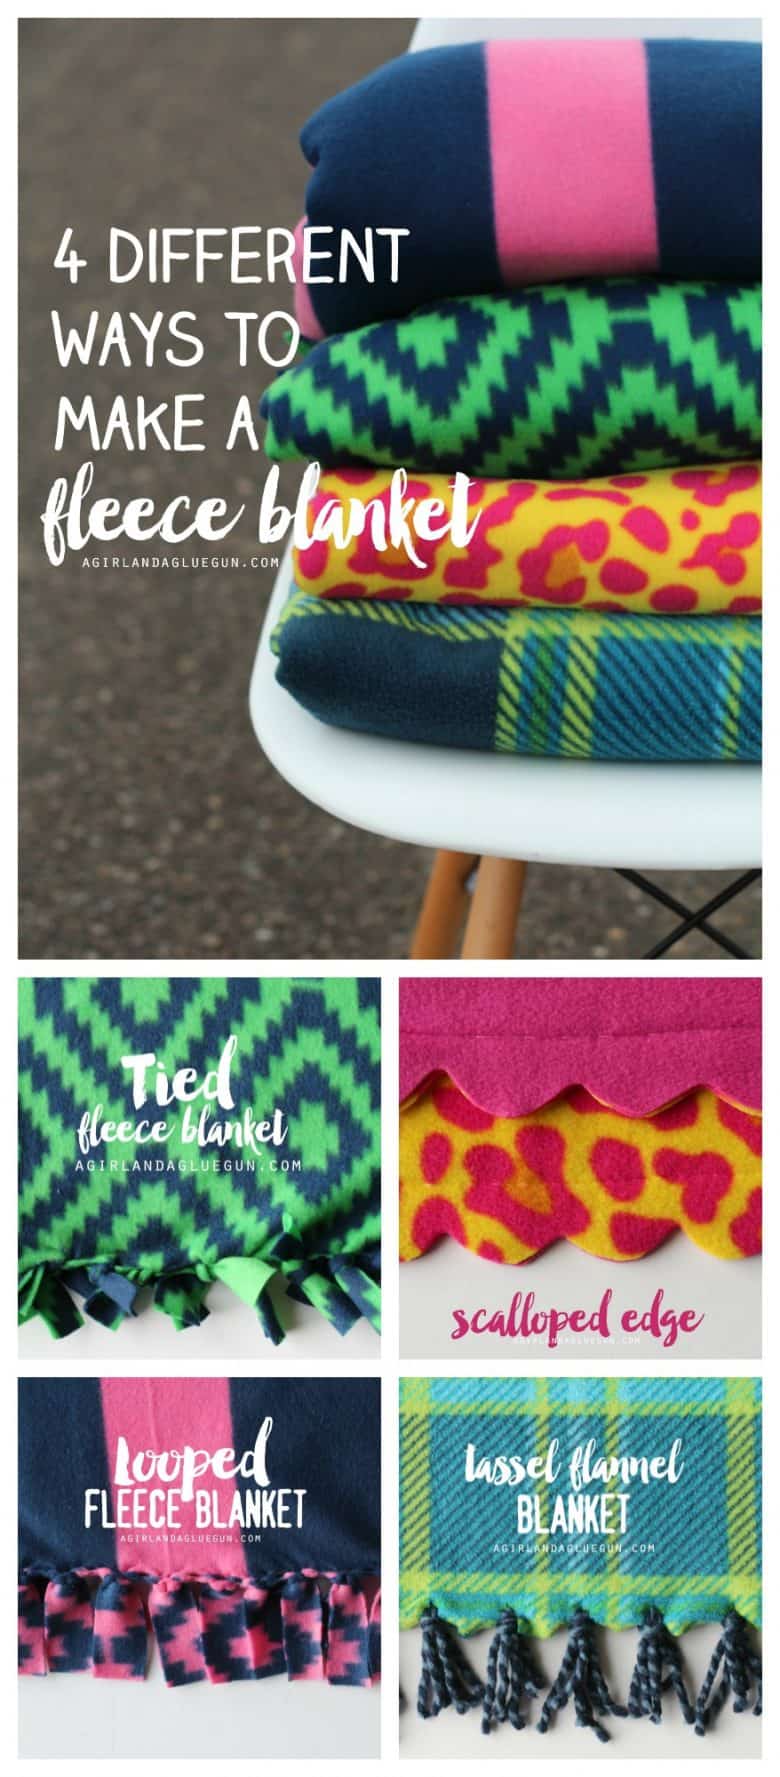
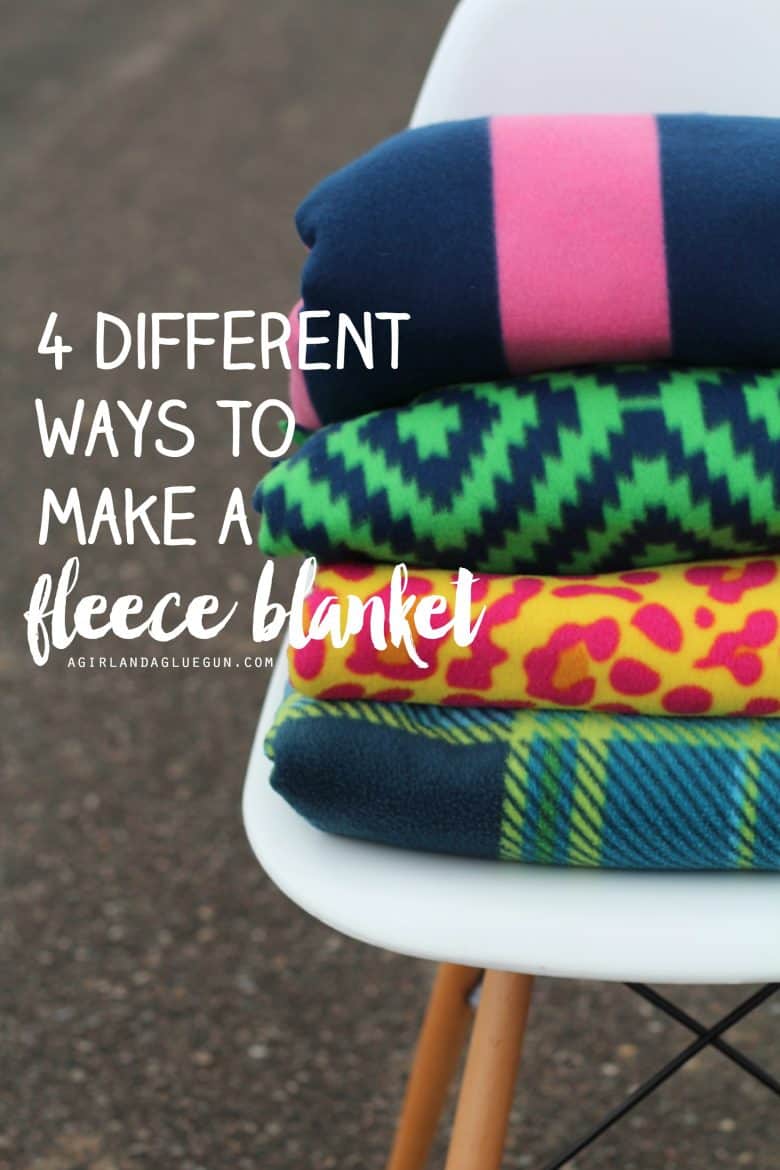
Okay! So Fleece Blankets are the best! They are so soft and cuddly and EASY! They don’t fray which means you don’t have to sew them at all! Win win! I’ve got 4 fun different fleece blankets for you! 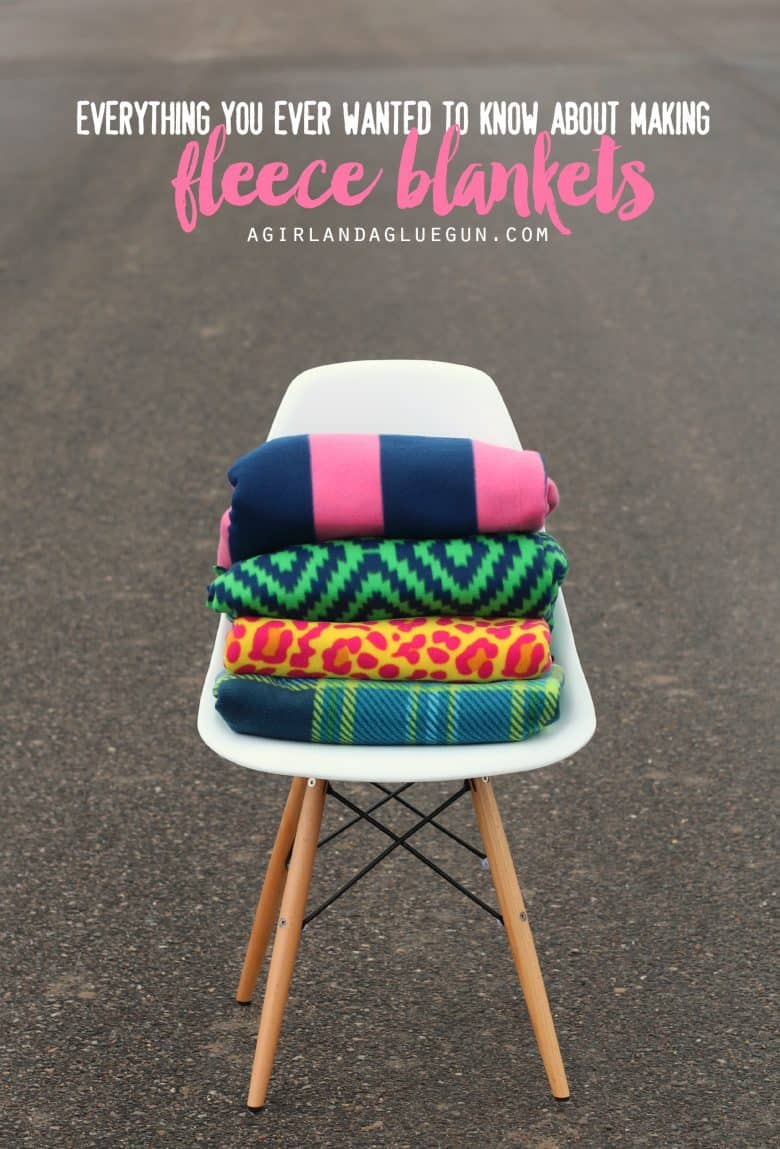
Making Fleece Blankets
But first: Details! There are two kinds of fleece you can buy at Joann Stores…Blizzard Fleece and No pill Fleece. No pill fleece is a bit more expensive (by just a couple dollars) but it will hold it’s softness longer and won’t “bead” up like the cheaper fleece (hence the name No pill fleece!)
Fleece is a bit wider than regular fabric on the bold. So I buy a yard and half to make a good rectangle size. It’s perfect for regular sized adults to cuddle up on the couch with. You could buy a yard and trim off about a foot to make a crib sized quilt. (and I just noticed at Joanns they have EXTRA wide fleece…!)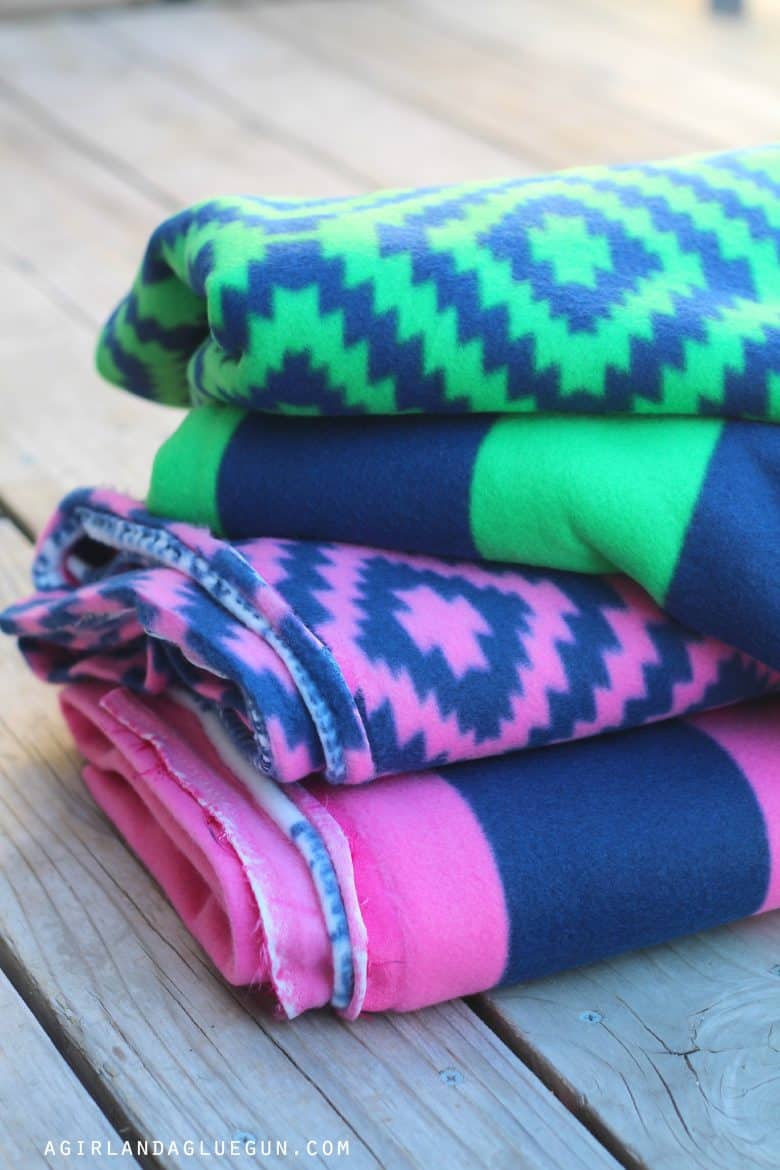 Sharp scissors are a MUST! I love my Fiskars–Fleece is pretty thick so if your scissors are dull it will make a hack job of your fabric! For nice smooth edges make sure they are nice and sharp! (don’t use fabric scissors for anything other than fabric! Mark them and keep them away from your kids!) You will want to cut off the salvage edges before starting!
 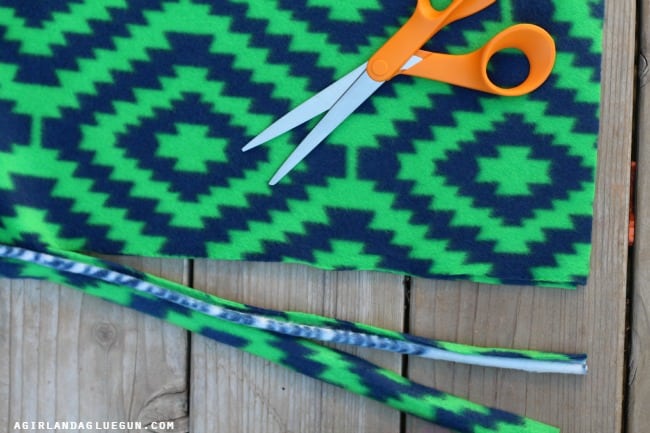 And you can can buy one fleece pattern and just finish the edges. It looks good from front and back…but I love doubling up my fabric. It makes it even more warmer (I’m ALWAYS cold) Nice thick blankets! So I just purchase two fun patterns and match them together!!!
I put together a video of all the different ways to tie a blanket!
Okay! Let’s start the fleece making process—a Tied fleece blanket!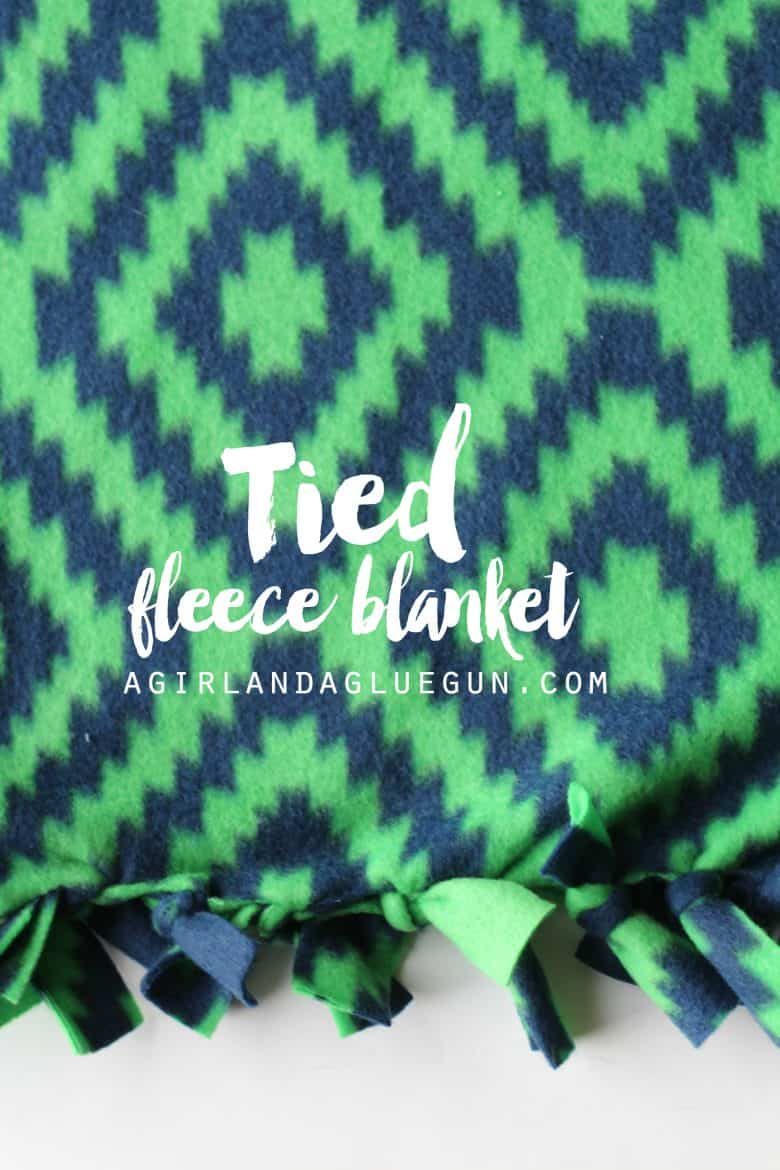 This one is pretty universal! Just tying a knot! So I have two pieces of fabric on top of each other and trimmed so all the edges match up. Then I cut 3-4 inch stripes every 1 1/2 inches.
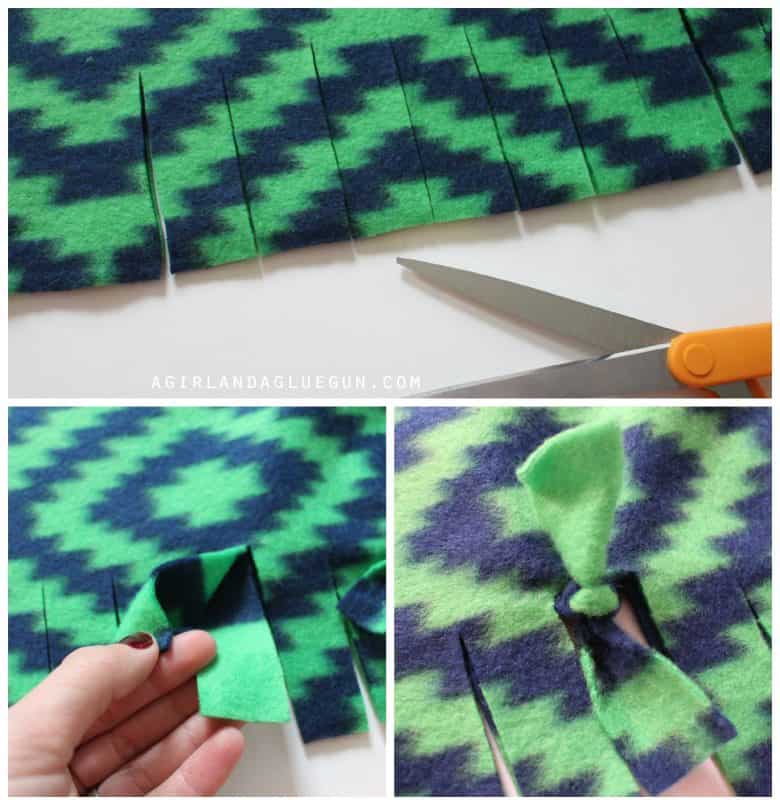
Take a top and a bottom and tie a double knot! It’s just the at easy! My 7 year old and almost 10 year old helped me make it! Super Easy–and since it requires nothing but fabric and scissors you can take this in the car or at a meeting or waiting at the bus stop! The edges are totally funky and fun!
(I forgot to mention that you cut out the corner!
(If you are super anal about cutting strips you can follow this tip)
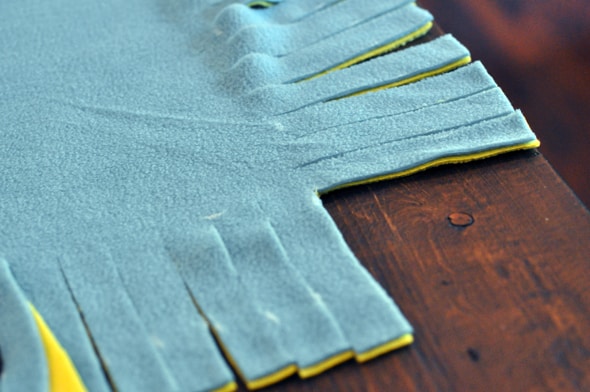
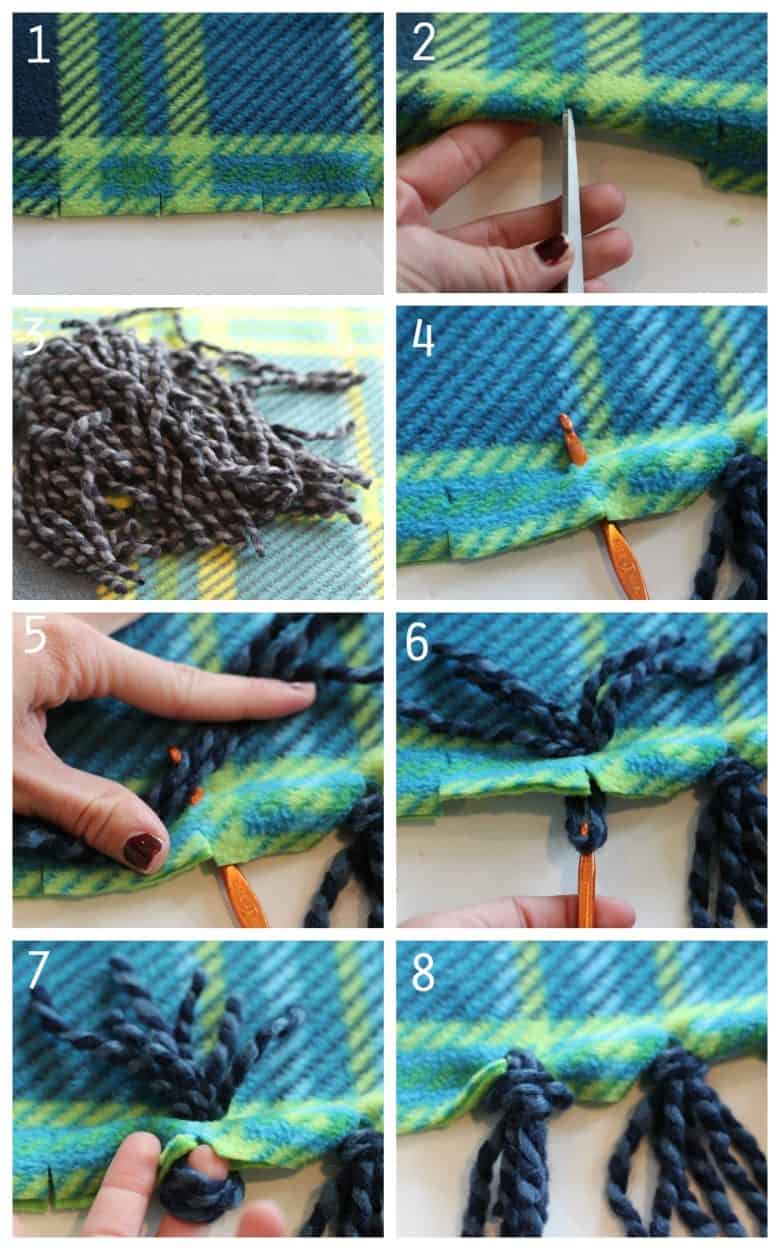
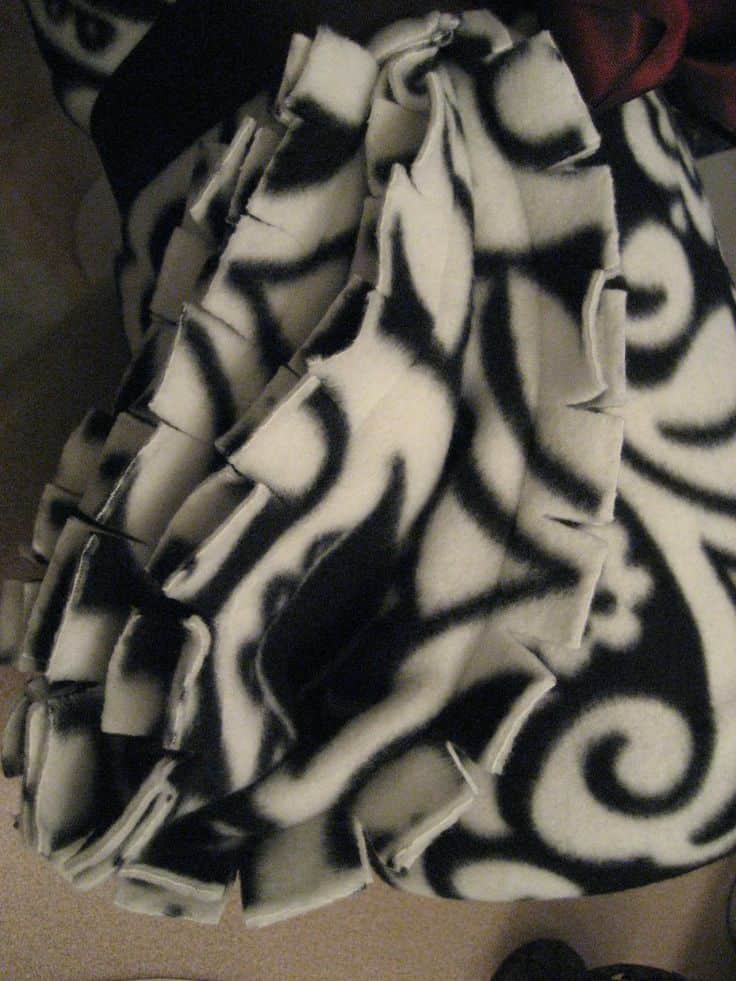
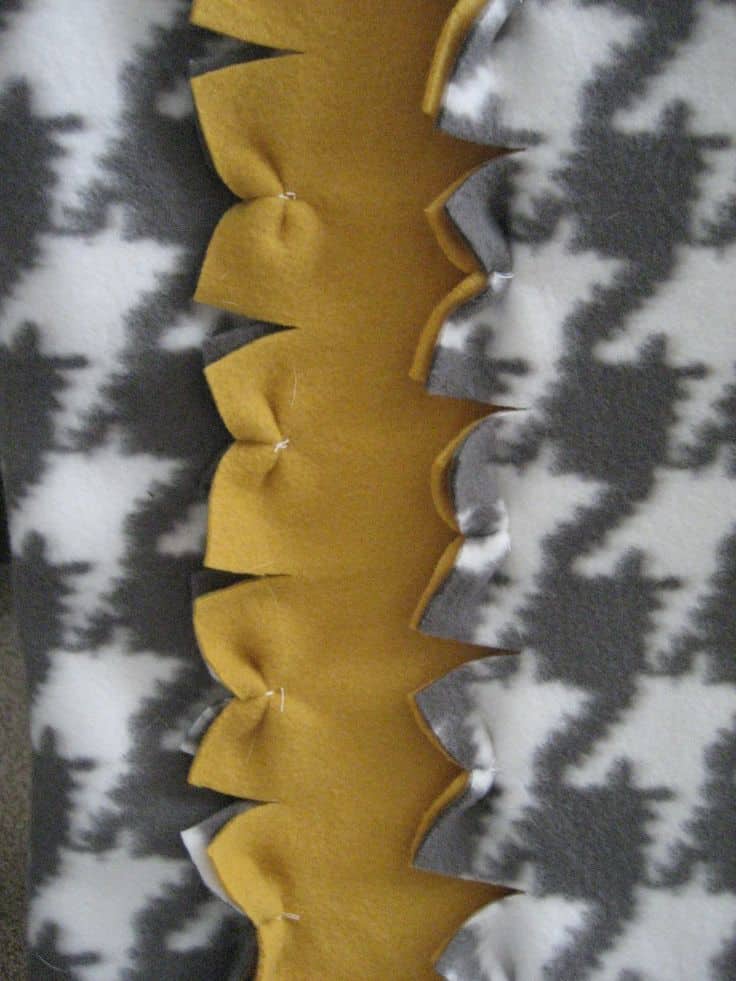
 The Second blanket is super similar…but instead of adding a knot we loop it. This makes the edges lay flat as opposed to all fluffy.
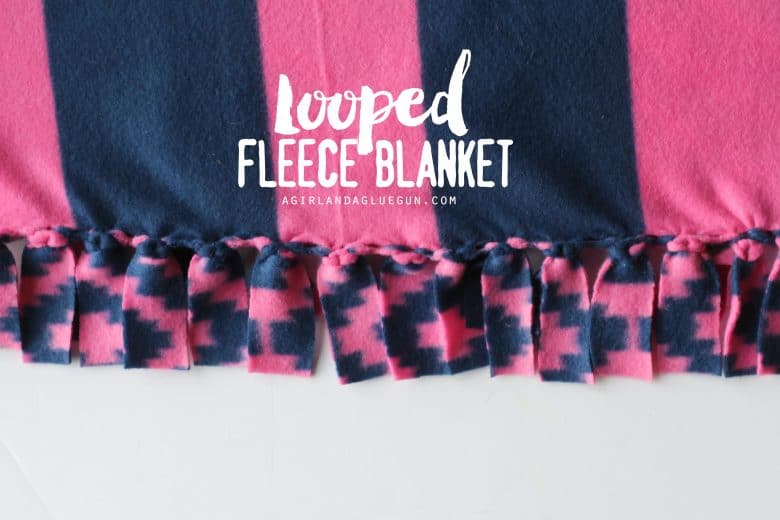
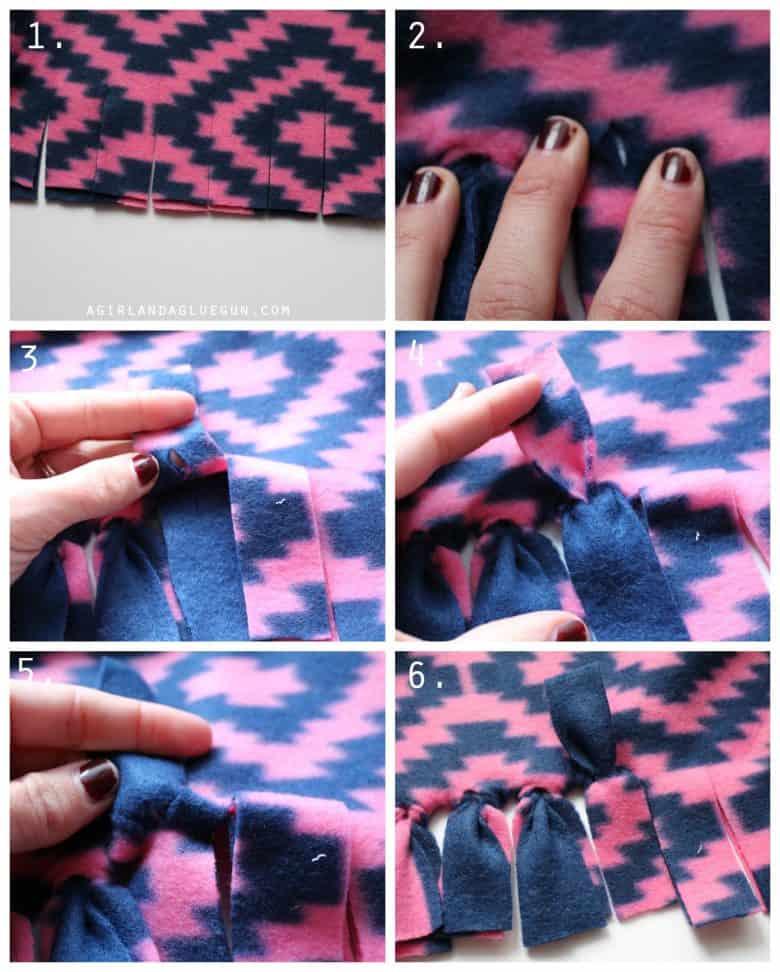 1. cut strips just like the knotted blanket.
2. at the top of each strip snip a hole through the top and the bottom
3. Take the top layer and push the bottom layer up through the hole.
4. Take the bottom layer and push it up through the hole (So the zig zag is back on top where it started.
5. You can stop here…but I like to run it through one more time so the front fabric is on the back and the back fabric is on the front! It’s super fun for contrast!
6. That’s it….start again…and again…and again!
My kids helped me do this one too! It’s not tricky (although I’m afraid I made it look like it’s hard!) But once again–No sew! and it looks pretty! 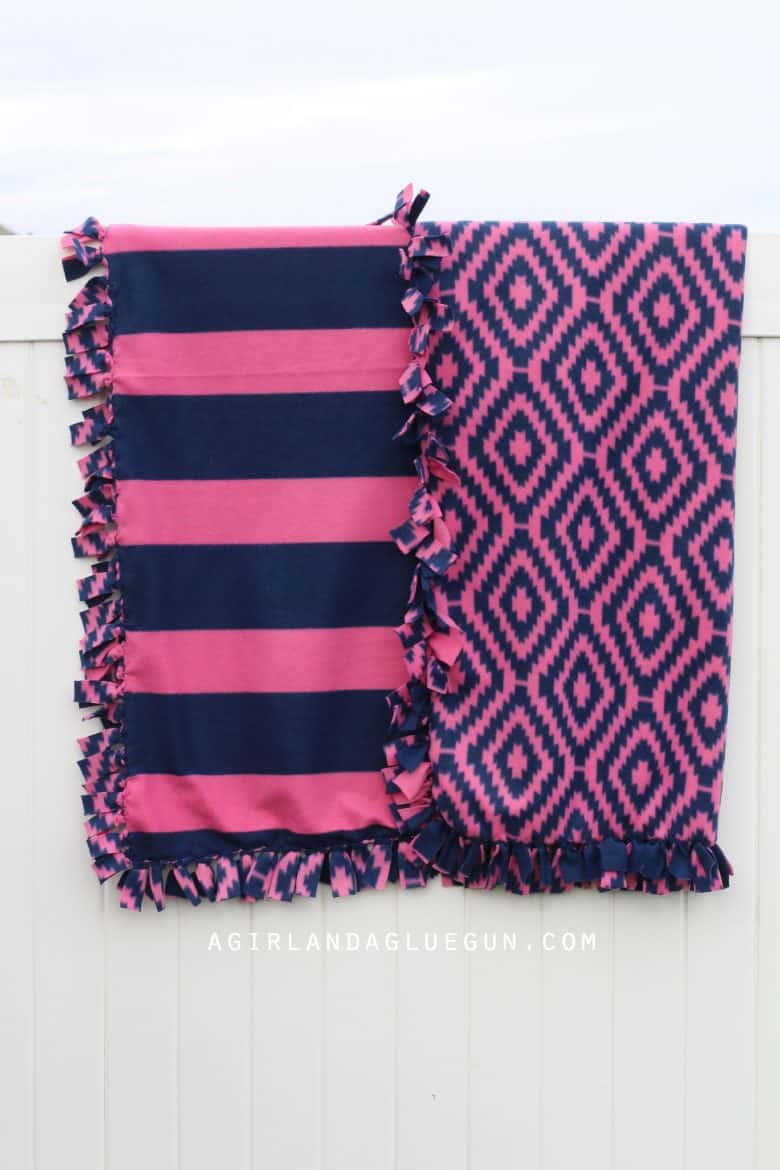 When creating these blankets..you can have a little fun and round the edges or cut them into a point

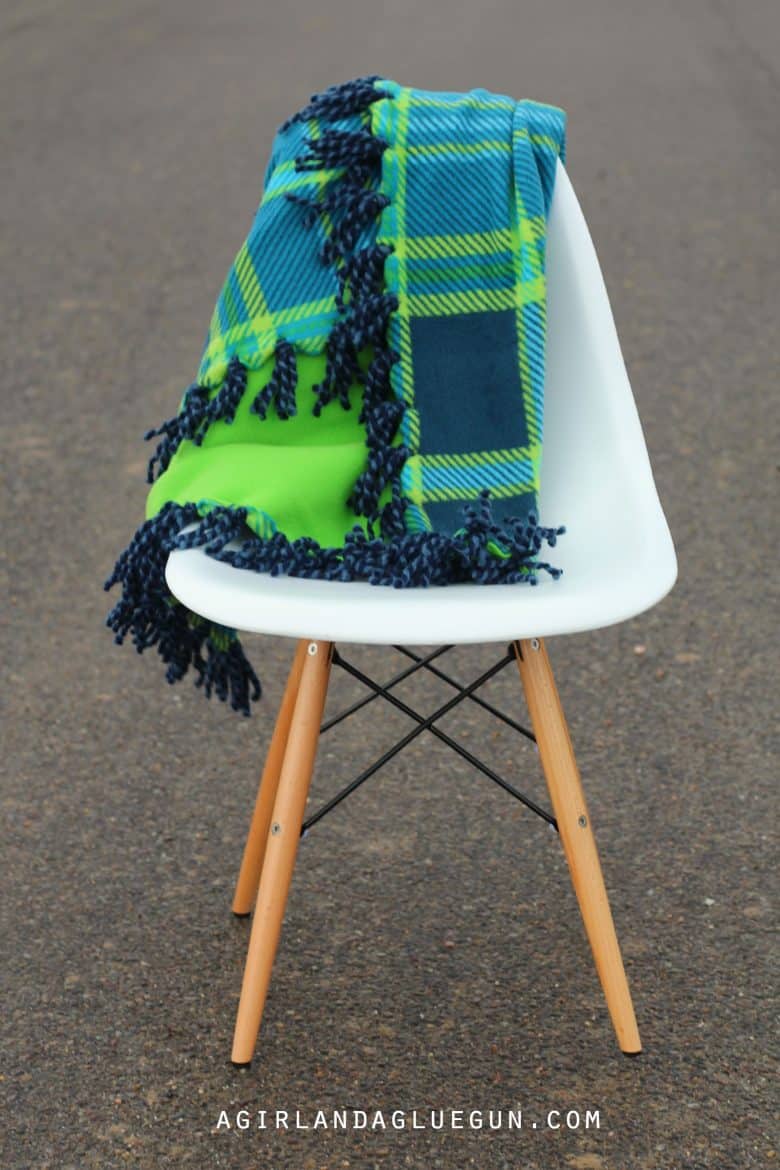
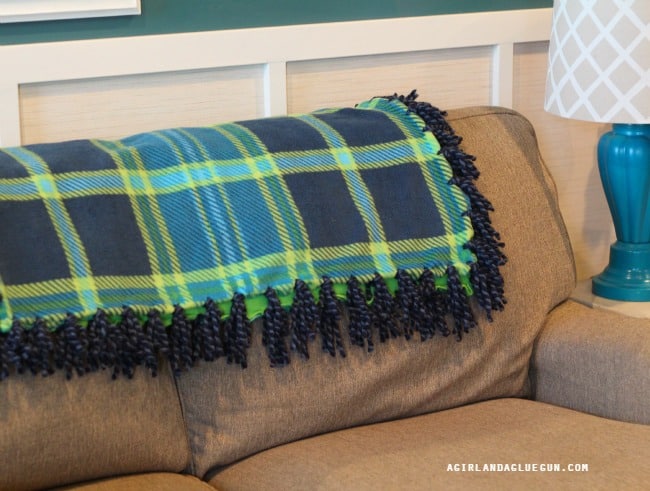
source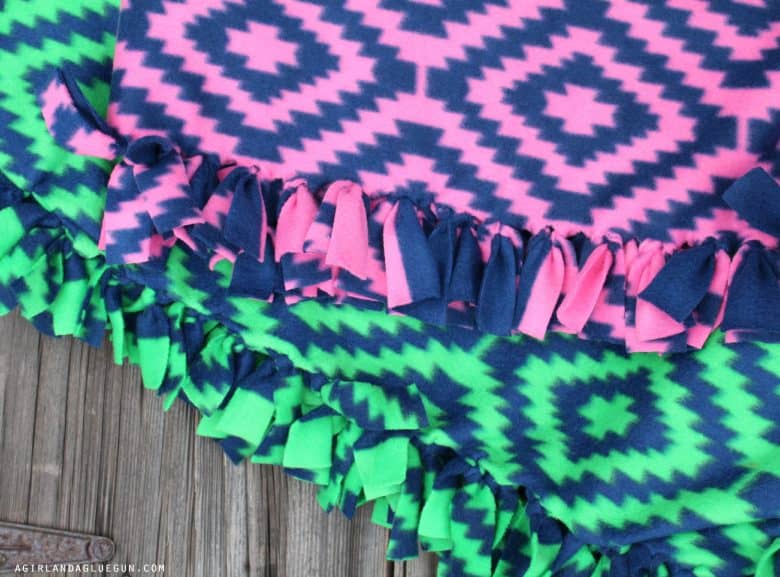 Taking it one step harder—we are making some yarn fringed fleece blankets next!
  you need fleece…and yarn to match! (I couldn’t resist this striped yarn! love!) This is the brand HERE
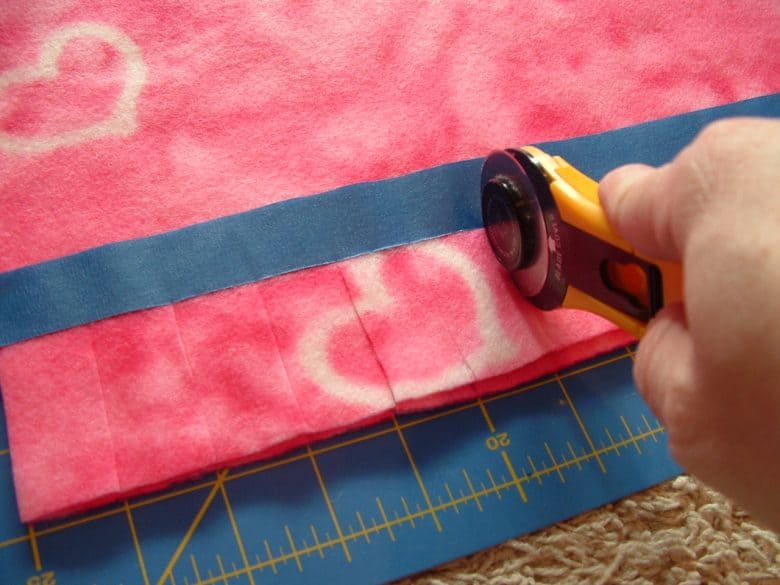
 1. snip little notches every 2 inches…or you can do more or less.
2. snip holes above the notch
3.cut you yarn into 7 inch long strips.
4. slip a crochet hook in the hole
5. Add strips of yarn (since it’s thicker yarn I used 3 pieces)
6. Pull through hole
7. Open hole and pull down the ends through the hole
8. tighten. And repeat!
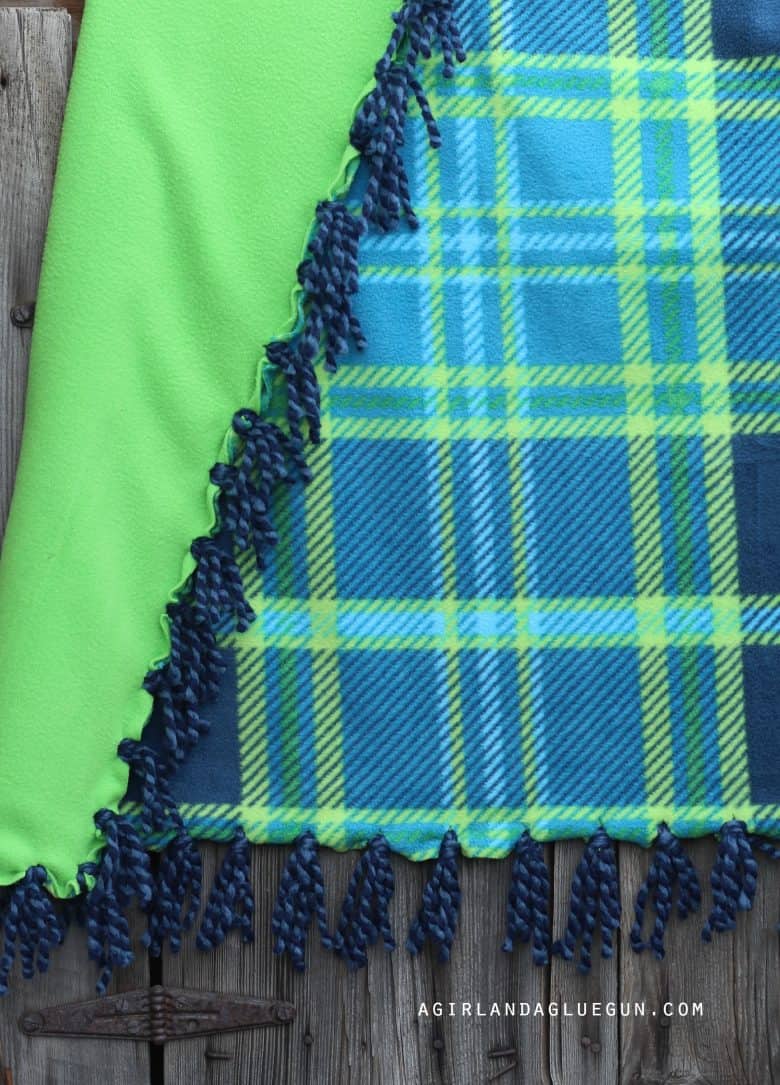
It looks so fun! I love how this on turned out!
 And last but not least…scalloped edge
 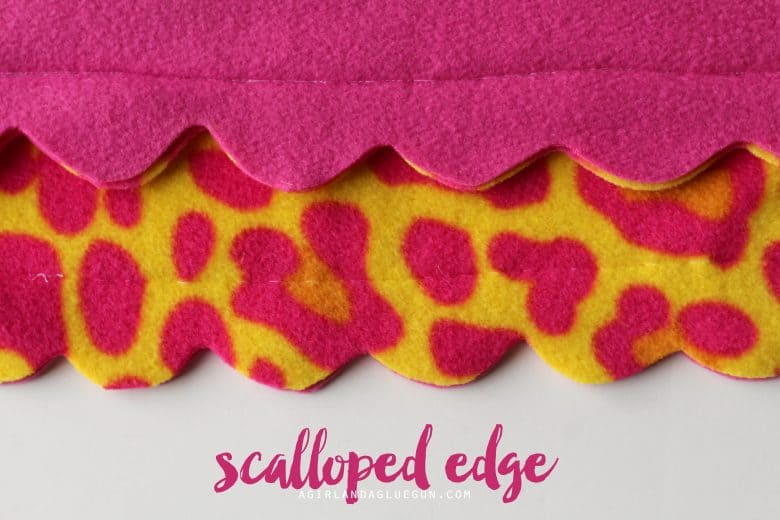 This one does require some sewing! but nice straight stitches so it’s great for first timers!
 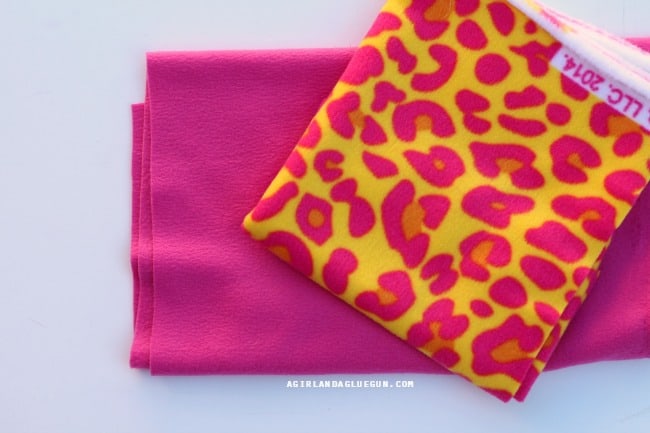 Laid out two fabrics and pin together.
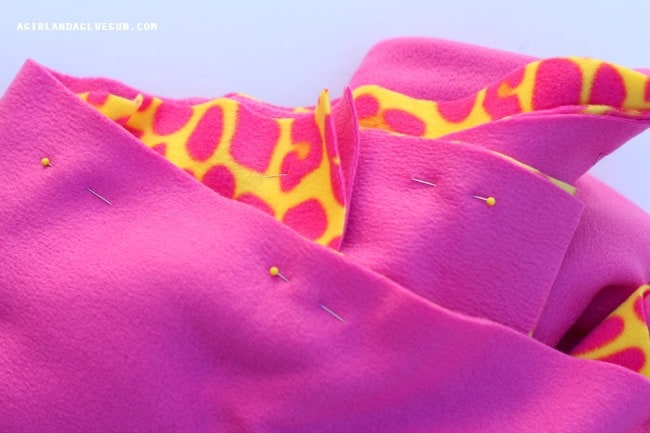 I sewed around about two inches in.
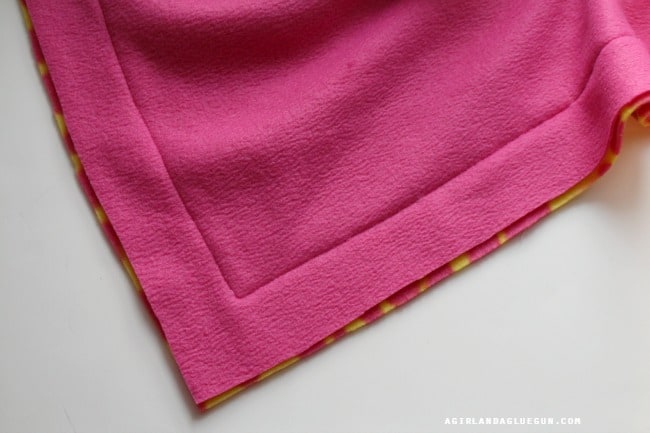 And then took my nice sharp Fiskar scissors and cut a fun scalloped edge!

You can also cut a zig zag along the edge for more manly blanket–Trim it out and leave it a solid edge, or even cut strips..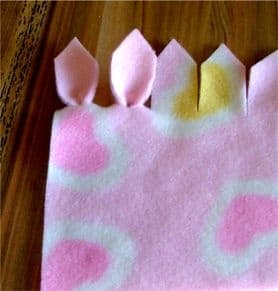
You can also try this fun Braided edge! 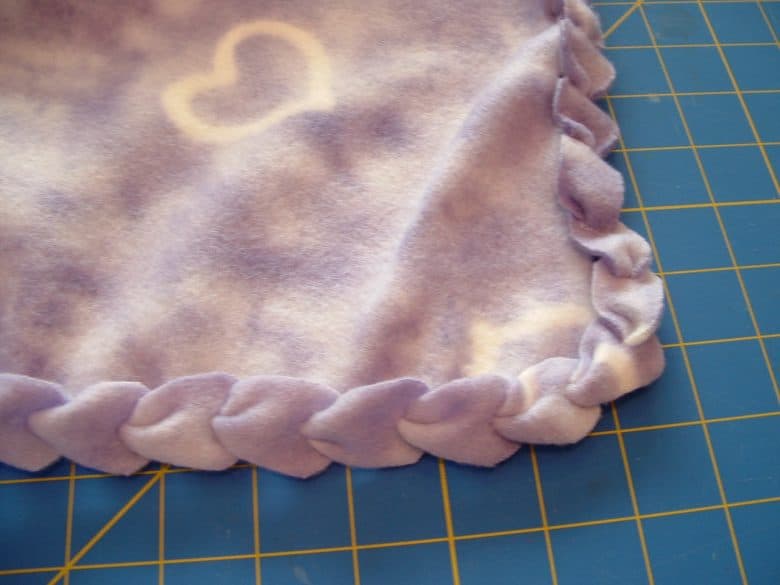
and a braided edge 2.0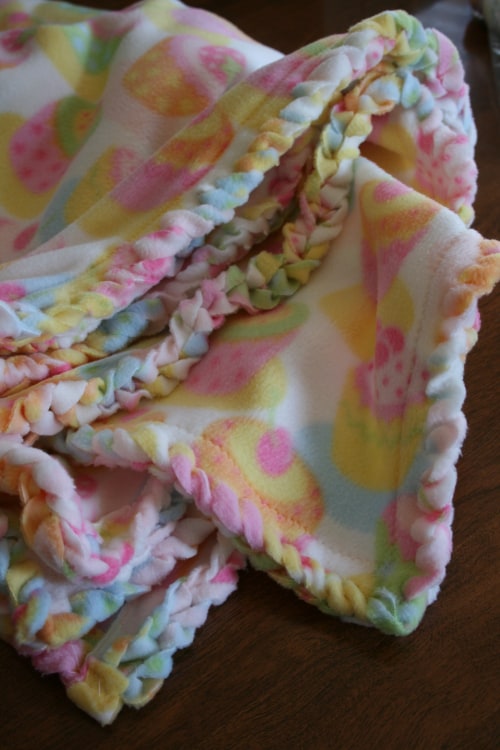
Or a bow edge! (cant find a link to this one!) But it looks like they cut a slit every 3 inches and add a little stitch to make the bow effect! so cute!
Or the loop through is another great easy edge idea!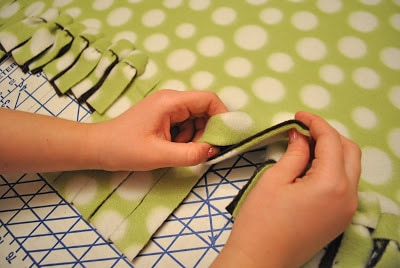
Or just long skinny strips!

(These four blankets I made are being donated to Luke’s Loves! Check it out HERE)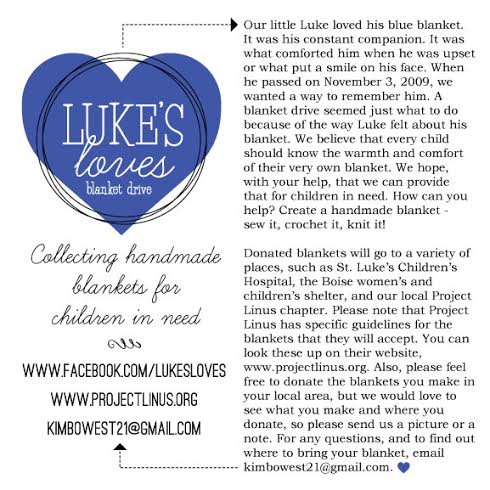
I have a roundup of 200 other fun blankets to create! See it here!
Marie says
How do you get your corners so flat when you tie a knot? Mine came out a little like a fitted bed sheet.
Kimbo says
We noticed if you pull too tight they get gathered a little bit. So tie a knot without pulling it all the way (if that makes any sense!)
Kim says
Thanks for the great tutorial.
One question. When using two layers of fleece. Do you need to attach them in the middle? I can’t imagine how they go through the wash with just the edges attached.
Thanks!!
Kimbo says
no. We don’t attach them in the middle. There is enough static cling between the two that they don’t really come apart!
Liz Goddard says
Thanks very much for your clear explanations and ideas.
Jillian Seymour says
I make the little bow edged blankets all the time. I make a cut every three to four inches. Cutting off the corners. At the center of each strip at the top makes a tiny slit or using a yarn needle with whatever yard you want to use. Thread the yarn into the slit and then make a little accordion shape folding the strip back and forth. Tie the yarn into the center knotting it then trimming the ends of the yarn leaving little bows. I make the slits about three inches up. They make the most ruffly bows. For more standard bows only make the slits two inches up.
L. Wright says
When I make blankets and use a solid color anti pill or blizzard fleece, I have a hard time seeing which side of the fleece is the “good” side. My eyesight isn’t what it used to be. Do you have anything in your bag of tricks that will help me? Also, thank you so much for your posts! You’re succinct and a good teacher ☺️
LW