
Learn how to create this Dollar tree witch broom. It’s a darling and inexpensive way Halloween decor that is pretty easy to DIY!
When it comes to celebrating Halloween, a classic witch broom can add a spooky touch to your decorations. But you don’t have to break the bank to create your own, as DIY Dollar Tree witch broom requires just a few inexpensive supplies. Best of all, it’s a fun craft project that anyone can do and takes less than 30 minutes. Whether you’ve always wanted to make your own witch broom, or are just looking for an easy Halloween craft idea, this article is for you. We’ll go over all the supplies you need, the step-by-step instructions, and other tips to help make your DIY Dollar Tree witch broom a success. Ready to get started? Let’s do it!
Check out how to make a witches broom using branches!
Supplies to make the Dollar Tree witch broom
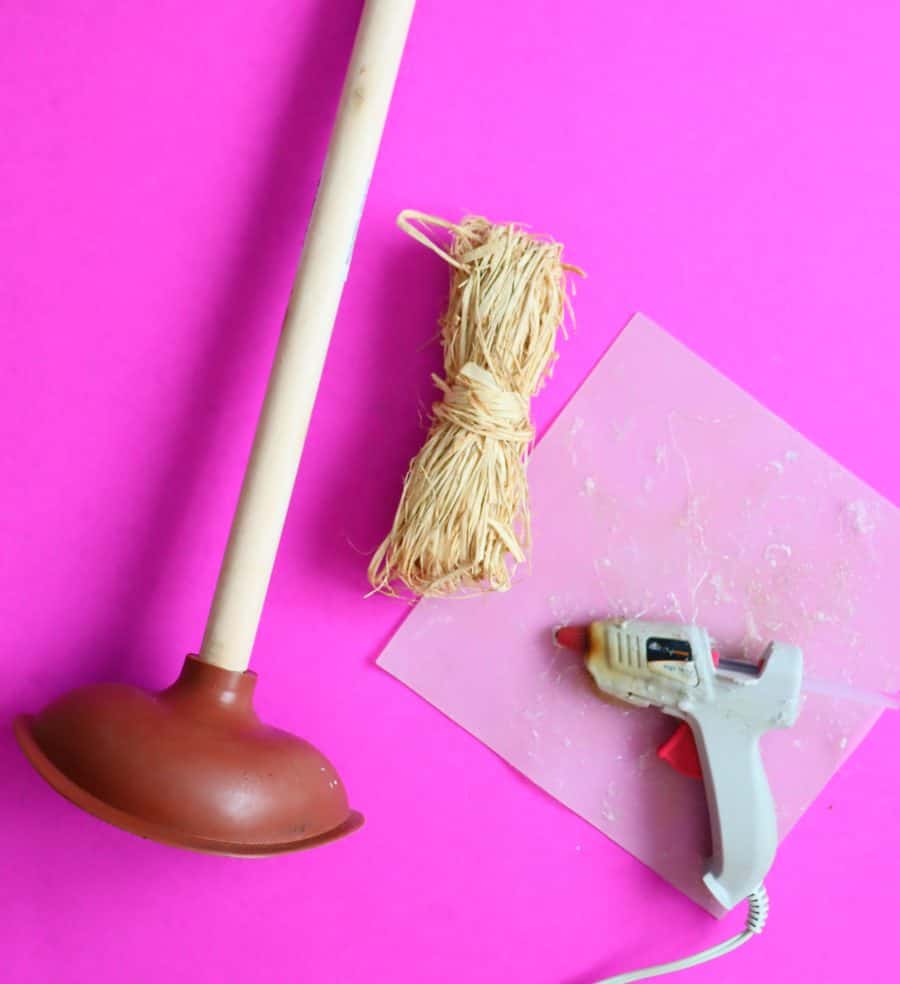
- Toilet plunger from Dollar Tree
- cute Halloween sign of your choosing
- raffia or luau skirt from the party section
Craft items
You probably already have these on hand!
- hot glue gun
- brown or black paint (tole paint or spray paint)
- scissors
Extras:
Any fun embellishments you want to add to make your witch’s broom pop!
- ribbon
- spiders
- spiderweb
How to DIY a witches broom
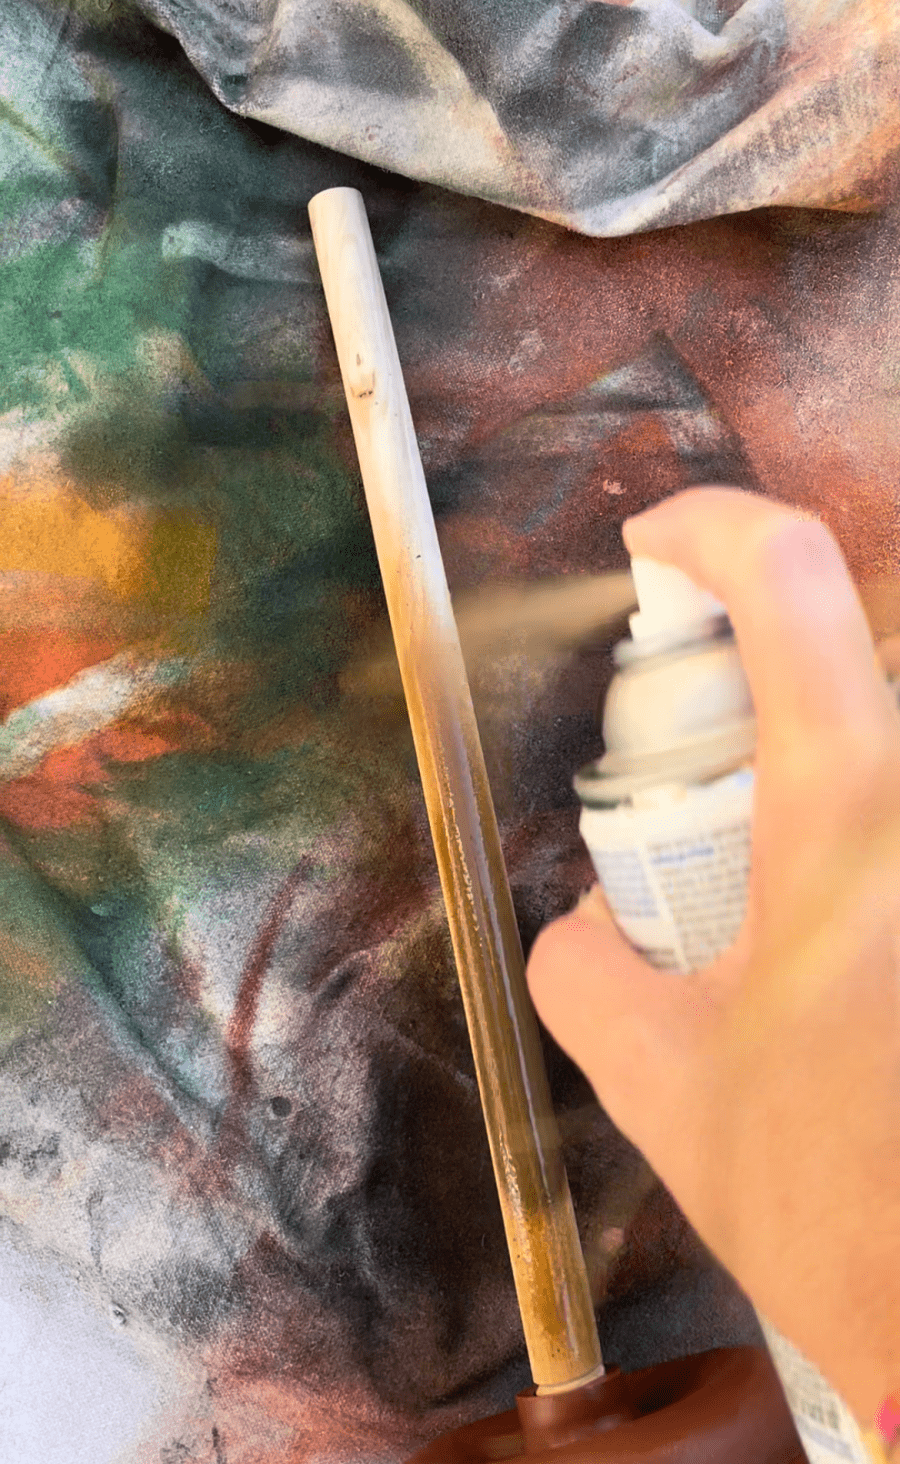
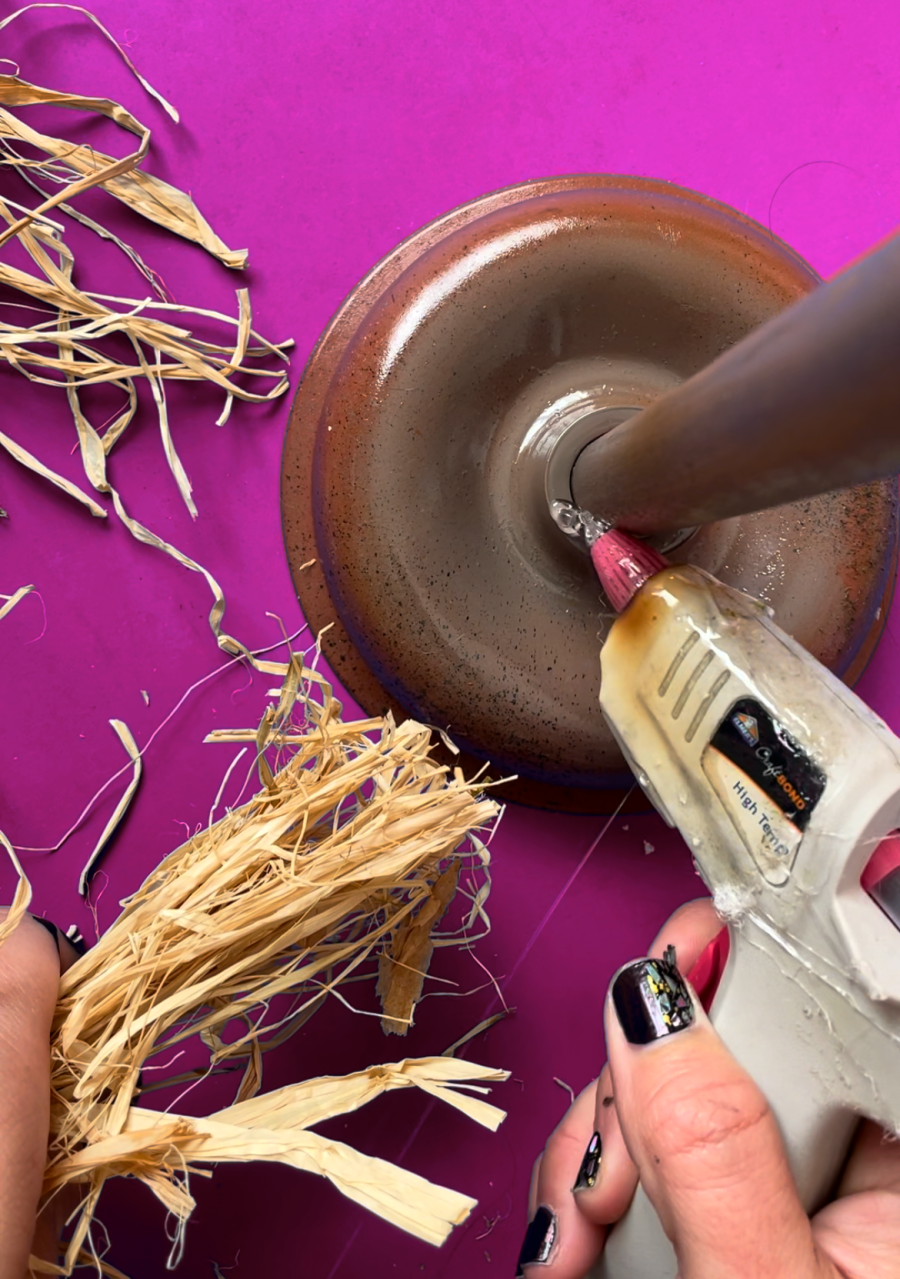
Take your plunger and paint the handle. It was a little too light of wood for the look I was going for! You can paint this black or brown. I opted for brown and then painted some lines with lighter brown to create a wood grain effect.
Once the paint is dry, heat up your glue gun! Trim your raffia sections into 6-8 pieces depending how you want the broom to look.
The first layer I go all around the top of the base. The rubber material of the plunger doesn’t hold the glue very well. So I aim for about 1 inch up base of the wood handle. Add a dob of glue and add a section of raffia. Go all the way around. If any pieces of raffia fall out, just add more glue!
You can add raffia until you like the look.
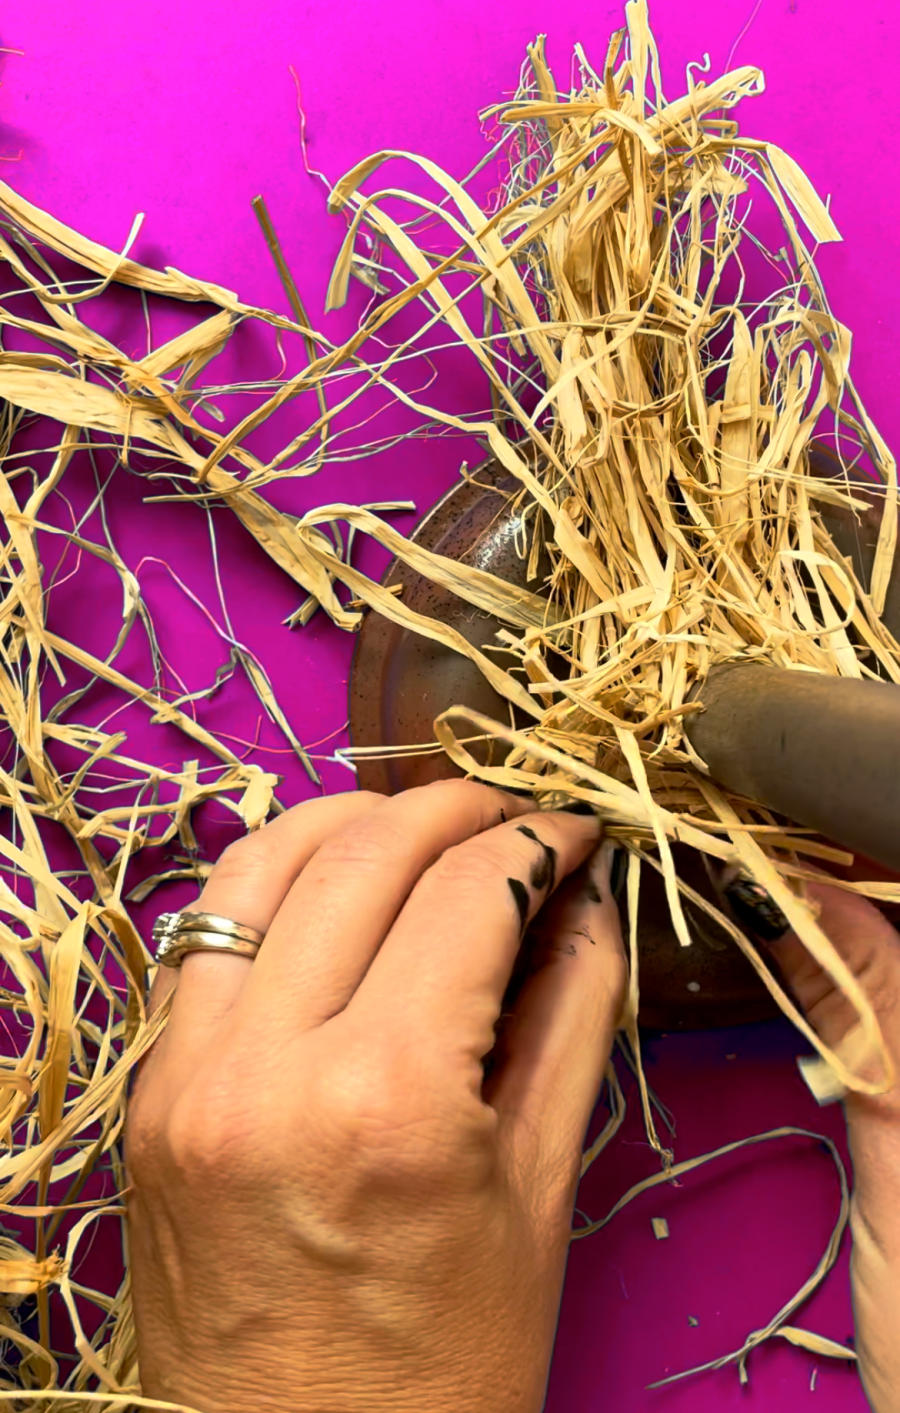
I took a piece of straw or raffia and tied it around the base. Then wrap a few more pieces around. I add some hot glue as I’m going to help secure it as well as make it look finished.
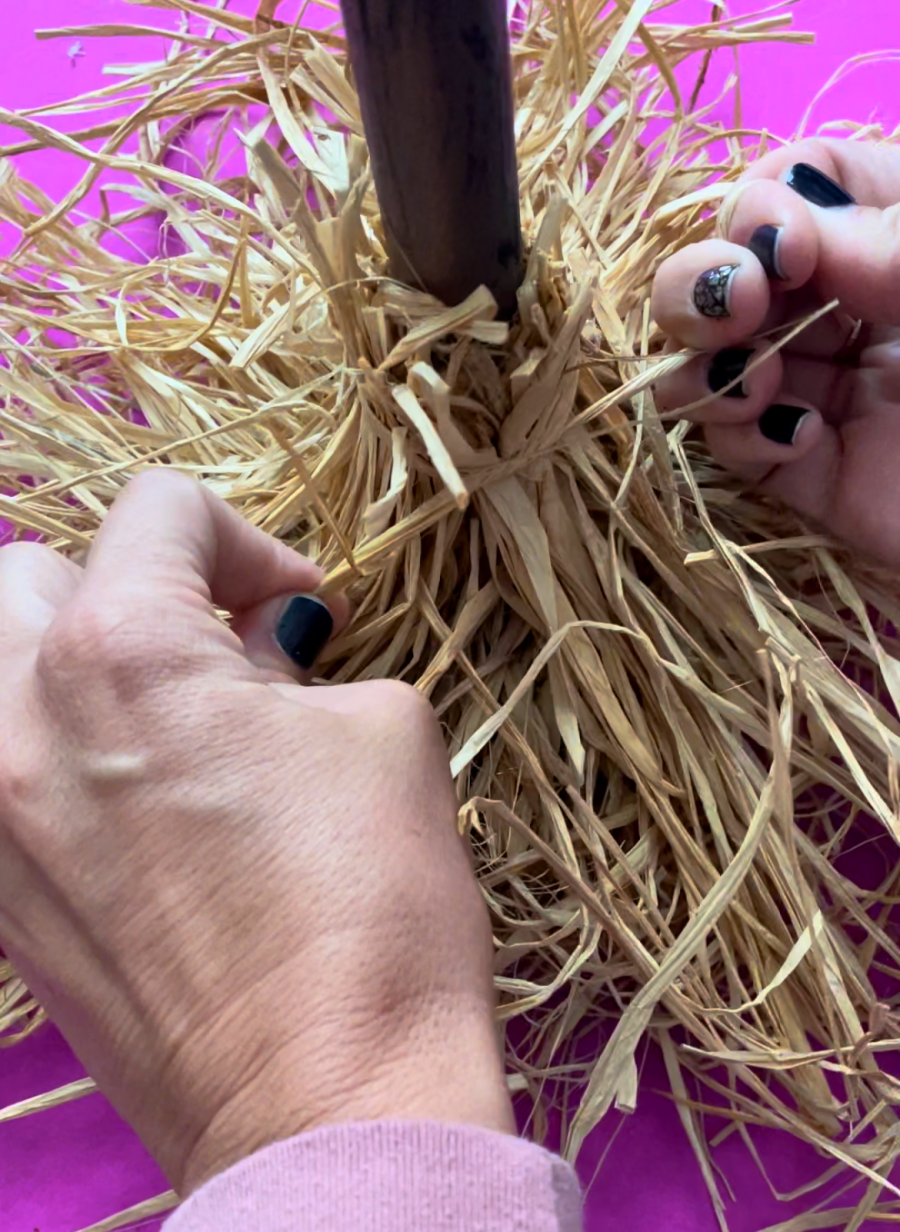
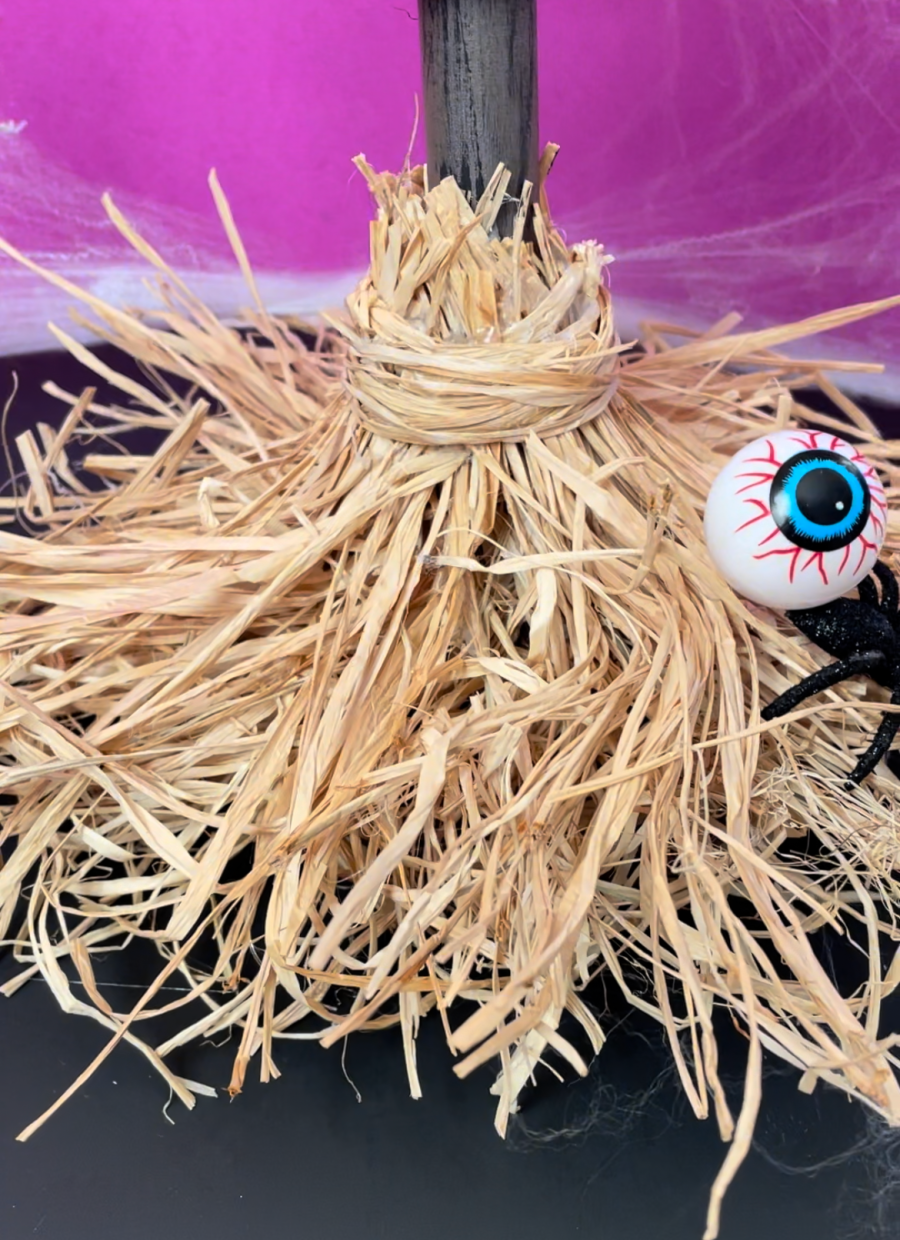
Then it’s time to trim! Just take your scissors and trim up the edges as well as where it’s tied up. I like the messy look but it still needs to be all about the same length so you get the broom shape!
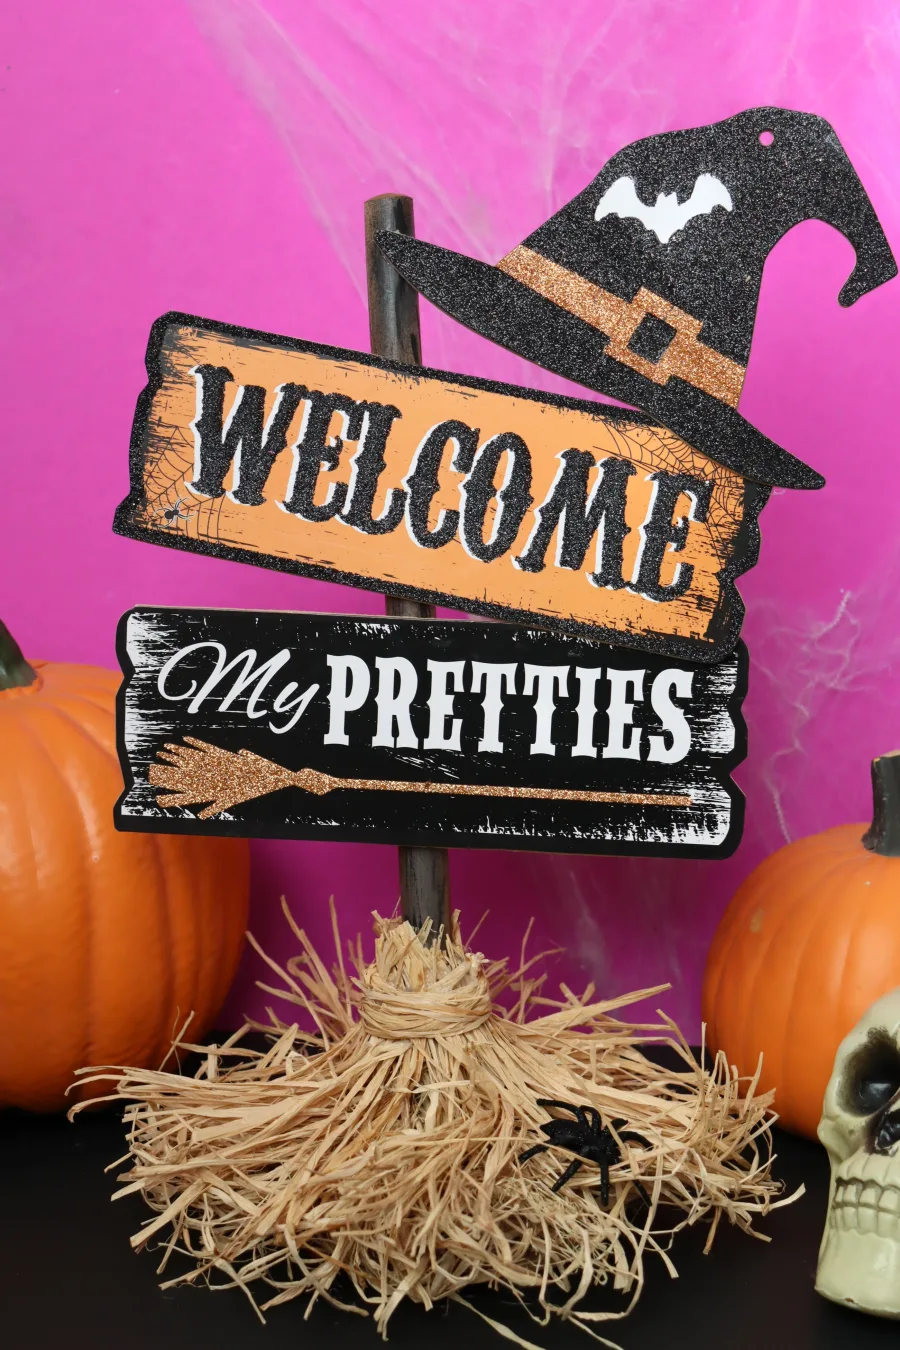
Add sign
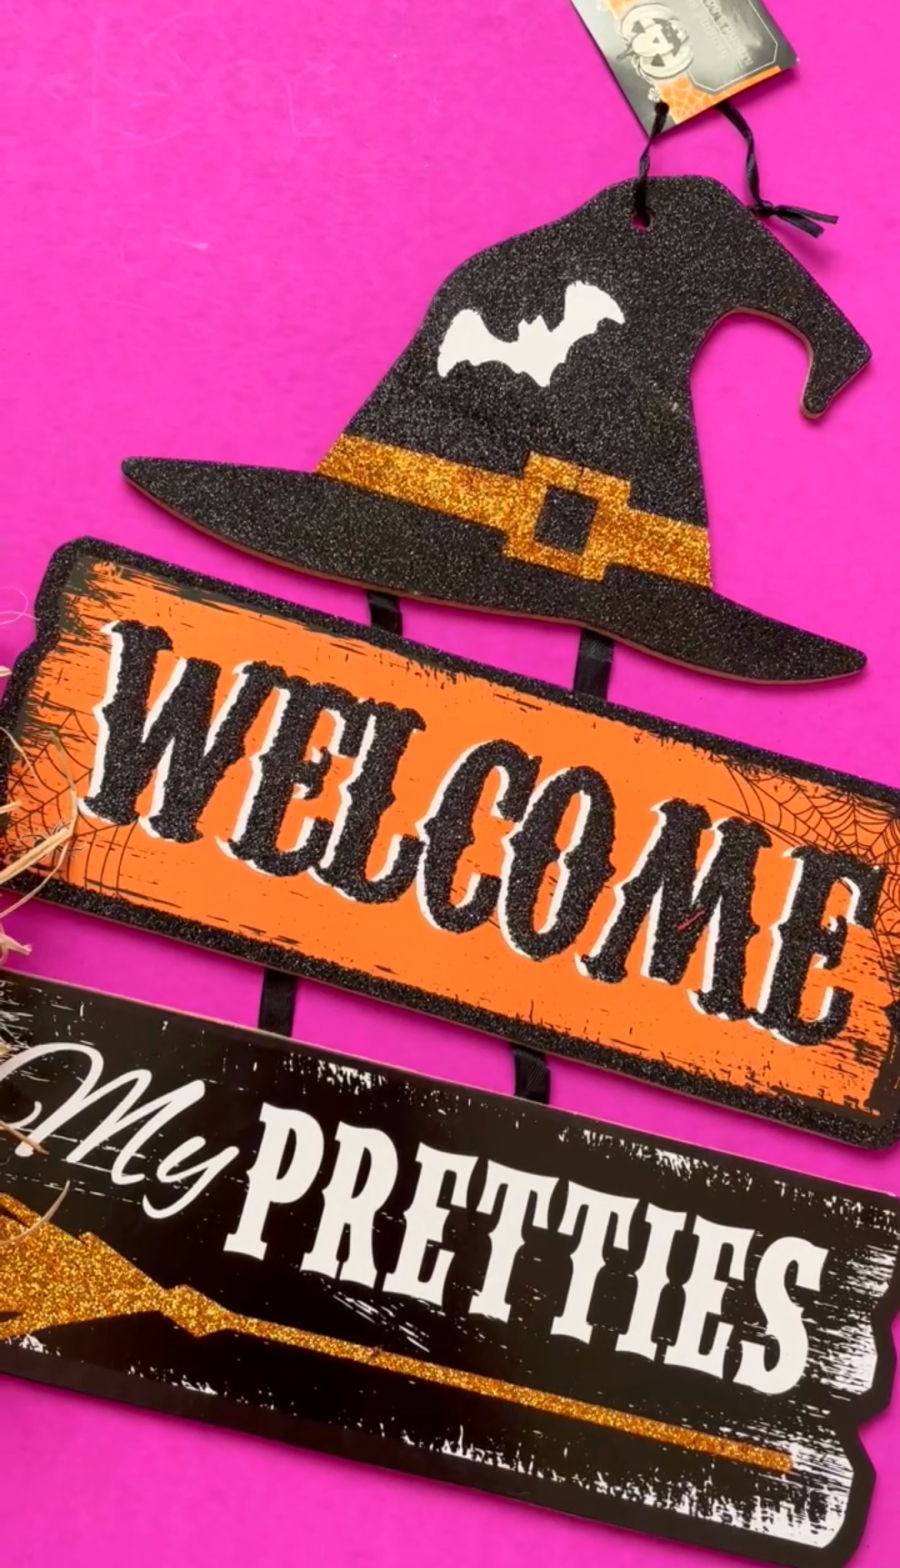
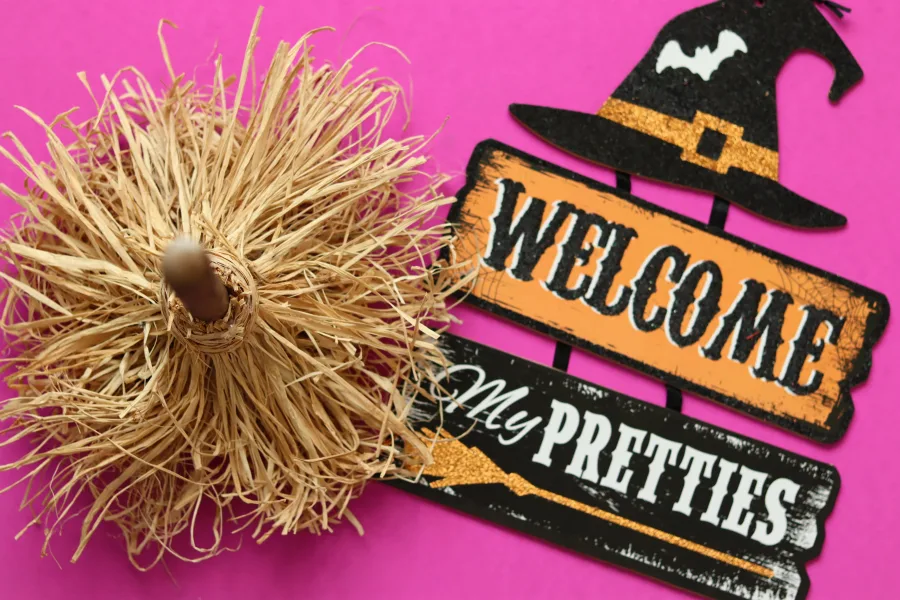
The broom is just darling as is! But I wanted to add this darling witch sign that I found at Dollar Tree! They are killing it with their signs! I buy them out every year! They offer so many good ones that you could add this witch broom!
I just snipped apart all the pieces that held it together.
And then adding a bunch of hot glue, I secure them to my broom handle. You can add some duct tape behind to really secure it if you are concerned!
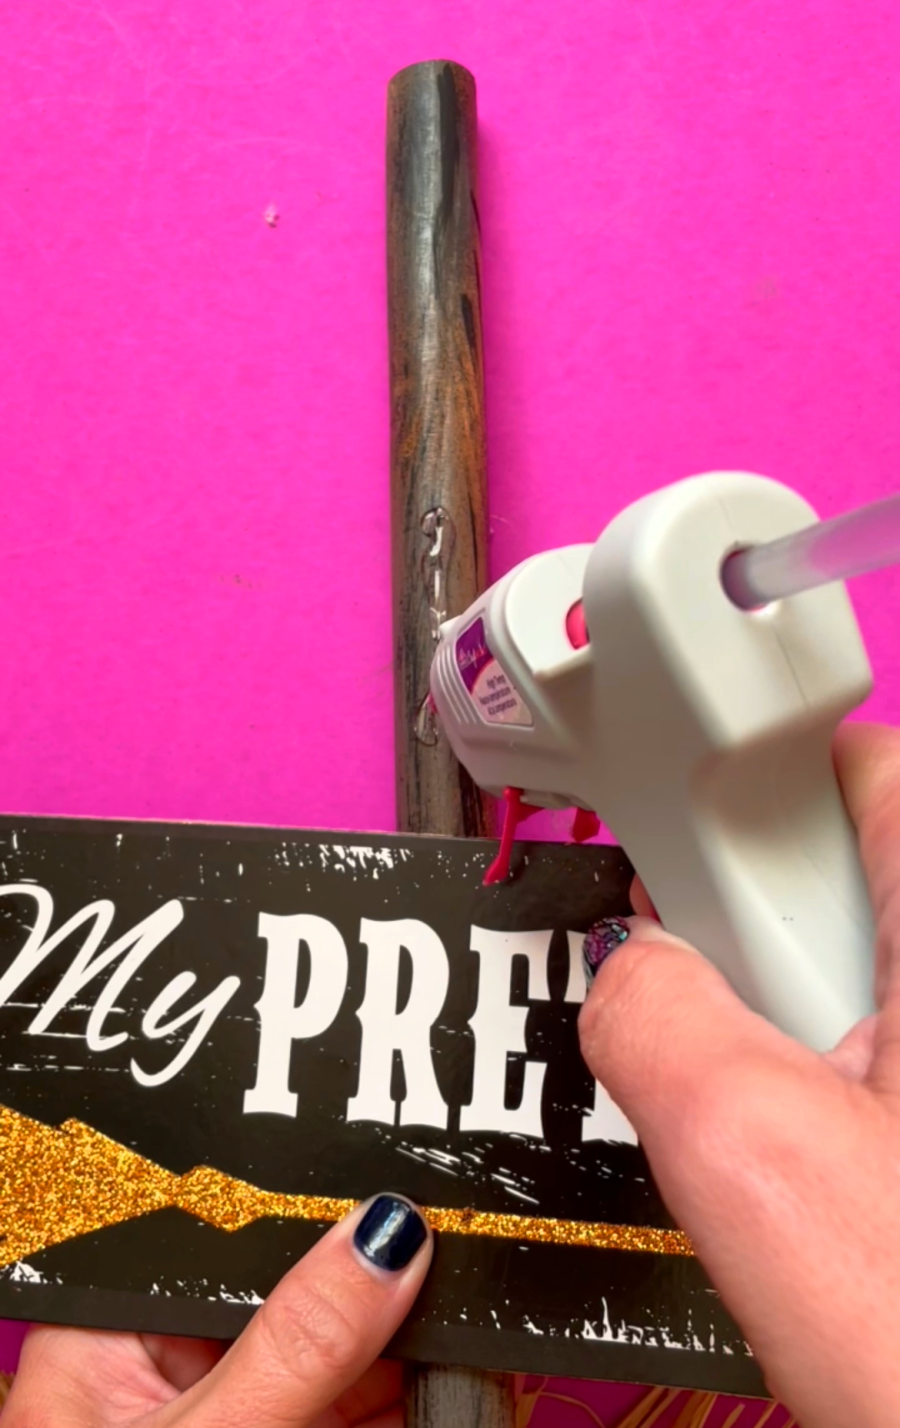
Since I added my signs a little off the side, my plunger wants to bend over. So I actually grabbed a wood round from Dollar Tree and just placed that down first and then added the witch broom sign on top! It held up just great until I added the hat, so if you put everything on straight, or are just using the broom as is, it will be fine by itself!
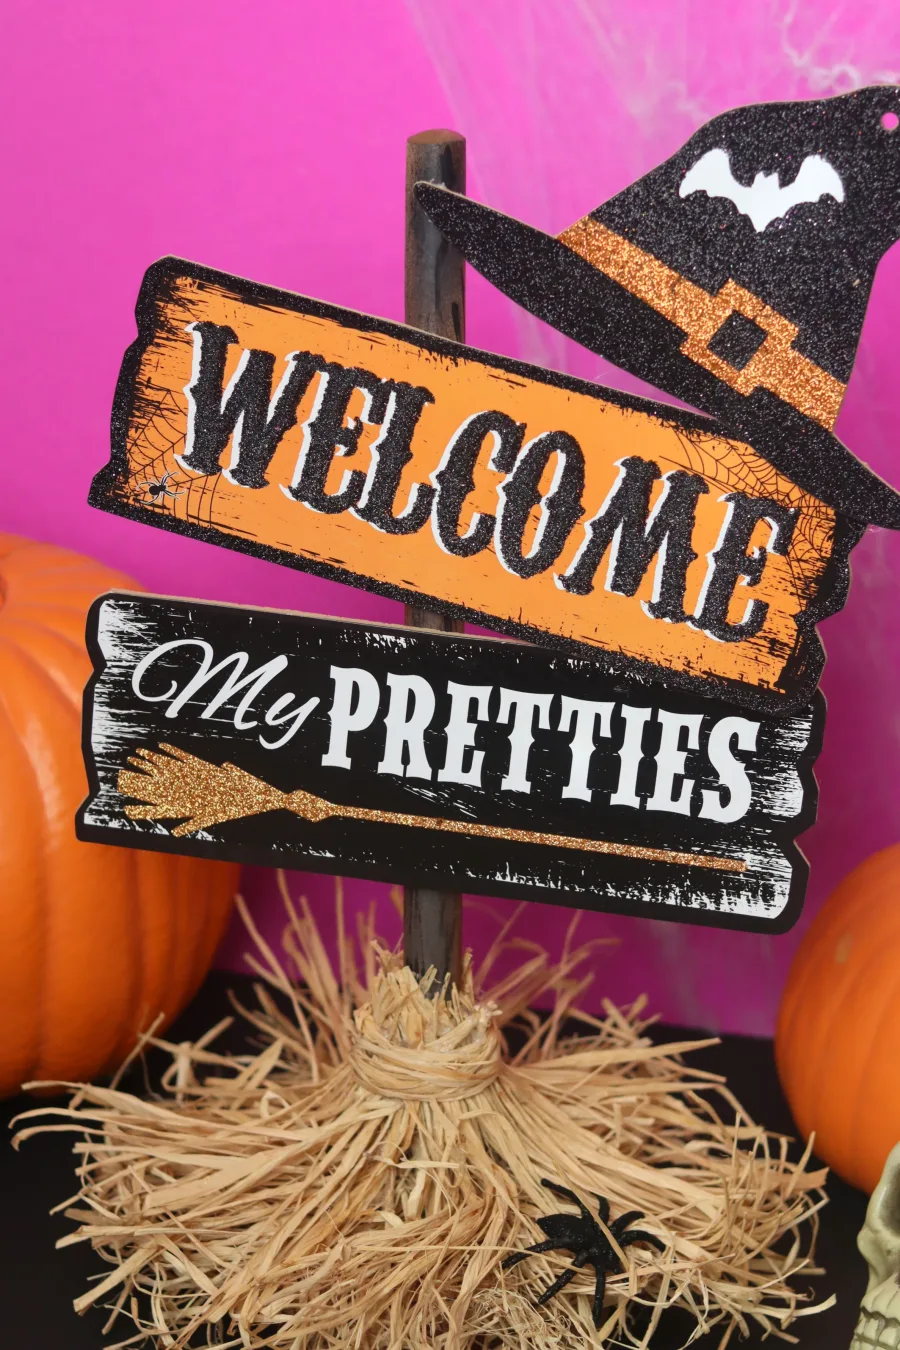
Then you add a bow, ribbon, spiders, etc! Dazzle it up however you want! This would honestly make such an easy girl’s night craft to do this spooky season! Invite your friends over and get crafting!
Too busy to get crafting today? No problem! Pin this post to remind yourself about this project later! Sharing my projects helps me reach more people, allowing me to continue sharing free content!
If you loved this- you will also love these:
Sonia Carranza says
Love it, cute and easy!! Thank you for sharing your talent.