
This is a sponsored post in partnership with Amazon Prime. All opinions are my own!
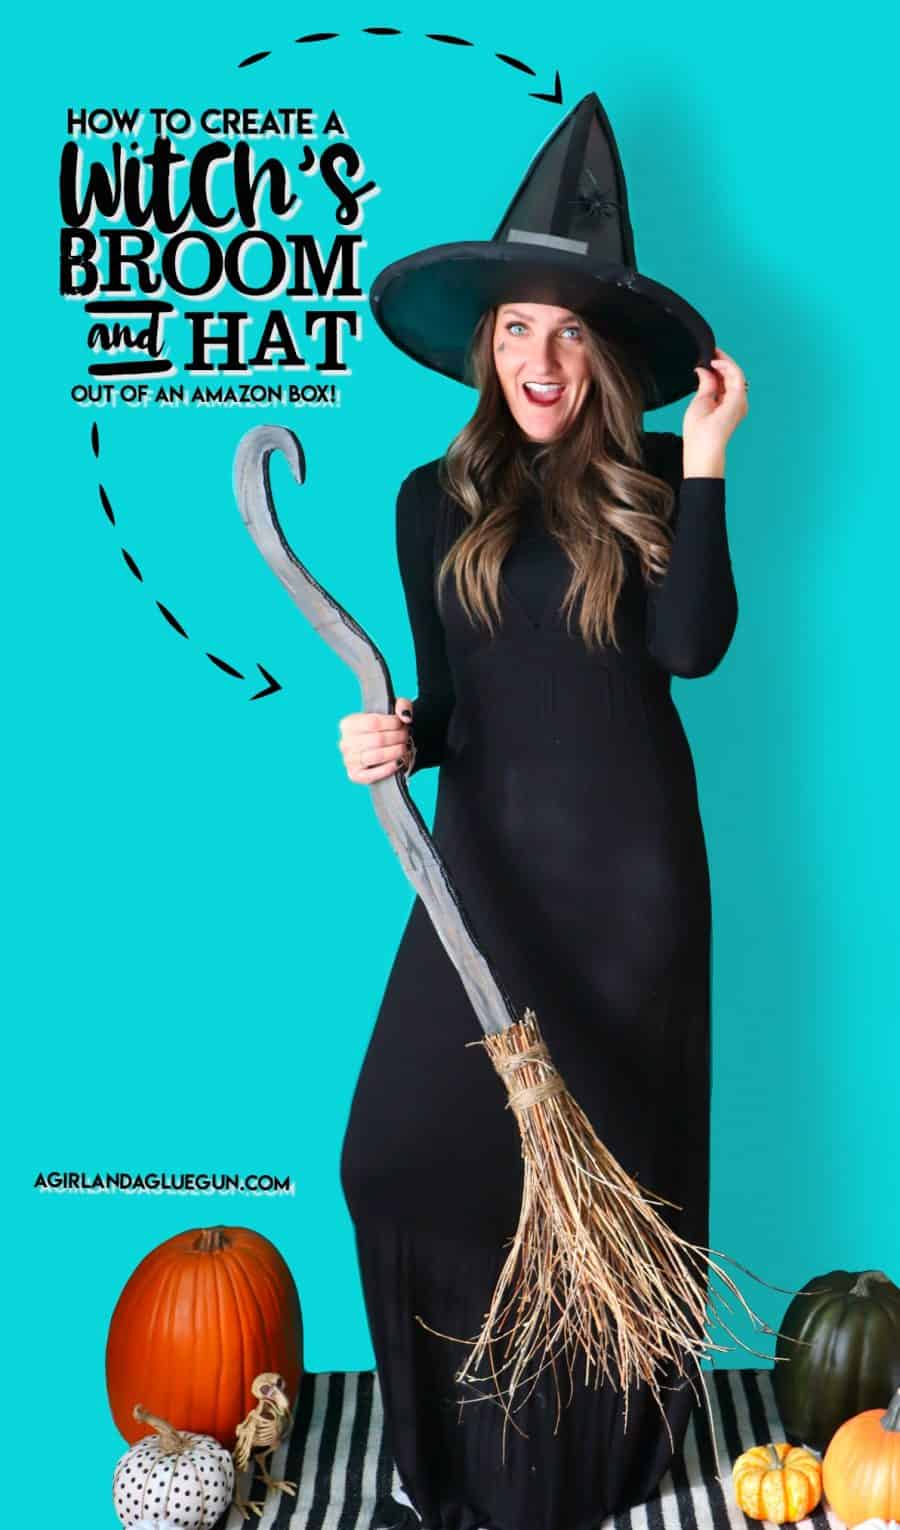
For Halloween this year, it’s easy to repurpose old Amazon Prime boxes into fun, creative Halloween costumes – aka Boxtumes! Today I’m going to show you how to create a Witch’s Broom and Hat using those old Amazon boxes and supplies from around the house!
I love crafting with Amazon Prime Boxes! It lets your creativity shine and my kids love that they can create their own Halloween boxtumes! If you remember last year- My daughter and I created a cute peacock Costume! She loved wearing something she helped make!
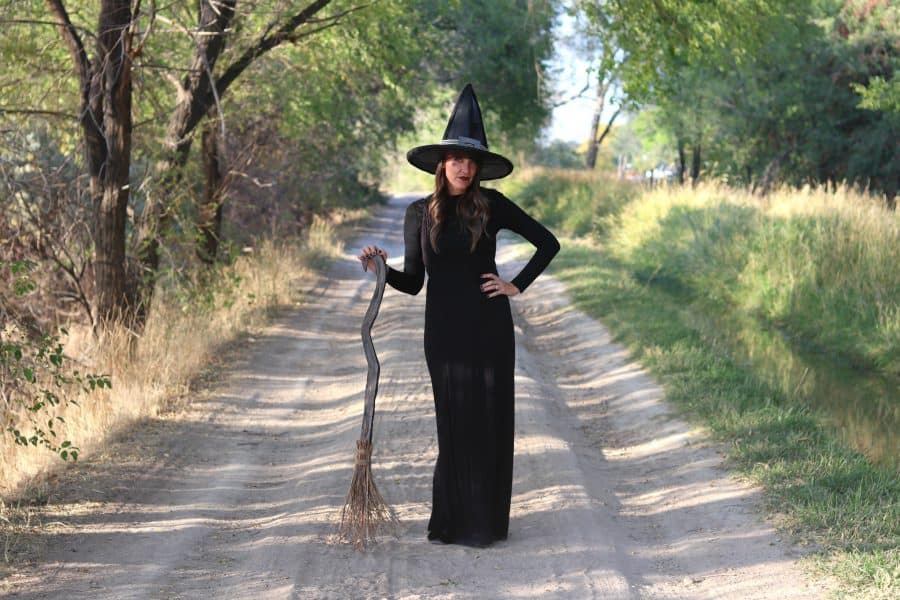
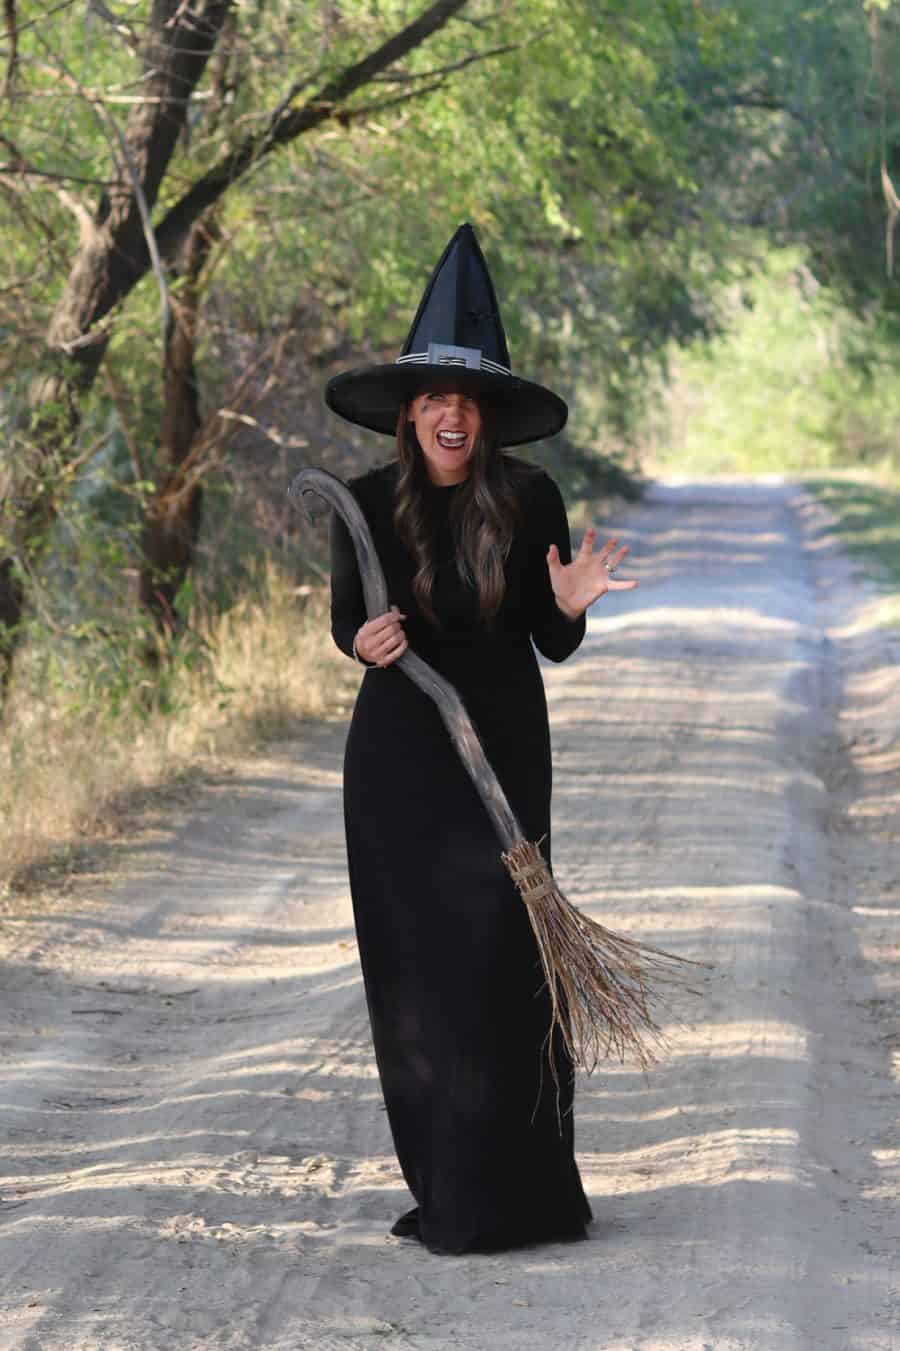
This year I decided to create a Witches’ Broom and Hat to complete my Witch’s Costume! It turned out so easy and I literally spent about $5 in supplies to make it happen!
Supplies you need to create a witch’s Broom and Hat Boxtume outfit
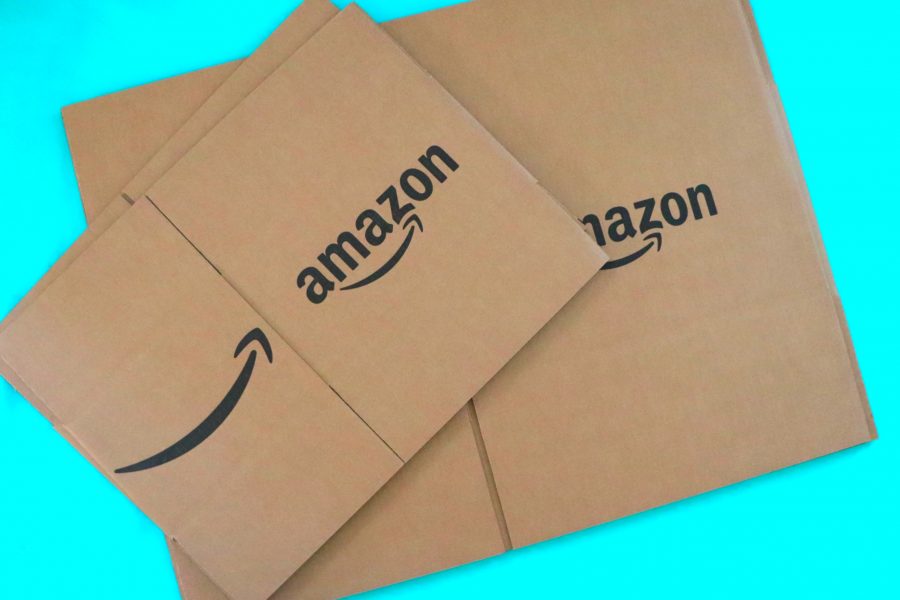
- Amazon Box
- Scissors and/or box cutter
- Pencil
- Ruler
- Twine
- hot glue gun
- Paint (Spray paint or acrylic paint)
- Ribbon
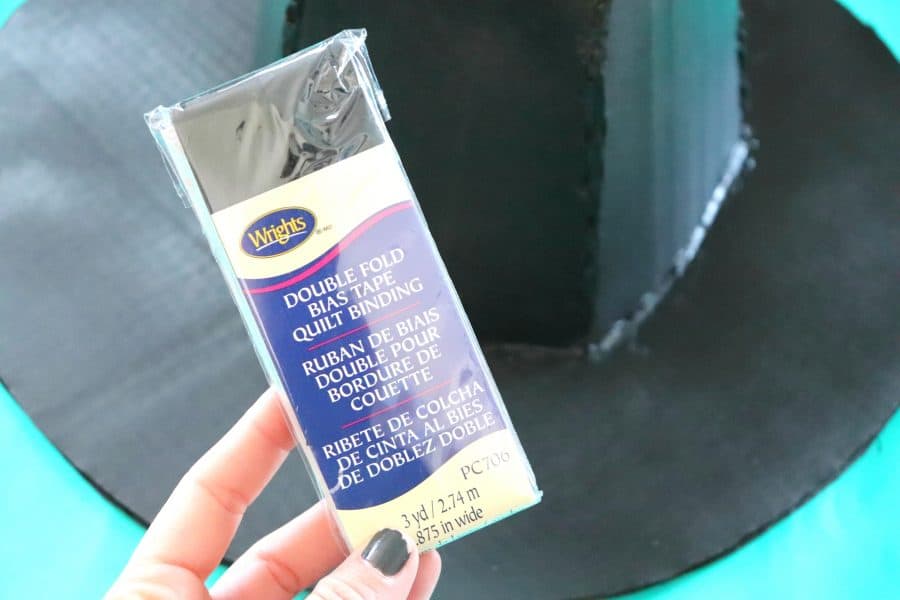
- Bias tape (optional)
Most of these supplies I already had! The Bias tape was the only thing I had to buy (and that is optional!) That’s what is so great about Boxtumes! They are a fantastic way to upcycle the boxes you already have on hand so you can save money for all those Halloween treats!
How to make a Witch’s Broom

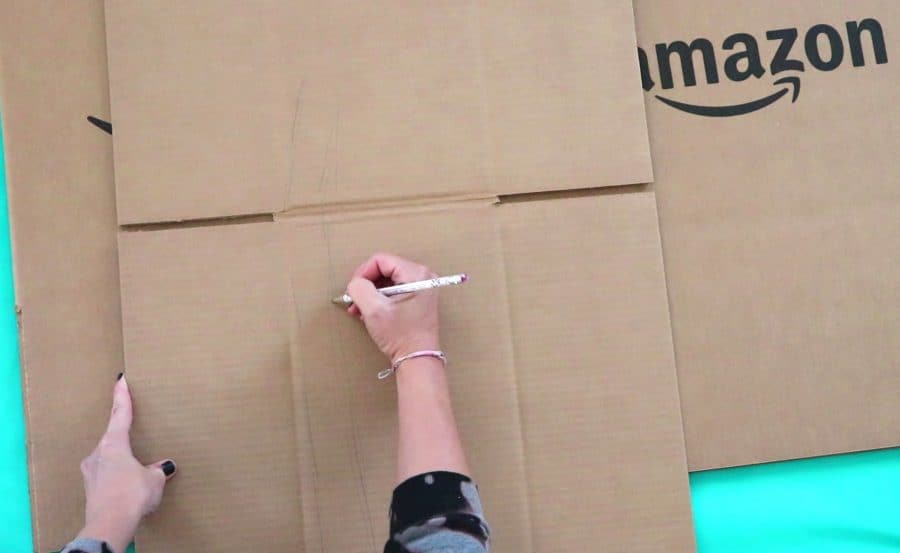
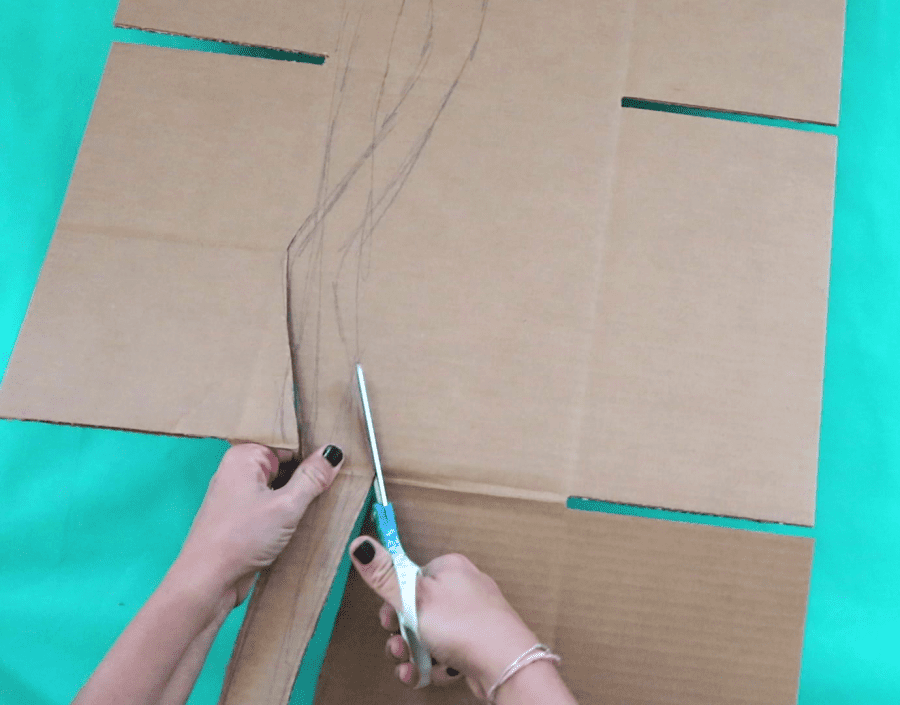
Step 1. Sketch out broom shape!
This is the fun part. You can make it as whimsical or plain as you want! I placed the broom shape right in the middle so I would have one nice long continuous piece. Try to avoid the seams and creases of the Amazon Prime Box. (You will have a few that are unavoidable)
Step 2. Cut out.
Scissors cut through the Amazon boxes very smoothly. I did find that a box cutter helps get in the tight little places a little easier though. Chose whatever you prefer.
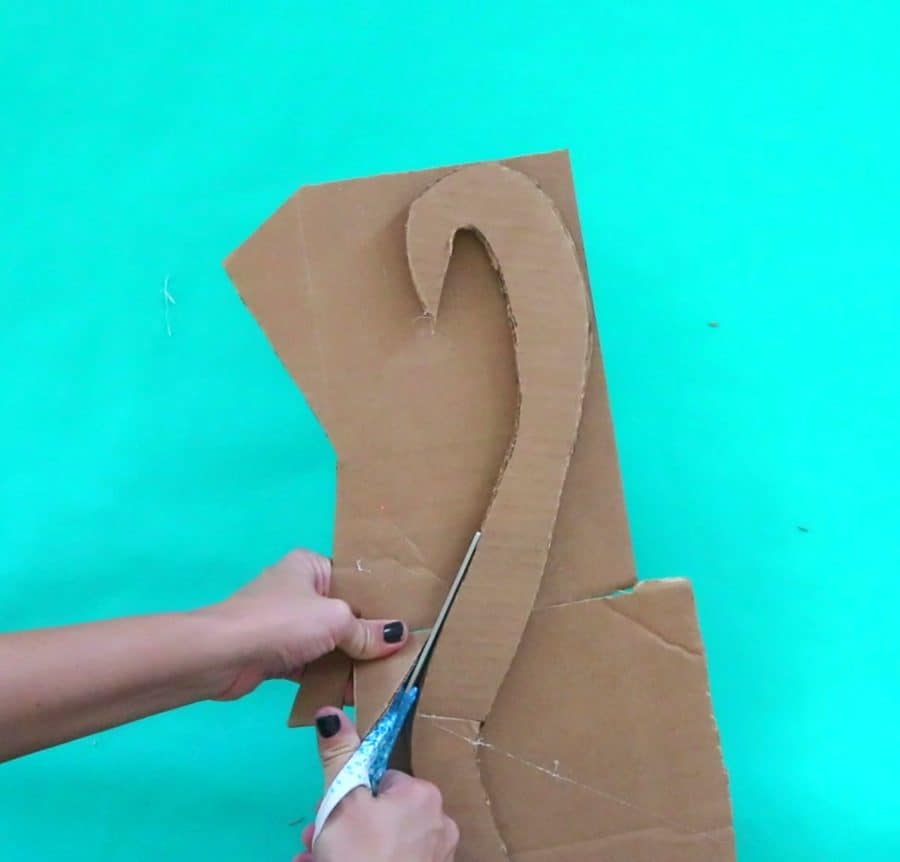
Step 3. Add another Cardboard layer.
The first layer was super easy to bend- and I wanted a really sturdy broom handle. I achieved this by adding cardboard layers. Hot glue on your broom handle to another piece of the cardboard box and cut out.
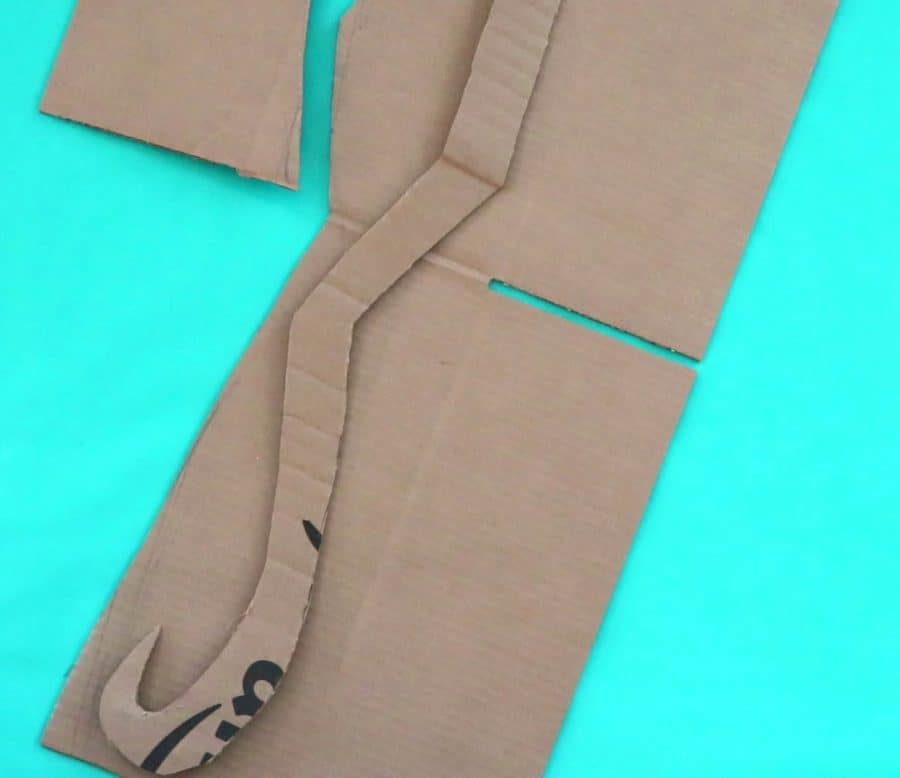
Repeat as many times as you want. I ended up with four layers.
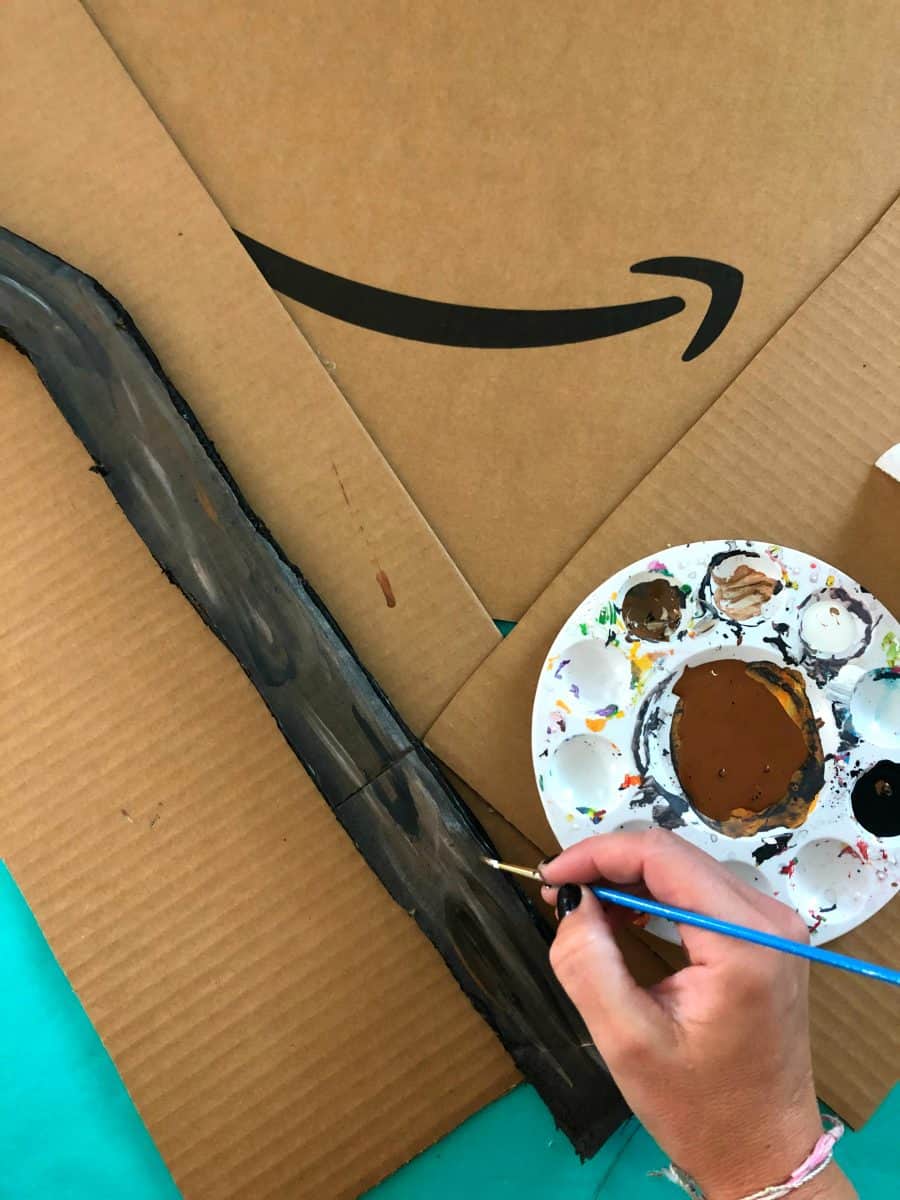
Step 4. Paint.
Technically the broom handle is already brown- so you don’t have to paint the Amazon box and skip this step. But I love paint so I added a brown spray paint to broom and then went in with a finer brush and hand painted some wood texture.
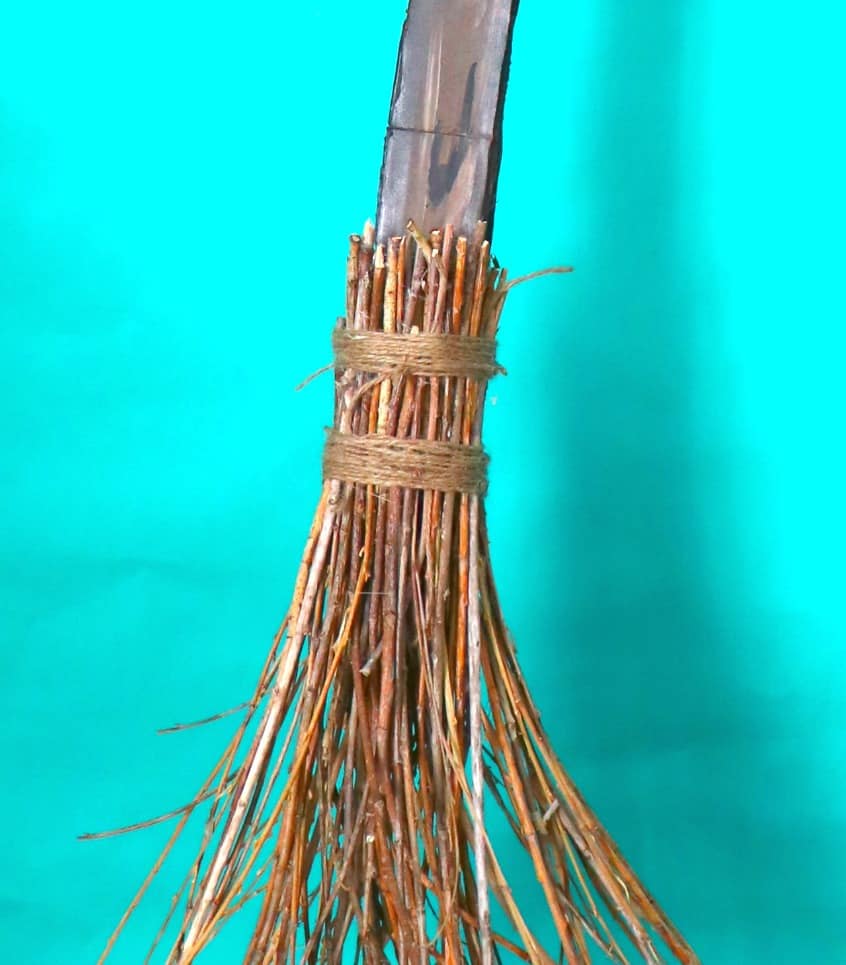
Step 5. Add the broom bristles
I went out to my local park and gathered up a bunch of old branches and sticks to use as the broom bristles. I wanted thin pieces so my broom would look nice and wispy. I broke them off so they are all relatively the same size and added the first layer around the broom handle with hot glue.
The second layer, I added a loose piece of twine around the base and shoved more sticks around to make the twine nice and tight. You can make the bristles as nice and full as you want.

When it was full I secured it with more twine and hot glue to achieve the broom look.
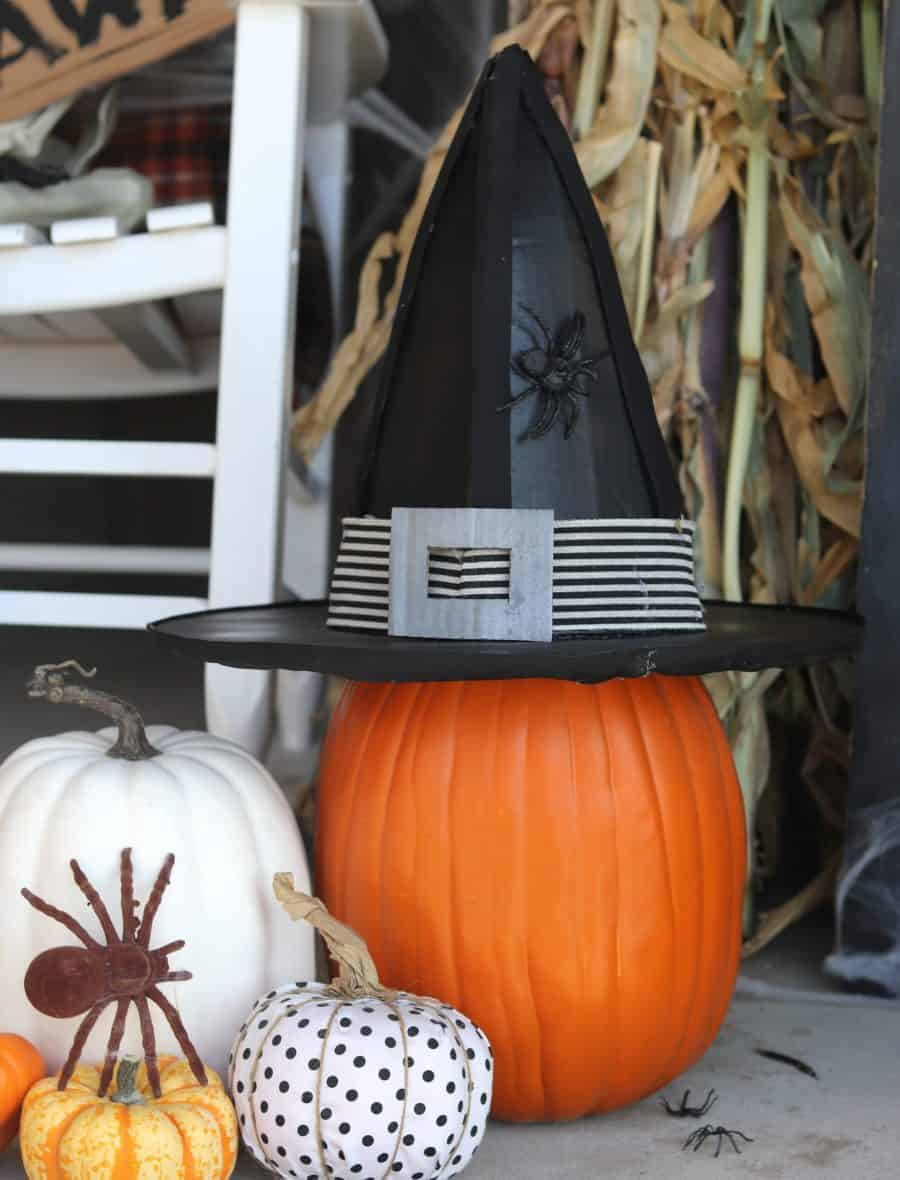
How to create a Witch’s Hat
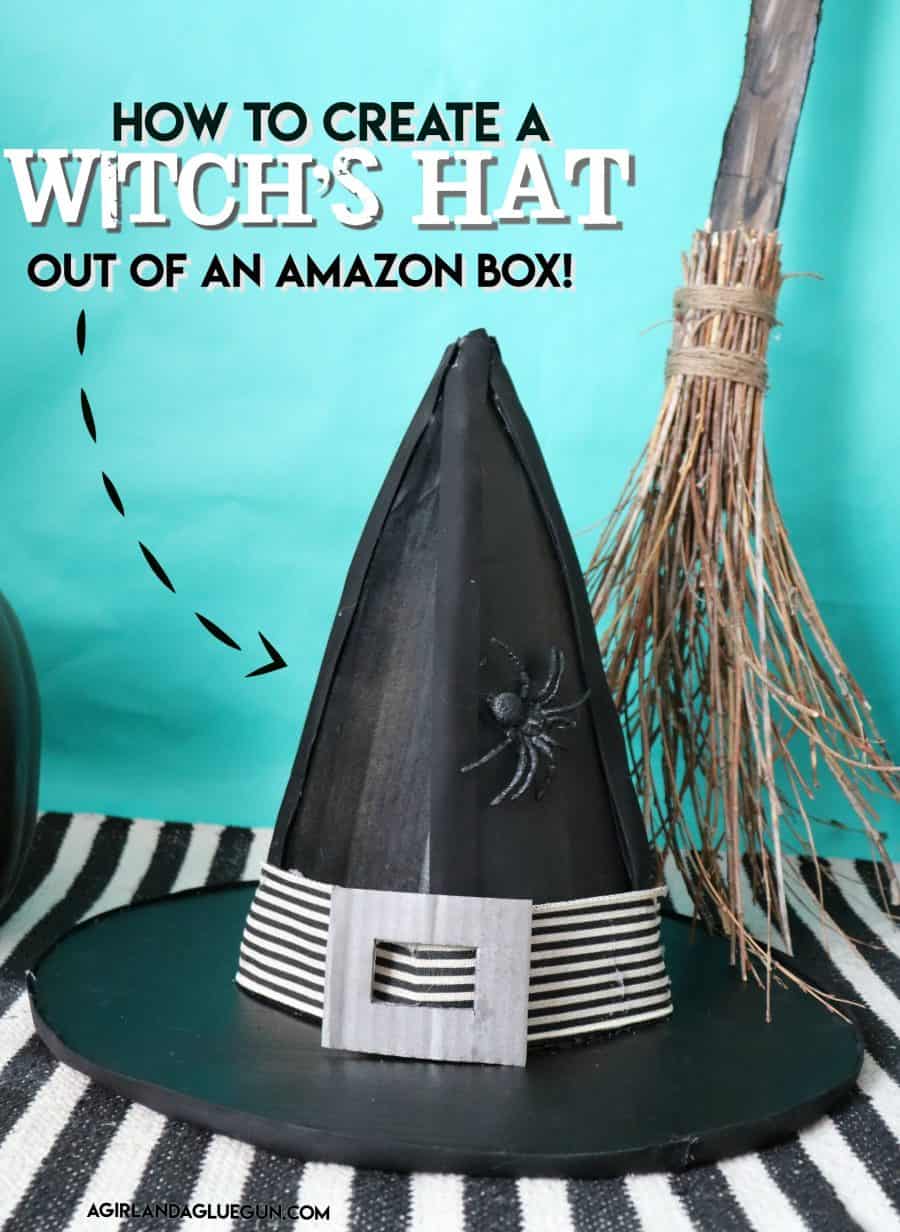
The Witch’s Hat I made was for an adult- so if you are making a kid’s size, you will want to adjust the size down.
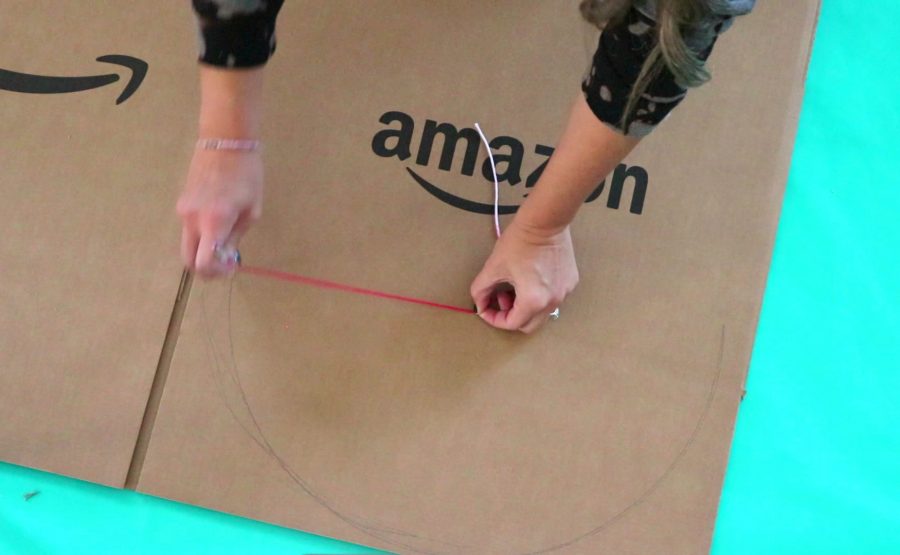
Step 1. Draw a circle.
The hat I used has a circumference of 16 inches. You can make it bigger or smaller depending on the look you are going for. You can add a string to a pencil to make a larger compass
Step 2. Cut out.
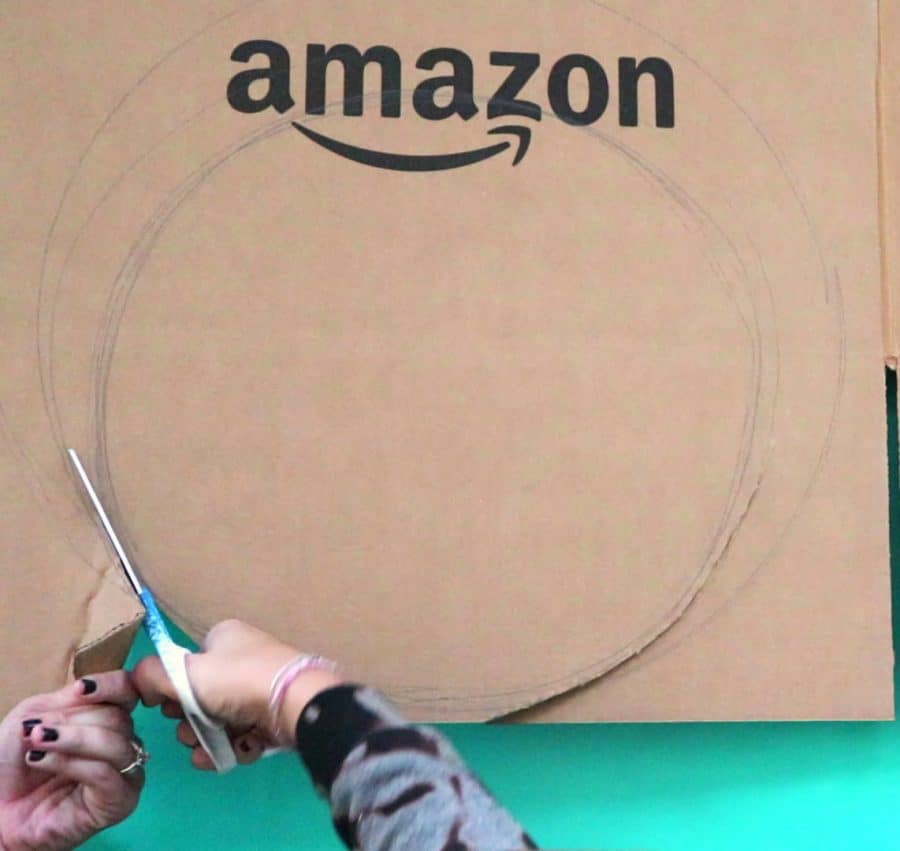
Step 3. Cut out the middle of the Witch’s hat.
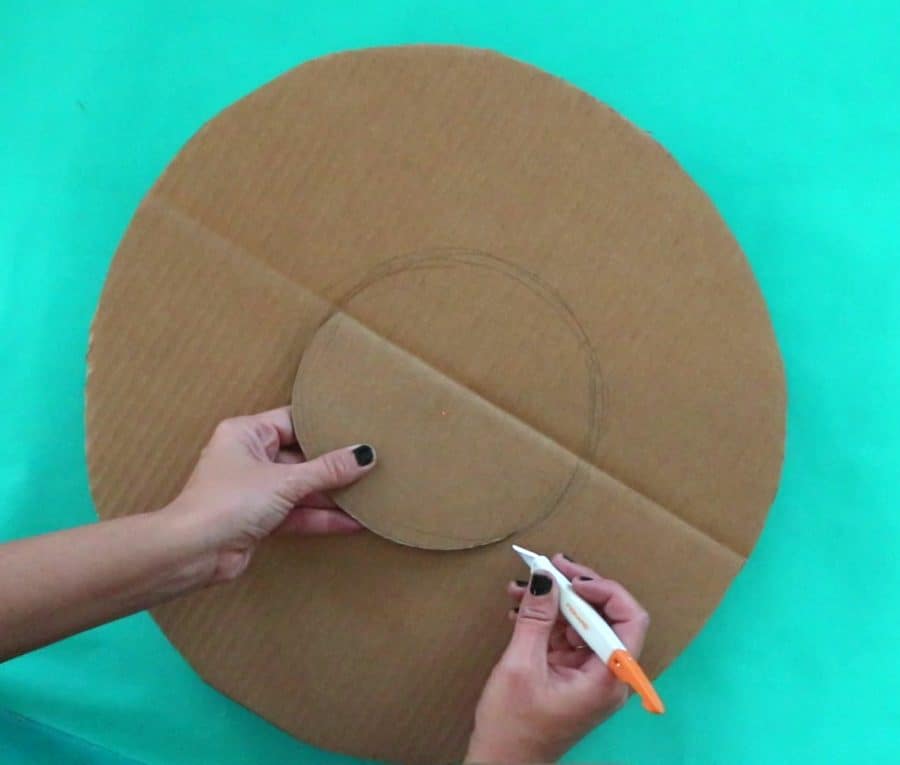
My circle in the middle is about 7 1/2 inches wide. I placed the cardboard donut shape on my head to make sure it would fit on my head! You can adjust the size bigger- but not smaller- so start on the smaller scale and trim off as needed.
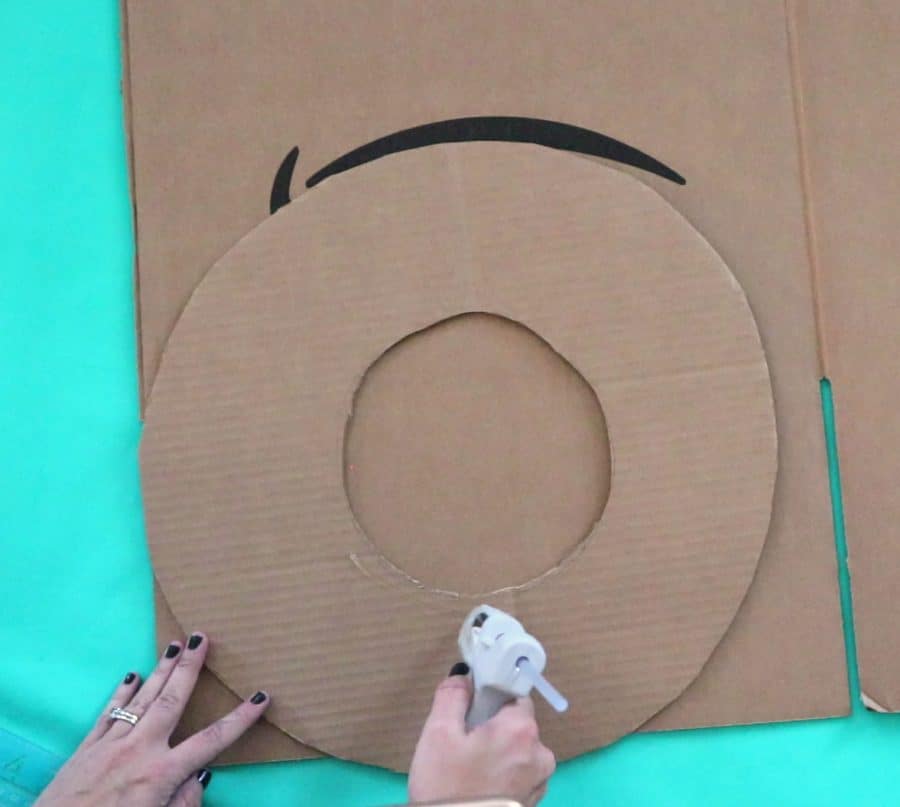
Step 4. Add another piece of cardboard.
Just like the broom, I wanted my base sturdy. I hot glued it to another piece of cardboard and cut out. (I only did two layers)
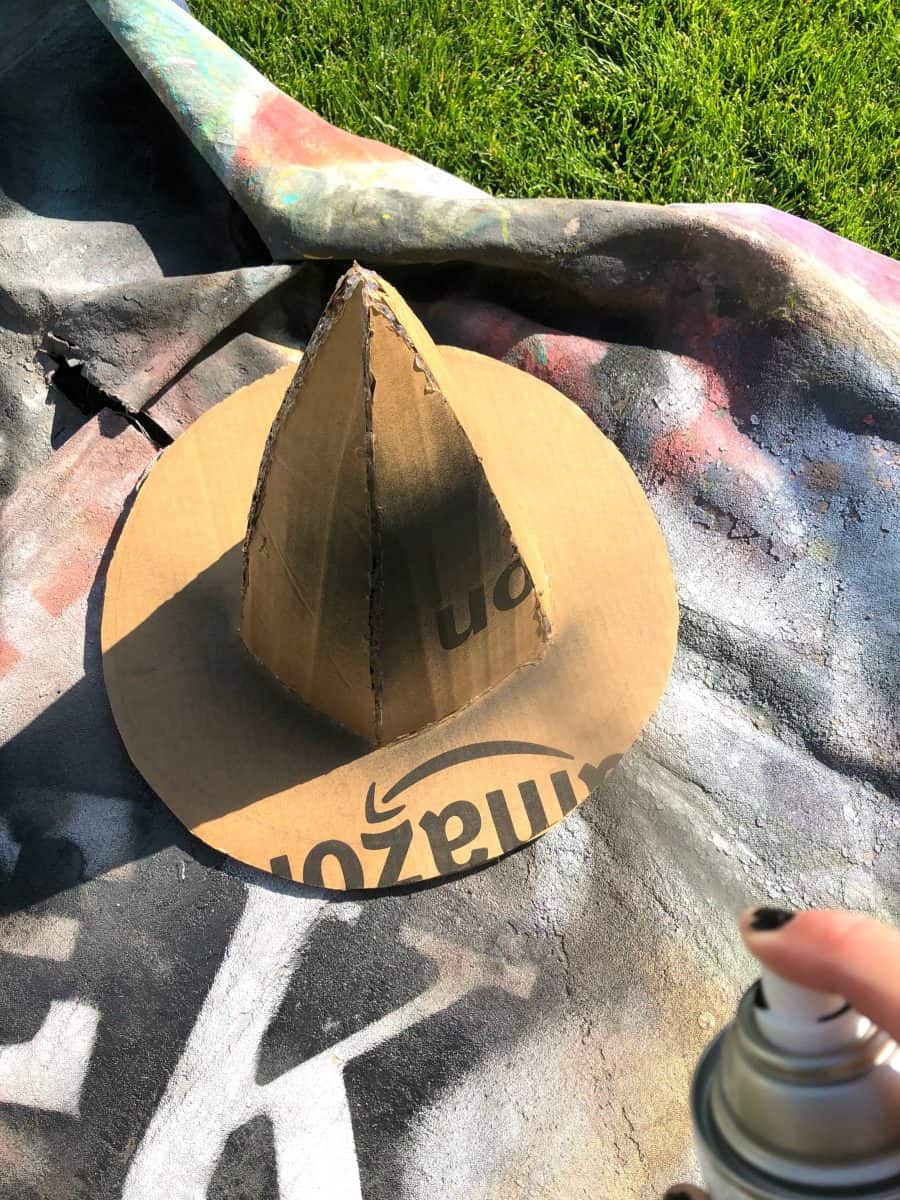
Step 5. Add the top of the witch’s hat.
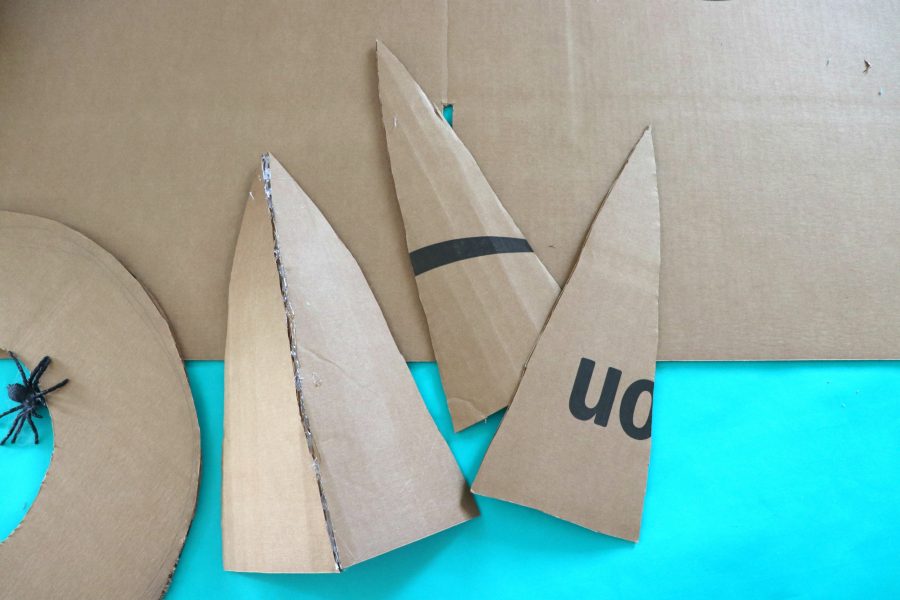
This part is a little tricky. You want 4-5 triangle shapes to make the pointy part of the hat. The size of my triangles are 5 inches wide at the bottom and a height of 12 inches. I did notice that cutting out the shapes so the lines of the cardboard were running vertical makes it so you can bend the piece and make it rounded. I hot glued the piece together to make a cone shape. I was VERY generous with hot glue. All along the seams on the outside. All along the seams on the inside.
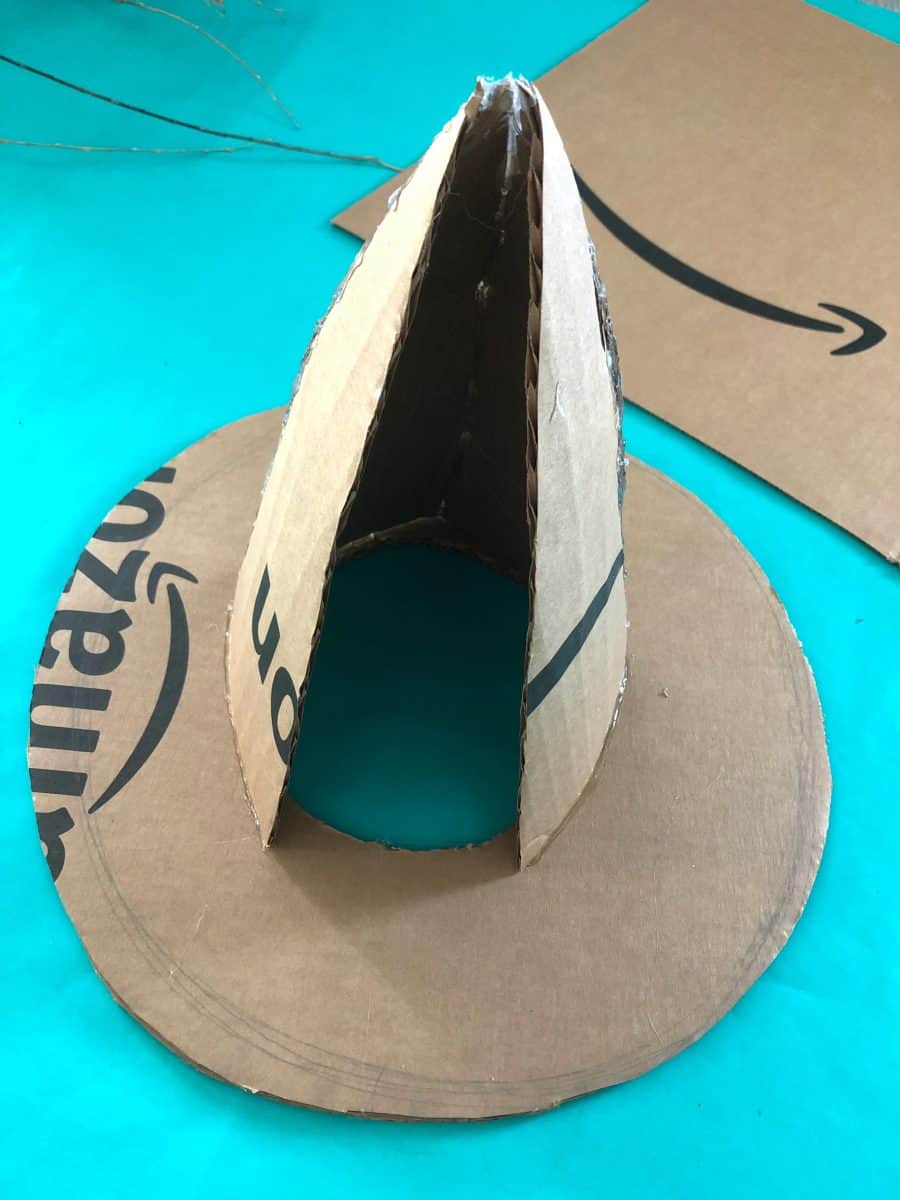
Step 6. Paint.
I did a simple satin black spray paint- but you could paint black and white stripes, gray, brown or even make it candy corn colored.
Step 7. Embellish.
I wanted the edges to look finished so I actually hot glued some cloth bias tape around the edge of the hat to give it a more polished look.
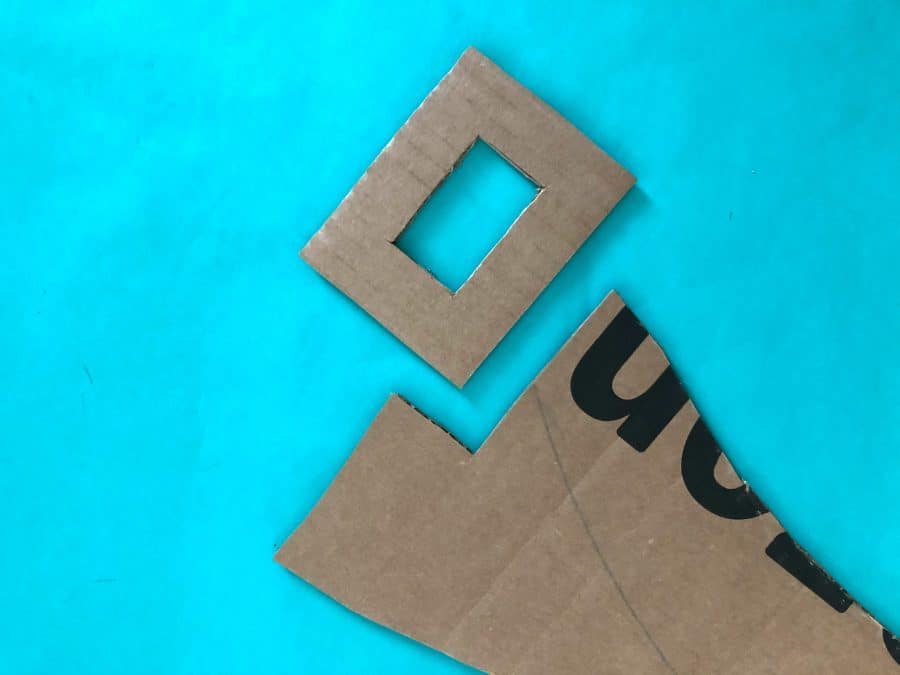
You can also add some ribbon around the base and finish it off with a cardboard buckle.
Step 8. Add Black Dress.
You can paint your face green and add a wart if you want. But I threw on a simple black dress and dark lipstick and was ready to cast spells on all my neighbors!
If you end up making a Boxtume- share on your social media using these hashtags so we can all see @amazon, #boxtumes and #morethanabox.
What I love about this Boxtume is that next year if no one decides to be a witch, we can set these around our mantel or front porch and turn them into fun Halloween decorations!
Don’t forget: Prime members can also extend their experience with Halloween-themed content on Prime Video, Prime Reading, Prime Gaming and Amazon Music.

Leave a Reply