
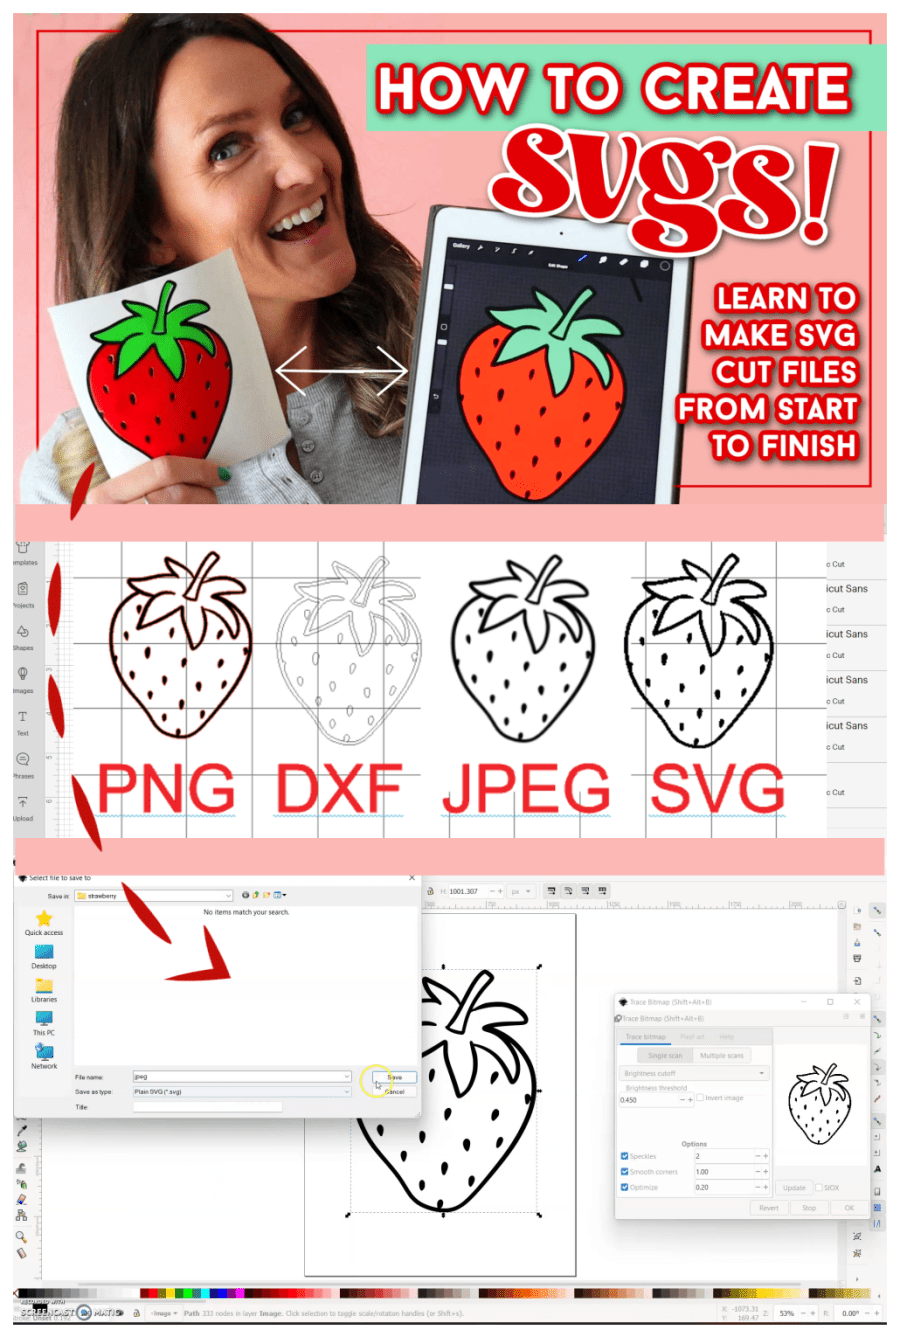
Learn how to create SVG cut files from start to finish for the Cricut or Silhouette Cameo. Turn your designs into different image formats, PNG, SVG, DXF and JPEG!
When I was starting out on creating cut files, everyone I knew was using Adobe Illustrator. I was a poor starving artist and just couldn’t splurge on it. So I basically had to figure out how to do everything without it. And that included turning my designs into SVGS! I googled and tried out and kept my fingers crossed that I wasn’t accidentally downloading viruses on my computer disguised as an SVG converter! But I figured it out. and so today I’m writing up everything I wish I would have known when I was starting out! How to create cut files from start to finish!
I did put it in video form- it’s a little easier to watch than explain. You can watch my video on how to create SVG cut files on youtube below
I am going to post the basics talking points down below- but I pinky promise that the video is going to make a lot more sense!
What is an SVG?
SVGS is a type of image format. It stands for Scalable Vector Graphics.
SVG’s are the format that is compatible with Cricut and Silhoeutte Cameo software so most people say SVGS when they really mean CUT files. A cut file is the image you use to cut something out with electronic cutter (Cricut or Silhouette cameo etc).
I save my cut files in 4 image formats JPEG, PNG, DXF and SVG. SVG’s are the most common. But I do think that it’s important to offer more then just SVG if you are starting an etsy shop for cut files. The Silhouette Studio software free edition can not upload an SVG. But a DXF works great. And there are TONS of other electronic cutters and even embroidery softwares that I don’t even know about. I’m not sure what works best with each one. So offering the variety of image formats is the best practice!
(SVGS are also great because you can size them up and down and they don’t get pixelated!)
Image formats in the Silhouette Studio Software
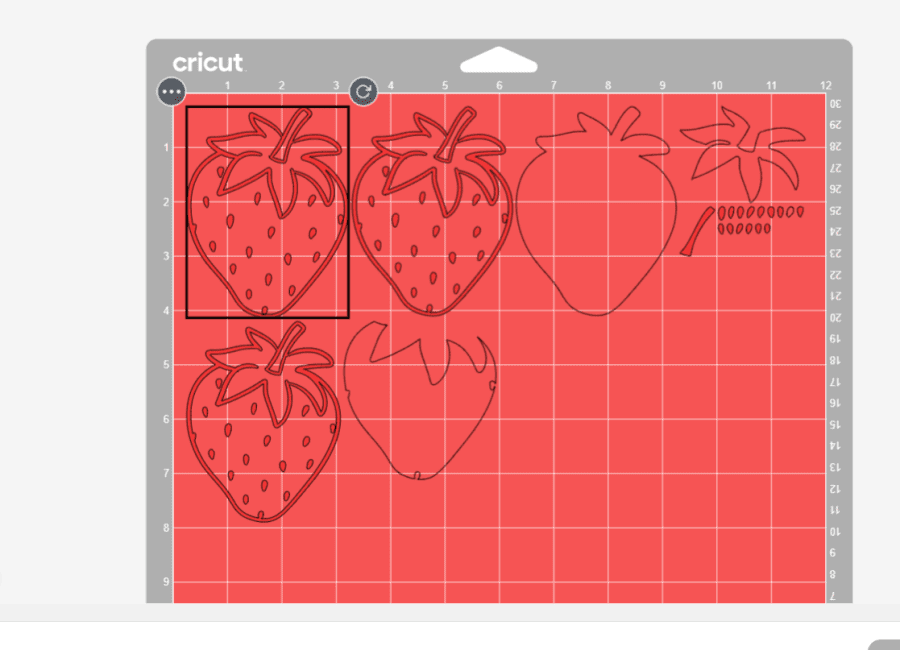
I wanted to give you a quick visual of the 4 formats in the Silhouette software. I do have the business edition software so I can upload the SVG. But if you are using the free version you will need to upload the png or dxf or trace the jpeg! Silhouette has an amazing Trace feature so don’t feel like you need to upgrade just because of the SVG!
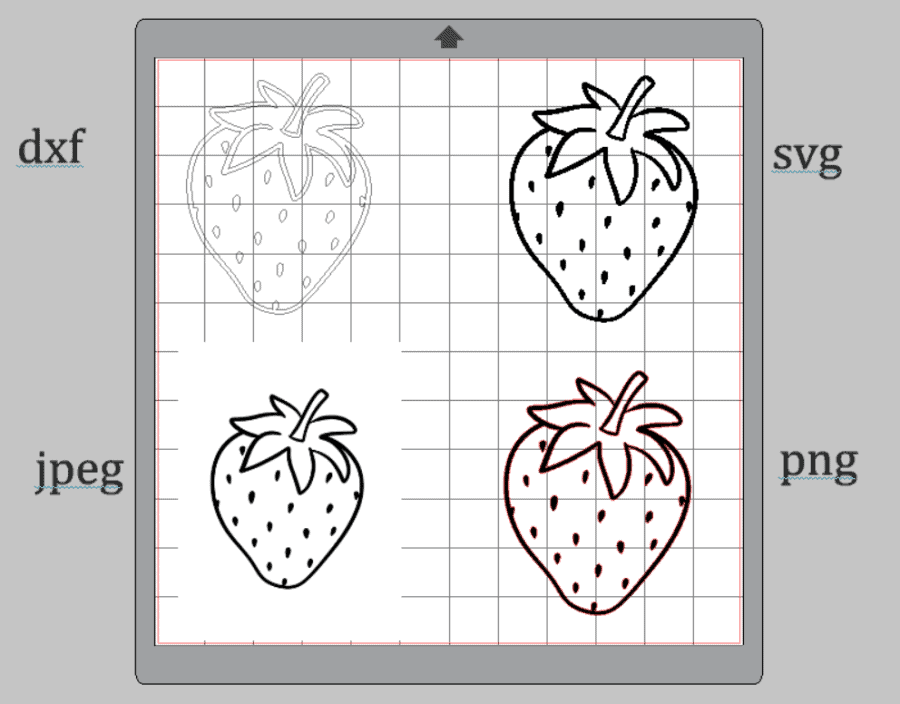
The picture below is what happens when you push send in the software. (The jpeg has no cut lines.)

Image formats in the Cricut Design Space
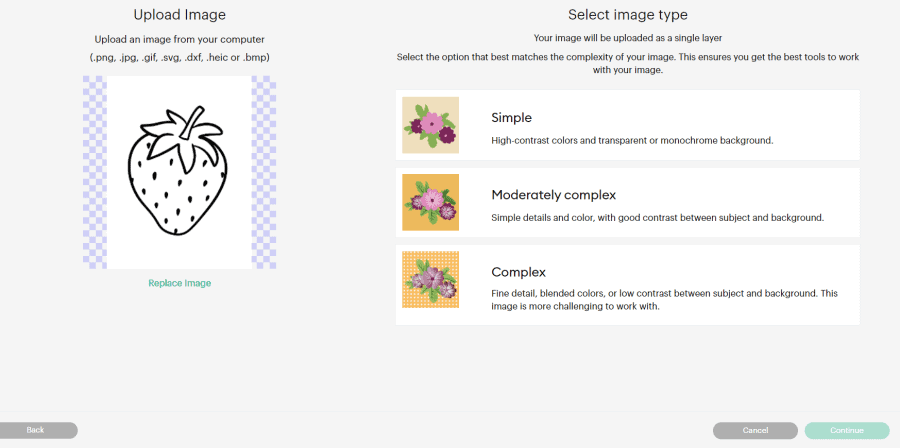
The Design space gives you the option to delete the background space- which is a really cool feature. You can upload any image format and delete the white space. That being said, anything really intricite is going to be a pain in your butt. SVGS are going to be way easier to deal with in general.
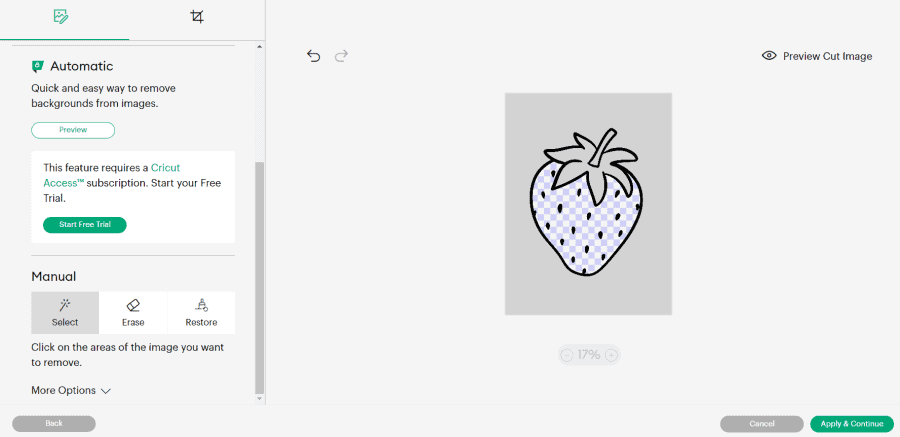
All the files, once you delete the background will cut the same in the Cricut EXCEPT the DXF.
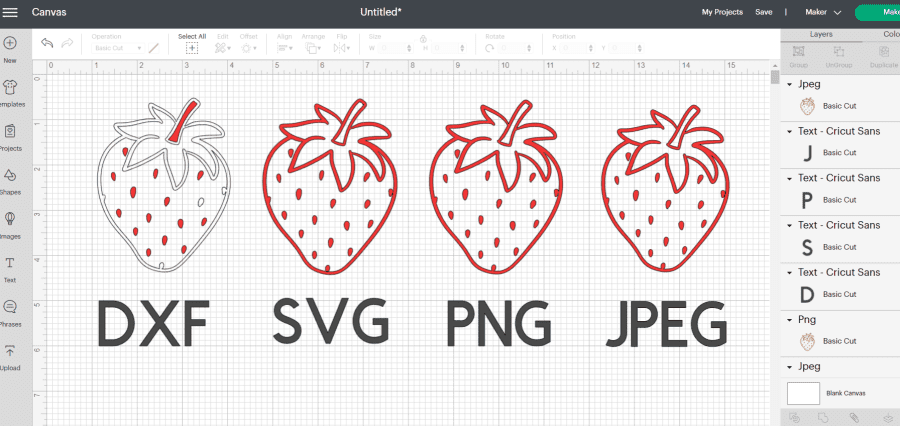
The DXF is completely ungrouped and will cut each section seperatly. It’s perfect if you are wanting to layer the design. If it was a saying with words, it would piece apart all the insides of the letters. And that would be a nightmare. You can tell which one is the DXF below:
How to design a cut File
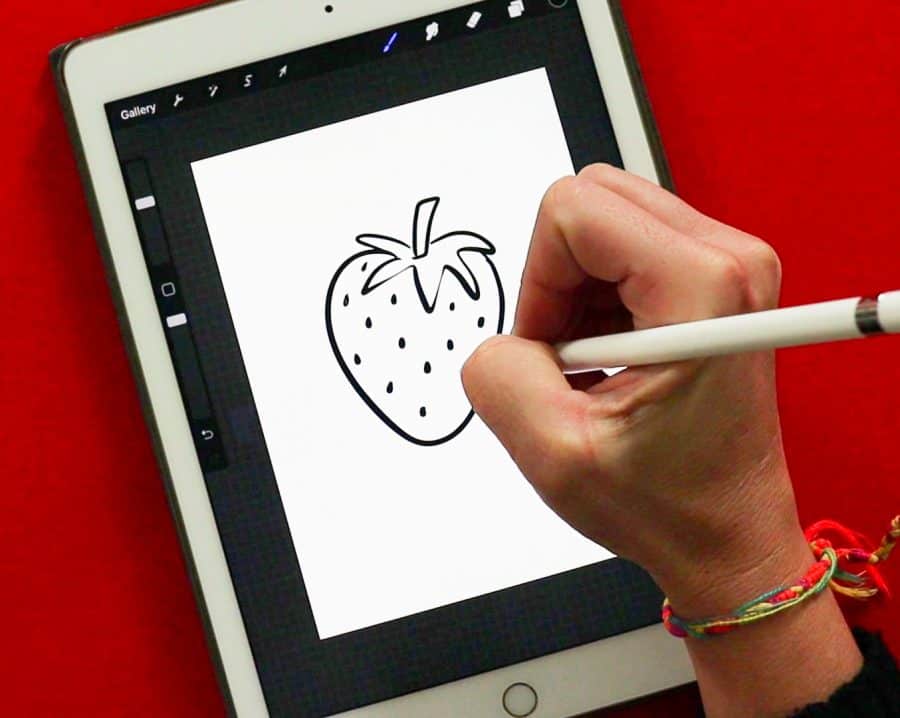
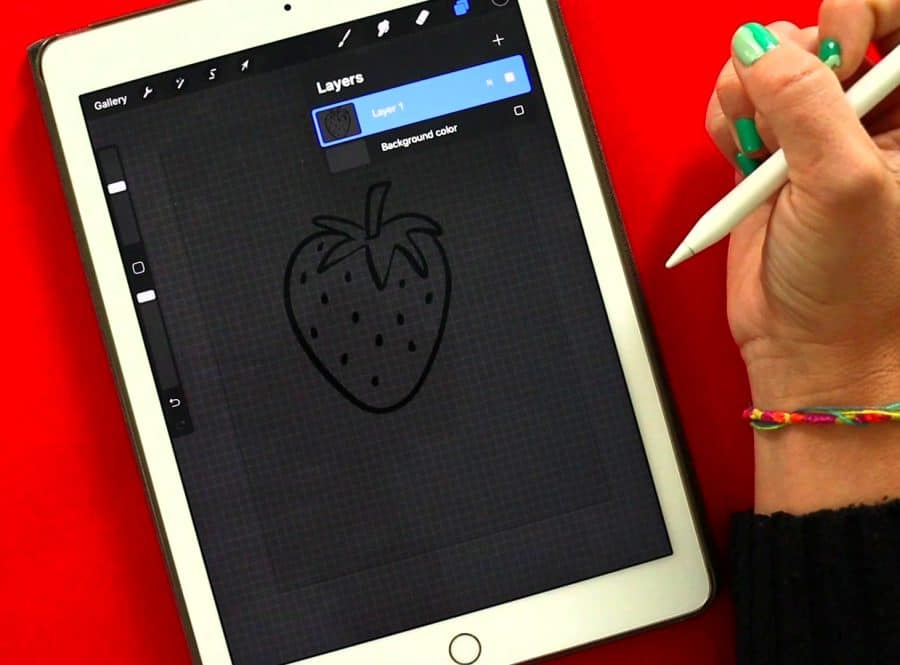
I like to create my cut files in the procreate app. I hand letter and draw the majority of my cut files and I just LOVE the bells and whistles the procreate app has! (You can read all about it how I design my cut files)
There are lots of different ways to design cut files though! CANVA, Picmonkey, Hand drawn and take a picture, adobe illustrator, etc. I’m sure there are tons of drawing/designing softwares out there! Most desiging options give you the option to save the image you created as a JPEG and PNG. I make sure that when I save my PNG, I’m saving it without the background. (A very easy process in the procreate app)
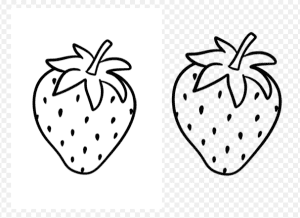
On the left is JPEG and right is PNG.
I also design in black and white to make sure the svg process is nice and clear!
Once I have my JPEG and PNG, I send them to my computer and it’s time to turn it in an SVG (and DXF!)
How to create an SVG
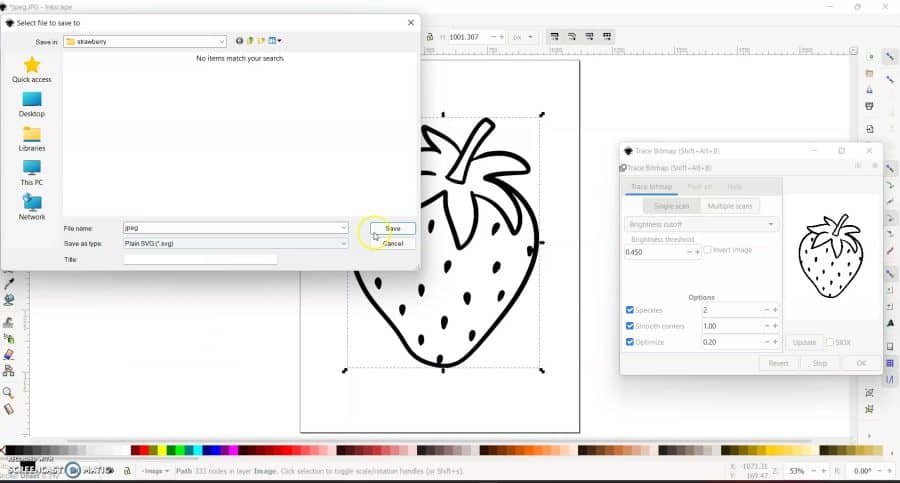
The software you need is called INKSCAPE! It’s a FREE app, but you need to download it on your computer!
This is actually a great designing software if you want! I haven’t done anything with it but I know a few people who love it!
How to turn your image into an SVG
- Upload image (either jpeg or png) into inkscape
- Across top, click Path and then in the drop down menu pick trace bitmap. A window will pop up.
- Making sure your image is selected, click Ok in the window.
- A new outline box will from around the image. This the svg. Delete the original image. (pull it off the side to seperate so you can tell them apart)
- Go to File and drop down to Save As. In the dropdown file format you are going to select plain SVG. and click Save.
- Go to File and drop down to Save As. In the dropdown file format, select DXF 14. Another pop up window will appear. Click Ok.
Now you have SVGS and DXFS to add to your JPEG and PNG!
How to upload your cut files
If you are just creating these for your personal use, You can just create a folder and save them. If you are creating these cut files to sale in your shop, there are two ways to do this!
Upload the cut files directly
Etsy gives you 5 files to upload. I would individually upload JPEG, PNG, SVG and DXF.

BUT. (It’s a big butt!) I have a few cut file bundles or layered cut files that come with more than 5 files. I zip them up so it’s easier to send. Zipped (compressed) files take up less storage space and can be sent to by email more quickly than uncompressed files. It’s a very easy process! (this is in the youtube video!)
How to download your cut files into a zip file
- Open google drive
- Create new Folder
- Name the folder the name of your cut file
- Open up folder
- click new and add files.
- Upload your cut files
- Once uploaded, by the name is a little arrow. Press it and in the drop down menu press download.
Google drive will compress (zip) your files and download them to your computer! From there you can email them, add them in your downloads in your shop etc!
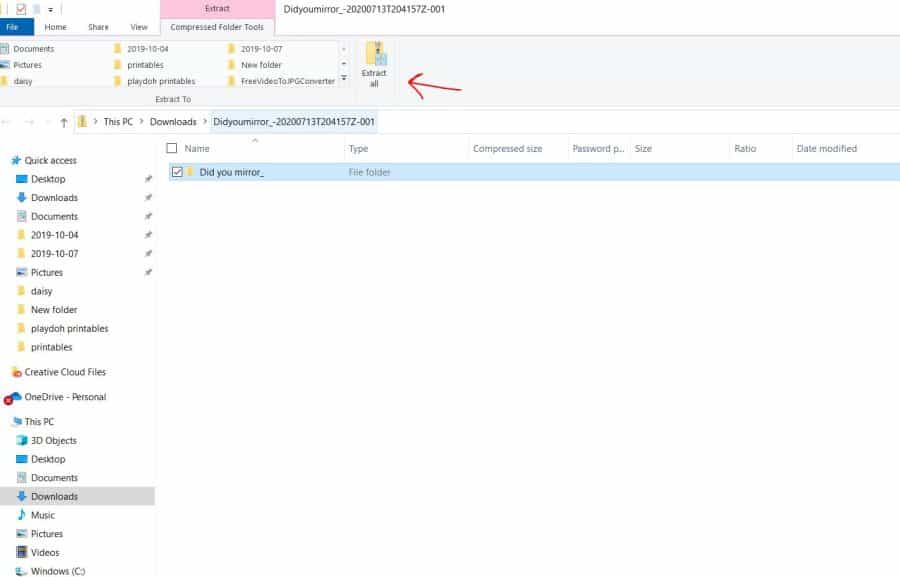
Some people do have problems unzipping folders sometimes- It’s not hard but an extra step! Just click extract all.
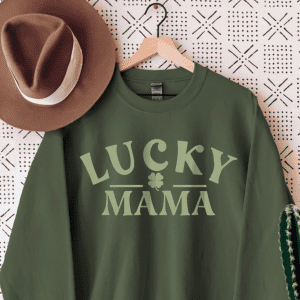
And that is the full tutorial! From Start to finish that is how I create my cut files and turn them into SVGS and add them to my shop! I have two posts coming. One is how to use mockups for your shop-Like this cute lucky mama shirt. Just a png cut file laid over an image I got on etsy! (I know! I’m such a faker!)
Then next video is going to be HOW TO TURN YOUR PHOTOS INTO SVGS! Lots of people want to create vinyl images from pictures. Pictures of loved ones, pictures of pets, picture of hand writing! I’m going to show you how! STAY TUNED!
Leave a Reply