
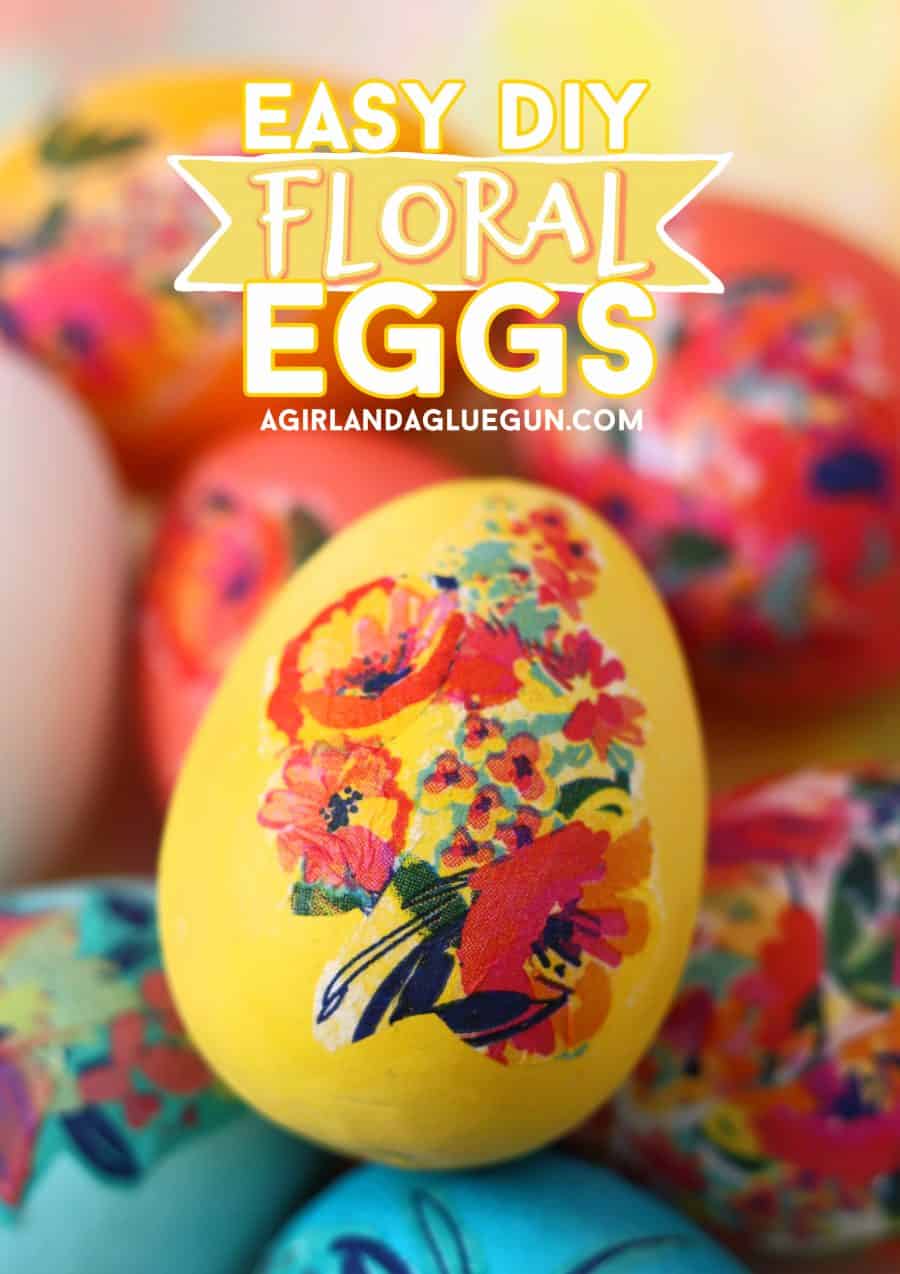
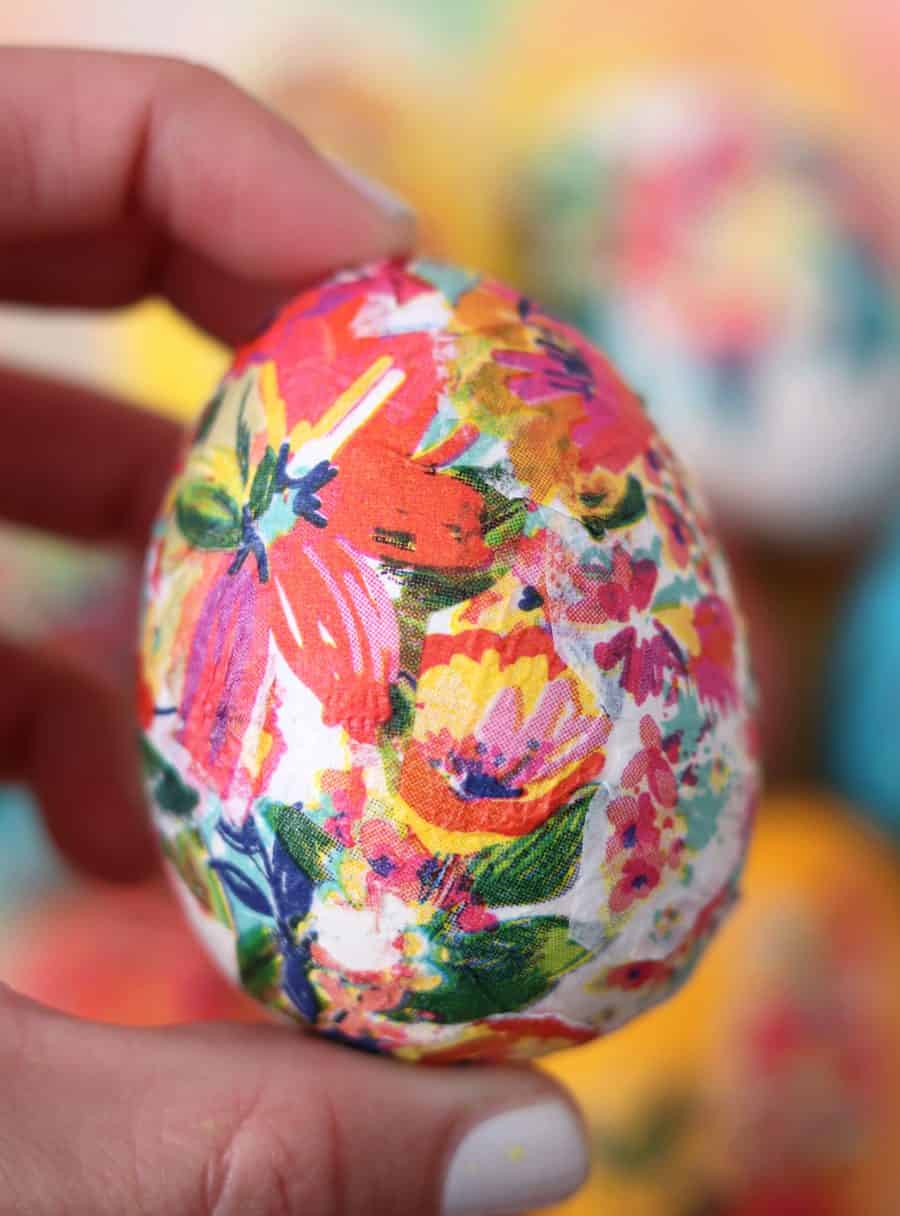
Learn how to make these gorgeous mod podge floral eggs! They look like they are hand painted but so much easier!
If you’re looking for a beautiful and easy Easter craft idea, learning how to Mod Podge a napkin onto an egg is a fun way to create stunning decorative eggs. This simple technique transforms ordinary eggs into gorgeous vintage-style Easter decorations using patterned paper napkins.
This craft is perfect for spring decorating, Easter centerpieces, or a creative afternoon project. With just a few supplies, you can create elegant eggs that look like they came straight from a boutique home décor store.
These look hand painted –but they are SO MUCH easier!
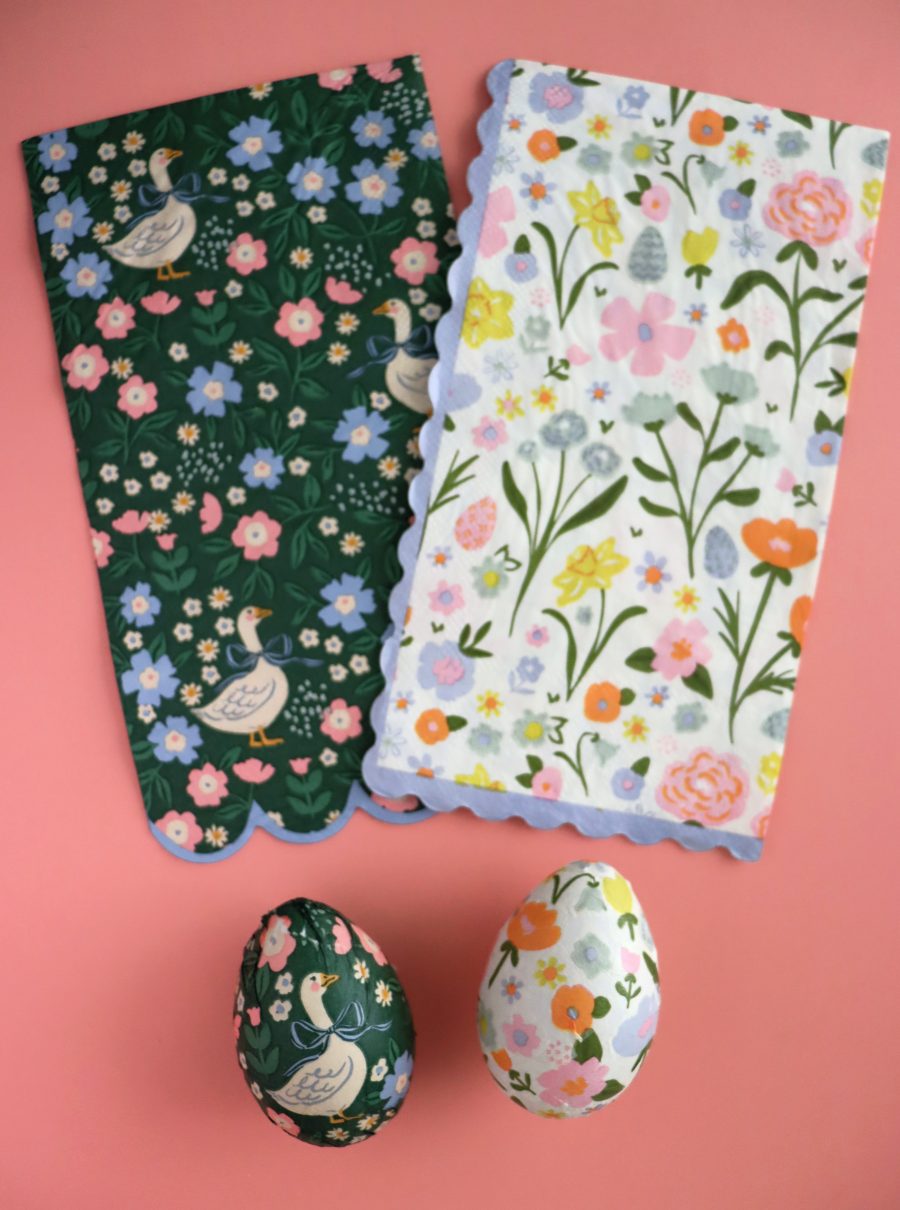
I made these in 2021- and then just got the cutest napkins from My Mind’s Eye so I had to recreate it! I mean look how adorable these are!

Why Try Napkin Decoupage Eggs?
Decorating eggs with napkins and Mod Podge is a popular craft because it’s both simple and impressive. The thin layers of decorative napkins blend beautifully onto the egg surface, creating a seamless design.
People love this craft because:
- It’s easy for beginners
- The eggs look professional and decorative
- You can use endless napkin patterns
- It’s perfect for Easter and spring home décor
Once finished, these eggs make beautiful additions to Easter baskets, centerpieces, or tiered tray displays.
What you need to make Mod Podge Floral Eggs
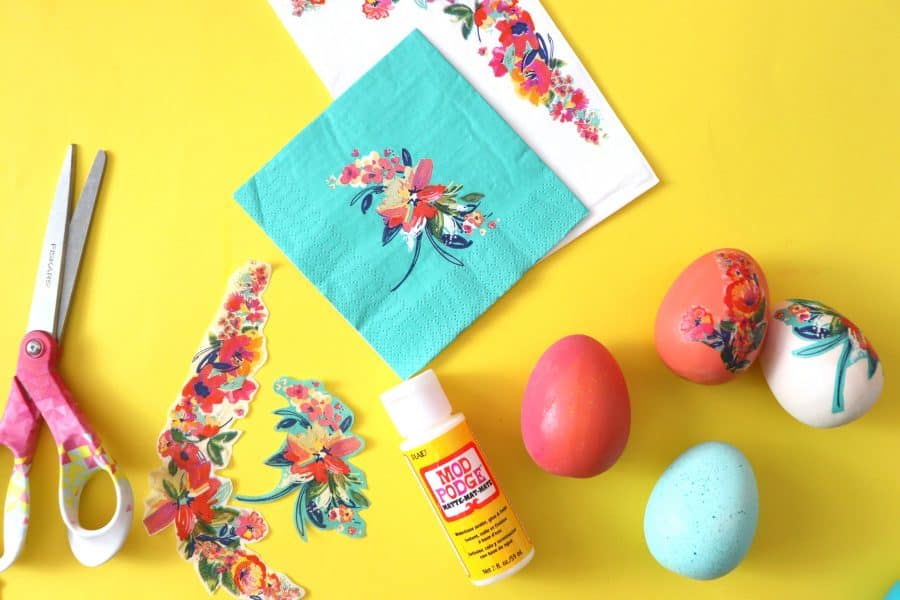
- floral napkins (I got mine from Oriental trading)
- mod podge (I used matte)
- scissors
- eggs (fake ones are available at walmart for cheap!)
- paint (optional)
- paint brush
How to create floral Eggs
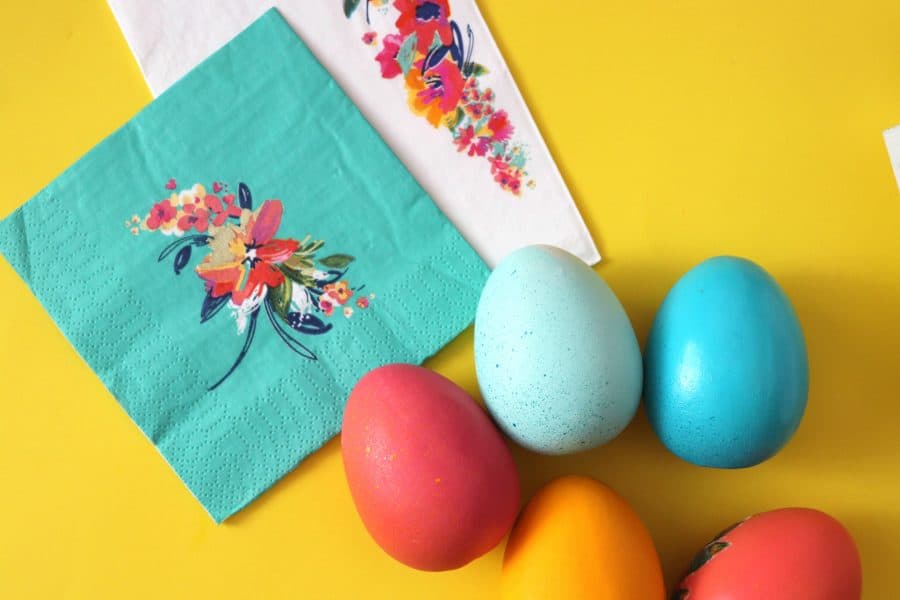
I painted the eggs beforehand because I wanted them to be bright and fun- but the floral napkins would so great on white ones as well!
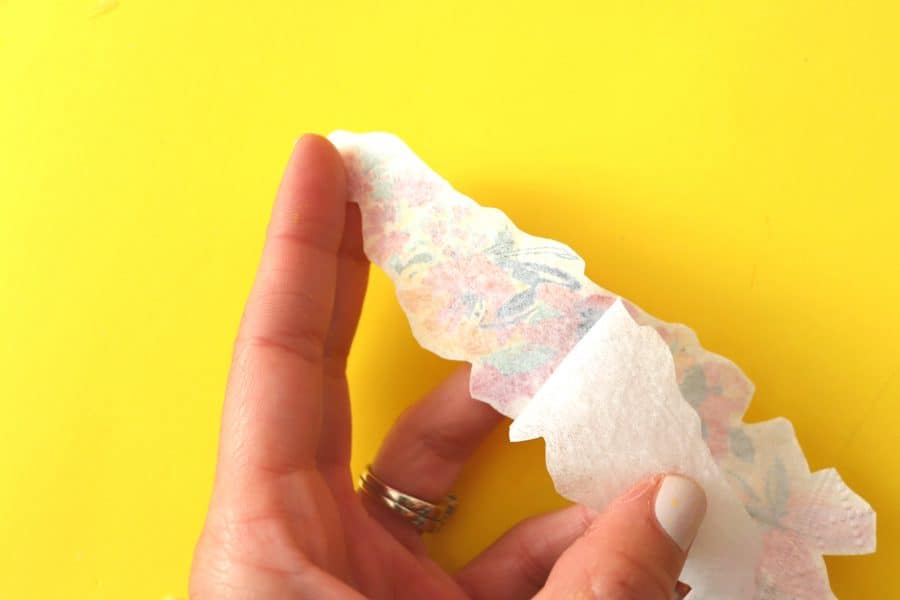
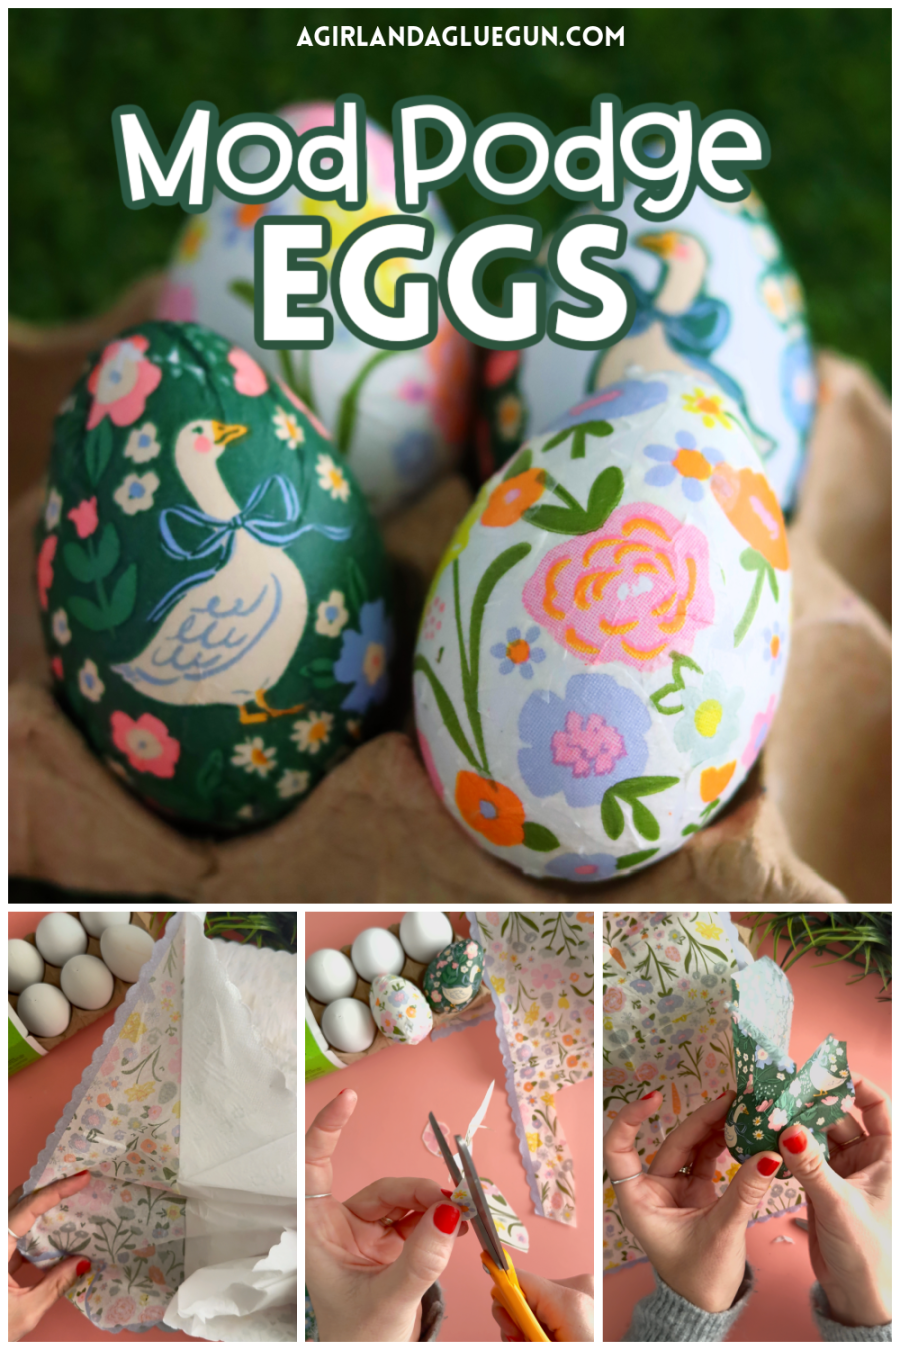
1. Prepare the Napkin
Most decorative napkins have multiple layers. Gently separate the top printed layer from the white backing layers. You’ll only use the thin printed layer.
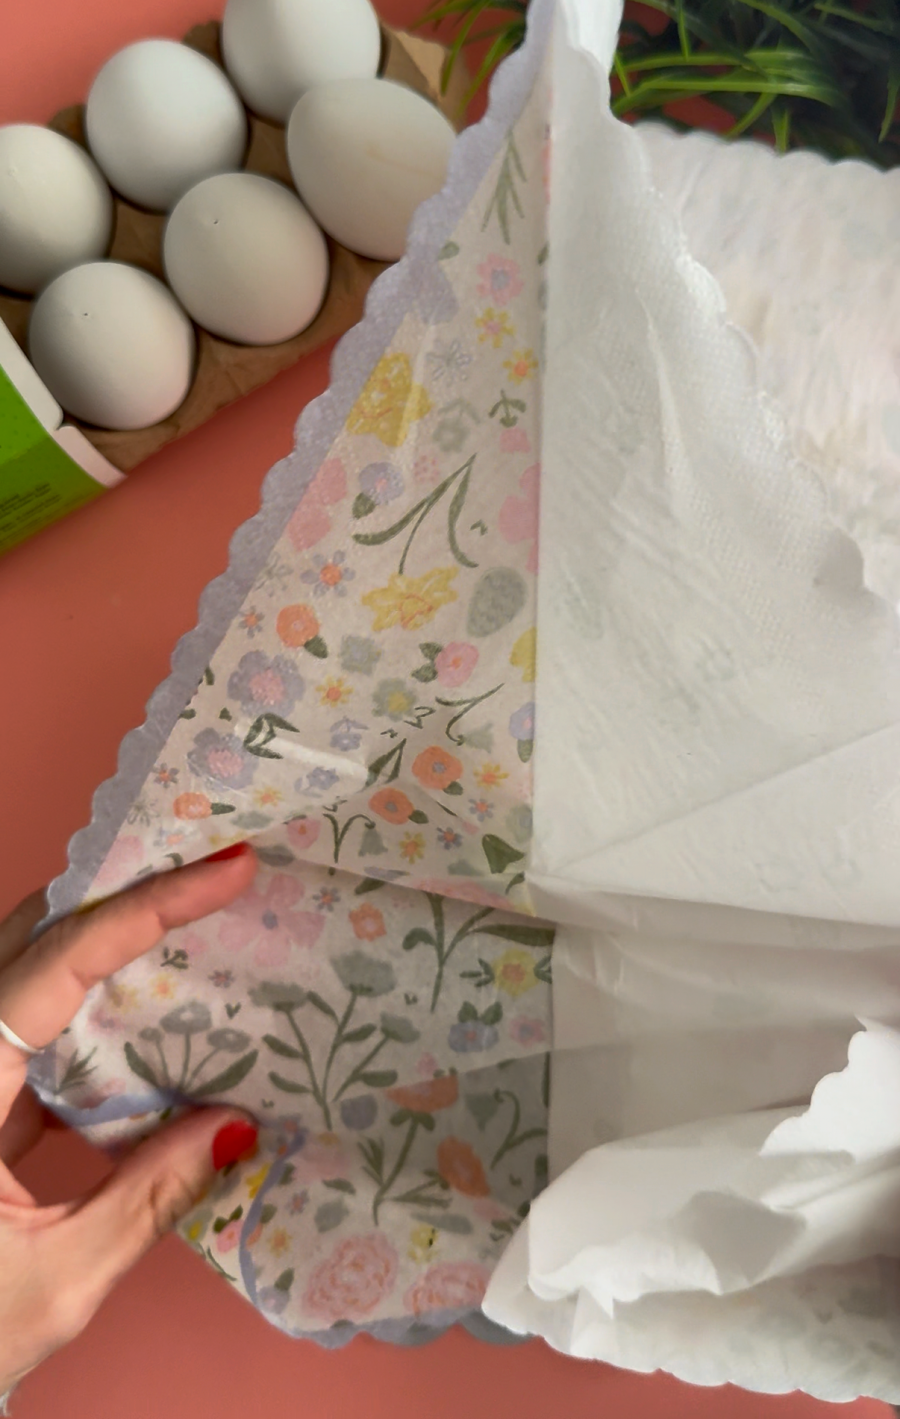
The napkin has multiple layers. I kept peeling apart each layers until I couldn’t peel anymore. As thin as possible!
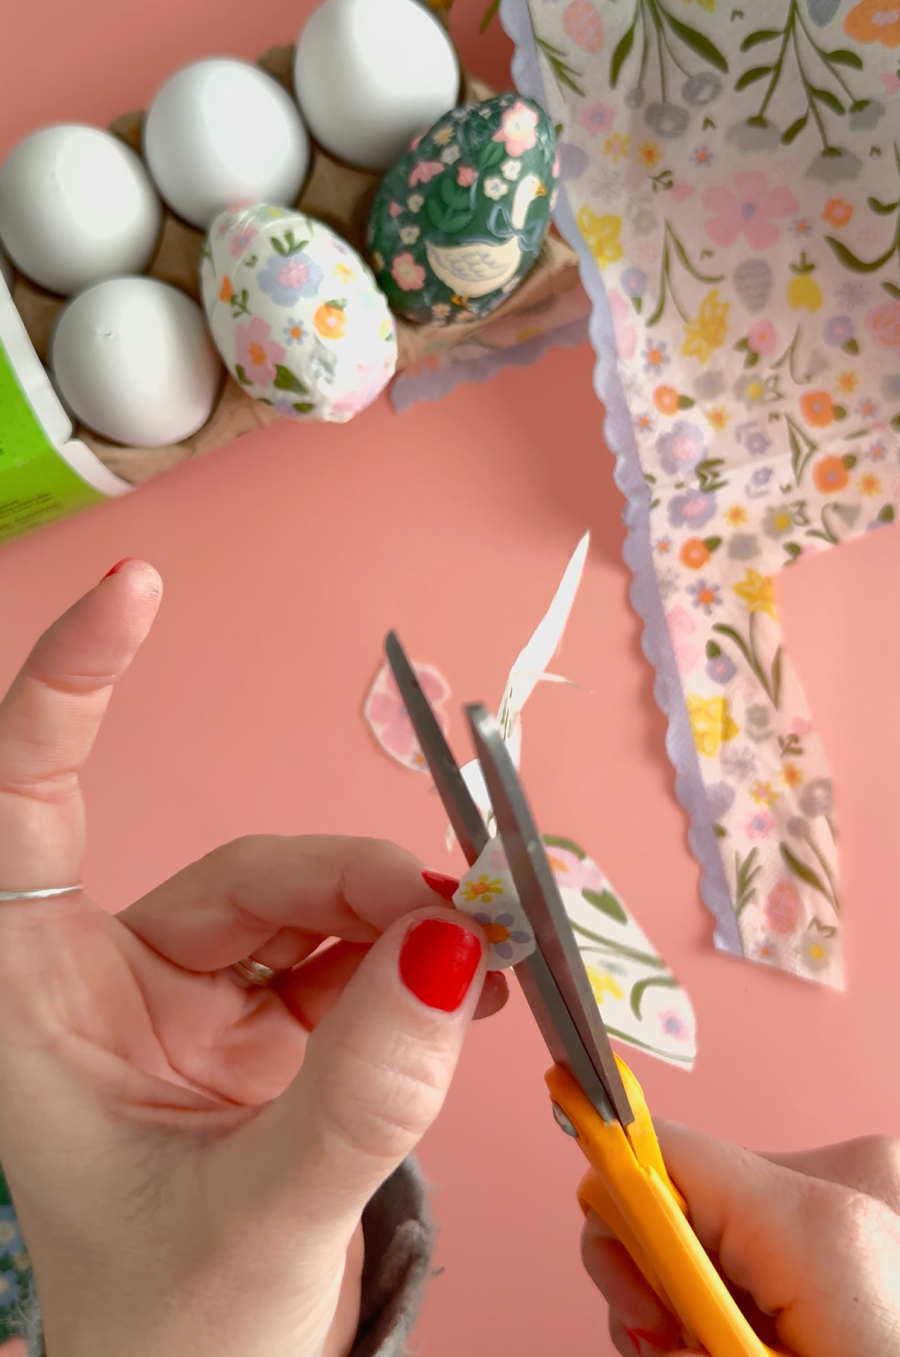
Cut or tear small pieces of the design you want to place on the egg.

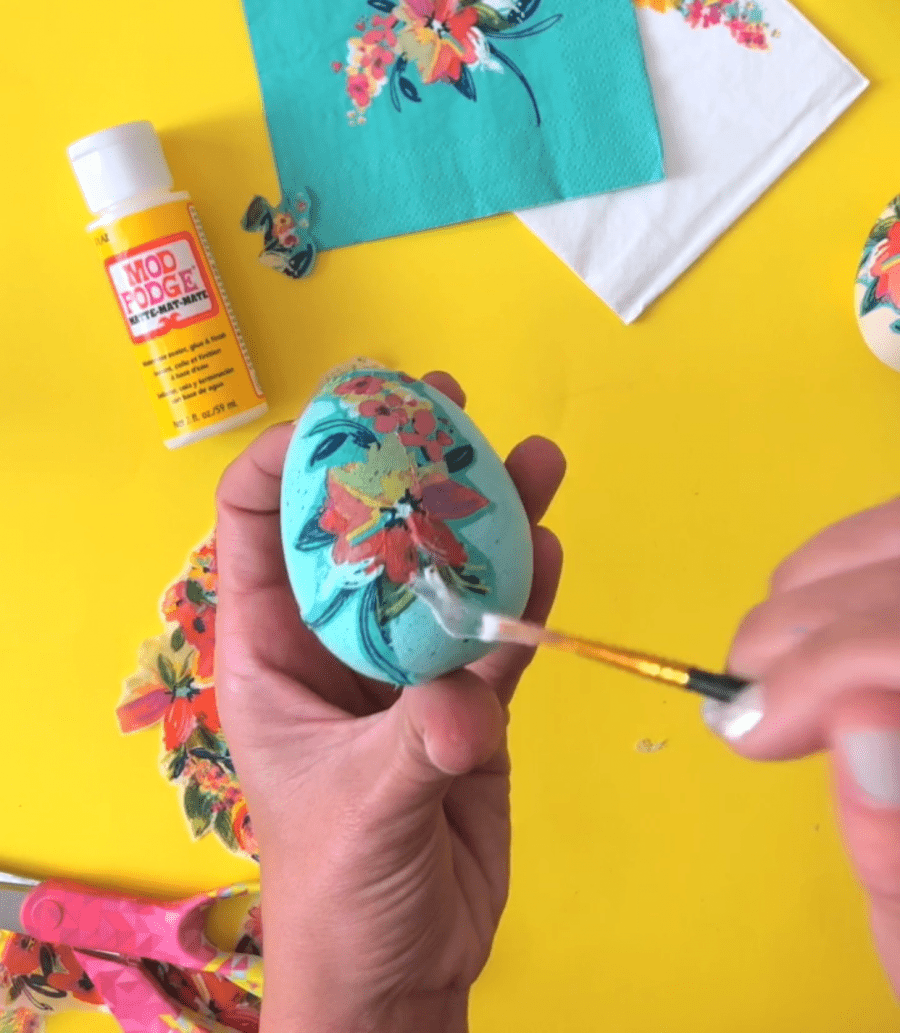
2. Apply a Layer of Mod Podge
Using a small paintbrush, apply a thin layer of Mod Podge onto a section of the egg.
Work in small sections so the glue doesn’t dry before you place the napkin.
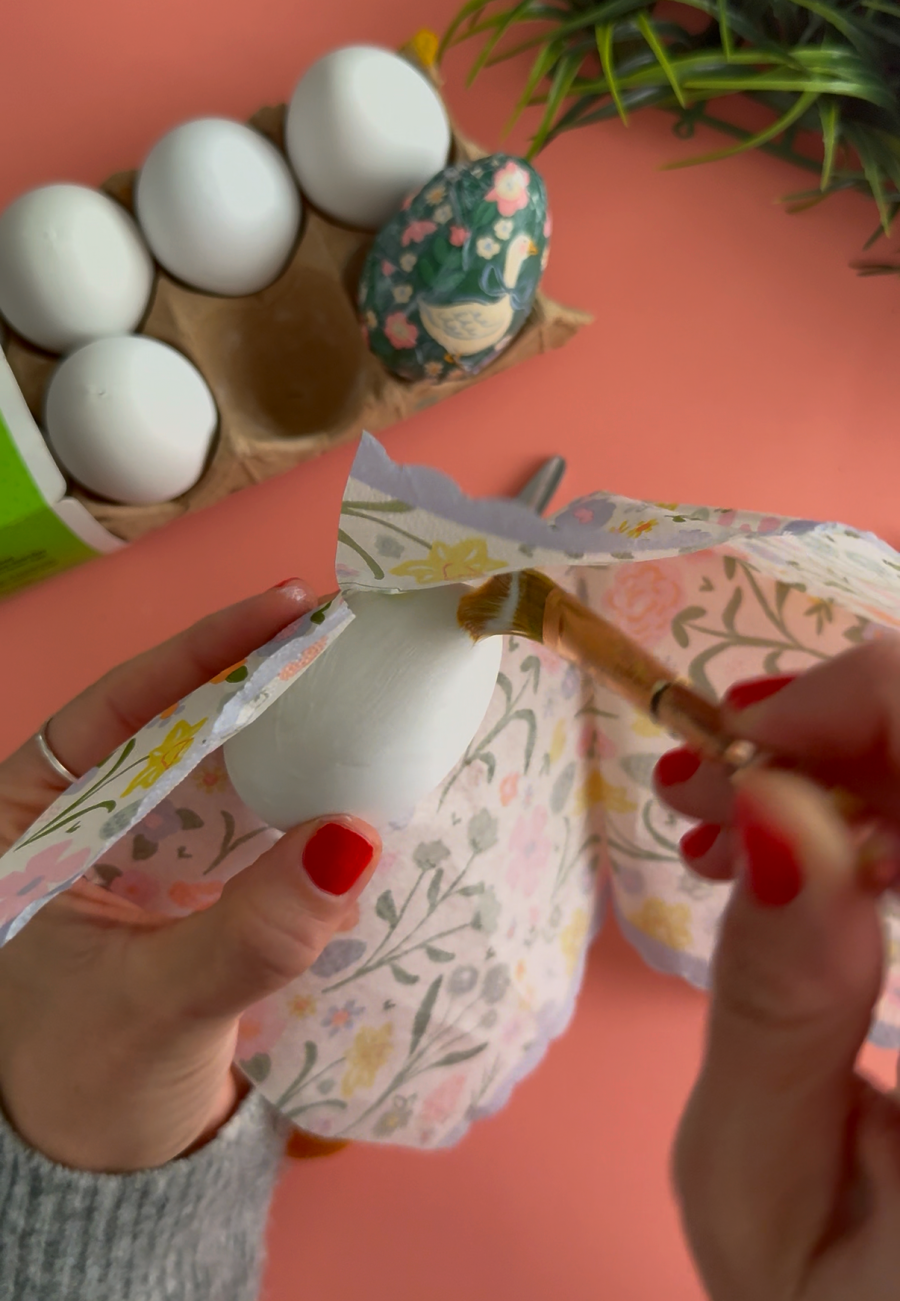
3. Place the Napkin onto the Egg
Carefully lay the napkin piece onto the egg where the Mod Podge was applied. Because napkins are delicate, use a light touch to avoid tearing.
You can smooth it gently with your fingers or the brush.

You can add florals on both sides or all over depending on the look you are going for!
4. Seal the Napkin with Mod Podge
Once the napkin piece is in place, lightly brush another thin layer of Mod Podge over the top.
This seals the napkin and helps it blend into the egg surface.
5. Continue Decorating the Egg
Repeat the process until the egg is covered with the napkin pattern or decorated to your liking.
You can:
- Cover the entire egg
- Add small floral pieces
- Create a collage-style design
6. Let the Egg Dry
Allow the egg to dry completely. This usually takes 30–60 minutes depending on how much Mod Podge was used.
Once dry, the napkin design will look smooth and beautifully blended onto the egg.
You can watch my tik tok to see just how easy it is!

Tips for the Best Decoupage Eggs
Use small napkin pieces
Smaller pieces help prevent wrinkles on the curved surface.
Apply thin layers of Mod Podge
Too much glue can cause the napkin to tear.
Choose soft patterns
Floral and watercolor napkins look especially pretty for Easter eggs.
Add a final seal coat
A final light coat of Mod Podge will protect the design.
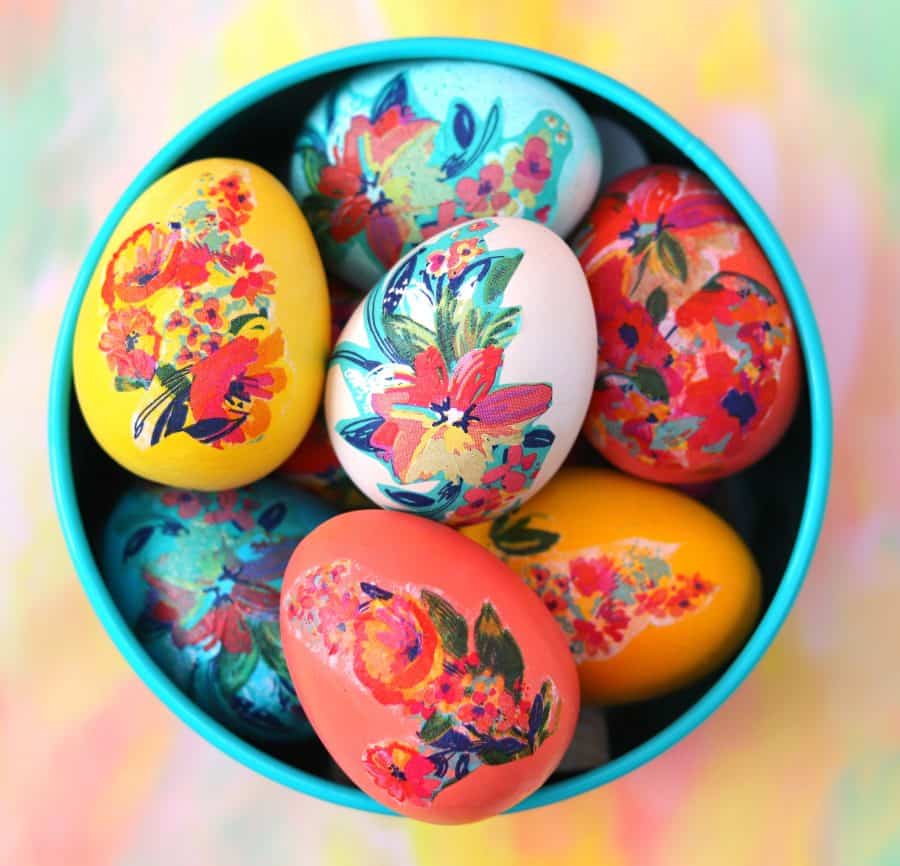
Creative Ways to Display Your Mod Podge Eggs
Once your eggs are finished, there are so many fun ways to display them.
Try:
- Filling an Easter basket
- Creating a spring centerpiece
- Decorating a tiered tray
- Adding them to a decorative bowl
These eggs can be reused year after year as part of your Easter decorations and will continue looking great year after year!
Save for later
Too busy to get crafting today? No problem! Pin this post to remind yourself about this project later! Sharing my projects helps me reach more people, allowing me to continue sharing free content!
A Beautiful and Simple Easter Craft
Learning how to Mod Podge a napkin onto an egg is an easy craft that creates stunning results. With just napkins, Mod Podge, and a little creativity, you can transform simple eggs into elegant pieces of Easter décor.
Whether you’re crafting alone, with friends, or with kids, this project is a fun way to celebrate the spring season and Easter creativity.
If you like this post- Check out my cute Easter Bunny wreath
Or the easiest Easter breakfast Ever (bonus points for being so cute!)
OR this Spring activity for kids to do (free printables!)
AND this fun Easter Egg Craft
Leave a Reply