
I ADORE this fun series from Capturing Joy with Kristen Duke
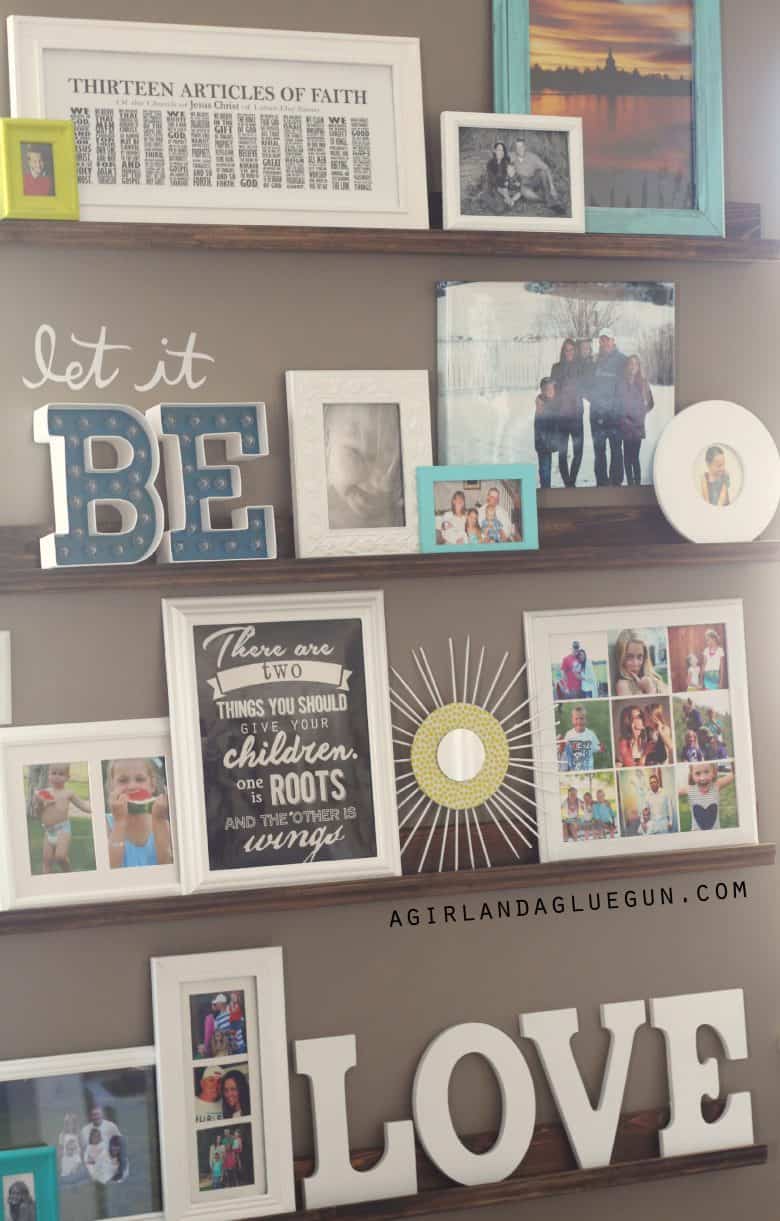
I pretty much only like to decorate my house with my family pictures. It just makes me so happy seeing their faces and remembering the stories behind each photo! I have a few gallery walls going on in my house…so I knew I didn’t want to do another one…but I love spaces where you can get a ton of photographs in one kabang! So I decided to whip up these fun photo ledges—perfect for those of you who are indesicive and want to rearrange a bunch of time! They are also great if you have so many random frames –you don’t have to be all matchy matchy! You can paint them all one color with spray paint–or print all black and white photos–so many fun ways to doll it up!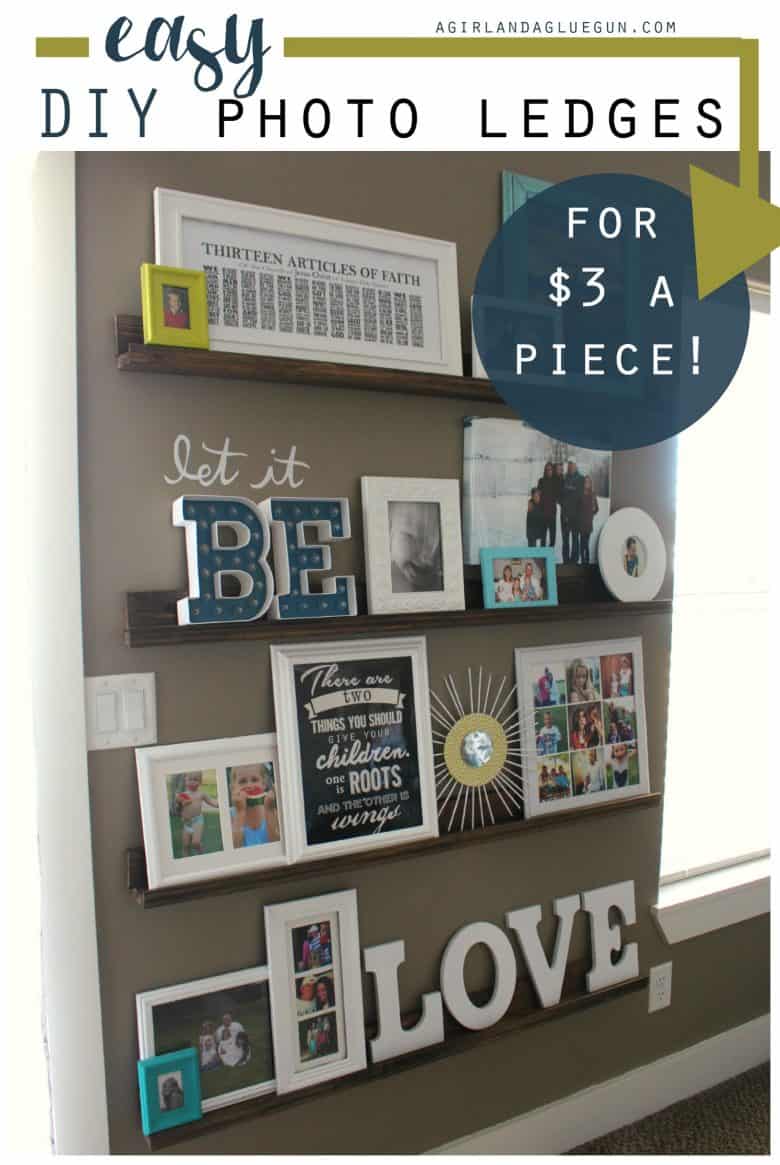
and here’s the best part! You can make each shelf for $3 each! So this whole display was $12!!! (seriously…I already had each frame!)

okay…let’s talk DIY!!! it’s REALLLLY easy! pinky promise. I bought 6 pieces of wood in total 4 of the big pieces (they were 6 feet long–2 1/2 inches by less than one inch wide and on the end caps of the lumber aisle at home depot. $2 a piece. Dig through and make sure they are as straight as you can find! and 2 pieces of the smaller size it’s only 1 1/2 wide…and they are about $1.15 a piece. I actually cheated and found myself in the molding aisle–I only needed 2 pieces for 4 shelves and at $4 a piece I couldn’t pass up a a fun decorative edge. If you stick with straight you can get this realllly cheap.
You will also need a hammer, nails, wood glue, and paint or stain…all stuff I had on hand.
I have a scroll saw at home…so I cut my own. But if you know you measurements before you buy home depot will cut them for you for free!)
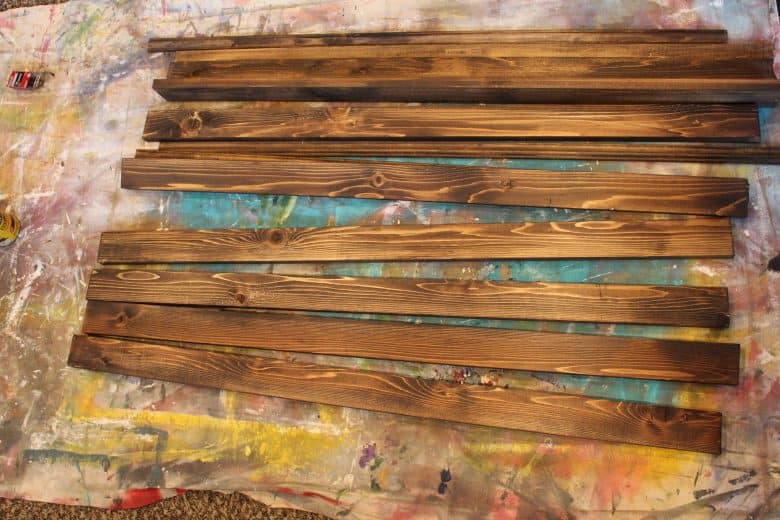
Each 6 foot piece was cut in half (one for the back of the shelf and one for the bottom) and then the molding was cut to size (you just need one per shelf…for the front!
and stain…(or paint..or distress) I still on the fence about going back and painting these shelves white. My kitchen table is wood…and my mantel on my fireplace is wood…so I felt like it needed some natural unpainted wood to tie it in.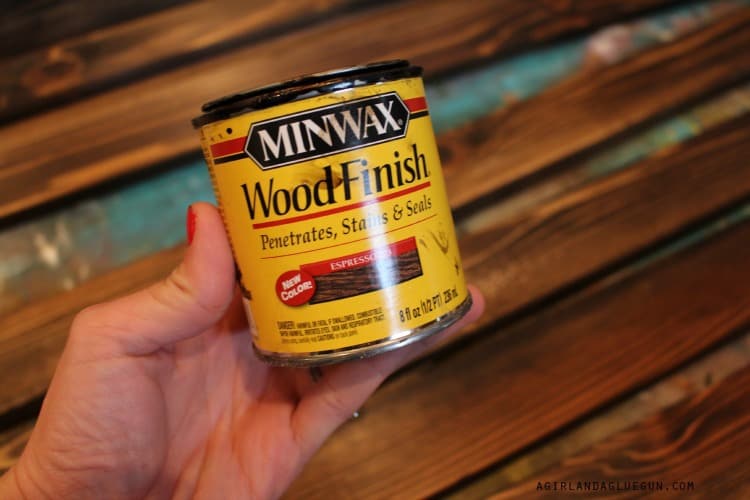 and assemble. I used wood glue…then I had a nail gun (cause i’m pretty cool….not really) but a hammer and nail does the same-plus you get a workout and get to skip the gym!
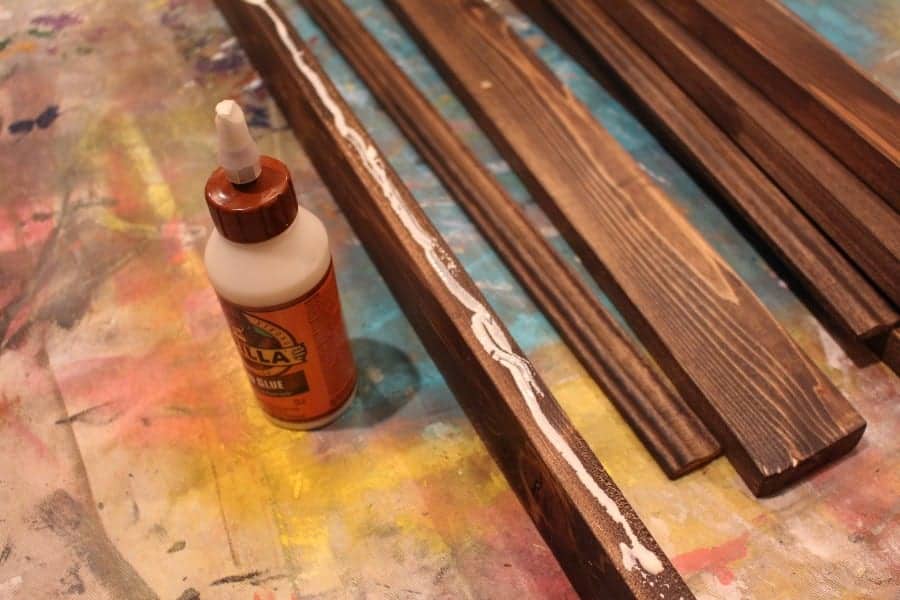
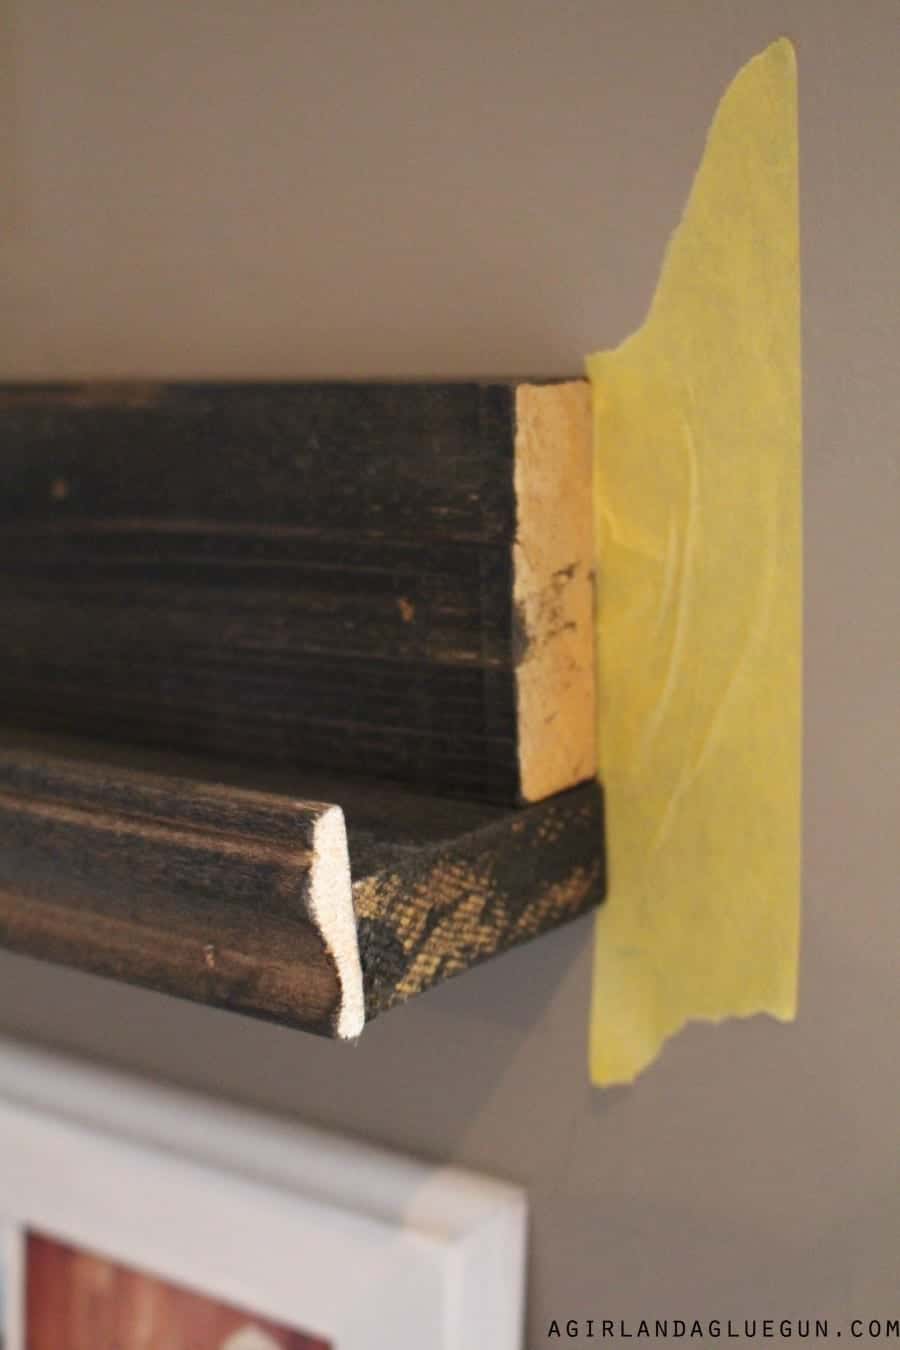
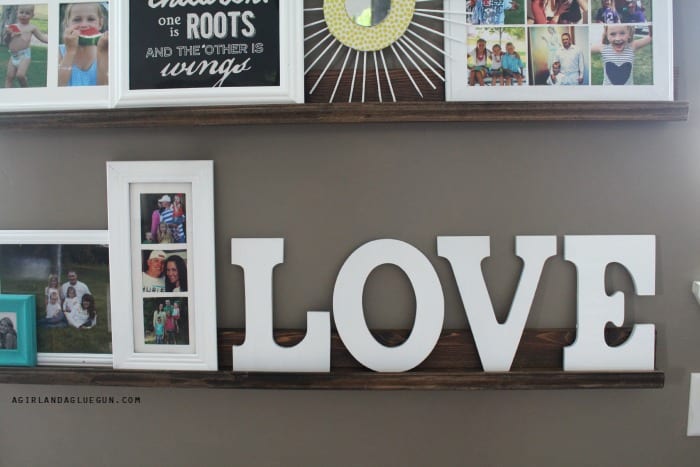
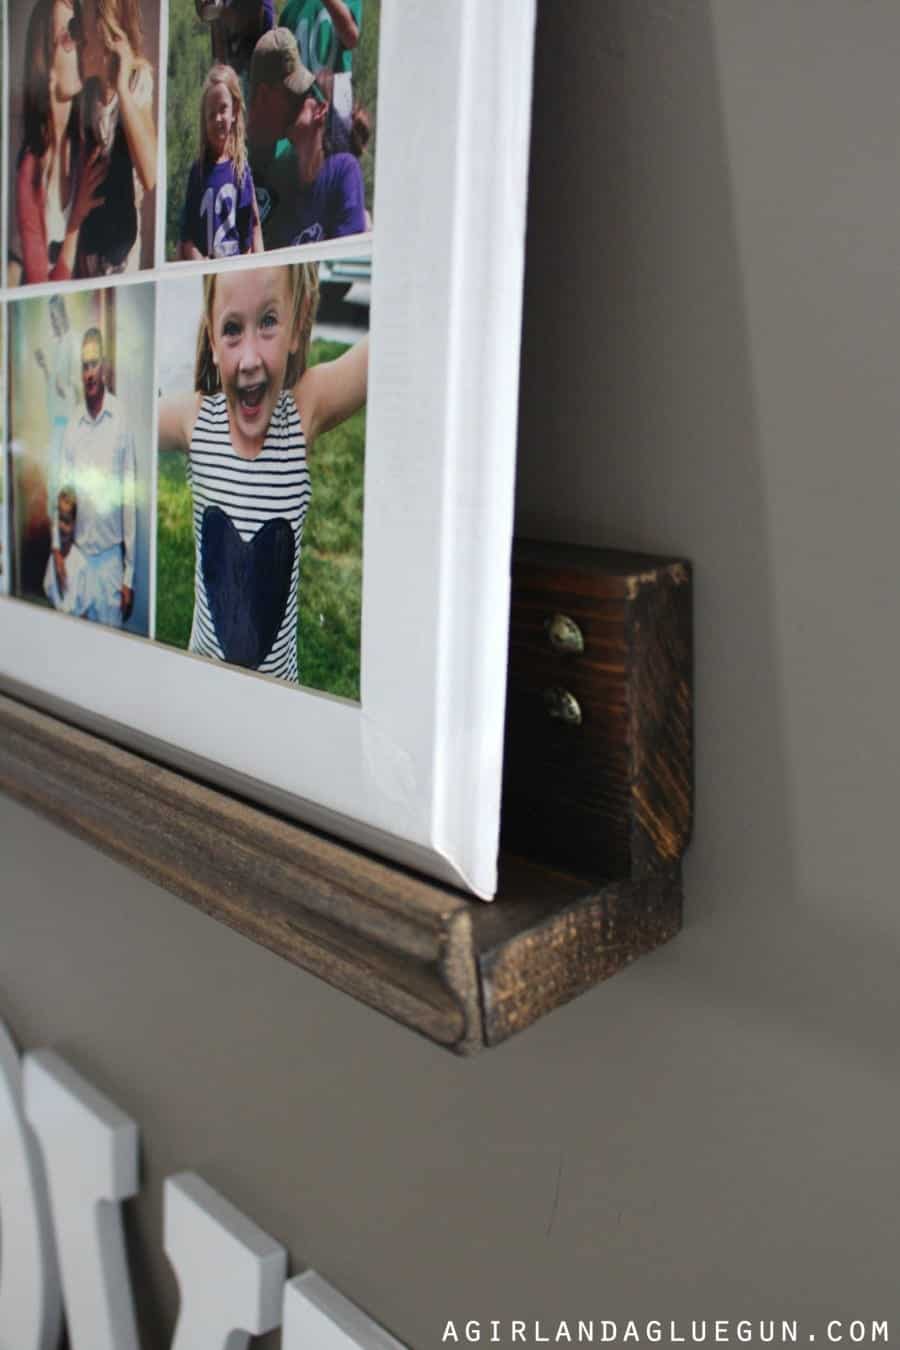
 okay..here’s what the shelf looks like…the molding (or front piece) is flush with the bottom and has a lip to prevent the frames from sliding off the shelf. The back is taller than the front pieces (which is mostly hidden by the frames) but that is what you nail into the wall so you need to be able to hammer and shoot nails in without the front piece getting in the way….
 Measure out where the studs are in your wall (insert weird joke about husband being a stud) and measure out how far you want the shelves spaced apart (word to the wise, find your biggest frame and go from there) I actually had a big clock I wanted to stick on the top shelf…but after it was all said and done it was a little too close to the ceiling for my liking. I contemplated taking all the shelves down and moving everything down about 6 inches…but then I remember it was me and i’m lazy.
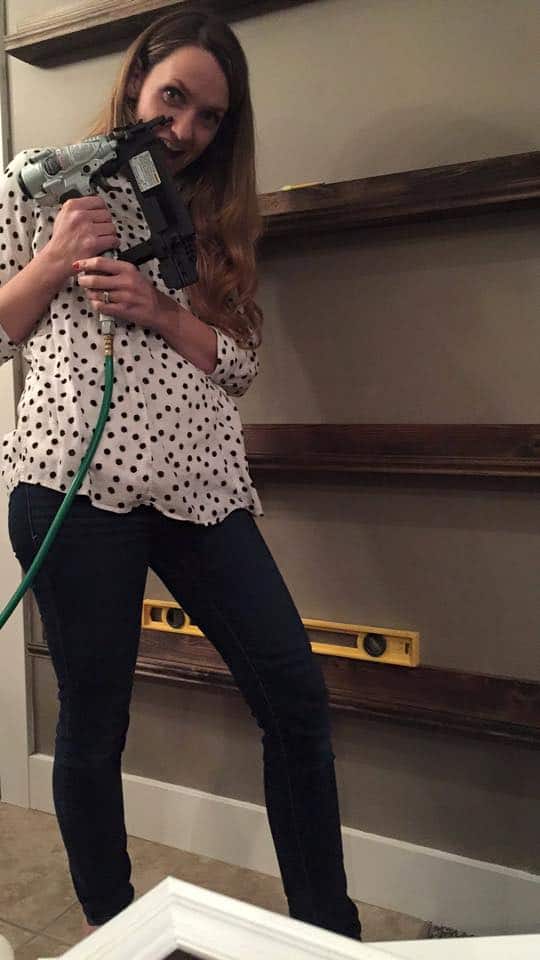
also. use a level. These shelves are pretty noticeable when not even!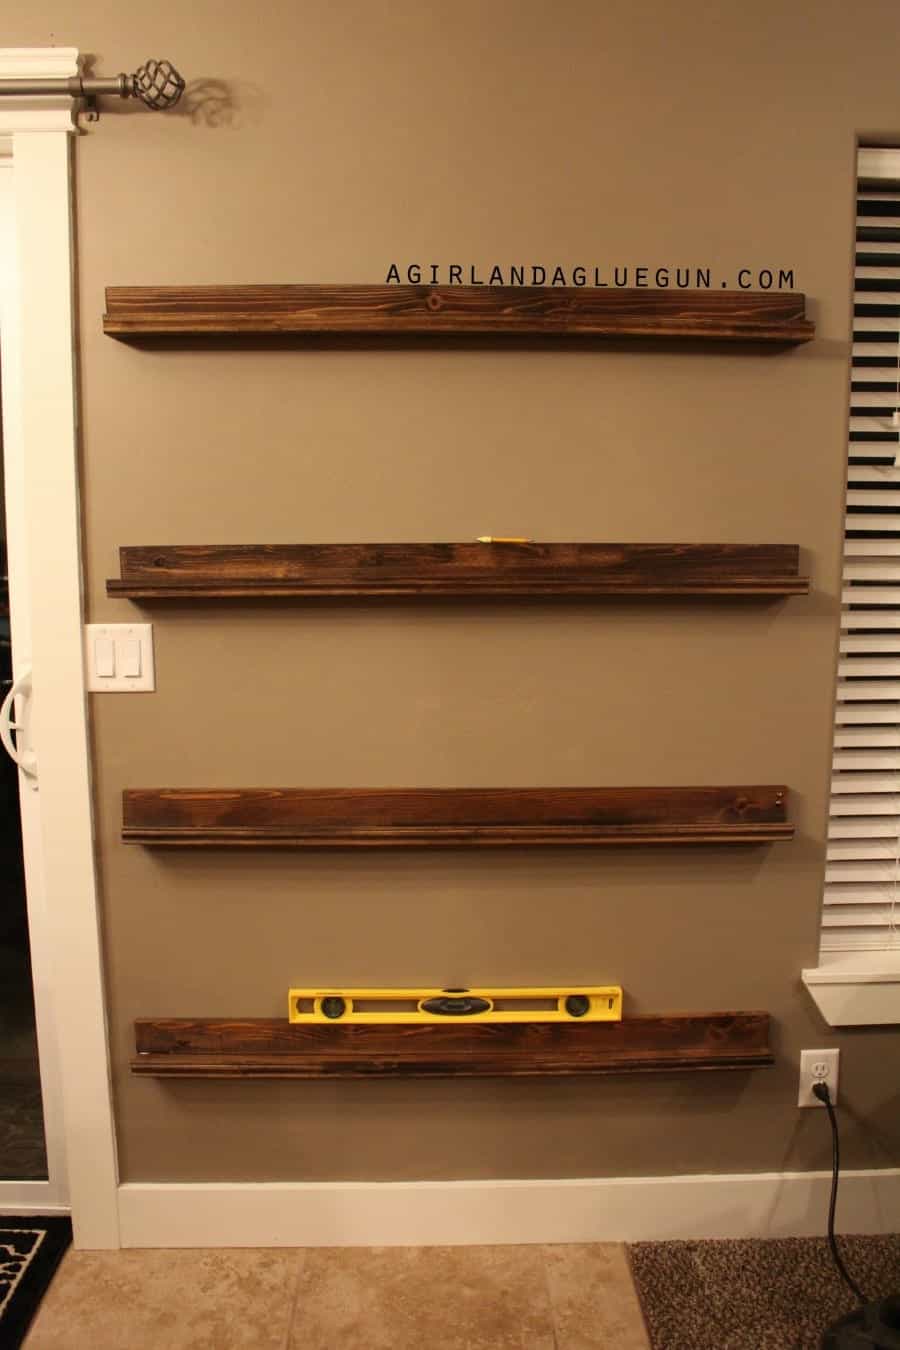
You guys ready for the hardest part????
styling it! I have rearranged about 50 times. put some on the floor…moved all around. added plants. moved plants. added a star…hated the star.

and in all reality…I’m still playing around. Ever since I have taken these photos I have still swapped things out. I kept in some pops of colors–cause color is my favorite. But who knows what will change in down the road.
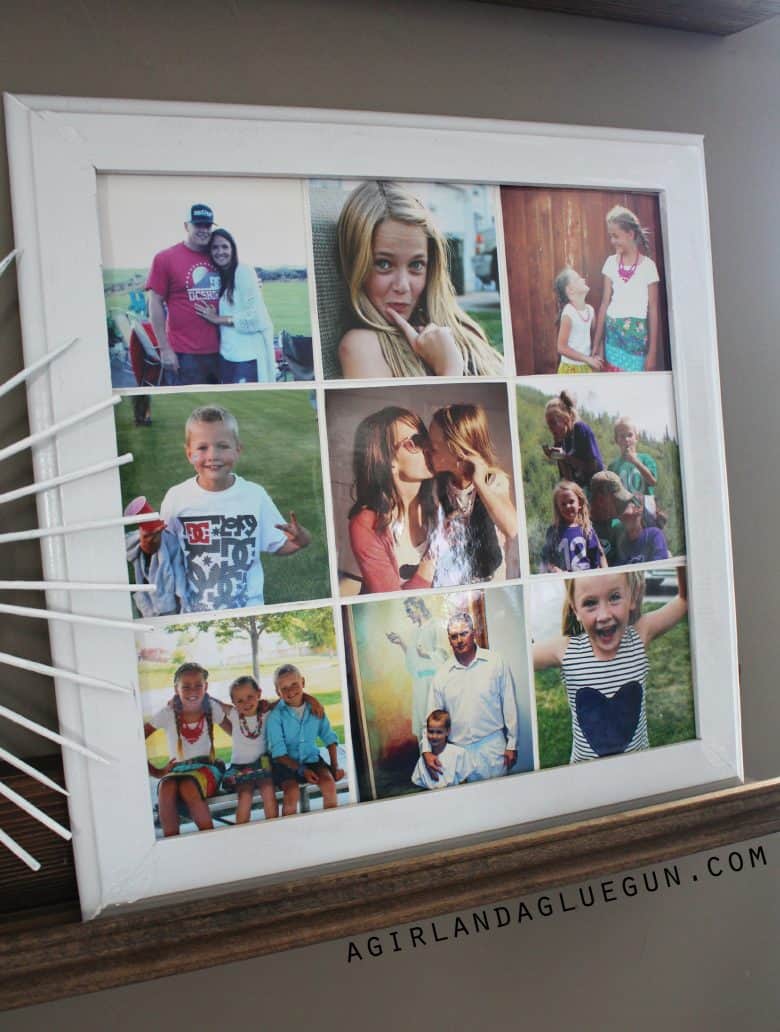
I did put up a fun instagram frame…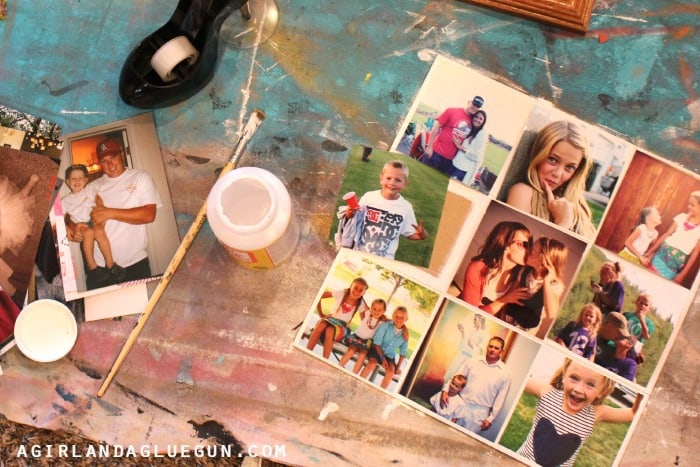
 I love it because I get to showcase my favorite pictures…and they are easy to swap in and out!
for more about these fun marquee letters go HERE
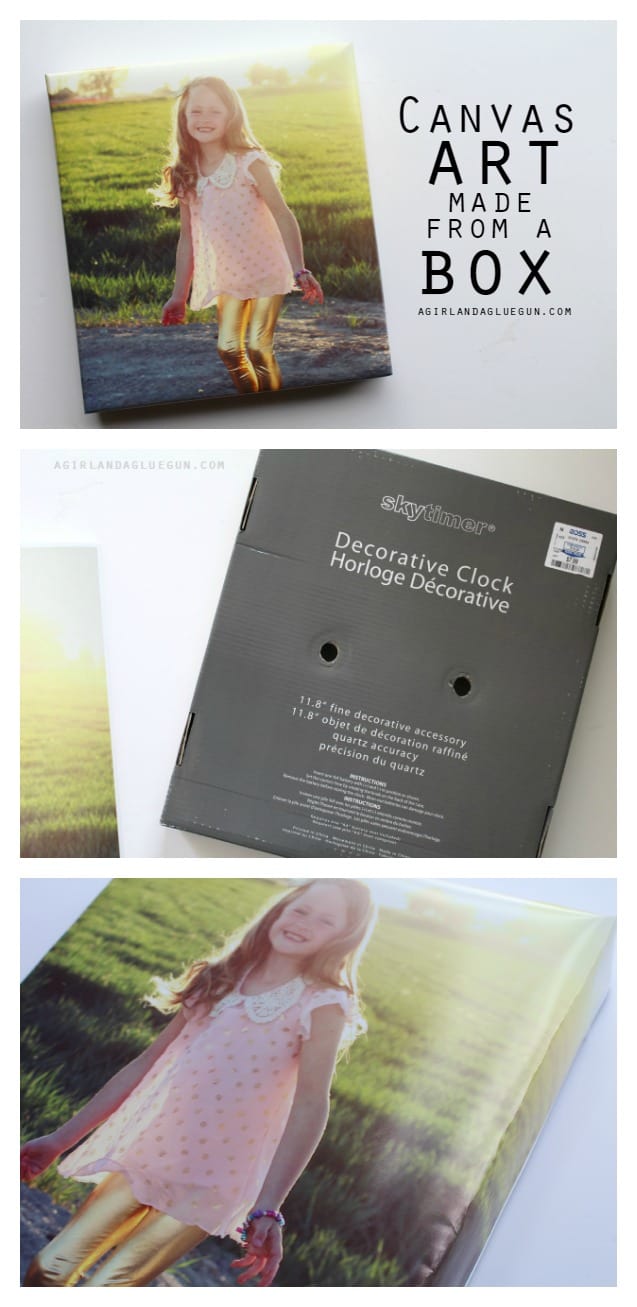
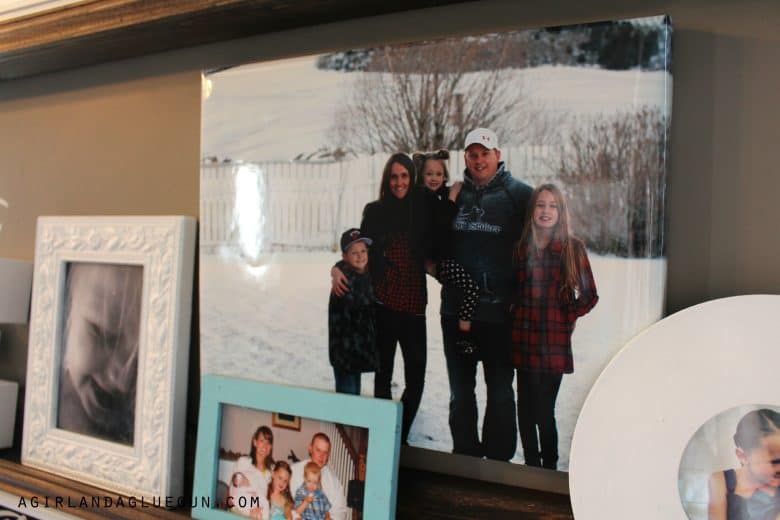
I made my own canvas in a pinch by ordering a large photo from Costco and wrapping it around a shoe box lid and hot gluing.

you can head here to see how: https://www.agirlandagluegun.com/2015/05/make-a-canvas-picture-from-a-box.html
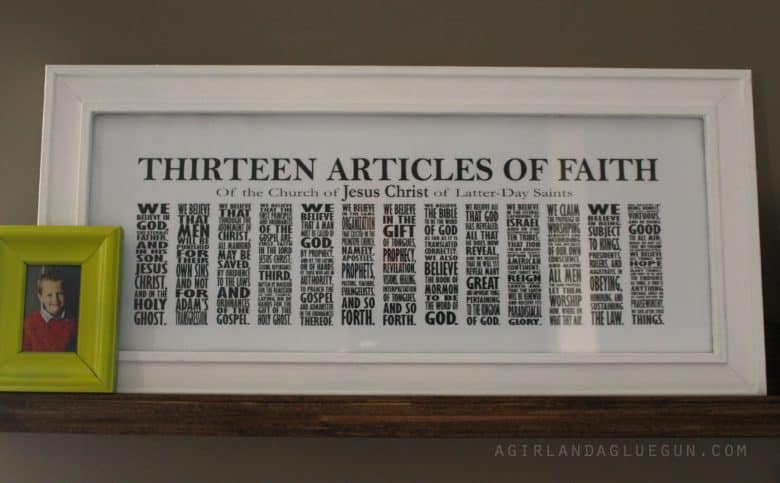 13 article of faith is from HERE
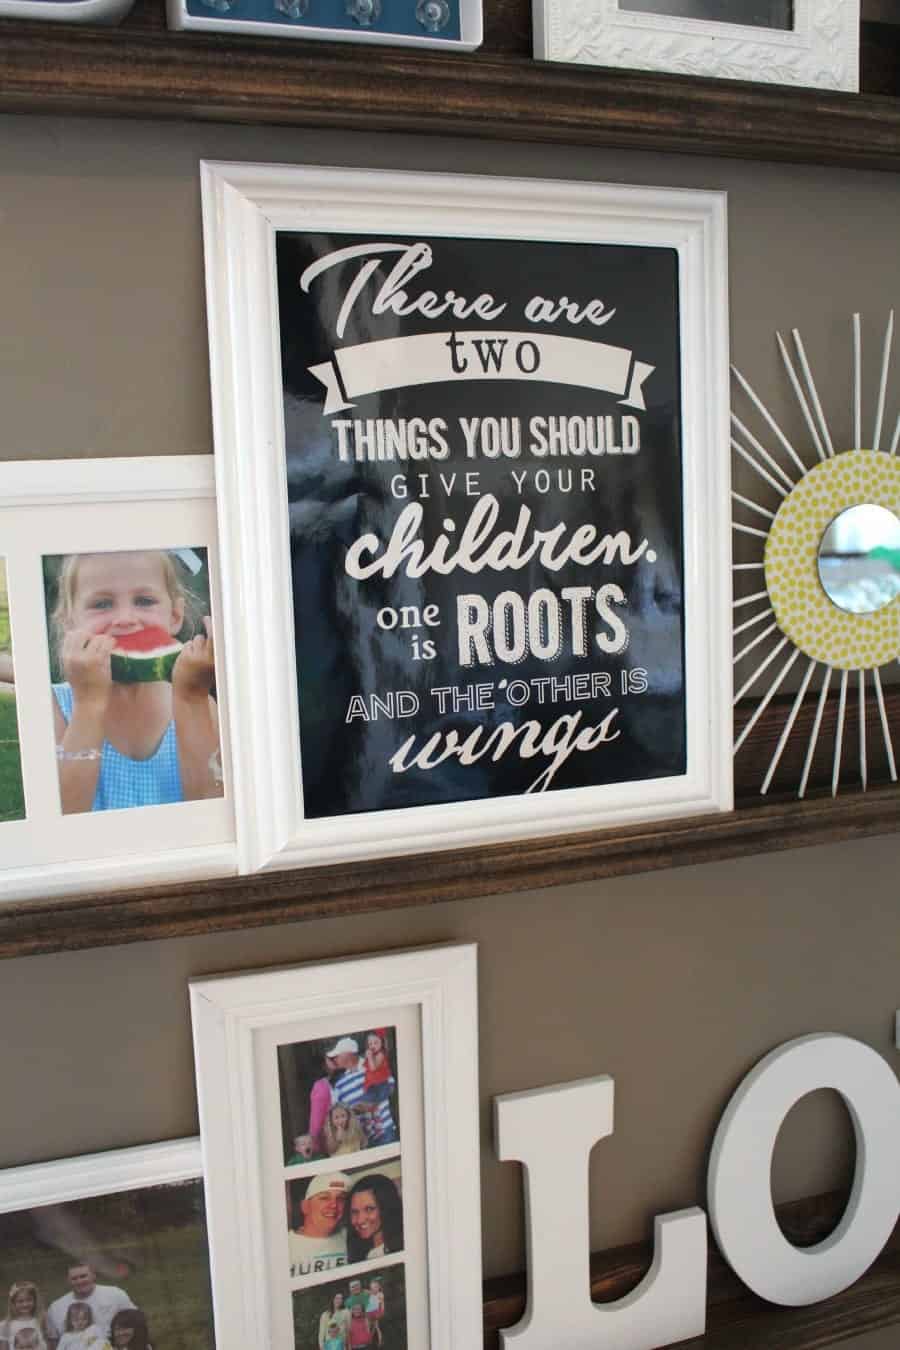
for this printable you can go HERE
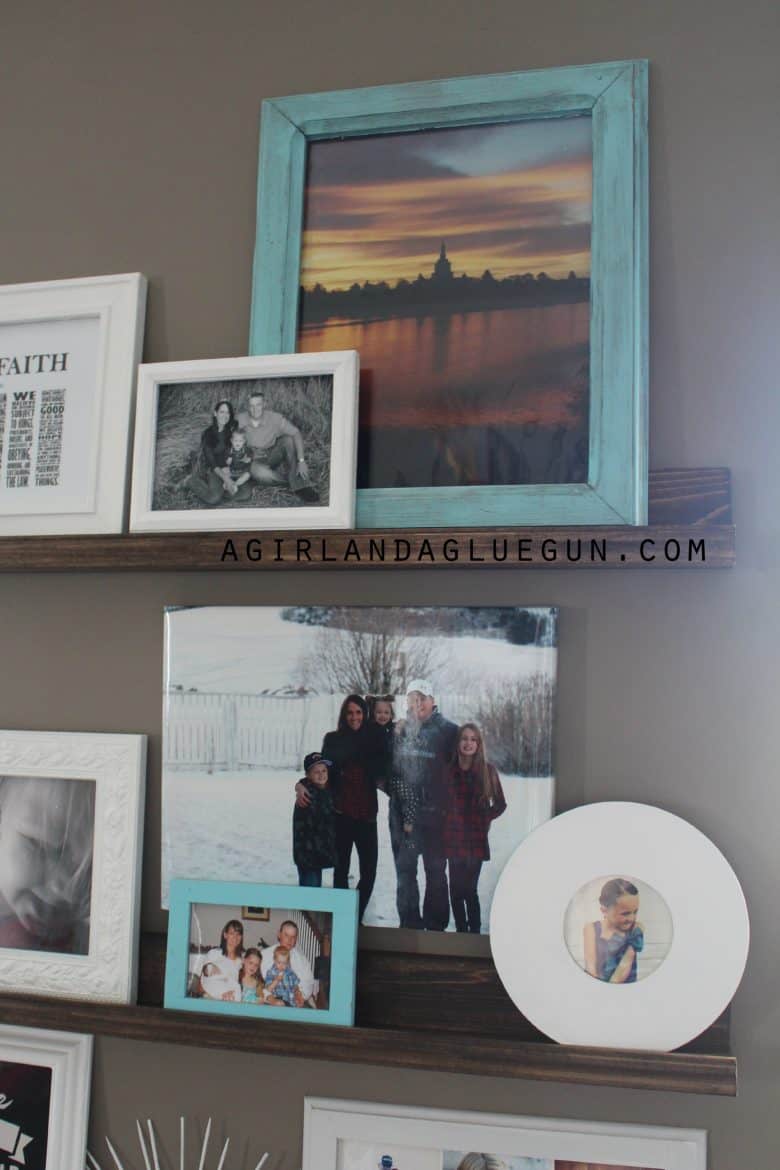
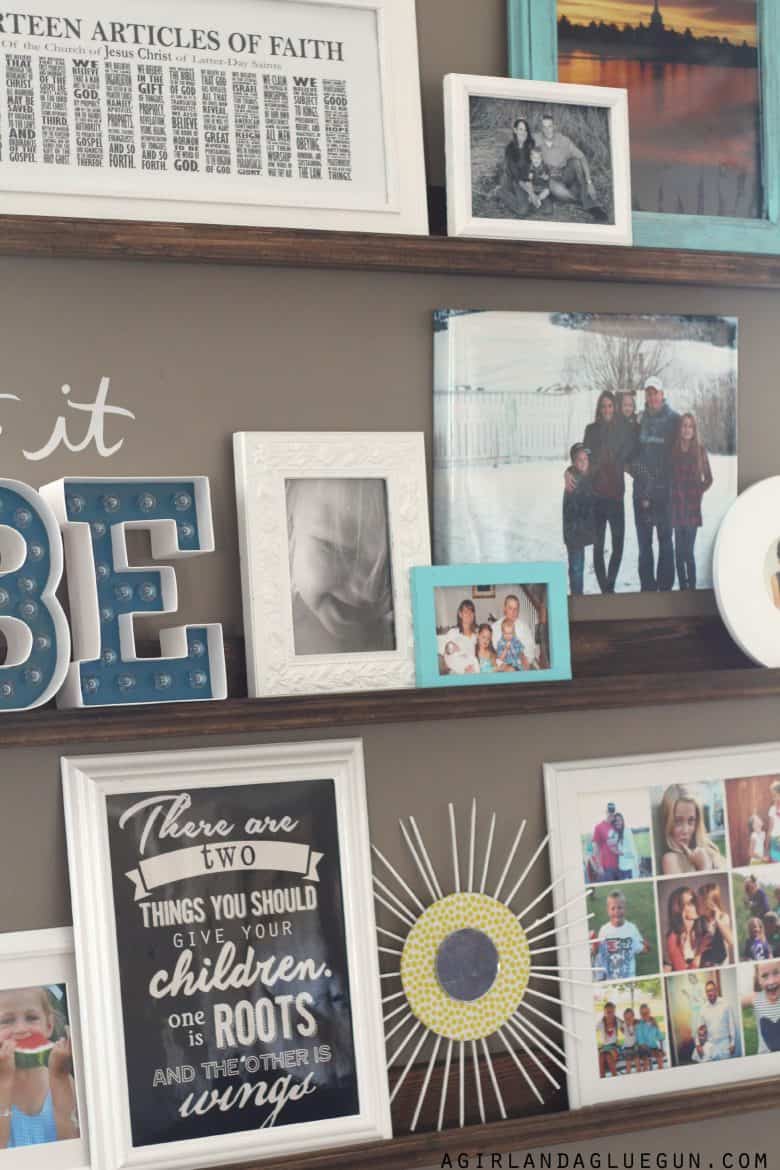 when you walk into my living room the fire place is straight ahead…this is to the left of it…right between the living room and dining room
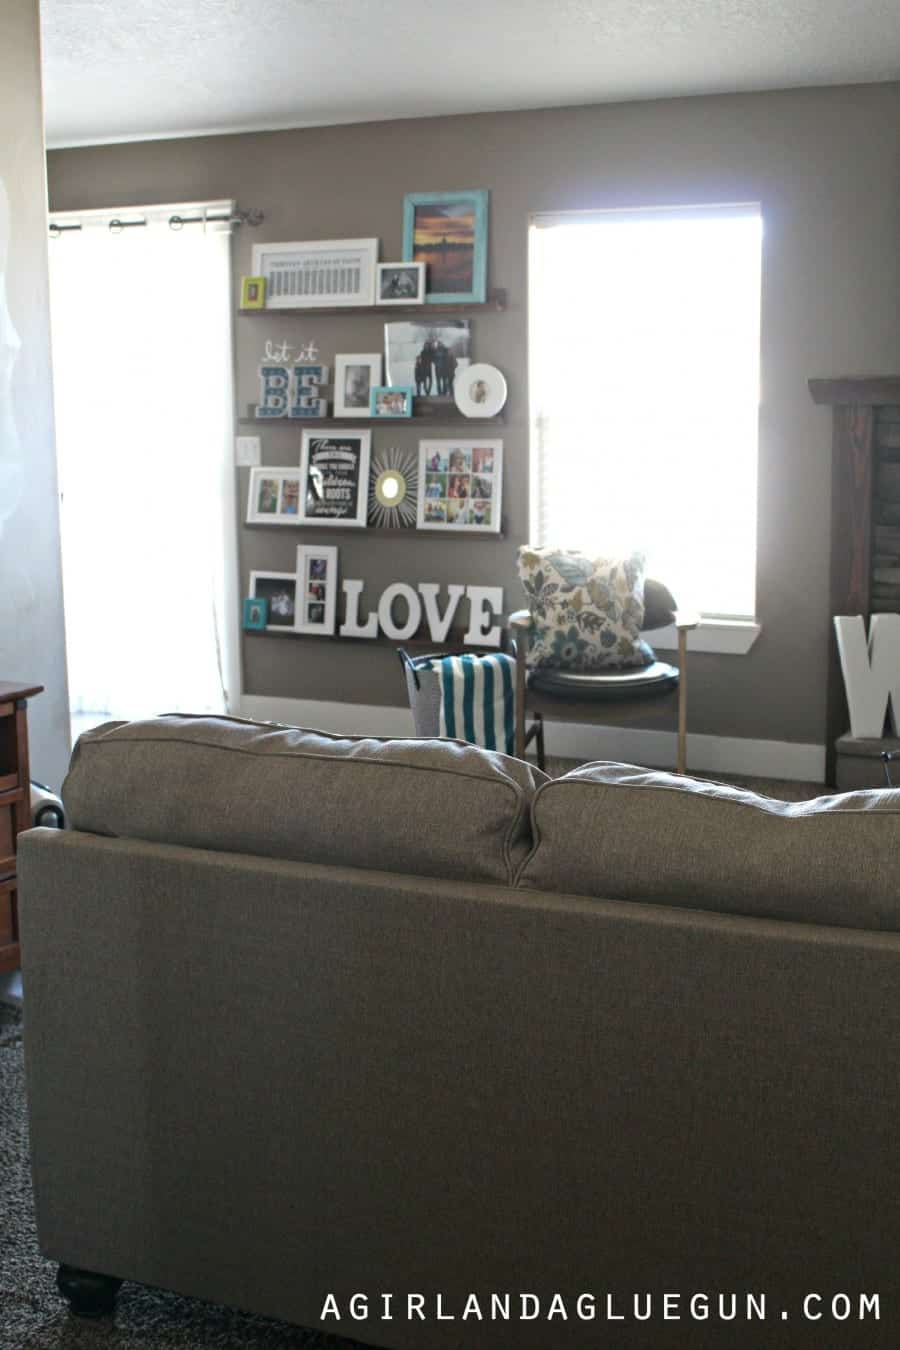
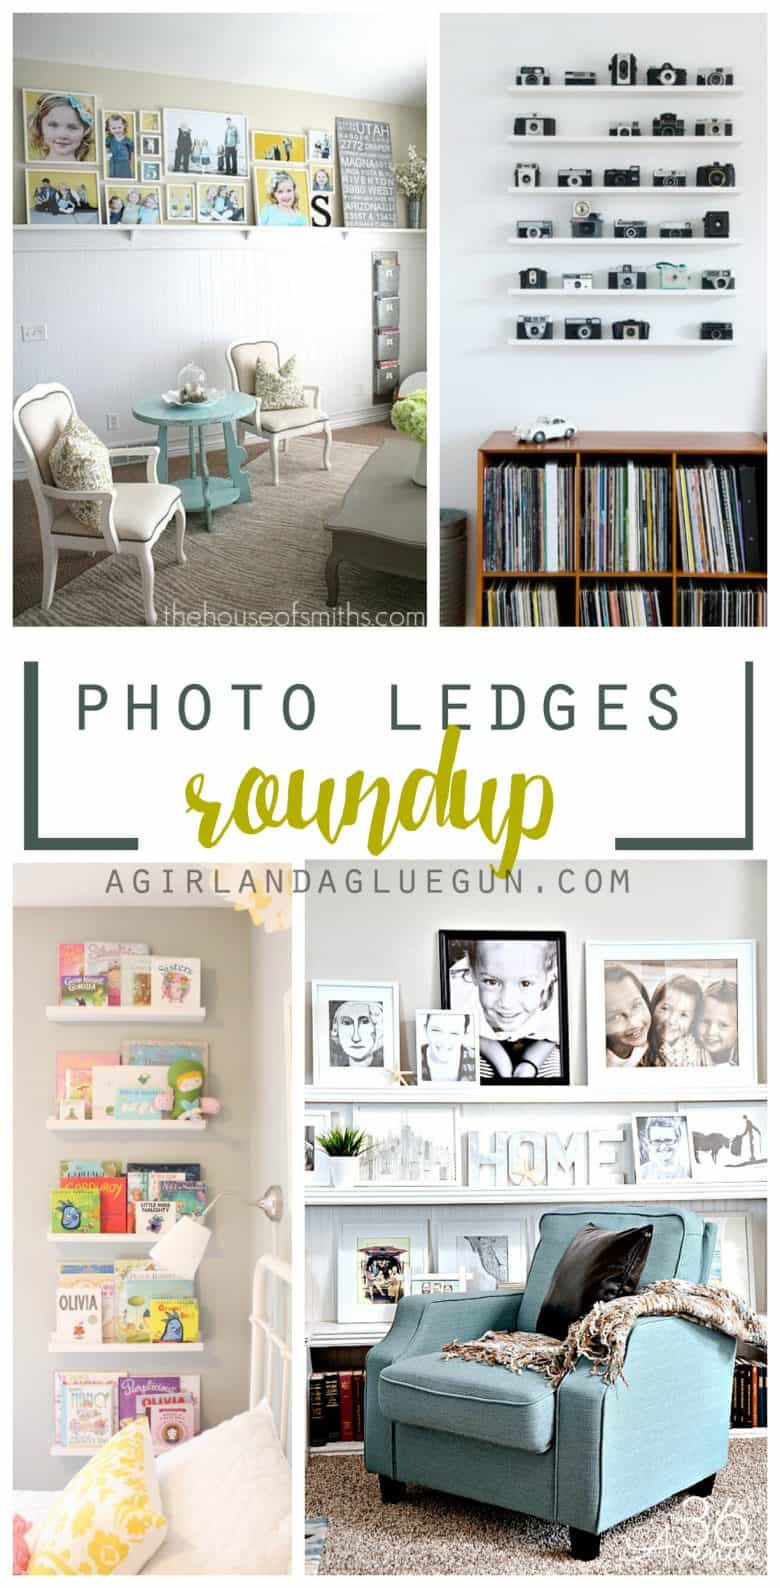
now..since you know how to do these easy peasy ledges…check out my roundup of all the different ways to use them!!!
Sue S says
I just love your photo ledges. I’m really glad that you gave some directions as to how you did it.
I have been thinking about doing something like that and now you have given me the inspiration.
My first grandchild is due in May and I love to display pictures of my family and that as has inspired me
to do something. Thanks.
Virginia Fynes says
Hello amazing project!! These look great, all the ways you styled them. I love the ‘let it be’ mixed medium, super clever… and your uber cute kiddos! I think I needs to make me some of these little ledges!
jen says
I really like your shelves. They look great. It made me rethink doing a traditional gallery wall concept on our living room wall.Not sure which way i’ll go quite yet but now I’m kind of partial to your shelf idea. Was the Articles of Faith a print you bought? I’ve never seen one like that before and would really like one. Thanks.
Kimbo says
thanks! article of faith printable is here: https://www.etsy.com/listing/161963300/lds-articles-of-faith-subway-art-digital?ref=related-0
Jaclyn says
Hi! I love your gallery wall. I was just wondering about those two small turquoise frames. The ones on the 2nd and 4th shelves. Did you buy those the colors that they are or did you paint them? I’m hoping you painted them and could tell me what color they are painted. Thanks!
Kimbo says
They are both krylon spray paint. They have 3 blues that I love….sea breeze is one of them!!
Susan says
I love this idea! Really one of my all-time favorite Pinterest diys. I am not really handy with wood projects, but this looks doable. Is the AOF print your creation or available somewhere?
Kimbo says
I got it from here: https://www.etsy.com/shop/GreenJelloSalad
but this one is similar: https://www.etsy.com/listing/113558282/articles-of-faith-subway-art-instant?ref=shop_home_active_5
Susan says
Thank you for the link. I found it. Sorry, I just noticed you answered the same question in another comment. I am excited to try these shelves and glad to know about that Etsy shop!
Ellie says
I love this! Glad i came across your site 🙂
Niki says
Did you also nail through the front piece, or gorilla glue only?
Kimbo says
I think I added a few nails. It wasn’t holding weight..just preventing things from sliding off so it didn’t need to be super reinforced!
Tori May says
I love your style! Where did you get the let it BE sign? I am dying for one!
Kimbo says
It’s a heidi swapp marquee! You find them at joanns and michaels and you can customize them however you want! Looks like this: http://amzn.to/1UkZ2vT
Mindy says
I love your shelves! And I really love your wall color!! Do you know what the color is called?
Kimbo says
Family tree by dutch boy
Kathleen says
I am just finding this older post … where did you get the “there are two things you should give a child … ” print. Thanks for sharing your creativity!
Kimbo says
http://www.agirlandagluegun.com/2015/02/free-printable.html
Brooke says
Did you print he Instagram collage on printer paper ? Wondering how you did that collage ?
Kimbo says
I just took regular photos and trimmed them down to a square and mounted them on a board that fit in a square frame!
TIFFANY says
What kind of spacing did you use between the shelves? I like that it fits all different size picture fames ect!
Kimbo says
It’s around 18 inches! You can do it bigger or smaller depending on frame sizes!