
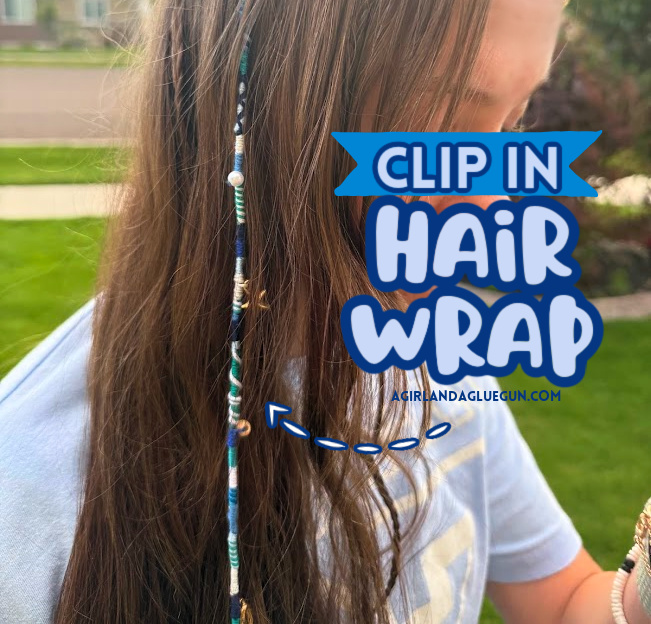
Want the fun, beachy look of a hair wrap without tying it into your actual hair? This DIY clip-in hair wrap is the perfect solution! Using colorful embroidery floss and a simple snap hair clip, you can create a trendy, removable hair accessory that’s perfect for summer, vacations, festivals, concerts, or everyday style.
The best part? You can clip it in whenever you want and remove it just as easily—no commitment required!
Why You’ll Love This DIY Hair Wrap
Hair wraps have been popular for decades, and they’re making a huge comeback! Instead of wrapping embroidery thread around your own hair, this version is made separately and attached to a small clip, making it reusable and easy to swap out with different colors.
This project is:
- Beginner-friendly
- No damage to your hair
- Completely removable
- Great for kids, tweens, teens, and adults
- Perfect for summer and music festivals
- Easy to customize with beads and charms
Supplies You’ll Need
- Embroidery floss in your favorite colors
- Snap hair clip or Wig clip (These really stay put!)
- Scissors
- Tape or clipboard to hold your strands while working
- Small charms (I got this pack from Amazon that I’m using in this post)
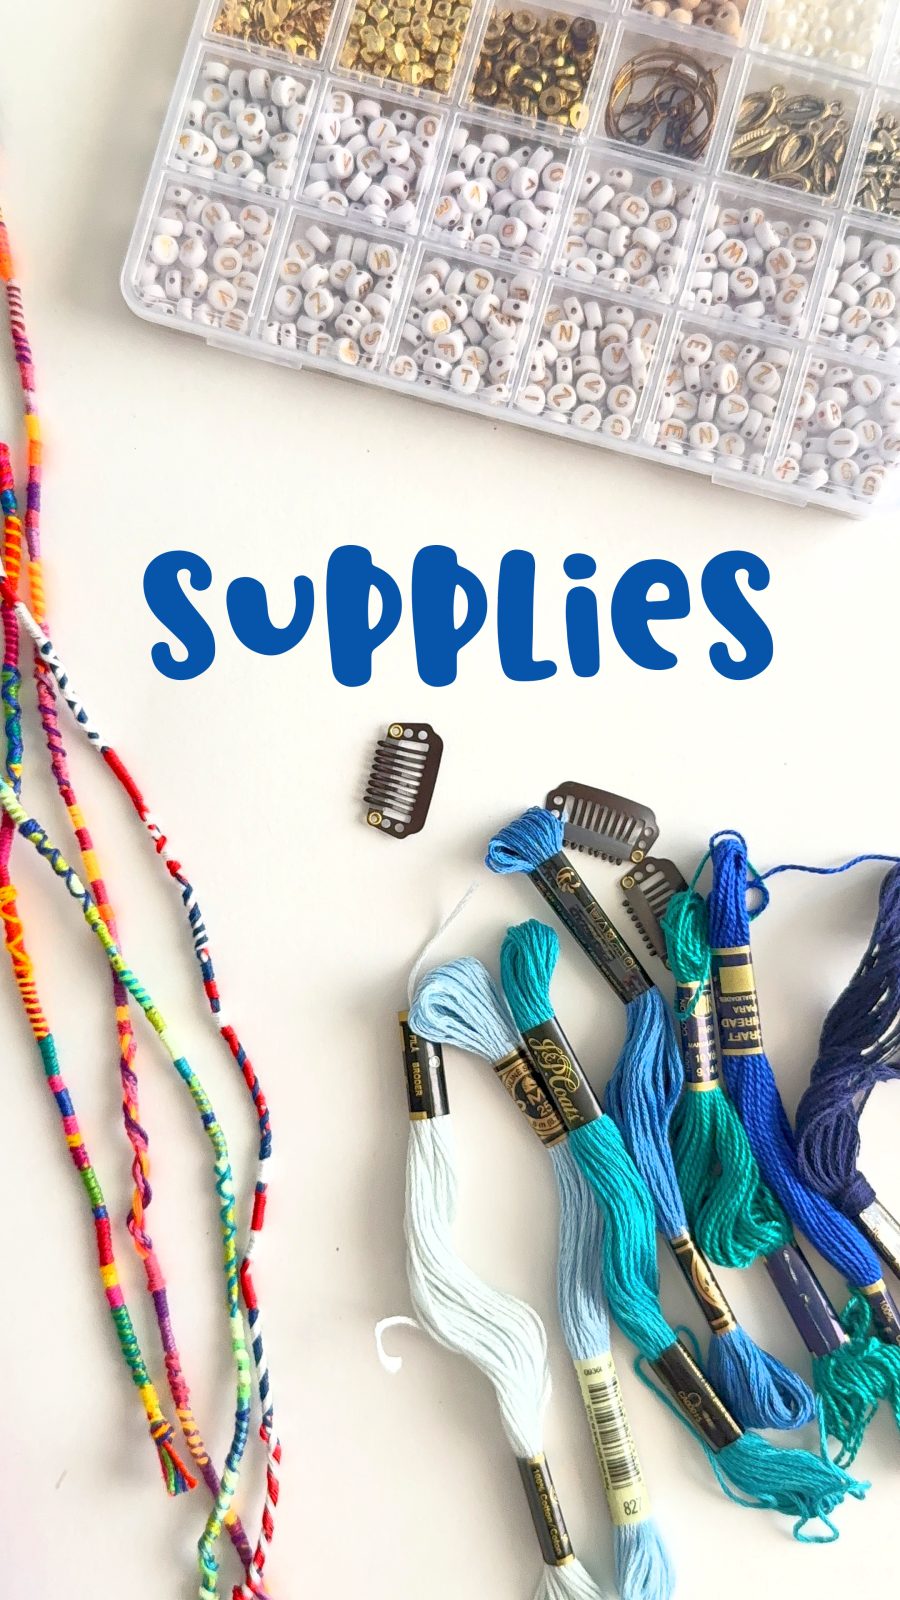
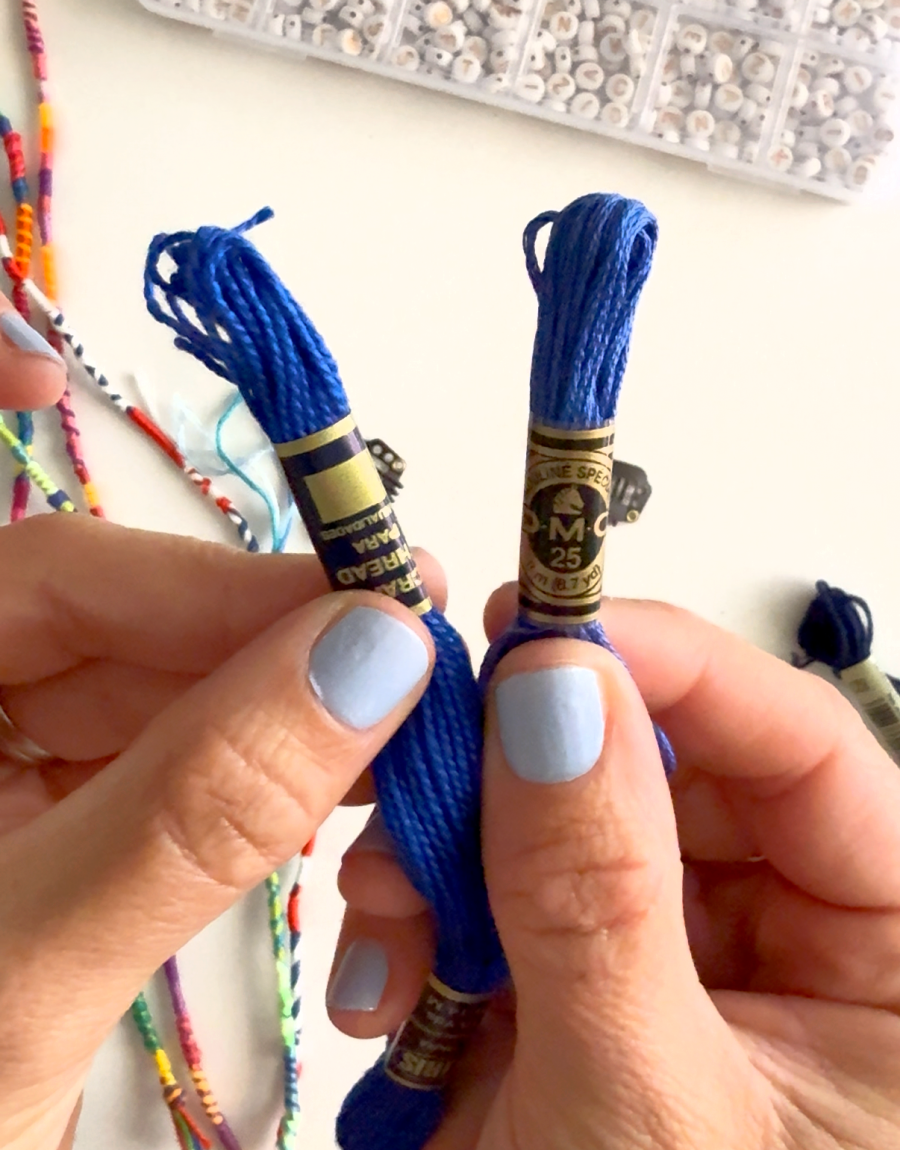
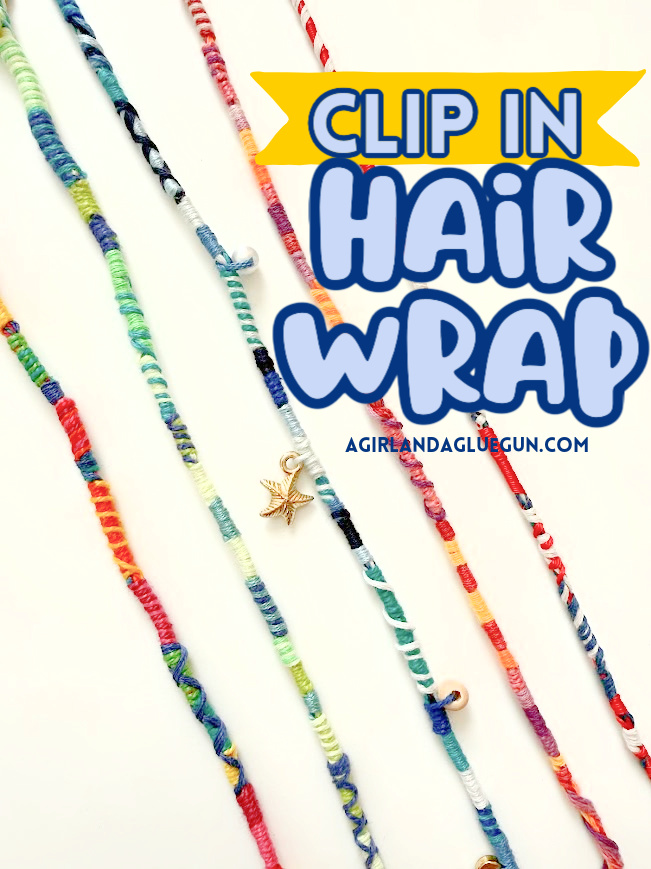
As you can see above, I have a wide variety of embroidery thread. I actually try to stay away from the smooth, silky floss. The texture of it makes it hard to keep wrapped. I actually prefer the packs of embroidery floss that you can buy in bulk of 20- I think they are meant for friendship bracelet, but they have a little texture on them that helps. But use what you have!
How to Make a Clip-In Thread Hair Wrap
Step 1: Cut Your Embroidery Floss
Cut several strands of embroidery floss to your desired length. I shoot for about 8 strands in 4-8 different colors. Keep in mind you’ll lose a little length while wrapping, so it’s better to start longer than you think you’ll need. I just loosely eyeball, but I do about 4 times as long as the hair. So if my hair were 12 inches long, I would cut the threads about 48 inches long.
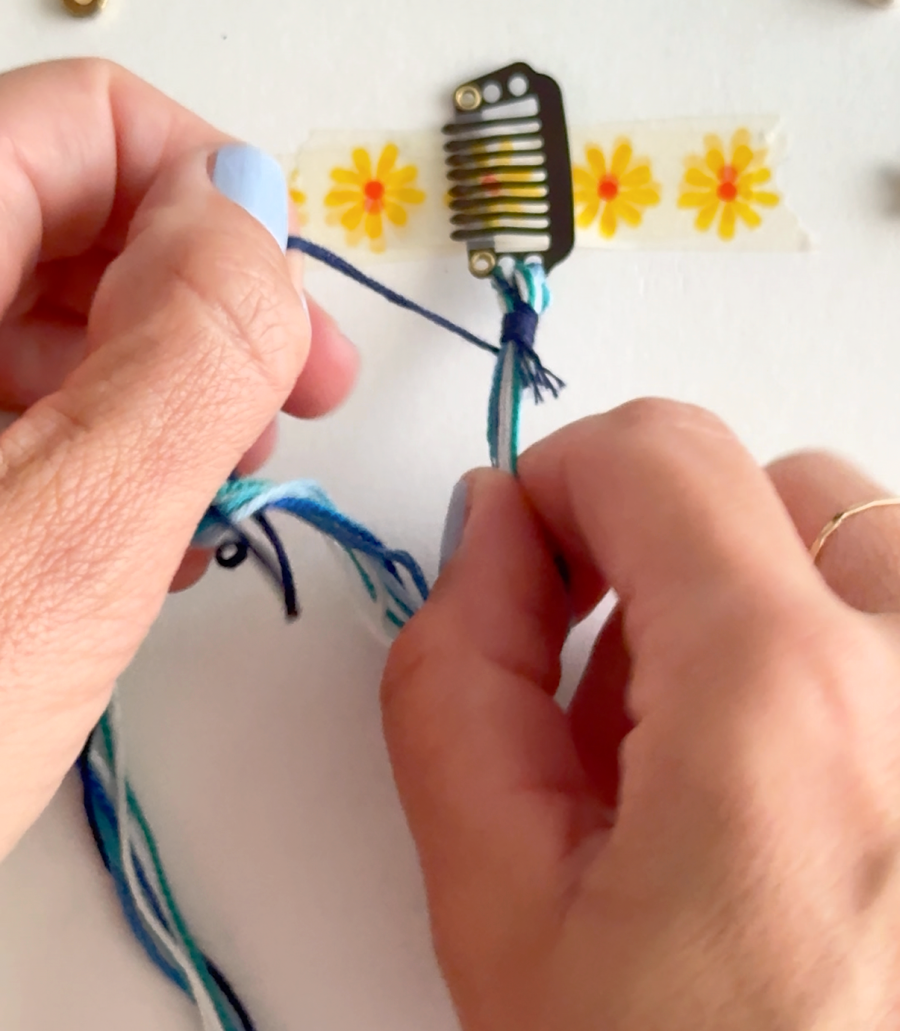
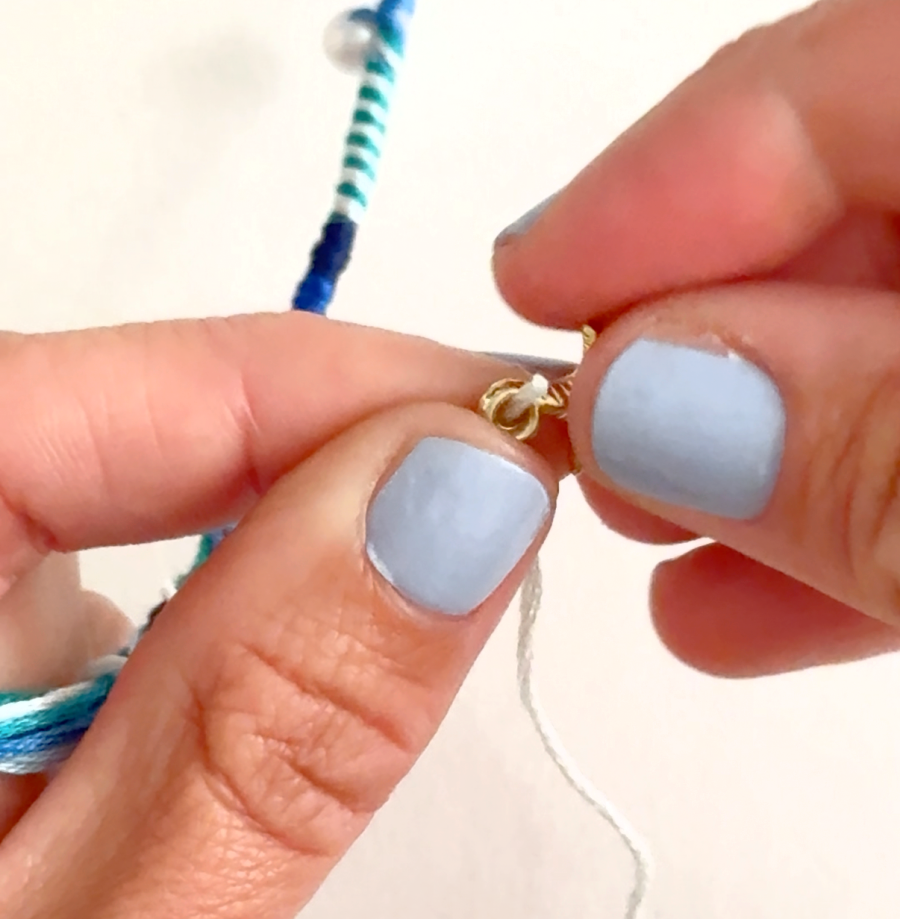
Step 2: Secure the Threads
Tie the floss securely around the top of your snap clip or alligator clip using a tight knot. I pull out any beads that I’m using so I have them ready to go.

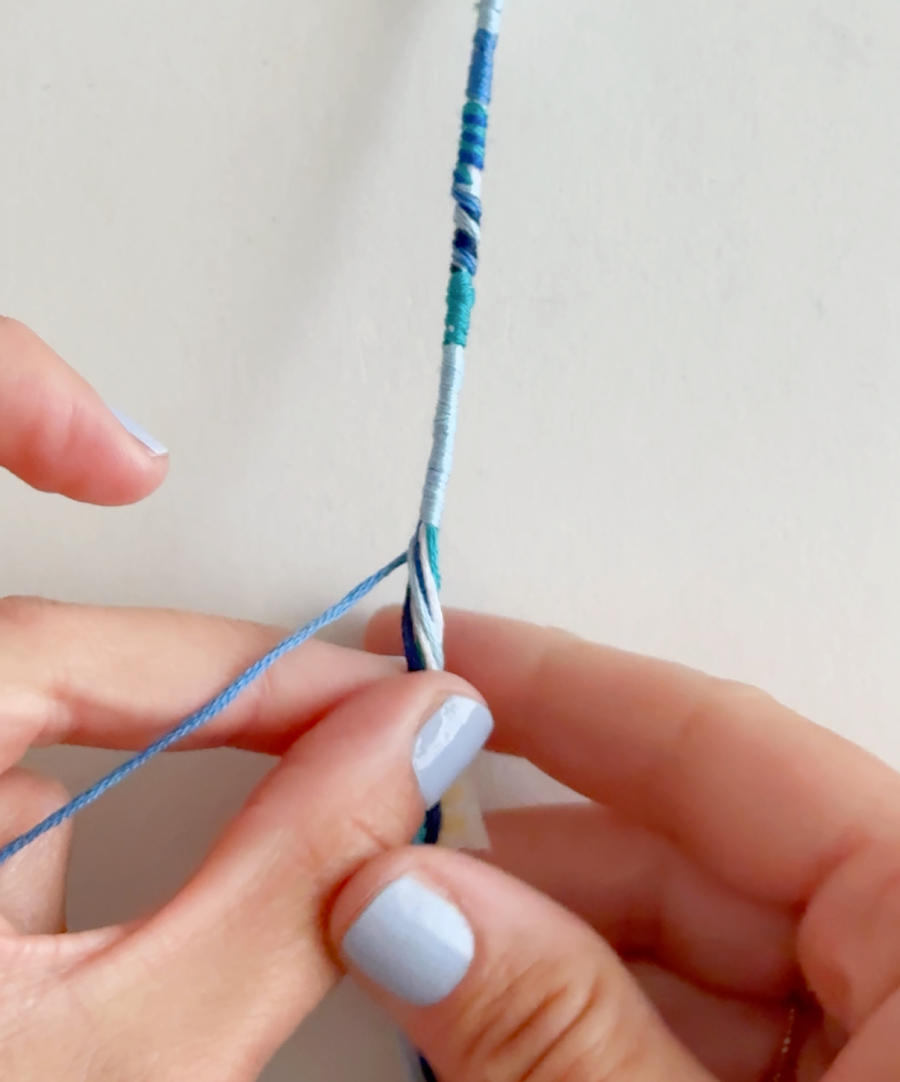
Step 3: Begin Wrapping
Choose one color to use as your wrapping thread. Hold the other floss right in the middle and Wrap the thread you pulled out tightly around the bundle of floss, working your way down the strands.
You will want to hold on tight as you go and wrap tightly.
Keep the wraps close together to create a neat, colorful pattern. You can push up the thread as you go to keep it tight.
Switch thread colors whenever you’d like to create stripes, blocks of color, or fun designs.
There are a couple different designs I do to switch it up!
A: Double Thread
I take two pieces and wrap them around at the same time. This creates a mini stripe. You need to go slow and make sure they stay in the correct order.
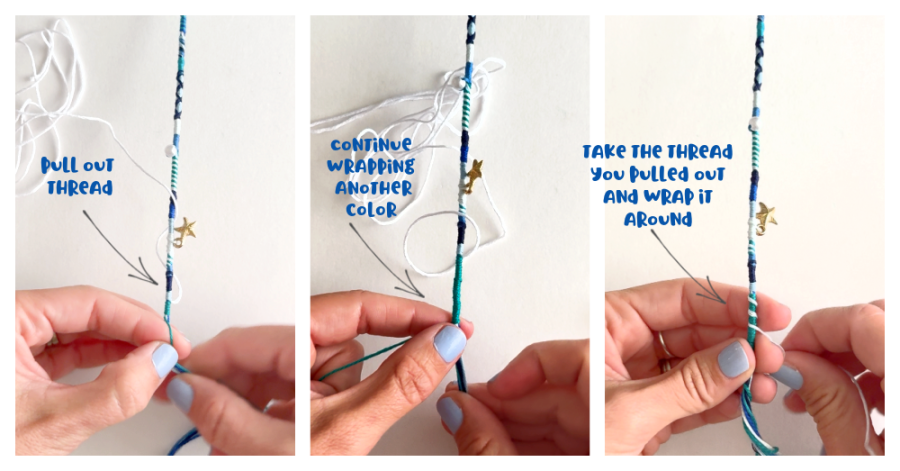
B: Big Stripe
To achieve the big stripe, I take out one piece of thread and then wrap as usual with another color. After I have an inch or two, I take the piece I pulled out orginally and wrap it around the thread. I tie a knot when I’m done wrapping since it’s not as tight as the other wraps so it can fall out more easily.
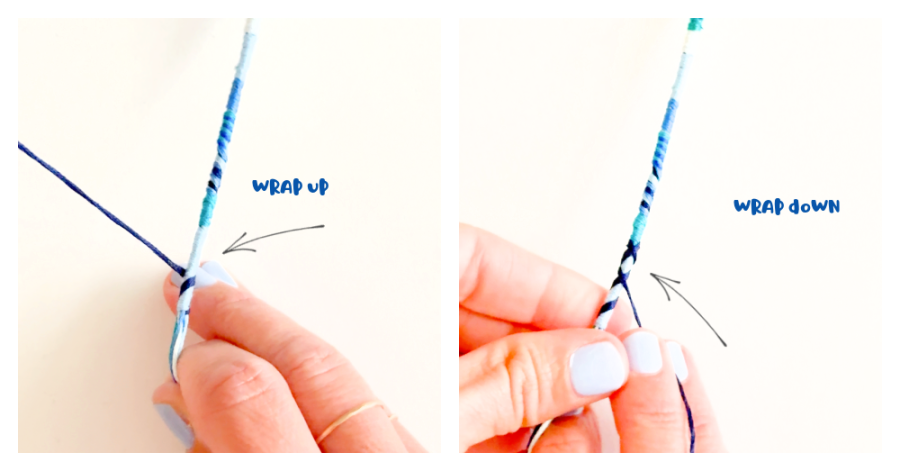
C. X wrap
This one is kind of like the one above, but you don’t have to remember to take a piece out. You wrap a piece around, and then grab a coordinating piece. You are going to do the big stripe going up to the top and then wrap around and then come back down creating an X pattern around the thread. Tie a knot and then continue on.
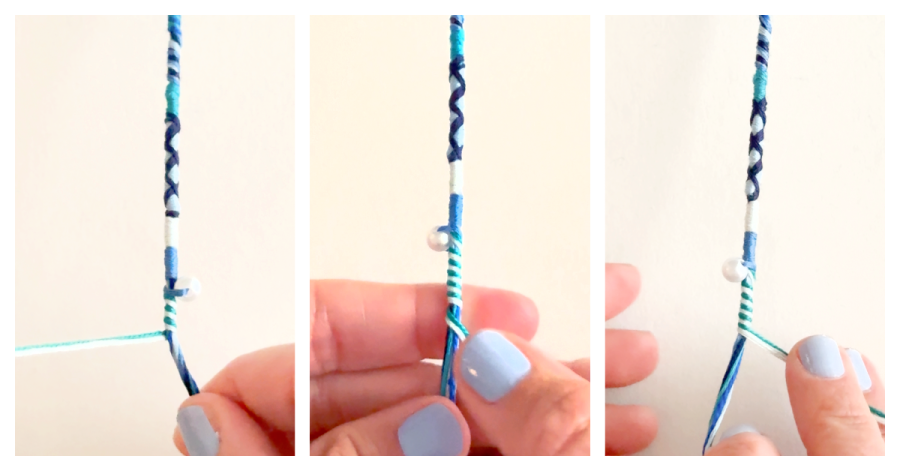
Step 4: Add Beads or Charms
Slide on beads, alphabet letters, shells, or tiny charms as you work down the wrap. These little details give your hair wrap a personalized, boho-inspired look. I take a little bit of hair wax or pomemade on my fingers to smooth out the ends of the thread so it will easily slide into the beads.
Add a knot when you are done with the thread color the bead is on. Beads are heavy and you won’t want it to pull out the thread.
When adding a bead: I wrap a couple times, add bead, wrap a couple more times and then tie a knot.
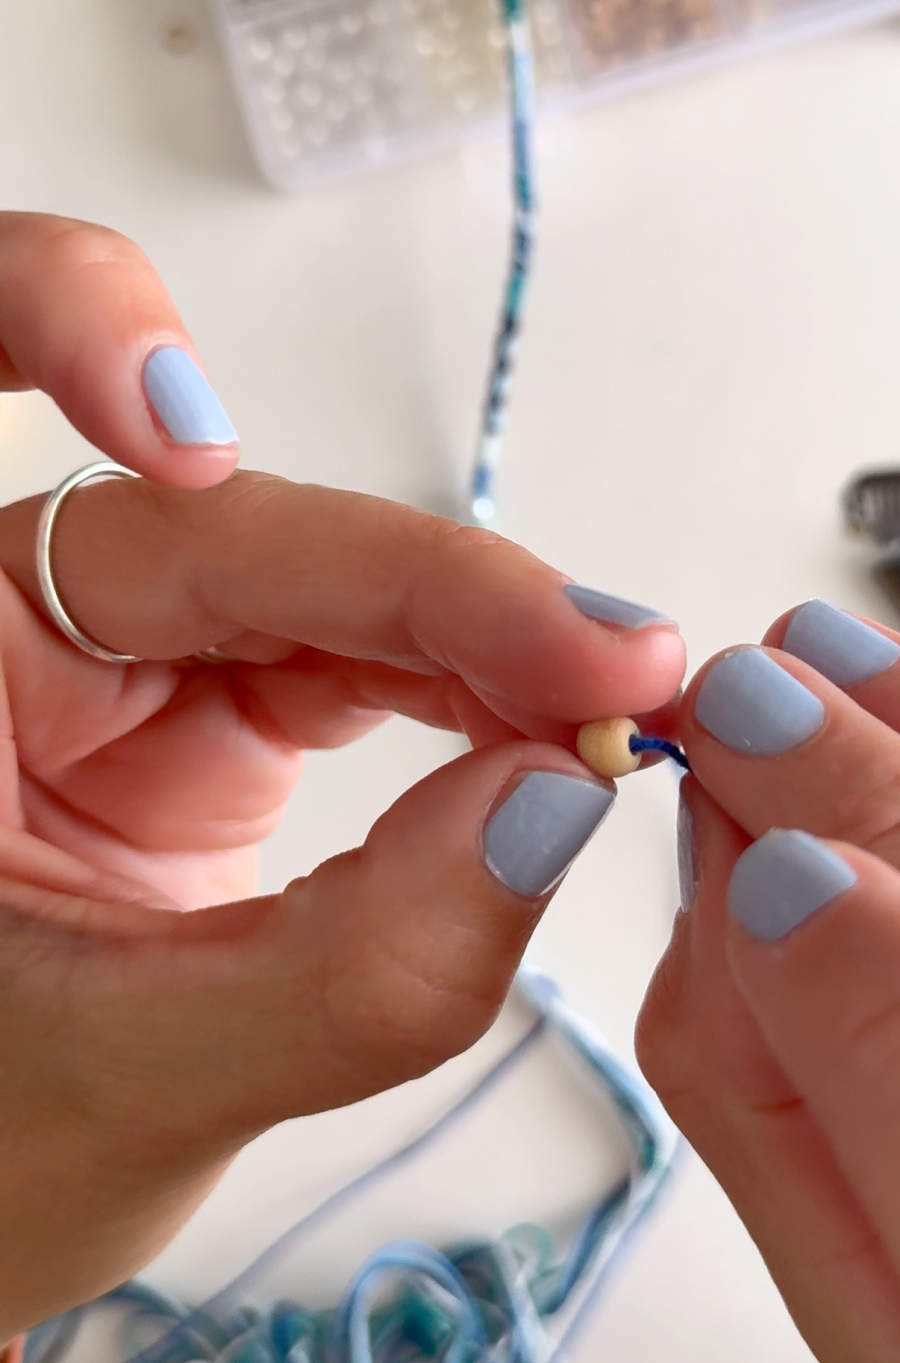
I spaced these apart about every two inches. You can add more or less or just a fun one at the end.
Step 5: Finish the Hair Wrap
Tie a secure knot at the bottom and trim the ends evenly or leave them slightly uneven for a relaxed, beachy style.
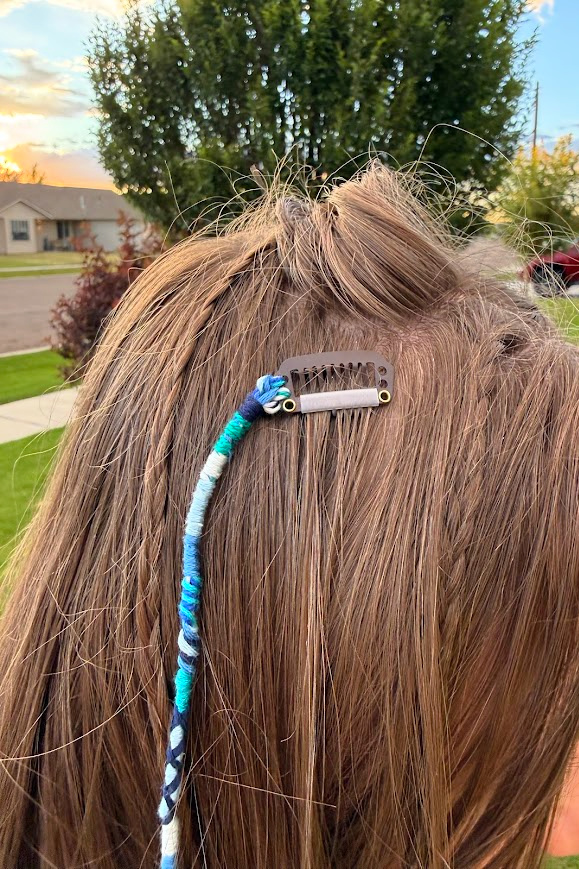
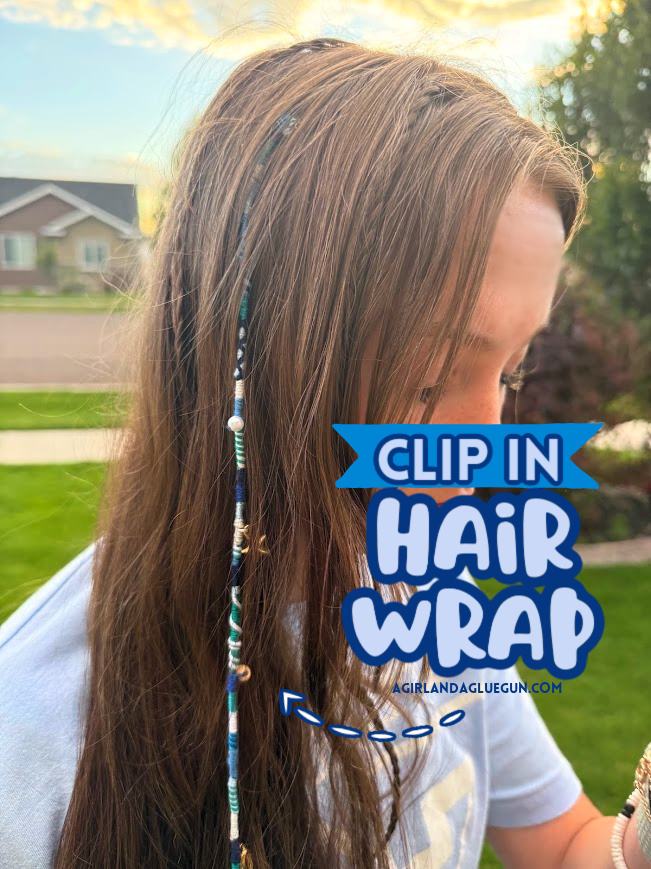
Clip your finished wrap into your hair and enjoy your new colorful accessory!
I like to place the clip underneath a little hair so you can’t see the actual hair clip, and colorful just peeks through!
Fun Color Combinations
Customize your wrap with color palettes like:
- Ocean blue and turquoise
- Sunset pink, orange, and yellow
- Rainbow colors
- Earthy boho neutrals
- Black and white
- School spirit colors
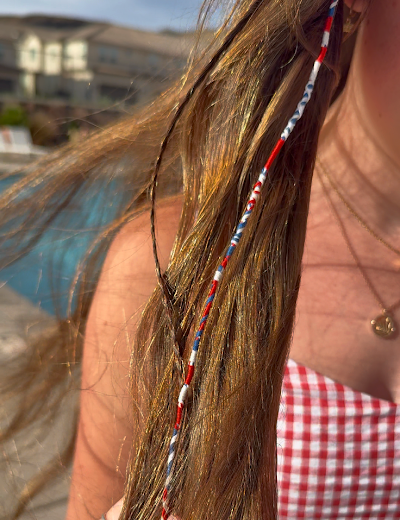
- Red, white, and blue for the 4th of July
- Mermaid-inspired teal and purple
- Pastel rainbow
Add Even More Personality
Make your hair wrap one-of-a-kind by adding:
- Gold or silver charms
- Tiny seashells
- Alphabet beads
- Wooden beads
- Crystal beads
- Star charms
- Butterfly charms
- Heart charms
- Feather charms
Mix different textures and colors for a unique accessory that matches your personality.
Perfect for So Many Occasions
Clip-in thread hair wraps are fun for:
- Summer vacations
- Beach days
- Music festivals
- County fairs
- Sleepovers
- Birthday parties
- Camp crafts
- Tween and teen DIY nights
- Spirit week
- Everyday accessories
Since they’re removable, you can even make several wraps to coordinate with different outfits.
Try tying one onto your wrist for a fun Wrapped Bracelet!
Tips for the Best Hair Wrap
- Pull the wrapping thread snugly to keep the design neat.
- Mix solid sections with spiral wrapping patterns for extra texture.
- Choose embroidery floss with vibrant colors that won’t fade easily.
- Add a tiny dab of clear glue to the ending knot for extra durability.
- Make wraps in different lengths for a layered look.
Frequently Asked Questions
Does this damage your hair?
No! Since the wrap clips into your hair instead of being tied around it, you can remove it whenever you like without damaging your hair.
Can kids make this craft?
Yes! Older kids, tweens, and teens can easily make these with a little patience. Younger children may need help tying the knots.
How long does it take?
Most clip-in thread hair wraps can be completed in about 20–45 minutes, depending on the length and design.
Save for later
Too busy to get crafting today? No problem! Pin this post to remind yourself about this project later! Sharing my projects helps me reach more people, allowing me to continue sharing free content!
Create Your Own Boho Hair Accessories
DIY clip-in embroidery thread hair wraps are a fun way to add a splash of color to your hairstyle without the commitment of permanent wraps. They’re inexpensive, customizable, and make great handmade gifts for friends, party favors, or summer camp crafts.
Grab your favorite embroidery floss, add a few charms, and start creating colorful hair wraps that you can clip in and wear all season long!
SEO Title
DIY Clip-In Hair Wrap | Easy Embroidery Thread Hair Wrap Tutorial
Meta Description
Learn how to make a DIY clip-in hair wrap using colorful embroidery thread! This removable boho hair accessory is perfect for summer, festivals, beach vacations, and fun crafts for tweens and teens.
Leave a Reply