
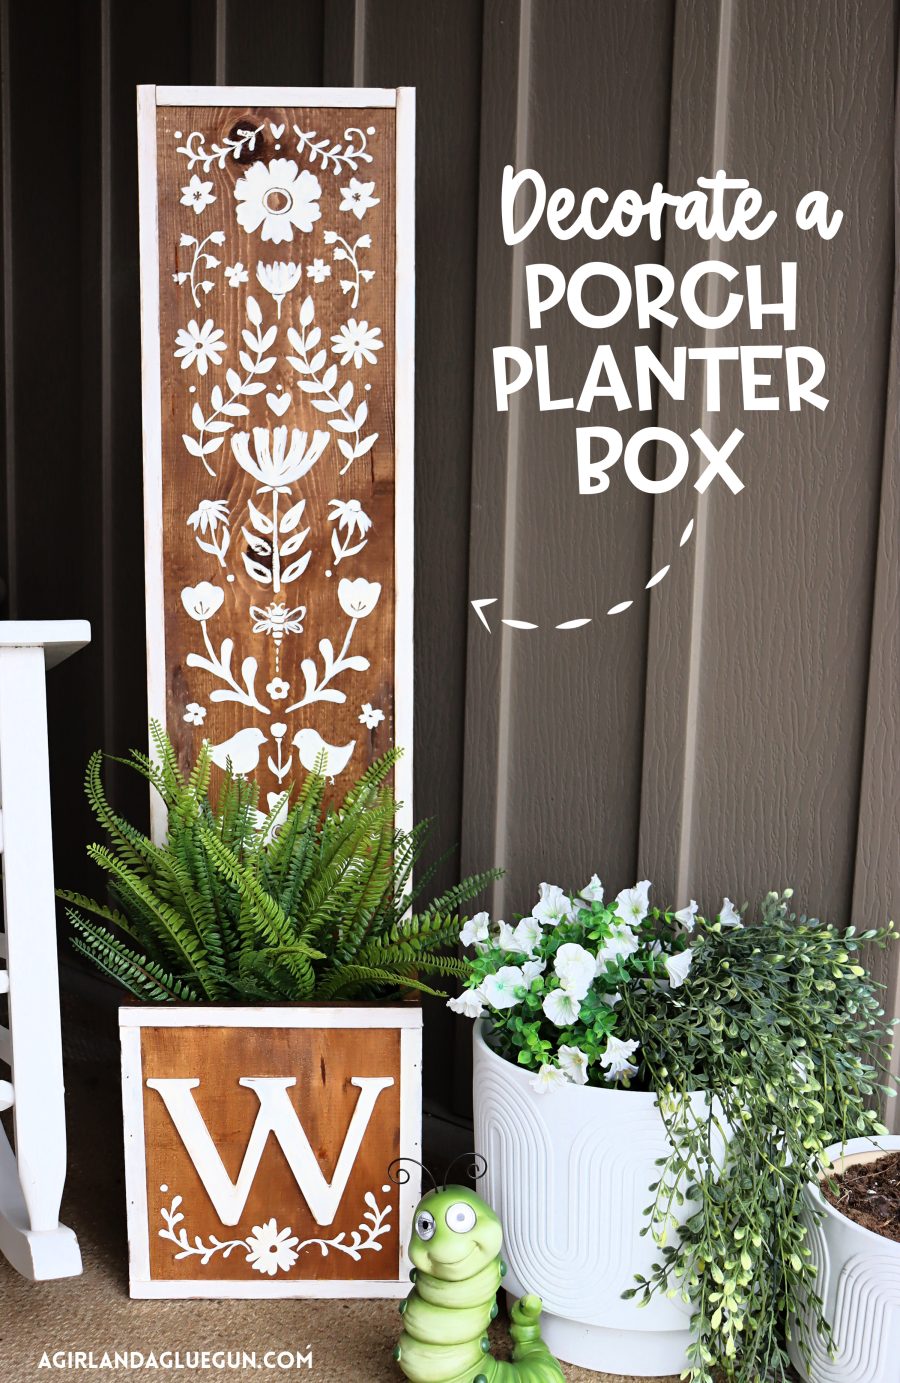
Decorating a wood planter box with stain and paint is one of the easiest ways to upgrade your front porch décor without a major project. With just a few supplies and an afternoon of work, you’ll have a custom piece that adds charm, color, and personality to your home’s entrance.
This is a sponsored post written by me on behalf of Hobby Lobby. All opinions are 100% mine.
This step-by-step guide shows you how to decorate a wood planter so it looks custom, polished, and weather-ready — even if you’re new to DIY.
Whether your style is modern farmhouse, classic cottage, or clean and minimal, this project is an easy way to boost curb appeal and create a warm welcome at your front door.
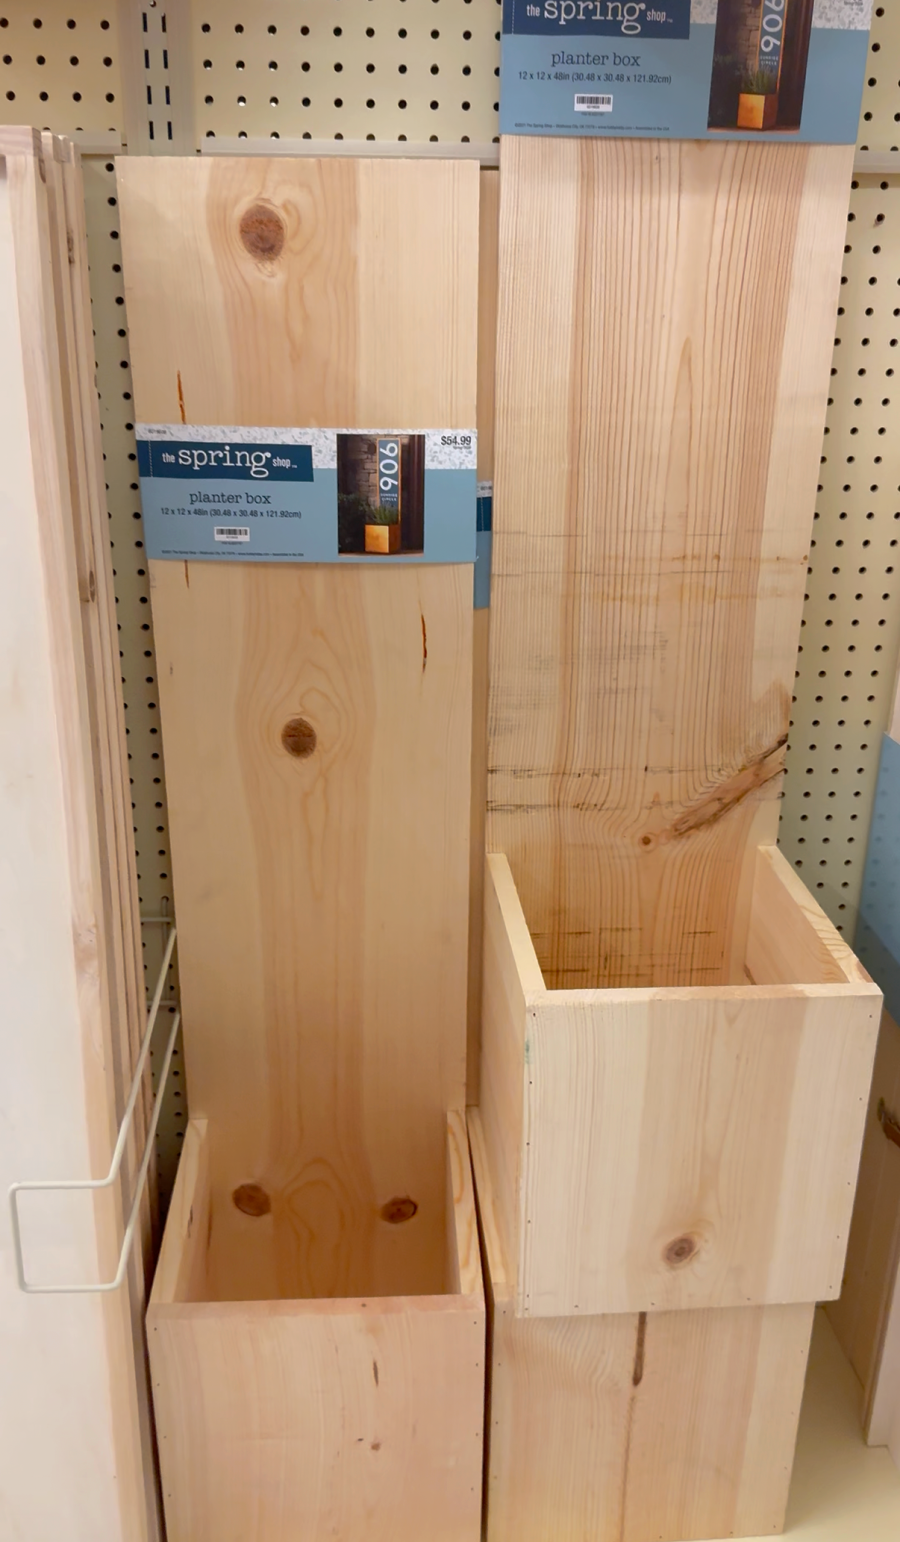
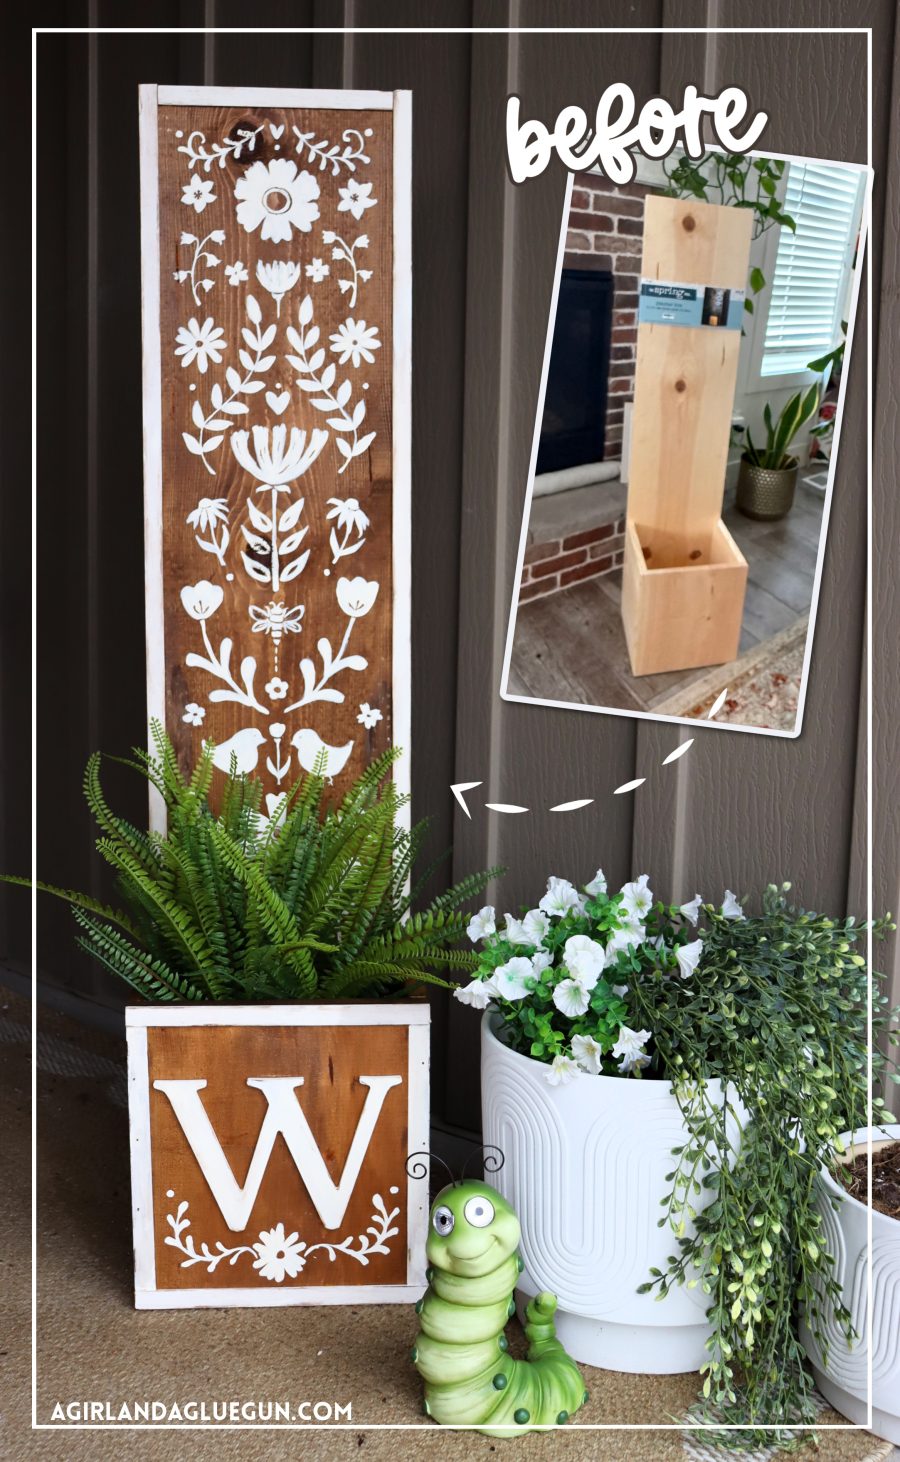
Here is the wood planter box blank from Hobby Lobby we are starting with! The Spring Shop was all 40% off, so I did not pay full price for this.
Planter ideas
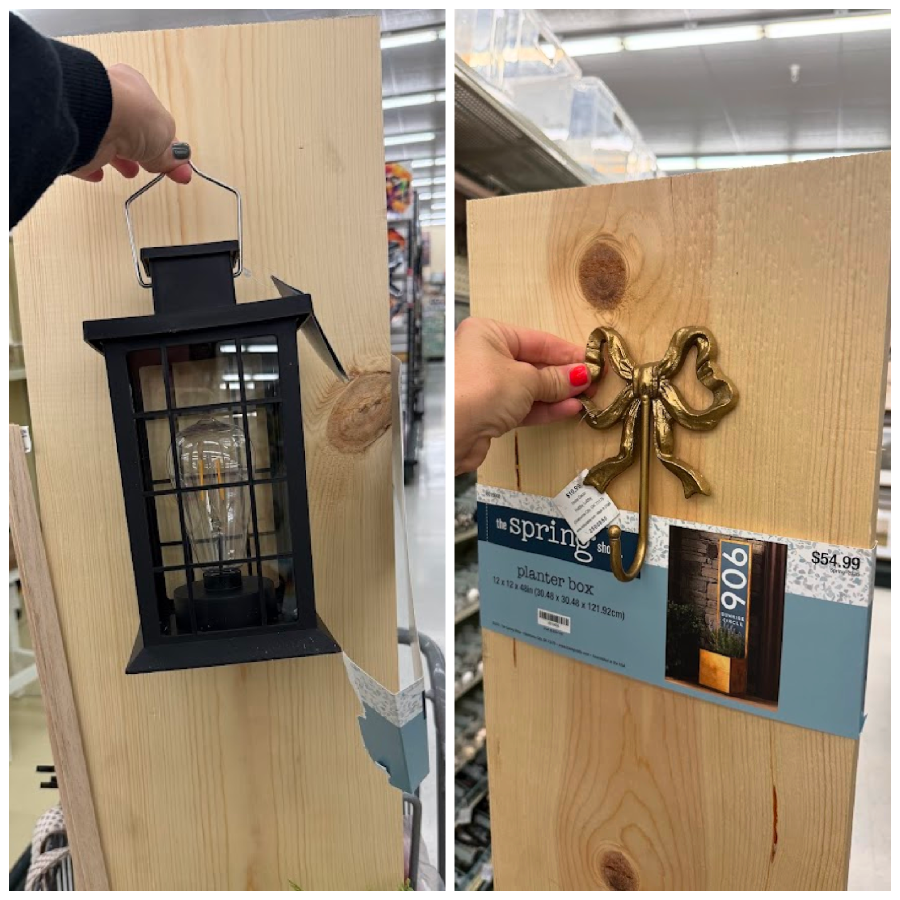
I actually really loved the way Hobby Lobby has this one styled with house numbers and a dark paint to make it pop!

But I wanted to show all the amazing, creative possibilities these planters have! I walked about Hobby Lobby on my Instagram stories and shared all the things you could use! The wood aisle had lots of great sayings, letters, butterflies, and even a giant bow! The spring section had a picket fence that I thought would be so cute wrapped around the base. Lots of large metal flowers that would make this planter perfect for spring!
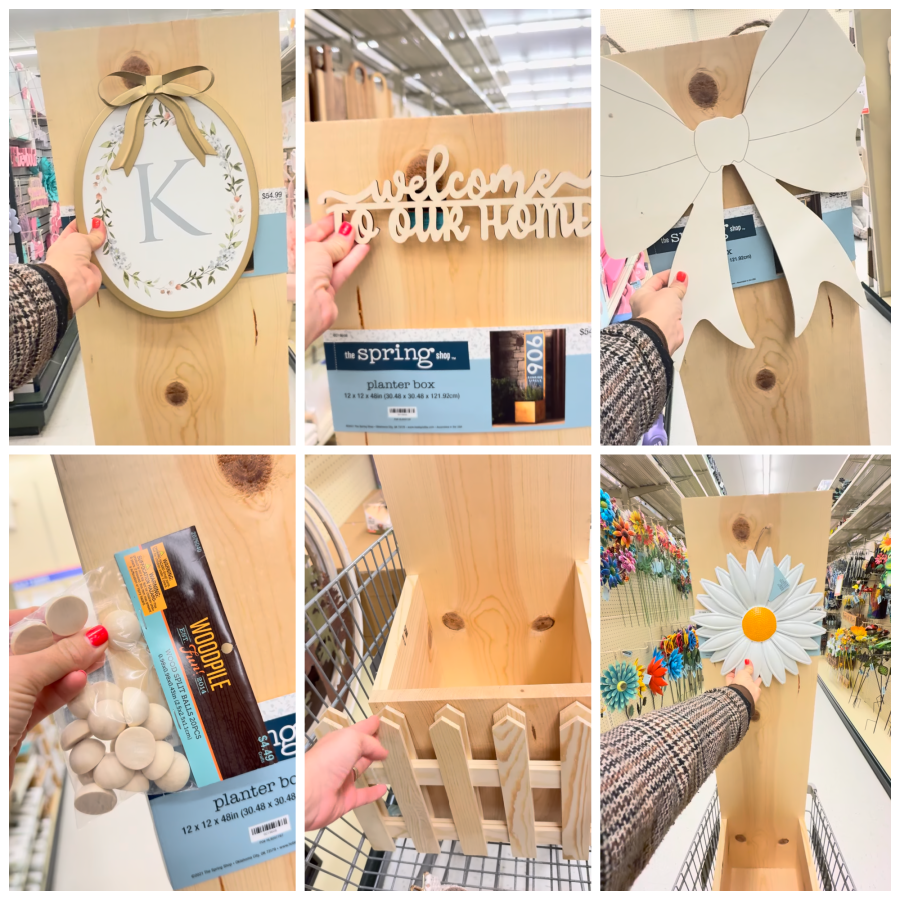
I also thought of adding a hook to the top of the board. (Hobby Lobby has SO MANY CUTE ONES!) Use it to hang a wreath, ribbon swag, or even a solar lantern!
Another option I thought of was getting a wooden board to put on top. You could use it to hide amazon packages and just put a light plant on top to hide it!
There were so many ideas that I wasn’t sure what to do with this planter! I ended up sketching out my ideas because I’m a visual person!
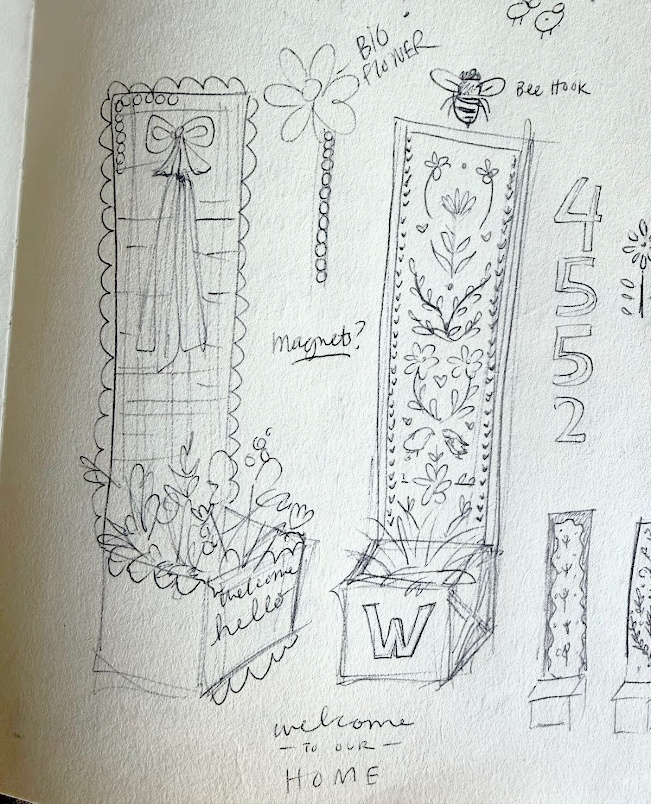
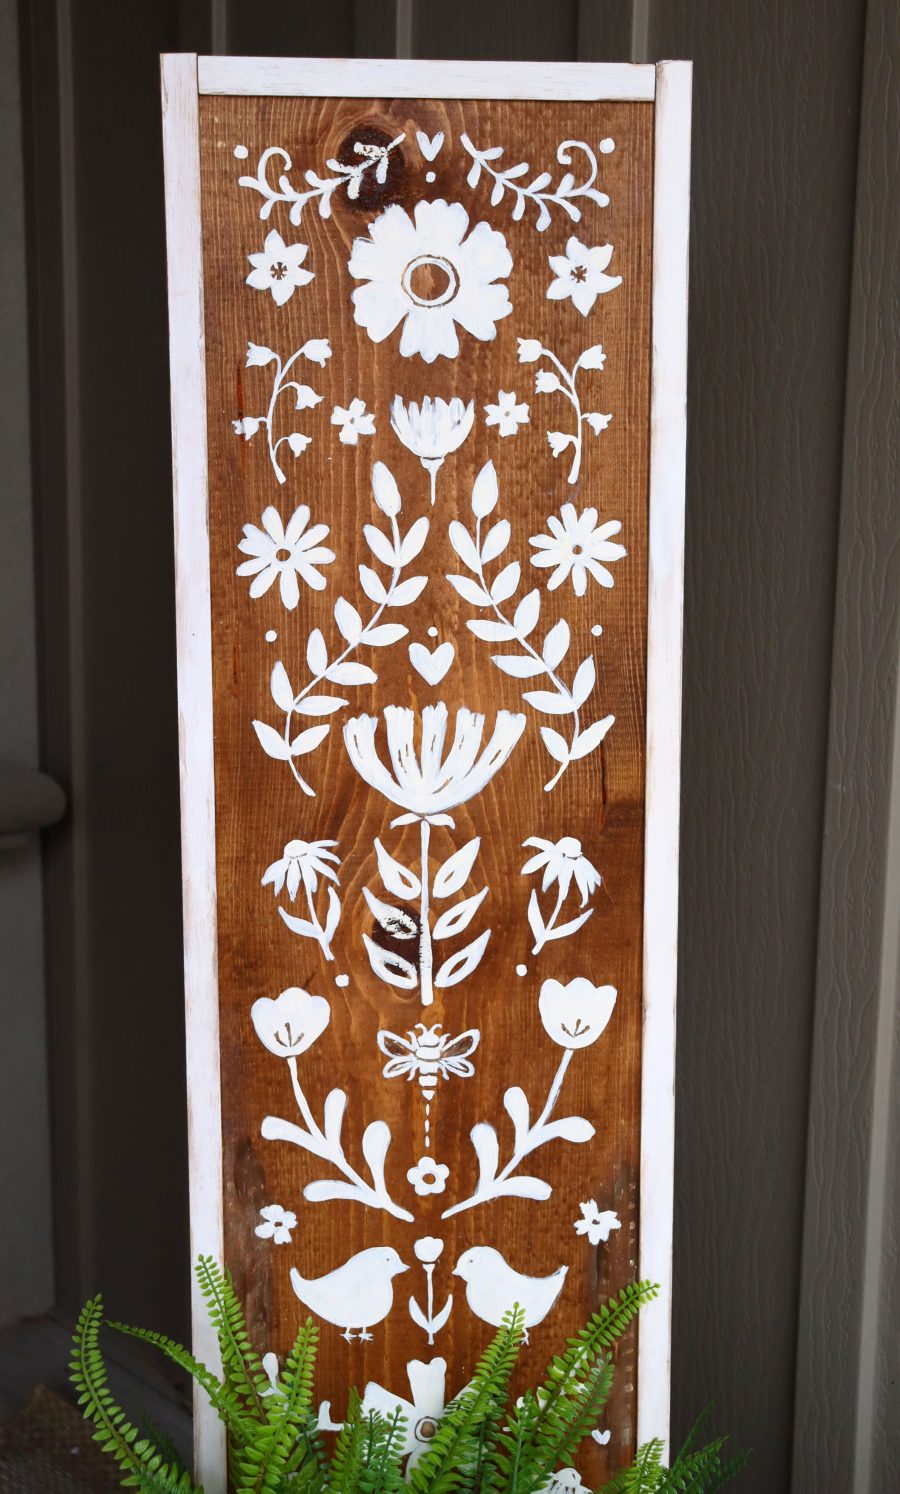
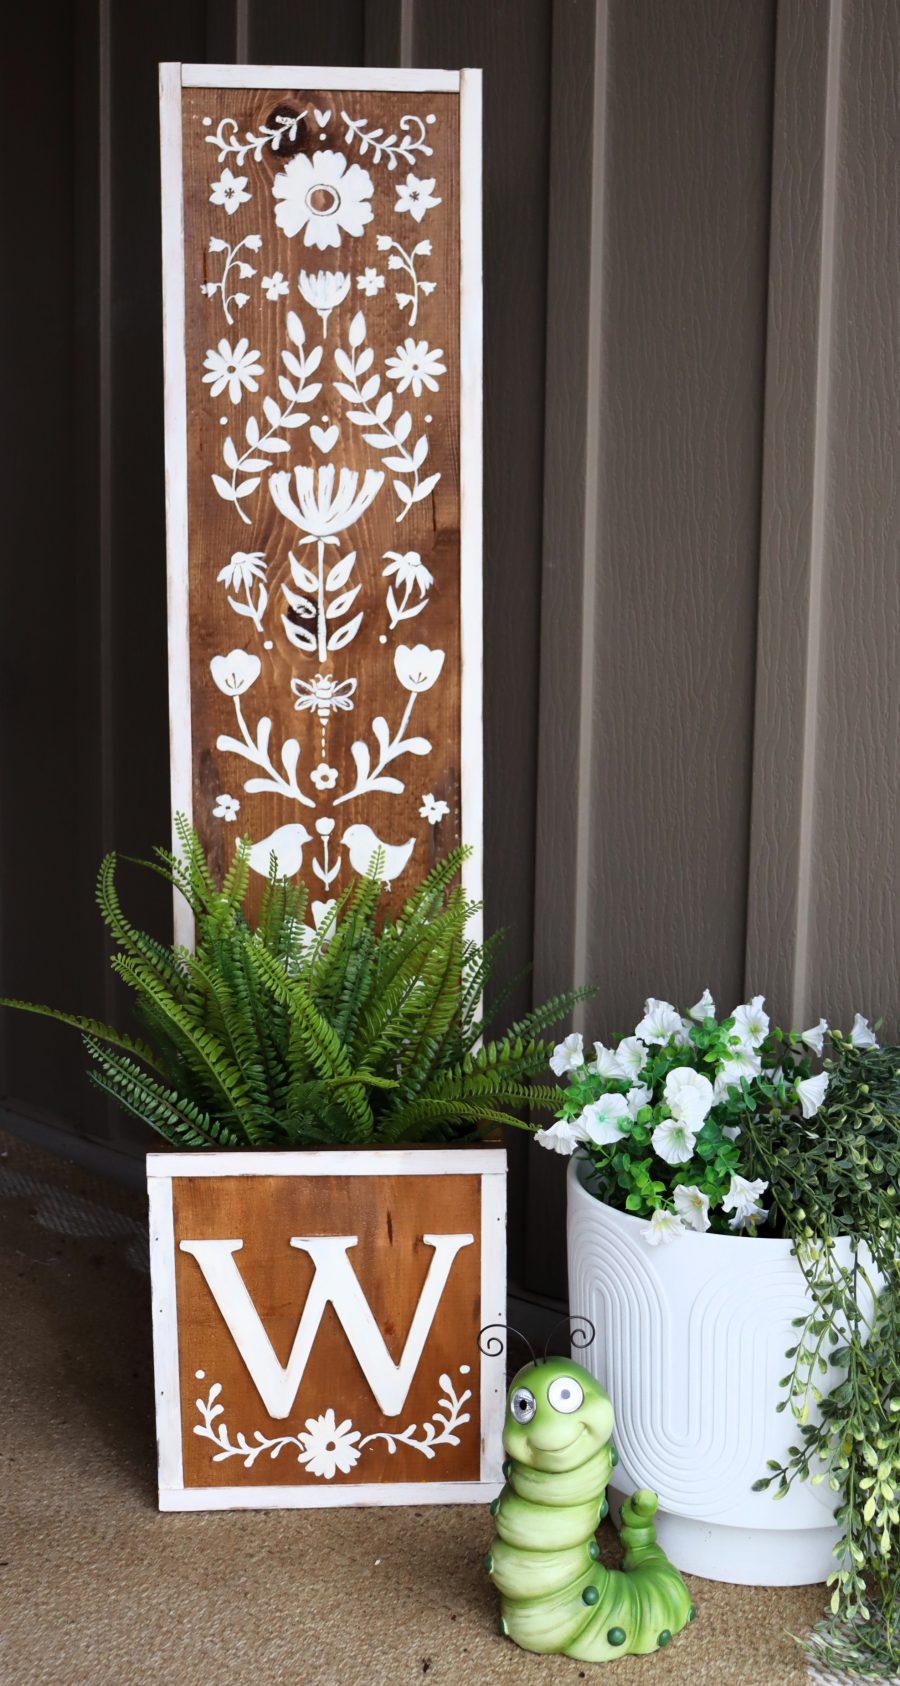
The design with the flowers got picked. Mostly because it’s not overly springy and I can leave it up all year long!
Supplies You’ll Need
- Unfinished wood planter
- Wood stain (any shade you love)
- Acrylic paint
- Paintbrushes or foam brushes
- Sandpaper (120–220 grit)
- Painter’s tape
- Clean cloth
- Outdoor sealer or polyurethane
- Drop cloth or cardboard for workspace
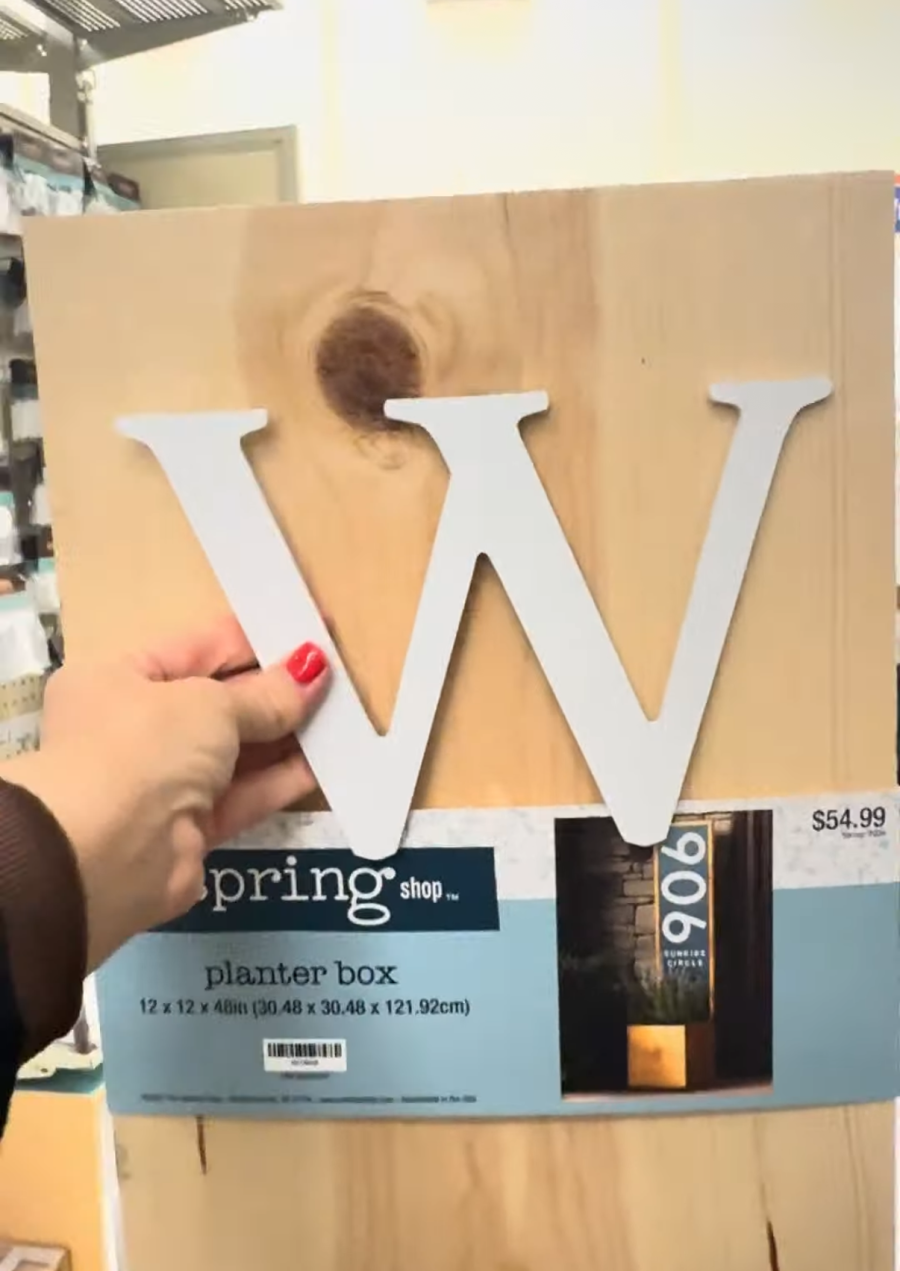
- Wood Letter W for Bottom
- Faux plant
- Balsa wood for trim
- Wood glue
Optional but helpful: disposable gloves and a small detail brush.
Step-by-Step: Stain and Paint a Wood Planter
1. Prep the Wood Surface
Lightly sand the planter to smooth rough spots and open the wood grain. Wipe away dust with a clean cloth. Proper prep helps stain absorb evenly and paint adhere better.
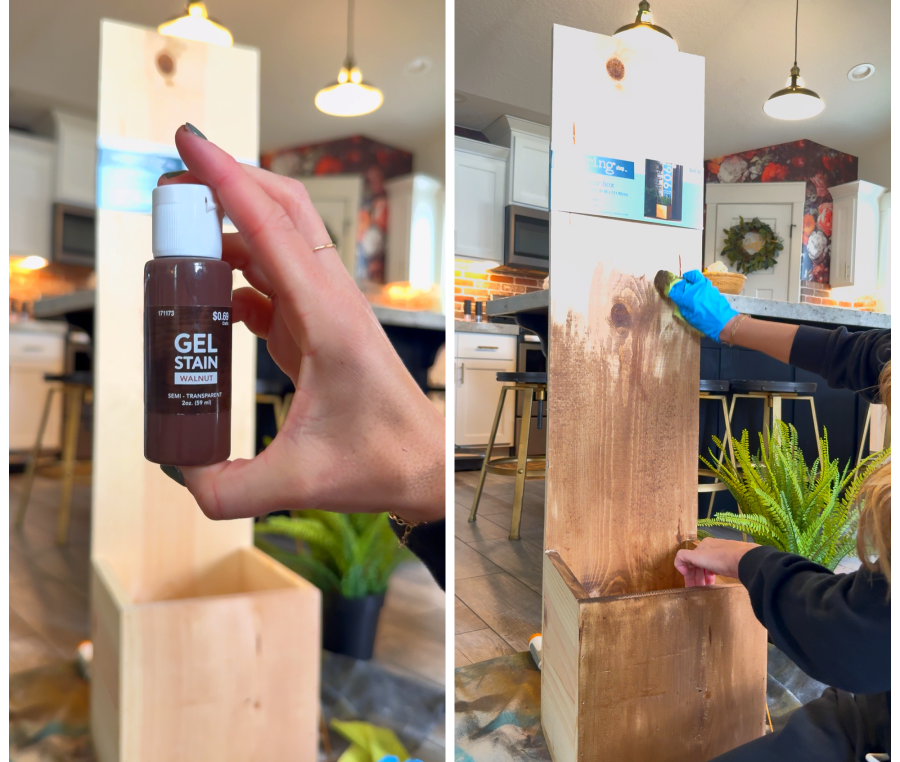
2. Apply the Wood Stain
Using a brush or cloth, apply stain in the direction of the grain. I found this gel stain at Hobby Lobby that was under a dollar and I had to try it! It worked so good!
Allow it to dry completely before moving to paint.
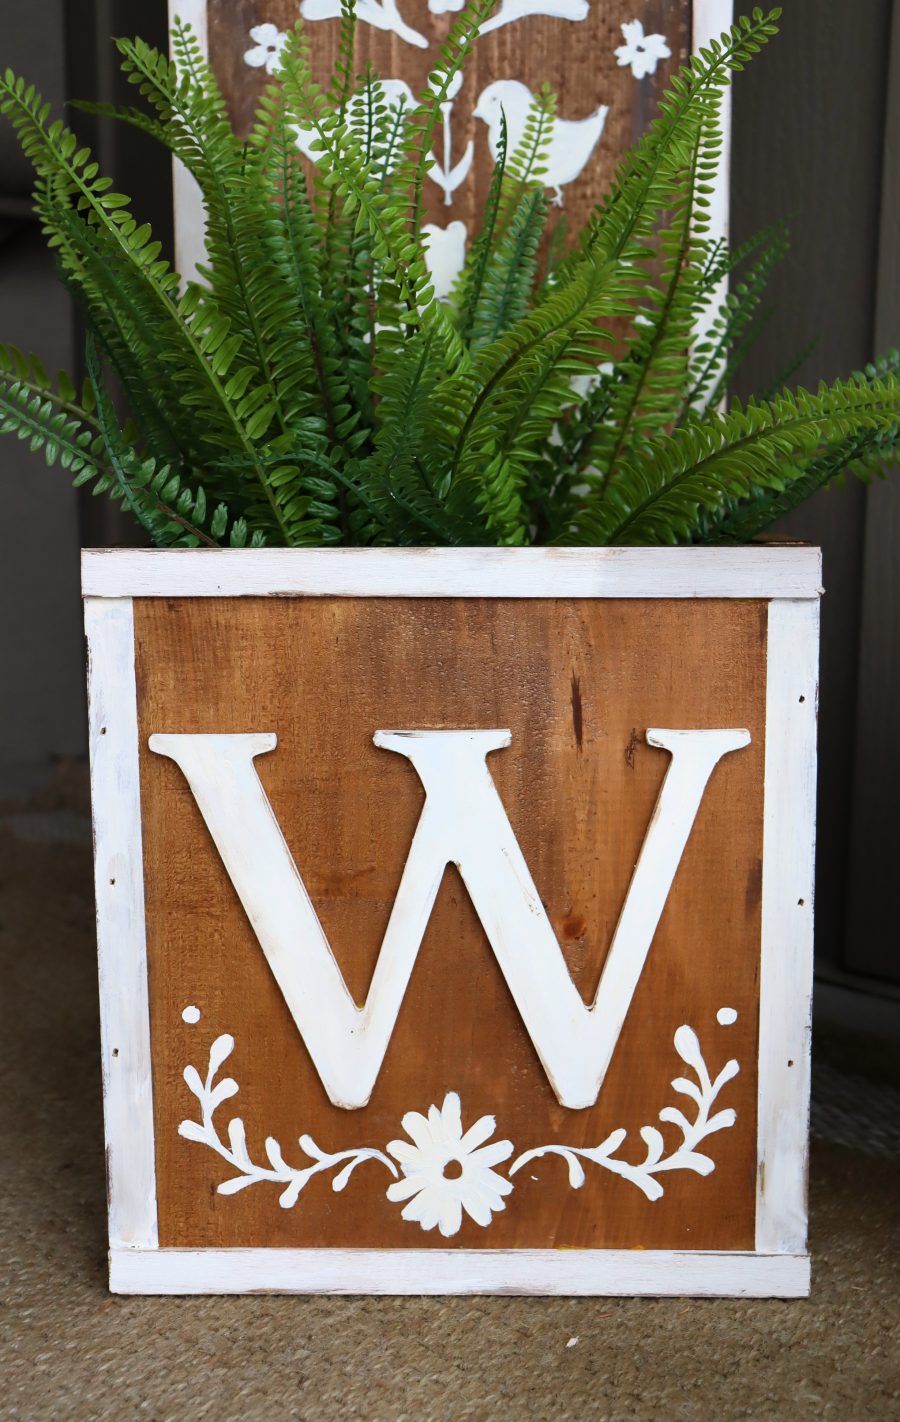
3. Add Trim
I found these balsa wood strips that fit perfectly on the edges. I painted them the white/cream color and glued them to the edges using wood glue. Use clamp or put some books on top to glue them in place. Balsa wood is super light weight and you can cut them with scissors! No need for any fancy tools!
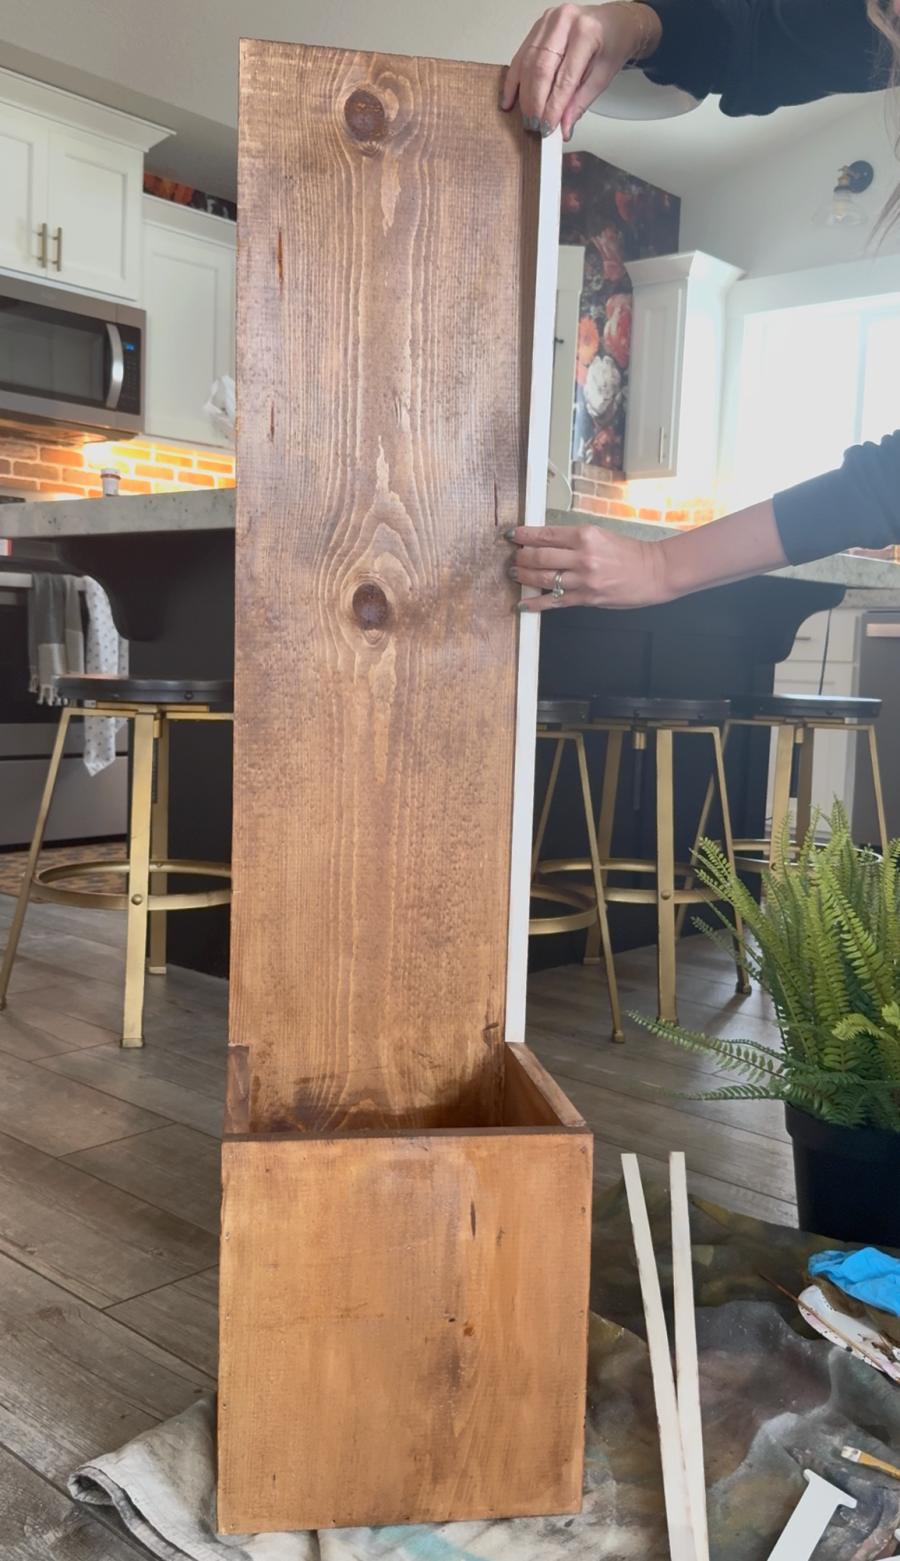
Full disclosure: I decided I wanted to trim out the bottom part and I ran out of balsa strips. I ended up using painters tape and just painted the two sides. AND it looked just fine! So if you don’t want to use any trim and just paint it on, then go for it!
Can you even tell which ones are painted on? It’s the ones on the left and the right!
4. Plan Your Painted Design
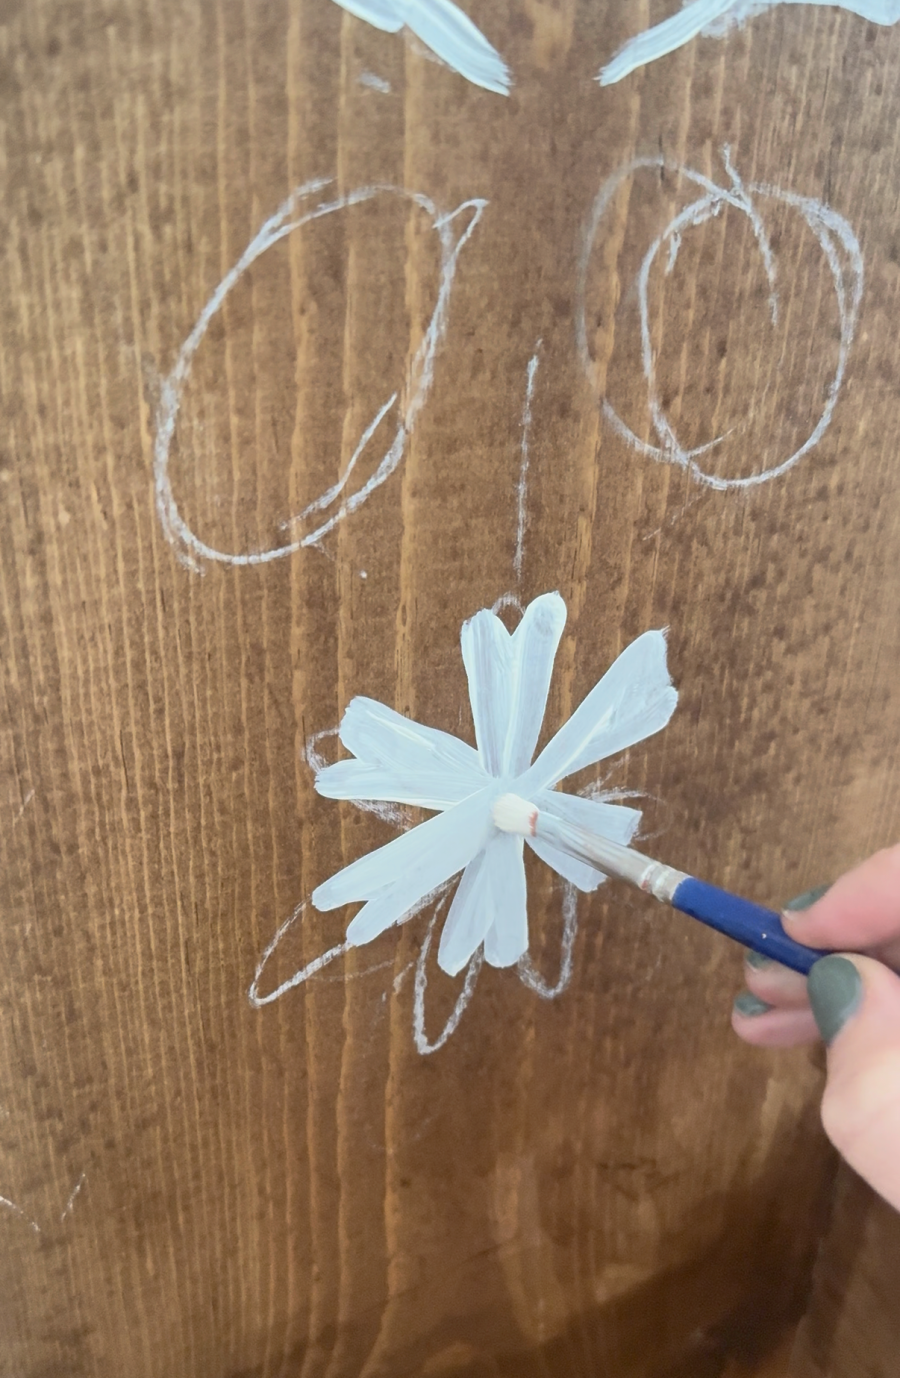
Decide where paint will go before you start. I used chalk to put a basic outline of where I wanted my design to go.
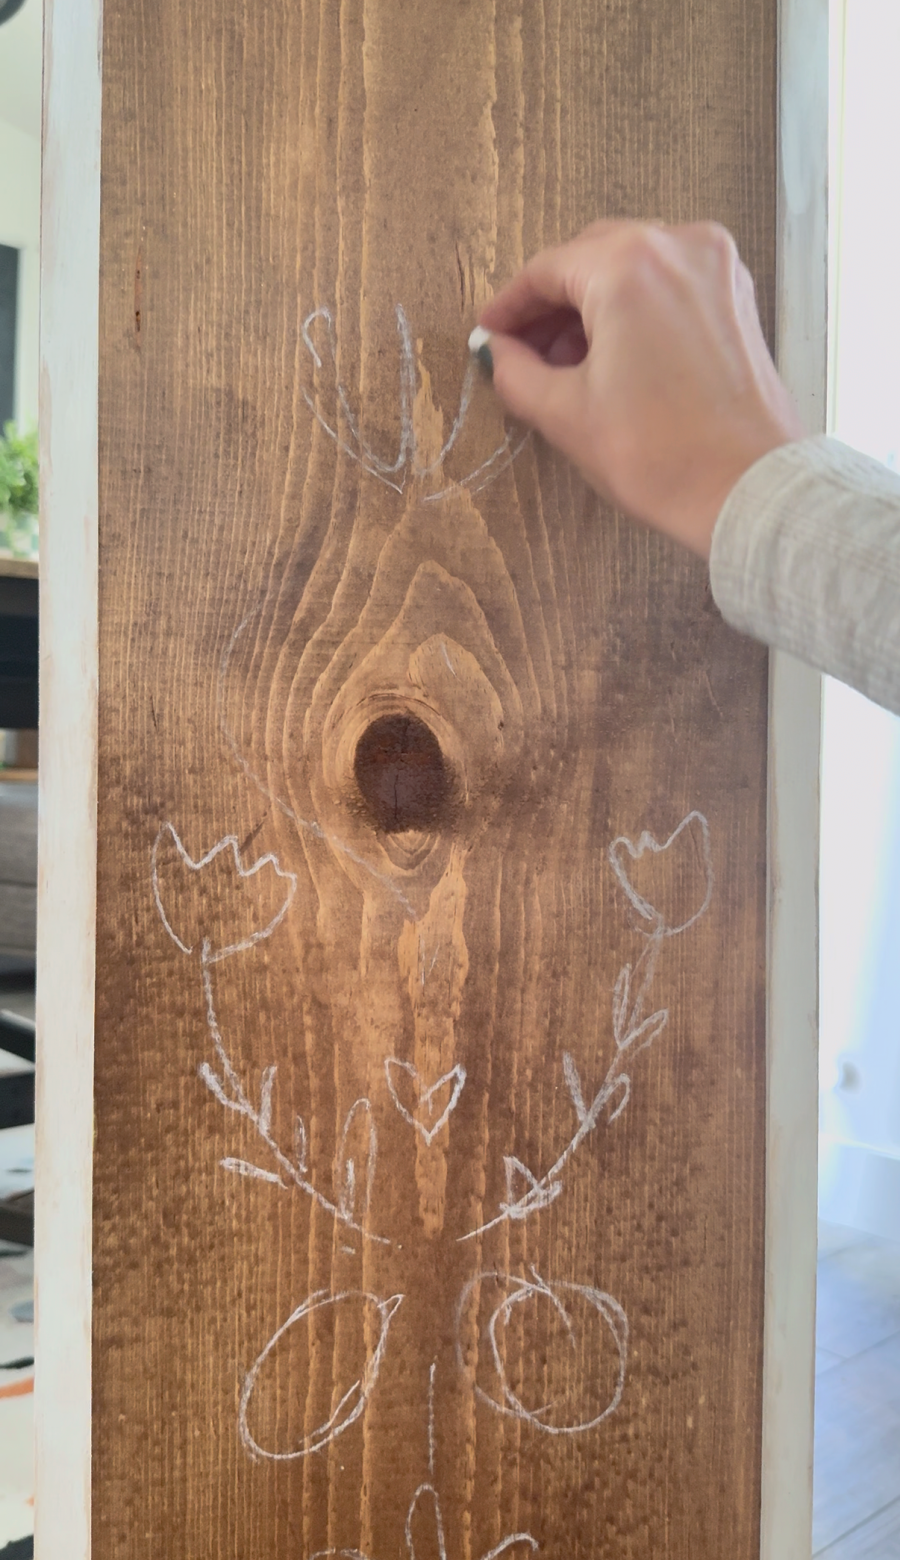
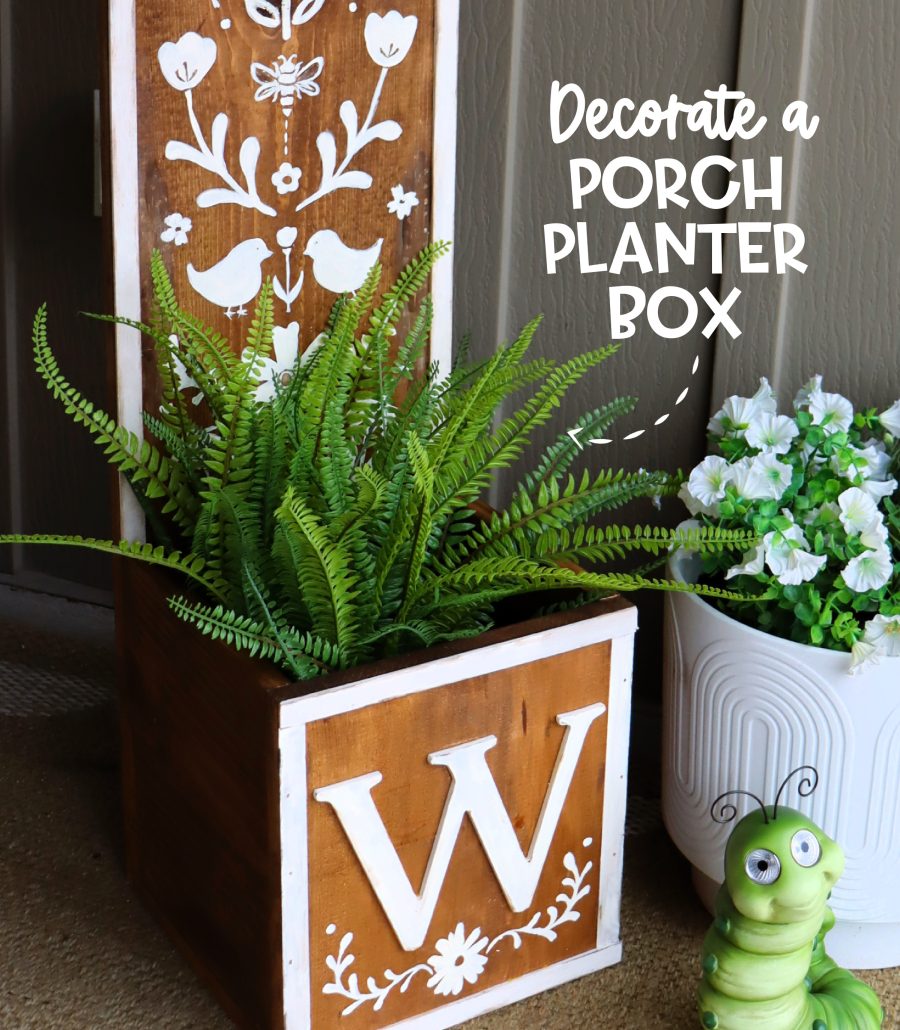
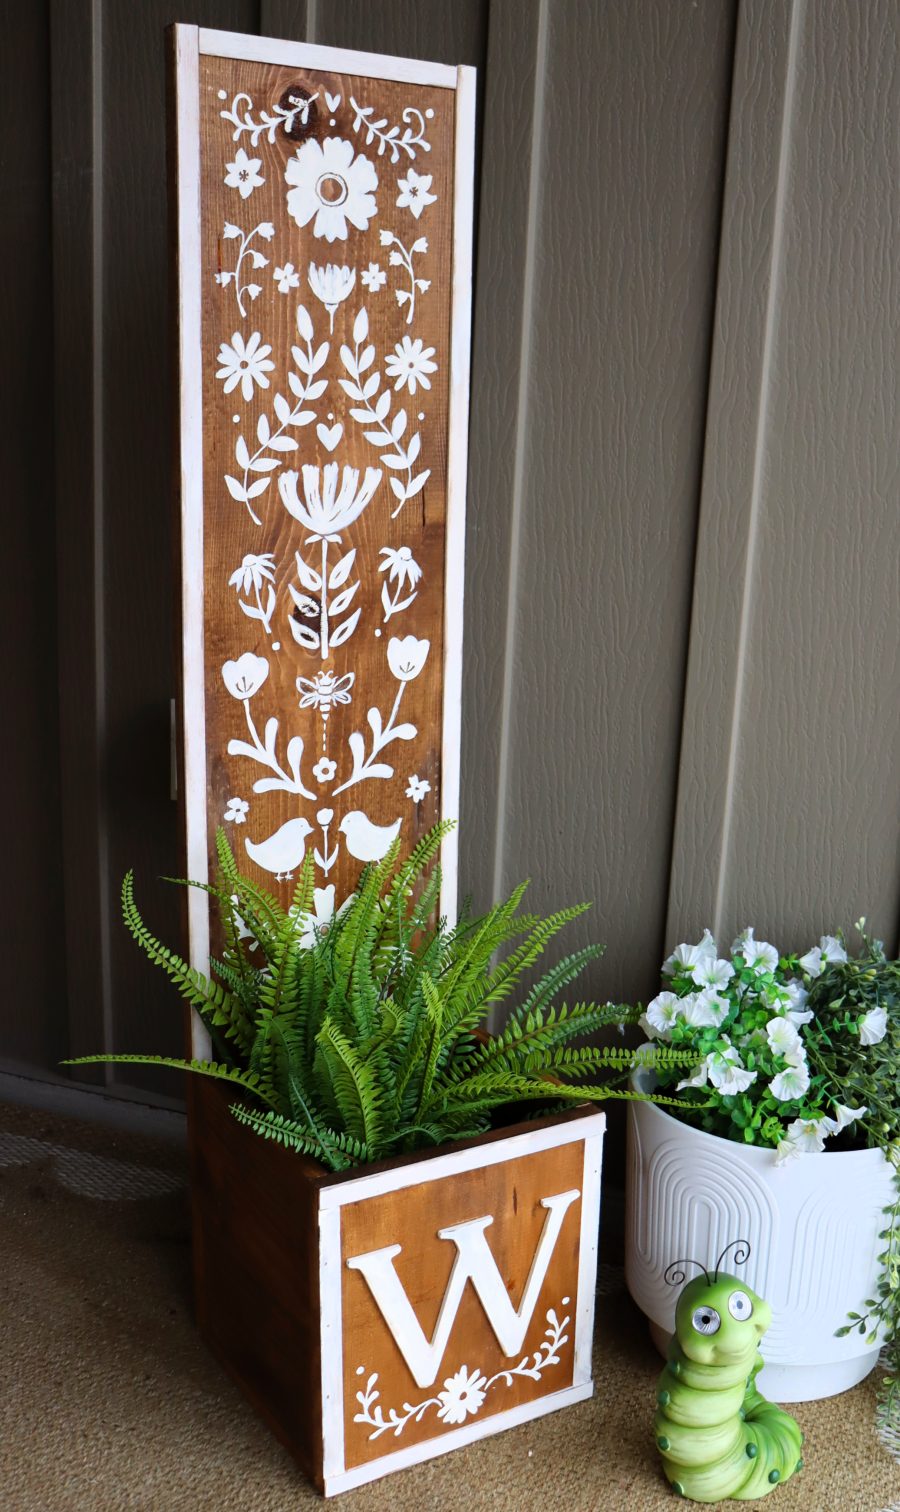
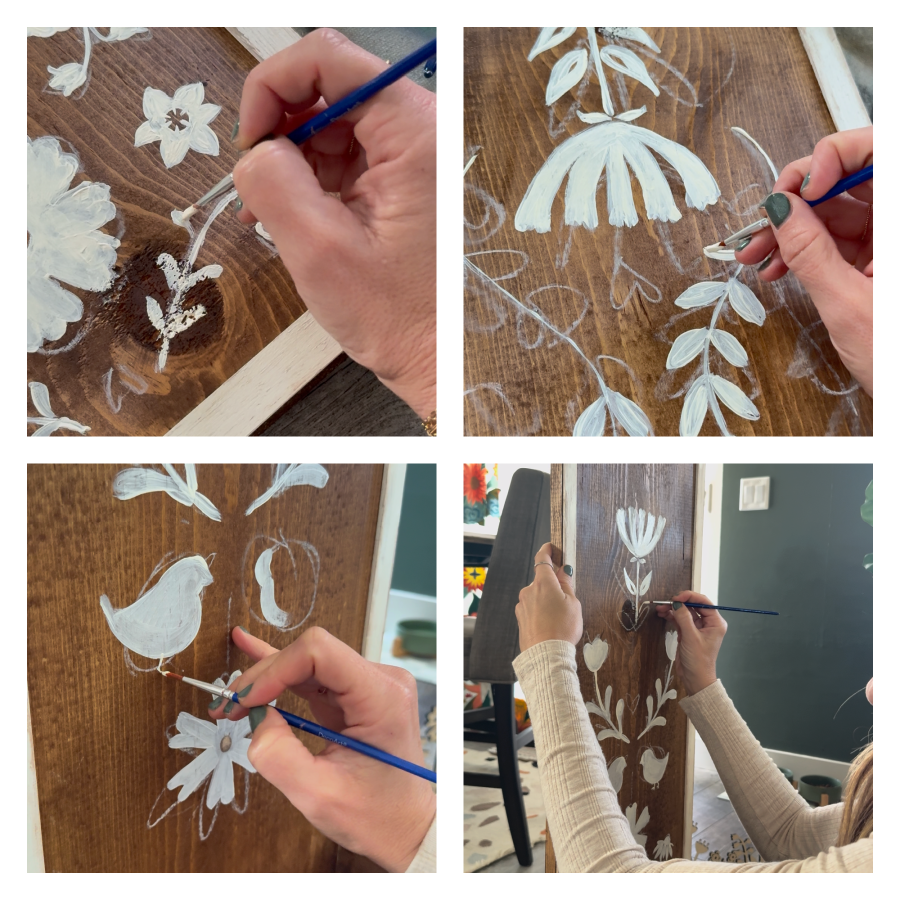
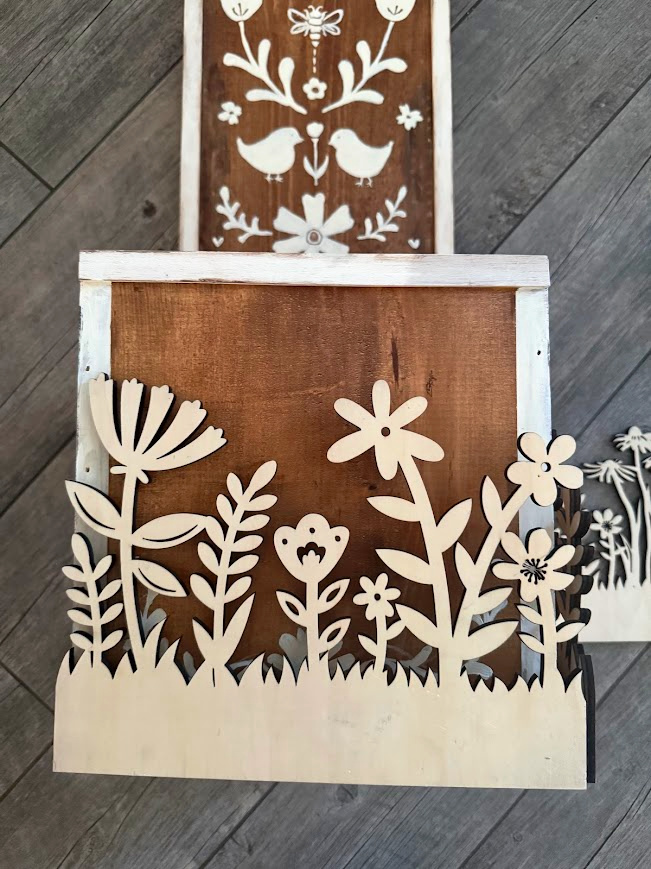
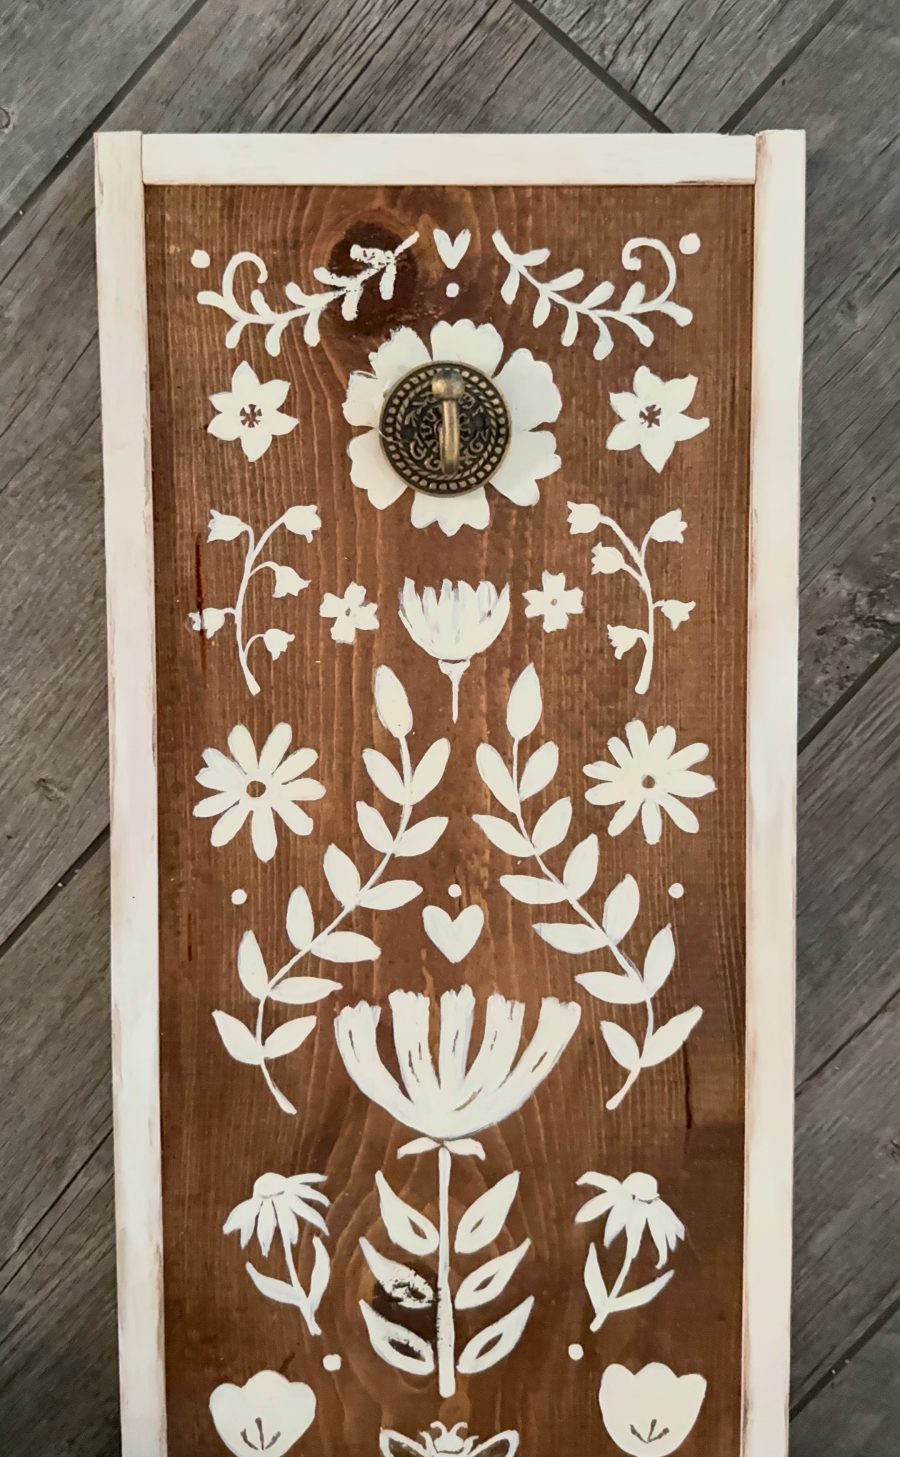
I chose to paint some folk art style flowers that I free handed on.
But Hobby Lobby had a whole section of cool stencils. Checkered, fruit, florals, etc! I even used one to add a butterfly!
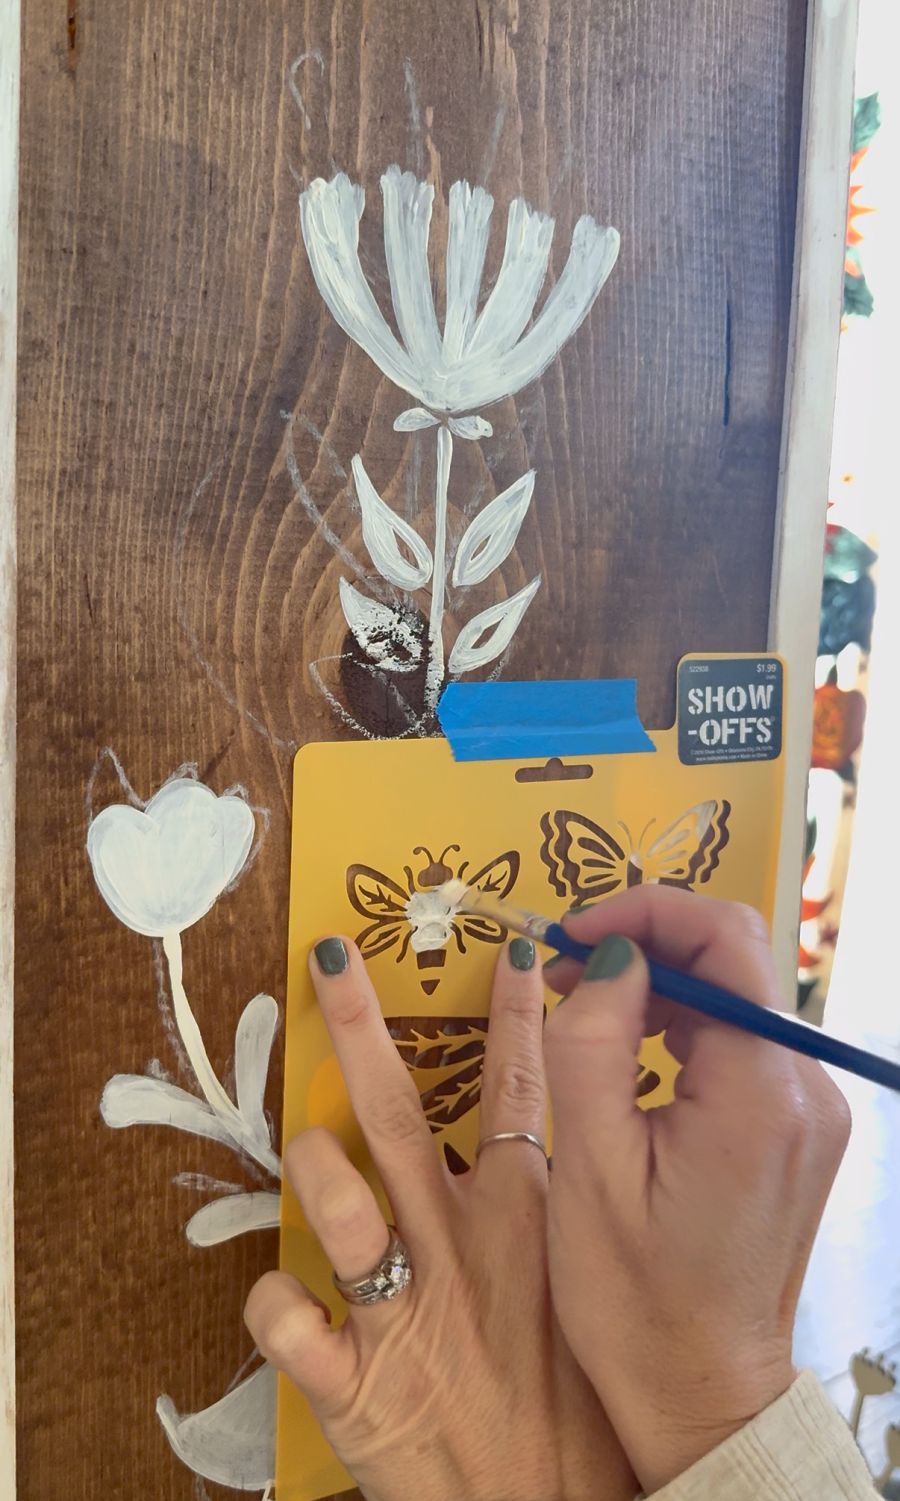
The stain absorbs the paint a little bit. So I did have to apply a few coats of paint. Just put on a good movie or podcast and paint! I had so much fun with these flowers! They are so happy looking!
Once the paint was dry, I took a damp paper towel to wipe away all the chalk marks.
Other Popular ideas to paint your board include:
- Plaid pattern
- Color-blocked panels
- A simple stripe or border
- Stenciled house numbers or words
- Whitewashed or distressed finish
For a rustic feel, lightly sand edges after drying to create a soft distressed look.
5. Decorative Details
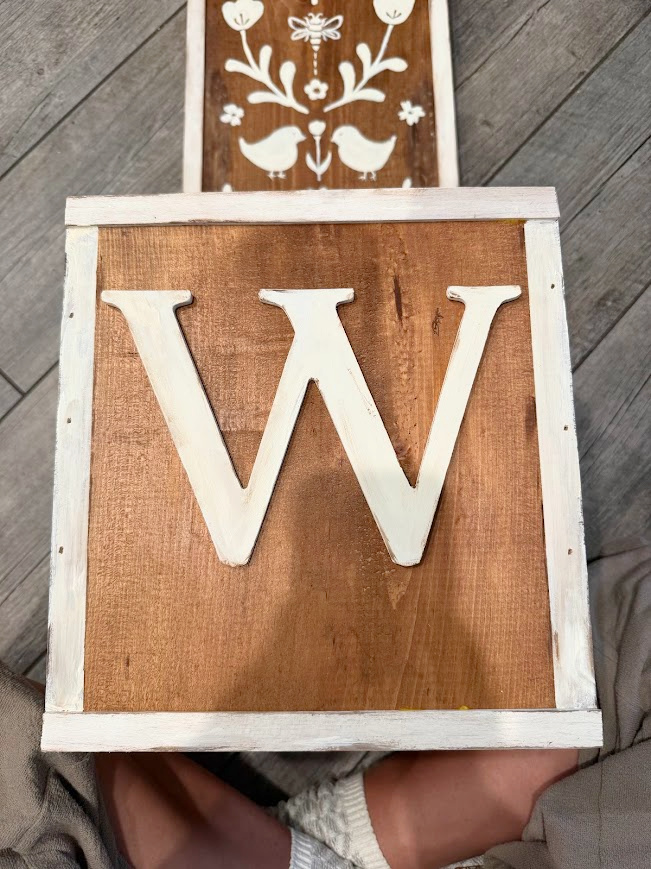
I painted the W to match the flowers.
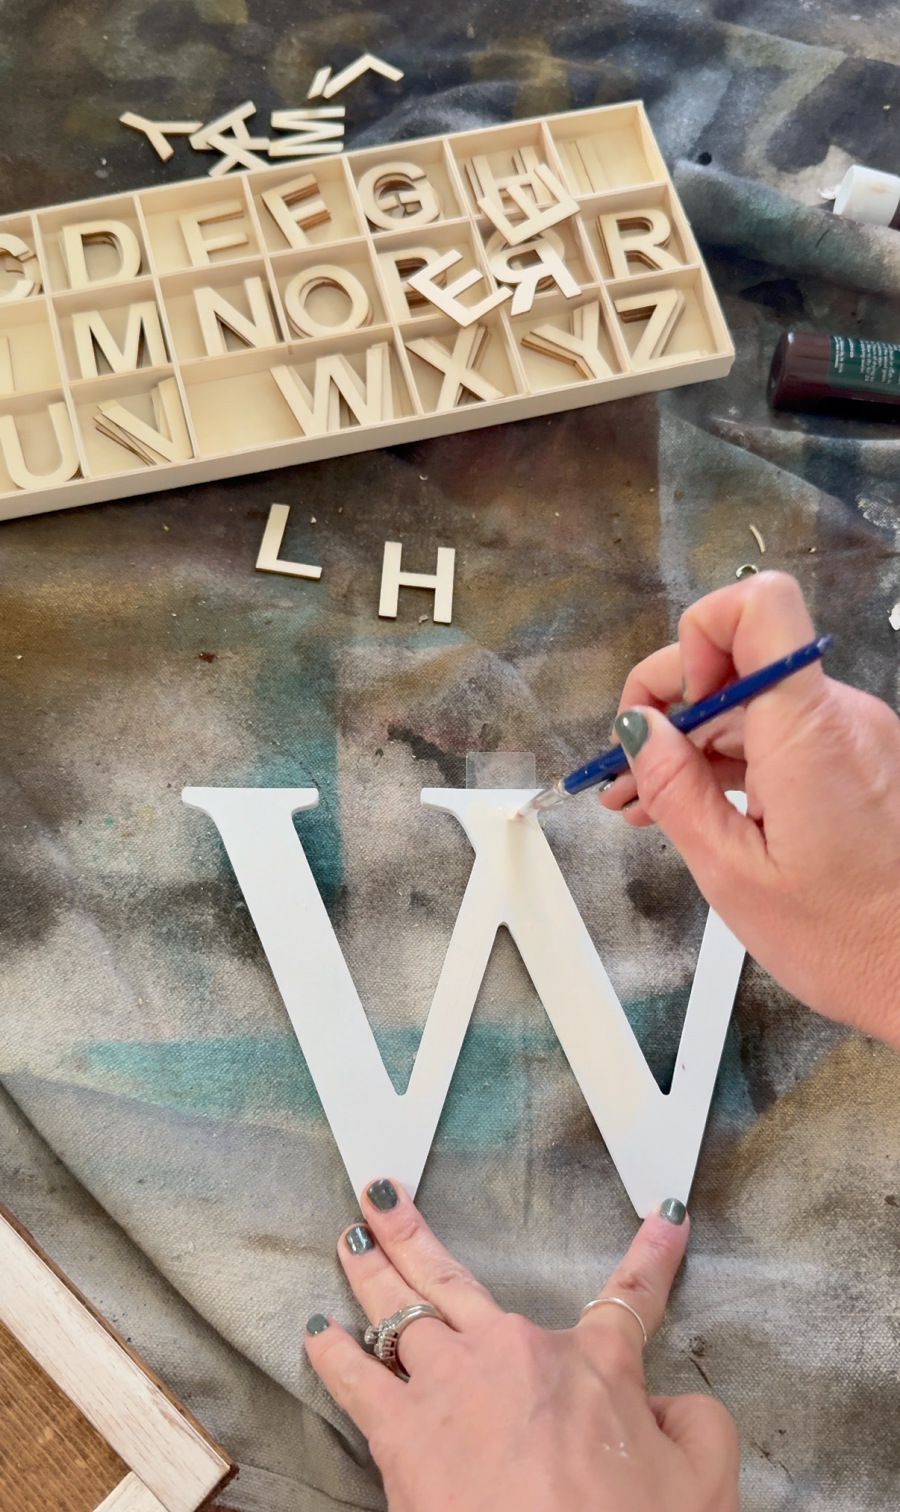
You can also see those wood letters above. I grabbed those because I wanted to play around with adding a welcome or hello etc with those letters! Another fun option!
I also grabbed these wood flowers from the spring shop that I loved around the bottom but I was worried it would be too busy.
And I did grab a couple hooks because I wasn’t sure if I wanted to add a ribbon bow to the top. I painted the sign so the flower was centered so I could add a hook right in the middle. I opted out because I didn’t want a ribbon to cover up any part of the flowers!
6. Seal for Outdoor Protection
Finish with a clear outdoor sealer to protect against moisture, sun exposure, and wear. This step keeps your planter looking fresh season after season.
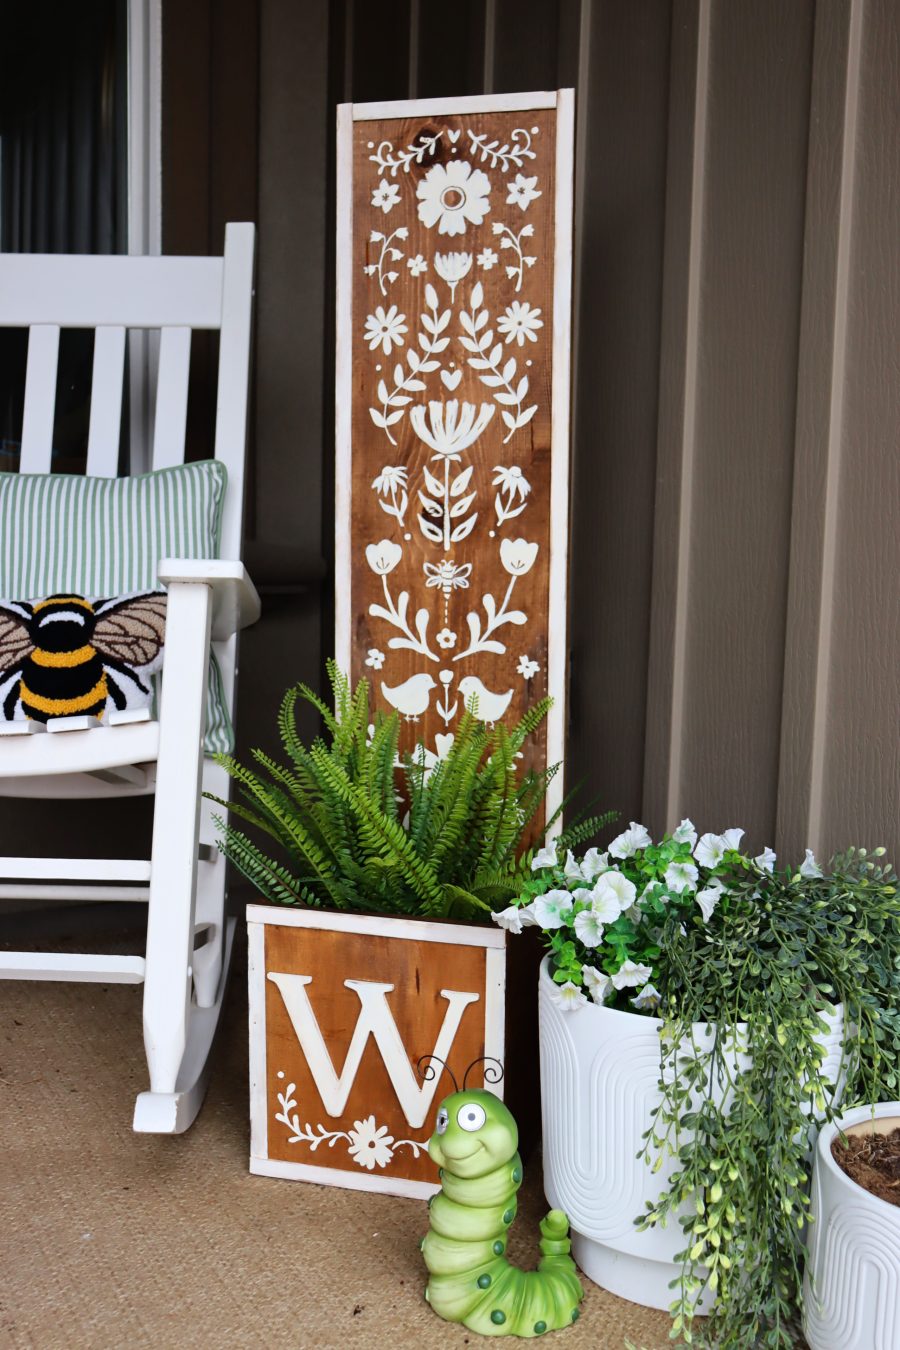
Front Porch Styling Ideas for Your Finished Planter
I bought a faux plant to put inside the planter box. It’s still a little too cold here in Idaho to plant real flowers. But you can add in whatever you want into your planter!
Once decorated, your planter becomes a statement piece. Try these styling ideas:
- Fill with seasonal flowers for year-round appeal
- Add small evergreen shrubs for a clean, structured look
- Pair two planters symmetrically beside your door
- Mix with lanterns or a welcome sign
- Use contrasting plant colors to highlight the finish
A beautifully finished planter instantly makes your porch feel more intentional and inviting.
Tips for Long-Lasting Results
- Choose exterior-grade paint and sealer
- Elevate the planter slightly off the ground for drainage
- Reapply sealer yearly for maximum protection
- Test stain color on scrap wood first
- Work in a well-ventilated area
A Simple DIY That Makes a Big Impact
Decorating a wood planter with stain and paint is one of the easiest ways to upgrade your front porch décor without a major project. With just a few supplies and an afternoon of work, you’ll have a custom piece that adds charm, color, and personality to your home’s entrance.
Save for later
Too busy to get crafting today? No problem! Pin this post to remind yourself about this project later! Sharing my projects helps me reach more people, allowing me to continue sharing free content!
This is a sponsored post written by me on behalf of Hobby Lobby. All opinions are 100% mine.
Leave a Reply