
so i like to repost all my old posts on here….cause, well, it’s mine. and this is my blog. and i like to be able to find my crap without going around town gathering up my old guest posts.
but see..i added throwback Thursday up there in the title….so it sounds legit–cause there is alliteration.
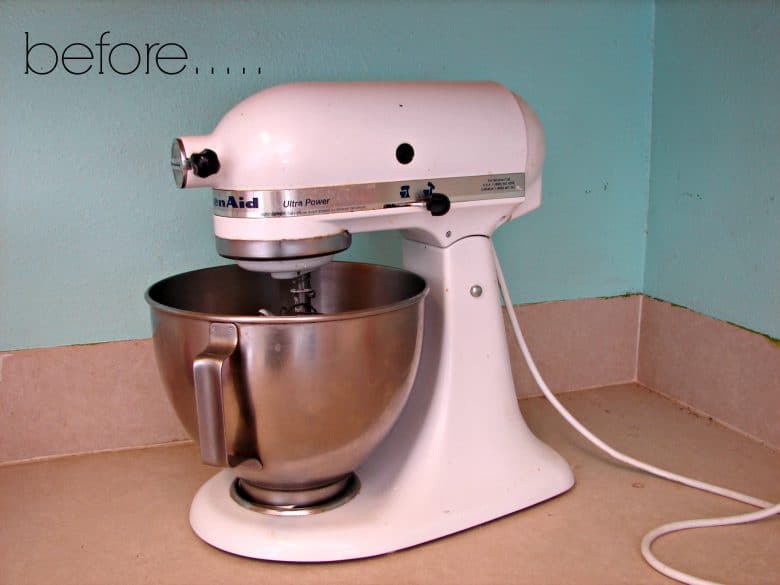
and this is another reposter…
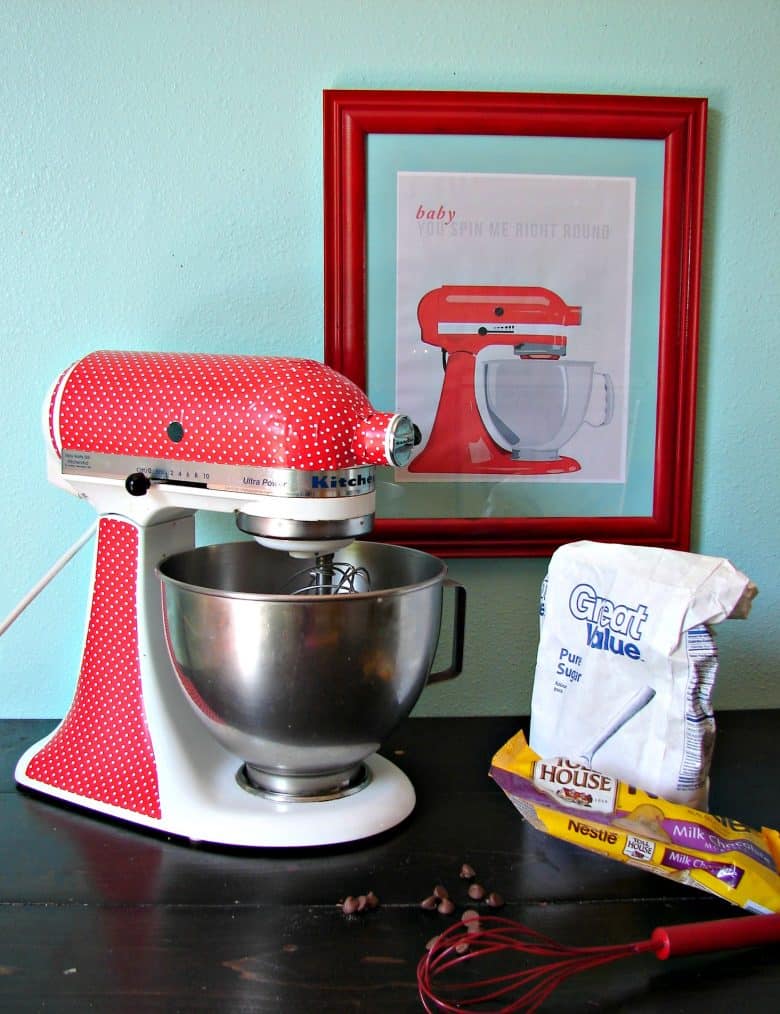
and it’s old..cause you see my baby blue wall in it.
(i miss you baby blue wall!)
but the kitchen aid is sitting in my new kitchen looking all pretty still!!!
expressions vinyl has all this fun patterned vinyl. and i literally walk around my house trying to find stuff to stick it on.
and guess what got the makeover today….
my kitchenaid. i love it. so much. time to prettify her up.
FIRST: this is not a project for cutters–so even if you don’t have a vinyl cutter machine you don’t have to feel out of the loop.
SECOND: the kitchenaid is a curved surface and it takes a little time and finesse to get it on smooth.
first. oh wait. i already said first.
what number are we on..
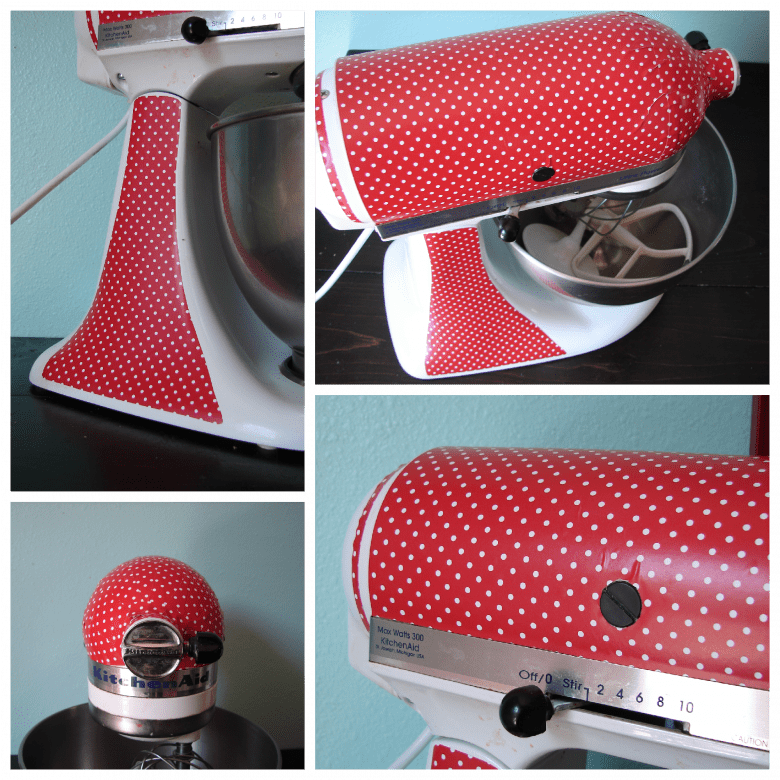
oh. third. cut your vinyl to size…
you are going to have to refer to this tutorial
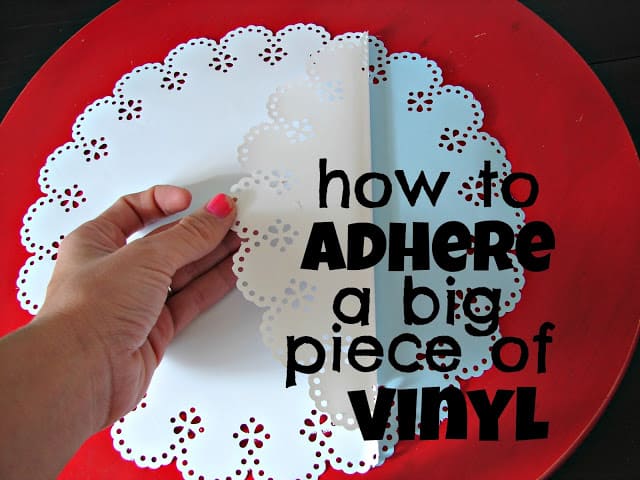
after you read that it will be a little more smooth going for you.
you will start peeling and sticking….
my kitchenaid has this black rubber screwy thing right on the side….
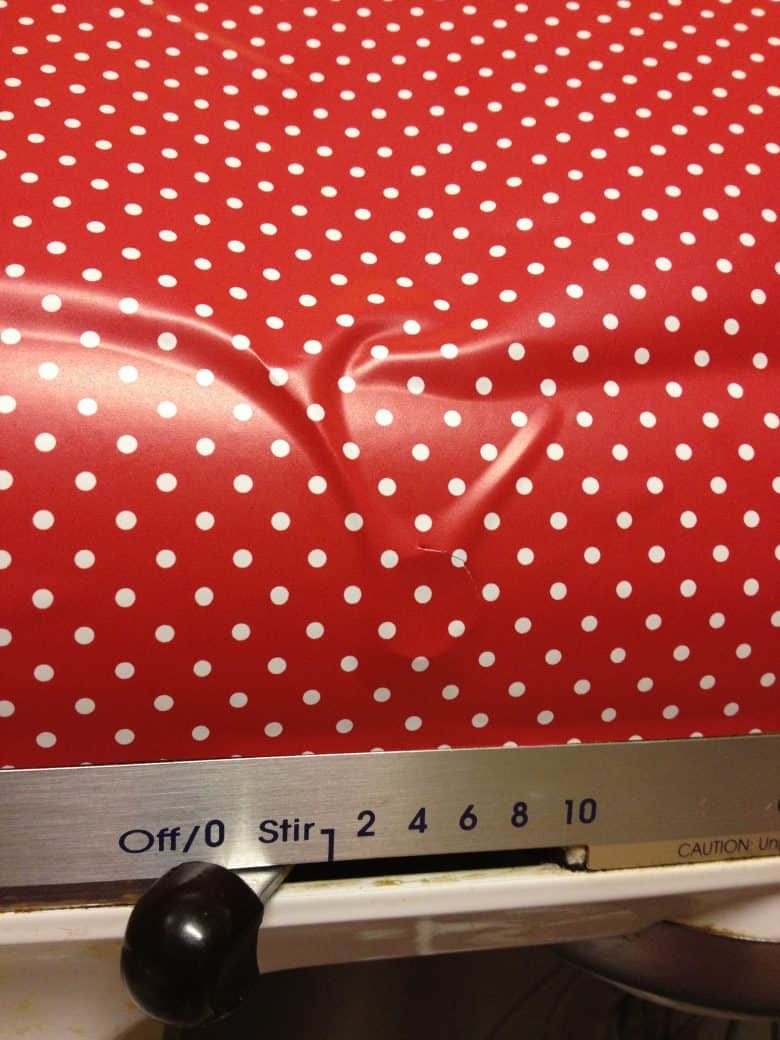
which was causing the vinyl to ripple…
so i just took an exacto knife…
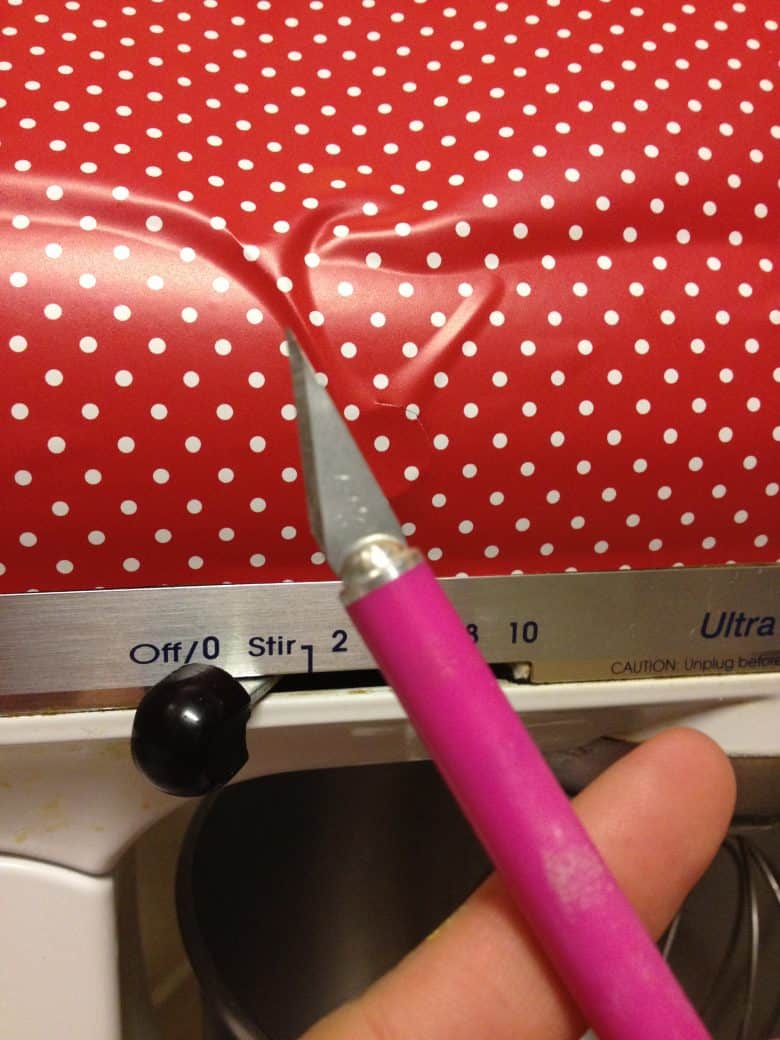
and cut right around it….be careful. vinyl is thin and cuts really easy…

hmmm. you think i would have cleaned my kitchen aid.
and you would have thought wrong.
then i just continued on peeling and sticking and rubbing the wrinkles out.
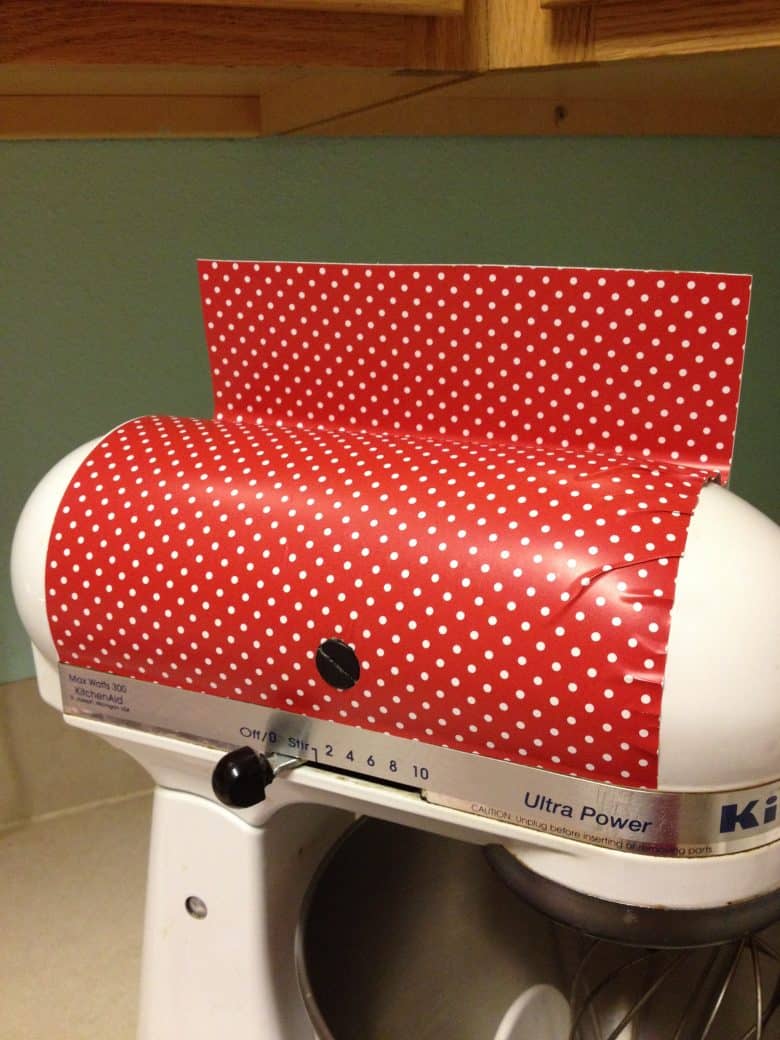 you can see at the rounded head of the kitchen aid it starts to crease a lot…
so now i’m going to direct you to THIS tutorial (ha! you are all over today!)
 .this tut is basically just going to reinforce the fact that if you have a curved surface…and straight vinyl…it isn’t going to happen.
you need to cut small pieces and lay them out. (luckily this polka dot is pretty easy to work with.
if you get a wrinkle…work it out…
you can take your exacto knife and trim excess off. (this is the slow part that i was talking about in number two.)
the fact of the matter is…you will probably have some wrinkles. (don’t we all at some point)
don’t sweat the small ones. if you get too big of ones you can slowly peel it up and try to work it back down. (botox for vinyl)
cause it’s worth it..
check out this awesome baby.
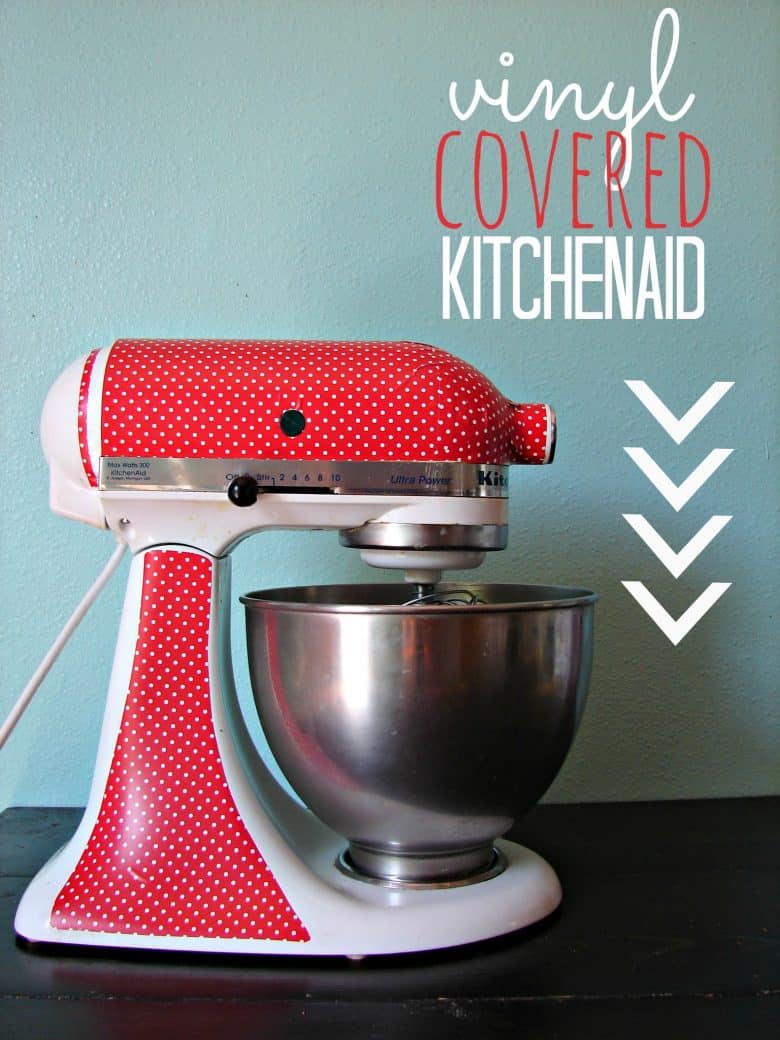
{red polka dot vinyl is from HERE}

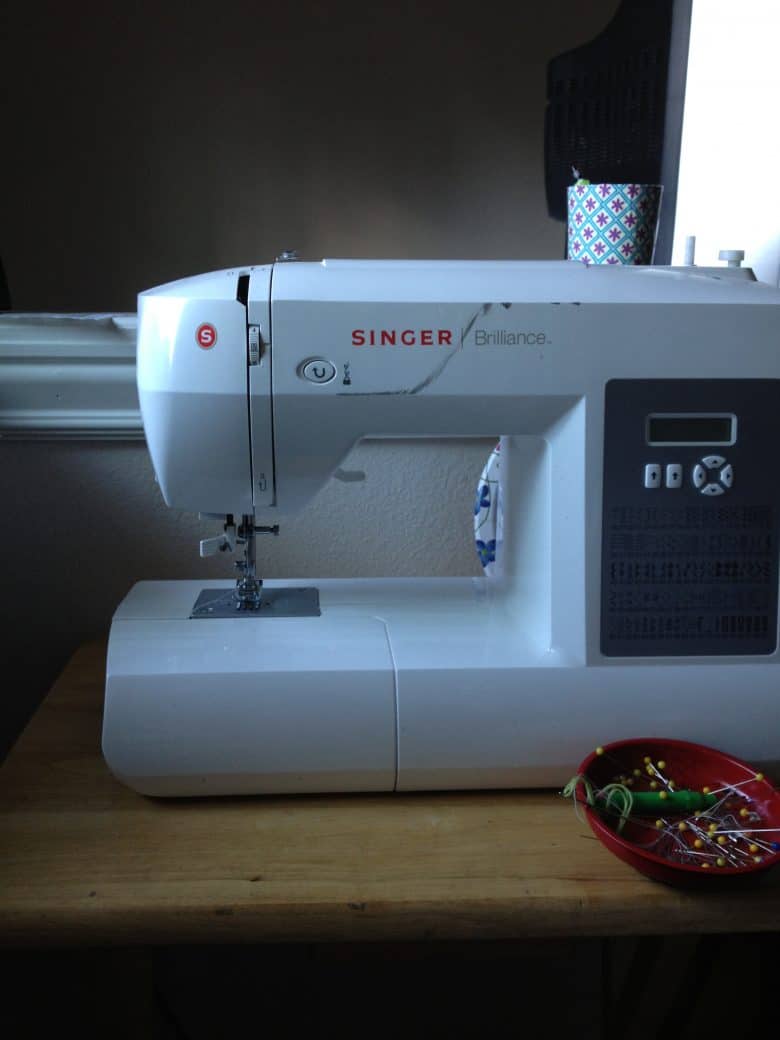
 and guess what’s next on my list of things to be adorned with vinyl…
stewart the sewing machine…..

Susan the farm quilter says
So now you are a plastic surgeon and do face and body lifts! Great job getting out the wrinkles and taking your Kitchen Aide to a whole new level! Love it!!!!!
Susan the farm quilter says
Must be bed time cuz it’s only an Aid, not an Aide! Maybe I need to pay a visit to the “plastic surgeon” and get the clock turned back a few decades!!
Desiree @The36thAvenue says
Oh my cuteness! I am pinning 🙂
Carolyn says
Hi, I was wondering how much vinyl you needed for this project. Will the 12 x 12 be enough or would the 12 x 24 be my best bet. Great idea by the way! I’ve been trying to think of a way to spruce up my white kitchen aid and I think I’ve found it 😀
Kimbo says
i would do a 12 by 24! you maybe could make it work with a 12×12…just barely. so i would go a size up to be safe! good luck!!!
Tori says
Hey, Kimbo! I LOVE this! Thanks for all the tips! I’m wondering how you came up with the pattern? Is there one, or is it a fly-by-the seat-of-your-pants kind of thing? Which IS how I usually do things!! Haha!
Kimbo says
fly by the seat of my pants! ha!!!