
so my fridge.
It was verrrrry slowly getting overtaken with kids pictures. and while i entirely encourage creativity…It was a bit much. and the garbage was underneath and if anyone bumped anything–it would fall into the garbage.
and i said enough is enough and decided to a make a designated spot for it all…
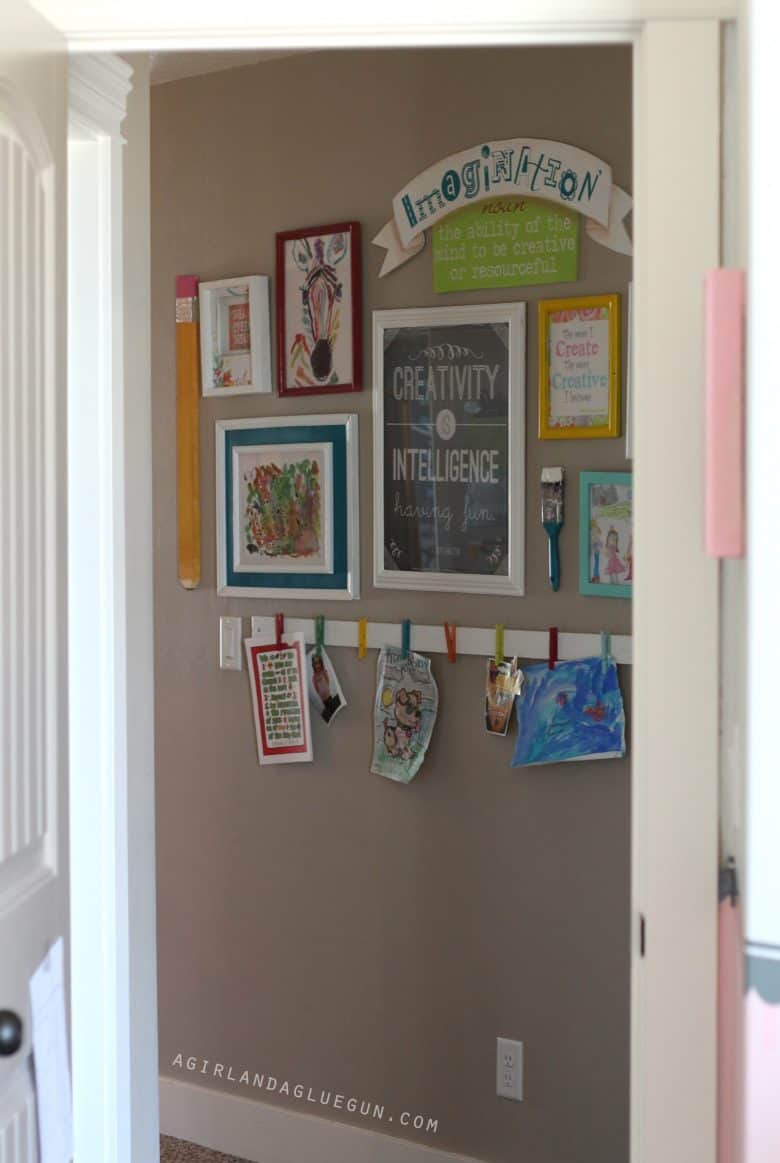
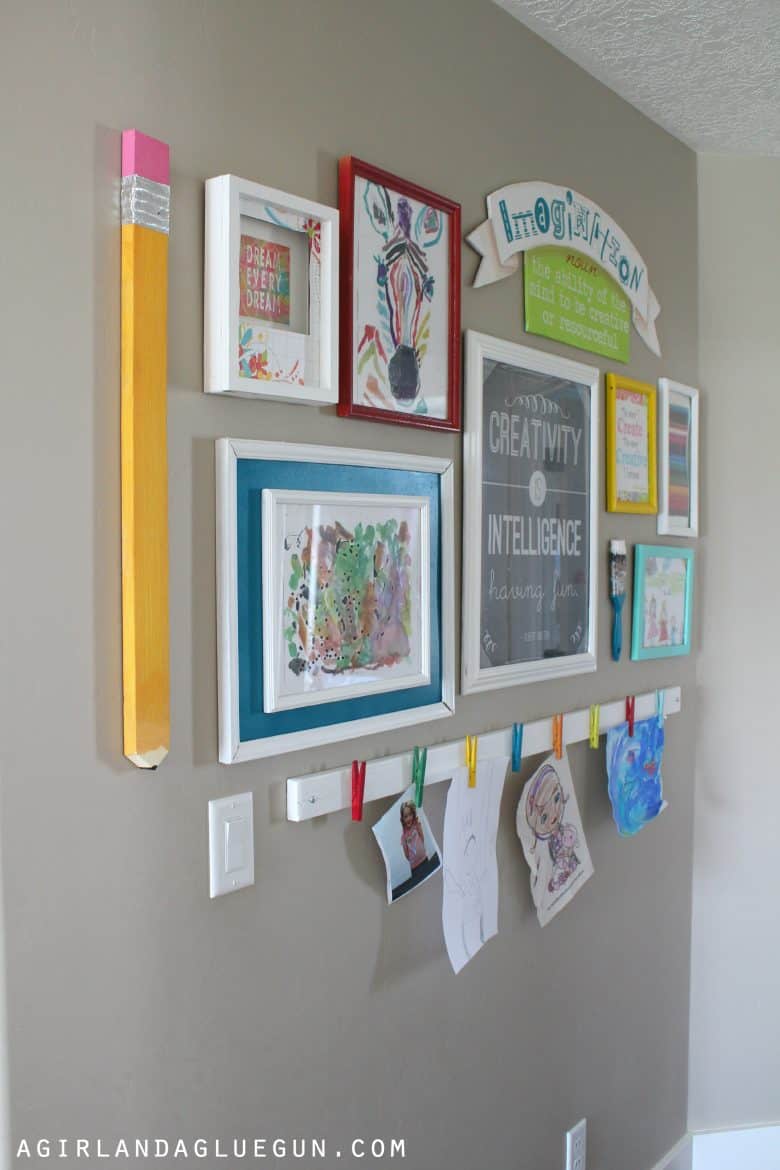
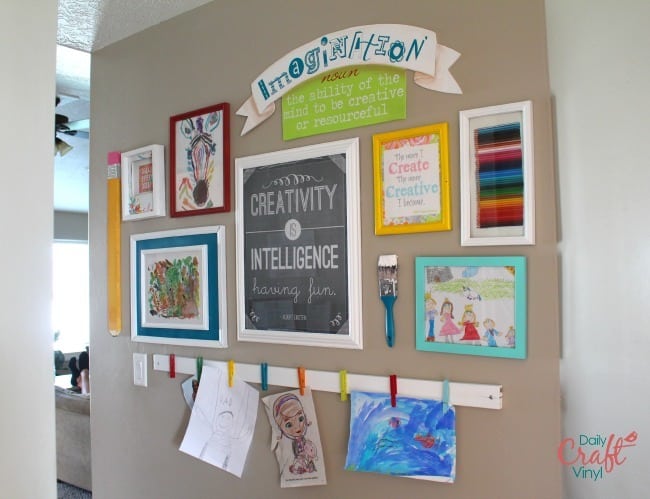
aka..art wall…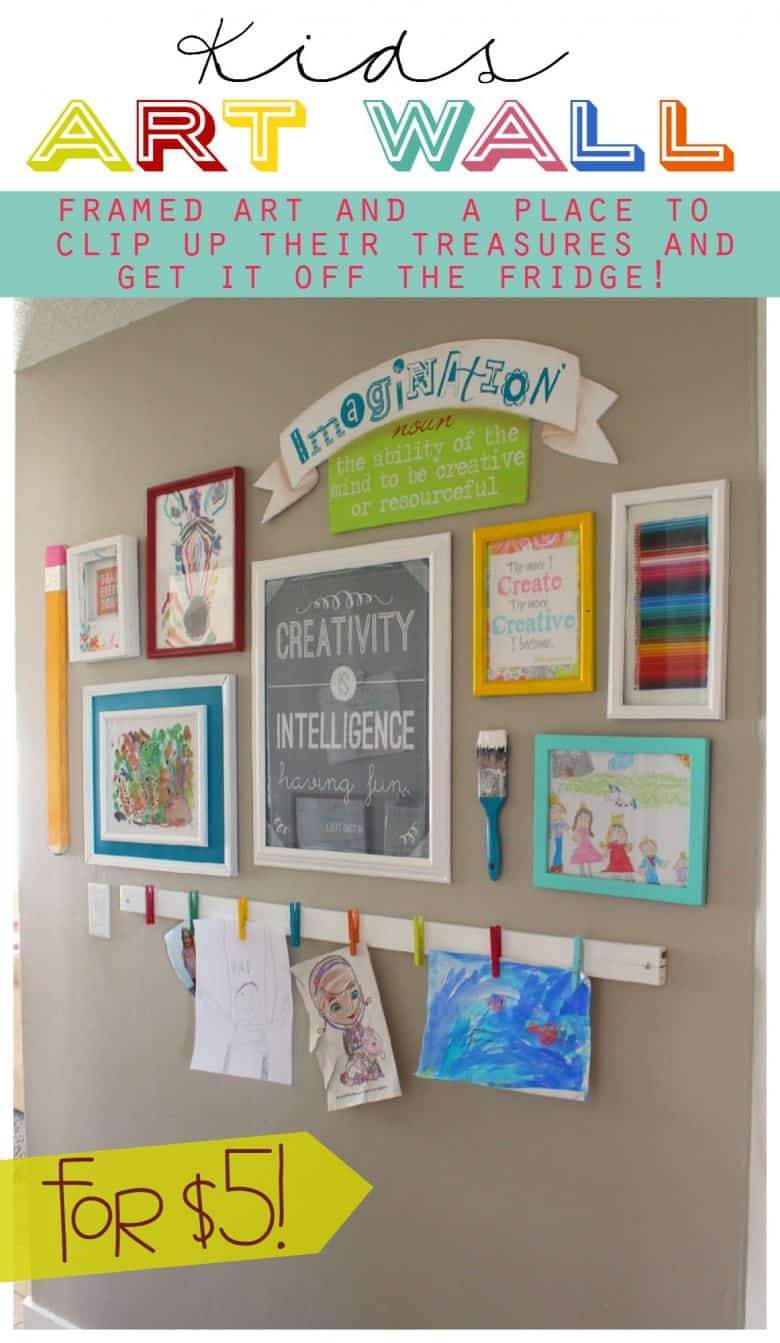
It leads down the hallway into my craft room…and my daughter’s room…and the bathroom.
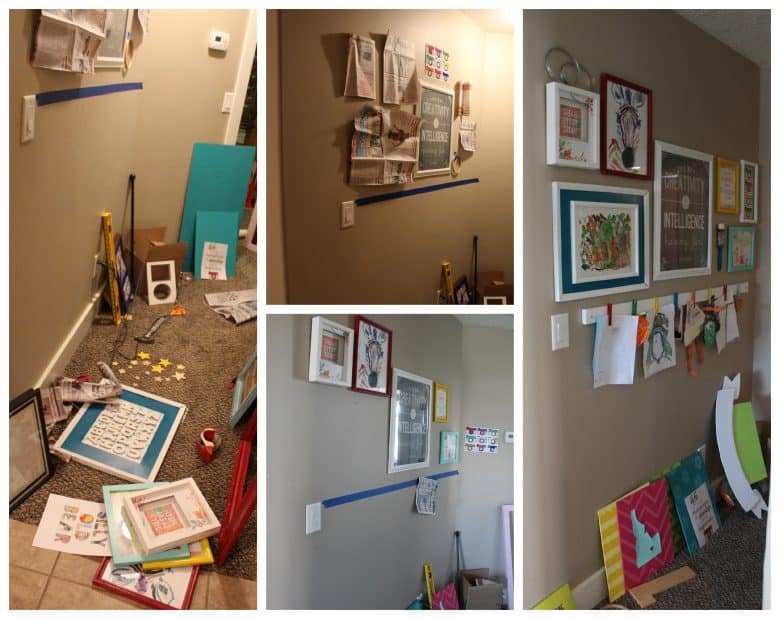
I started with newspapers cut to the frames size and taped them up so i could get a placement idea….because the house still had the new feeling where I couldn’t just put holes in the wall willy nilly (i’m over it now!)
and then I slowly over like two months added and subtracted crap until I found the perfect arrangement.
 i was originally going to hang a curtain rod with clippies on it…(clippies not being the official title)
much like this one
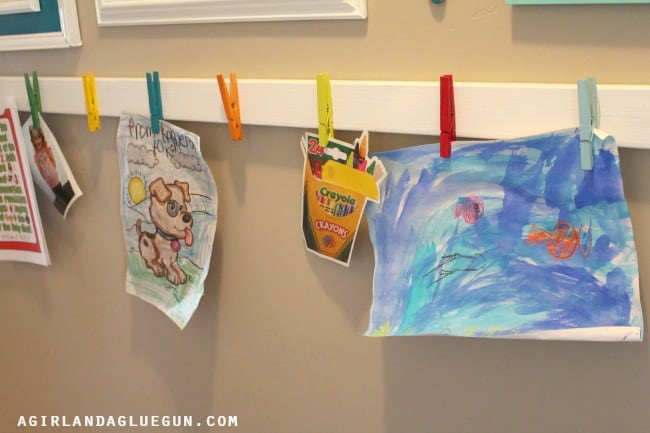
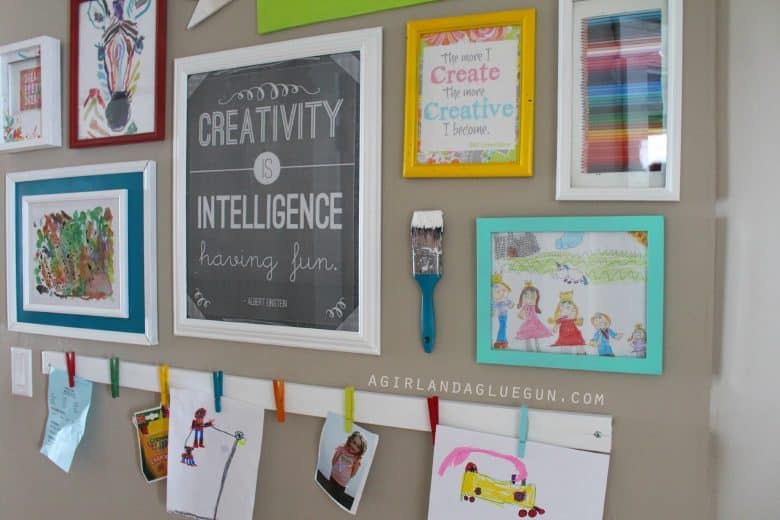
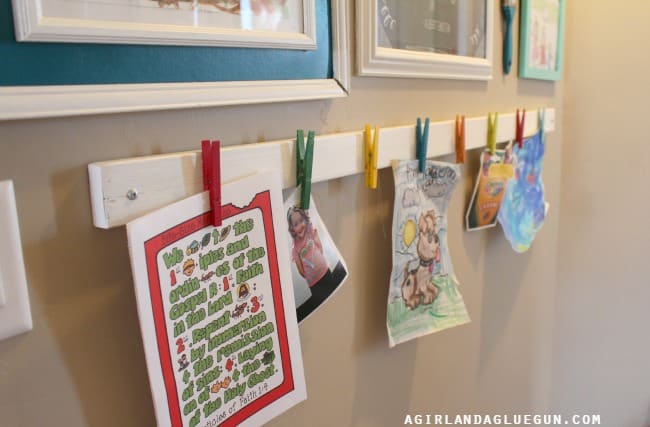
but then i found a straight board….and i knew i had clothespins..and free can’t beat anything in my book. so the board got painted…..and the clothespins got spray painted all different colors.
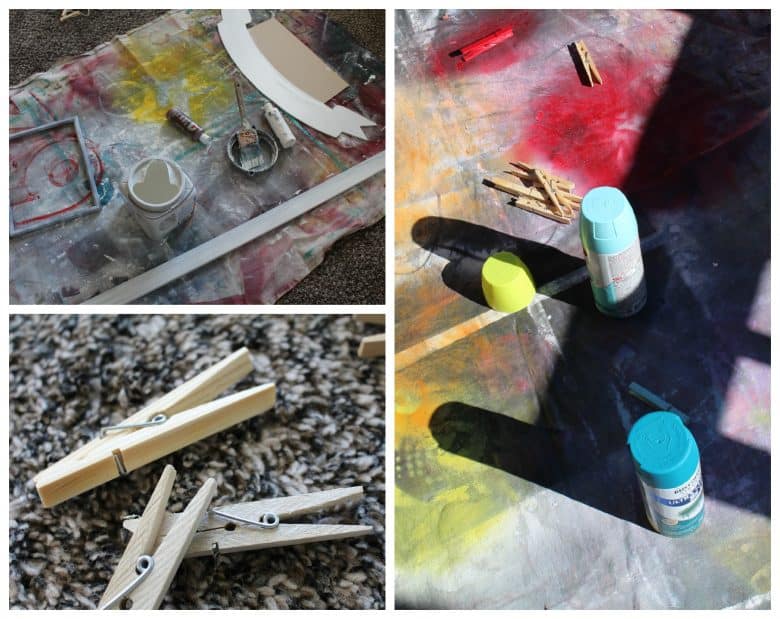
and just hot glued them to the board.
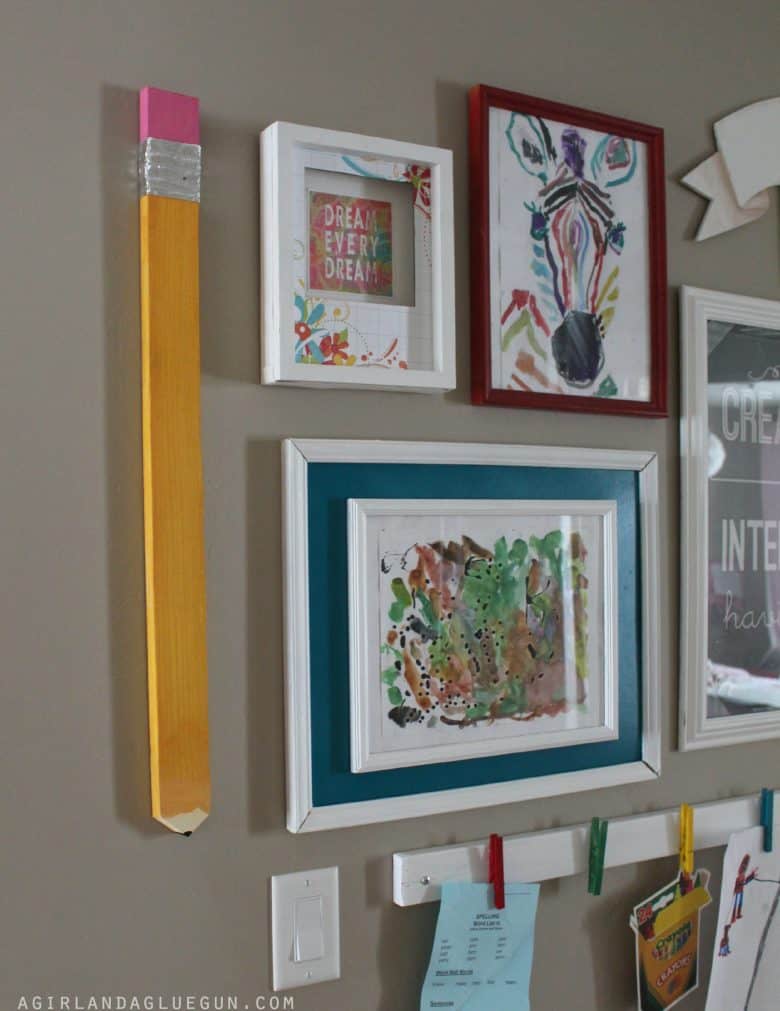
I made a giant pencil…just a piece of wood that i cut off the ends to make a point and painted
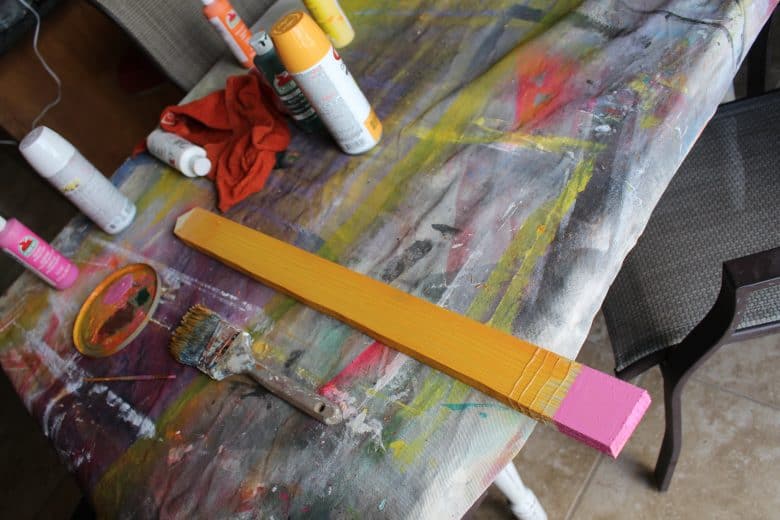 i slapped some hot glue around the ends
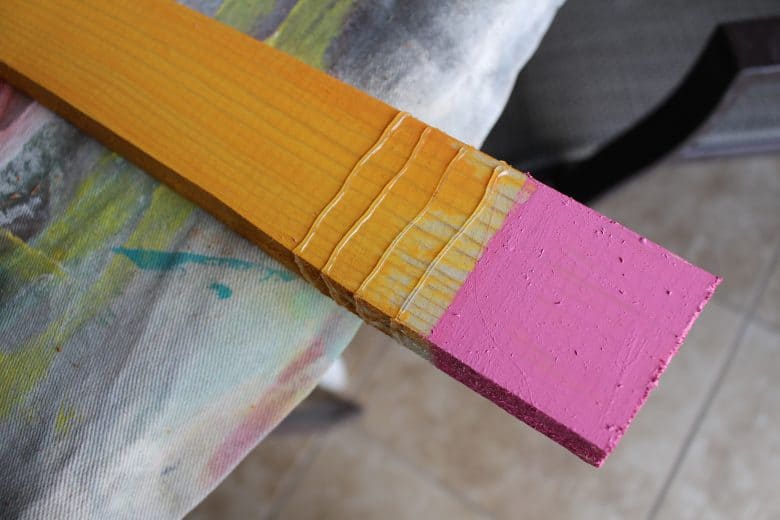
and covered it with tin foil to create the metal part of the pencil…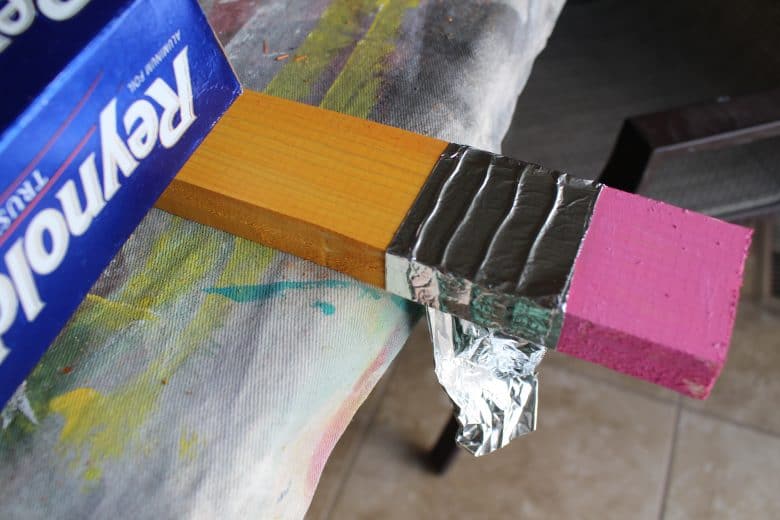
looks so fun on the wall!
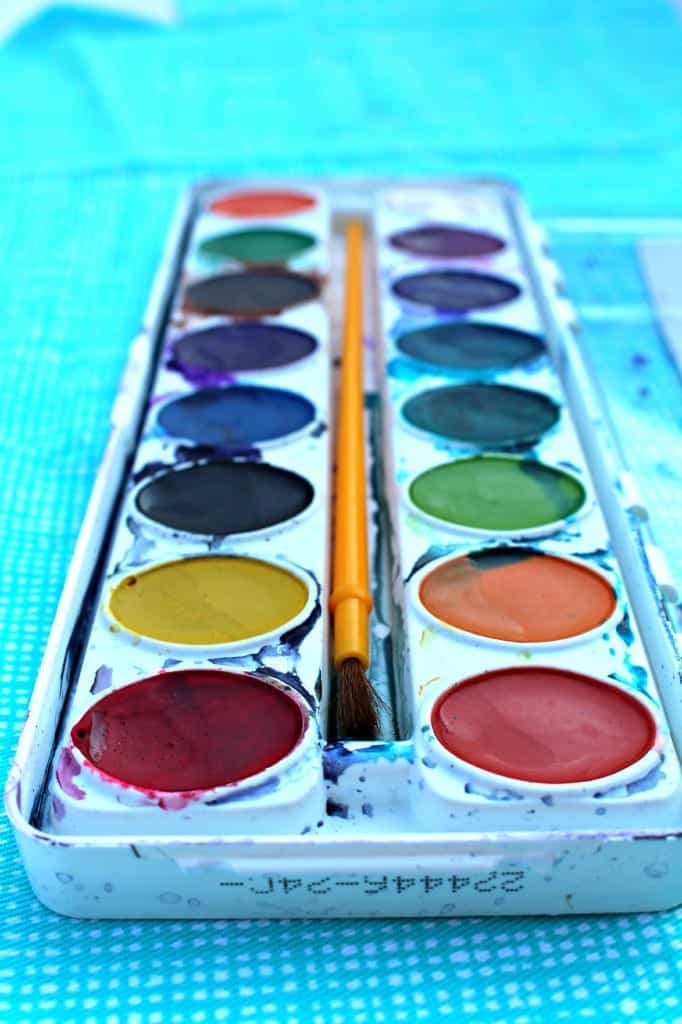
I also dipped an old paint brush in white paint and let it dry on some wax paper and stuck it to the wall as well….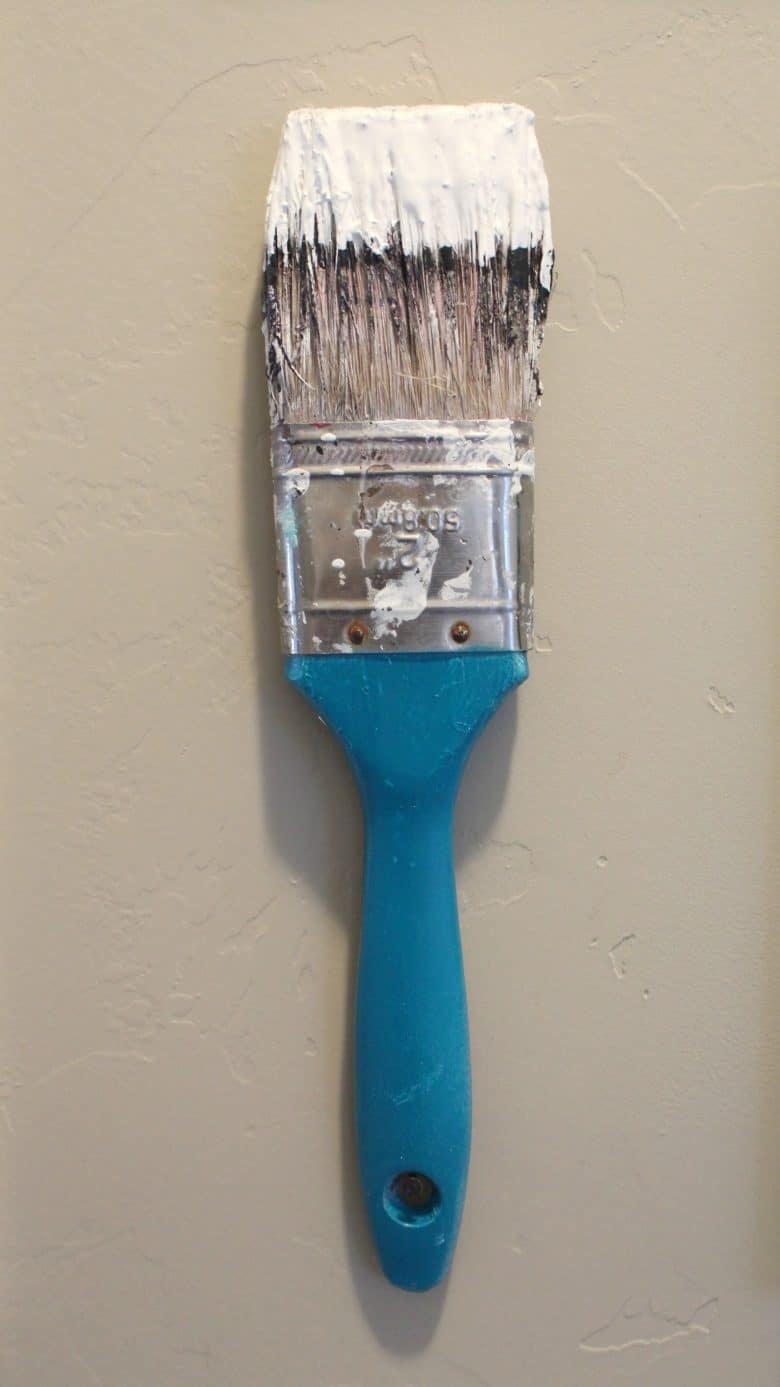
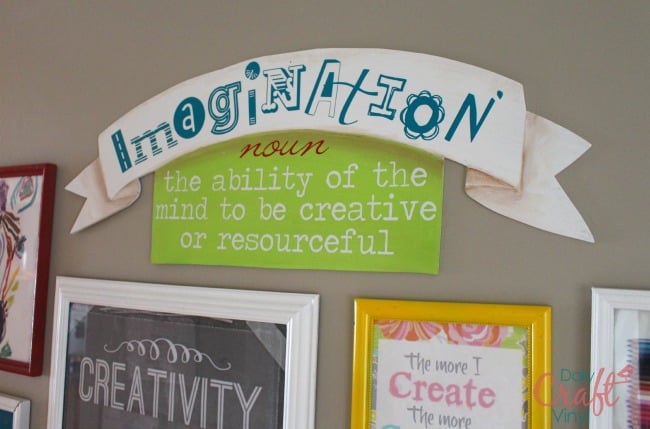
and added some vinyl to an arch…EDITED TO ADD: So many questions about this arch. It is just one piece of wood my husband cut out and I hand painted to look like this! I added vinyl from Expressions Vinyl! You can check out the how to vinyl HERE!
in short…this project cost me some paint. I reused the frames i already had (some got spray painted) and I filled the frames with my kids artwork
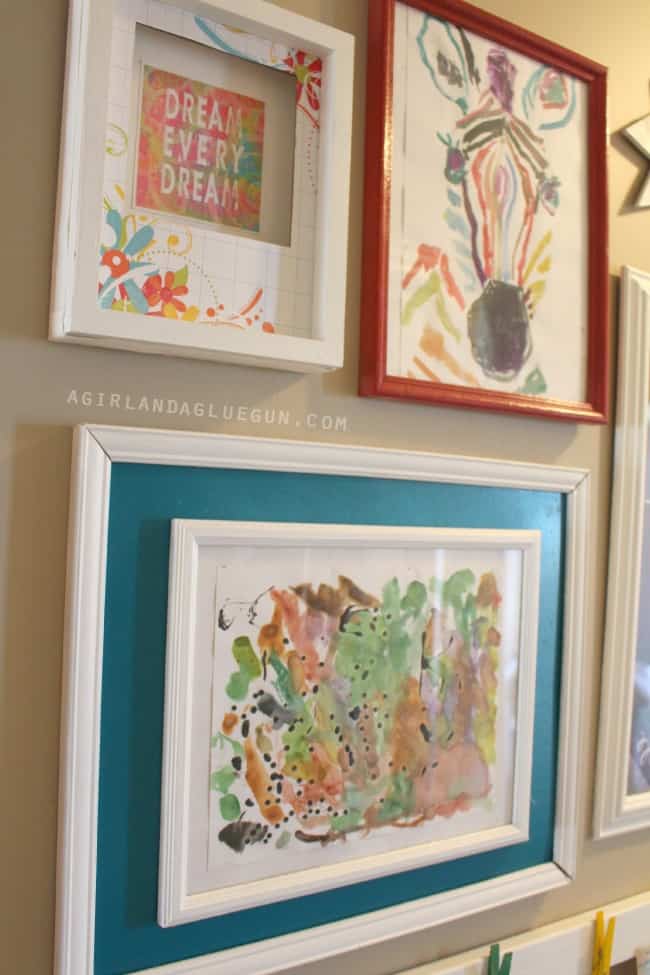
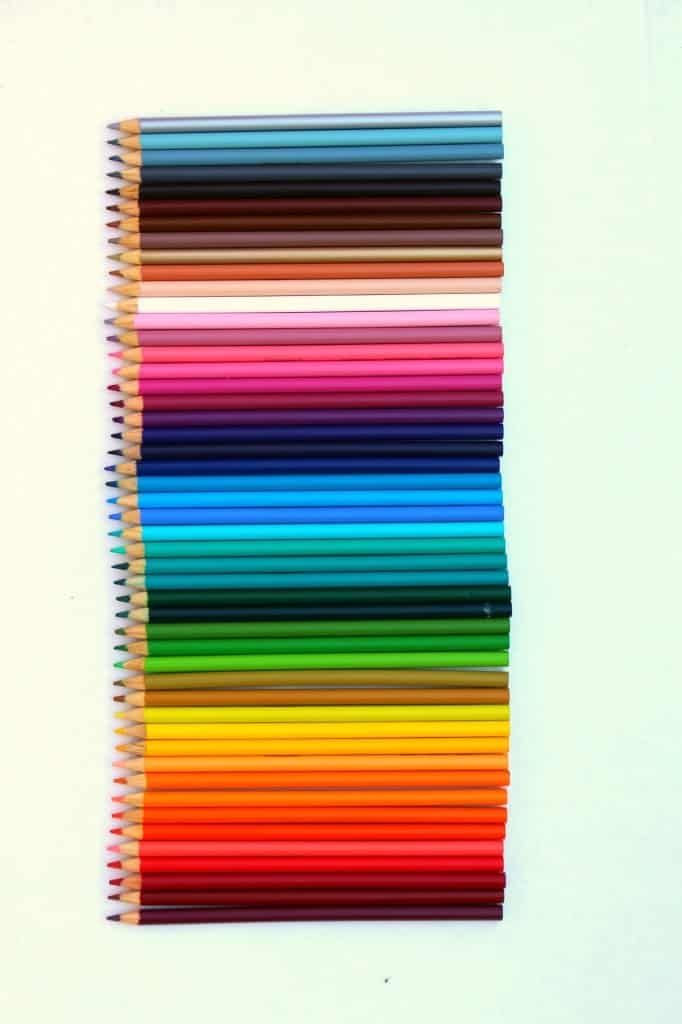
and some free prints (I printed a few from costco…and the giant creativity is intelligence is from HERE and i got it printed off at staples as an engineering print for $1.80.
so really…five bucks was the most i spend.
if you don’t include time. i hemmed and hawed over it entirely to long. but good thing bloggers don’t get paid by the hour.
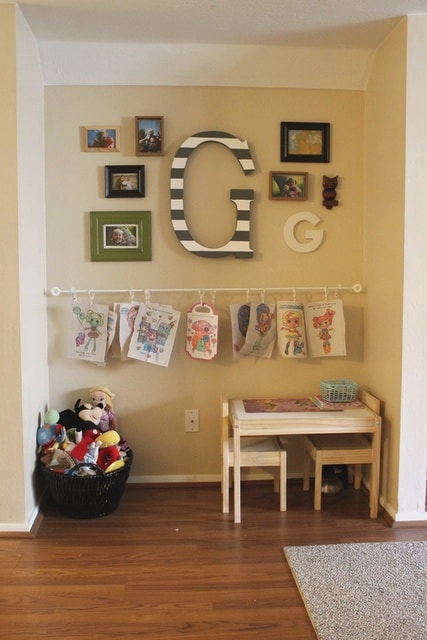
here is the view from my daughter’s room
and the view from the kitchen.

(i spy with my little eye my husbands feet…)
here’s some pictures i took in case you want to use them
(and remember my post about art quotes!!!) 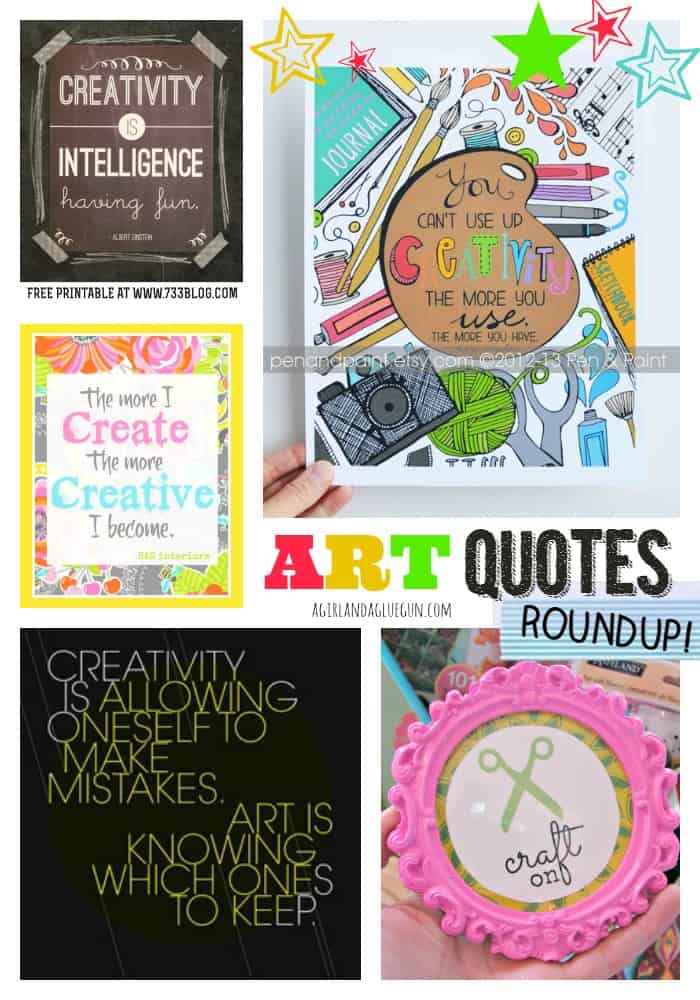
Stephanie Bishop says
I LOVE this- I have been looking to do something similar down my long hallway for my son. Thanks for the great ideas!
Carlee @cookingwithcarlee says
That is so cute! I would love to do this for my little guy!
Jessica says
Wow – this is pretty much the best art wall I have ever seen. I LOVE how you showed the progression and shared your thought process. I have thought about a lot of different ways to make my own art wall, and you’ve definitely given me a lot of ideas (and cool pictures too!). I found this post on the creative exchange link up.
Laura says
How long is your piece of wood for the clothespins?
Laura says
How long is the piece of wood you used for the clothespin display?
Kimbo says
It’s about 4 1/2 feet.
Jana says
The link for adding vinyl to an arch is not working??
Kimbo says
The website is doing some maintenance but should be up soon!
Melissa T says
This looks great! How did you mount the board onto the wall? (and the paintbrush, too!) I think I’m going to use this idea in my kids’ playroom. Love it!
Kimbo says
I screwed the board onto the wall. and the paintbrush is nailed to the wall (the nail is right in the bristles and won’t go up because of all the hard paint!)
Delia says
Hi Kimbo. I was inspired by both your pencil and paint brush art, and used them in my recent playroom makeover. I just finished the One Room Challenge. Check them out on my blog over at http://songthatdoesntend.blogspot.com/2015/11/orc-week-6-playroom-reveal.html. Thanks : -)
Kimbo says
AH! I love it all so much! that toy room is perfection!!!!
Delia says
Thanks. I posted a link to your blog, but I found it on Pinterest :-).
Christie says
I absolutely love this!!!! I am so going to attempt pt this! Love love love it!! And I finally have a use for those old painot brushes too. Tha ks for shsring!
Chelsea says
Love this! We’re fellow Idahoans and looking for inspiration for our new playroom. Please tell me more about the ‘Imagination’ arch! I adore the vinyl lettering and the arch!
Maria Tecuatl says
This is adorable! I am so glad I came accross your blog. Where did you purchase the arch? I’ve tried looking it up with no luck. Thanks in advance!
Kimbo says
I made it! wood and vinyl!
Nikki says
SO CUTE! Love the variety! Is the arch 3 dimensional? Can’t wait to give it a try. Thank you for sharing your creativity!
Kimbo says
no..I just painted it to look that way! and THank you!
Ashley Taylor says
I love this! I am going to give the artwork hanging part a try tomorrow. Thank you for sharing this great idea.
Andrea says
Superbe!!!!
Susan Anderson says
I love it! Where did you find the banner you used with imagination on it? The wall is gorgeous!
Kimbo says
I made it! Wood cutout that I painted and added vinyl too!
Susan says
This looks great! I really like board with the colored clothespins – I was going to get the wire with the clippies (that is too the correc title!) at ikea, but now I’m thinking of going this route instead.
nancy says
Wow! What a great job! I really like all the picture and the process.
I’m very inspired now:)
Amy says
Just found this and love it!!! Question is the colored pencils a picture or the real things?
Kimbo says
yes!
AMBER says
I know you said that your husband made the arch, but is the green board below it with the definition part of it or a separate piece? Also, where did you get the Blue and white trim frame? I’m sure you painted it, but I love it!
Kimbo says
The definition and art are all one piece! The frame is two frames put together!