
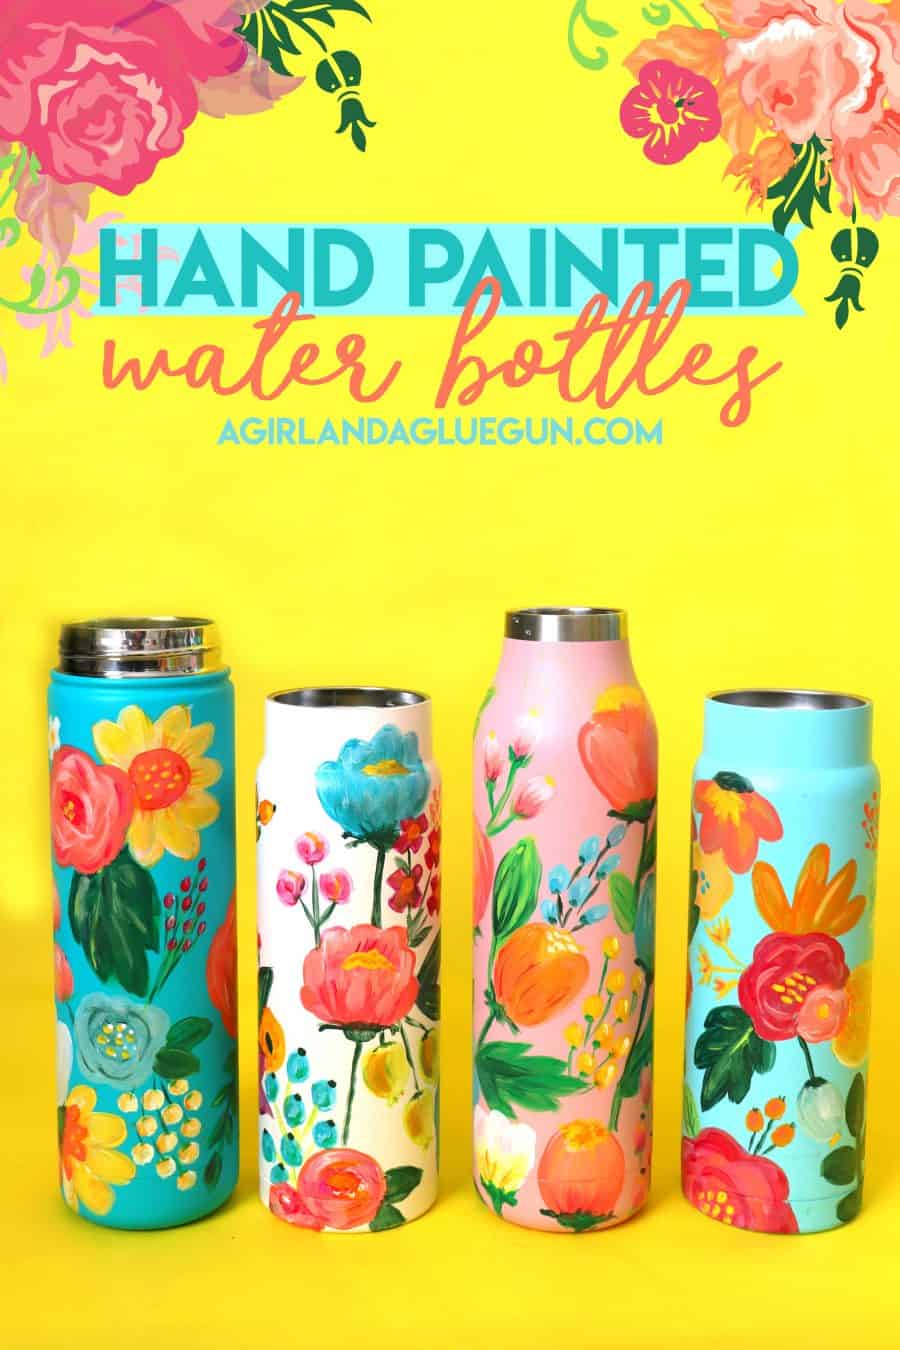
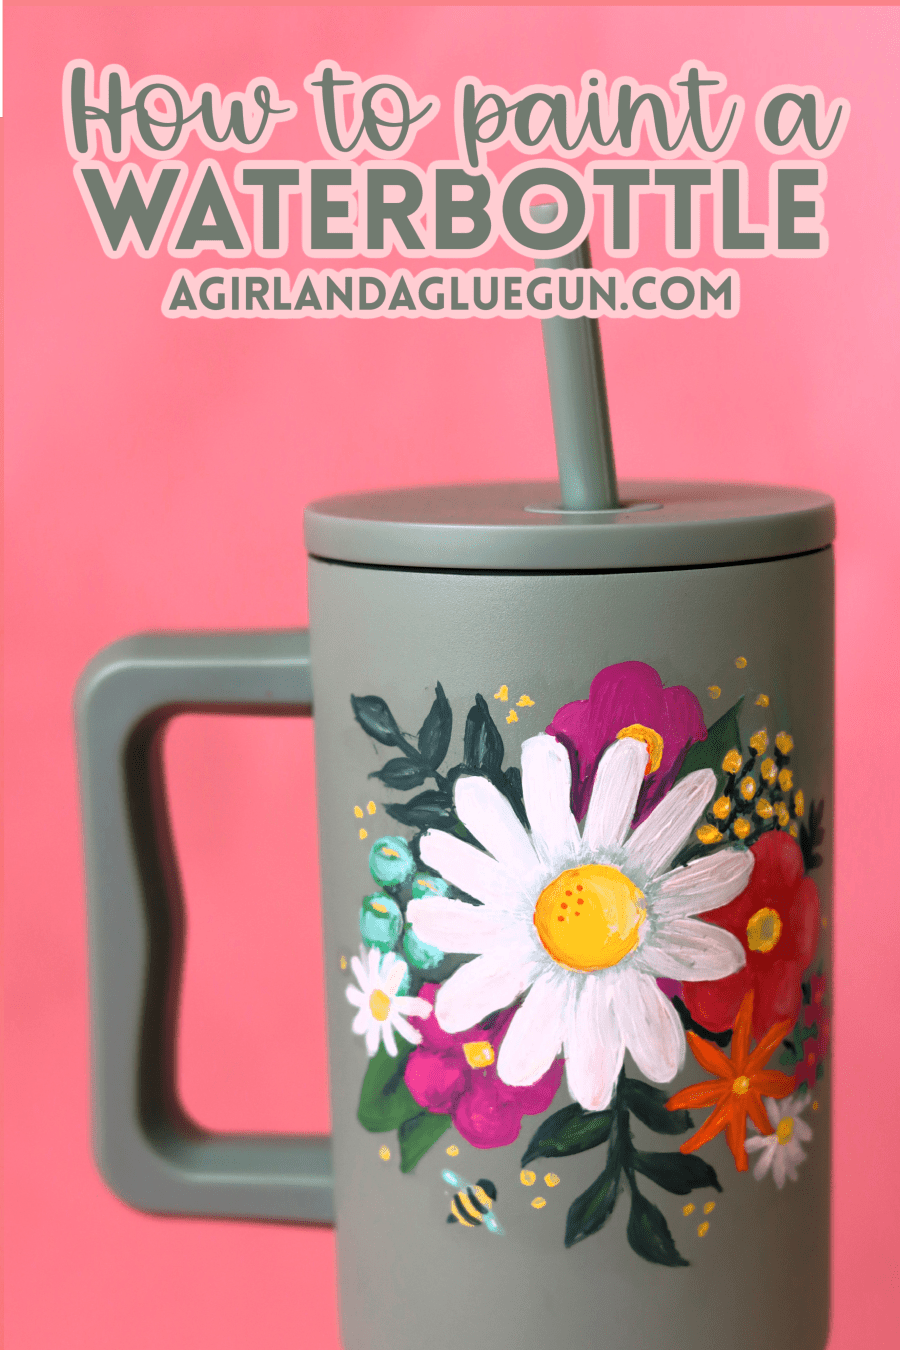
Don’t be stuck with plain Tumblers! Learn how to create hand-painted water bottles to put your own creative spin on your cups!
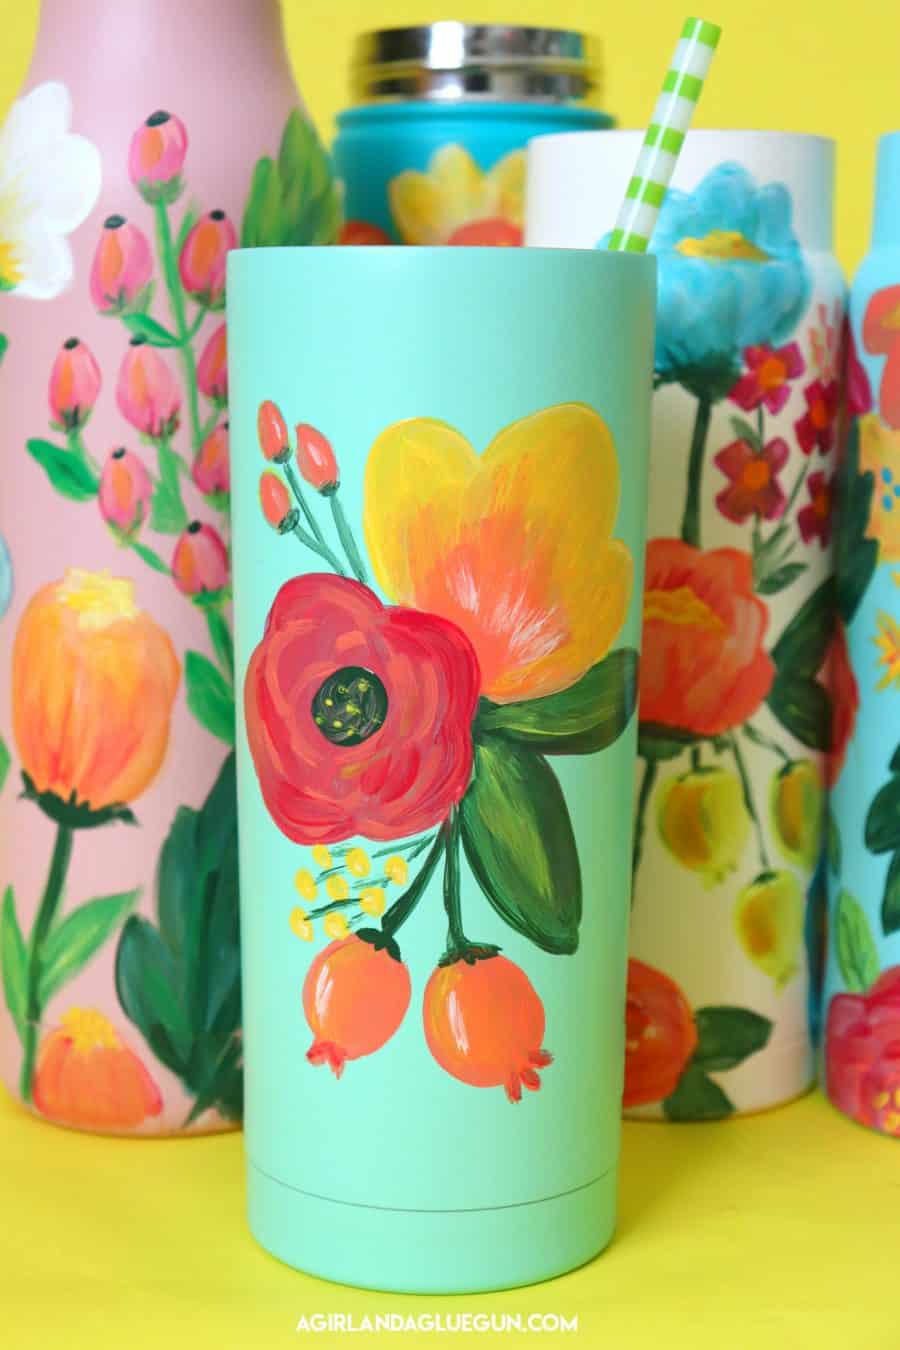
Do you want an eye-catching and unique way to stay hydrated? Hand-painting water bottles may be the perfect answer. Artisans around the world are creating beautiful designs and creating unique pieces that can be used in the home, office, or on the go. Not only do hand-painted water bottles make a stunning statement, but for many artists, it’s a way to express themselves and build a business.
This post has been updated recently! As Stanley cups and hydroflasks have been taking over the market, so many people want to put their creative spin on their mugs! The paint companies have listened and responded with lots of great paint that works on these bottles! So I will be referencing the old paint I used and the newer ones!
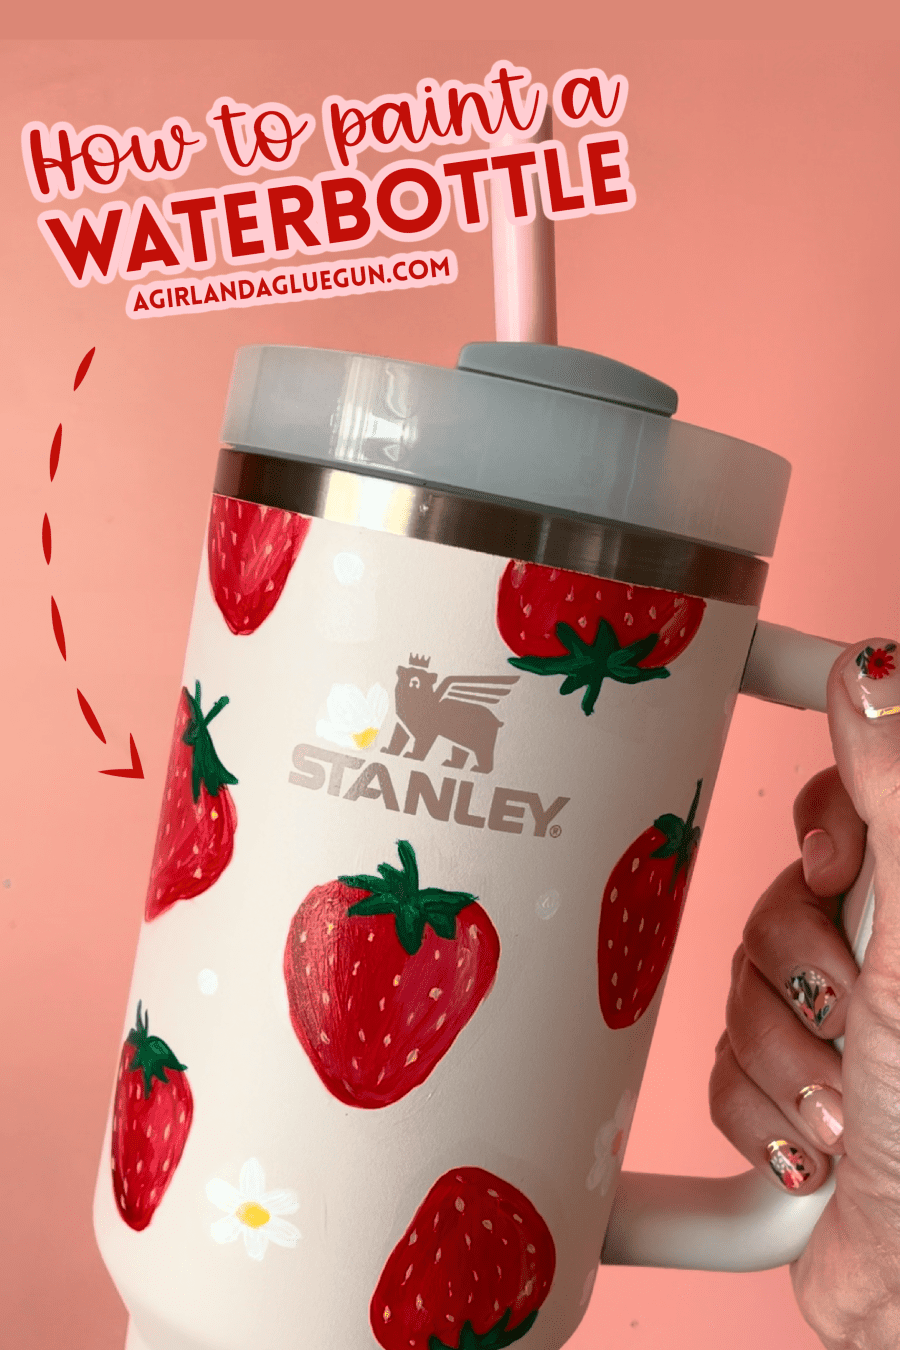
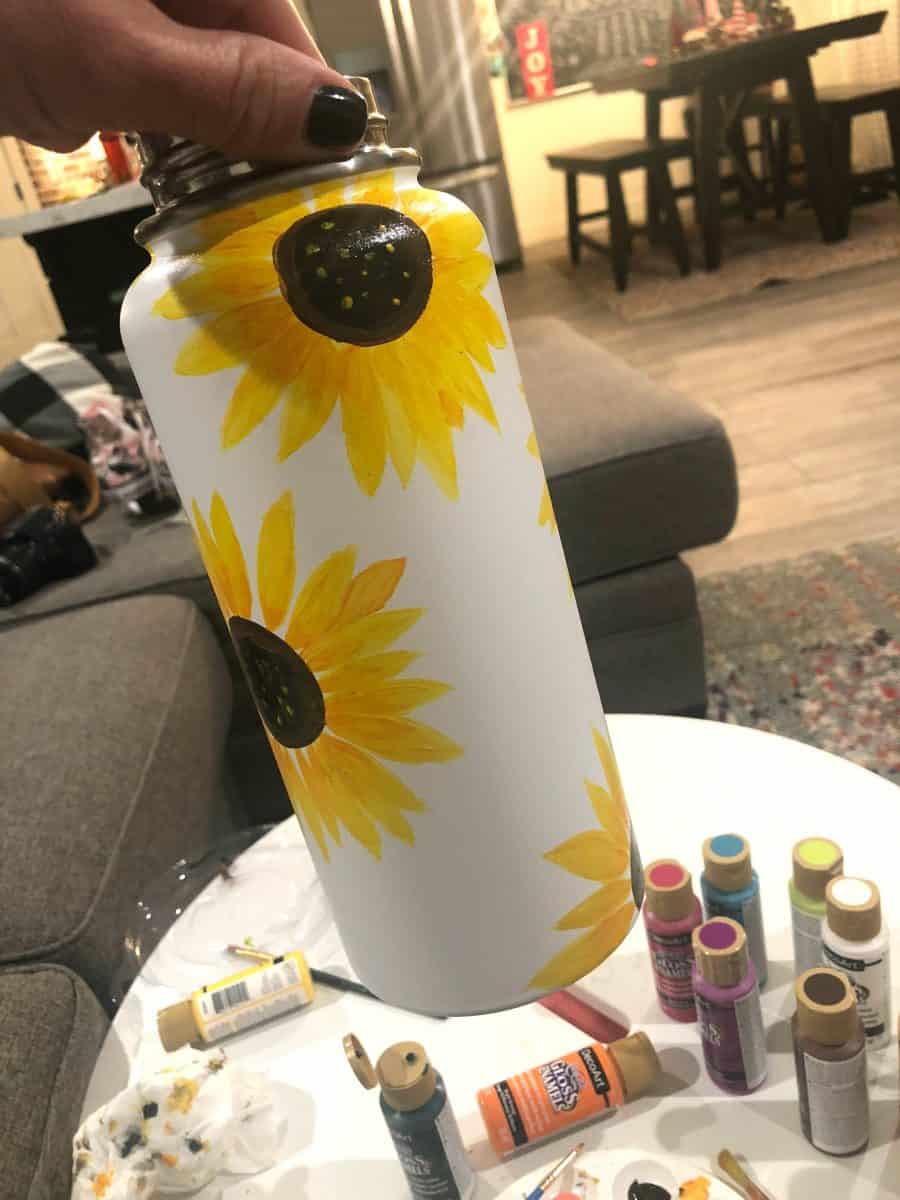
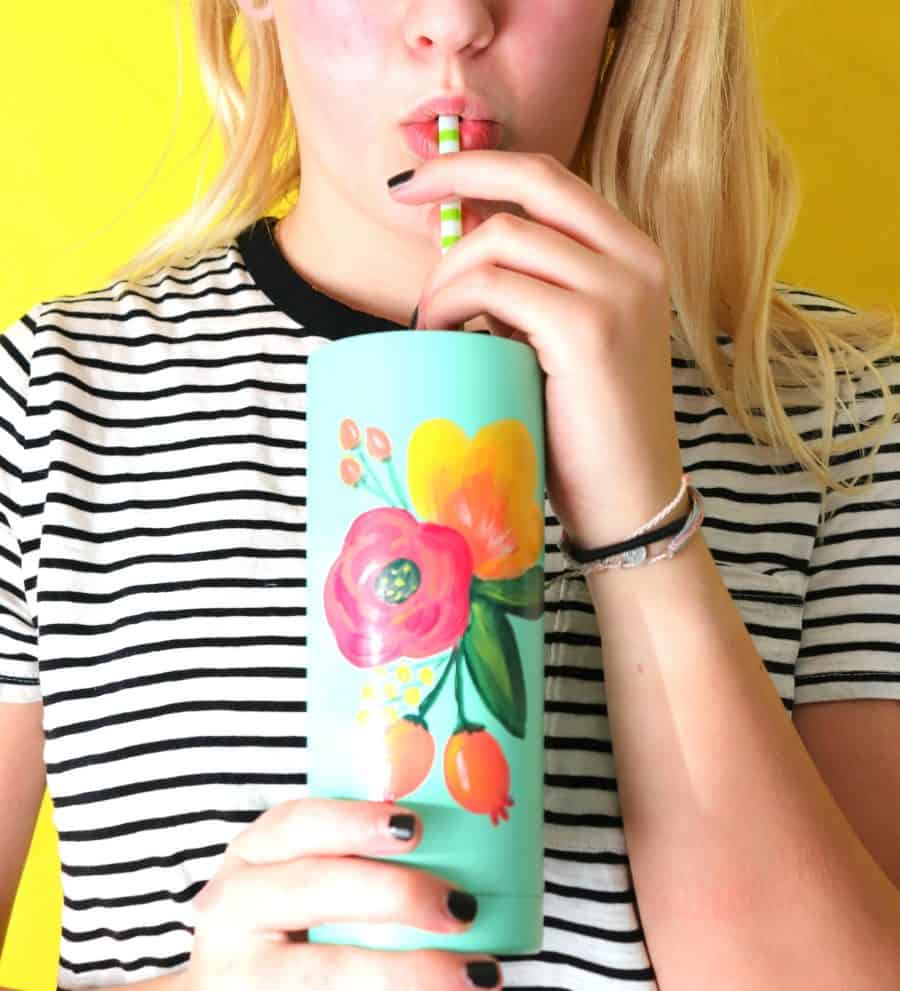
This fun tutorial comes courtesy of my nephew!! I got a message asking if I could paint sunflowers on a water bottle for a gift for Christmas. I knew that most regular craft paint would come off in the water. And as much as I love vinyl-I knew it wouldn’t quite look the same as hand-painted (variations of color and whatnot) So I got on Decor Art’s website and found out they had ACRYLIC paint! So I got painting!!!
Supplies you need for hand painted waterbottles
- Water bottles (in-depth details down below!)
- Paint (in-depth details down below!)
- Dishwasher safe mod podge
- paint brushes
- painters tape
- alcohol wipe
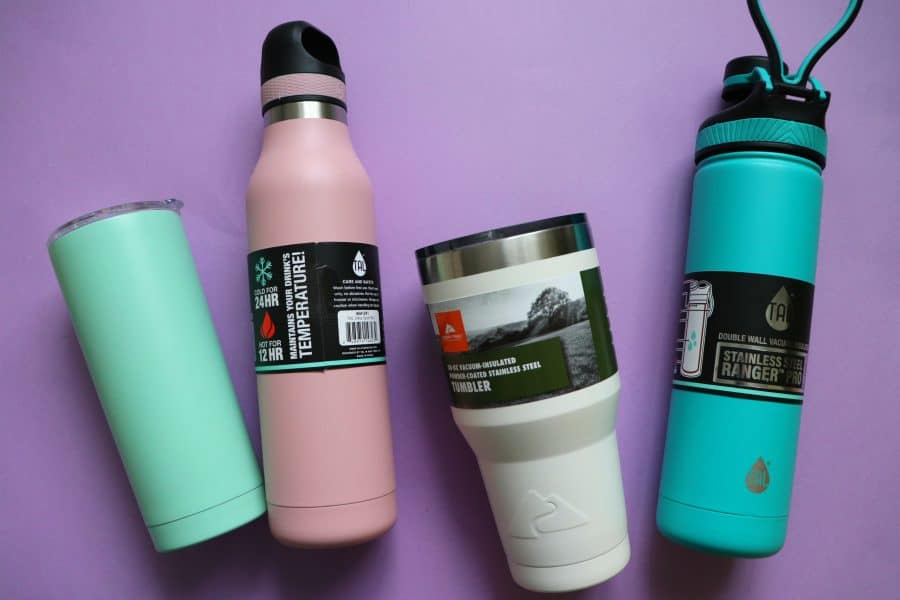
Waterbottles
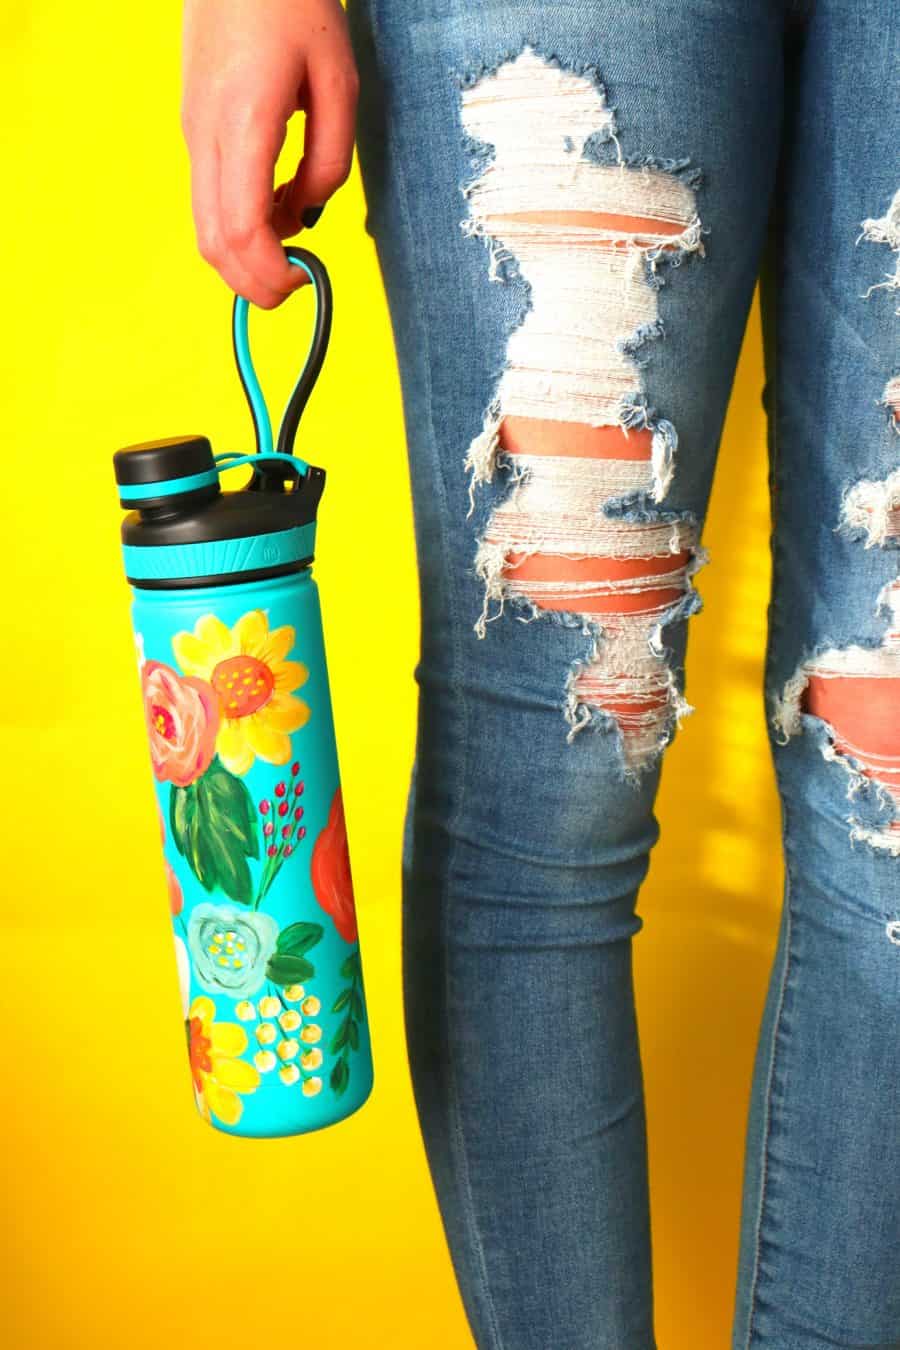
The water bottles need to be steel and powder coated. I’m pretty obsessed with the Stanley quenchers because I love the big straw, the handle to carry around, and that they fit in my cup holder in the car. I also really love the Simply modern ones. Same features and is a bit cheaper! There are also a lot of great cups on Etsy and amazon!
- Simply Modern 40 oz tumbler
- Stanley Quencher H2.0 FLOWSTATE TUMBLER | 40 OZ
- Great Waterbottle on etsy
- Walmart 40 oz with handle
- Another Etsy version
I bought some of these Stanely water bottles and didn’t realize they had a rubber coating. They did not work with the paint! So make sure to pay attention to the finish!
Walmart has lots of great variety of water bottles that work perfectly (and are quite a bit cheaper)!
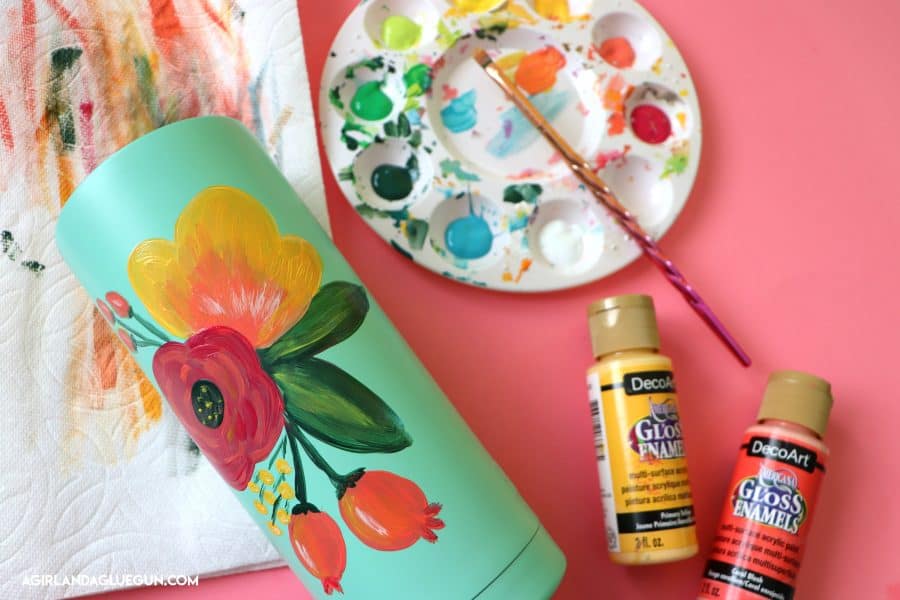
Paint
I originally used the gloss enamels from Decoart and they worked pretty well.
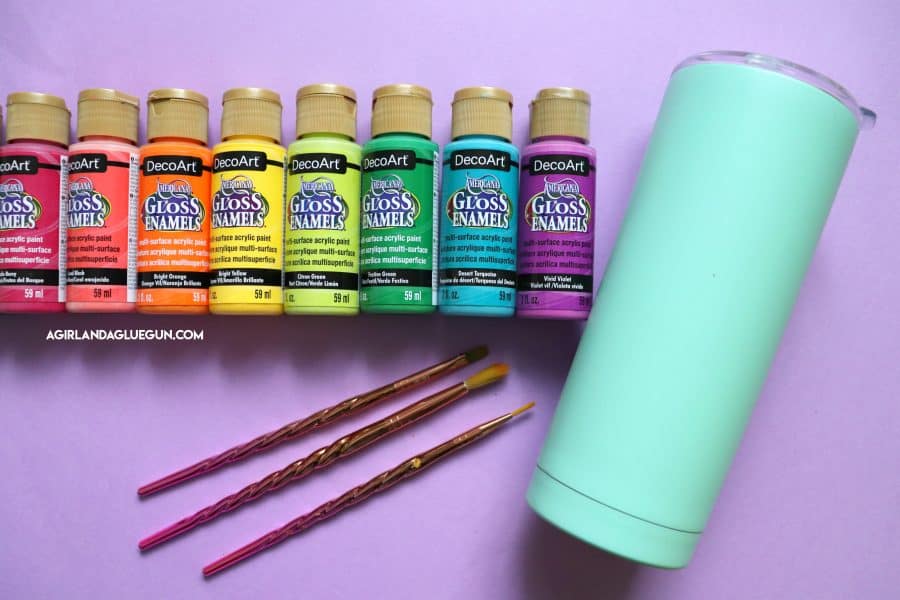
But recently they released some paint that is perfect and made specifically for this!
Enamel Paint:
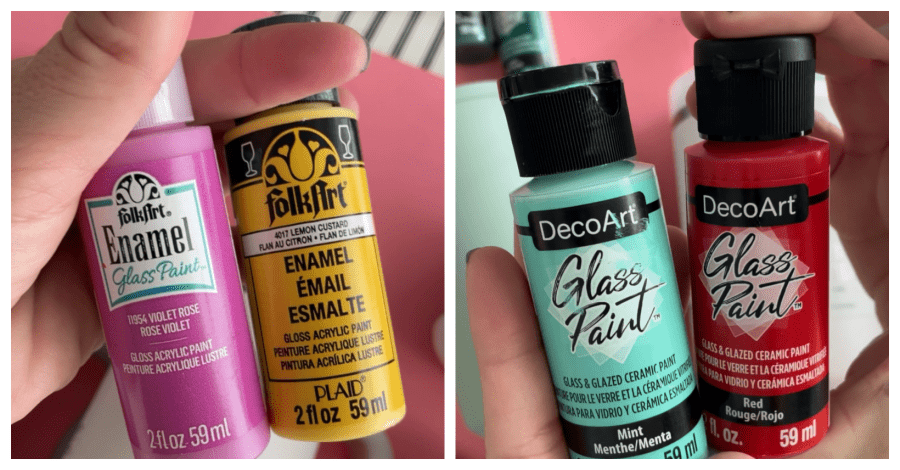
I know they say glass paint- but the enamel really helps them adhere to the powder coating!
There are lots of different colors and I used both and they both worked great! I did find them at Hobby Lobby for a lot cheaper than online!
How to paint the Waterbottles
Painting waterbottles is pretty easy, much like painting a canvas with just a few things to do and watch out for!
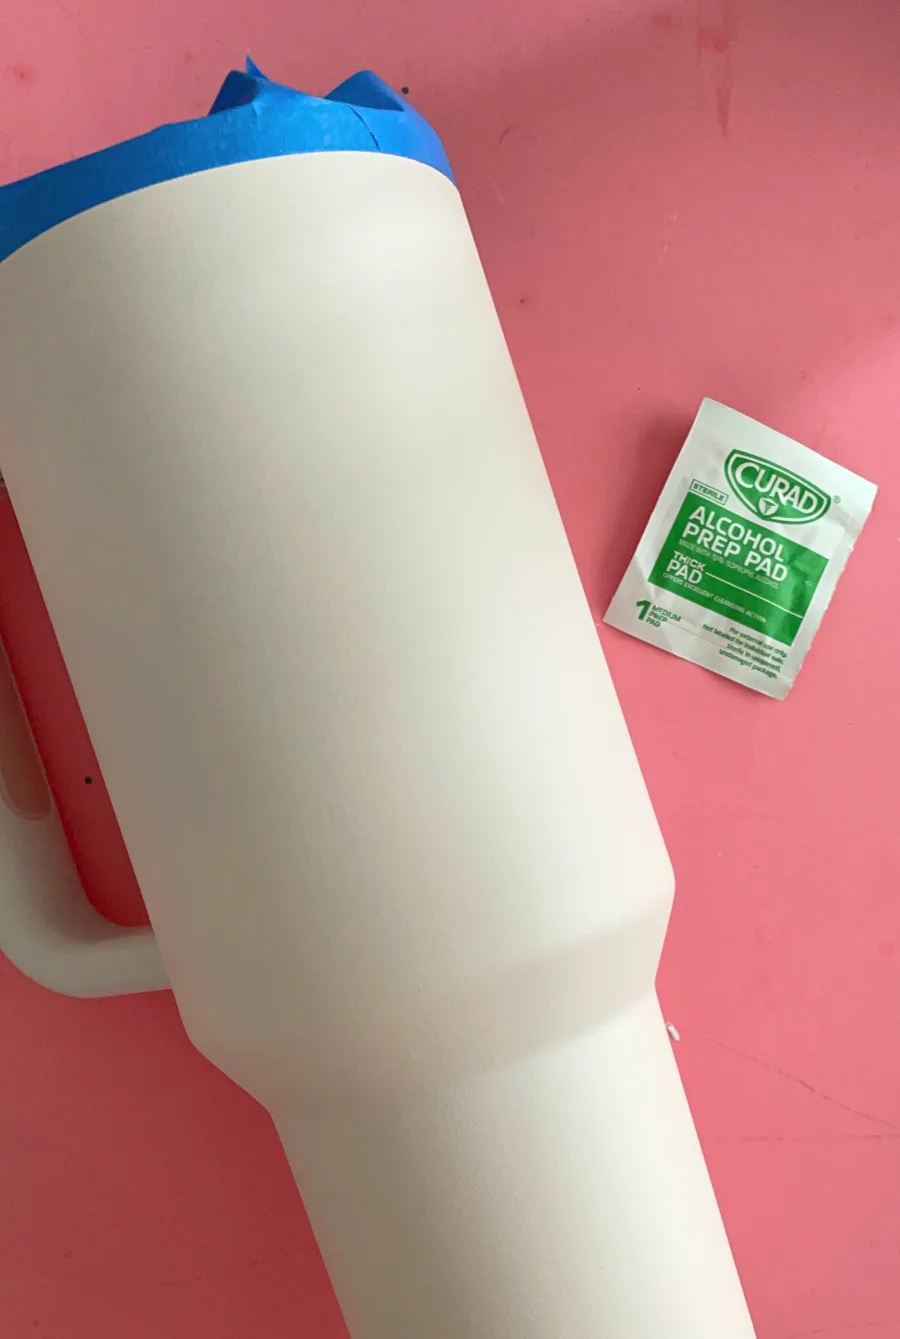
Prep the Tumbler
I mask off any part that I want to make sure not to get paint on! If they are water bottles that don’t have a straw, I try not to get any paint where the mouth would touch! Then I clean the surface with an alcohol wipe!
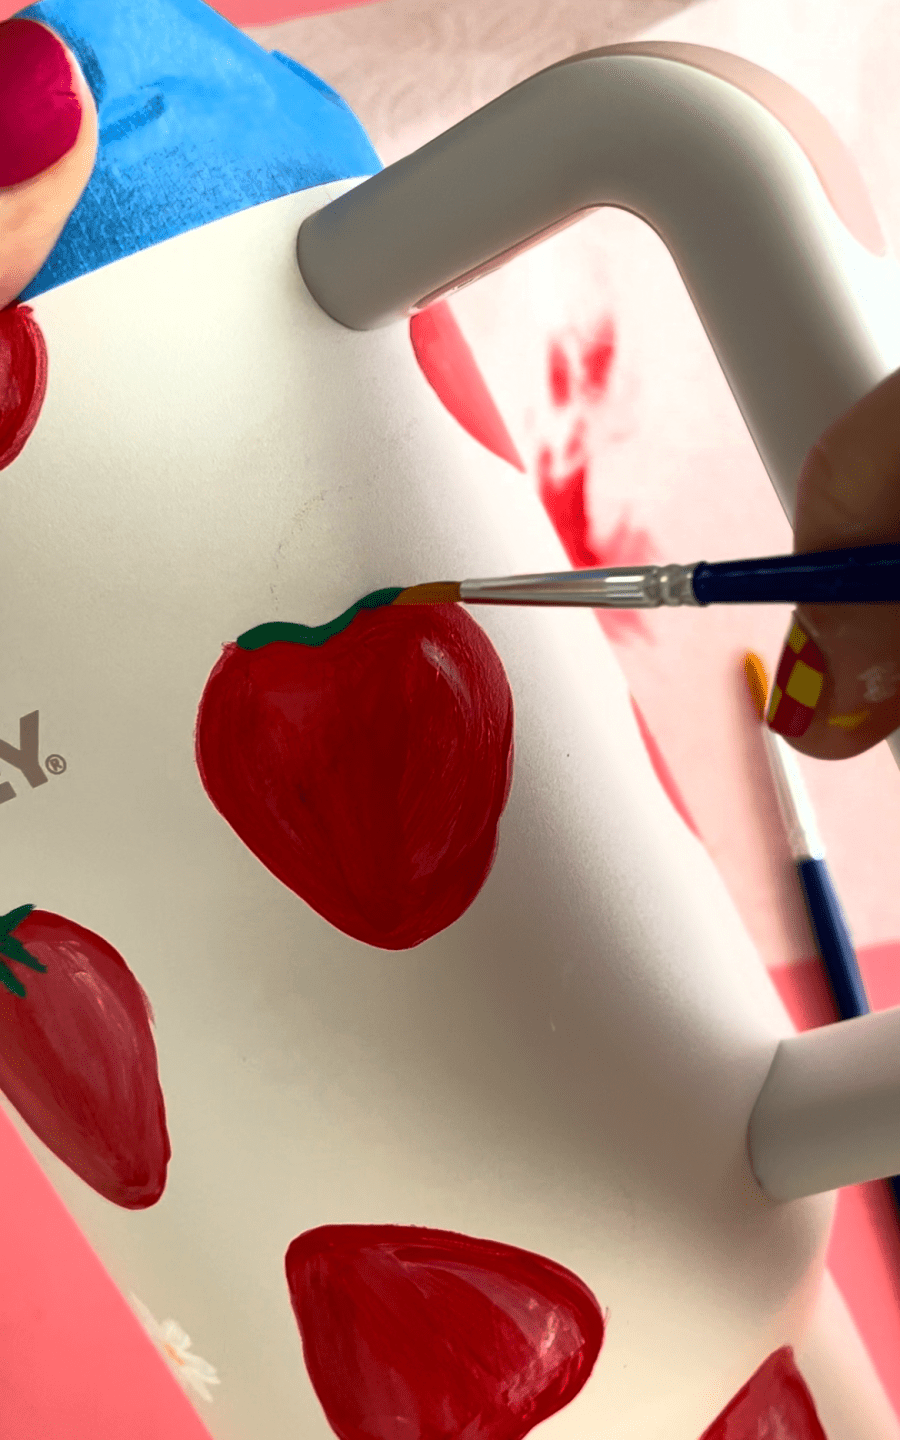
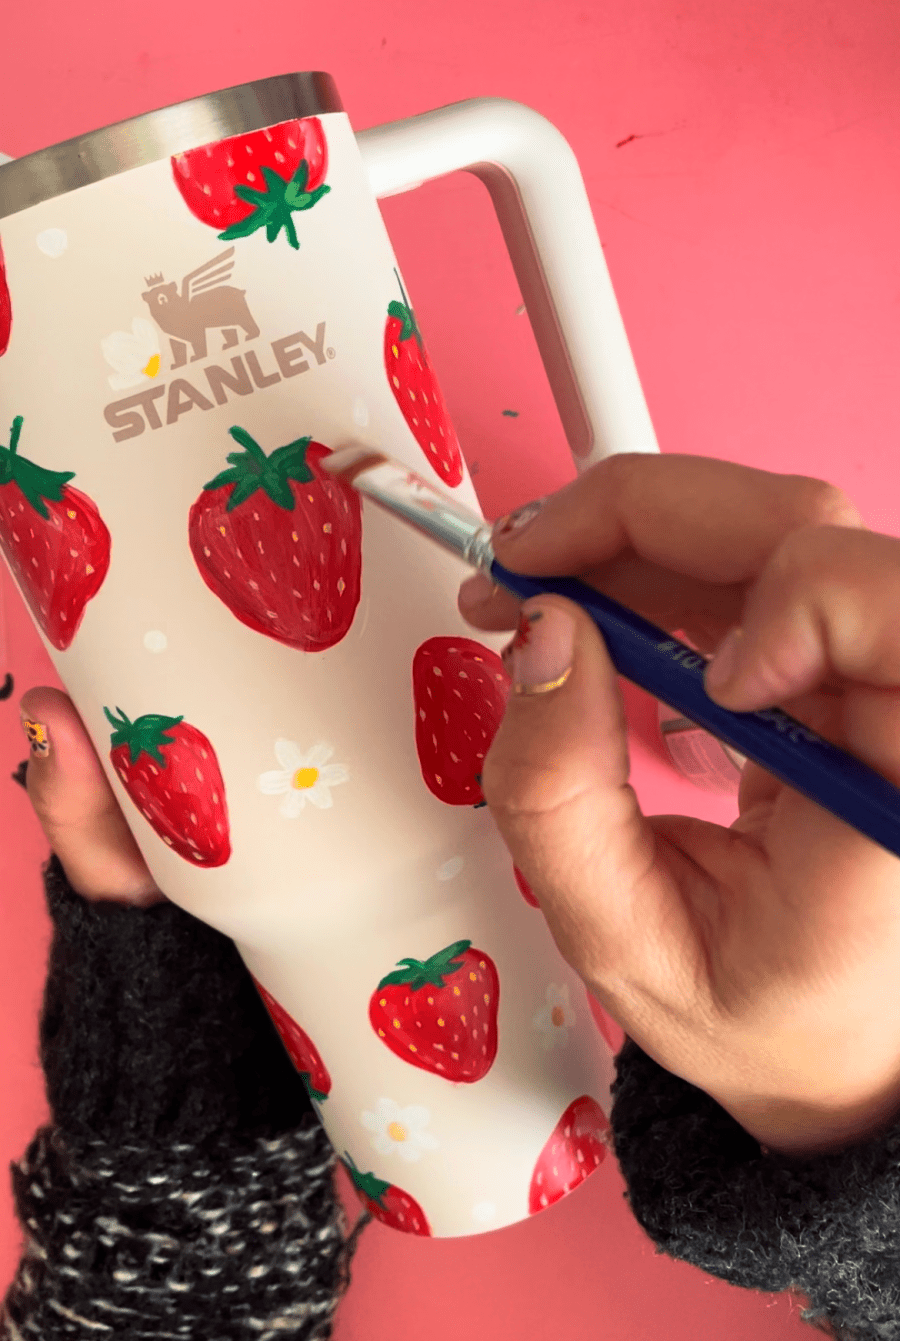
Paint your tumbler
If you are artistic, you can just jump right in and start painting! If you want a guide, you can cut out a template or outline with vinyl to help you. You can also use a projector and trace the image on your cup before you start!
Painting tips and tricks
One of the tricks is you don’t want thick layers. If it’s thick, it’s easier to scratch off. So nice thin coats. Let dry and then add the next layer. Try to avoid any clumps of paint.
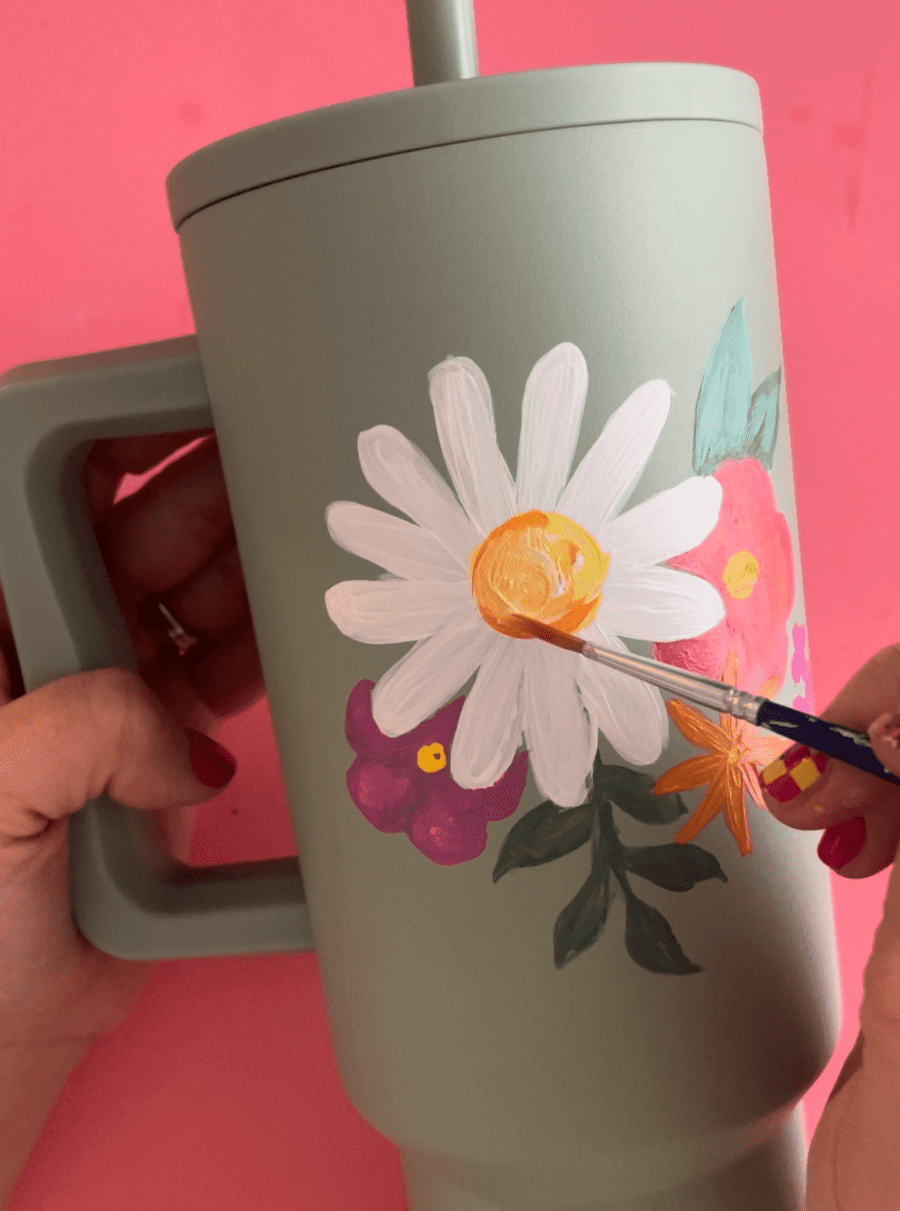
You need a few layers to get vibrant colors on these water bottles. The first coat might look a little transparent! The more layers you add, the brighter it will be!
If you have a dark colored waterbottle, you might want to put the first coat down as white to help the colors pop a little more!
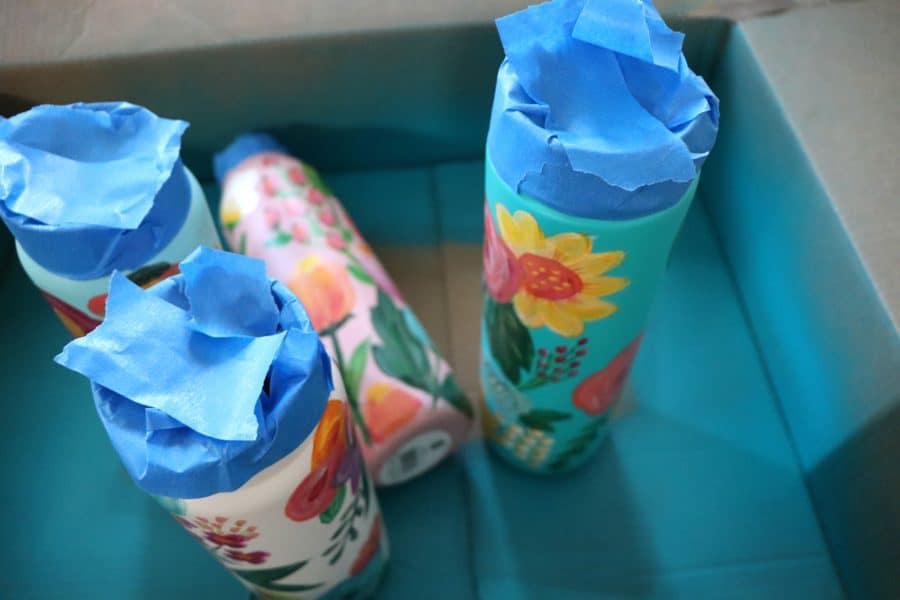
This was my nephew’s water bottle- the one that started this all!
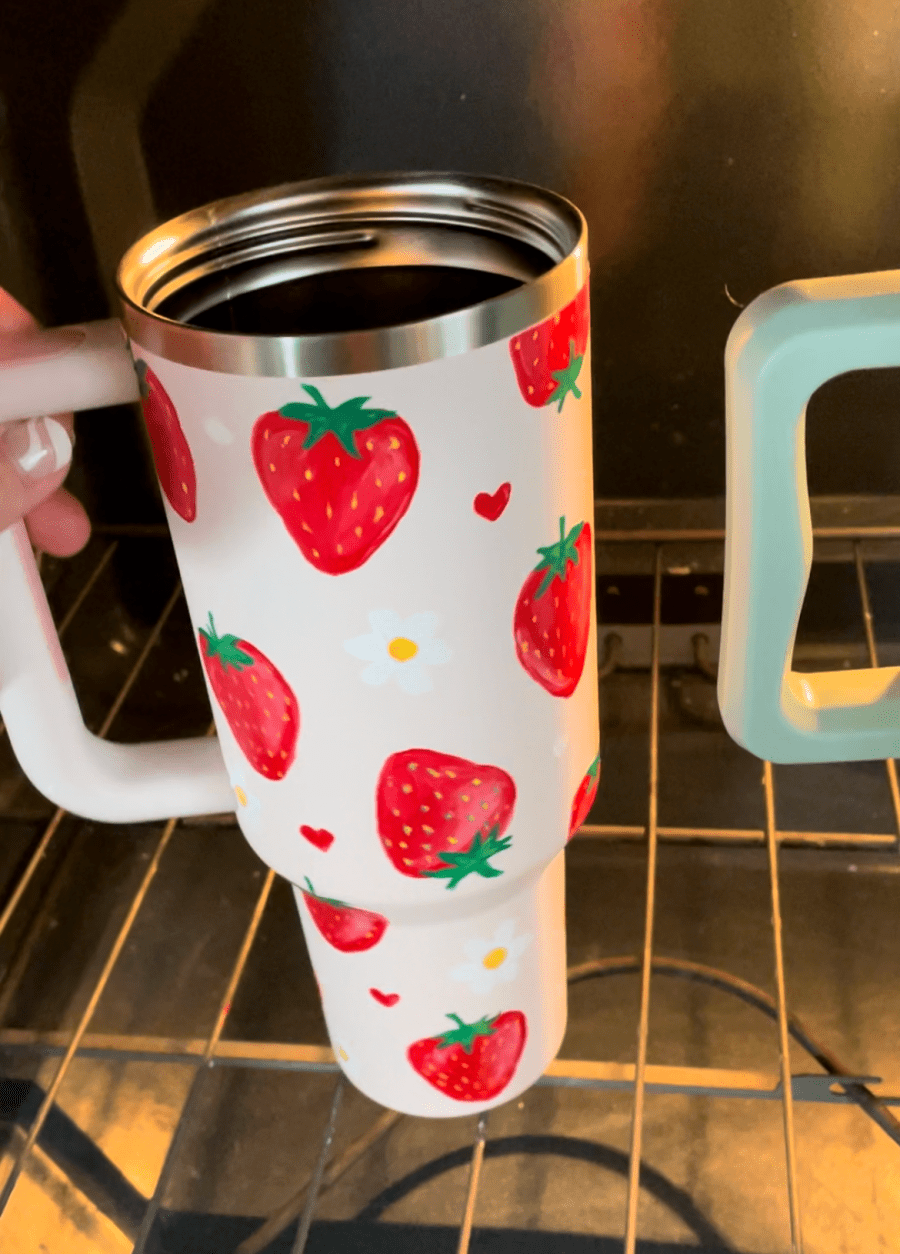
Let dry
The bottle of paints instructions is to paint and let cure for 4 days and then put it in the oven to set it. Place in a cool oven. Heat to 275°F and bake for 30 minutes. Allow to cool in the oven.
Seal the water bottles
After you take them out of the oven, I wanted to seal them. I originally used this matte spray.

I gave it 2 coats…making sure to tape off the whole mouth part- I don’t want any contact with the spray paint (although most of these have bottle tops or straws)
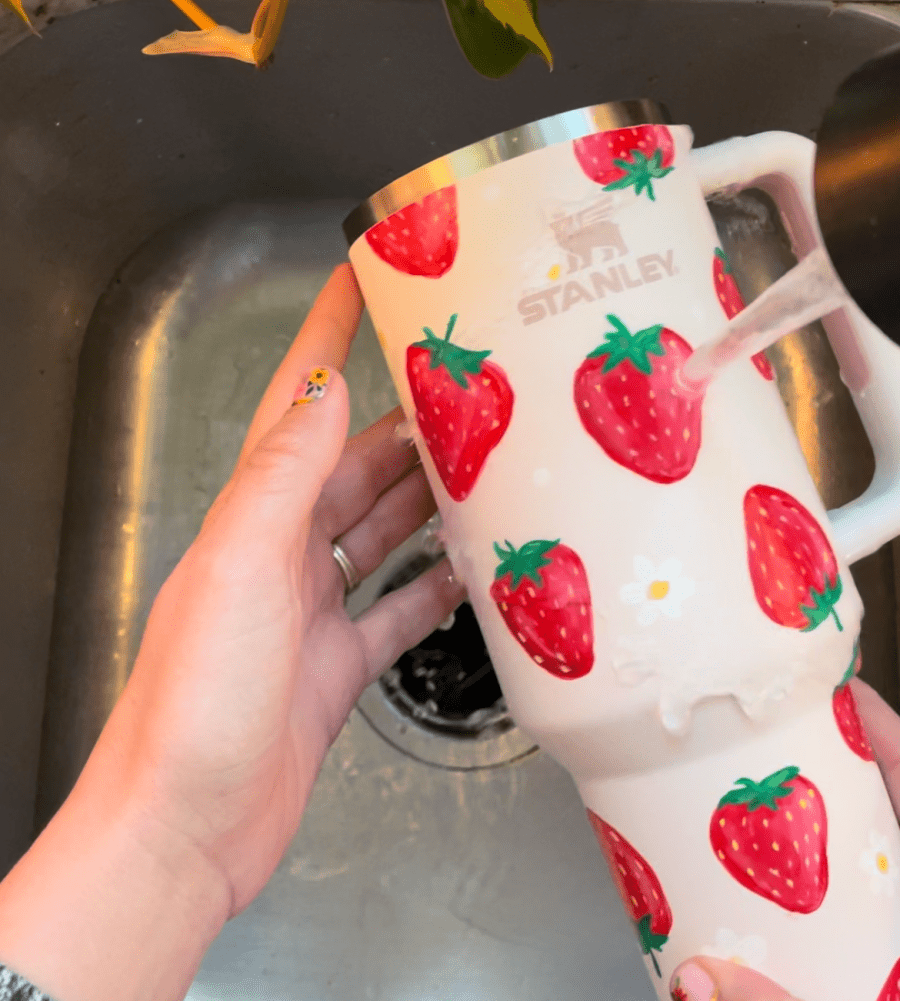
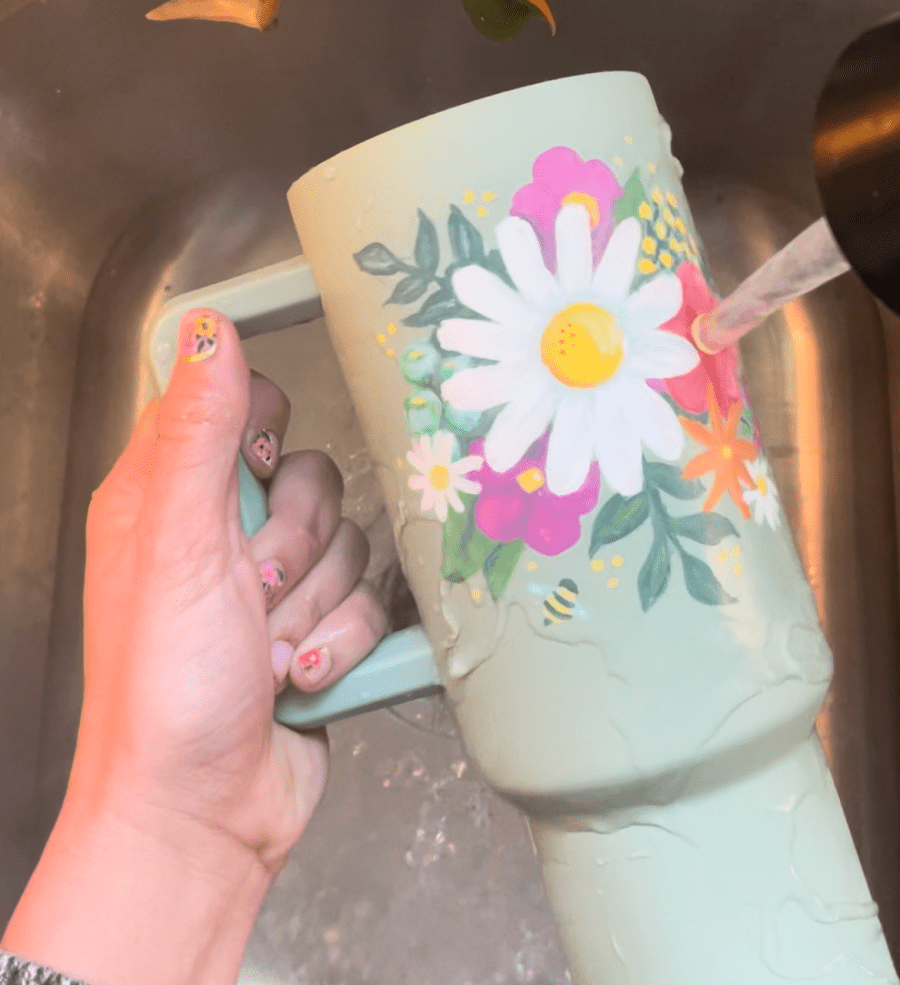
But then I realized that there is dishwasher-safe mod podge and it is amazing!
I just added it over all the parts I painted. The only downside is that it has to cure for 28 days before using in the dishwasher. My end goal was just to keep the paint from scratching off not really being able to use it in the dishwasher. So I didn’t wait 28 days!
After it dried for a few days I tested it! I took my scrubb daddy and no paint moved! I even tried to scratch off some of it with my fingernail!
Keep in mind, if you drop it, the powder coating can get scratched, so I’m sure it will eventually show some wear and tear! But it really holds up! It definitely holds up better than the clear acrylic spray!
So now I’m pretty much obsessed and want to paint on all the water bottles I come in contact with! I want to make an orange one and a daisy one and a lemon one! No water bottle is safe!
Are you looking for a unique gift for a friend or family member — something both special and trendy? Hand-painted water bottles fit the bill! These would be such thoughtful presents!
Other amazing craft projects you are sure to love!
- wood burning marker
- How to stencil a doormat
- Friendship bracelets-4 ways!
- How to draw faceless portraits

Leave a Reply