
I use my procreate app to create my cut files–-BUT before I had that (cause it’s kind of pricey) tracing in the silhouette studio was how I created and cut out my own personal designs! I would doodle them up on a piece of paper and transfer them over to my silhouette software and trace and cut them out! THat trace button is one of my FAVORITE tools in the silhouette software (and that is really saying something because that software has so many bells and whistles!!!) SO today is your lucky day–I’m walking you through it step by step so you can go from doodles to project easy peasy!
 First up…Silhouette cameo 3 is what I have and LOVE! You can grab one here!
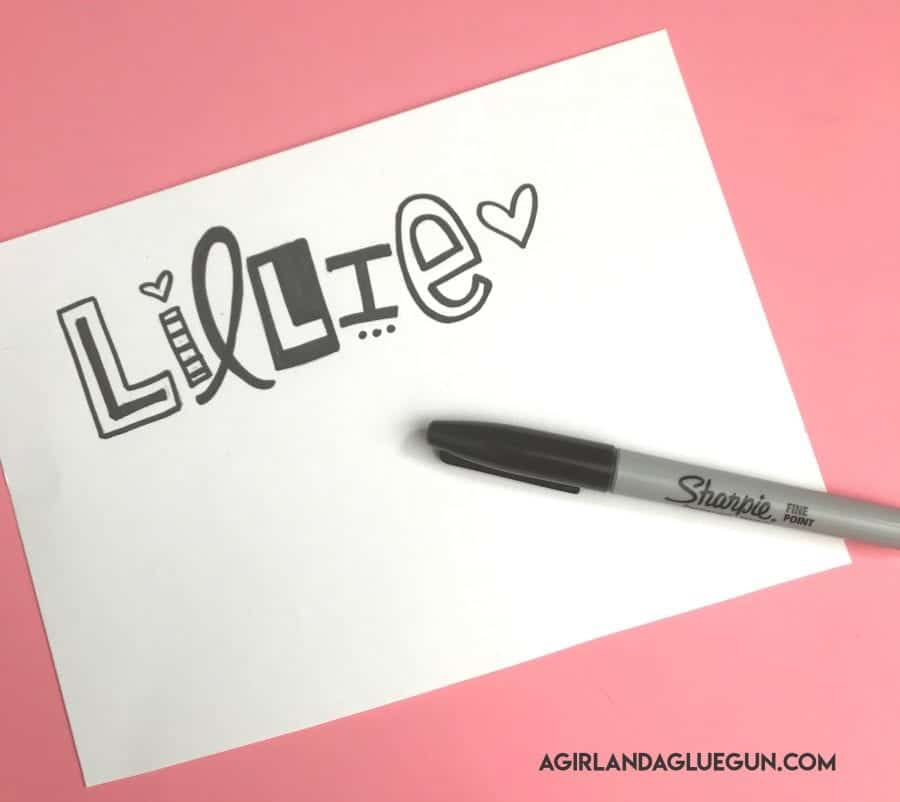
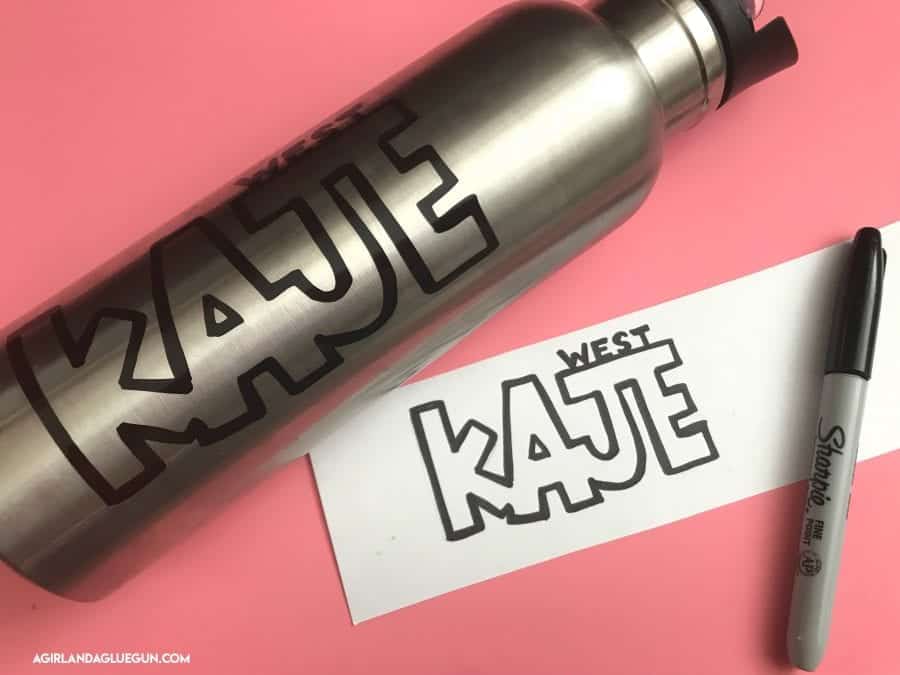
I start by doodling my design in pencil until I have it perfect and then I trace over it with a black sharpie. A nice contrast of white to black makes for a perfect trace. The lighter the color–the harder for the silhouette trace to pick up crisp lines!
Then I just snap a picture of it with my phone and email it to myself. (You can use a fancy camera…but I always have my phone right by me!) Just download it to your computer and open it up in your silhouette software like you would any project or picture. 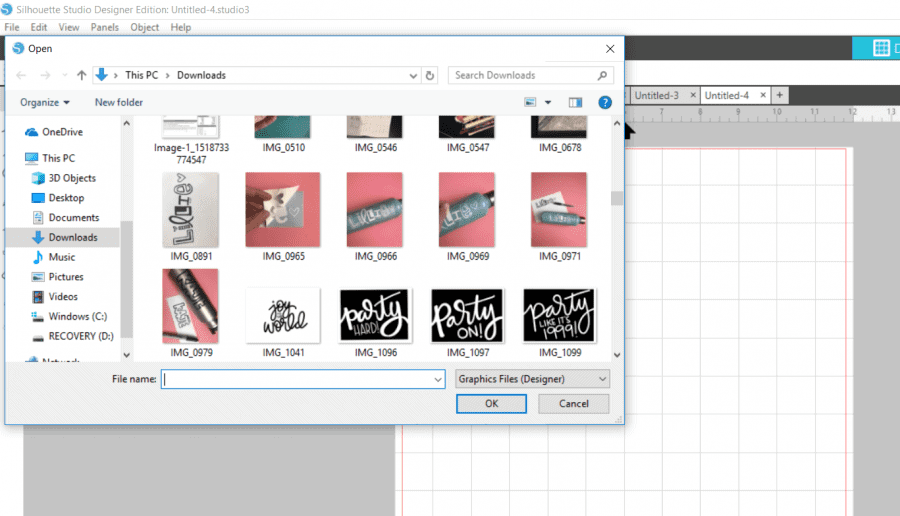
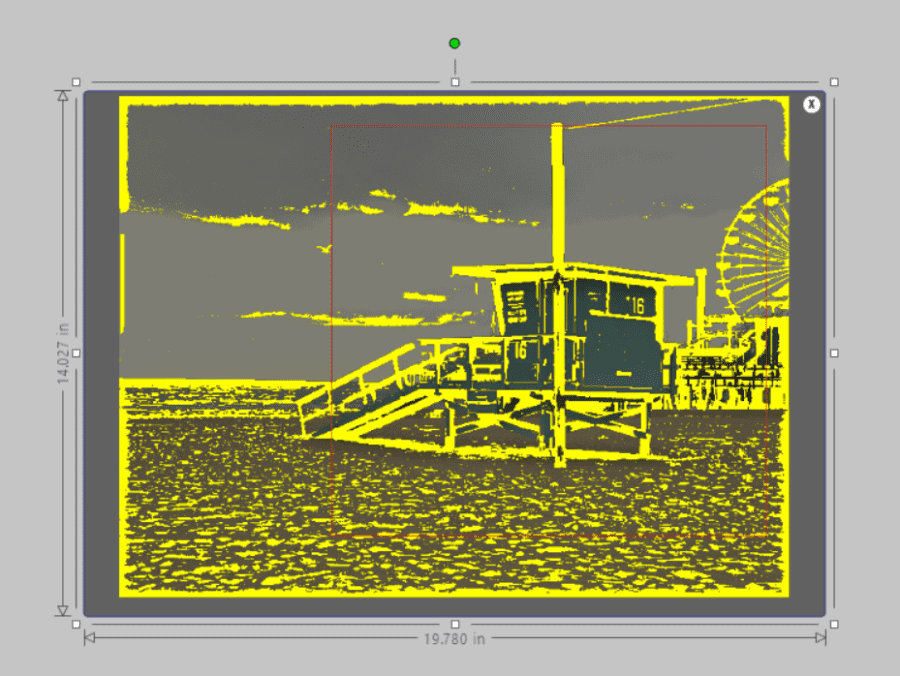
The trace button looks like a butterfly..or some toast. Depends on how hungry you are. Just click it and then you will click the select trace area. 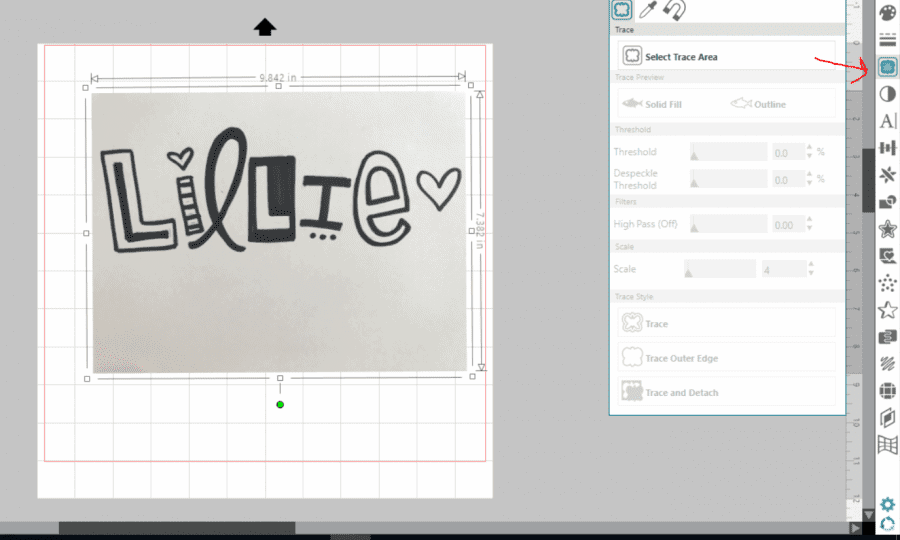
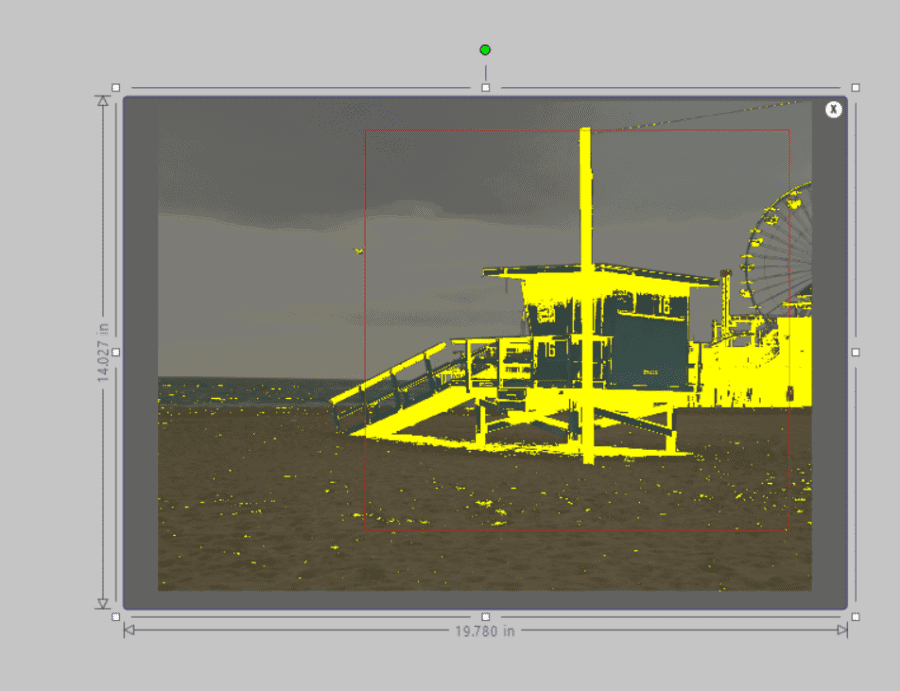
You will drag a box around your design. It will highlight what it picks up. You can see my black makes it easy for it to pick it up. If you are having some splotches that it’s not picking up..or if its picking up pencil marks you can play around with the side. Threshold, high pass–just a little slider. They all do something different depending on what you are tracing. Once you have a nice solid yellow you just click trace down at the bottom.

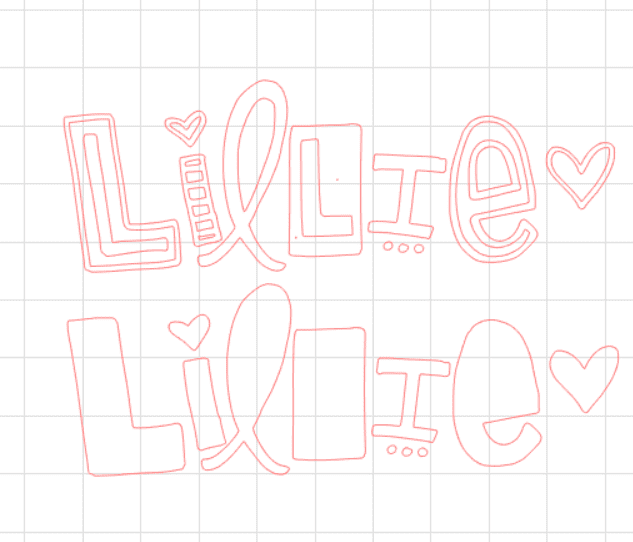
Move the your image down and you have created lines to cut with your silhouette cameo. From here you can click on it and ungroup or release compound path if you want to separate the design or cut it out in layers. 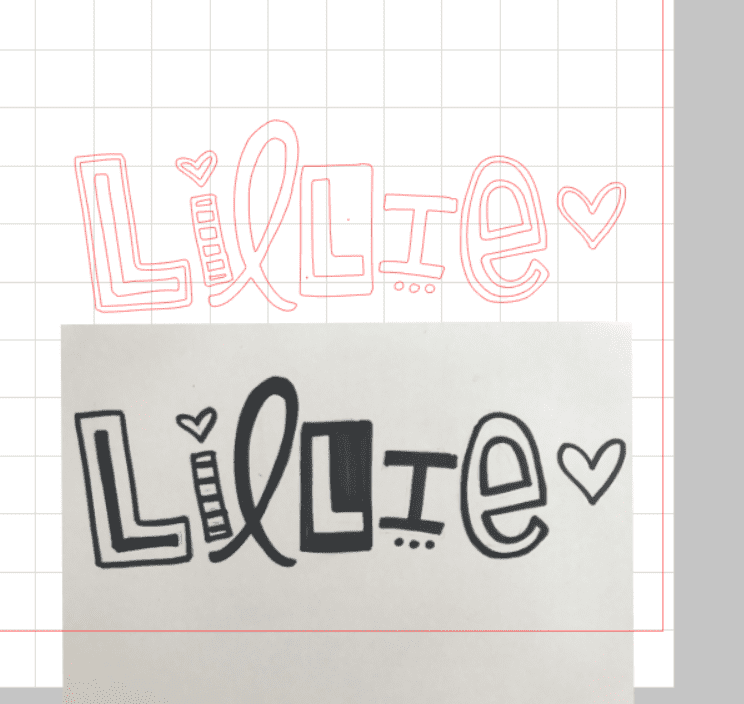
(just for educational purposes…the top is trace. the bottom is trace outer edge. Sometimes you just need the outer shape cut out.
Then cut out with your silhouette cameo
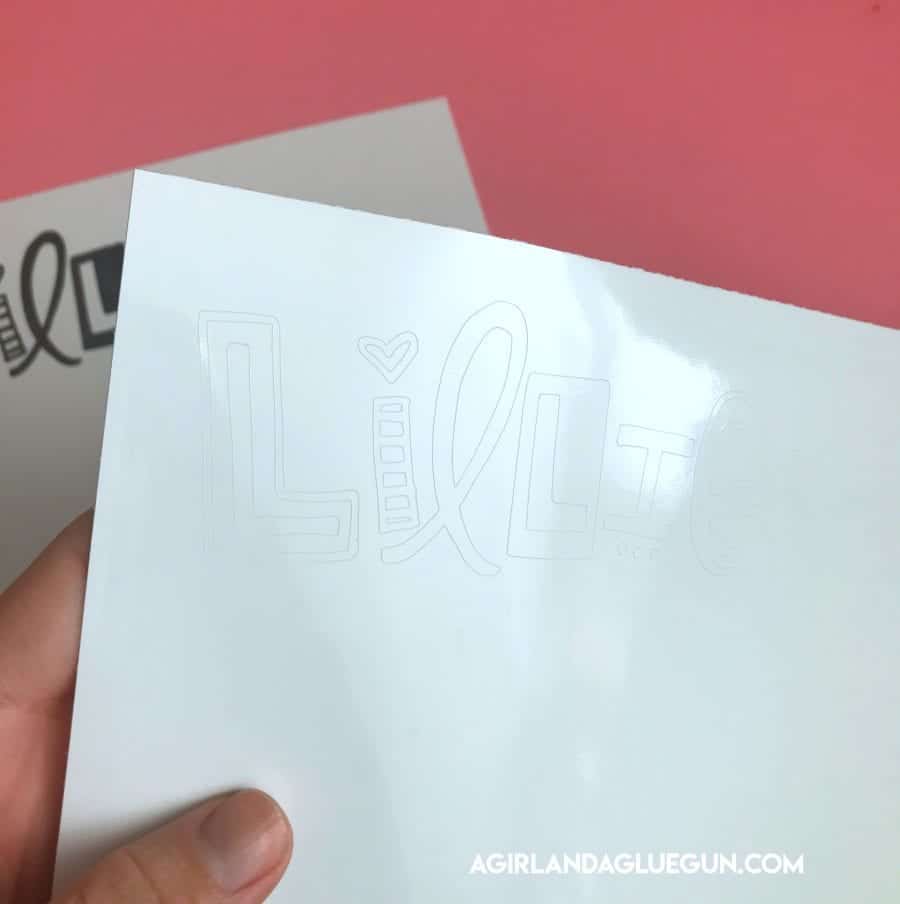
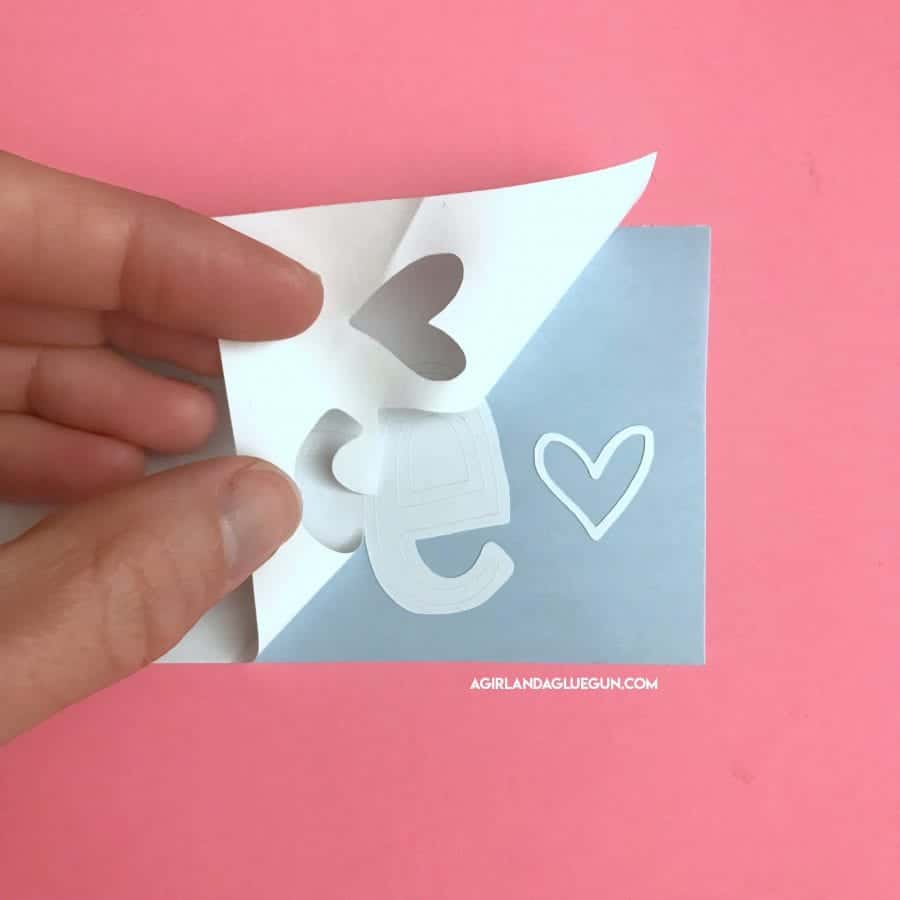
and weed away the vinyl like normal!
I’m using permanant vinyl and clear transfer tape from Expressions Vinyl!
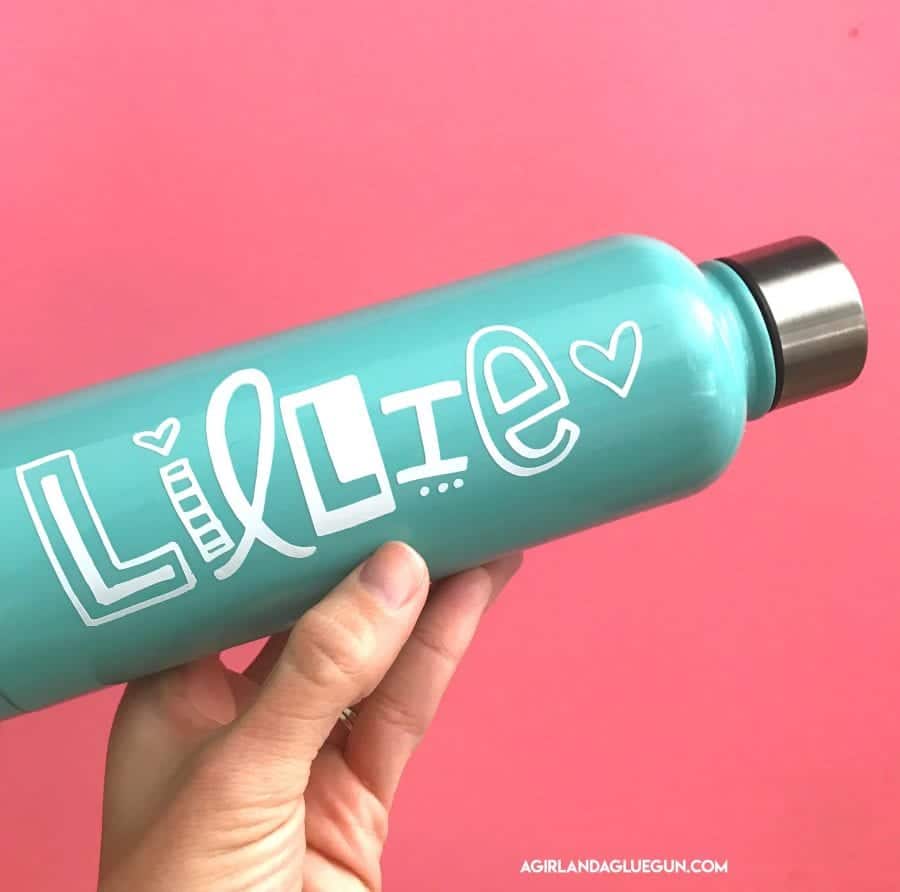
Apply it to your water bottle with transfer tape
![]()
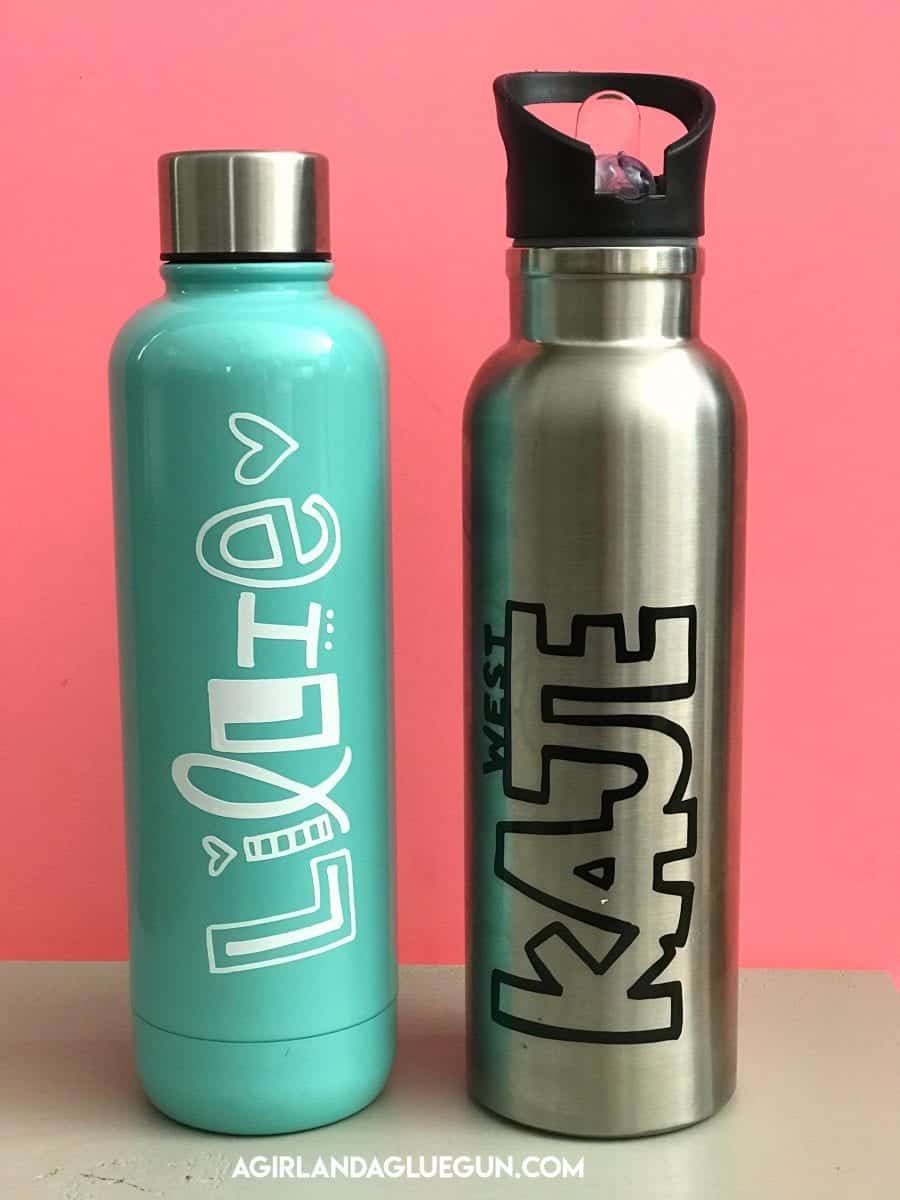
and there you go! Your own design or doodle or lettering on a water bottle! My kids have created their own t-shirts and binder covers! They love seeing their doodles made into vinyl!
![]()
here is another water bottle I made for my son!
Tracing pictures is on a whole other layer….lots of colors or variations and shades..so that’s a tutorial for another day!
I also have been organizing my amazon lists…so I have one that is just devoted to silhouette/ vinyl goodness! check it out here!
Leave a Reply