
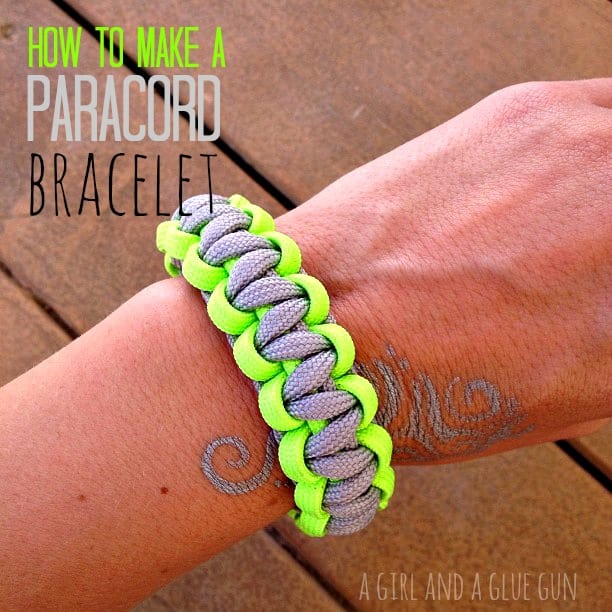
last time we were at my mom’s -my sister brought all the stuff to make paracord bracelets. we sat down and CRANKED out tons of fun bracelets! i posted about it on facebook and people wanted a tutorial–and since your wish is my command…..
ages approx 7ish to 100 can do this…my daughter is 9 and can whip these out pretty fast! (there is fire involved to melt so adult supervision is RECOMMENDED!) but still…a great kids’ craft!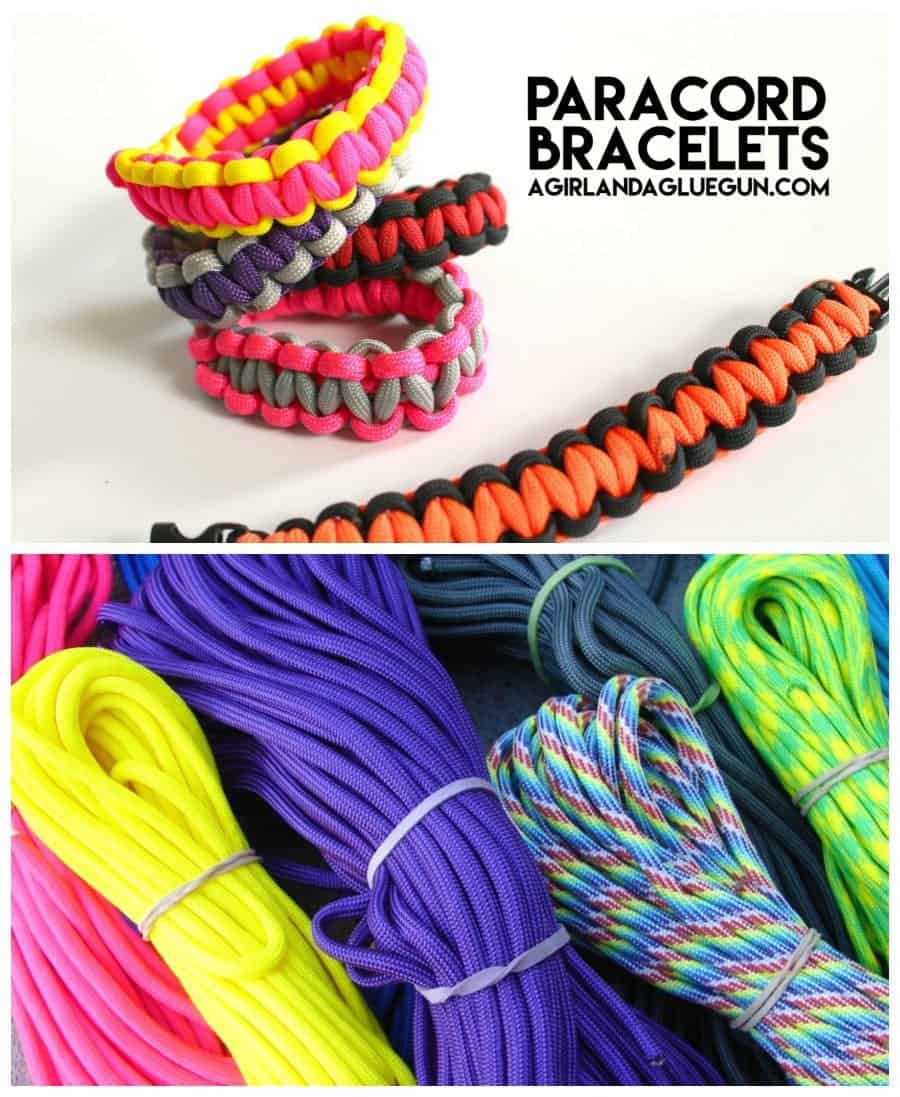
(first: credit is due to my awesome 12 year old nephew…who got on youtube and figured this out by himself!–if he lived any closer I would make him do a video tutorial with me!!!!)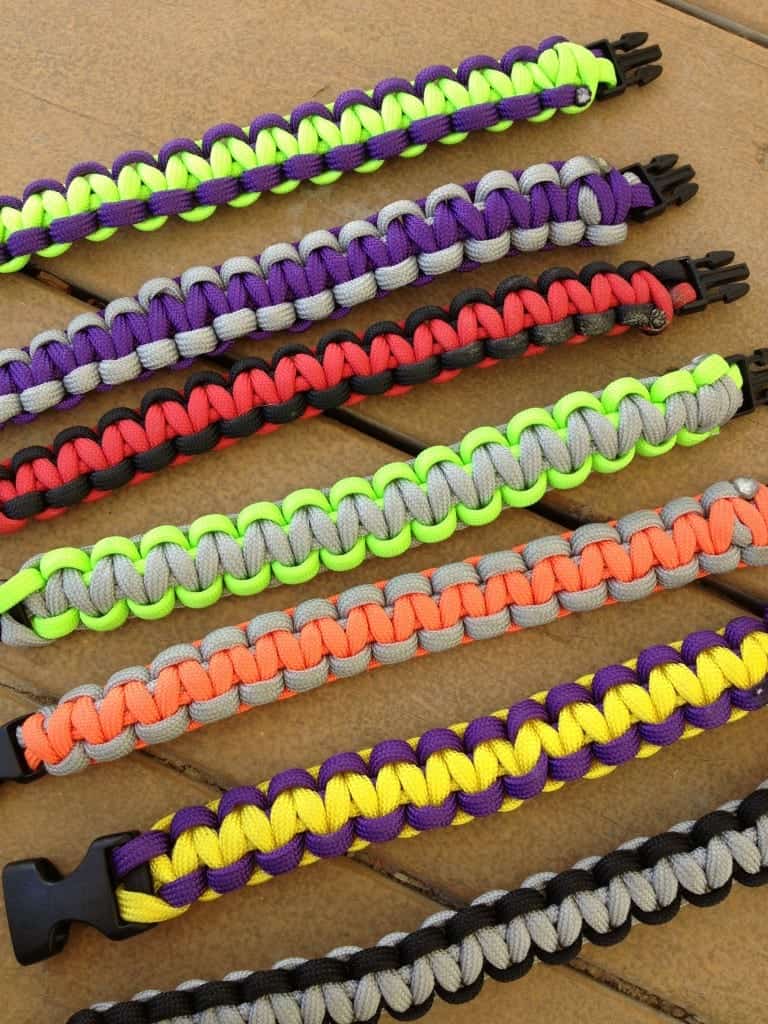
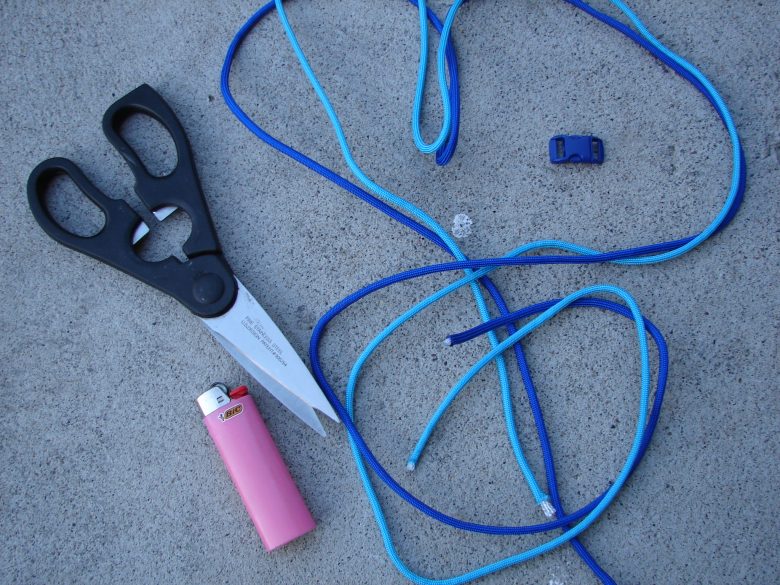
first up…you got to buy yourself some paracord….there are soooooo many colors..it’s impossible to not buy it all!
You can grab some here!
(aflink) 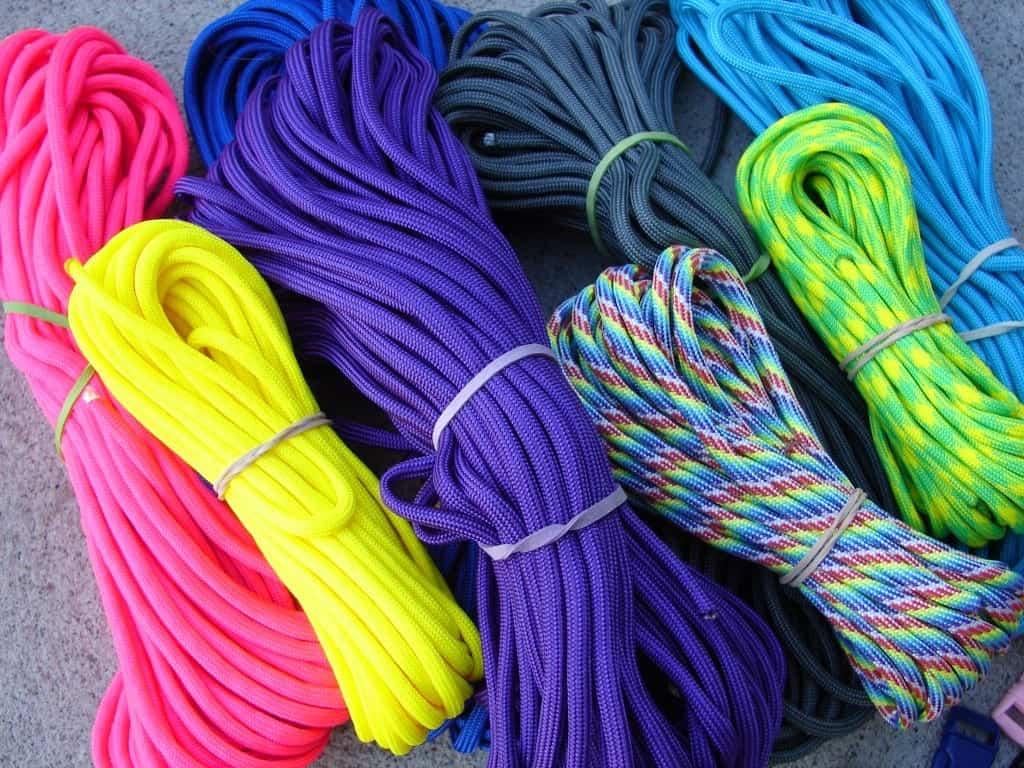
we have an army suplus store that sells it by the foot…and joanns now sells it in 16 foot bunches (use your coupon) and lots of different etsy shops sell them as well!
the average price is 8 cents a foot. so do the math and see if you are getting ripped off or not!!!!
(each bracelet you will need about 8 feet of paracord) (if you are doing one for 4 year old you probably only need 6 feet) full grown man…maybe 9 -10 feet) 8 is just the average
and you need buckles…..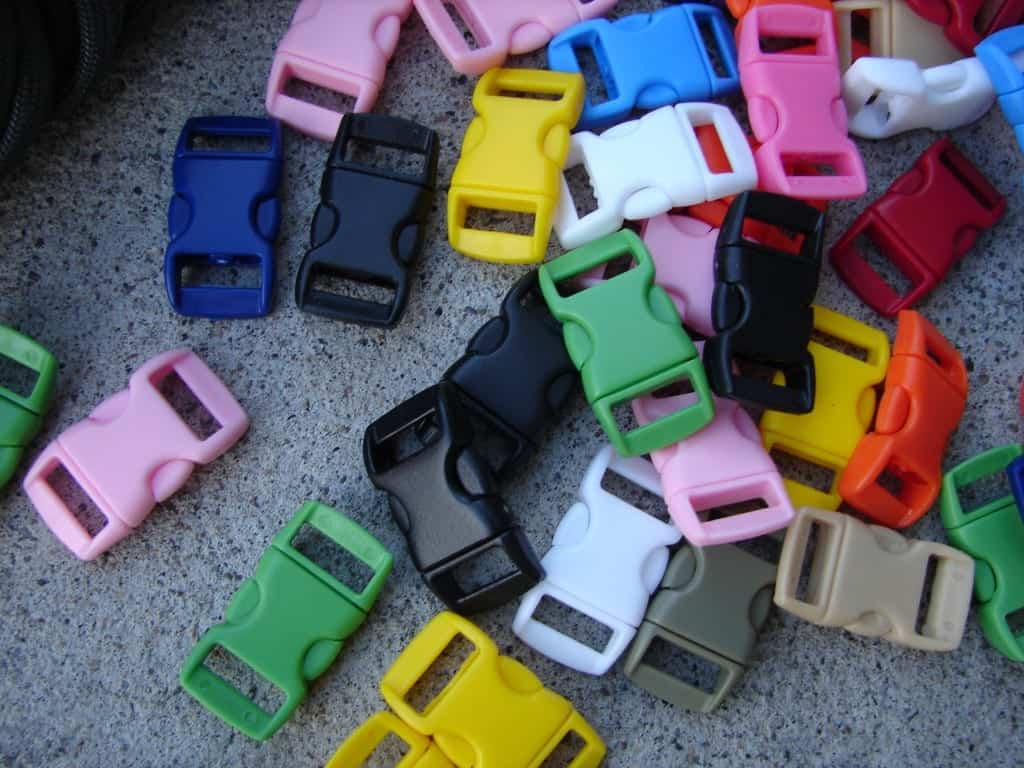
i got my buckles HERE
and before you start grab scissors and a candle (or matches or lighter)
now…to do one color is easy peasy.
to do two colors isn’t that hard just a bit more work.
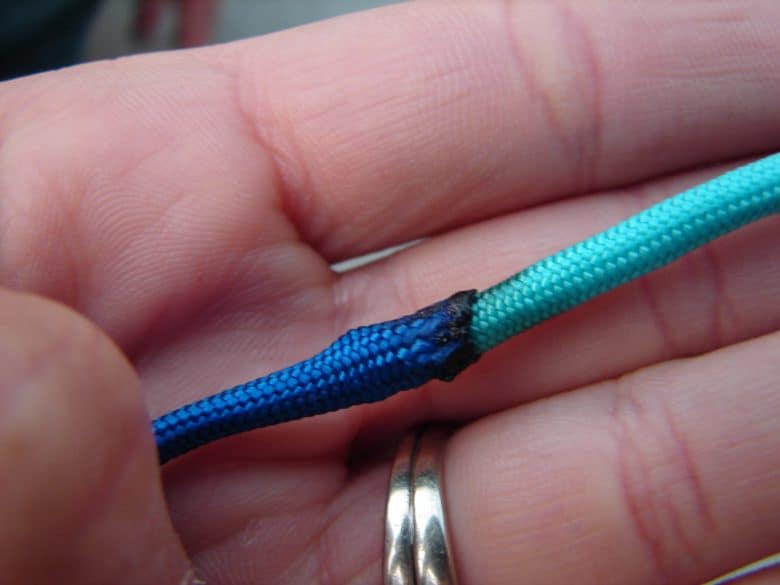
for two colors….cut a 3 1/2 -4 foot piece of one color and a 3 1/2-4 foot piece of the other color. you are going to slide your fingernail along the paracord rope of one color repeatedly. this makes the white strings on the inside come out one end and makes a hole in the other side…
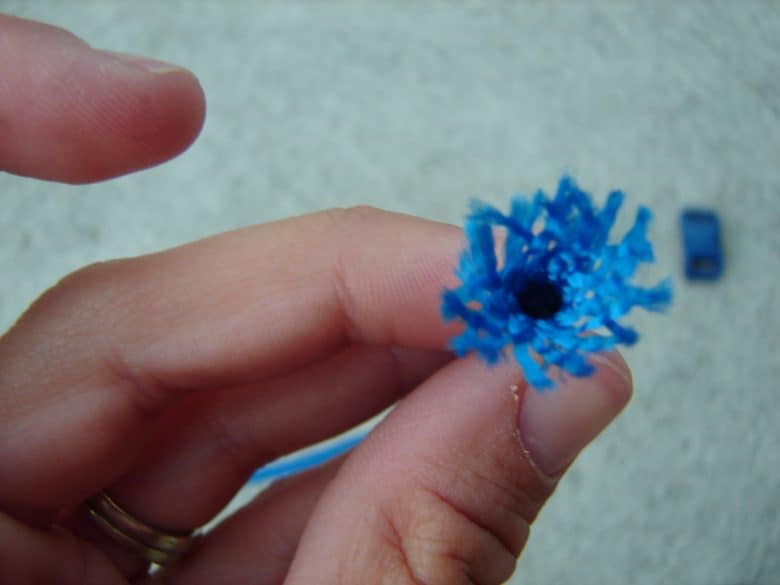
then you take the other color…and melt it a little bit with the lighter and pinch it together so it’s nice and pointy
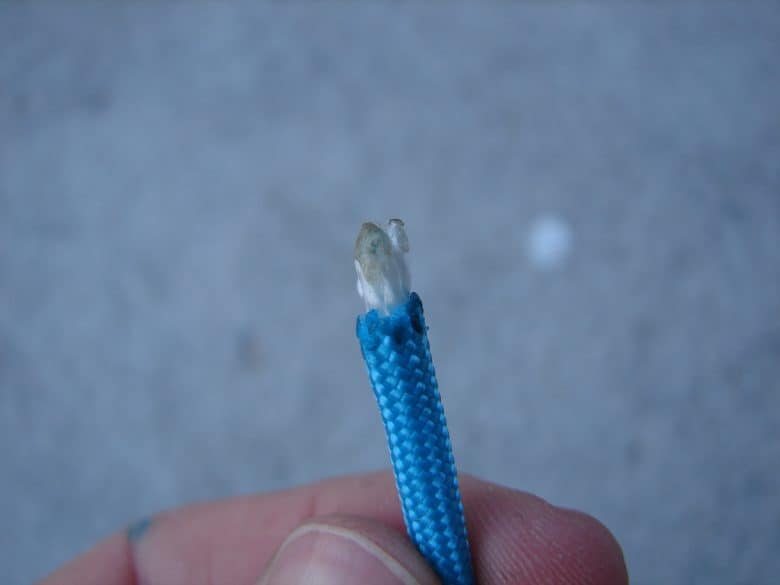
and stick it in the whole you just made. then melt those two suckers together really good! (you might want to get a bowl of ice…you might burn yourself. i melt it. give it just a second to cool and then press it together.
give it a little tug and see if it holds! if it does then let’s move on (if not..melt melt melt again!)
alright! grab your clip and let’s get started! (if you just want on color–cut a 8 inch strip and start here)
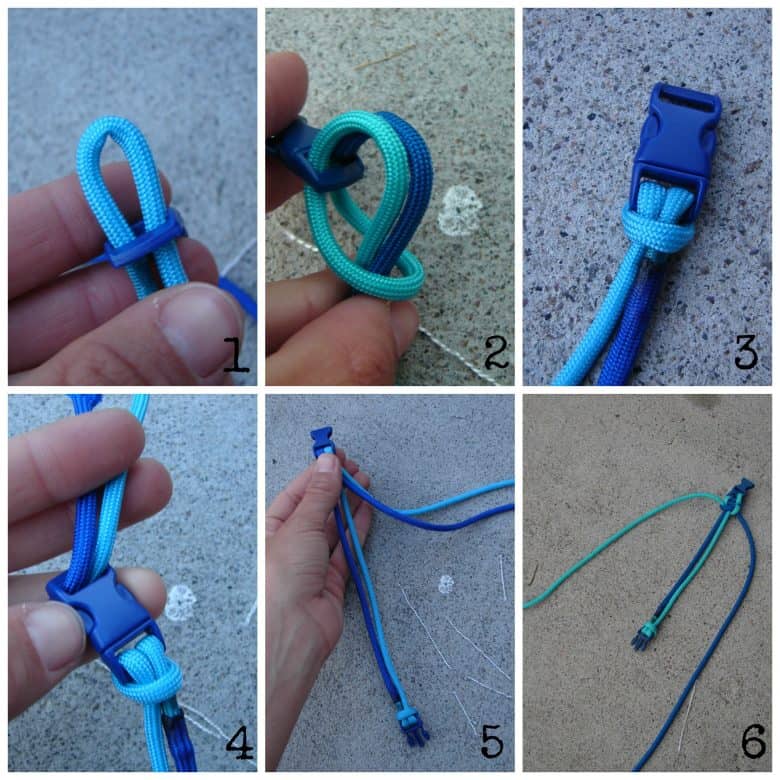
1. you are going to measure the strip in the middle and stick that folded middle piece in one side of the clasp
2.fold up the ends around the clasp and back down into the loop.
3. the burned part is pretty stiff so i always make sure it’s not on the clasp or it won’t lay flat.
4. take the ends and put them through the other side of the clasp (make sure they aren’t twisted)
you are going to pull these up until they are about an inch bigger than your wrist
5. undo clasp (this is tricky if you are making this for yourself to undo the clasp so if you have a friend around have them help you…make sure to hold the cord and the clasp so it stays the correct size.
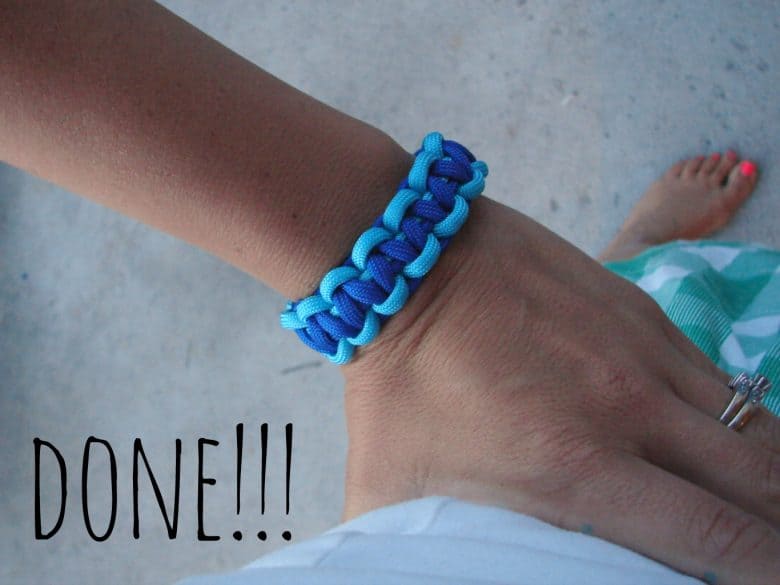
6. you are going to immediately start the braiding…the first one is super tricky cause you have to hold the clasp and make sure it doesn’t move…i always do this first on for my kids just to make sure…but picture 6 is how you want your bracelet to look…
let’s move on how to braid it!!!
if you have ever done friendship bracelets this will be pretty easy for you!
when doing two colors you need to make sure two things. you always start with the same color…(like i will always start with my light blue one) and that the clip is always on the same side…it will be twisted if you don’t (it can be fixed though!)
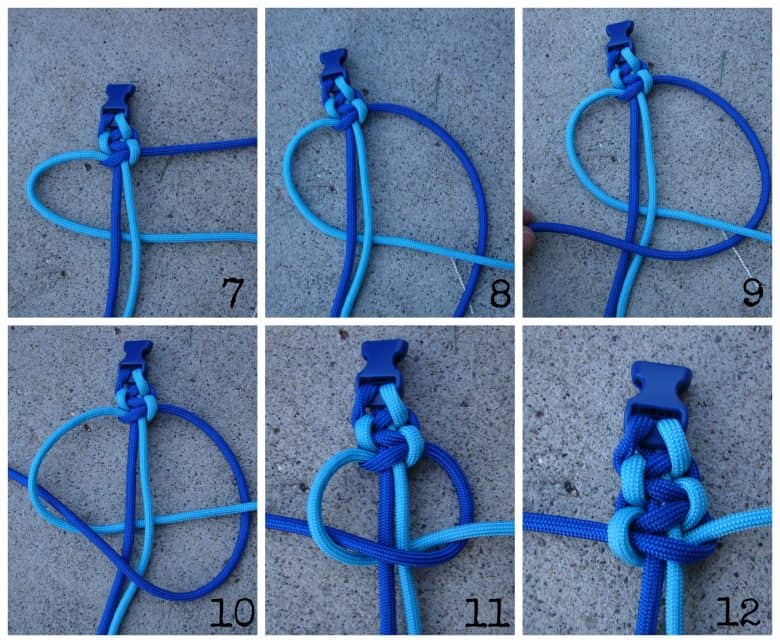
7. you make a loop (light blue) and put it behind the two middle pieces.
8. the dark blue on the other side goes behind the light blue piece you just brought over.
9 and now that dark blue piece goes up over the two middle pieces
10 and down the loop you just made
11. then slowly pull both sides up
12 until nice and tight

and repeat!
14 –make loop (remember…always start with the same color) so my light blue is now on the right and i make a loop and put it behind to the other side
15. then under …over …and through.
pull up and tighten.

16. repeat repeat repeat.
when you get the end..and if you still have cord…you can usually shove up the braided part to make it nice and tight and fit a few more braids.
(if it doesn’t look right..unbraid to the point it got messed up and do it again…
17…when you are out of string or room.. check to make sure it fits your wrist. if it doesn’t fit…..you need to unravel it all the way and start at the beginning (step 4) (think of it as awesome practice)
if it fits you are going to snip off the excess of one color..and melt the end
18 .and take your finger(or stick) and melt it into the braid.
(turn over and repeat with the other color!) make sure they are nice and melted!
(i save the ends if they are longer than a foot–cause you could make a little keychain thing with them!)
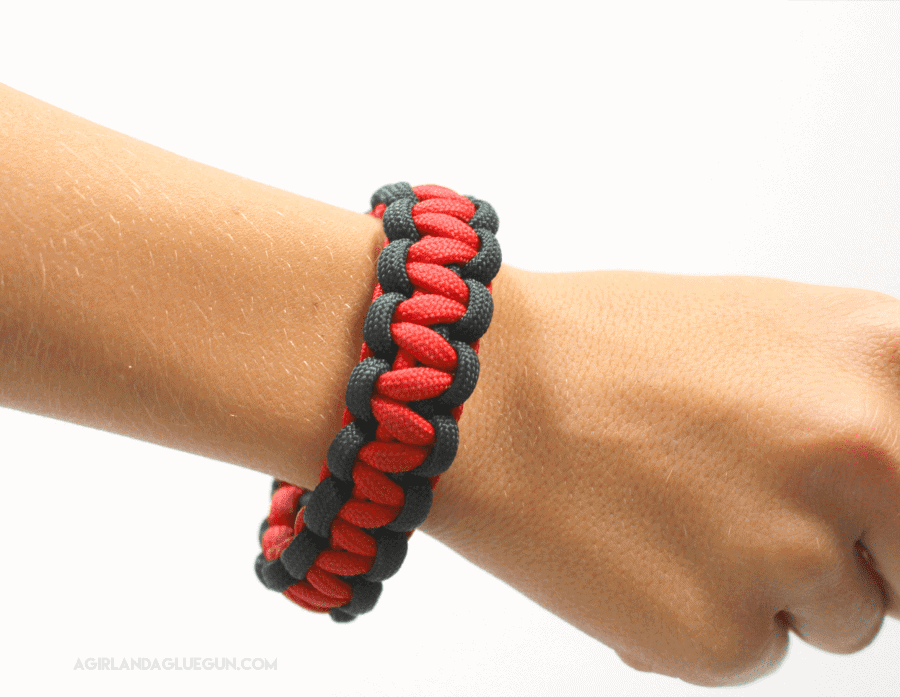
if you stayed with one color and made sure the clasp stayed on the same side the whole time you will have one color on the inside all the way down…and if you flip it over –that same color will be the outside pieces…
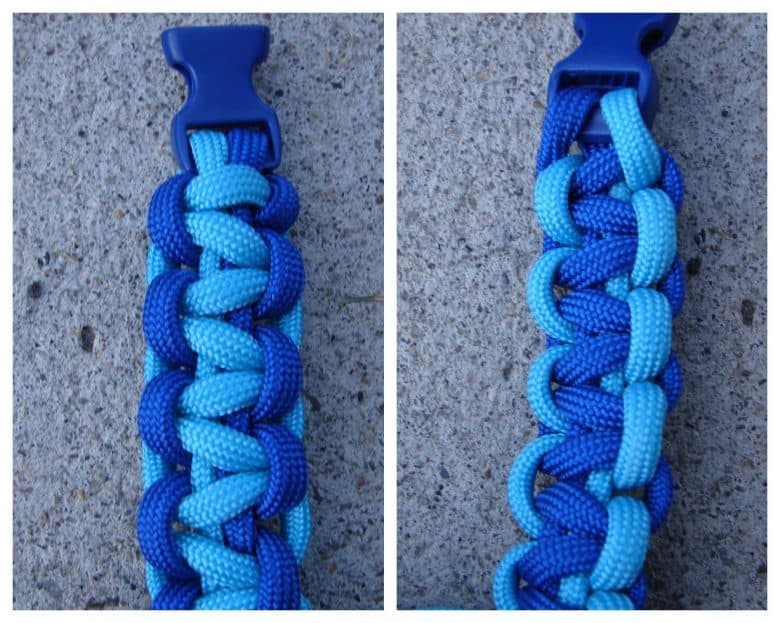
Let me show you what happens when you get mixed up colors…(we did some on purpose because it is a cool effect if you do it on purpose)
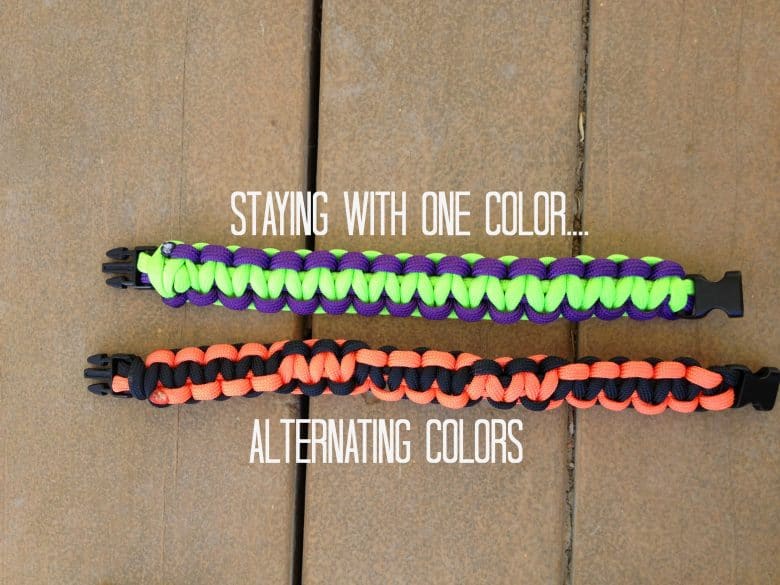
we alternated every few braids on this one..but see how it twists it? if you did orange than black then orange then black as the color you started with for the loop then it would twist around and around and around…..
but if you are trying to stay on one side. then accidently throw in a black where an orange was supposed to be..then it’s going to totally stand out and look weird.
(aka…do it on purpose=good. do it on accident=not good)
the first one is always a little wonky. but pretty soon you can do these
in your sleep!
we have done school colors (this would be an awesome fundraiser)
and favorite sports team..
and just favorite colors!
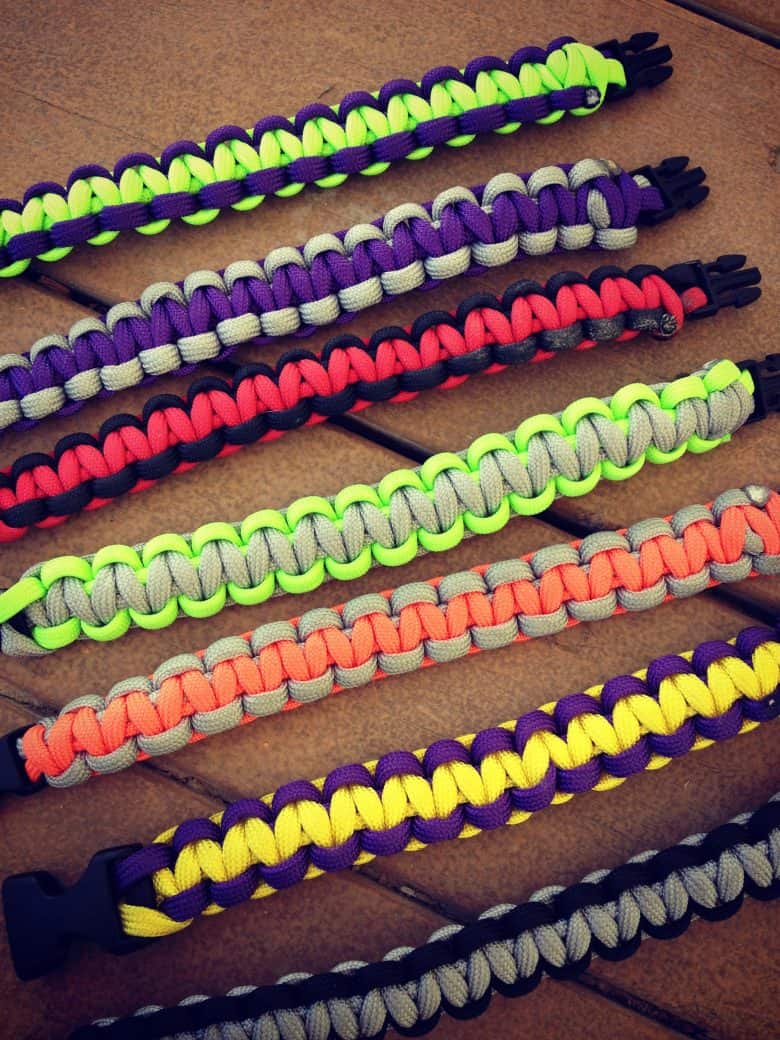
you could necklaces (you would have to cut probably 25 feet of cording!)
we are doing these at our family reunion next week! less than 75 cents a bracelet makes these a big hit!
any questions? leave me a comment!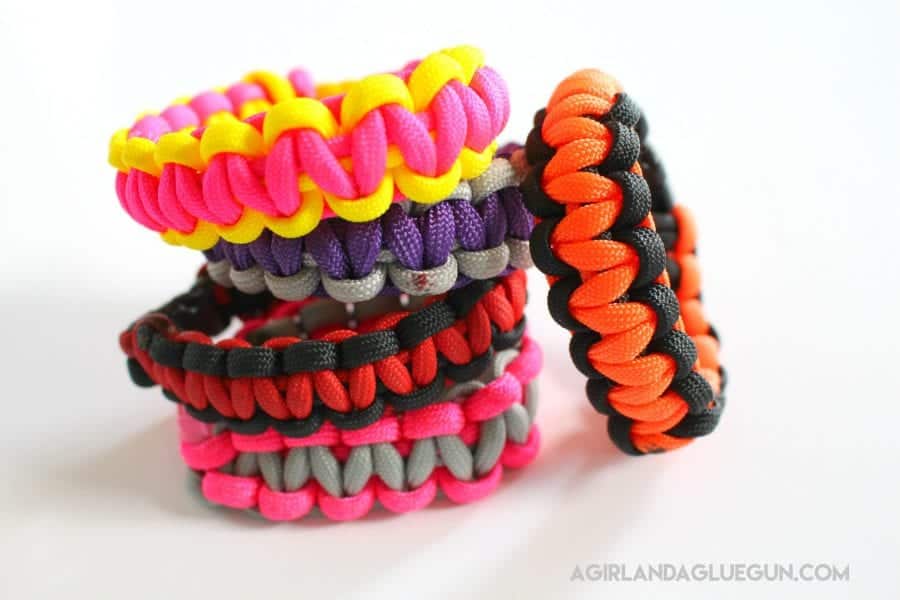
Mandy @ Sugar Bee Crafts says
good one! we’ve made them, but not the double-color kind….
Tracy says
Mandy,
These are such a Idea, I love them! They would be great for a girls camp I go to each year. We would love to have you join our Saturday Show Us How You Rock Link Party. It starts Fridays at 6pm, hope to see you there!
Tracy
http://www.madefrompinterest.net/